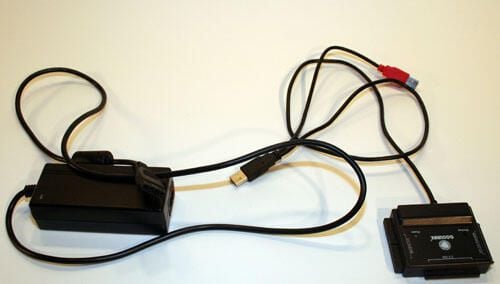
This Coolmax USB hard disk adapter can connect a 2.5-, 3.5- and 5.25-inch IDE or SATA hard disk to a PC. The black adapter box connects the hard disk, while the secondary power plug/adapter powers the drive. In the case of smaller notebook or SATA disks, the power cable is plugged directly into the adapter (as opposed to straight into the IDE hard disk).
The red USB cable, meanwhile, can be used to power hard disks directly from the host PC’s bus via another USB port.
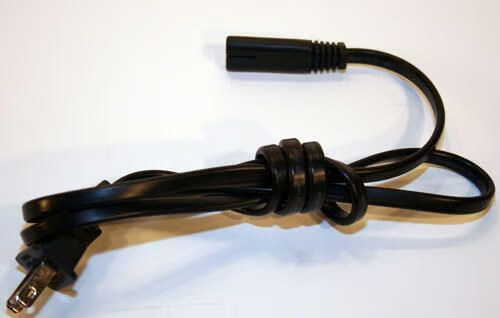
This simple cable connects the power adapter to a standard North American wall outlet.
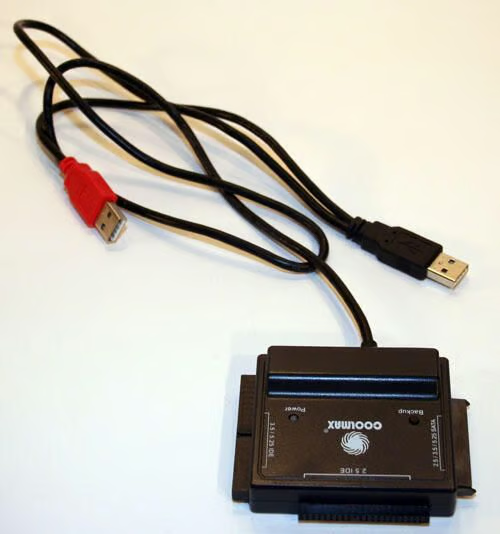
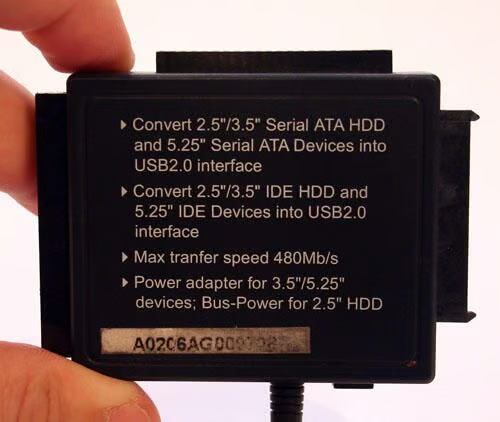
Here’s the Coolmax Adapter itself (with just the integrated USB cables attached).
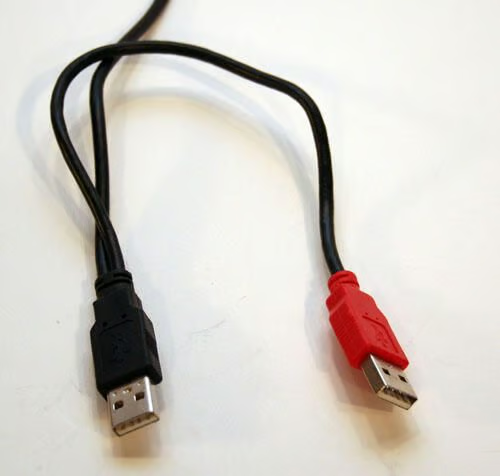
The black USB cable is used to connect the Coolmax USB hard disk adapter to a host PC’s USB port. The red USB plug, meanwhile, provides bus power to the hard disk being connected to a host system via the USB adapter.
According to the owner’s manual, the red USB power plug is to be used whenever the HDD requires more than 500mA to function.
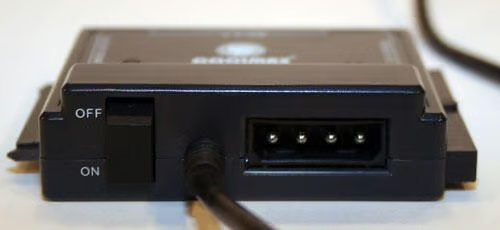
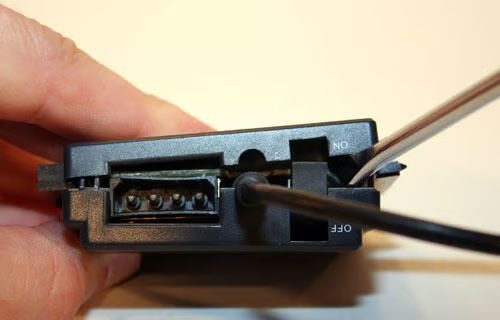
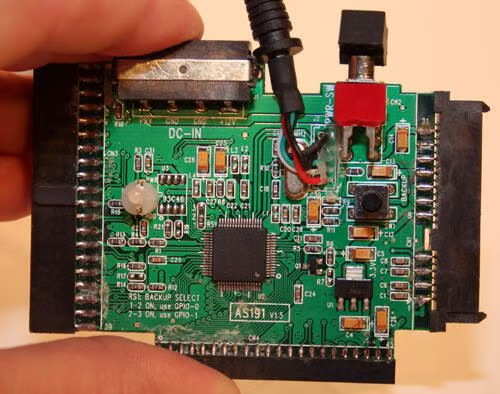
The Coolmax’s external power supply plugs into the adapter’s standard Molex plug here (to the right). The adapter’s on/off switch, meanwhile, is on the left.
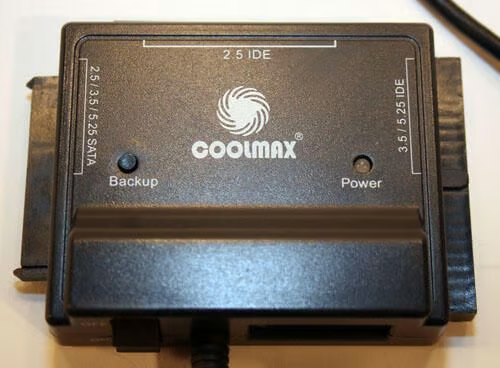
This Coolmax USB hard disk adapter shipped with software that simplified making one-button backups. Pressing the Backup button triggered backup operations on properly configured systems.
The LED to the right, meanwhile, lit up green whenever a hard disk was connected to a host system via the adapter (or red whenever data was being read from/written to the hard disk).
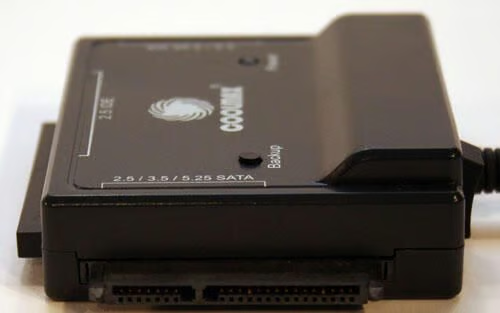
2.5-inch, 3.5-inch and 5.25-inch SATA disks are connected to the adapter using this port.
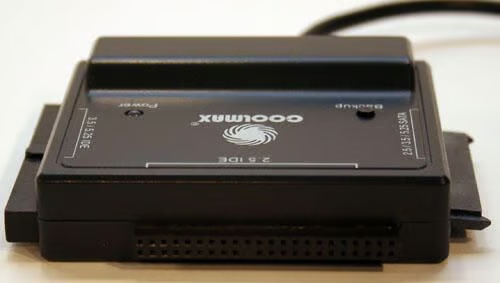
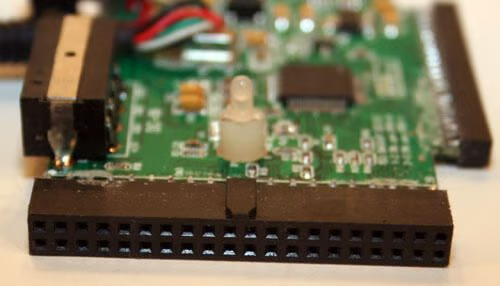
2.5-inch notebook IDE drives are connected to a host system using this Coolmax adapter 44-pin port.
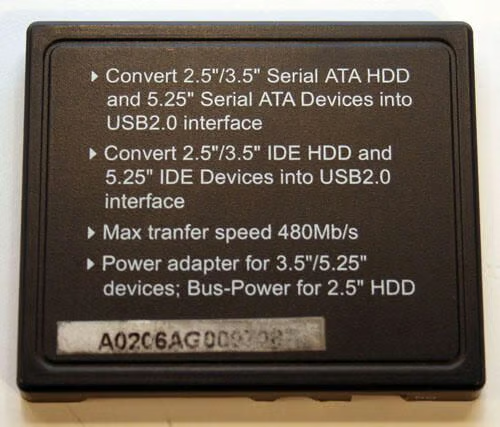
The bottom-side of the Coolmax USB HDD adapter describes its many uses.
The Coolmax USB hard disk drive adapter is easily opened. Just slide a screwdriver between the casing’s two plastic halves and give it a twist.
The Coolmax’s bottom cover separates easily from the top casing, as shown here by itself.
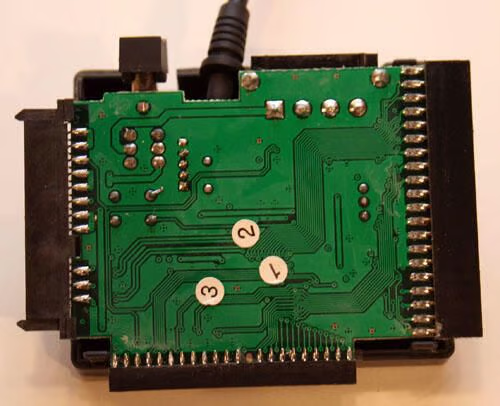
With the bottom casing removed, the Coolmax’s printed circuit board is exposed.
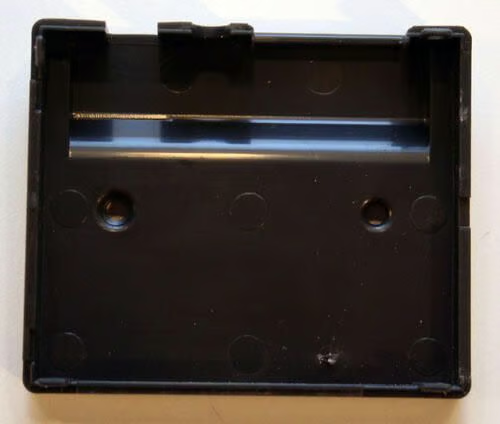
Here’s a look at the inside of the Coolmax USB hard disk adapter’s top cover (as evidenced by the two holes that accommodate the Backup button and status LED).
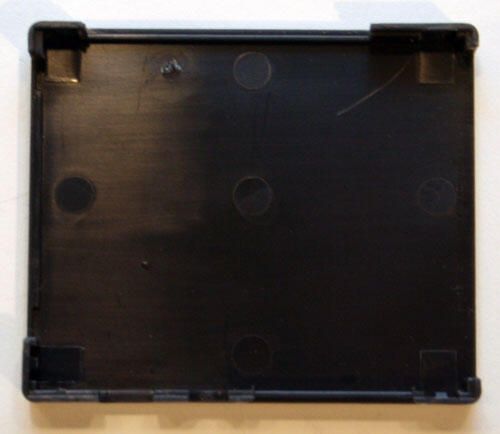
Here’s a look at the inside of the USB hard disk adapter’s bottom cover.
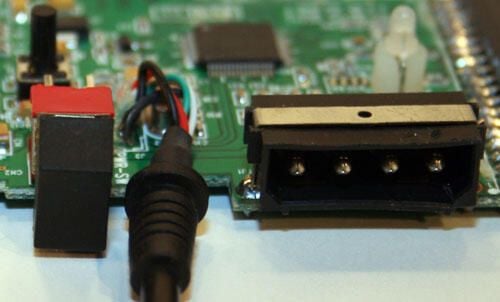
Here’s a close up look at the USB adapter’s external standard 4-pin Molex connector port. To the left you can see the unit’s black on/off rocker switch.
Here’s a close-up of the 3.5- and 5.25-inch IDE port’s circuit board connection.
Here’s a close-up view of the device’s 2.5-inch IDE port (where it connects to the printed circuit board).
Here’s a close-up view of the USB hard disk adapter’s 2.5-, 3.5- and 5.25-inch SATA connection (as it connects to the circuit board).
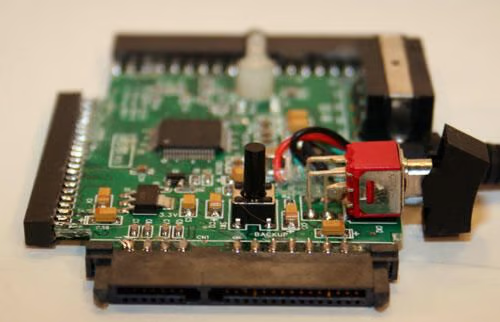
The short black column, meanwhile, is the device’s Backup button.
Here’s a tighter view of the unit’s on/off rocker switch (to the right) and the Molex connector port (for connecting DC power from the unit’s power adapter).
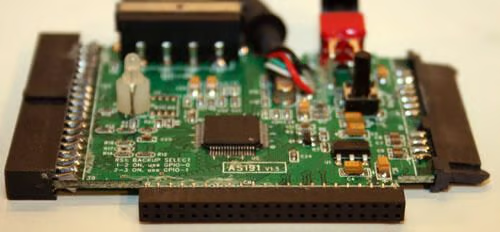
Here’s a closer look at the entire circuit board that powers this Coolmax unit.
The microchip in the center looks to likely be made by Shenzhen Zhongke Electronic Co. Ltd. It uses a silicon chip (JM20337) manufactured by JMicron. The chip serves to bridge communications between USB 2.0, SATA and ATA/ATAPI-based mass storage devices.
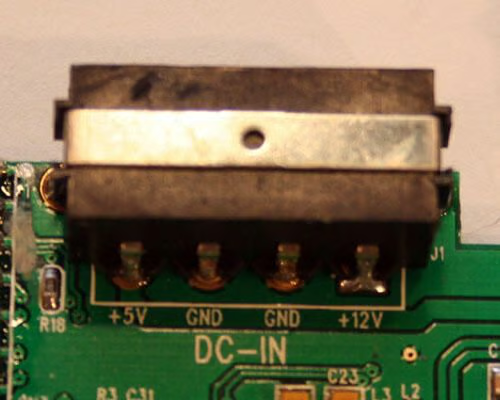
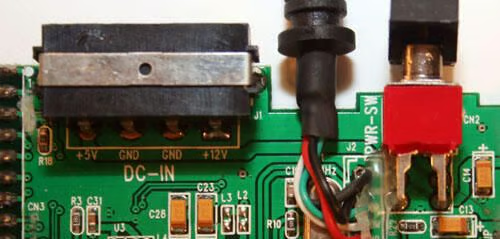
Here’s a close-up view of the Molex connector’s circuit board connection. Typically a +12 volt yellow cable connects to the +12V pin, while a +5 volt red wire connects to the +5V pin.
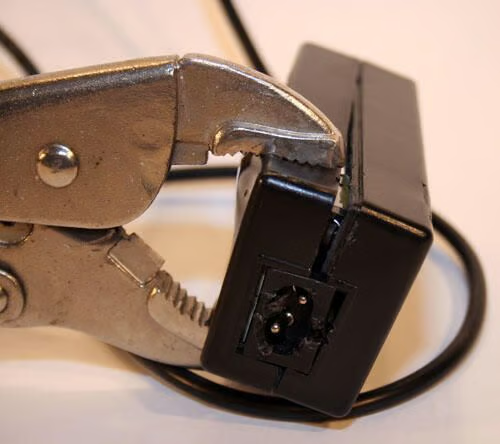
Some power adapters are easier to open than others. With the warranty already void on this unit, the author resorts to brute force to crack open the unit’s power brick.
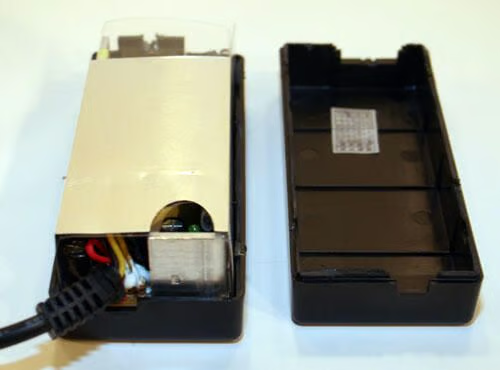
Once the power adapter’s two halves are loosened, the case’s two pieces can be separated.

Tucked neatly inside the black plastic halves is the switching power adapter. The power supply converts AC current to DC. Visible through the cutout in the protective metallic shield is the power brick’s status (green) LED.
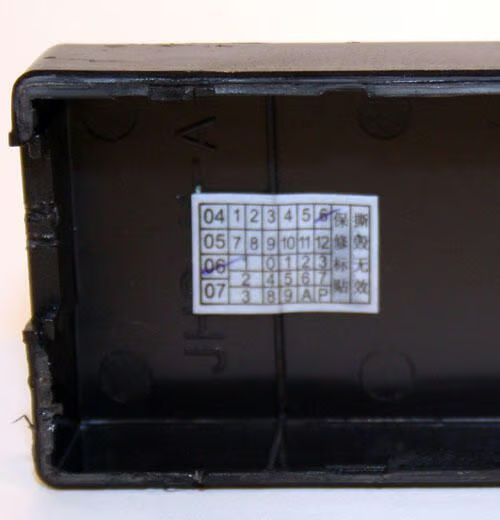
This unit’s power supply was manufactured in June of 2006.
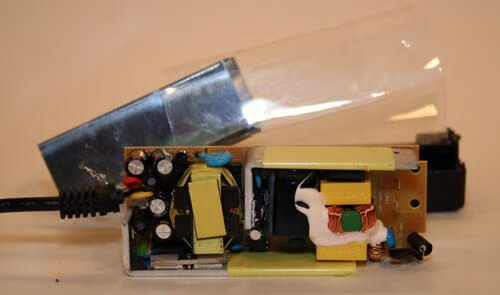
With the power supply’s protective metallic shield removed, you can see its switching mechanism and capacitors.
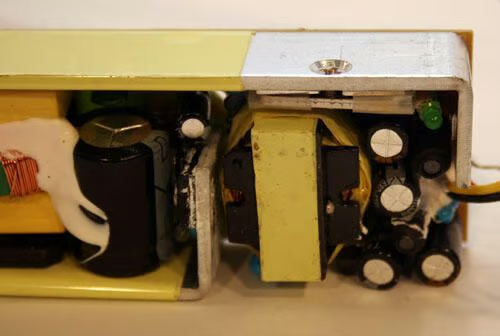
Here’s a close-up look of the power adapter’s capacitors.

Here’s a look at the power supply’s protective metallic shield (as compared to a standard flat head screwdriver in size).
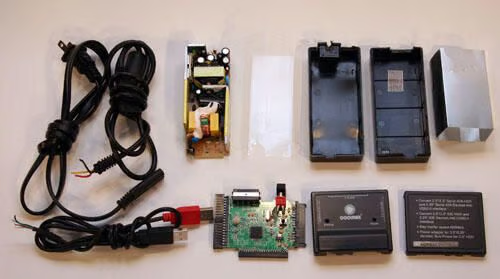
These are the components, highlighted by the circuit board at lower center, that compose the Coolmax USB hard disk adapter.

Erik Eckel is a managing partner at Louisville Geek and president of Eckel Media Corp. He previously served as Executive Editor at TechRepublic. He received Microsoft Engineer accreditation from Sullivan University and earned his Bachelor's Degree in English from the University of Louisville. He's earned Network+, Windows NT 4.0 MCP+I and MCSE, and Windows 2000 Professional MCP accreditations.


