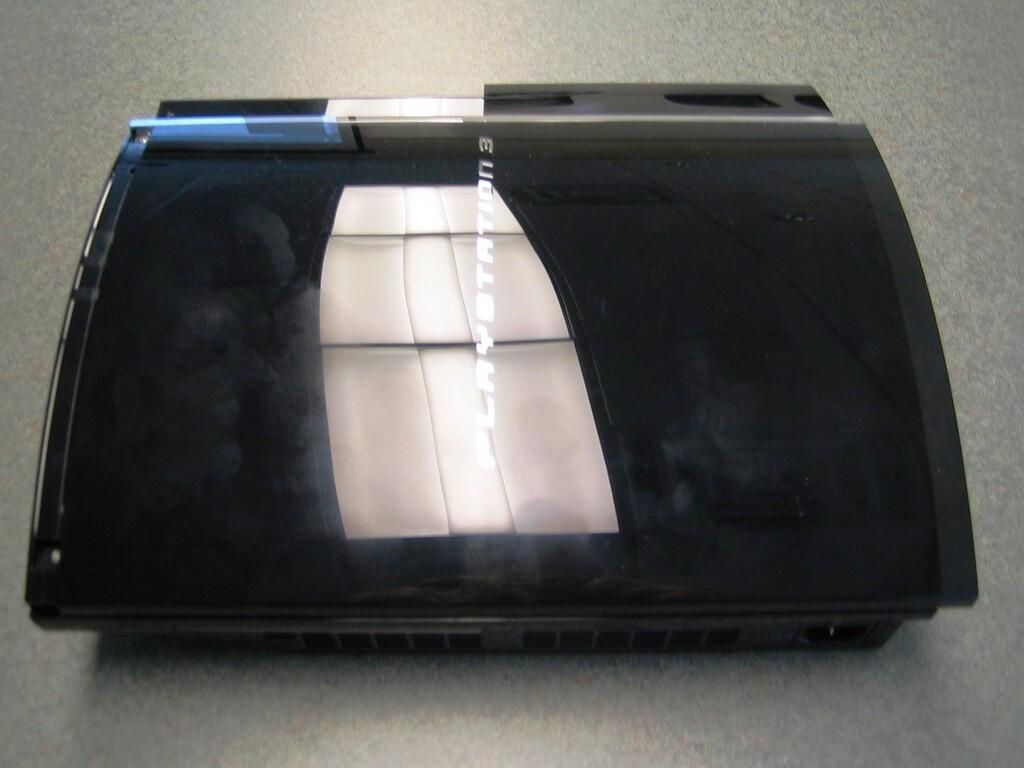
Skip to content

TechRepublic

  • Top Products Lists
  • Developer
  • 5G
  • Security
  • Cloud
  • Artificial Intelligence
  • Tech & Work
  • Mobility
  • Big Data
  • Innovation
  • Cheat Sheets
  • TechRepublic Academy
  • CES
  • TechRepublic Premium
  • Top Products Lists
  • Developer
  • 5G
  • Security
  • Cloud
  • Artificial Intelligence
  • Tech & Work
  • Mobility
  • Big Data
  • Innovation
  • Cheat Sheets
  • TechRepublic Academy
  • CES
  • See All Topics
  • Sponsored
  • Newsletters
  • Forums
  • Resource Library
TechRepublic Premium
Join / Sign In
After Hours

Cracking open the Sony PlayStation 3

By Bill Detwiler January 24, 2007, 3:58 AM PST on Twitter billdetwiler

Image
1
of 108

Cracking open the Sony PlayStation 3

Sony PlayStation 3 in pieces

Sony PlayStation 3 in pieces

ntOnce the initial launch rush died down, we were able to finally buy a Sony PlayStation 3. After taking it for a test drive, I began the surprisingly easy disassembly process. Come along as we go inside the PS3 and see the hardware that makes Sony’s $599 console tick.

n

ntnn

Cracking open the Sony PlayStation 3

Before surgery

Before surgery

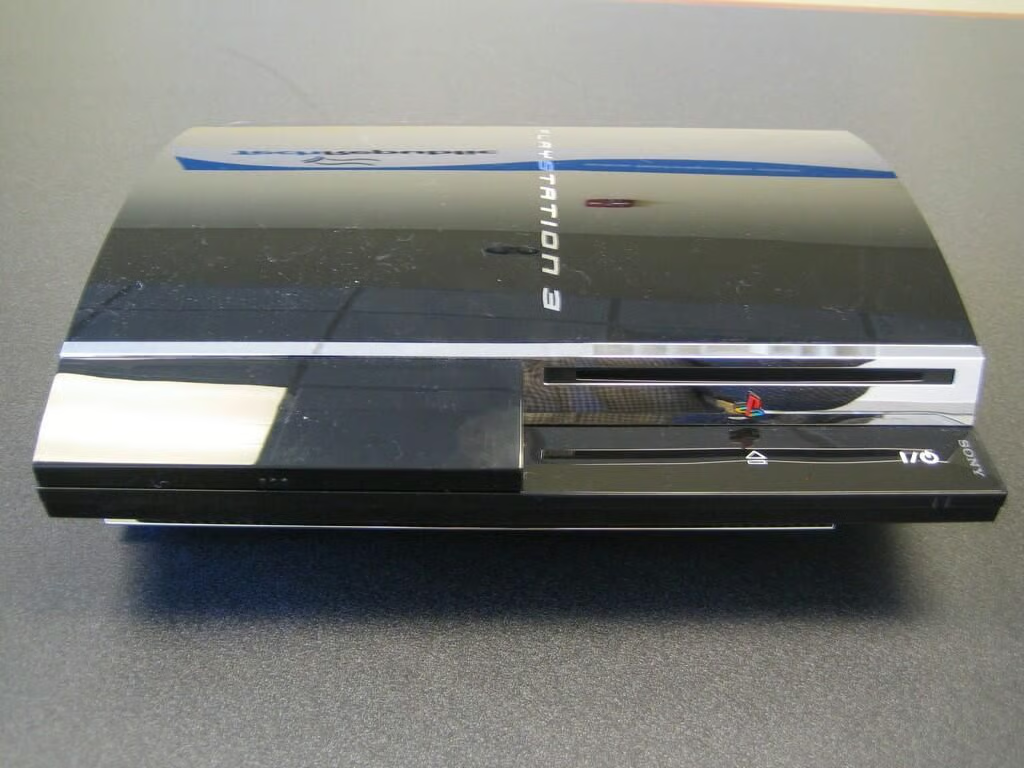
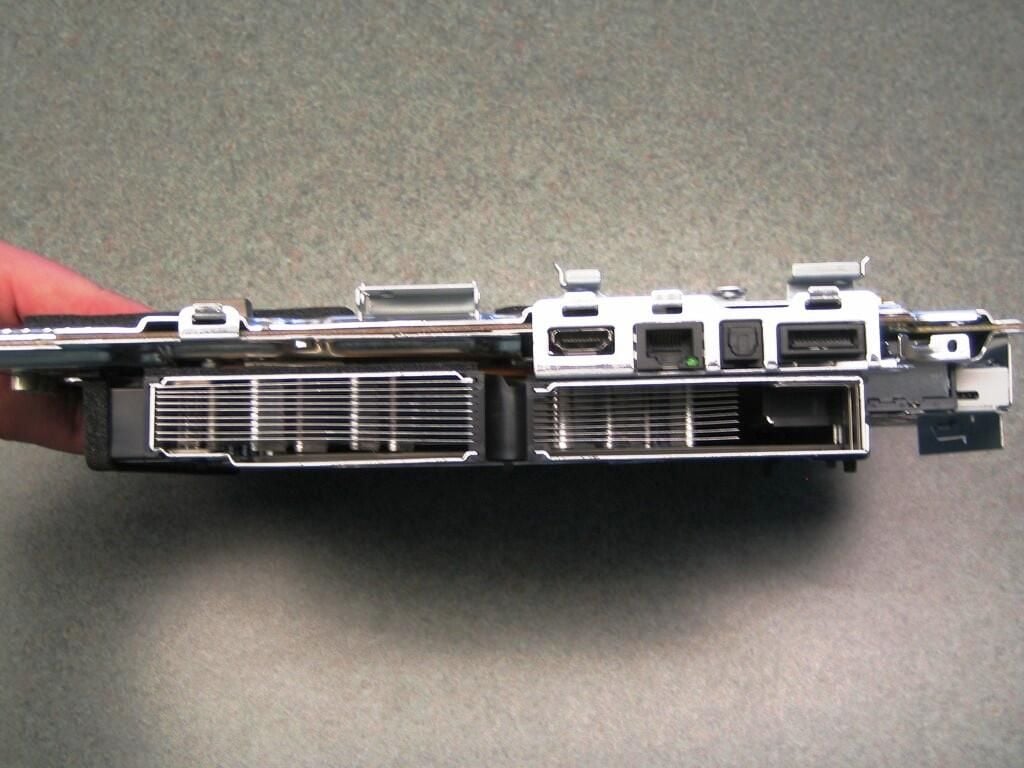
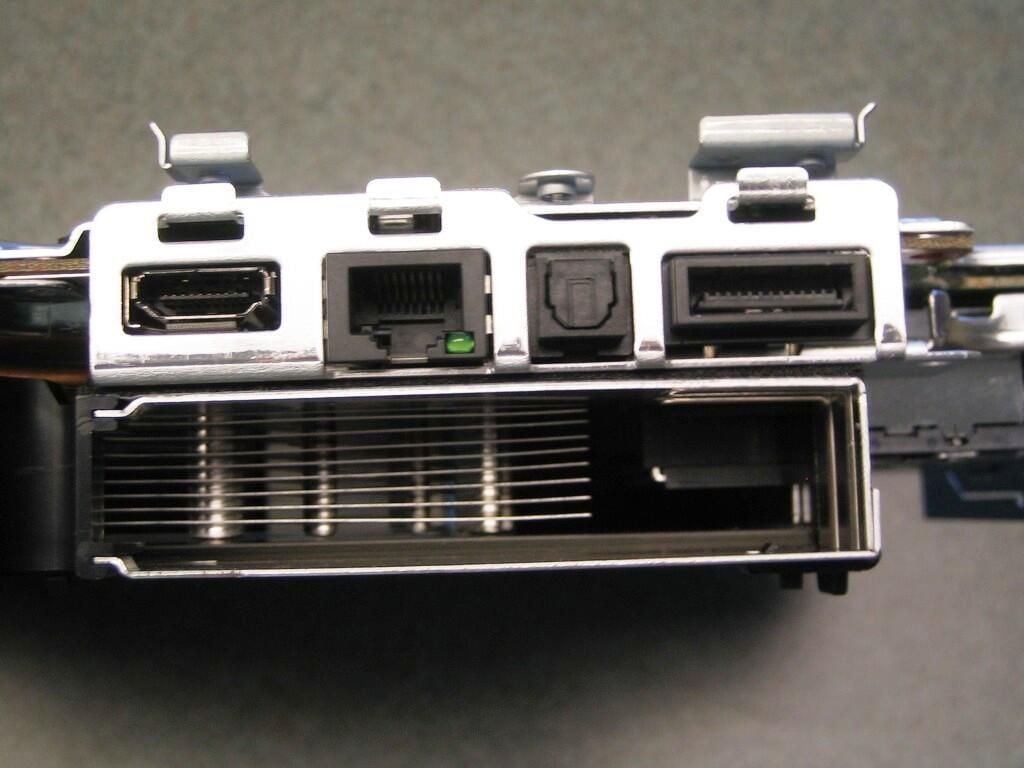
Our 60GB HDD PlayStation 3 comes with IBM’s ell Broadband Engine CPU, Nvidia’s RSX Reality Synthesizer (main GPU), Sony Emotion Engine Graphics Synthesizer (GPU for PS2 games), 256MB XDR Main RAM and 256MB GDDR3 VRAM, 2.5′ Serial ATA (60GB) hard drive, 4 USB 2.0 ports, Memory Stick/SD/CompactFlash Slots, Ethernet (10BASE-T, 100BASE-TX, 1000BASE-T jack, IEEE 802.11 b/g Wi-Fi support, Bluetooth 2.0 (EDR), 1 HDMI output, 1 analog AV output, 1 digital audio output (optical), the over-hyped Blu-ray/DVD/CD Drive “read only”.

The PS3 is approximately 325mm (W) x 98mm (H) x 274mm (D) and weighs in at about 5 kg.

Cracking open the Sony PlayStation 3

Hidden Torx security screw

Hidden Torx security screw

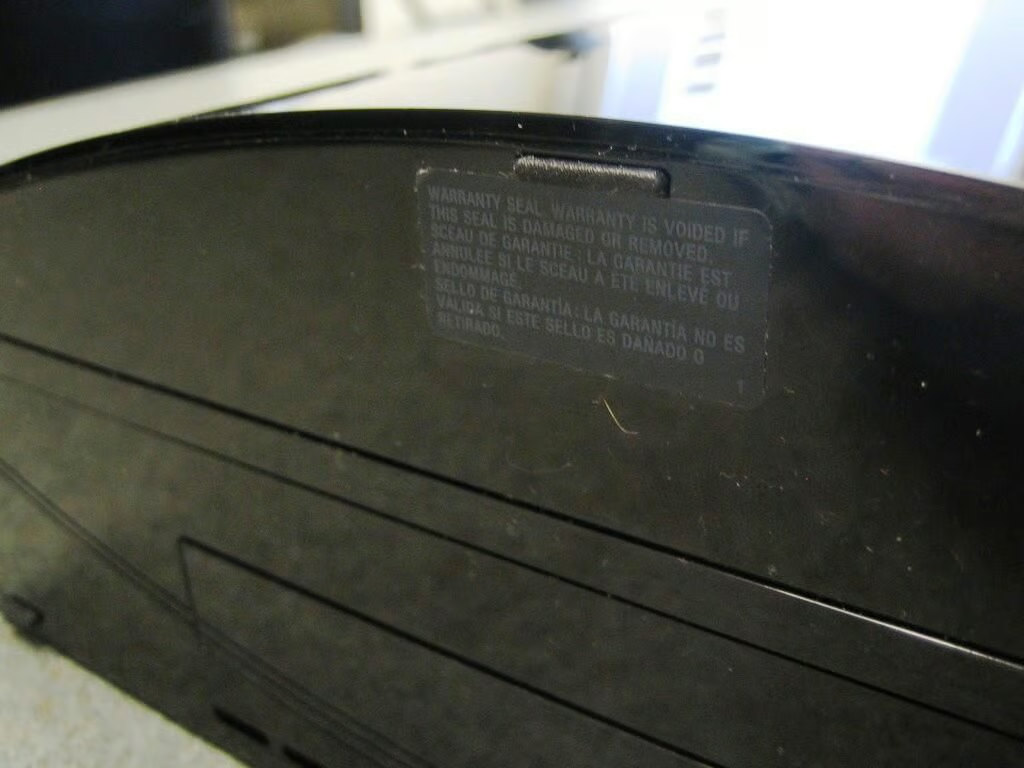
First, remove the “Warranty void if removed” sticker on the right side/bottom of the PS3–above the hard drive panel. Then, use a flathead screwdriver to carefully remove the pad beneath the sticker.

Cracking open the Sony PlayStation 3

Warranty sticker - Now void

Warranty sticker - Now void

There’s no going back now.

Cracking open the Sony PlayStation 3

Torx security screw

Torx security screw

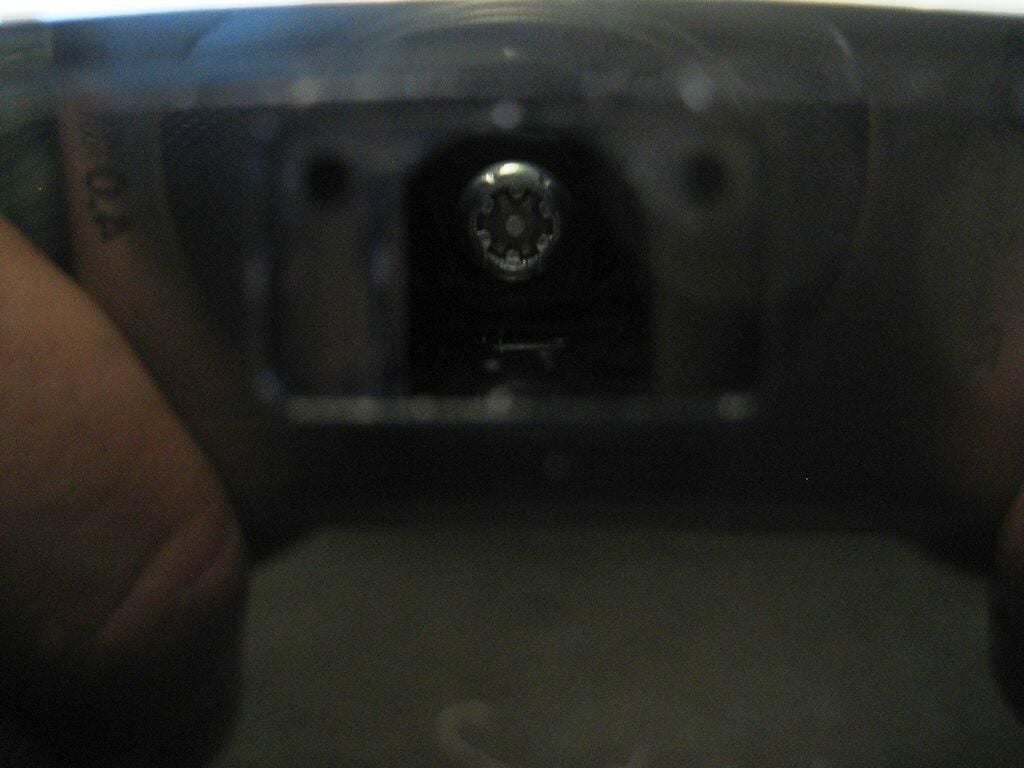
Removing the rubber pad reveals a Torx security screw–with a raised pin in the center. I was able to remove the screw with a regular Torx driver.

Cracking open the Sony PlayStation 3

Slide open the top cover

Slide open the top cover

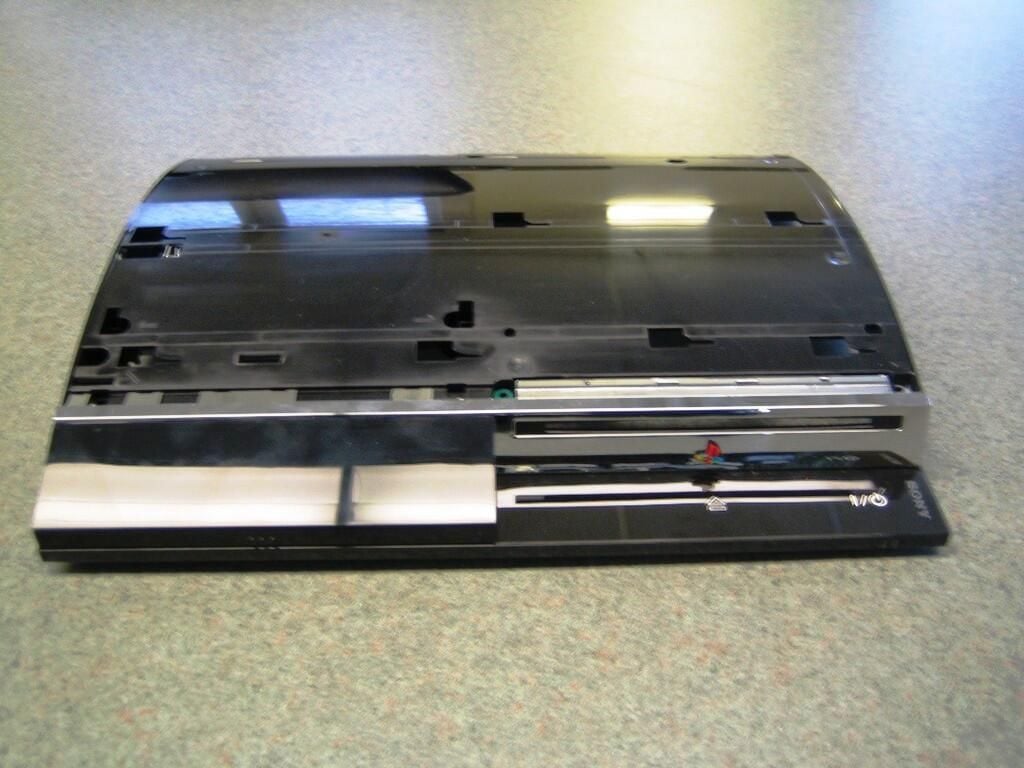
With the single security screw removed, you can slide the PlayStation’s top cover sideways and remove it.

Cracking open the Sony PlayStation 3

Seven Phillips head case screws

Seven Phillips head case screws

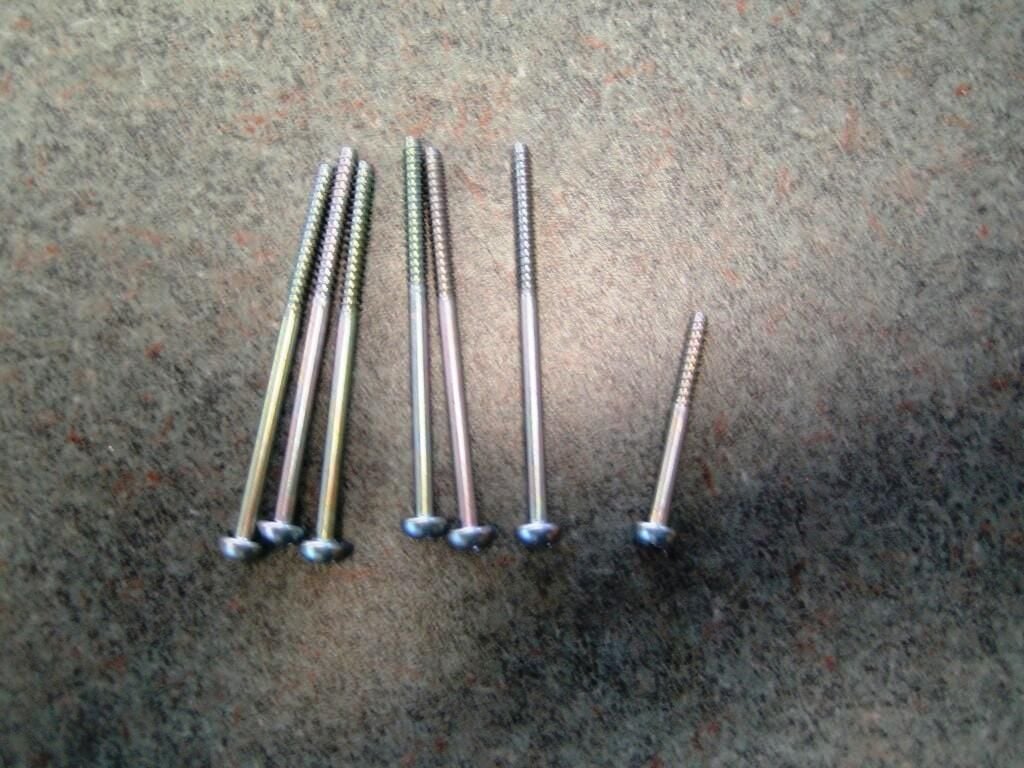
One screw is shorter than the others.

Cracking open the Sony PlayStation 3

S marks the short case screw

S marks the short case screw

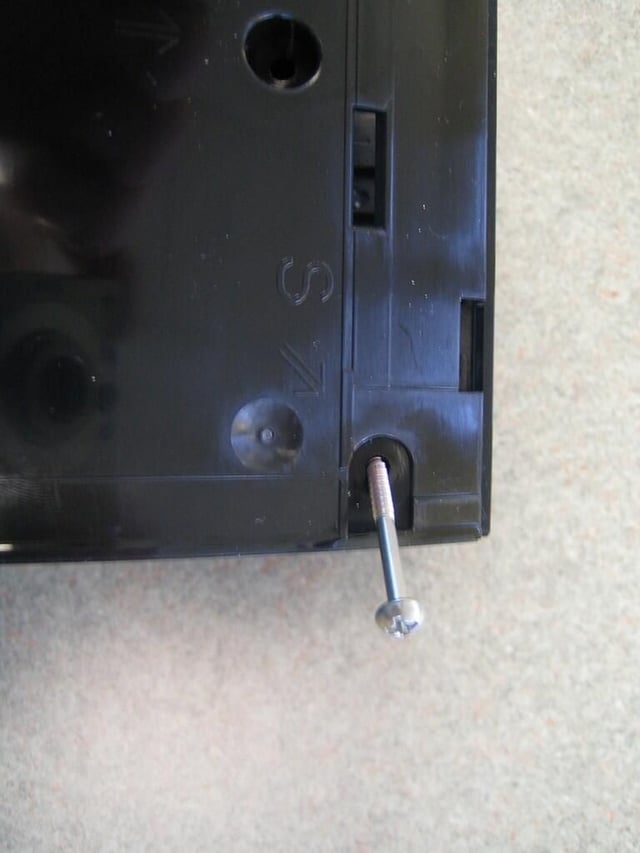
Luckily, an S marks the location of the short screw.

Cracking open the Sony PlayStation 3

Plastic case clip

Plastic case clip

Once the screws have been removed and safely set aside, gently depress the plastic clips that secure the top of the case to the bottom. There are two clips at the back and one in the middle of the case. You’ll need a screw driver to press inside the small square holes and release the latches.

As you release the latches, gently pull up on the top of the case from the back of the PS3.

Cracking open the Sony PlayStation 3

Remove the case's top half

Remove the case's top half

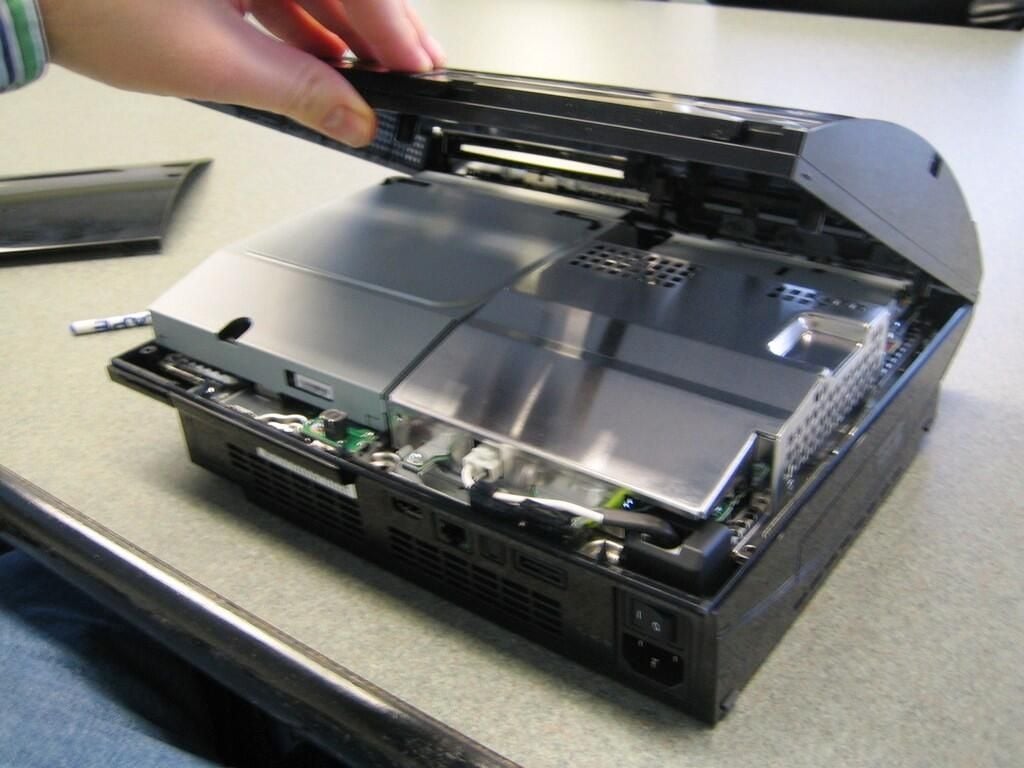
With the latches released, the top half of the case should lift off easily.

Cracking open the Sony PlayStation 3

PlayStation 3 case top

PlayStation 3 case top

Cracking open the Sony PlayStation 3

PlayStation 3 without case top - Front

PlayStation 3 without case top - Front

Cracking open the Sony PlayStation 3

Memory card slots and Wi-Fi/Bluetooth board

Memory card slots and Wi-Fi/Bluetooth board

Cracking open the Sony PlayStation 3

Memory card connector and optical drive power cable

Memory card connector and optical drive power cable

Cracking open the Sony PlayStation 3

Eject button, Power button, and associated lights

Eject button, Power button, and associated lights

Cracking open the Sony PlayStation 3

PlayStation 3 without case top - Side

PlayStation 3 without case top - Side

Cracking open the Sony PlayStation 3

PlayStation 3 without case top - Back

PlayStation 3 without case top - Back

Cracking open the Sony PlayStation 3

Wi-Fi/Bluetooth board

Wi-Fi/Bluetooth board

Cracking open the Sony PlayStation 3

Power supply cables

Power supply cables

Cracking open the Sony PlayStation 3

PlayStation 3 without case top - Top

PlayStation 3 without case top - Top

Cracking open the Sony PlayStation 3

Remove the memory card unit

Remove the memory card unit

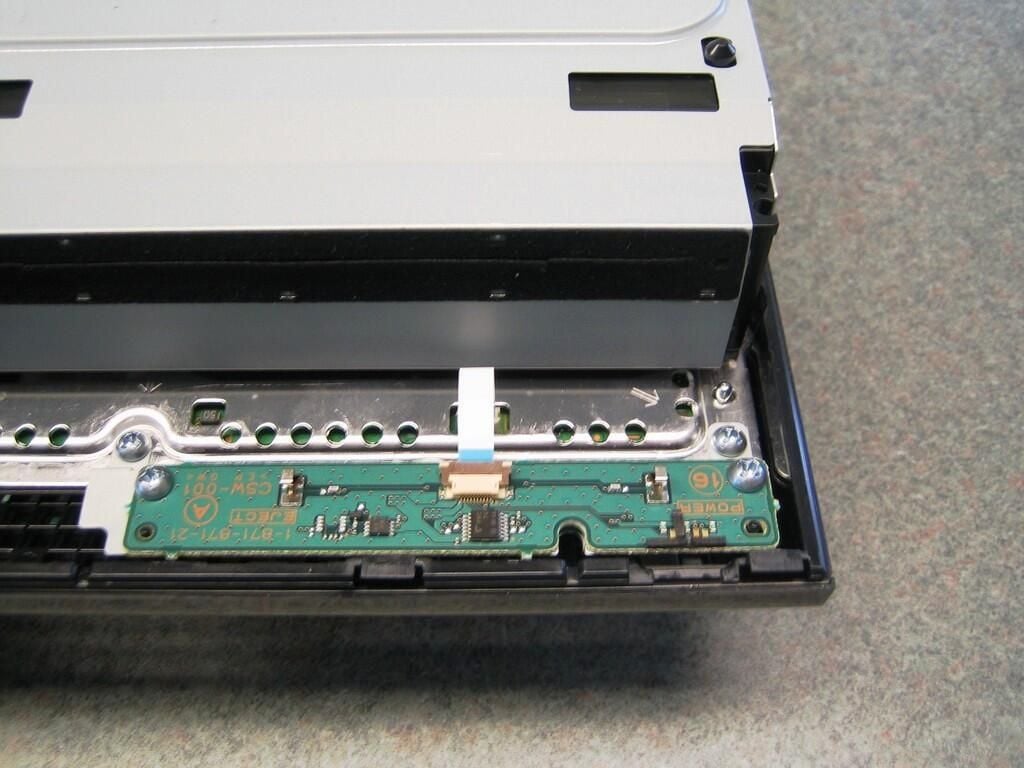
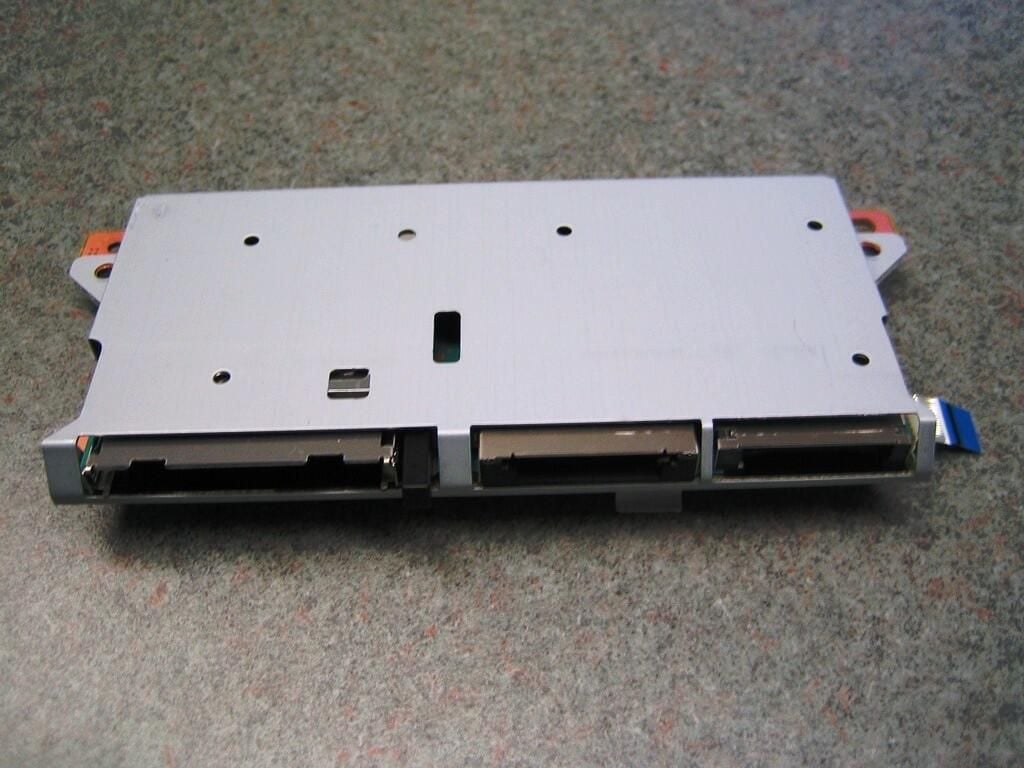
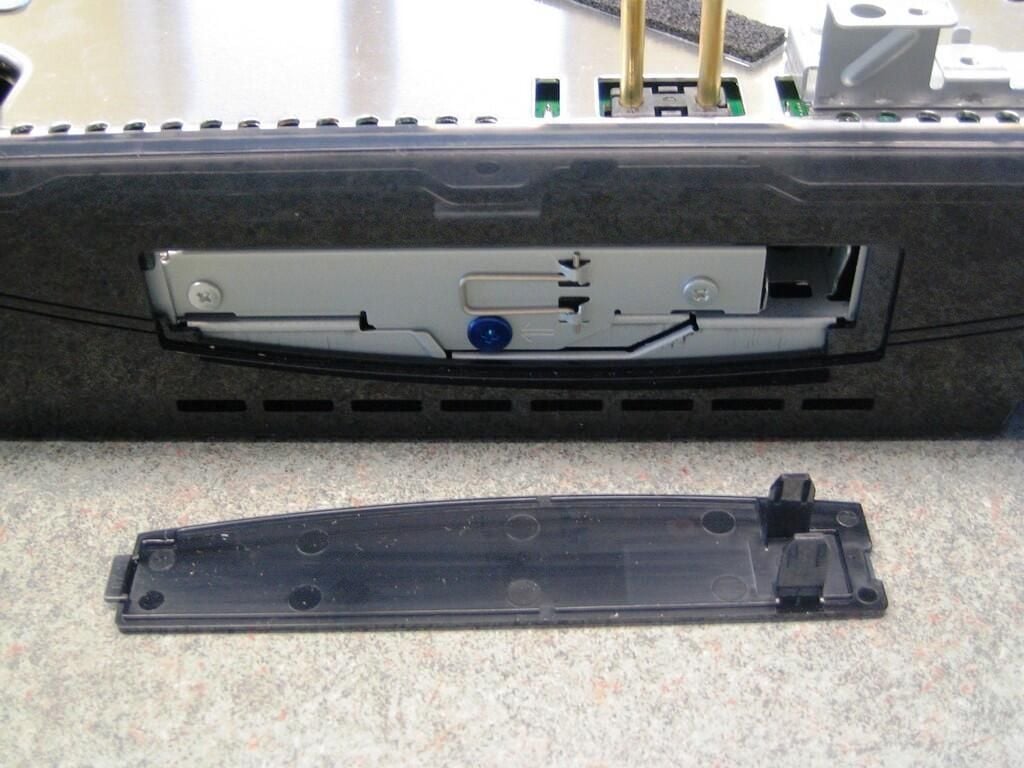
To continue disassembling our 60GB HDD PlayStation 3, we must remove the Memory Stick/SD/CompactFlash unit, which is held in place by two screws.

Cracking open the Sony PlayStation 3

Lift up the memory card unit

Lift up the memory card unit

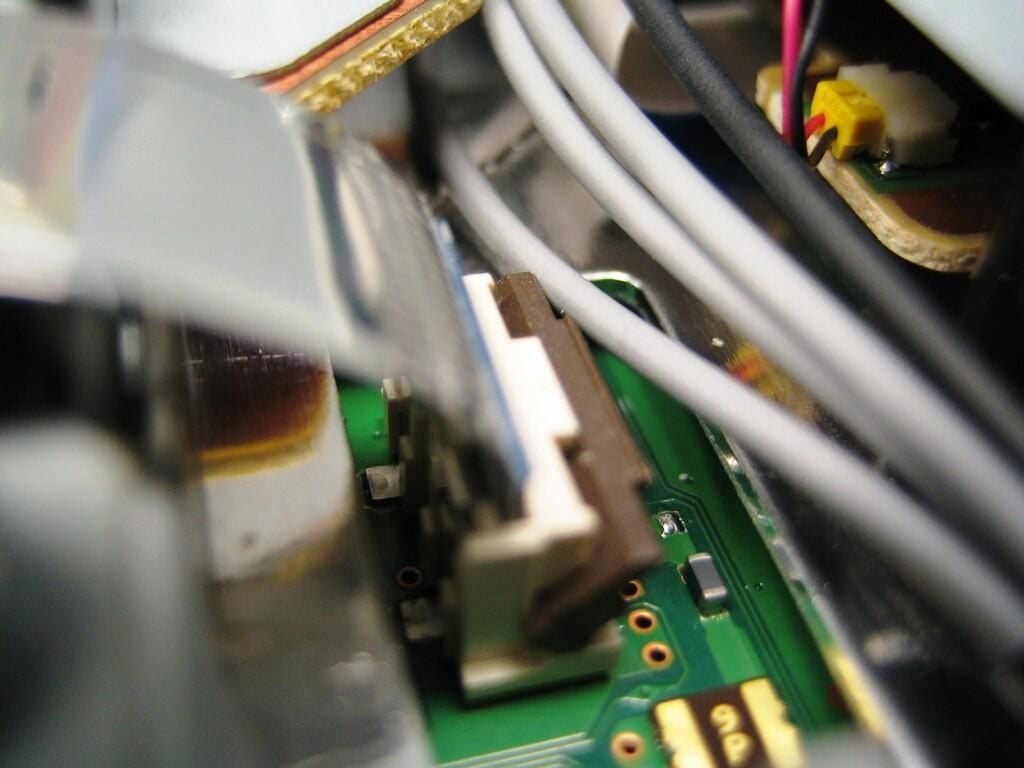
The Memory Stick/SD/CompactFlash unit is connected via very thin ribbon cable. The cable is held in place with a white, adhesive sticker that you will need to cut, tear, or completely remove before disconnecting the cable from the motherboard.

Cracking open the Sony PlayStation 3

Locate the memory card unit ribbon cable

Locate the memory card unit ribbon cable

Cracking open the Sony PlayStation 3

Memory card unit ribbon cable connector

Memory card unit ribbon cable connector

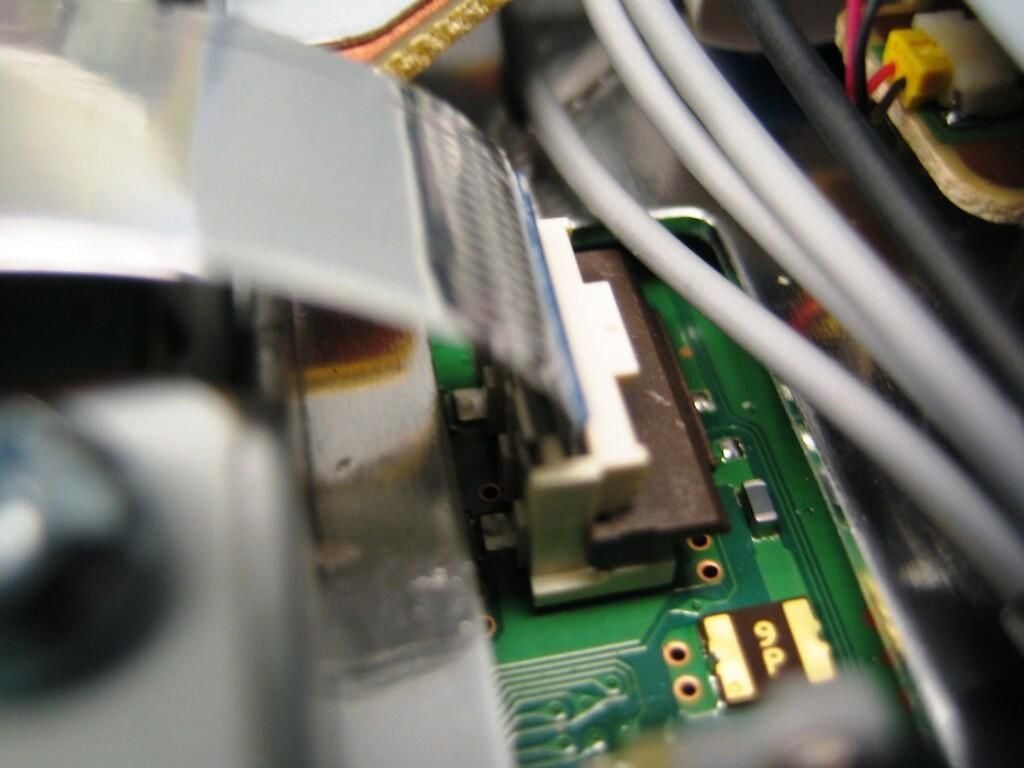
Gently lift up on the ribbon cable connector’s brown gate to release the cable.

Cracking open the Sony PlayStation 3

Flip up the connector's gate

Flip up the connector's gate

The ribbon cable connector in the open/unlocked position. Now, you can safely remove the ribbon cable.

Cracking open the Sony PlayStation 3

PlayStation 3 Memory Stick/SD/CompactFlash unit

PlayStation 3 Memory Stick/SD/CompactFlash unit

Cracking open the Sony PlayStation 3

PlayStation 3 with the memory card unit removed

PlayStation 3 with the memory card unit removed

Cracking open the Sony PlayStation 3

Remove the power supply

Remove the power supply

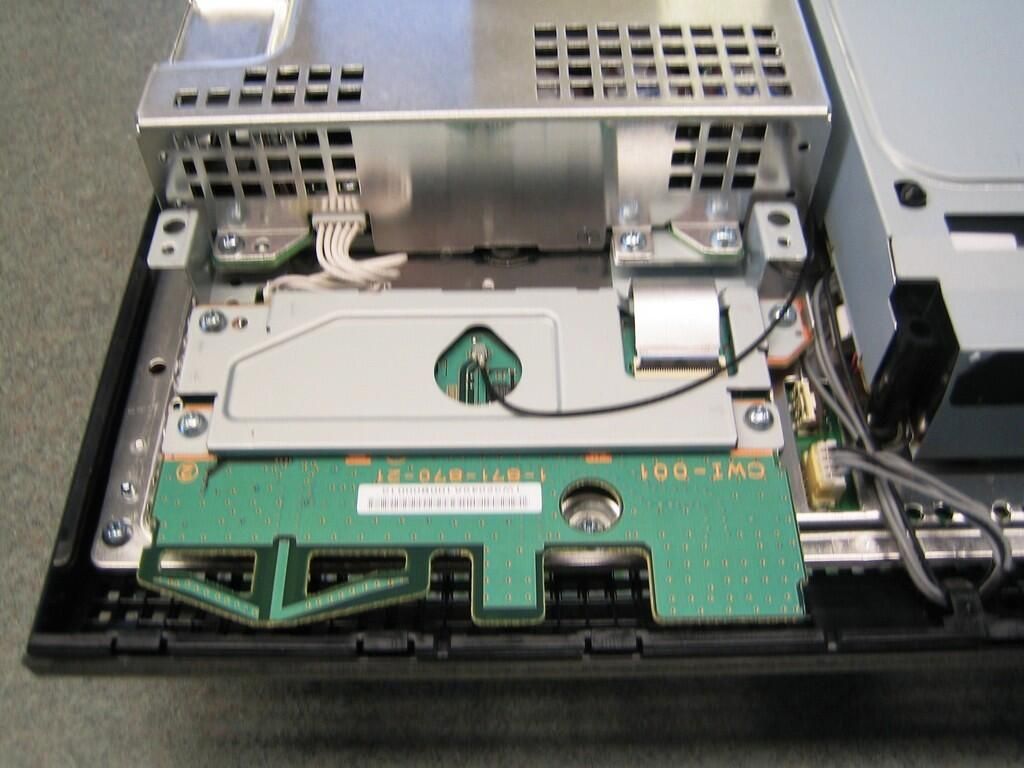
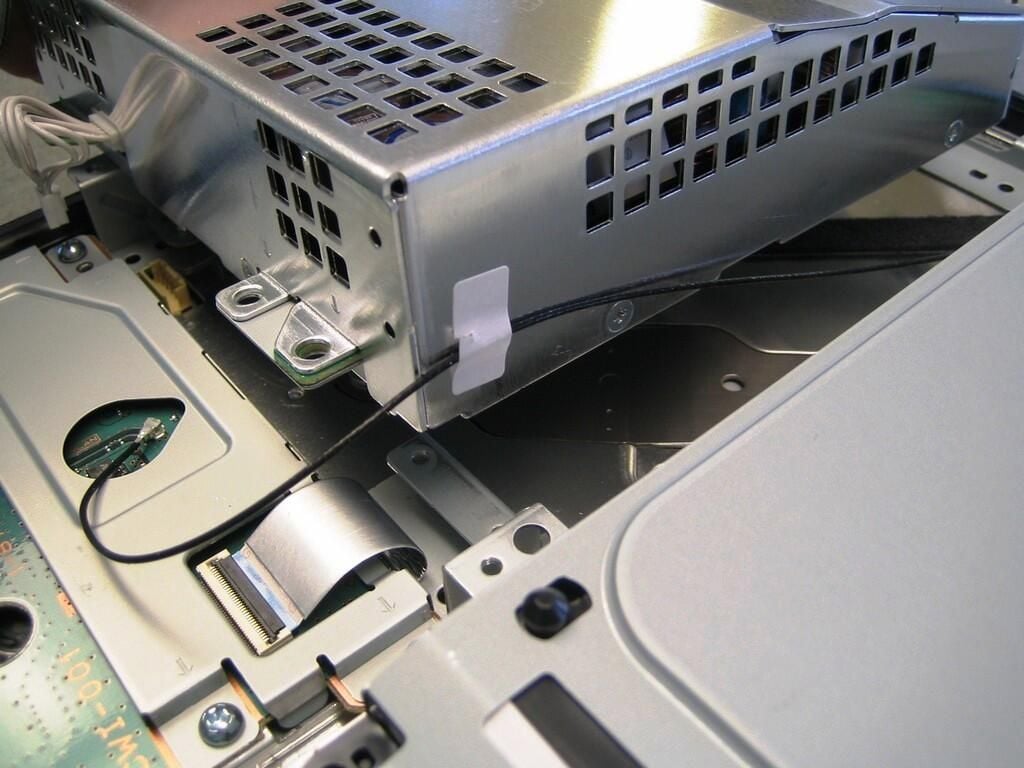
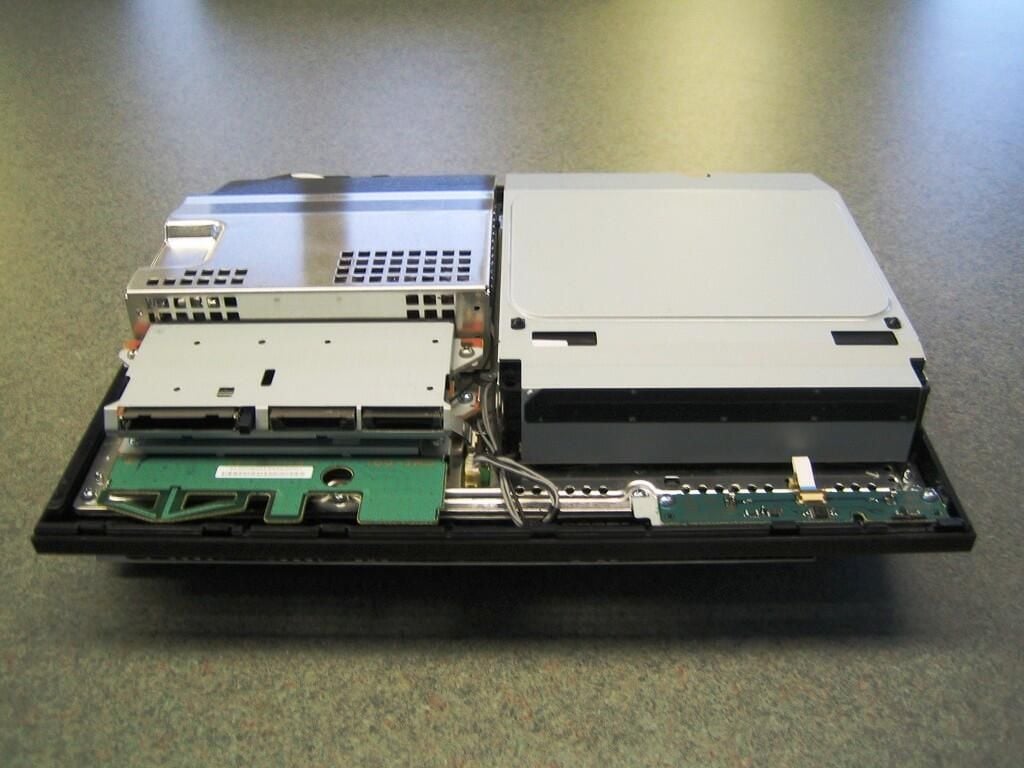
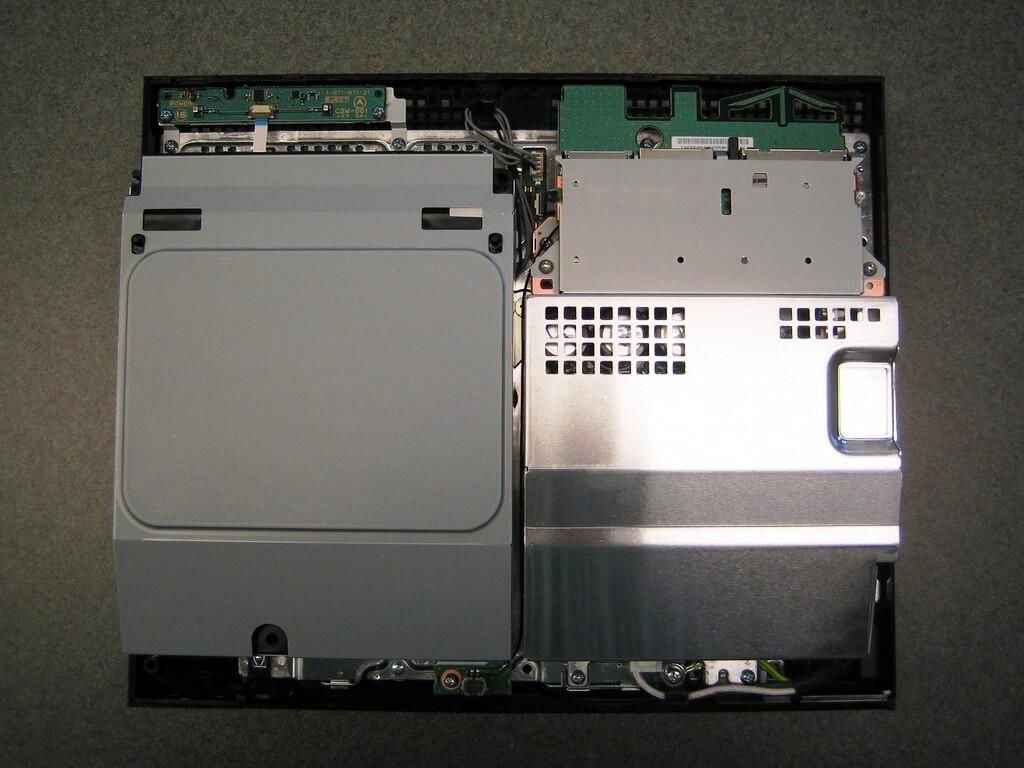
Removing the PlayStation 3’s power supply unit (PSU) is next on our disassembly task list. If you haven’t done so, disconnect all the PSU cables and remove the screws, that hold the PSU to the metal chassis and plastic case.

Cracking open the Sony PlayStation 3

PlayStation 3 power supply

PlayStation 3 power supply

Cracking open the Sony PlayStation 3

PlayStation 3 with the power supply removed - Top

PlayStation 3 with the power supply removed - Top

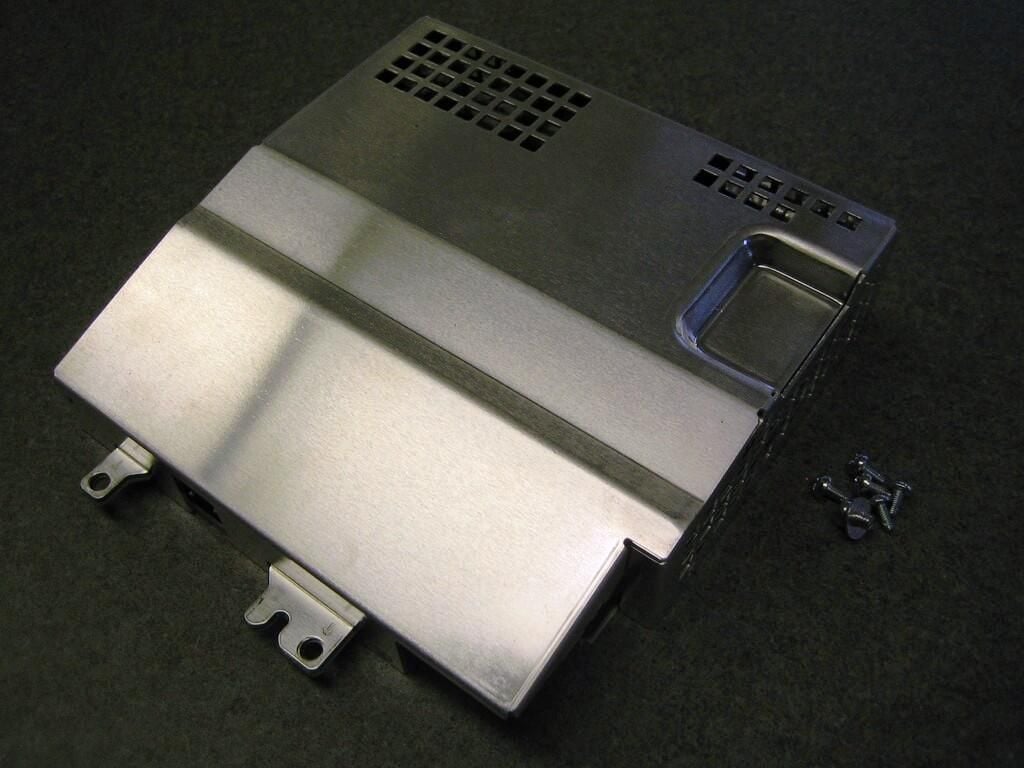
With the power supply unit remove, we can see a bit more of the metal shielding.

Cracking open the Sony PlayStation 3

PlayStation 3 with the power supply removed - Side

PlayStation 3 with the power supply removed - Side

Cracking open the Sony PlayStation 3

Remove the Bluetooth/Wi-Fi boards and wire

Remove the Bluetooth/Wi-Fi boards and wire

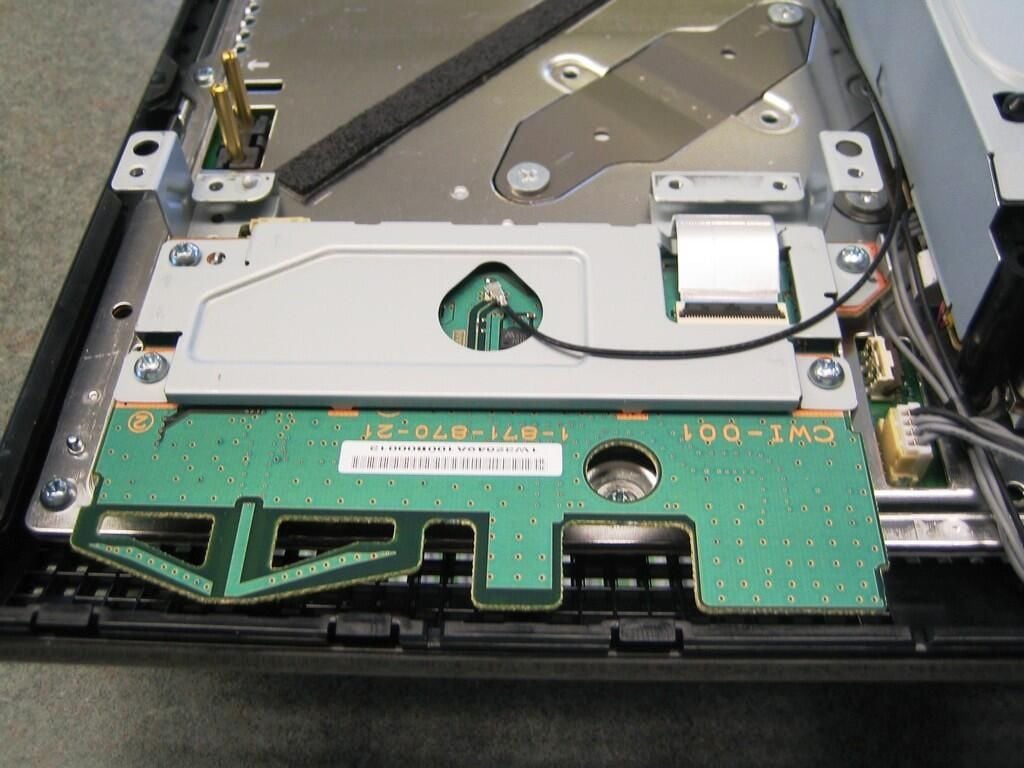
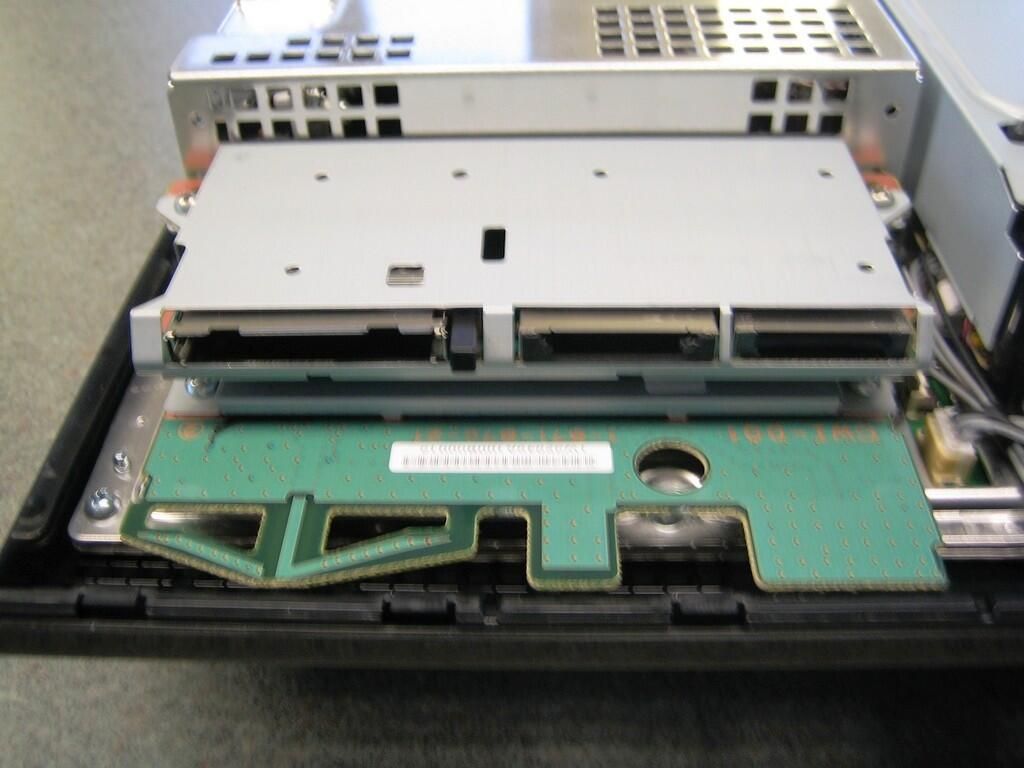
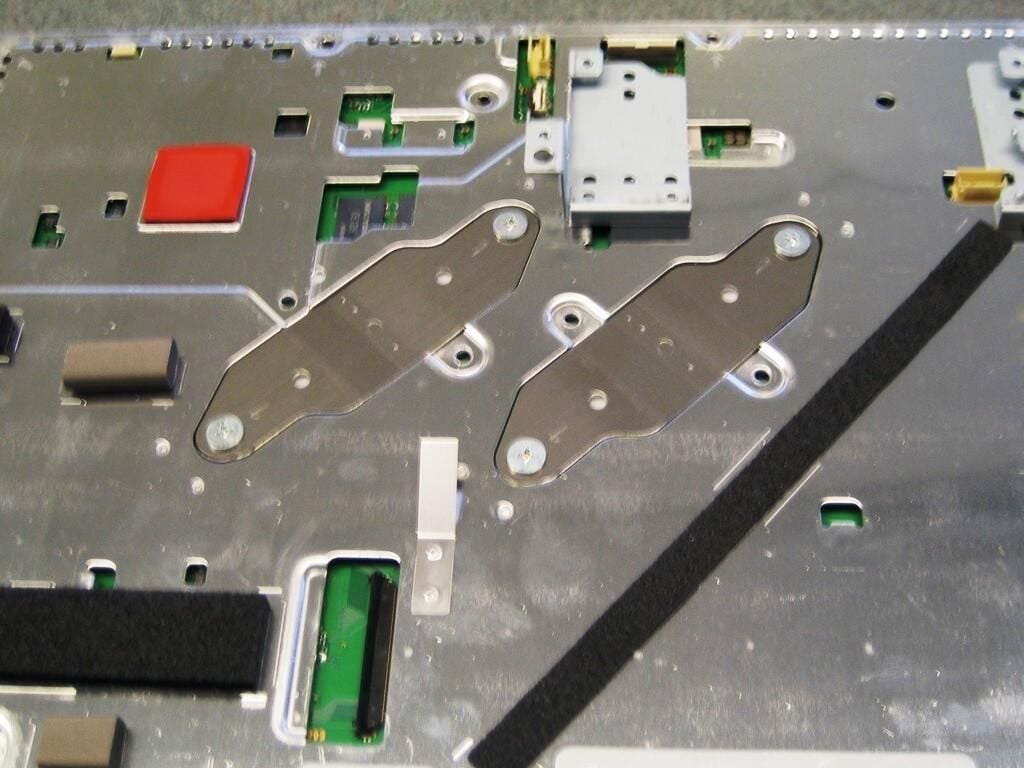
The 60GB HDD PlayStation 3 system contains both Bluetooth and Wi-Fi. I can’t be 100 percent certain, but most of my research indicates that both are located on these boards. My assumption makes sense, as Sony could easily install different boards for each model PS3.

There are four screws holding the front board in place and one screw holding the rear board in place. Remove all five screws.

Cracking open the Sony PlayStation 3

Rear Bloutooth/Wi-Fi board

Rear Bloutooth/Wi-Fi board

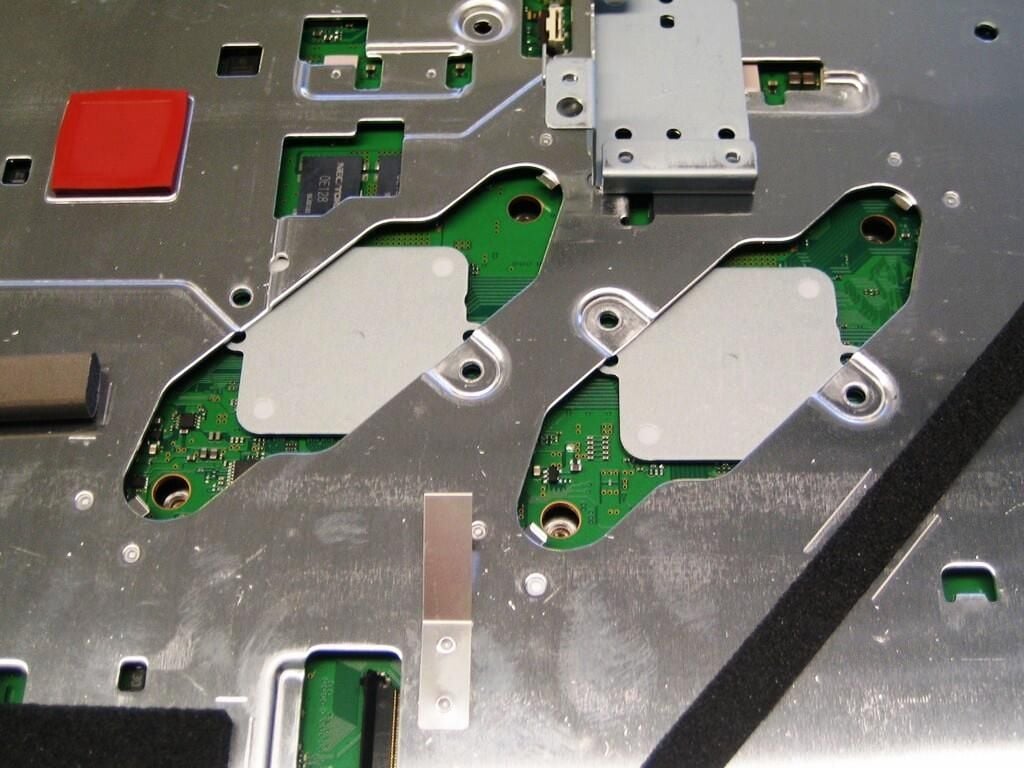
I’m not sure whether this board houses the Bluetooth or Wi-Fi unit. Regardless, you’ll need to remove it to proceed.

Cracking open the Sony PlayStation 3

Lift up the Bluetooth/Wi-Fi board

Lift up the Bluetooth/Wi-Fi board

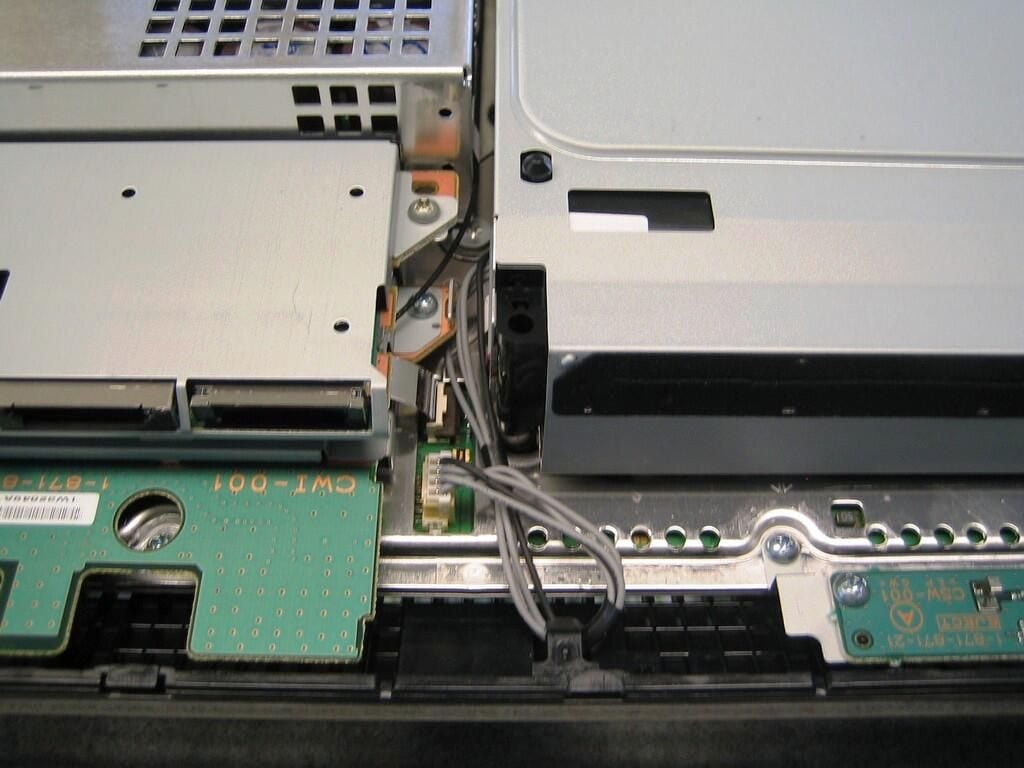
With the screws removed, gently lift off the Bluetooth/Wi-Fi board and locate the board’s ribbon cable.

Cracking open the Sony PlayStation 3

Bluetooth/Wi-Fi board ribbon cable and connector

Bluetooth/Wi-Fi board ribbon cable and connector

As with the memory card unit’s ribbon cable connector, you’ll need to gently raise the brown gate on the Bluetooth/Wi-Fi board’s ribbon cable connector.

Cracking open the Sony PlayStation 3

Bluetooth/Wi-Fi boards and wire

Bluetooth/Wi-Fi boards and wire

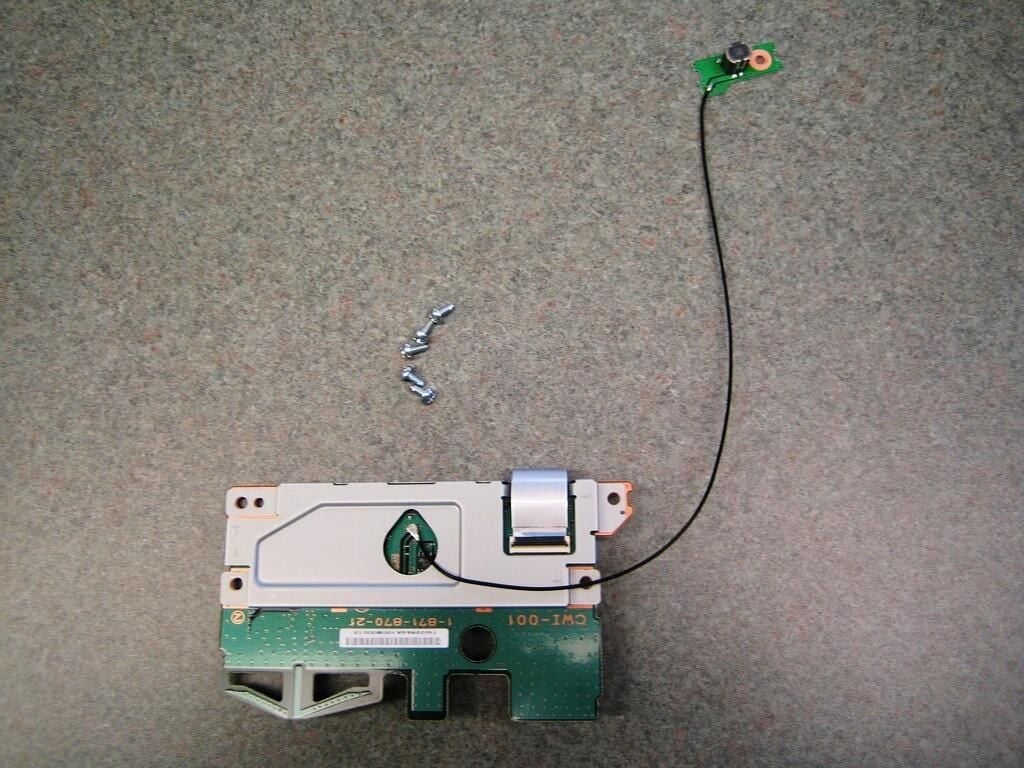
Although both the 60GB HDD and 20GB HDD versions support the PlayStation 3’s wireless Bluetooth controller, only the 60GB HDD version supports Wi-Fi. I’m not sure what this board looks like, or if it even exists, on 20GB HDD PS3 models.

Cracking open the Sony PlayStation 3

PlayStation 3 with Bluetooth/Wi-Fi boards removed

PlayStation 3 with Bluetooth/Wi-Fi boards removed

Cracking open the Sony PlayStation 3

Remove the PlayStation 3 optical drive

Remove the PlayStation 3 optical drive

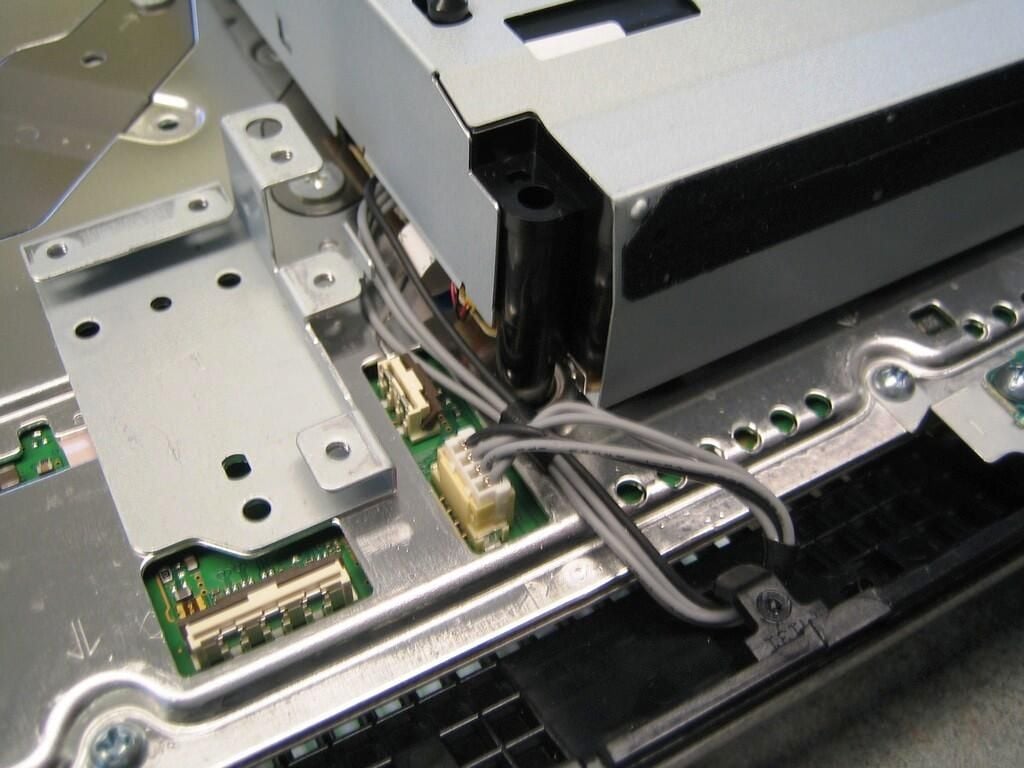
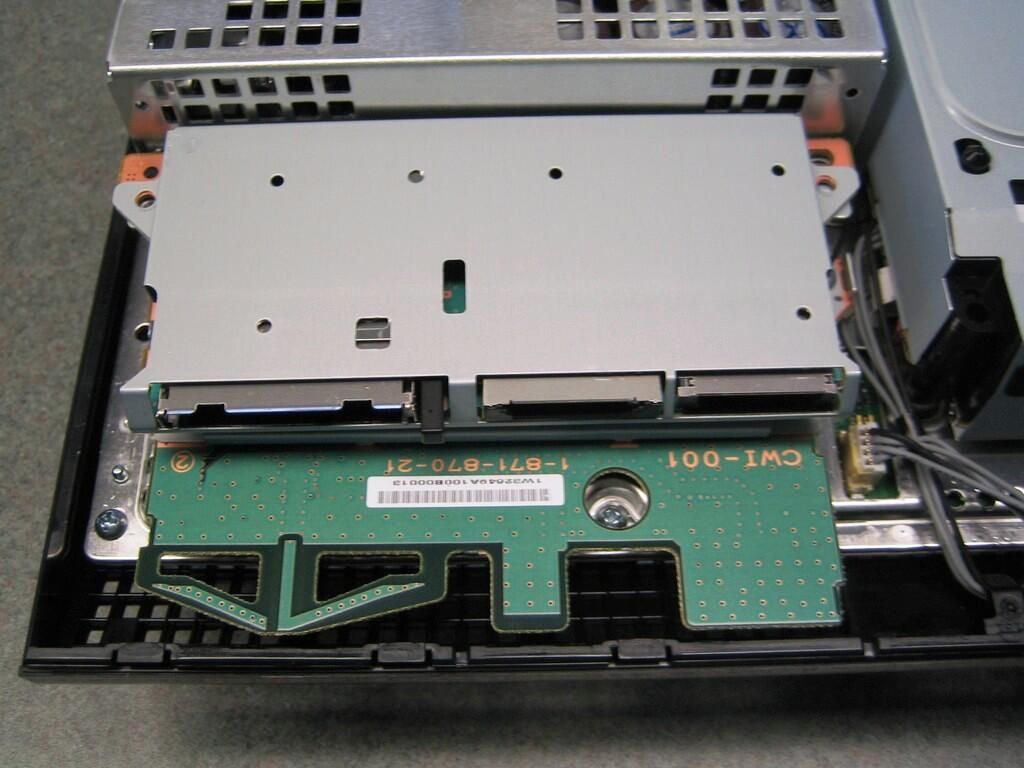
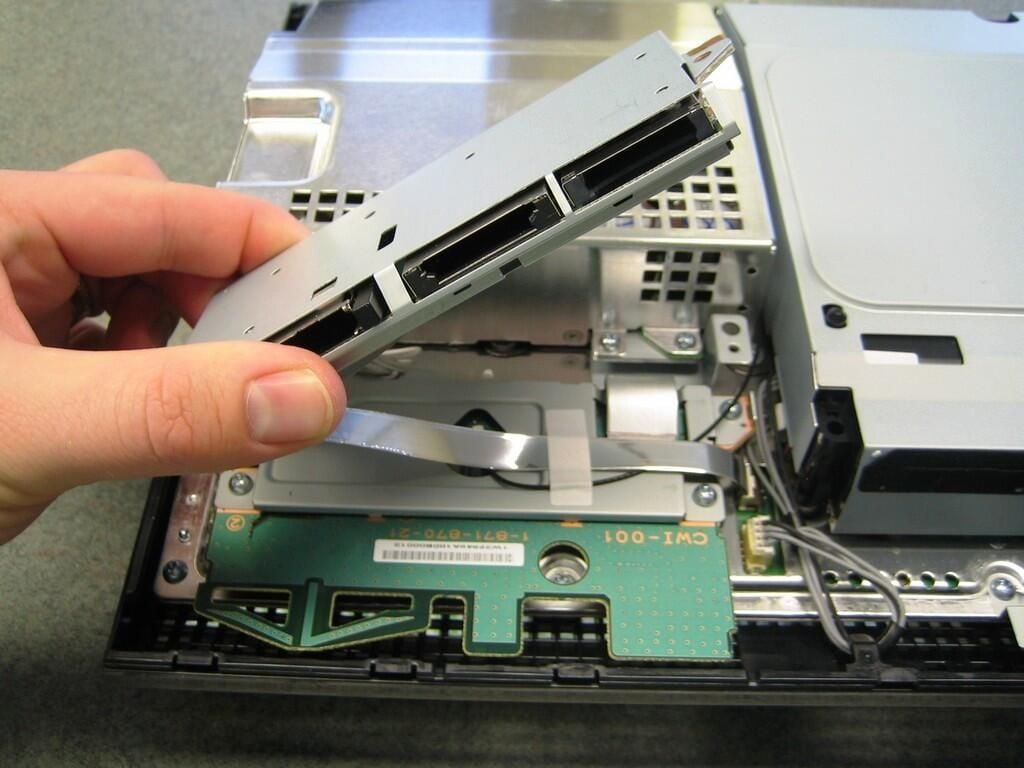
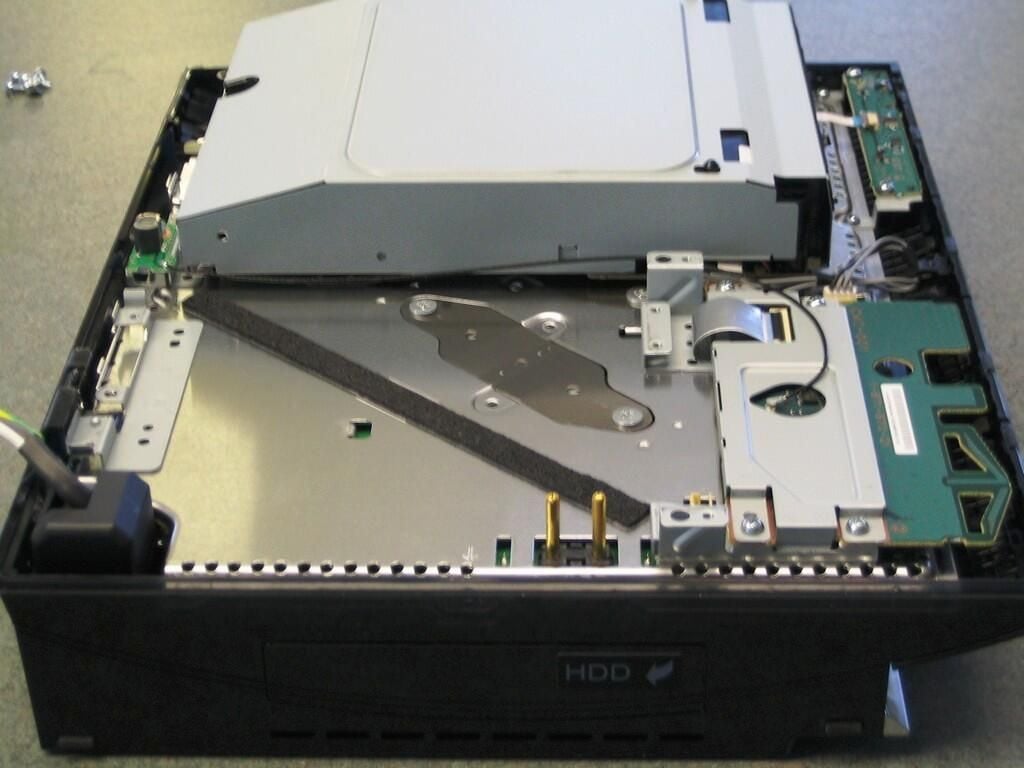
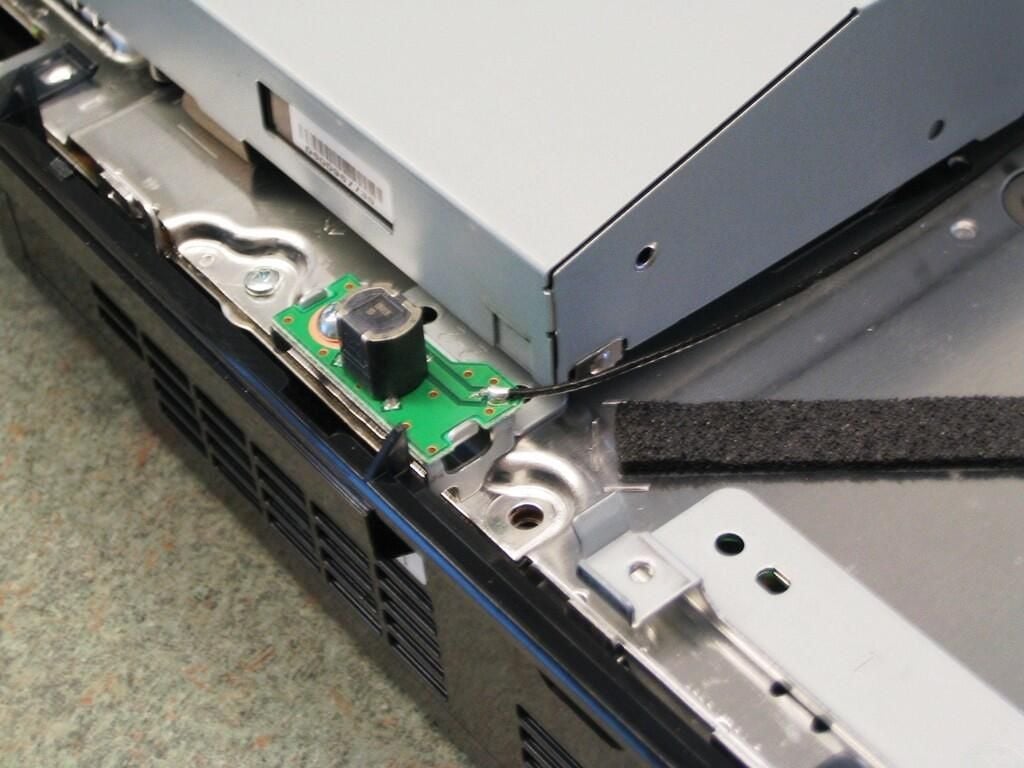
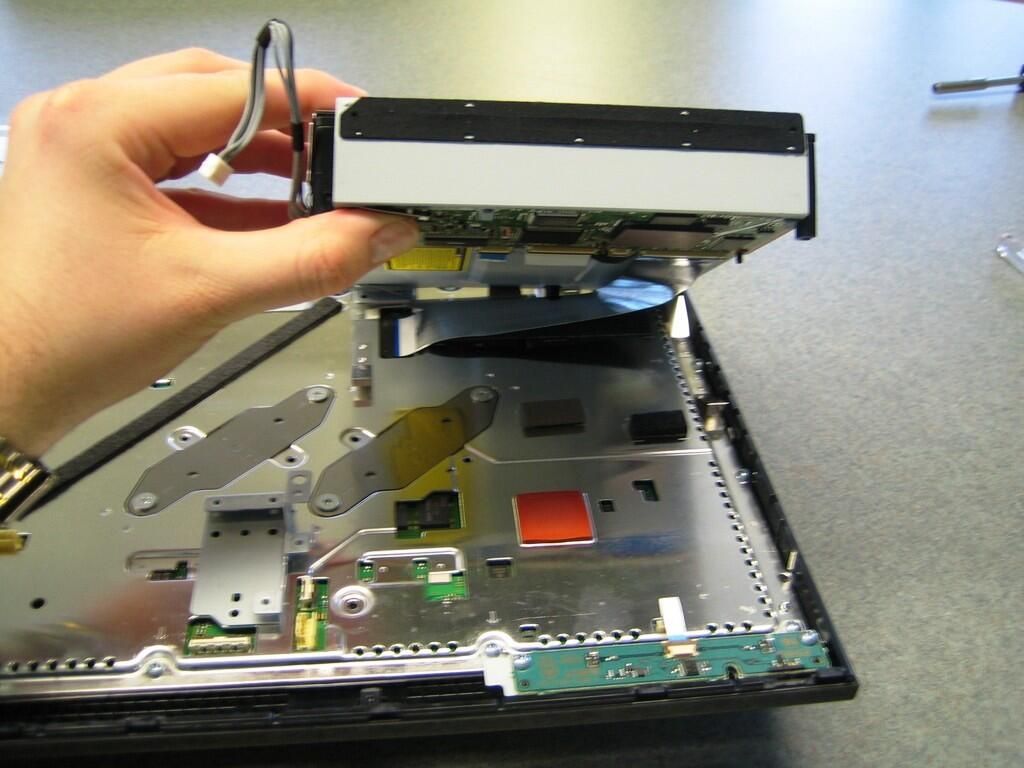
To remove the Blu-ray/DVD/CD Drive, disconnect the drive’s power cable and gently lift up on the drive. Don’t lift too far. The drive’s ribbon cable is hidden under the drive and must also be disconnected.

Cracking open the Sony PlayStation 3

Gently lift up on the optical drive

Gently lift up on the optical drive

The ribbon cable is folded under the drive.

Cracking open the Sony PlayStation 3

Set the optical drive on its end

Set the optical drive on its end

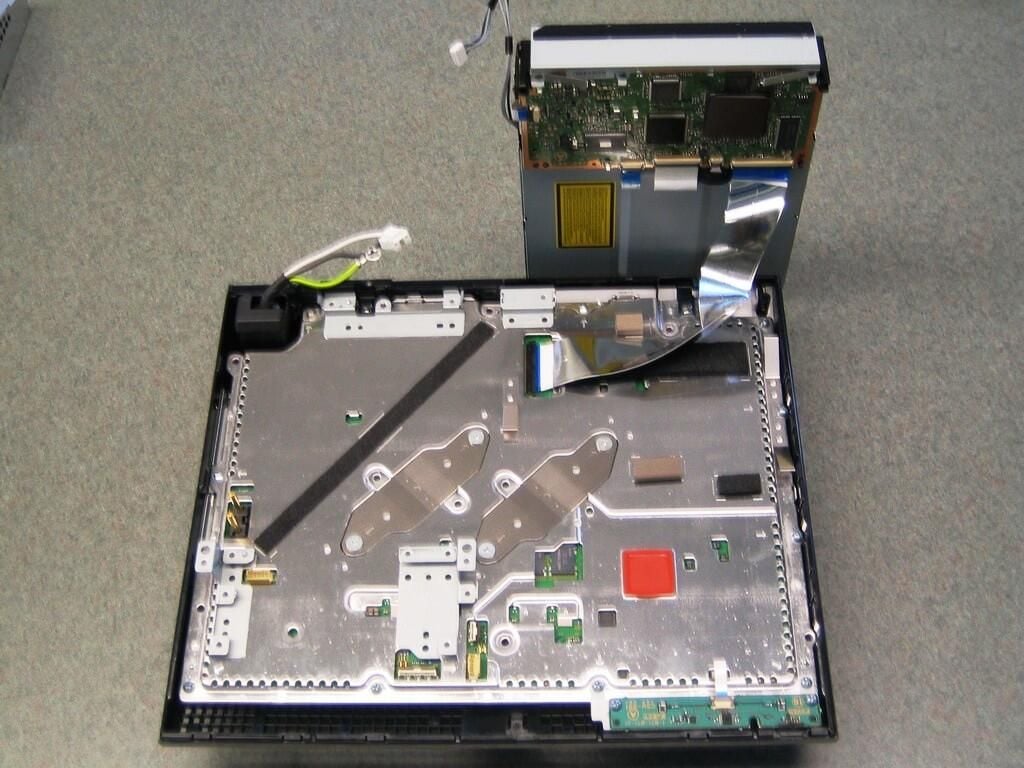
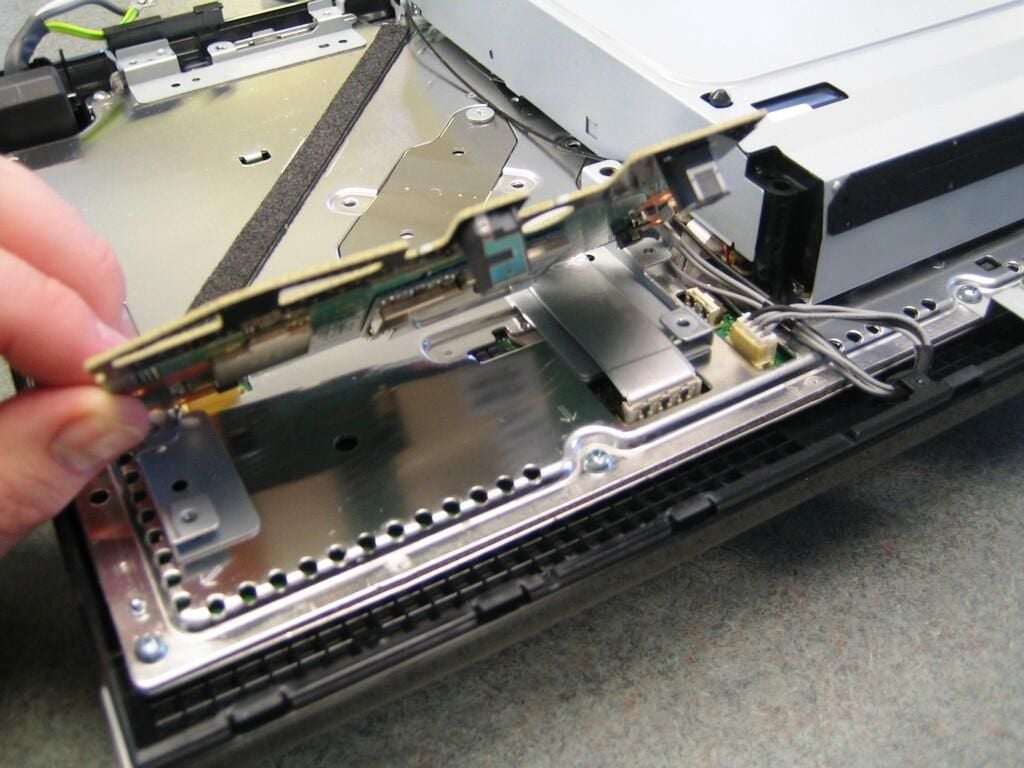
By standing the drive up on end, I could use both hands to remove the ribbon cable.

Cracking open the Sony PlayStation 3

Optical drive ribbon cable and connector

Optical drive ribbon cable and connector

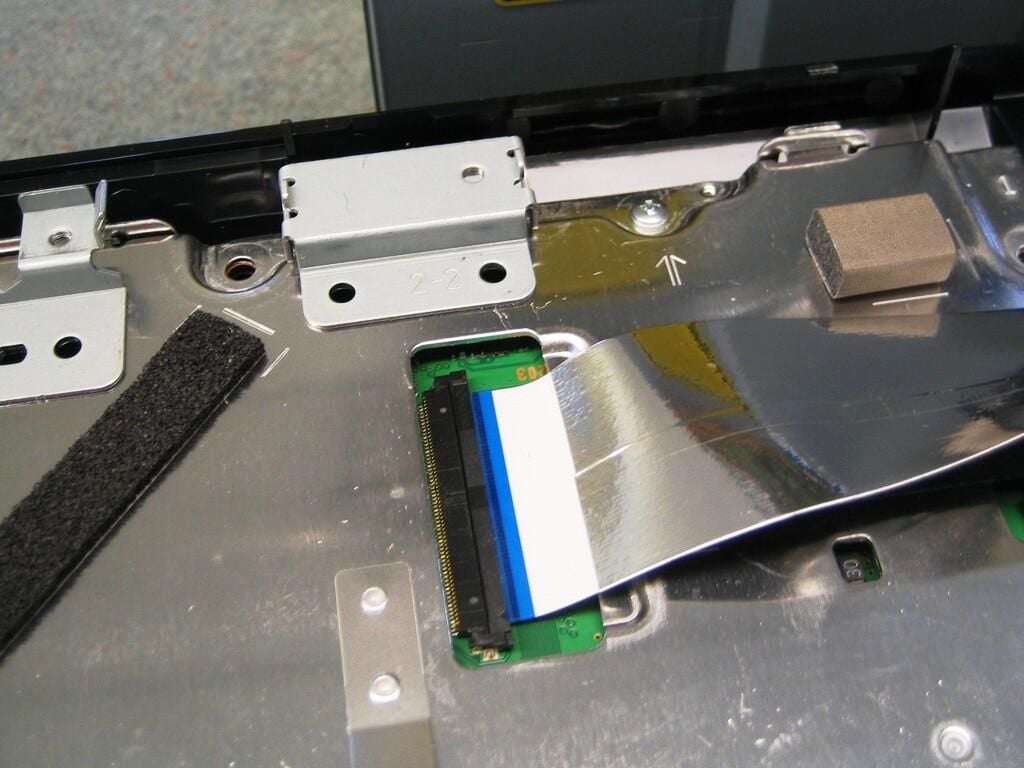
I really hate these fragile ribbon cable connectors.

Cracking open the Sony PlayStation 3

Gently flip up the connector's gate

Gently flip up the connector's gate

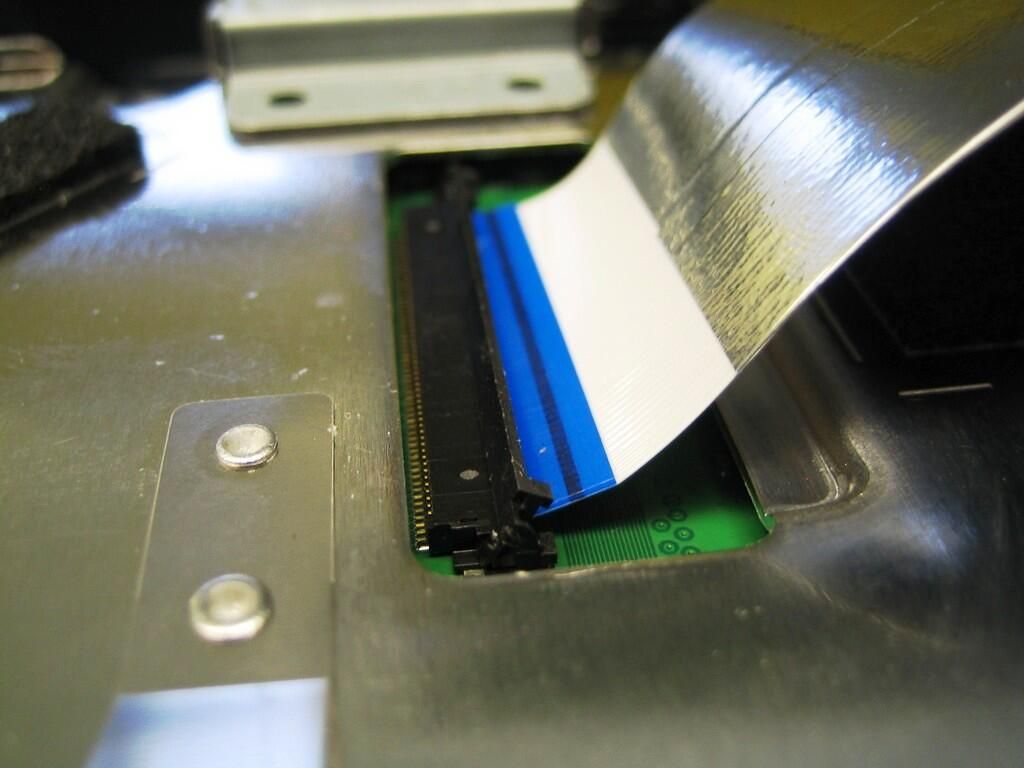
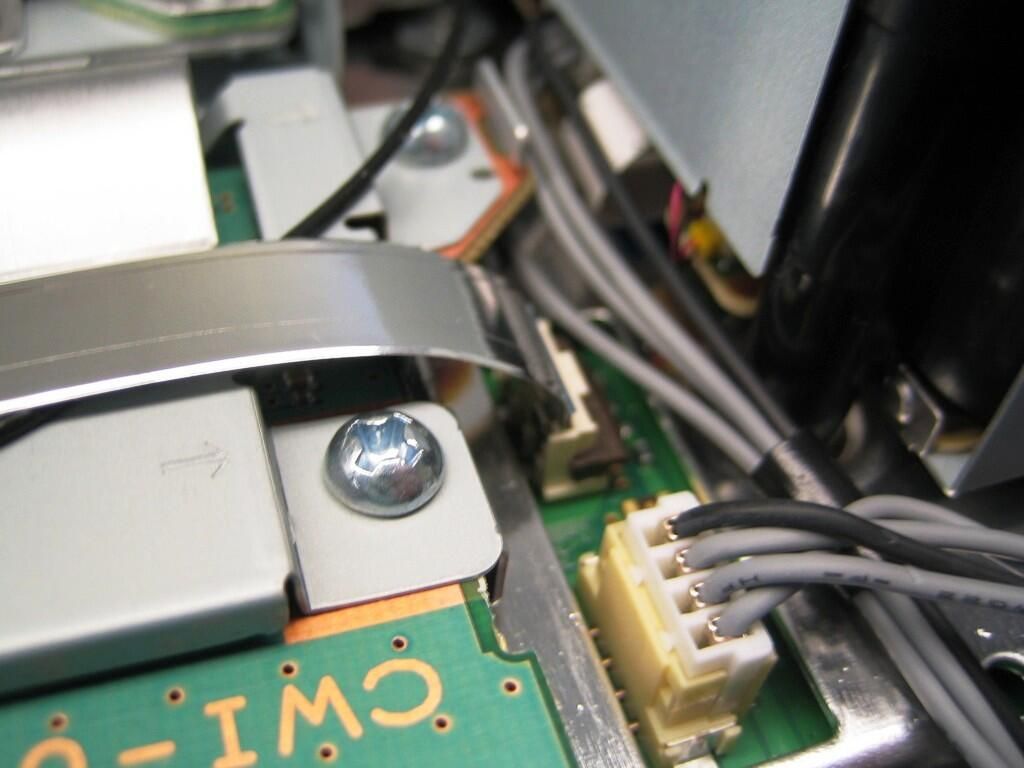
Very gently lift up the gate on the connector and pull the cable free.

Cracking open the Sony PlayStation 3

PlayStation 3 Blu-Ray Disc (BD)/DVD/CD drive

PlayStation 3 Blu-Ray Disc (BD)/DVD/CD drive

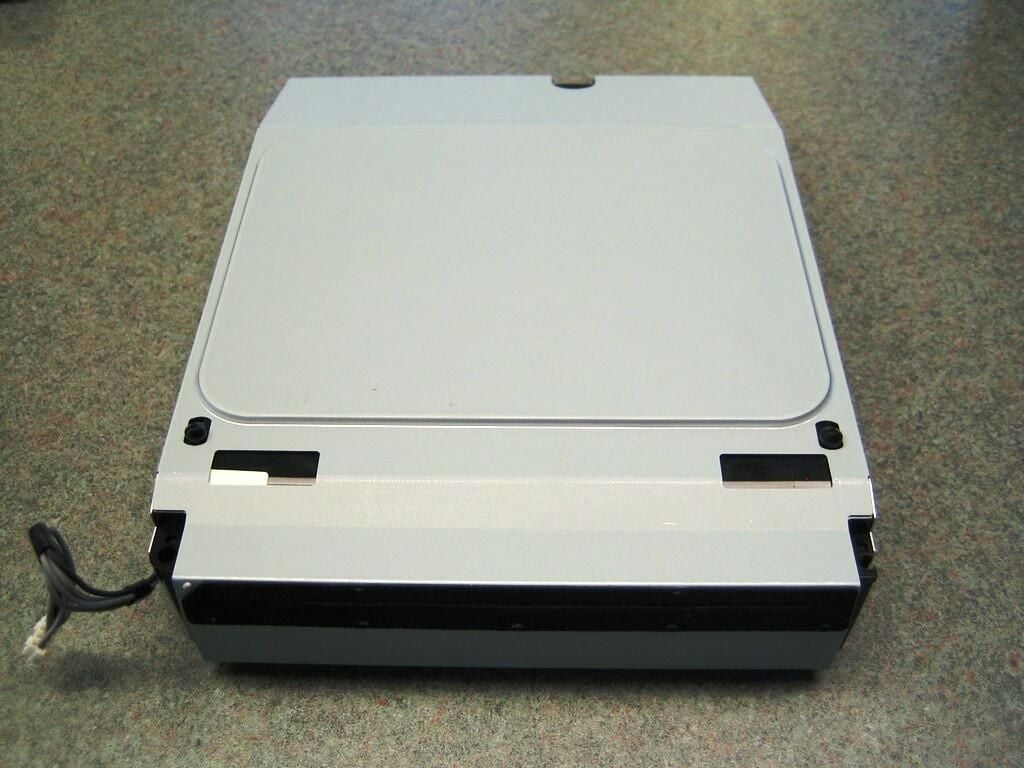
Well, here it is. The much-hyped Blu-ray drive that Sony hopes will be the next video standard.

Cracking open the Sony PlayStation 3

Blu-Ray Disc (BD)/DVD/CD - Bottom

Blu-Ray Disc (BD)/DVD/CD - Bottom

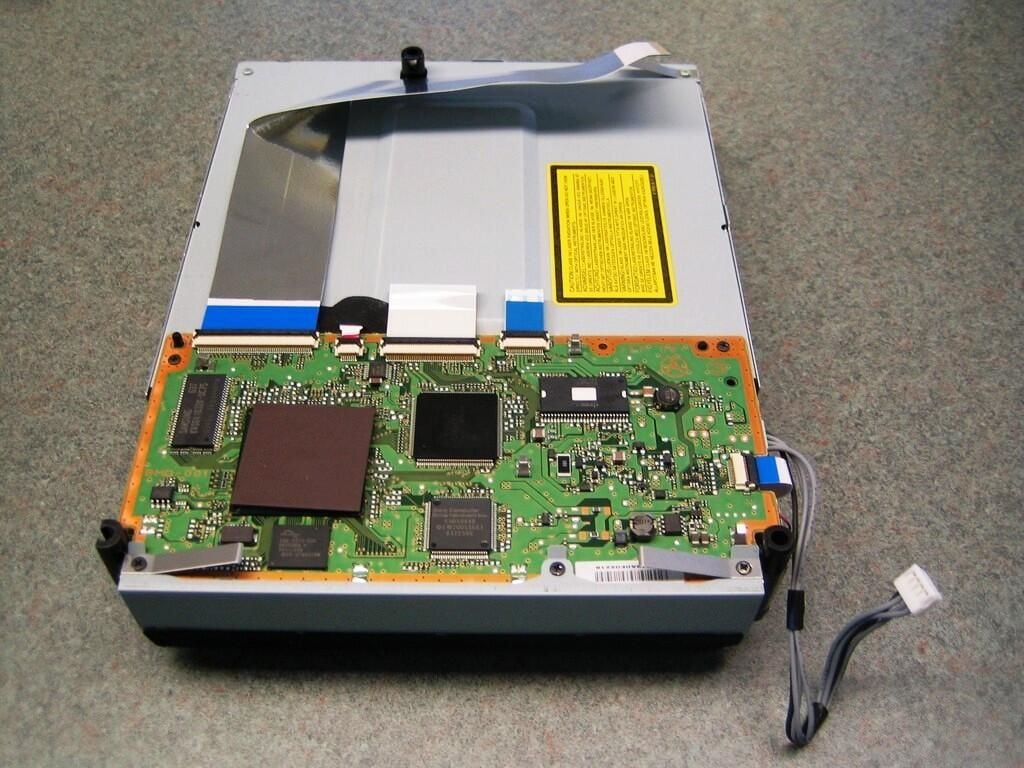
The drive’s controller board is mounted under the drive.

Cracking open the Sony PlayStation 3

Blu-Ray Disc (BD)/DVD/CD - Controller board

Blu-Ray Disc (BD)/DVD/CD - Controller board

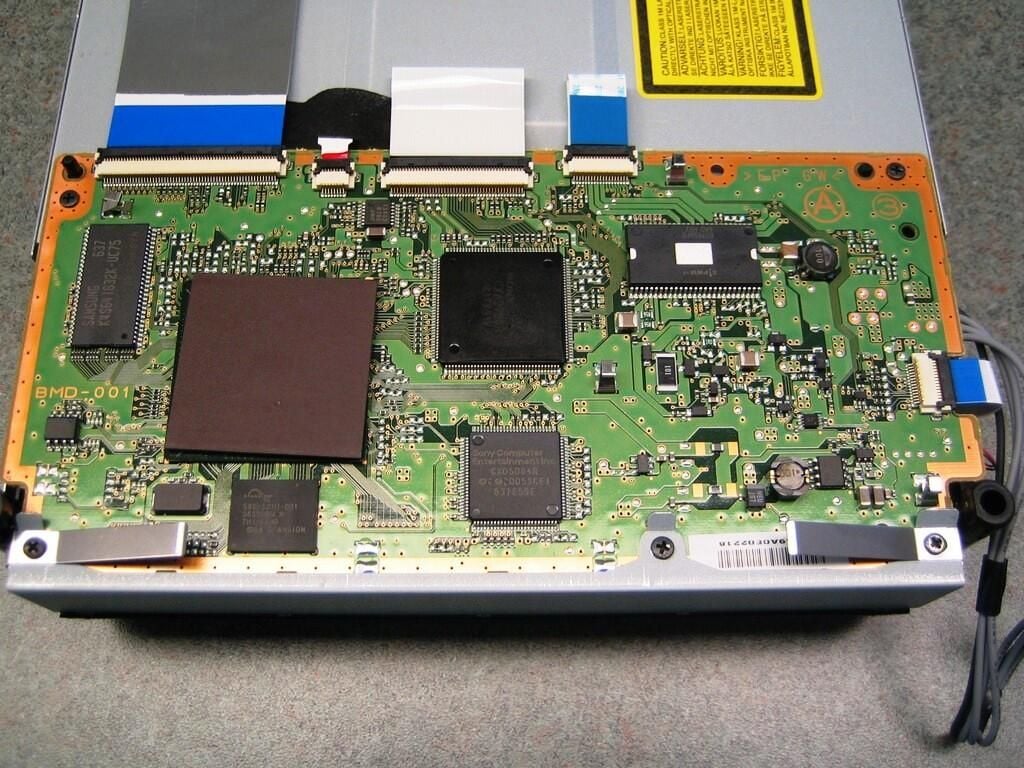
The drive’s controller board contains a 64M

Cracking open the Sony PlayStation 3

PlayStation 3 with optical drive removed

PlayStation 3 with optical drive removed

Cracking open the Sony PlayStation 3

Remove the Power and Eject button circuit board

Remove the Power and Eject button circuit board

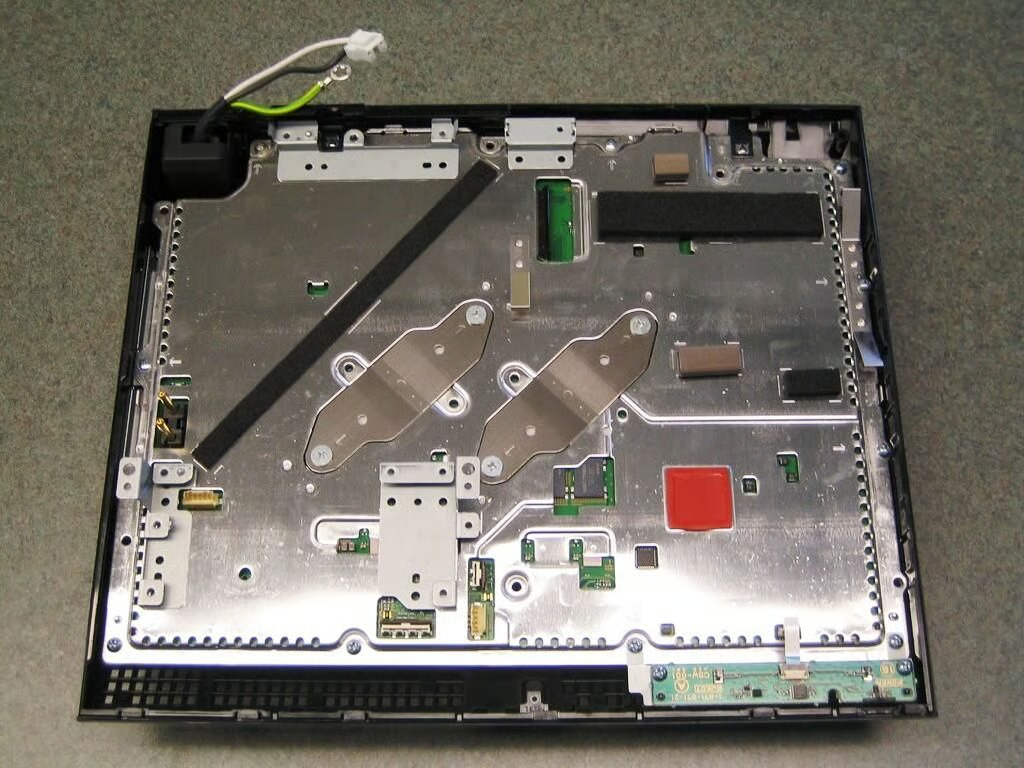
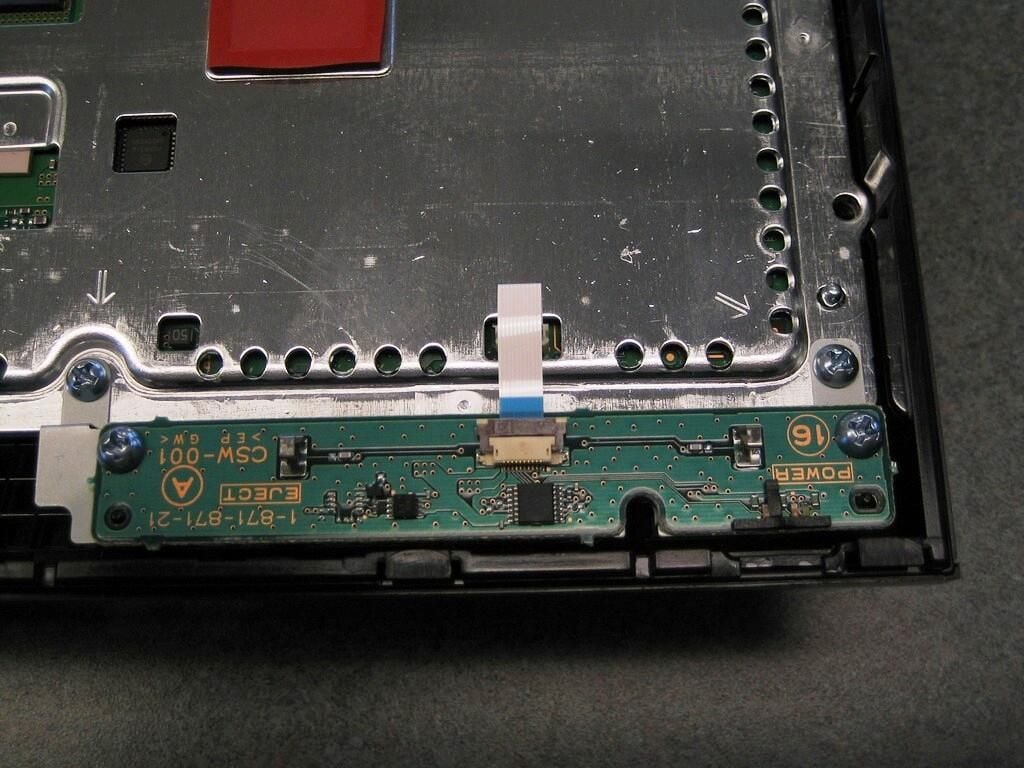
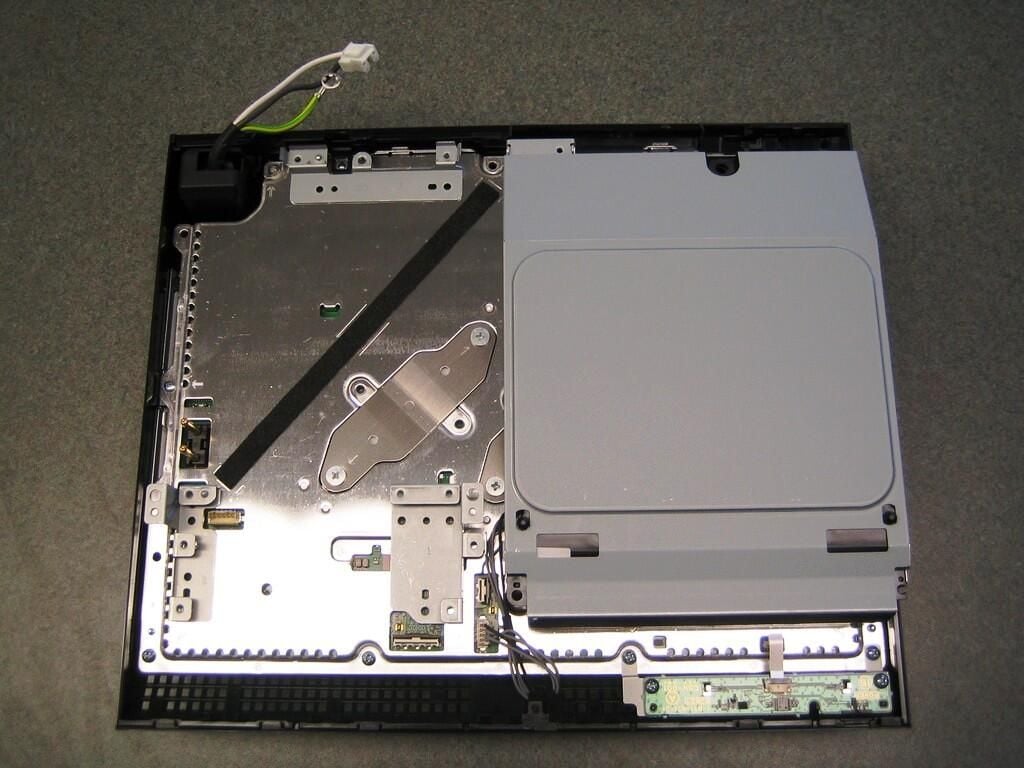
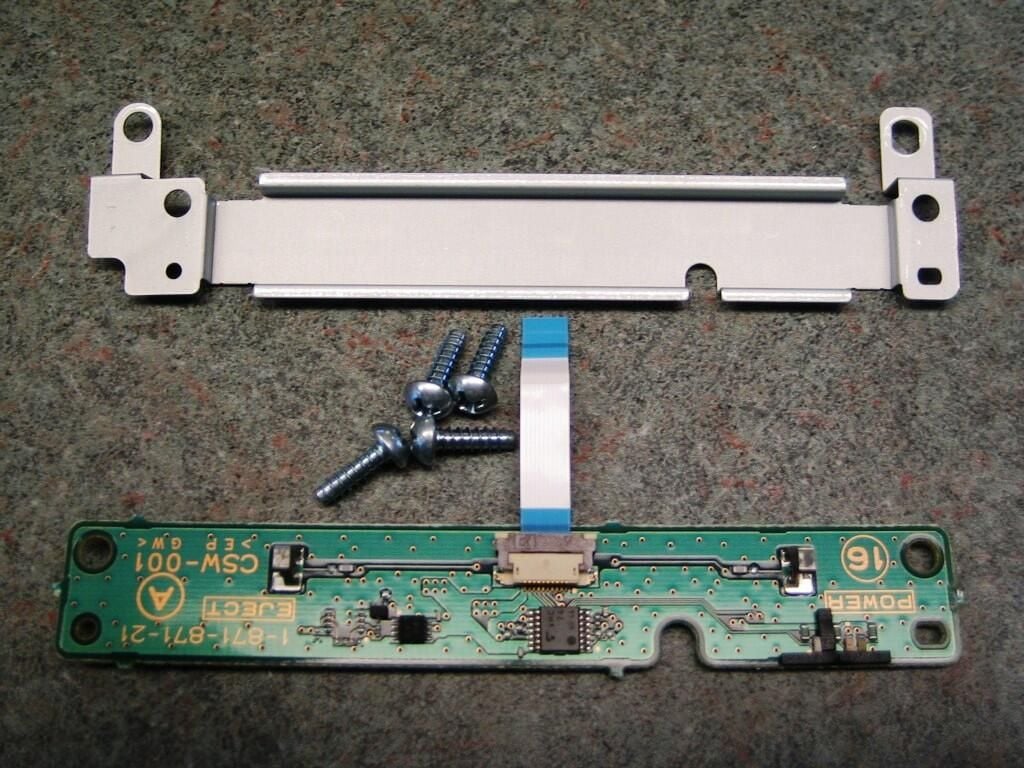
Next, remove the four screws that hold the power and eject button circuit board and its metal stand. Then, gently disconnect the board’s ribbon cable and remove the board and stand.

Cracking open the Sony PlayStation 3

Power and Eject button circuit board

Power and Eject button circuit board

Cracking open the Sony PlayStation 3

PlayStation 3 with the Power and Eject button circuit board removed

PlayStation 3 with the Power and Eject button circuit board removed

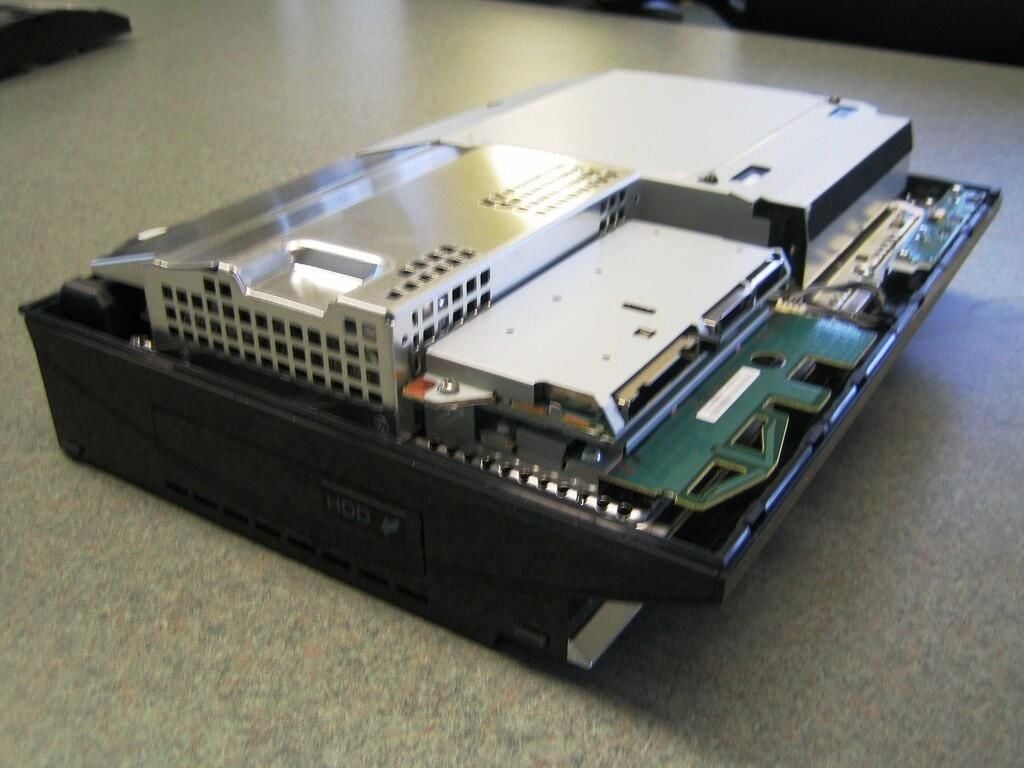
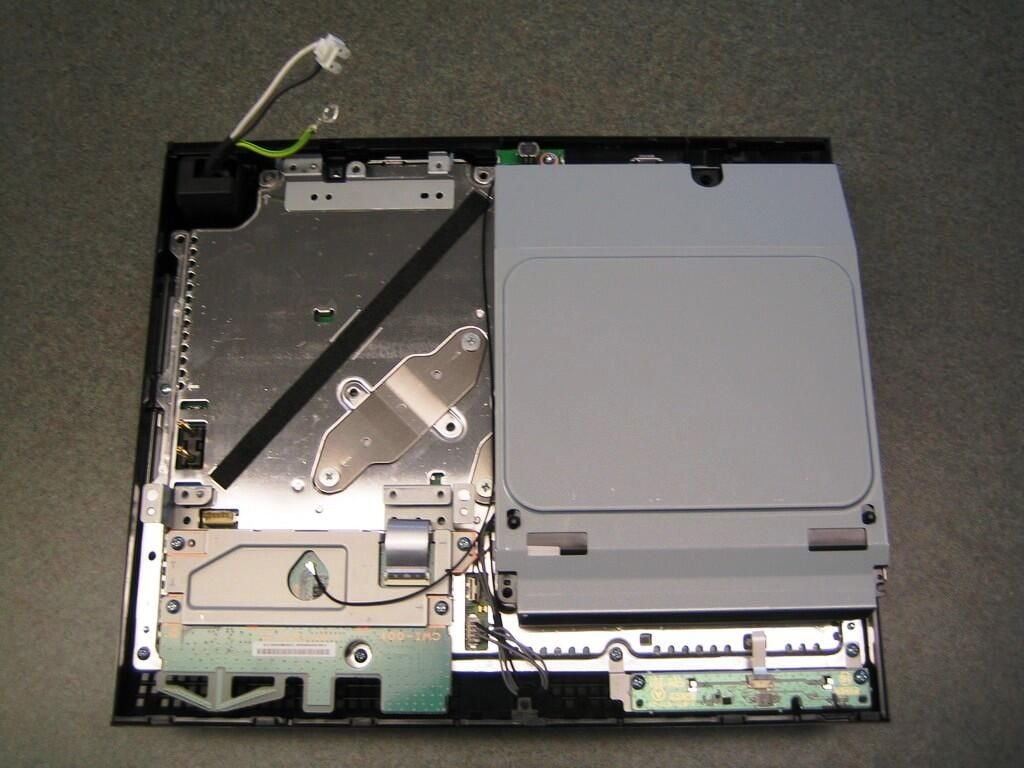
Finally, all the top components are removed.

Cracking open the Sony PlayStation 3

Remove the metal shield's case screws

Remove the metal shield's case screws

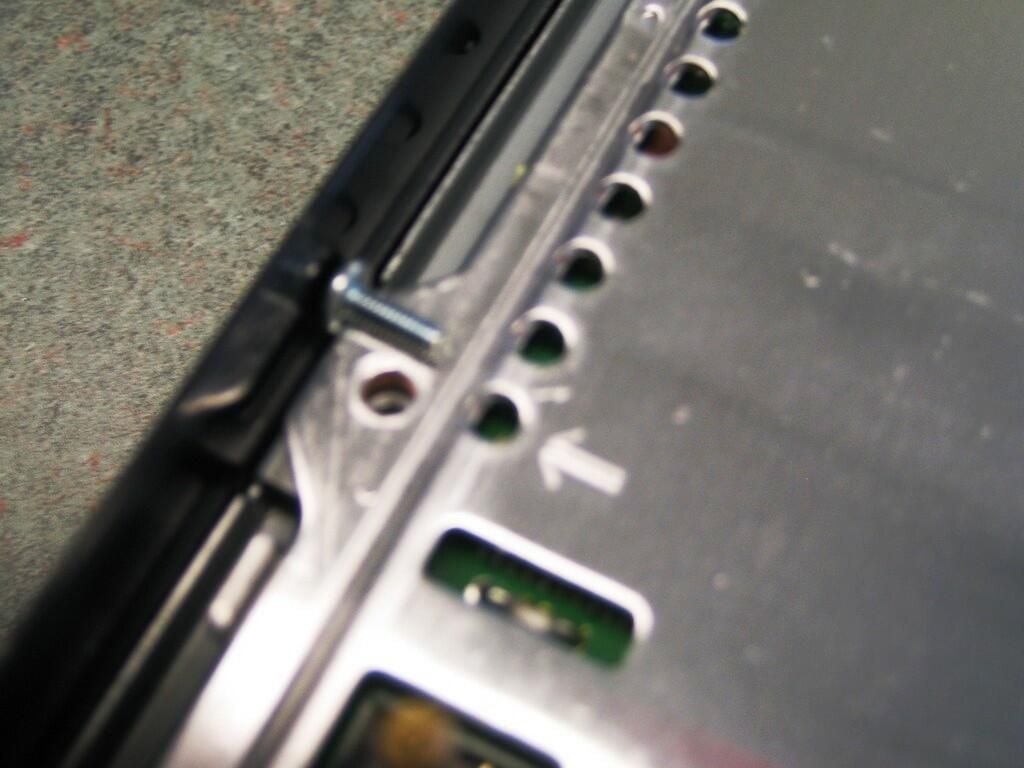
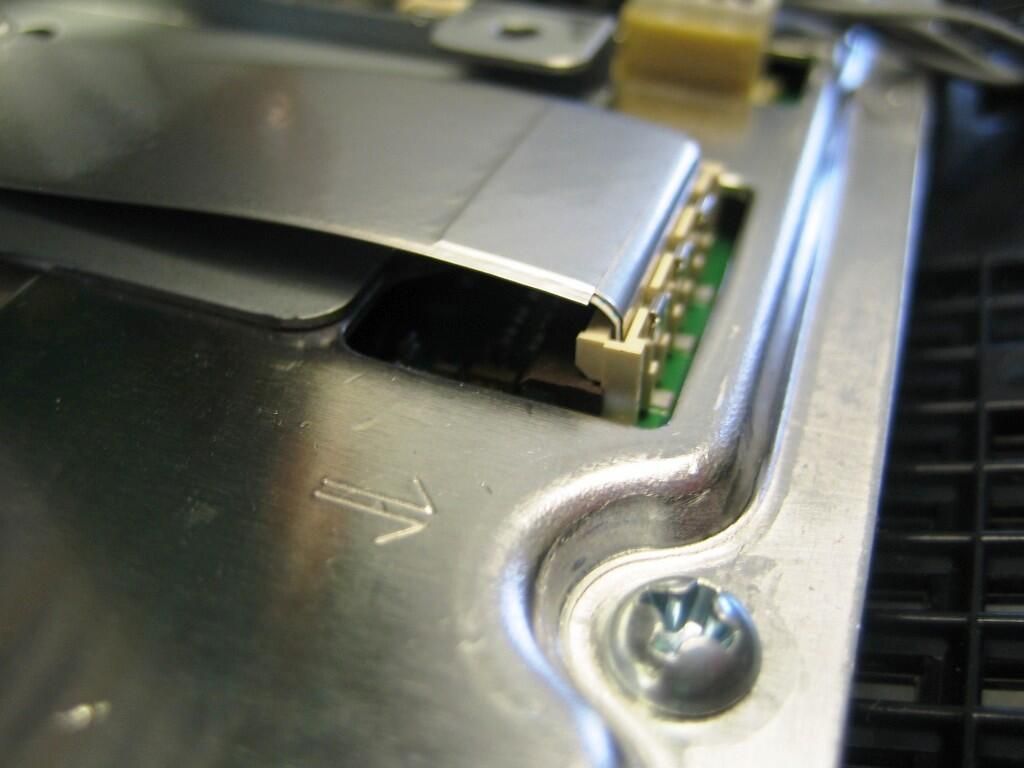
Now remove the eight screws holding the metal chassis to the plastic case. Sony has conveniently marked these screws with small arrows.

Cracking open the Sony PlayStation 3

Longest case screw screw goes next to the power switch

Longest case screw screw goes next to the power switch

All but one of the screws will be the same length. The longer screw is located next to the PlayStation 3’s power switch.

Cracking open the Sony PlayStation 3

Remove the hard drive case panel

Remove the hard drive case panel

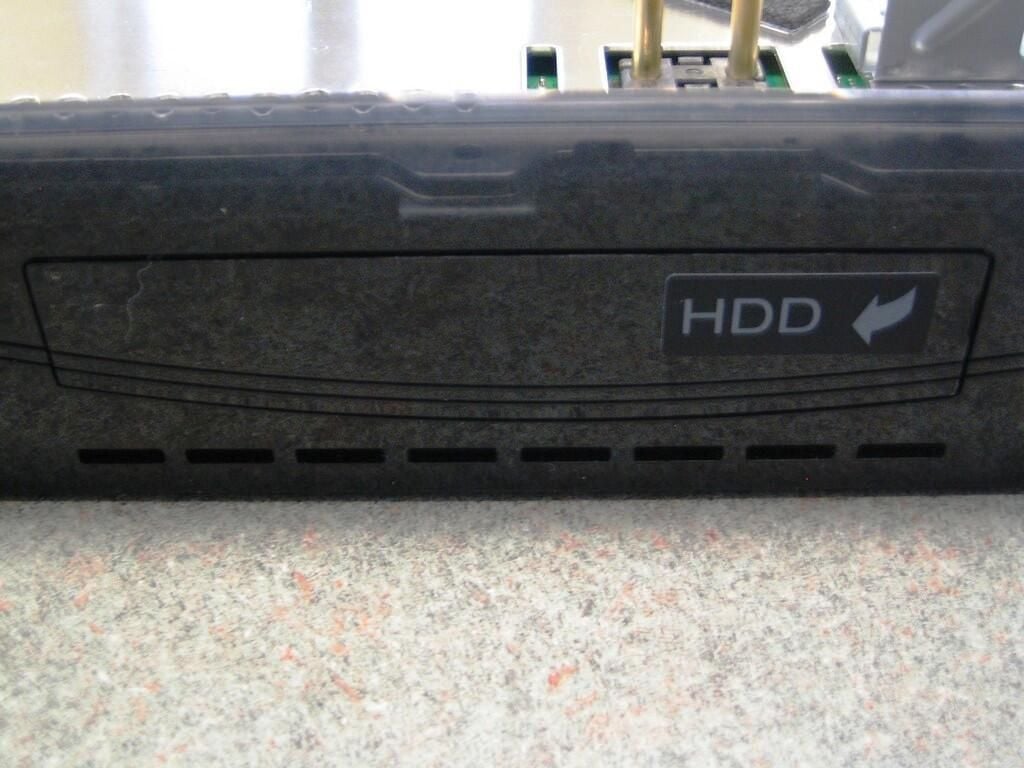
If you haven’t done so already, you must remove the hard drive panel before continuing. When in place, the panel’s plastic catches prevent you from removing the motherboard assembly from the case.

Cracking open the Sony PlayStation 3

Easily removable hard drive

Easily removable hard drive

To remove the panel, use your fingernail or a flathead screwdriver to gently it loose from the slot next to the HDD sticker.

Cracking open the Sony PlayStation 3

Gently lift up on the motherboard assembly

Gently lift up on the motherboard assembly

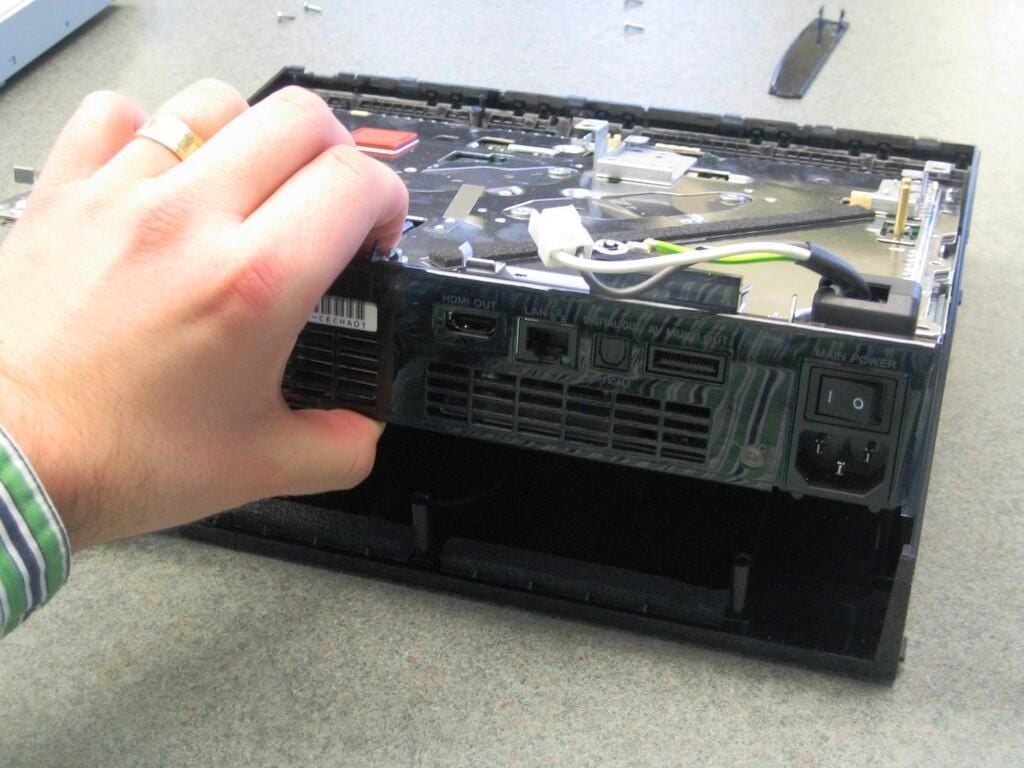
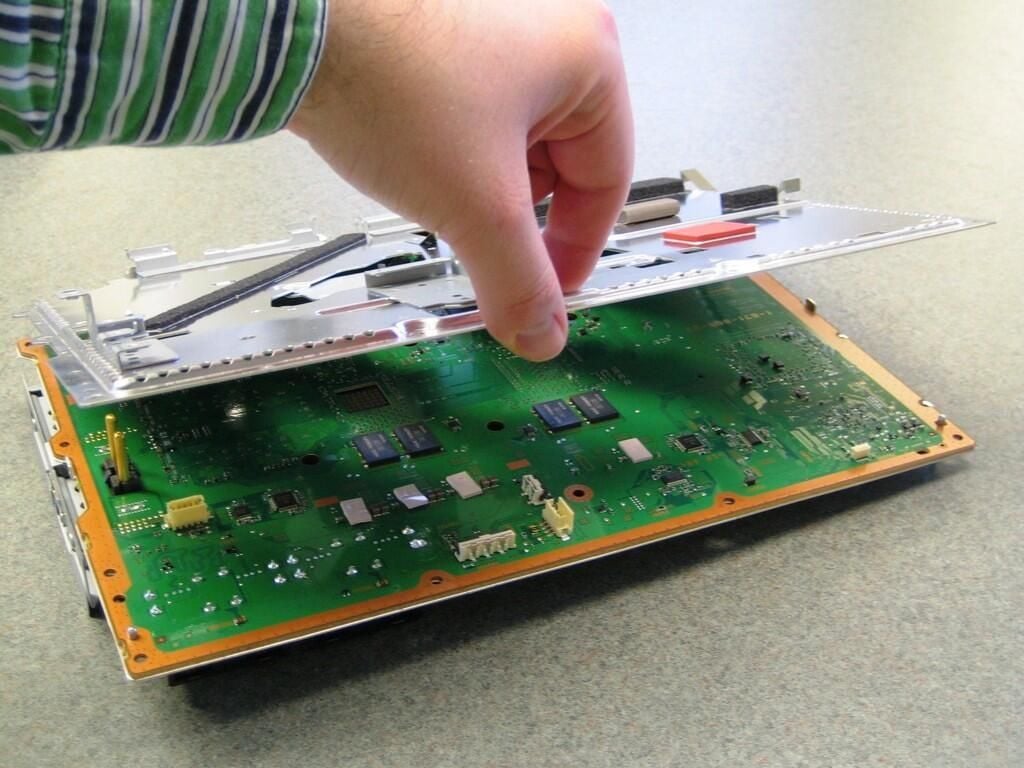
With the hard drive case panel removed, gently lift up on the motherboard assembly to remove the remaining components.

Cracking open the Sony PlayStation 3

PlayStation 3 case bottom

PlayStation 3 case bottom

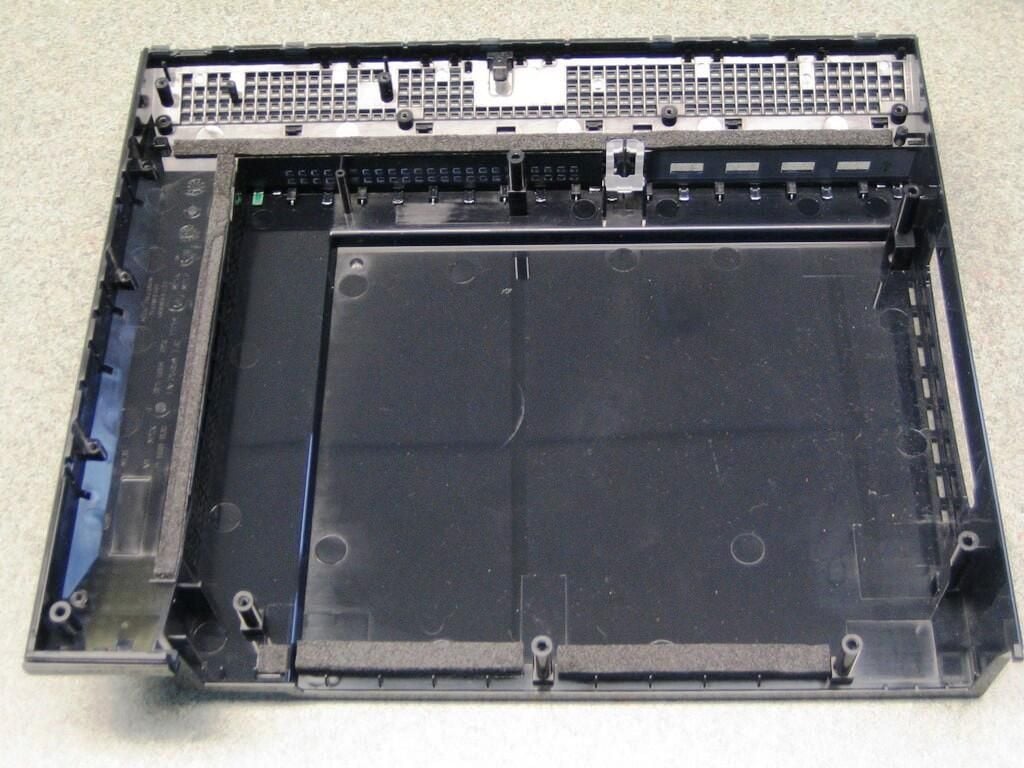
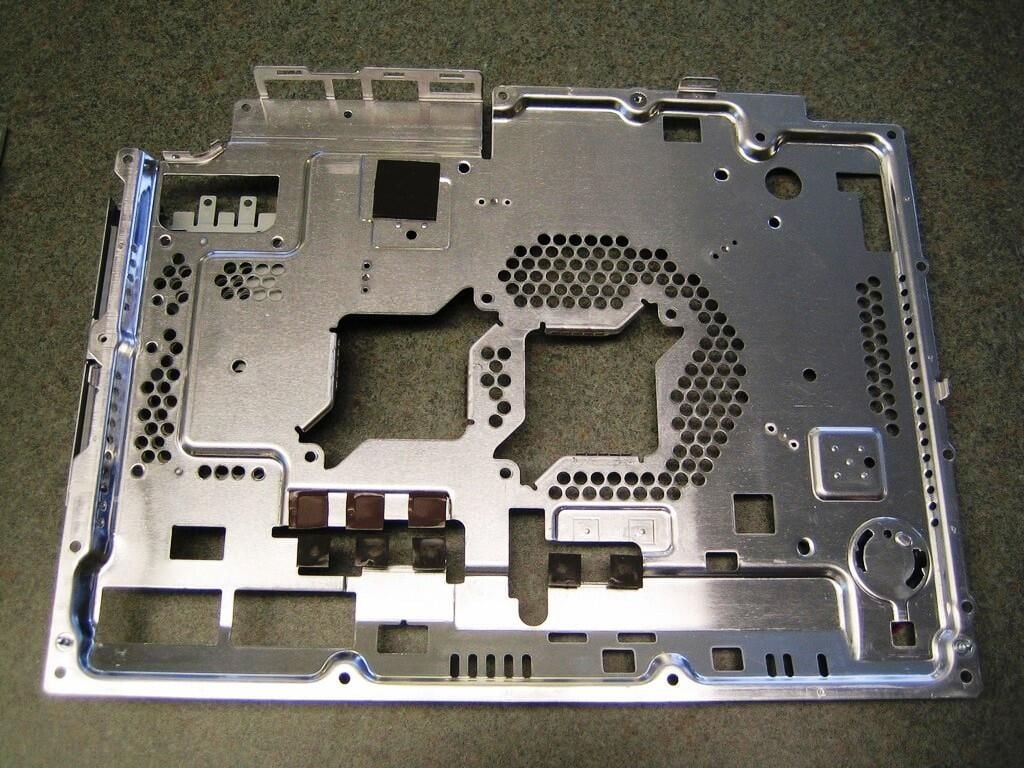
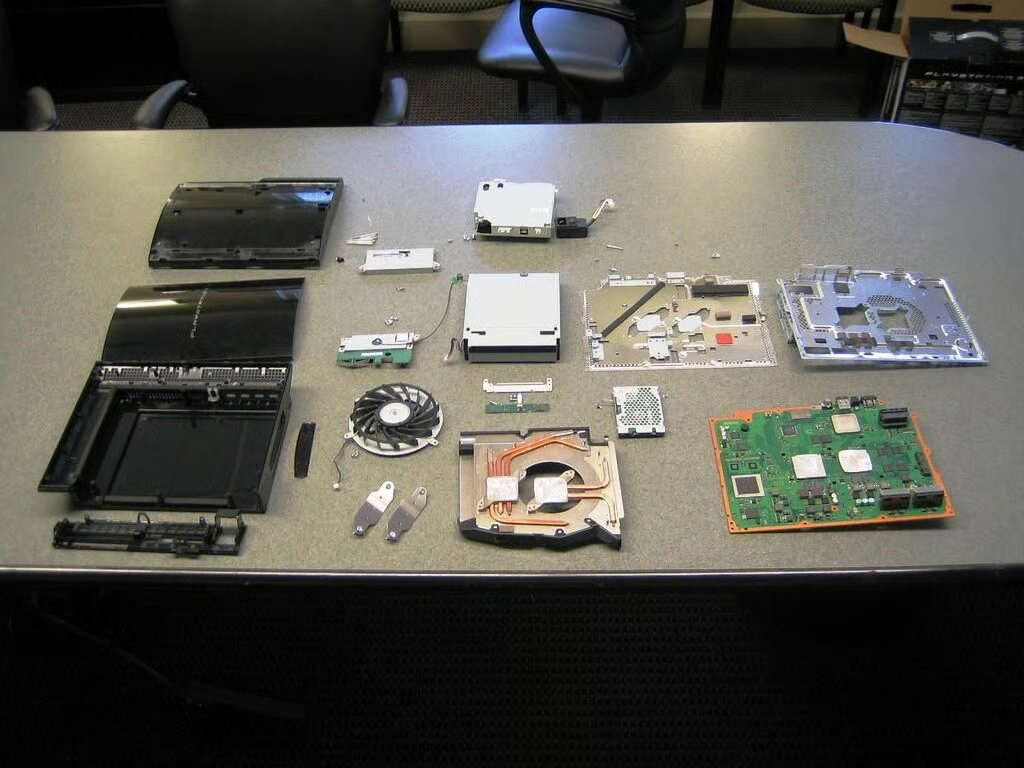
With the motherboard assembly out, there’s nothing left to remove from the PlayStation 3 case’s bottom half.

Cracking open the Sony PlayStation 3

Motherboard assembly - Top

Motherboard assembly - Top

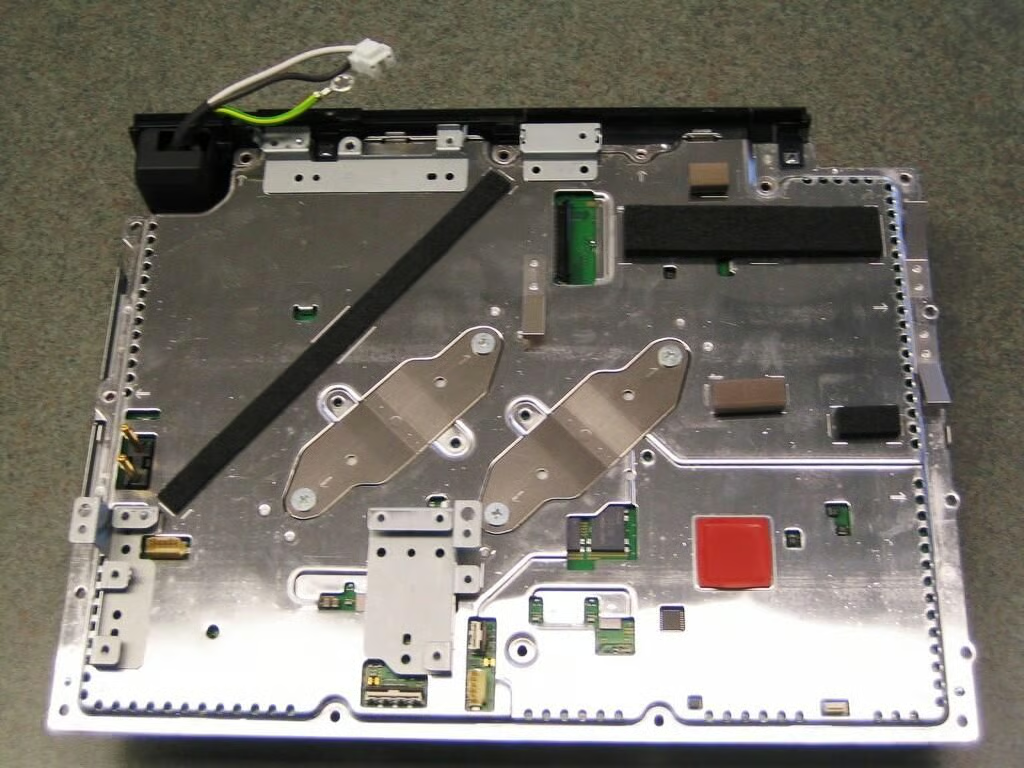
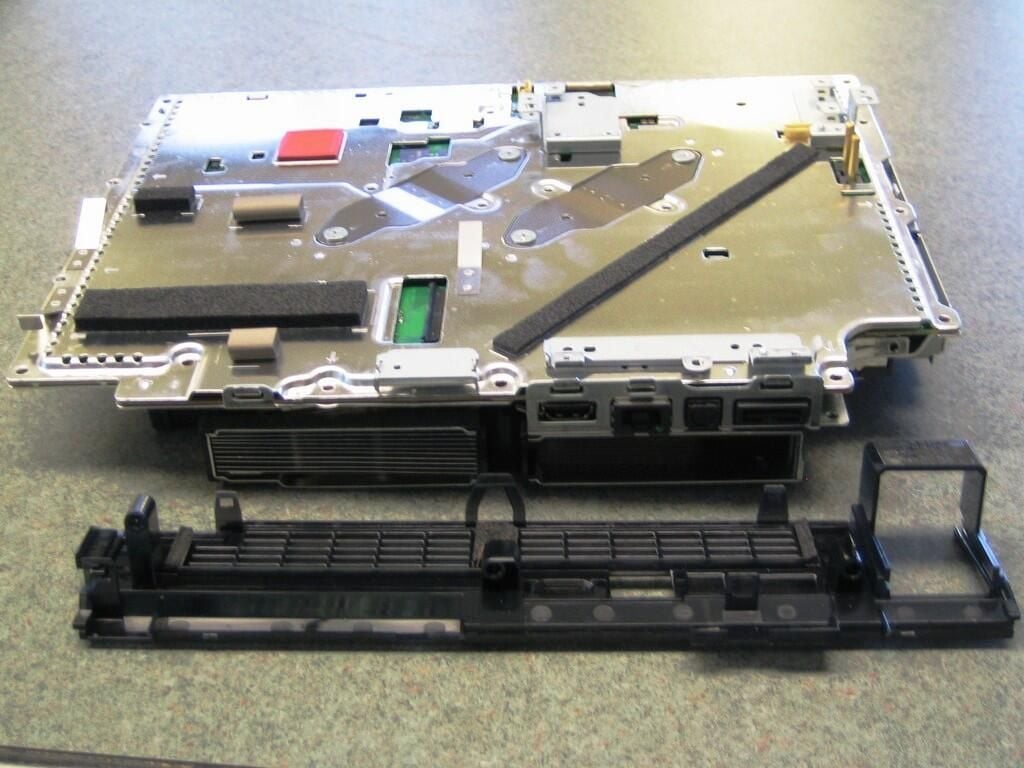
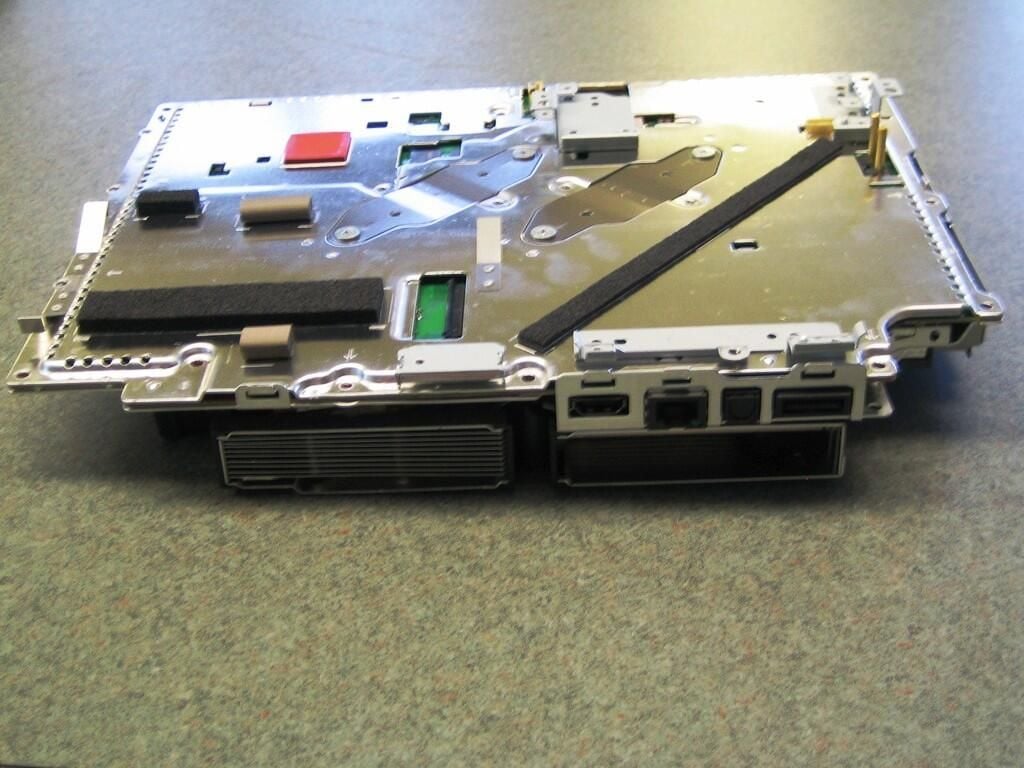
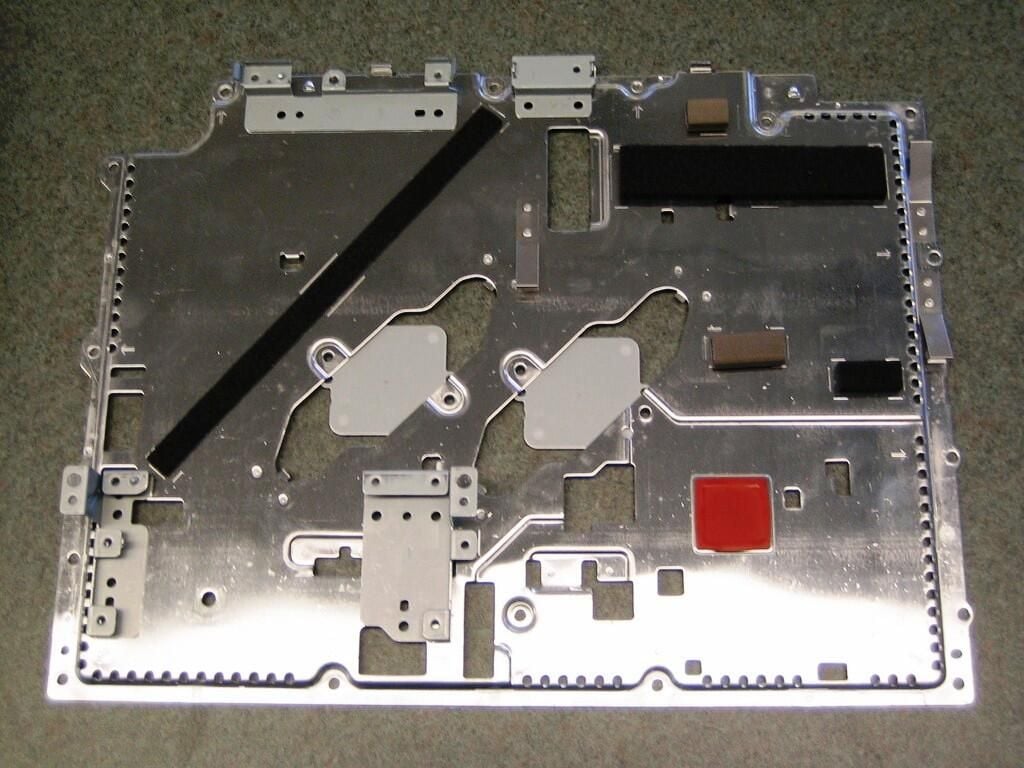
With the exception of the two diagonal brackets that secure the motherboard and shielding to the cooling system, there’s not much to see on top of the motherboard assembly. The motherboard is mounted upside down in the chassis, therefore most of the interesting components are hidden on the bottom.

Cracking open the Sony PlayStation 3

Main power switch

Main power switch

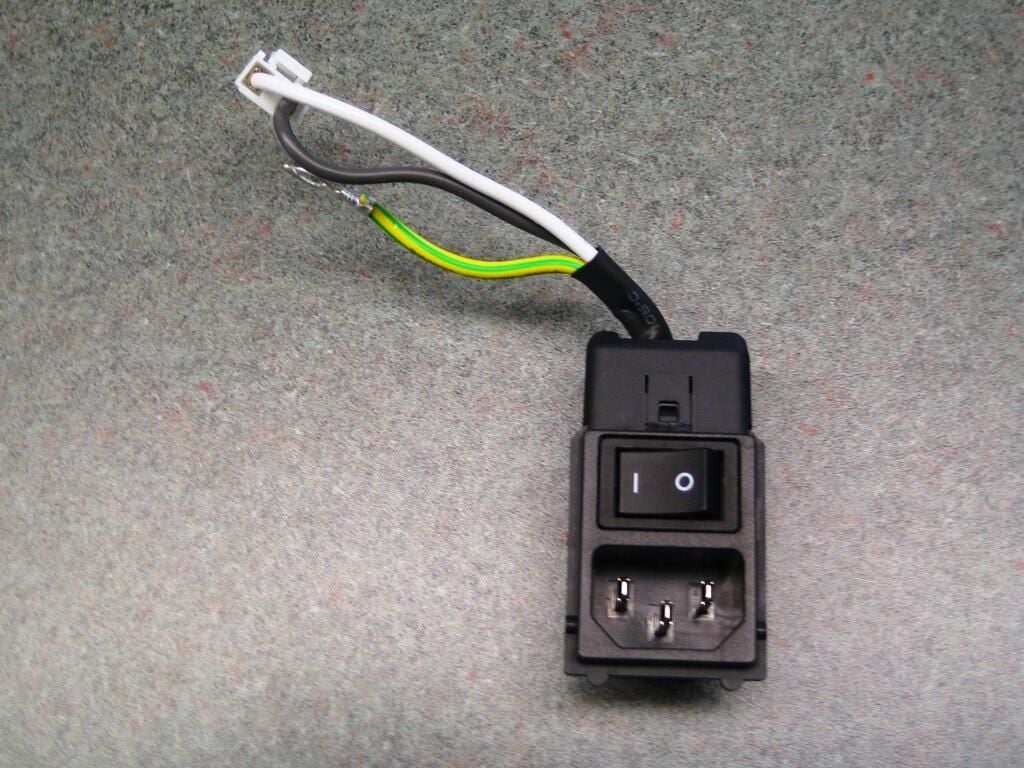
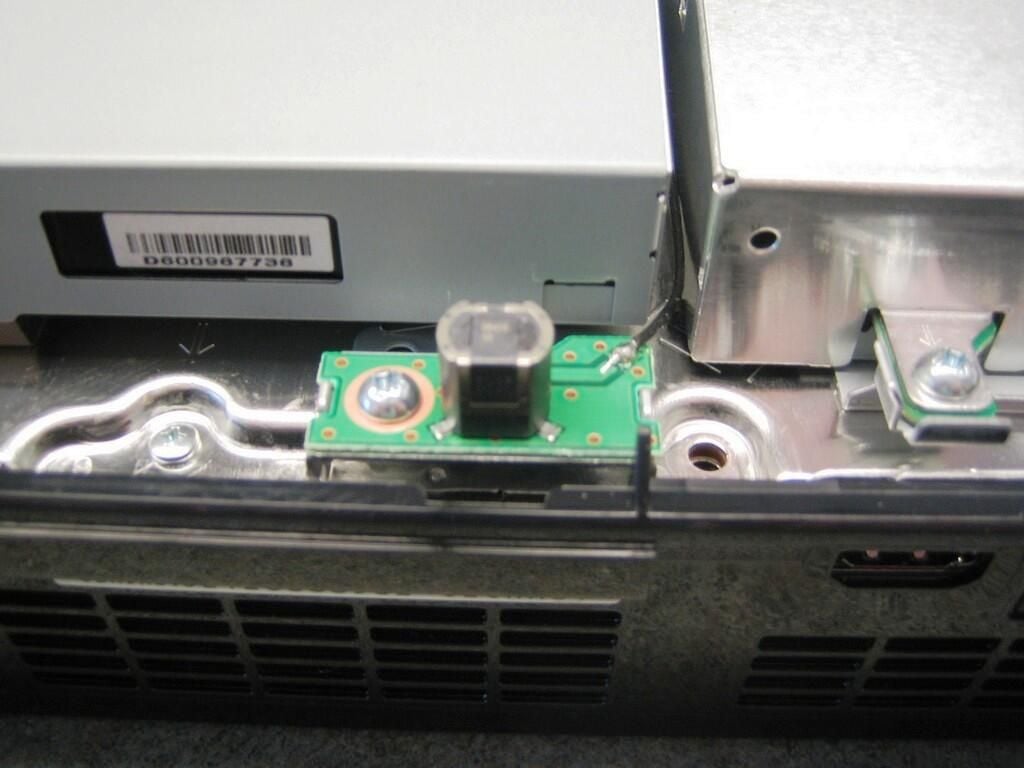
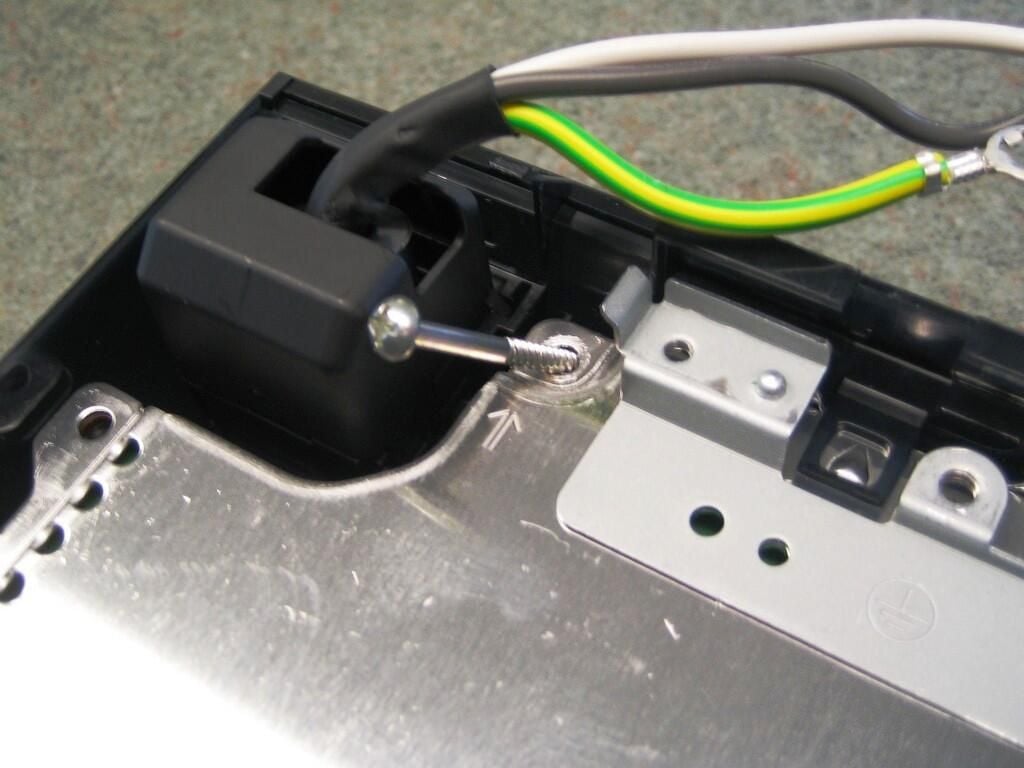
You can easily remove the PlayStation 3’s main power switch at this time by sliding it out of the rear case panel.

Cracking open the Sony PlayStation 3

Motherboard assembly - Bottom

Motherboard assembly - Bottom

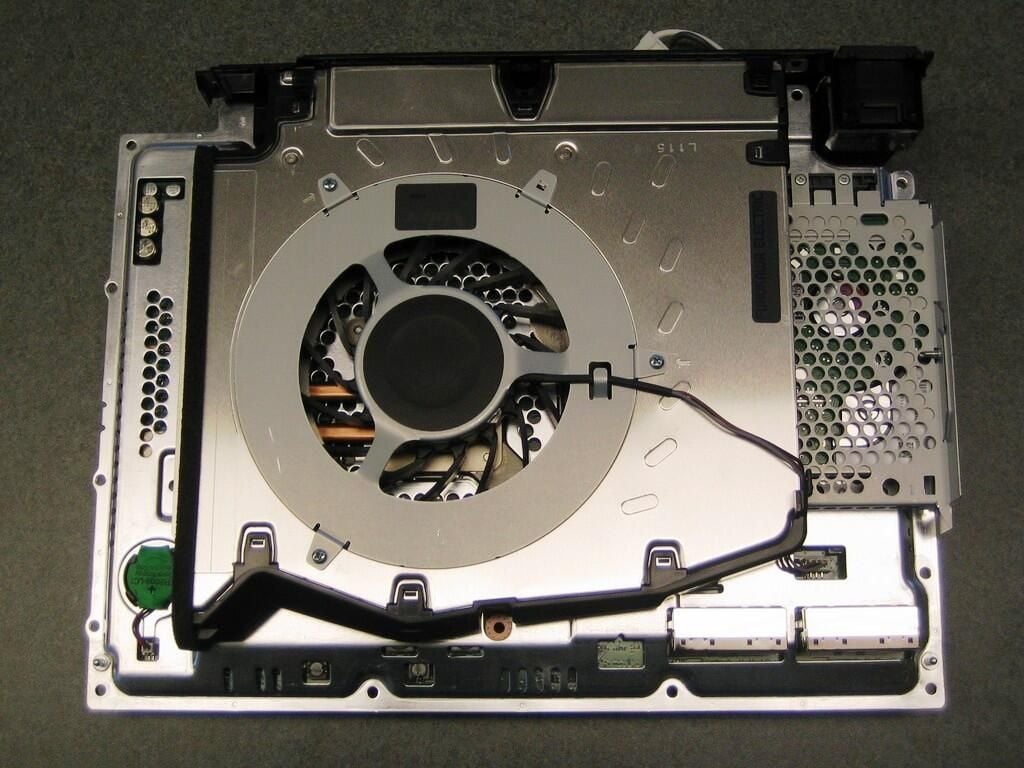
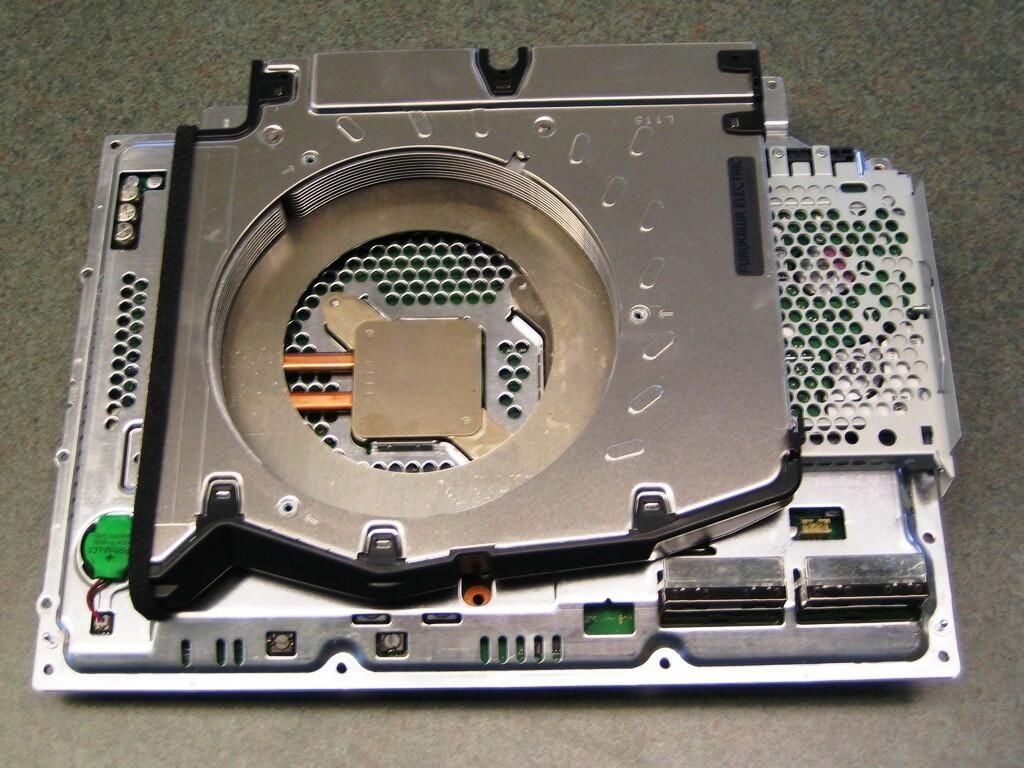
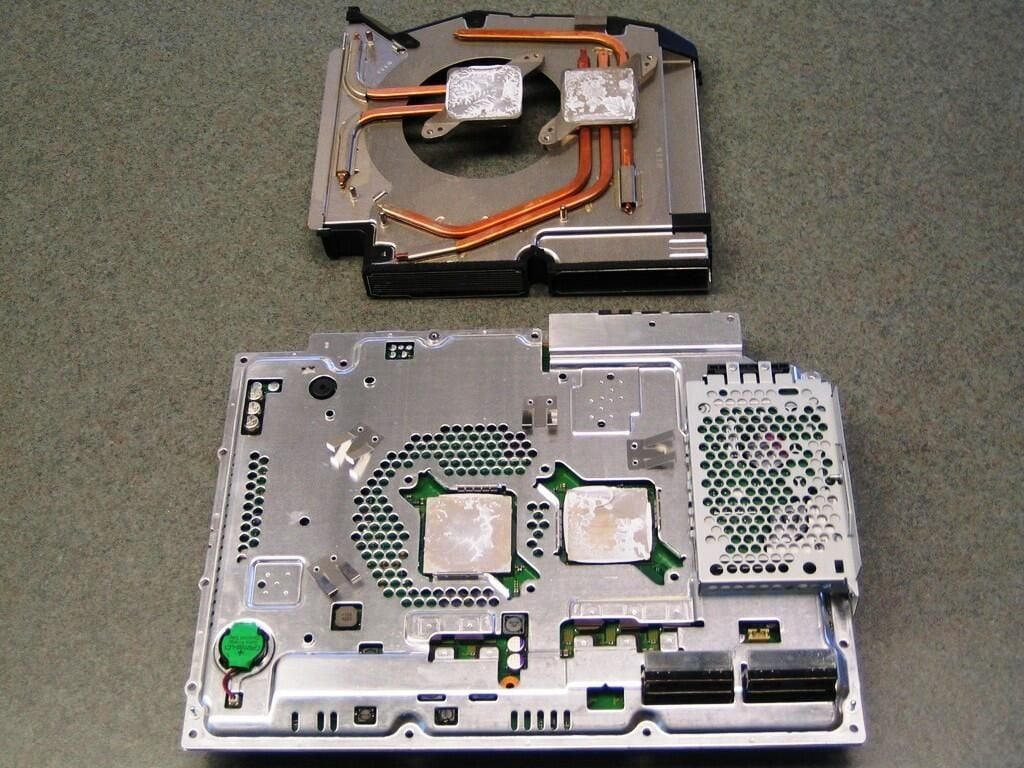
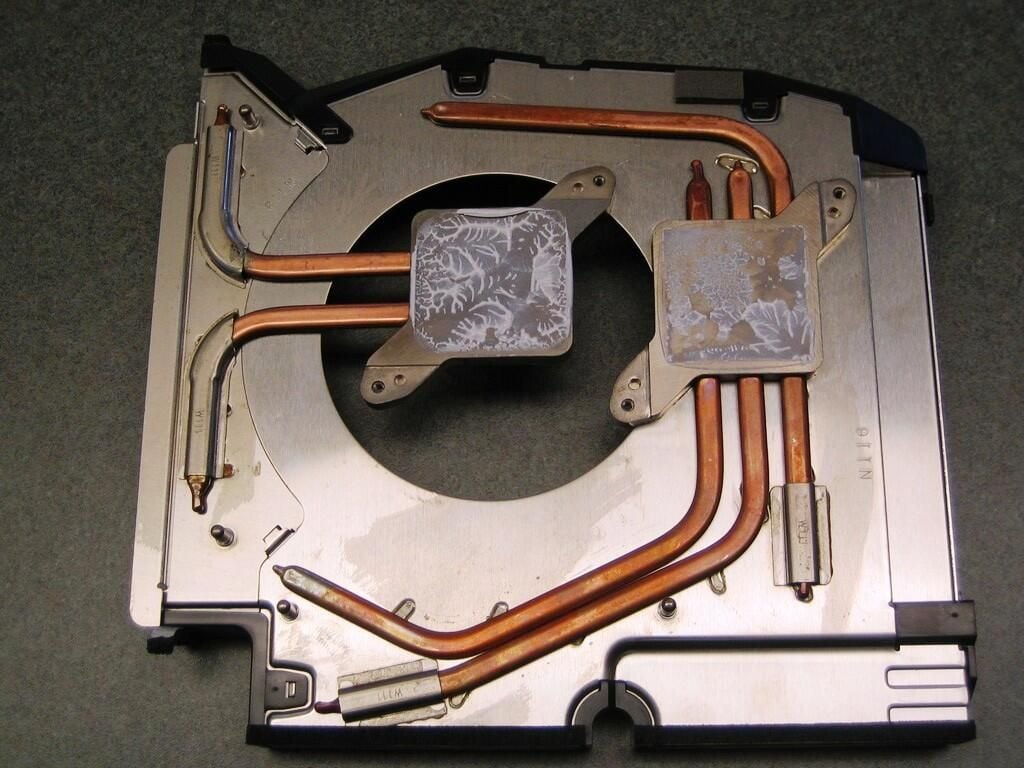
The PlayStation 3 has a massive cooling system that dominates the underside of the motherboard assembly.

Cracking open the Sony PlayStation 3

Motherboard assembly - Side

Motherboard assembly - Side

The cooling system is almost as wide as the motherboard assembly.

Cracking open the Sony PlayStation 3

Hard drive enclosure

Hard drive enclosure

Cracking open the Sony PlayStation 3

Cooling fan power connection

Cooling fan power connection

Cracking open the Sony PlayStation 3

Remove the rear case panel

Remove the rear case panel

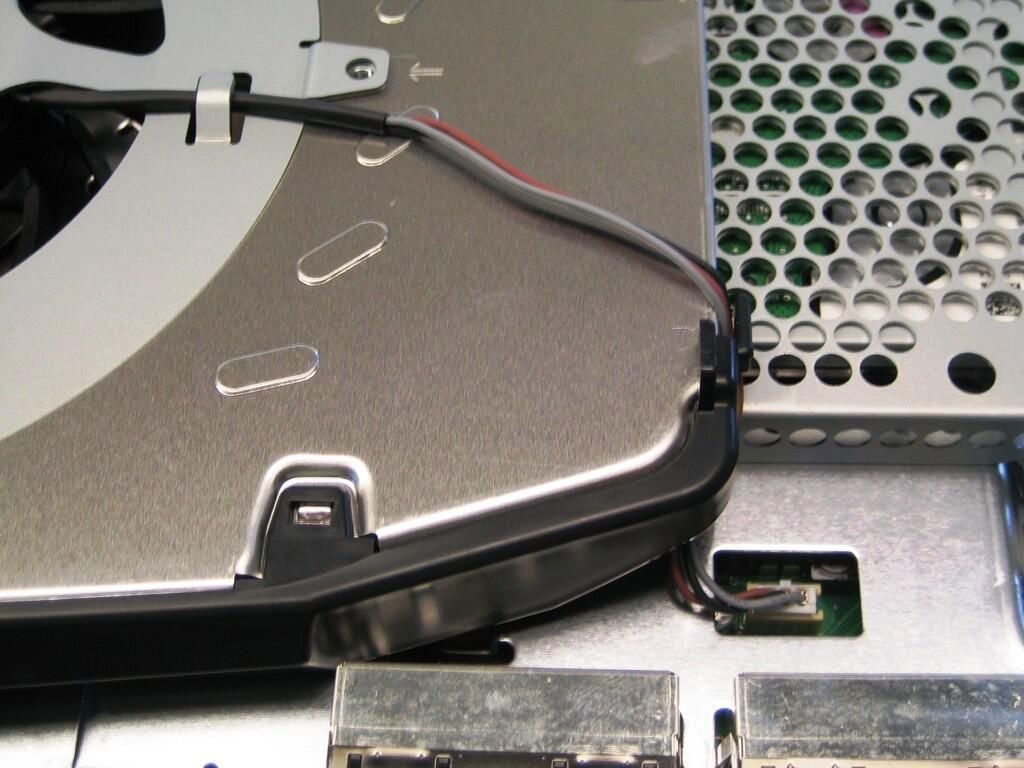
To remove the rear case panel, gently pry up the four plastic clips that secure it to the metal shielding.

Cracking open the Sony PlayStation 3

Motherboard assembly without rear case a panel

Motherboard assembly without rear case a panel

Cracking open the Sony PlayStation 3

PlayStation 3's massive cooling fan

PlayStation 3's massive cooling fan

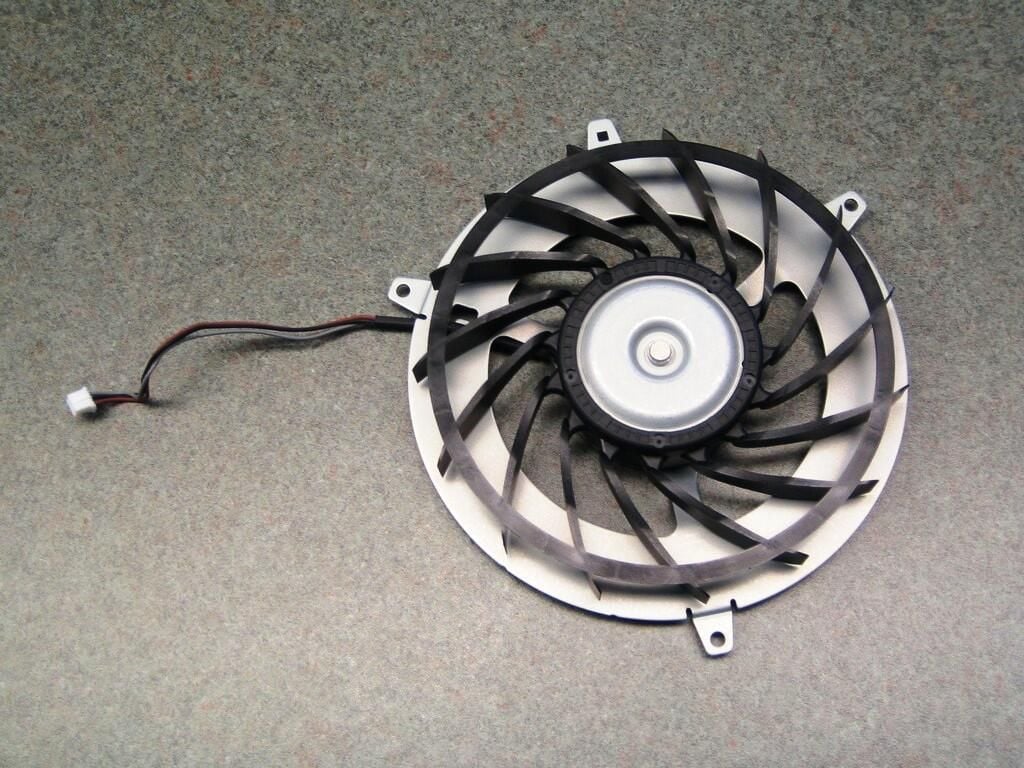
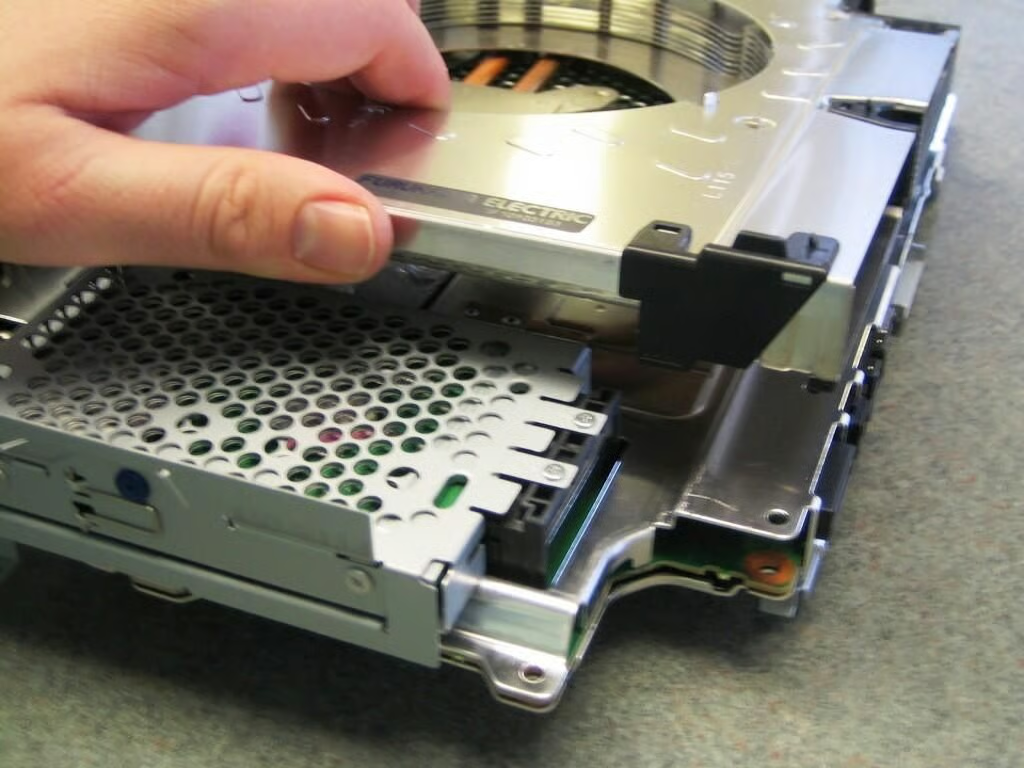
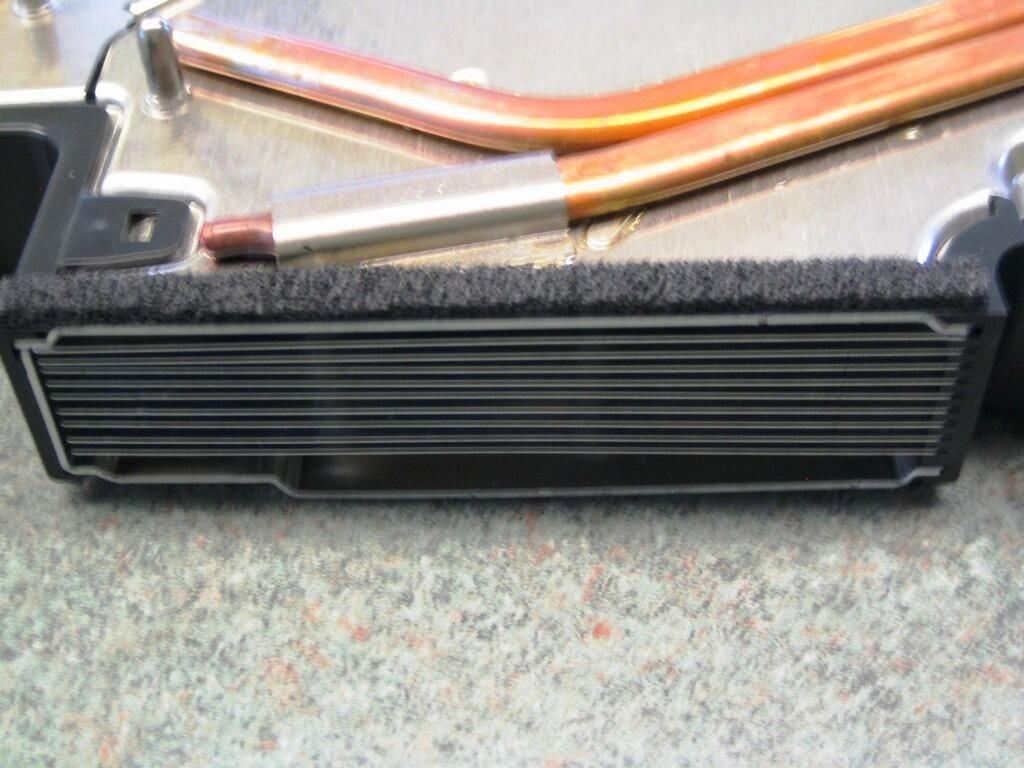
Compared to standard PC fans, The PlayStation 3’s cooling fan is absolutely massive.

Cracking open the Sony PlayStation 3

Holding the PlayStation 3 cooling fan

Holding the PlayStation 3 cooling fan

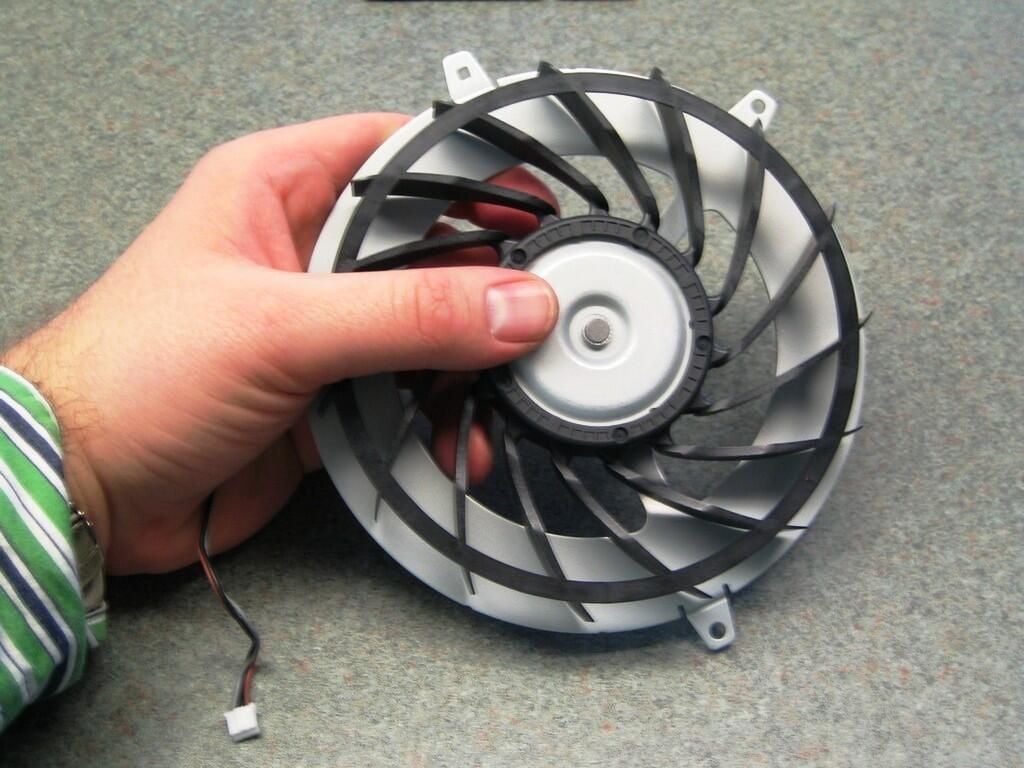
To give you an idea of the fan’s impressive size, this picture shows me holding the fan.

Cracking open the Sony PlayStation 3

Motherboard assembly and cooling system with fan removed

Motherboard assembly and cooling system with fan removed

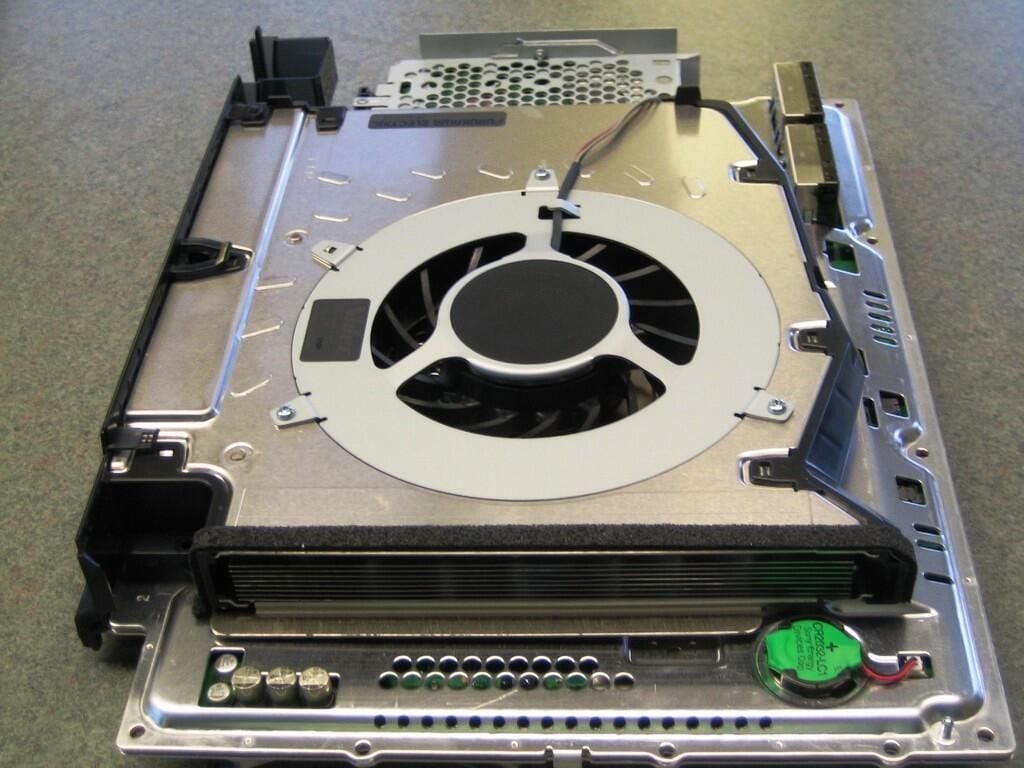
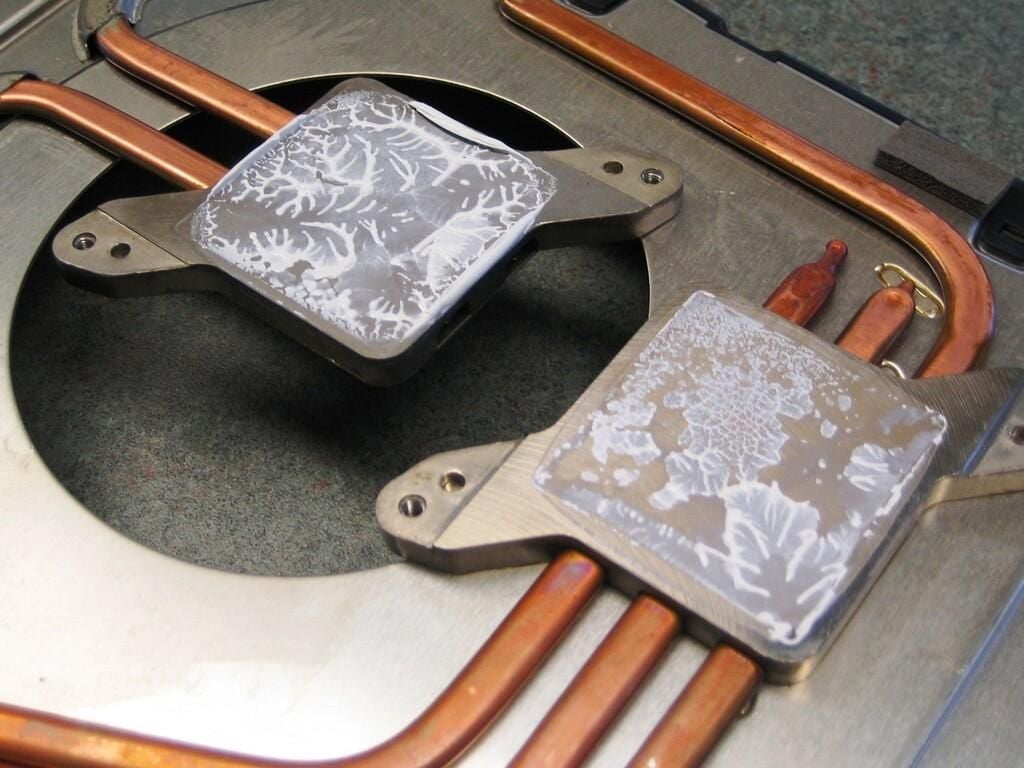
With the fan removed, we get our first glimpse at one of the system’s two cooling blocks.

Cracking open the Sony PlayStation 3

Motherboard assembly back - Ports and cooling vents

Motherboard assembly back - Ports and cooling vents

The cooling system makes up most of the motherboard assembly’s rear profile.

Cracking open the Sony PlayStation 3

Mother assembly back - Ports and cooling vents close up

Mother assembly back - Ports and cooling vents close up

Cracking open the Sony PlayStation 3

Remove the diagonal brackets

Remove the diagonal brackets

To release the cooling system and metal shielding from the motherboard, remove the four screws that hold the diagonal brackets in place. The brackets are bent to create pressure when screwed in place. When reassembling the PS3, you must tighten each bracket’s screws a little at a time to avoid binding one of the screws.

Cracking open the Sony PlayStation 3

Diagonal brackets removed

Diagonal brackets removed

With the brackets removed, you can remove the cooling system and metal shielding.

Cracking open the Sony PlayStation 3

Gently remove the cooling system enclosure

Gently remove the cooling system enclosure

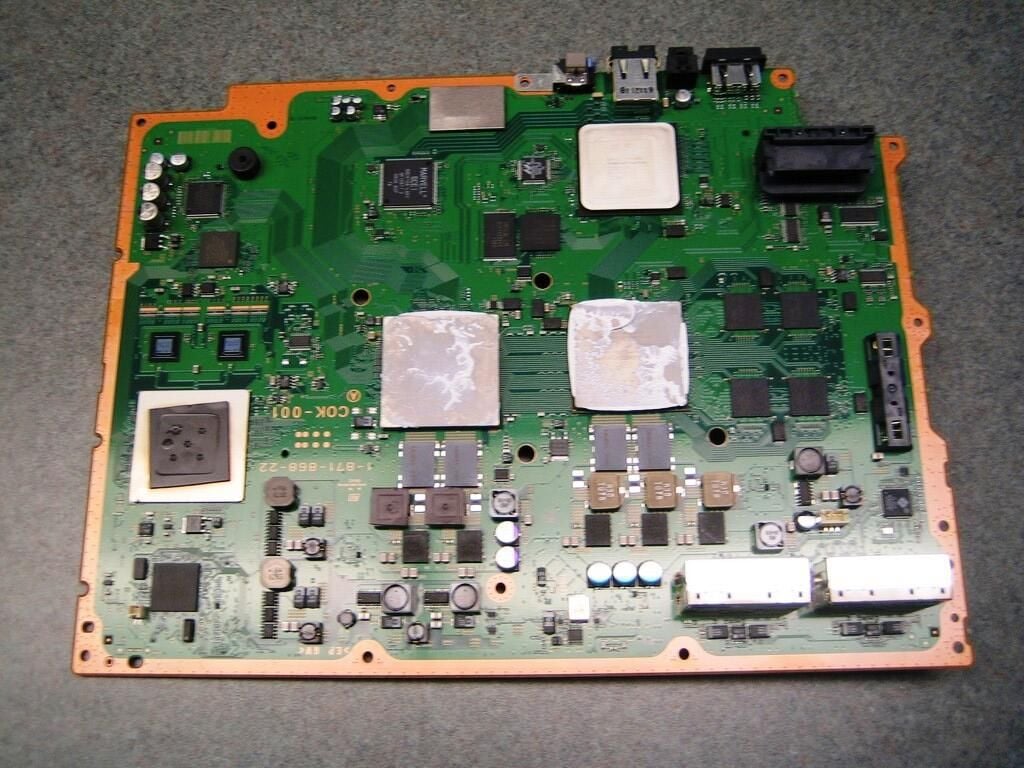
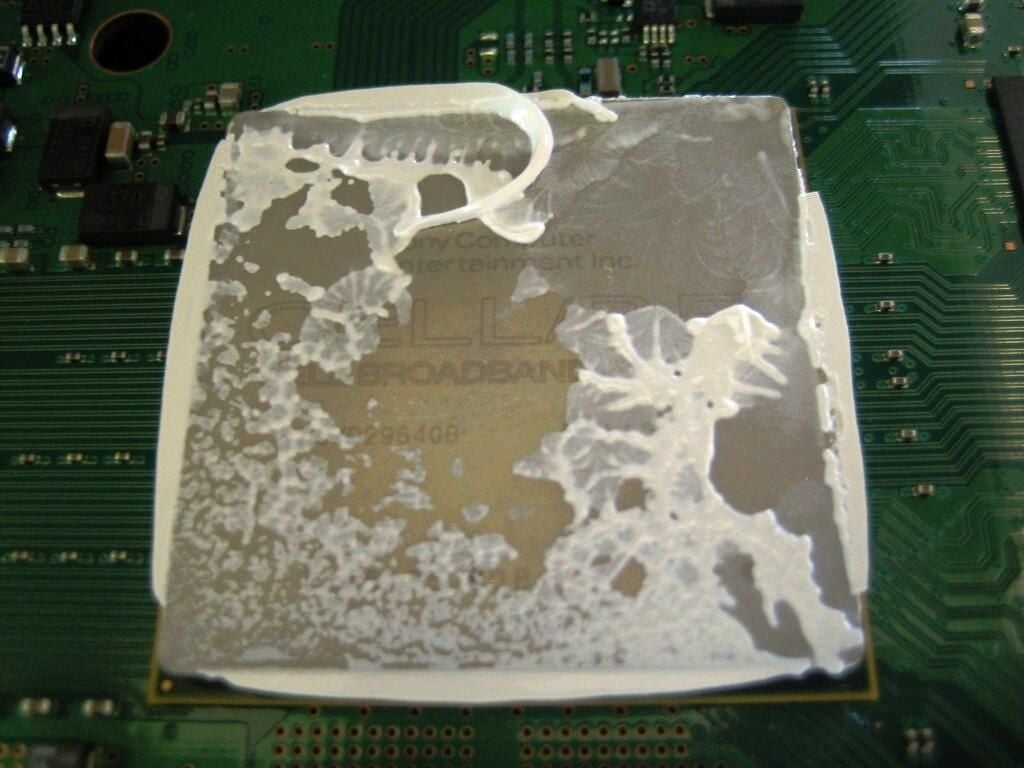
Carefully flip the motherboard assembly over and gently lift up on the cooling system enclosure. A layer of thermal paste exists between the cooling blocks and PS3’s CPU and main GPU. Be gentle when removing the cooling system enclosure to avoid damaging the CPU or main GPU.

Cracking open the Sony PlayStation 3

PlayStation 3 - Cooling system and motherboard assembly

PlayStation 3 - Cooling system and motherboard assembly

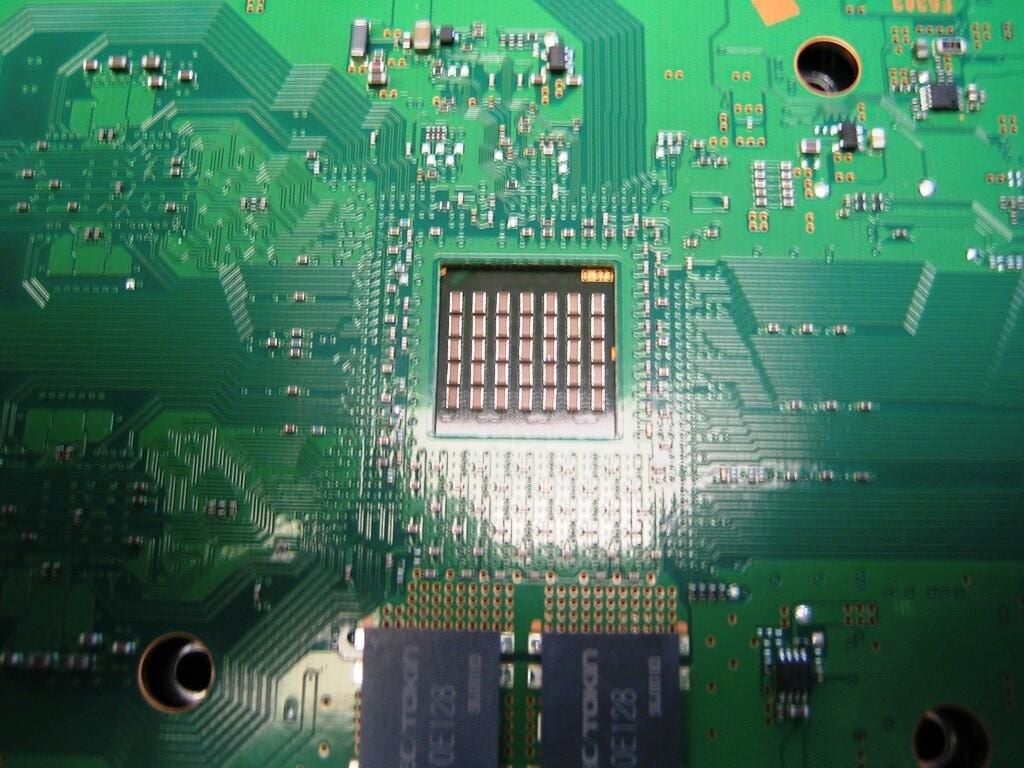
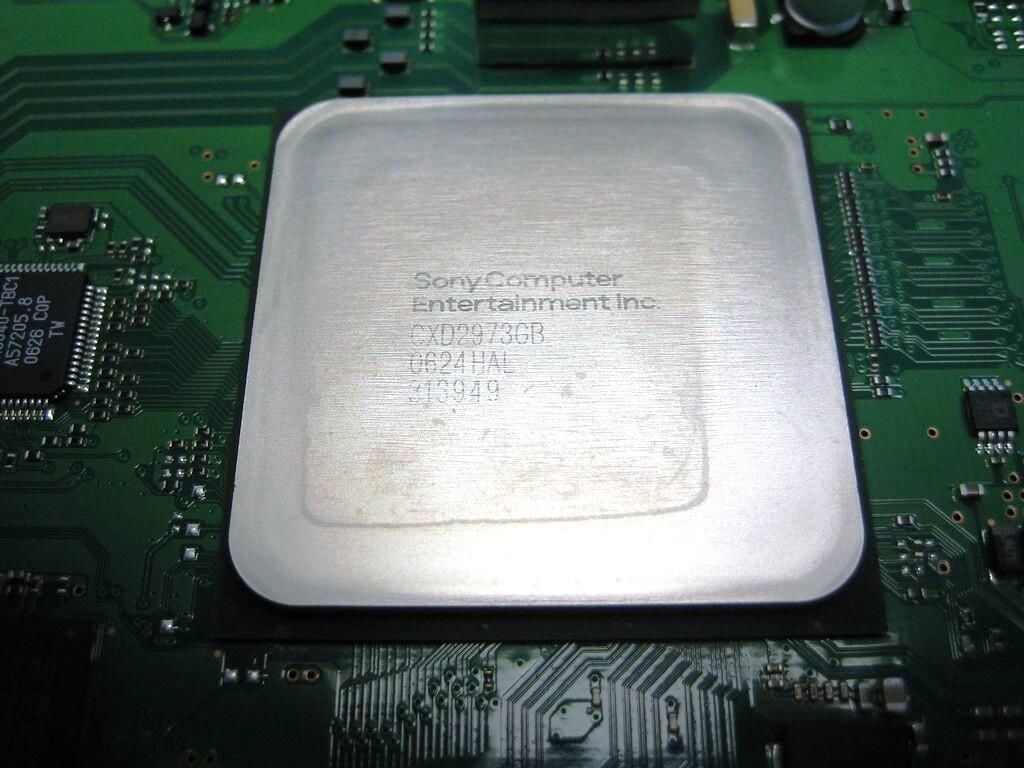
With the cooling system removed, we get our first look at the IBM Cell Broadband Engine (right) and Nvidia’s RSX Reality Synthesizer (left).

Cracking open the Sony PlayStation 3

Cooling enclosure removed

Cooling enclosure removed

Cracking open the Sony PlayStation 3

Cooling blocks and copper tubes

Cooling blocks and copper tubes

Cracking open the Sony PlayStation 3

Cooling enclosure fins

Cooling enclosure fins

Cracking open the Sony PlayStation 3

Remove the top metal shield plate

Remove the top metal shield plate

With the colling system enclosure removed, gently separate the metal shielding from the motherboard. Because the motherboard is mounted upside down in the PS3 case, the removing the the top metal shield reveals the bottom of the motherboard. Be careful with lifting the shield. The metal is thin and easily bent.

Cracking open the Sony PlayStation 3

Metal shielding - Top half

Metal shielding - Top half

Cracking open the Sony PlayStation 3

NEC TOKIN Proadlizers (black chips) and gray foam protection pads

NEC TOKIN Proadlizers (black chips) and gray foam protection pads

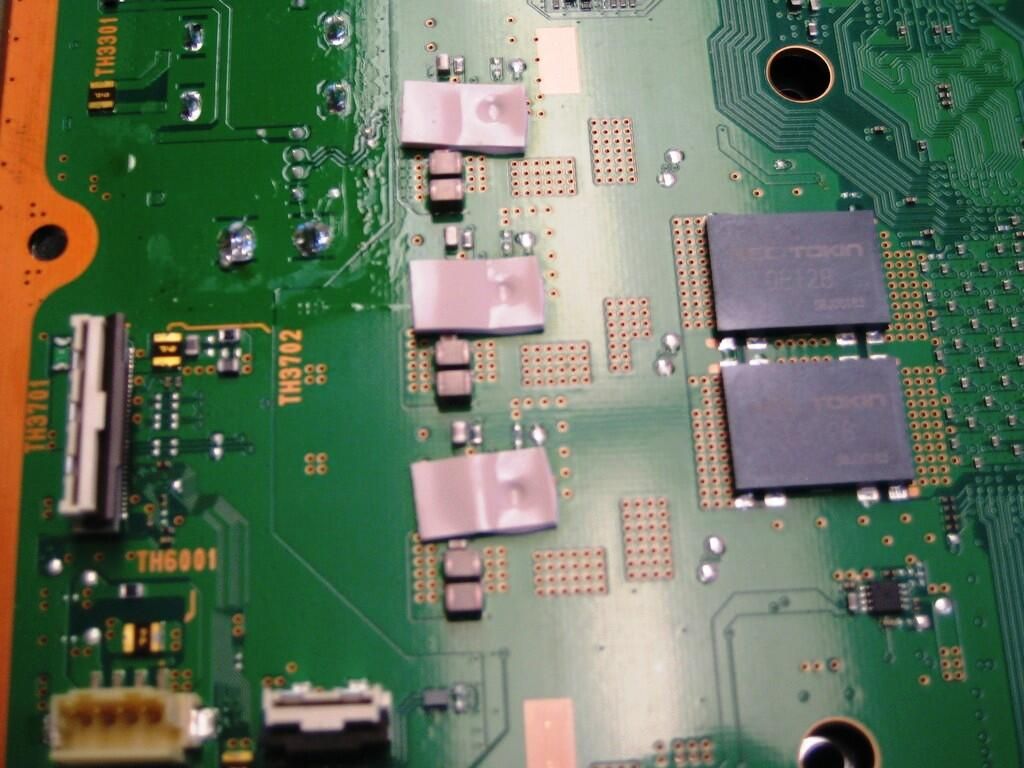
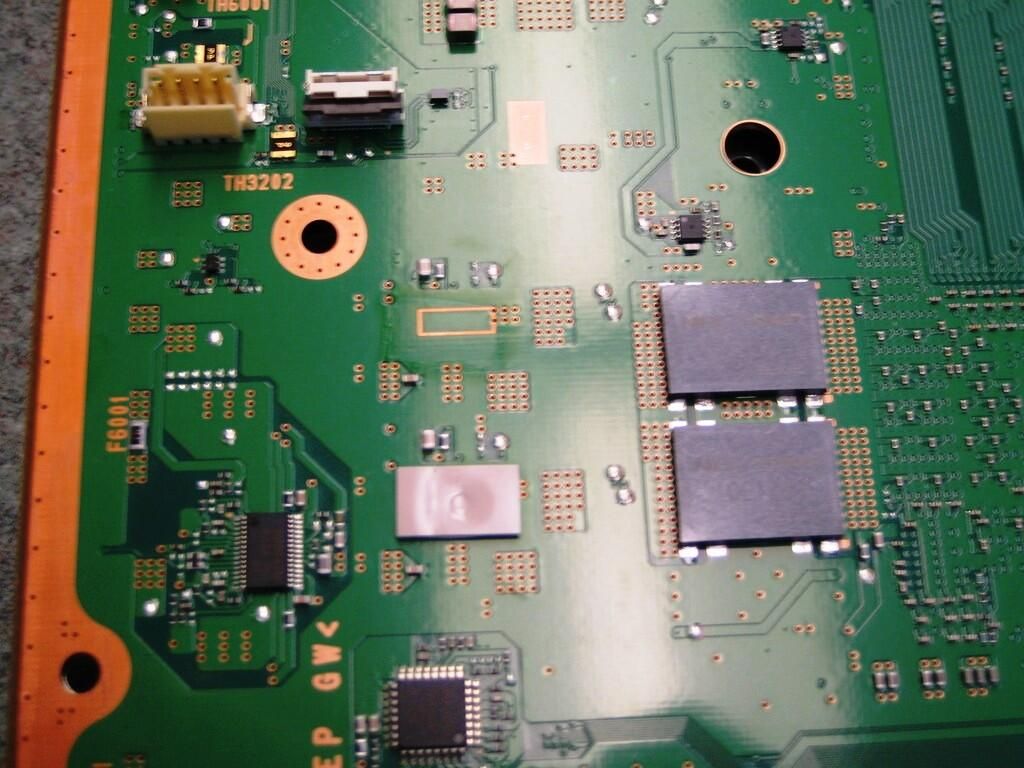
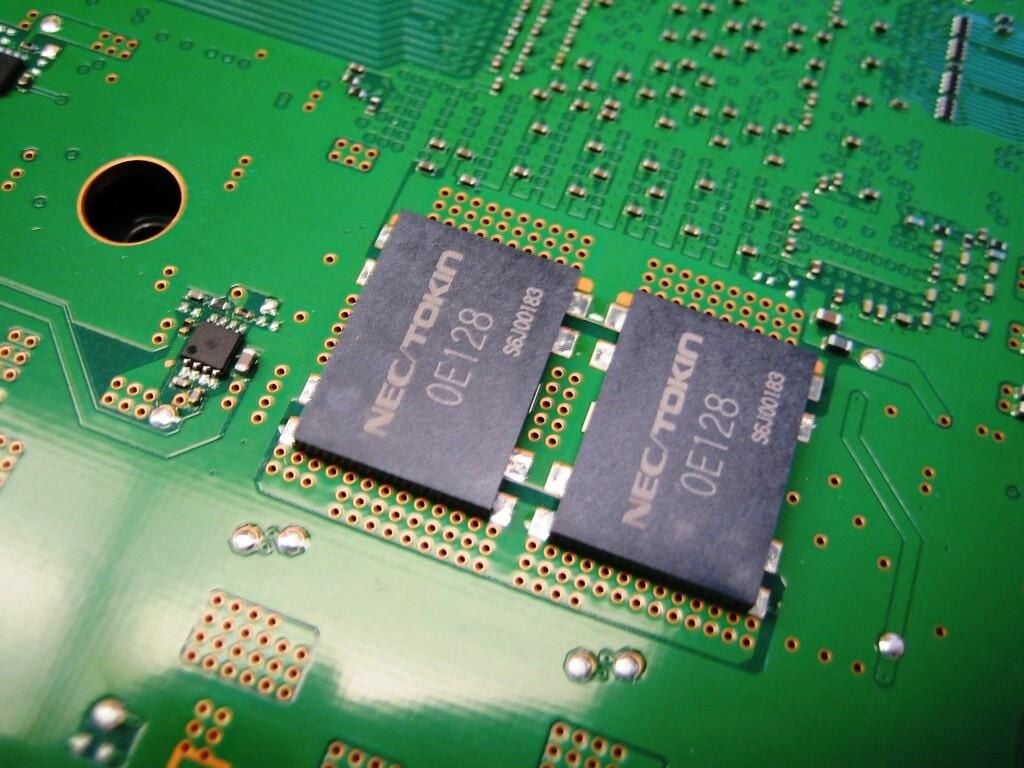
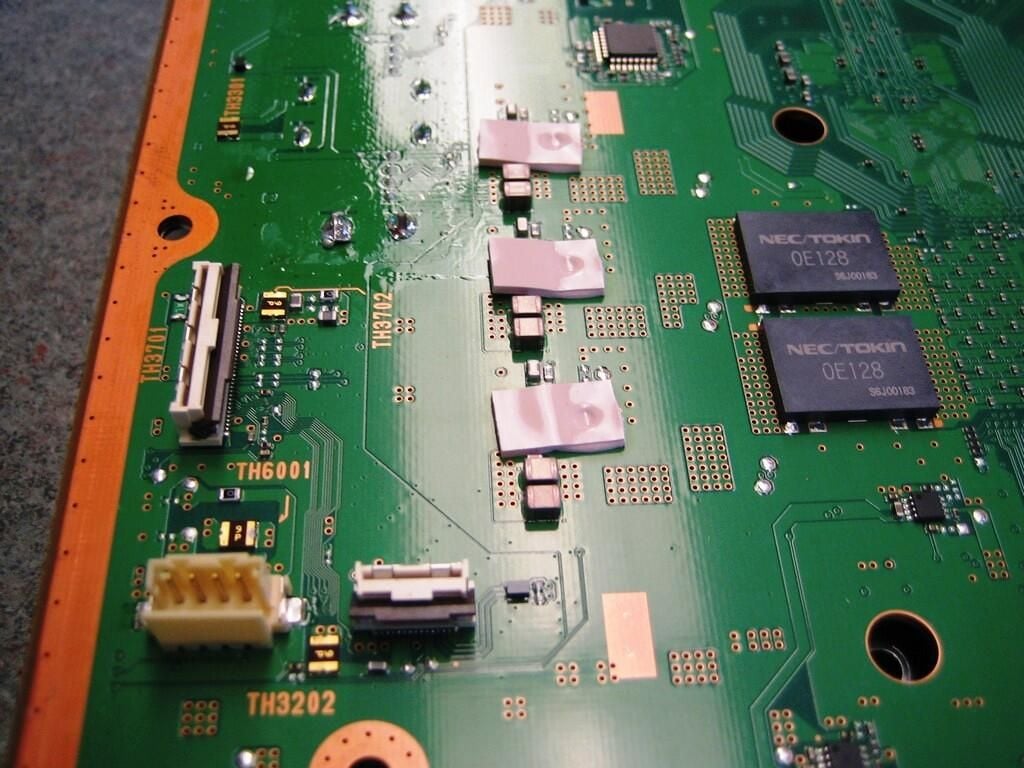
These are two of the four NEC TOKIN Proadlizers located on the bottom of the motherboard–another four are located on top. These Proadlizers work as part of the power regulator for the Cell Broadband Engine (CPU), shown in this photo, and Nvidia’s RSX Reality Synthesizer (main GPU).

The gray foam pads protect and cushion the motherboard from the metal shielding.

Cracking open the Sony PlayStation 3

NEC TOKIN Proadlizers for Nvidia's RSX Reality Synthesizer (main GPU)

NEC TOKIN Proadlizers for Nvidia's RSX Reality Synthesizer (main GPU)

Cracking open the Sony PlayStation 3

NEC TOKIN Proadlizers - Close up

NEC TOKIN Proadlizers - Close up

Cracking open the Sony PlayStation 3

Bluetooth/Wi-Fi connector, Memory Stick/SD/CompactFlash unit connector, and Blu-Ray Disc (BD)/DVD/CD drive power connector

Bluetooth/Wi-Fi connector, Memory Stick/SD/CompactFlash unit connector, and Blu-Ray Disc (BD)/DVD/CD drive power connector

Cracking open the Sony PlayStation 3

Samsung 1Gb SLC NAND Flash Memory chip

Samsung 1Gb SLC NAND Flash Memory chip

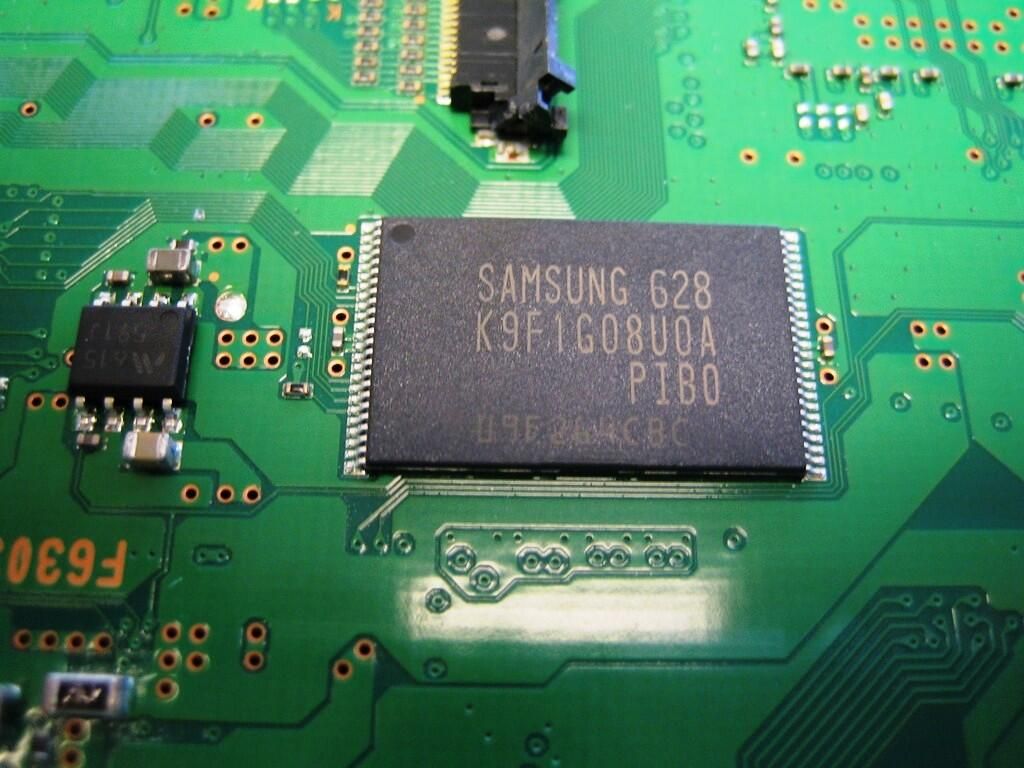
Located directly below the optical drive connector, this Samsung chip provides 128MB (128M x 8 Bit) of NAND Flash memory.

Cracking open the Sony PlayStation 3

Beneath IBM's Cell Broadband Engine (CPU)

Beneath IBM's Cell Broadband Engine (CPU)

Cracking open the Sony PlayStation 3

PlayStation 3 motherboard labling

PlayStation 3 motherboard labling

Cracking open the Sony PlayStation 3

More PlayStation 3 motherboard labling

More PlayStation 3 motherboard labling

Cracking open the Sony PlayStation 3

Power supply posts

Power supply posts

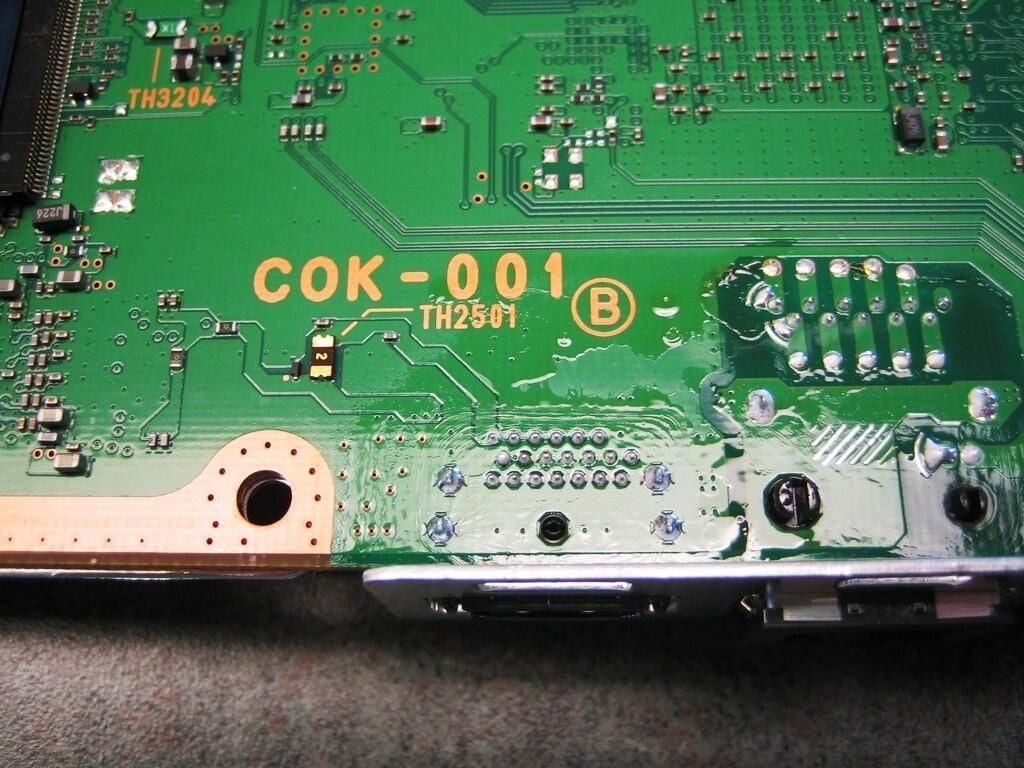
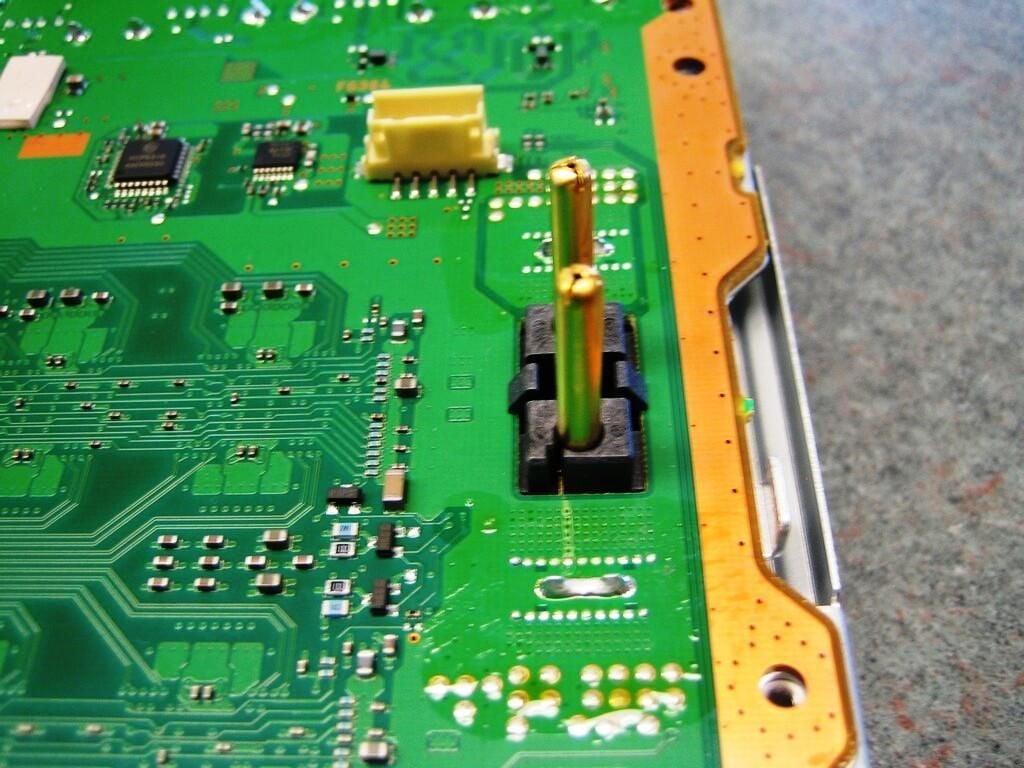
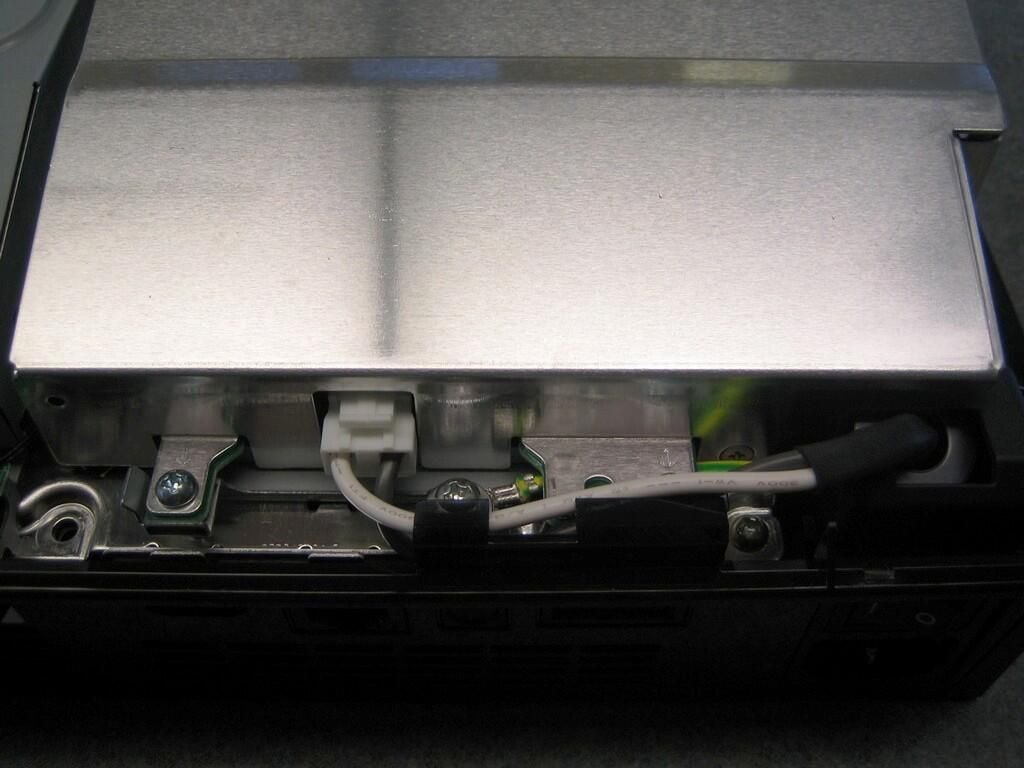
These posts connect the PlayStation 3’s motherboard to the unit’s power supply.

Cracking open the Sony PlayStation 3

Remove the PlayStation 3 hard drive

Remove the PlayStation 3 hard drive

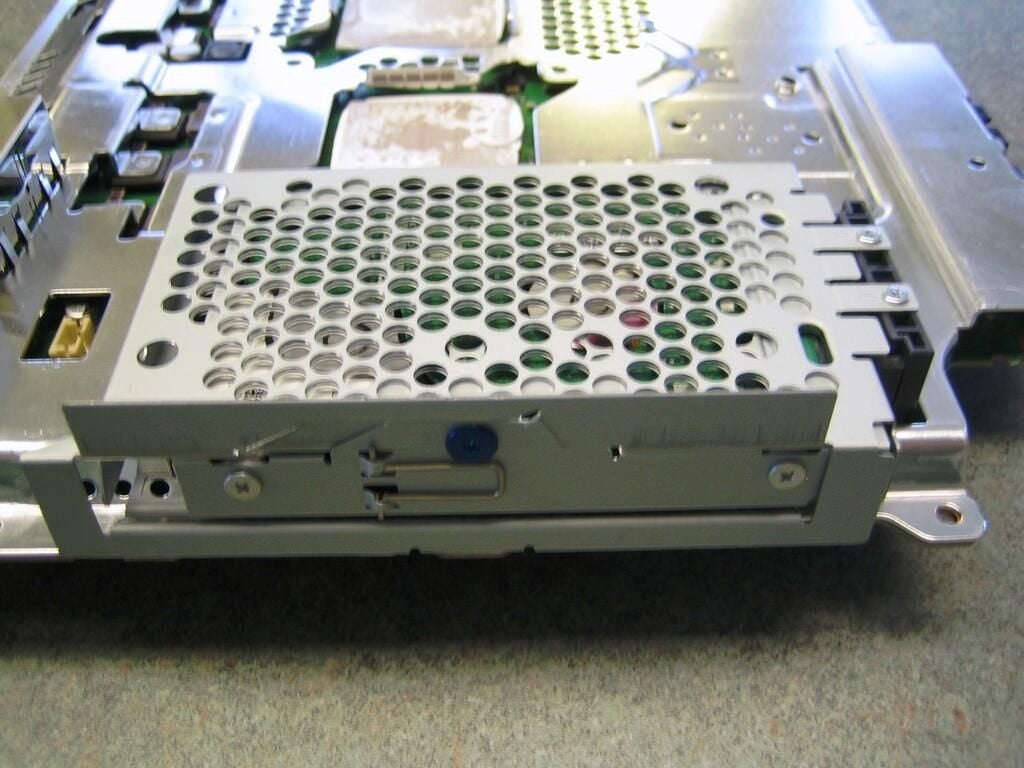
Unlike the Xbox 360, the Playstation 3’s hard drive is designed to easily upgraded. I could have, and probably should have, removed the HDD before disassembling the PS3, but the thought slipped my mind. There’s no time like the present.

Cracking open the Sony PlayStation 3

Remove the blue screw, slide, then pull

Remove the blue screw, slide, then pull

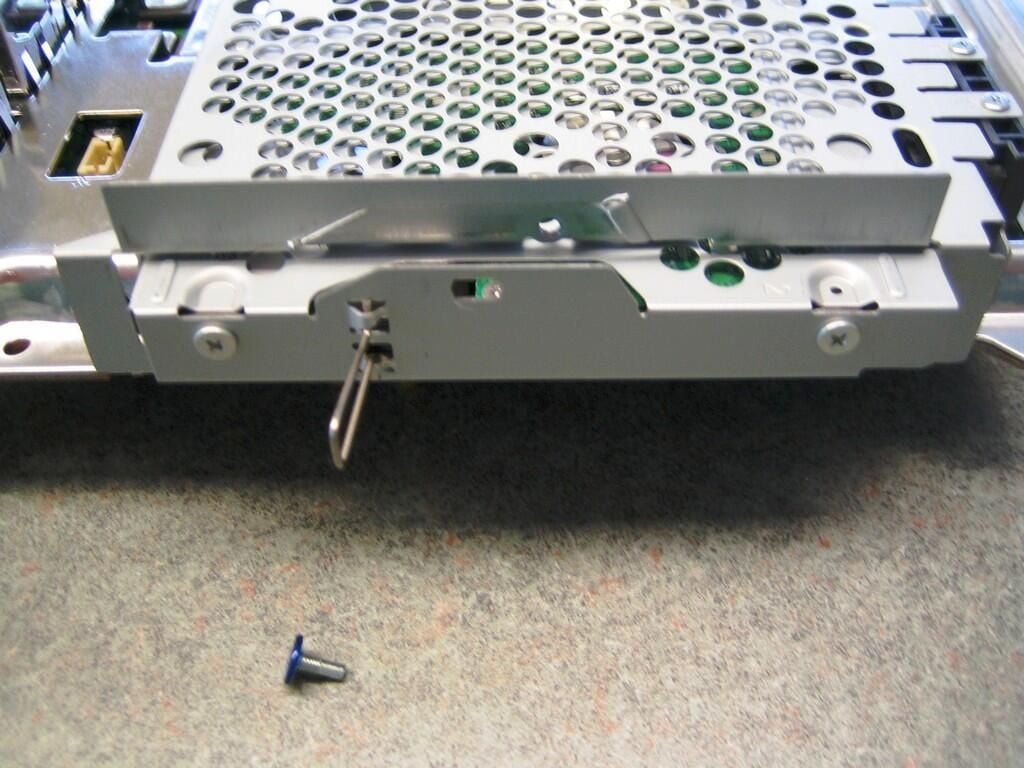
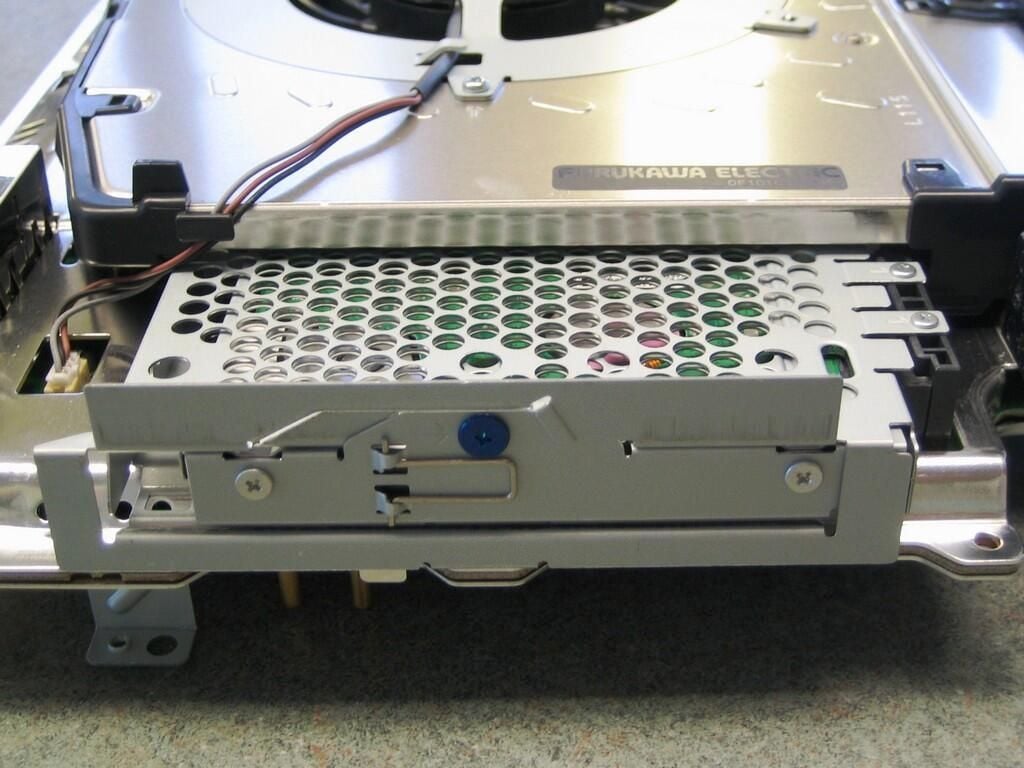
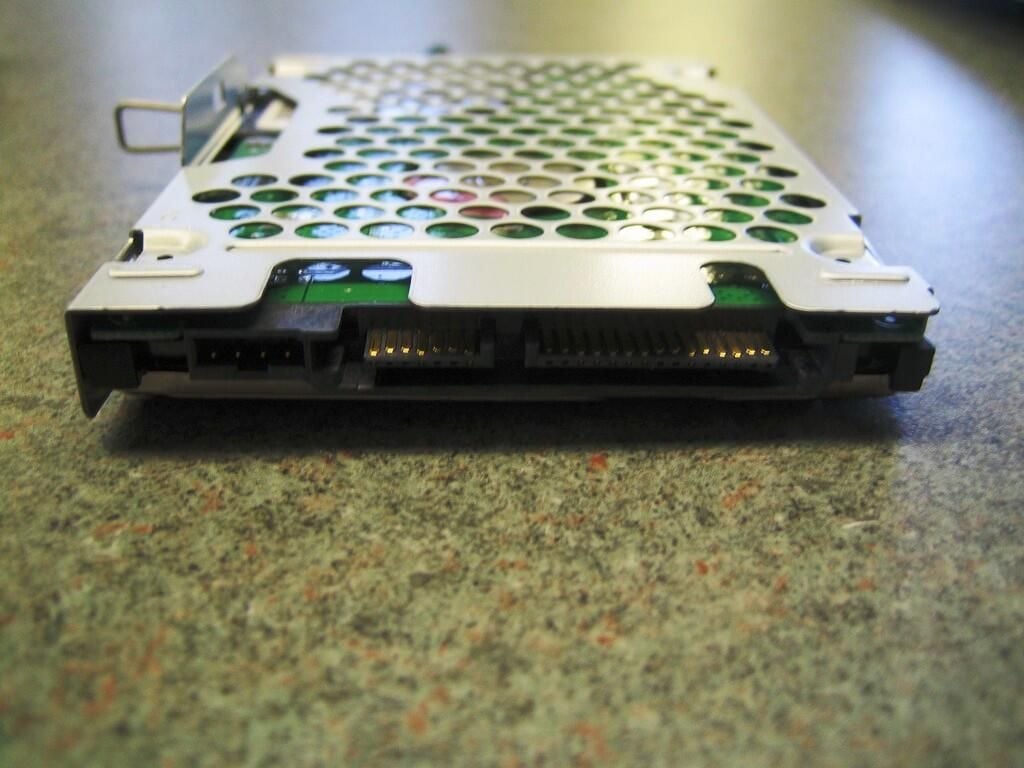
Remove the single blue screw holding the hard drive cage in place. Using the pull-out wire tab, slide the drive back away from the connectors and pull the drive cage out of the metal shielding’s drive enclosure.

Cracking open the Sony PlayStation 3

PlayStation 3 hard drive in cage

PlayStation 3 hard drive in cage

Cracking open the Sony PlayStation 3

PlayStation 3 hard drive

PlayStation 3 hard drive

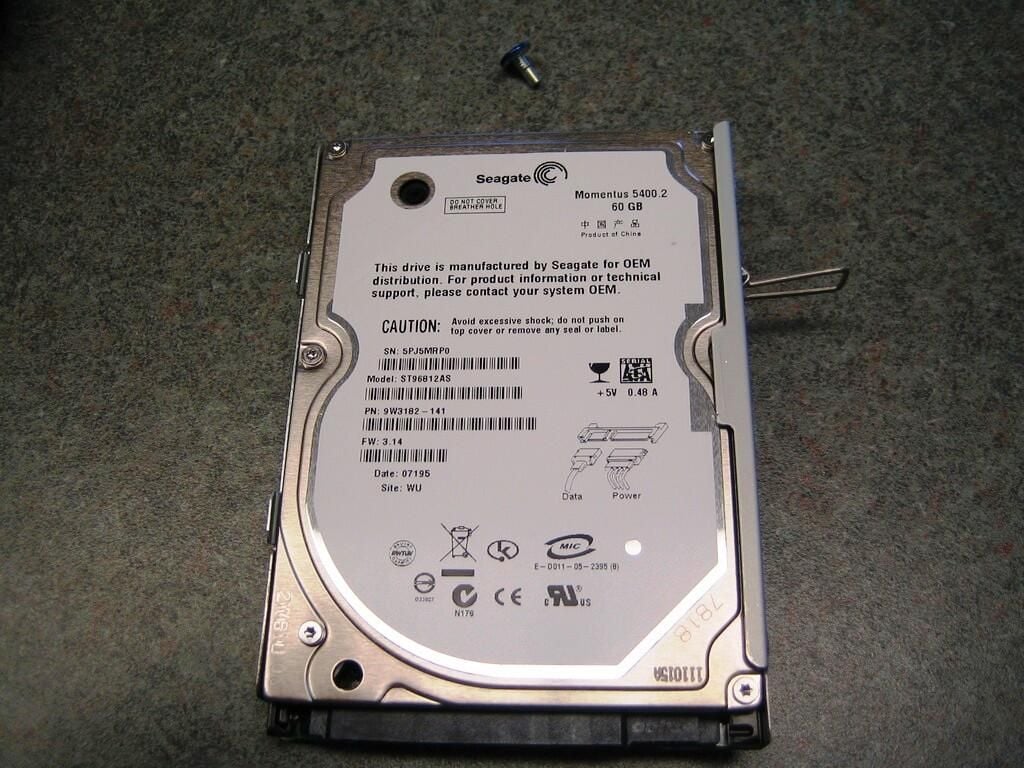
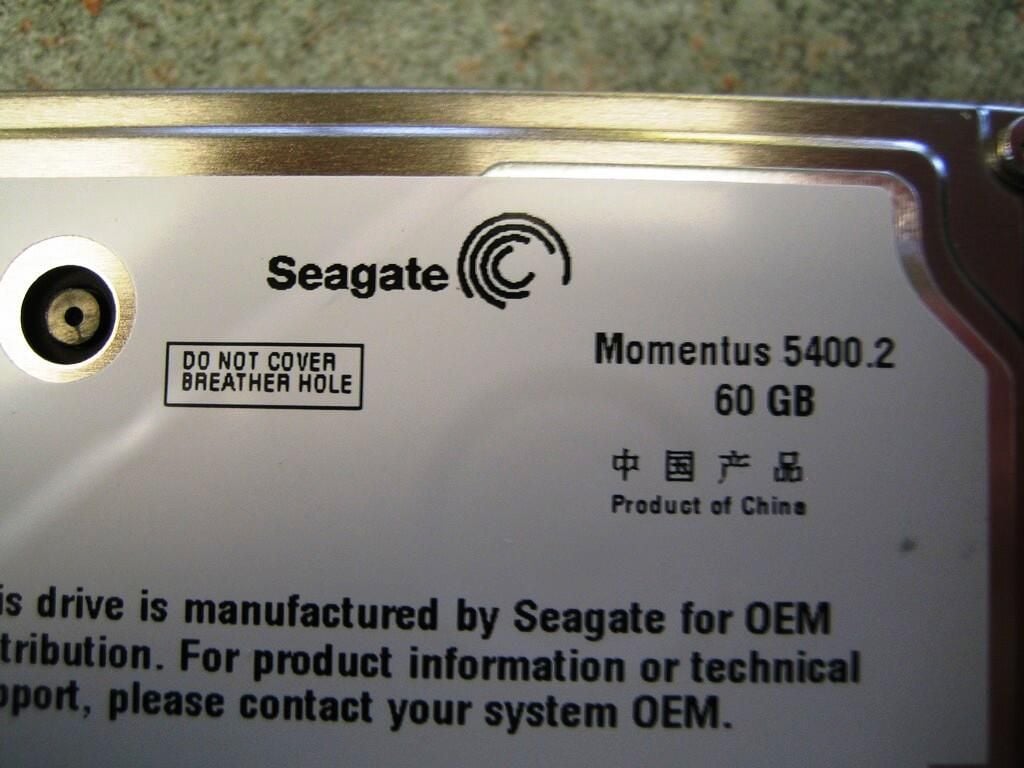
Our 60GB HDD PlayStation 3 used a Seagate Momentus 5400.2 OEM SATA hard drive.

Cracking open the Sony PlayStation 3

PlayStation 3 hard drive specs

PlayStation 3 hard drive specs

You can learn more about the PlayStation 3’s 60GB HDD on Seagate’s Web site.

Cracking open the Sony PlayStation 3

PlayStation 3 hard drive SATA connections

PlayStation 3 hard drive SATA connections

According to Seagate, the “SATA 1.5 Gb/s interface offers fast 150-MB/s interface speed.”

Cracking open the Sony PlayStation 3

Metal shielding

Metal shielding

Cracking open the Sony PlayStation 3

PlayStation 3 motherboard - Bottom without any metal shielding

PlayStation 3 motherboard - Bottom without any metal shielding

Cracking open the Sony PlayStation 3

PlayStation 3 motherboard - Top

PlayStation 3 motherboard - Top

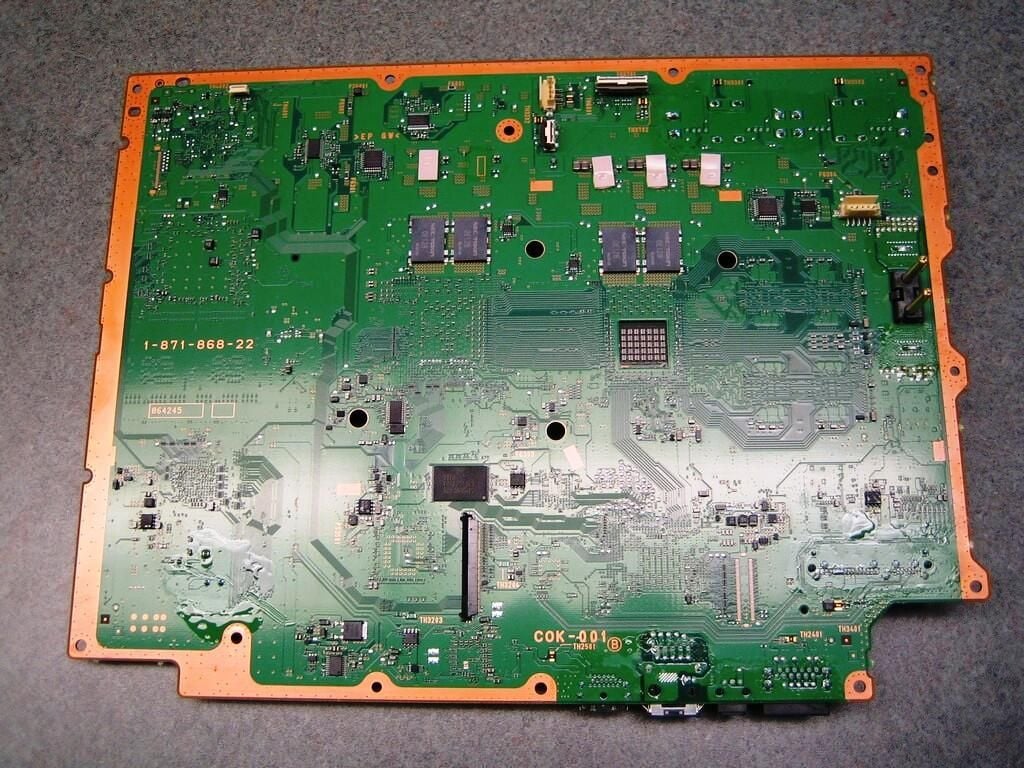
With the metal shielding removed from the top of the PlayStation 3’s motherboard we can see where most of the action happens.

Cracking open the Sony PlayStation 3

IBM's Cell Broadband Engine (CPU)and Nvidia's RSX Reality Synthesizer (main GPU)

IBM's Cell Broadband Engine (CPU)and Nvidia's RSX Reality Synthesizer (main GPU)

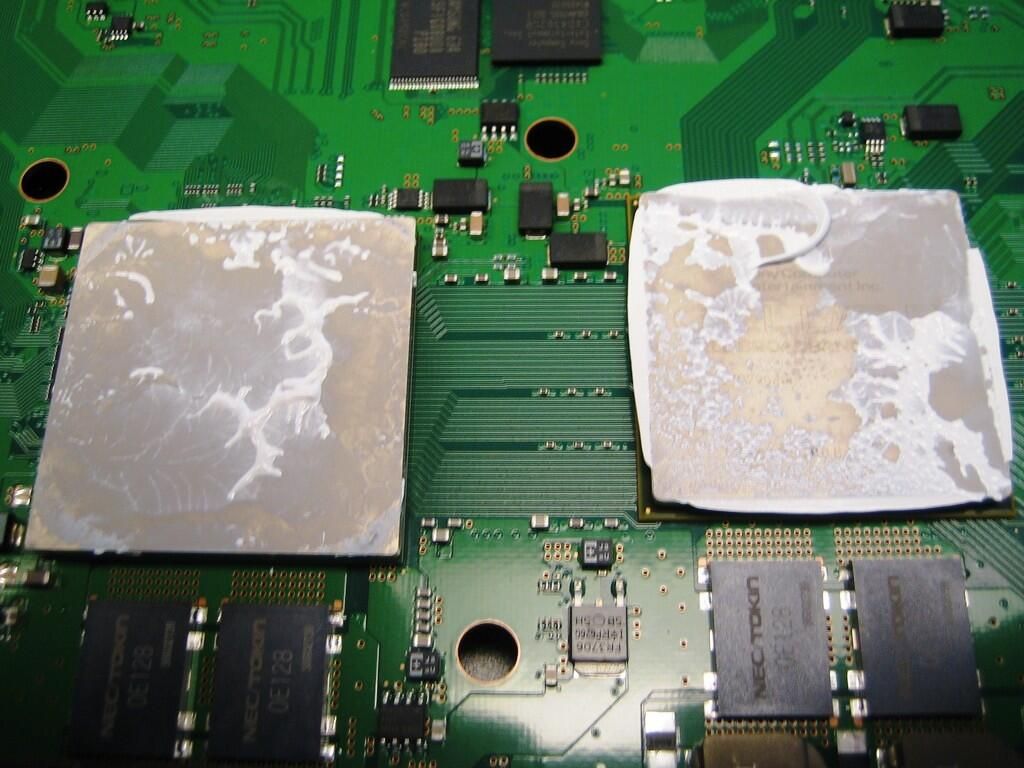
The white stuff is thermal paste. I didn’t have any extra on hand, so I left the original paste as is.

Cracking open the Sony PlayStation 3

IBM's Cell Broadband Engine (CPU)

IBM's Cell Broadband Engine (CPU)

Cracking open the Sony PlayStation 3

Cell Broadband Engine companion chip

Cell Broadband Engine companion chip

Cracking open the Sony PlayStation 3

Samsung XDR DRAM

Samsung XDR DRAM

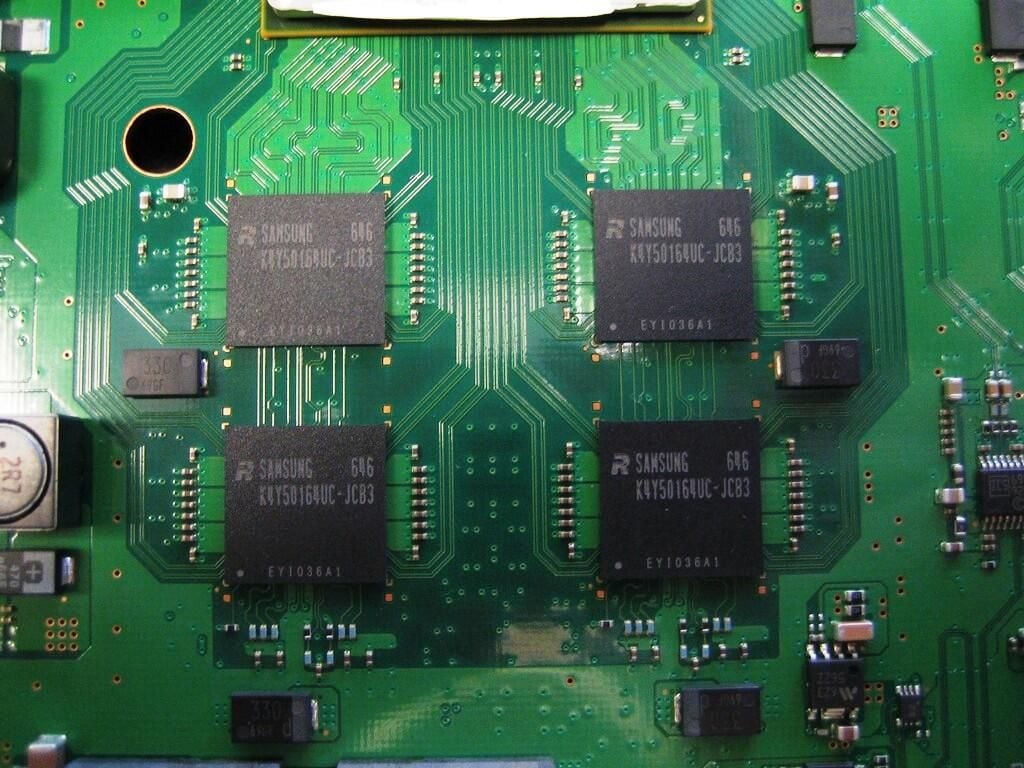
The PlayStation 3 has 256MB of XDR DRAM.

Cracking open the Sony PlayStation 3

Marvell Technology Group Ltd.'s network chip

Marvell Technology Group Ltd.'s network chip

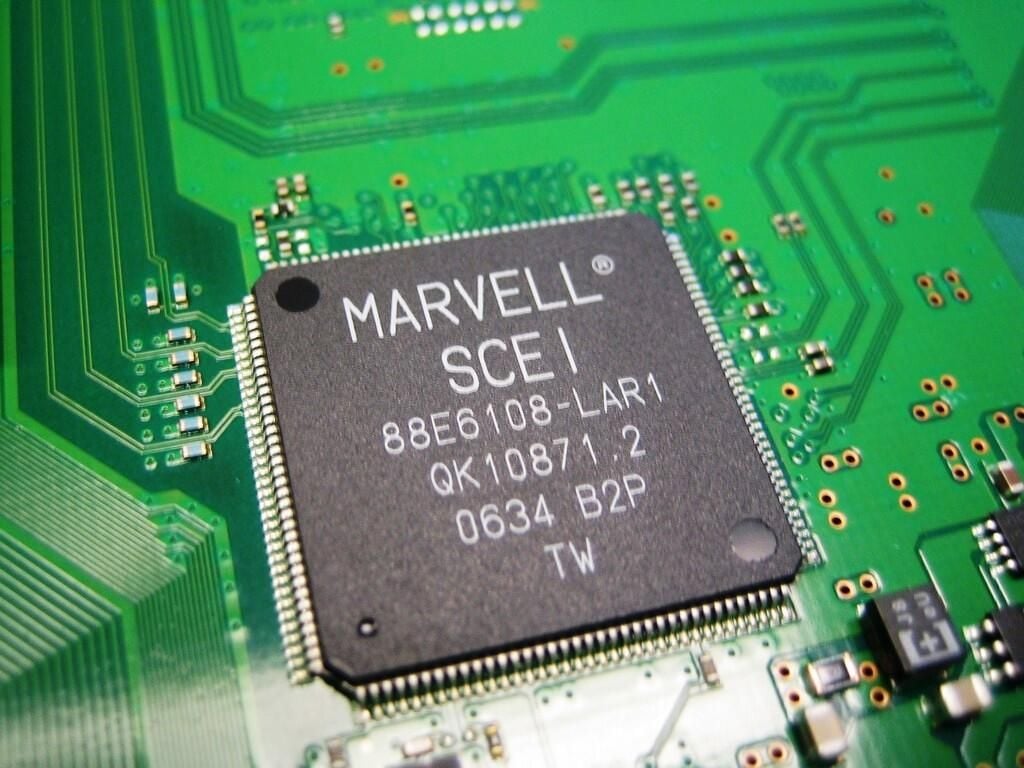
After quite a bit of research, I believe this chip is Marvell Technology Group Ltd.’s 802.11 b/g module, which provides the PS3’s WLAN capabilities. This chip may also provide the PS3’s wired LAN functionality.

Cracking open the Sony PlayStation 3

Marvell Technology Group Ltd.'s Serial ATA controller

Marvell Technology Group Ltd.'s Serial ATA controller

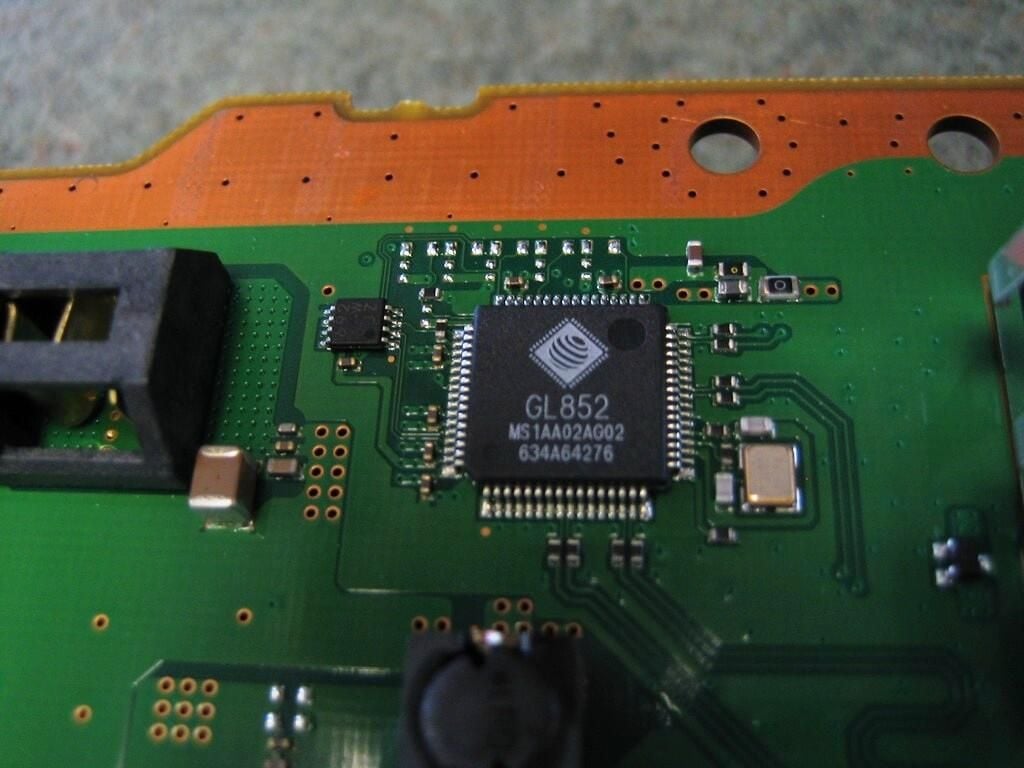
The information I’ve found indicates this chip is the PS3’s Serial ATA controller.

Cracking open the Sony PlayStation 3

Sony Emotion Engine Graphics Synthesizer - Covered with rubber pad

Sony Emotion Engine Graphics Synthesizer - Covered with rubber pad

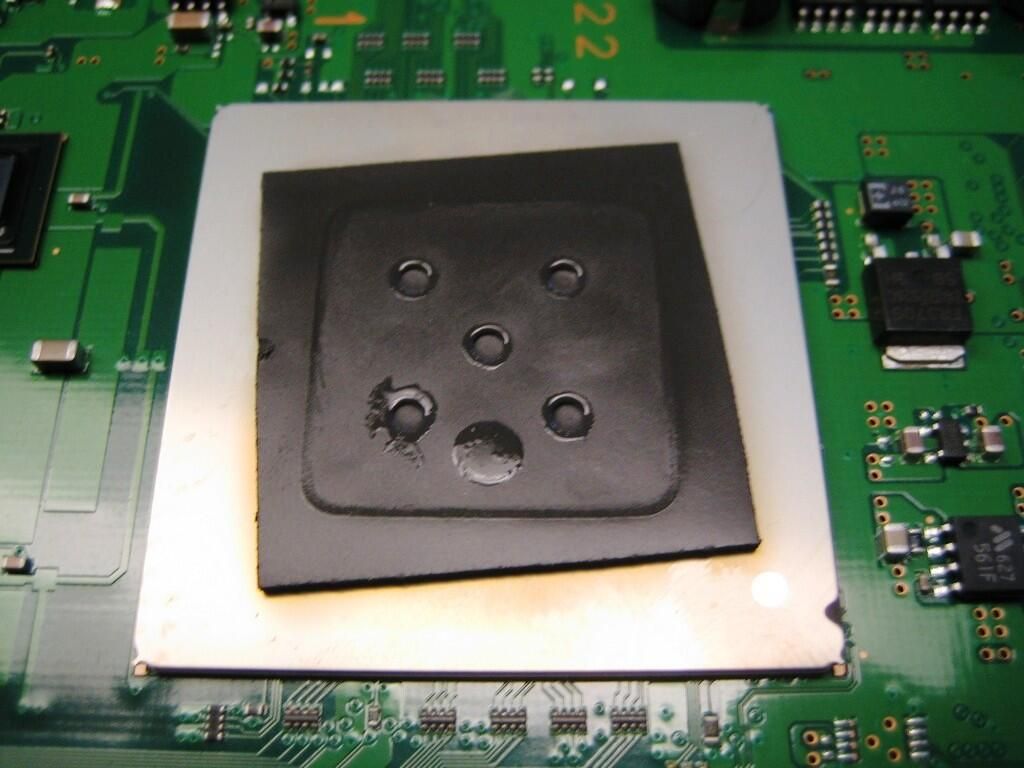
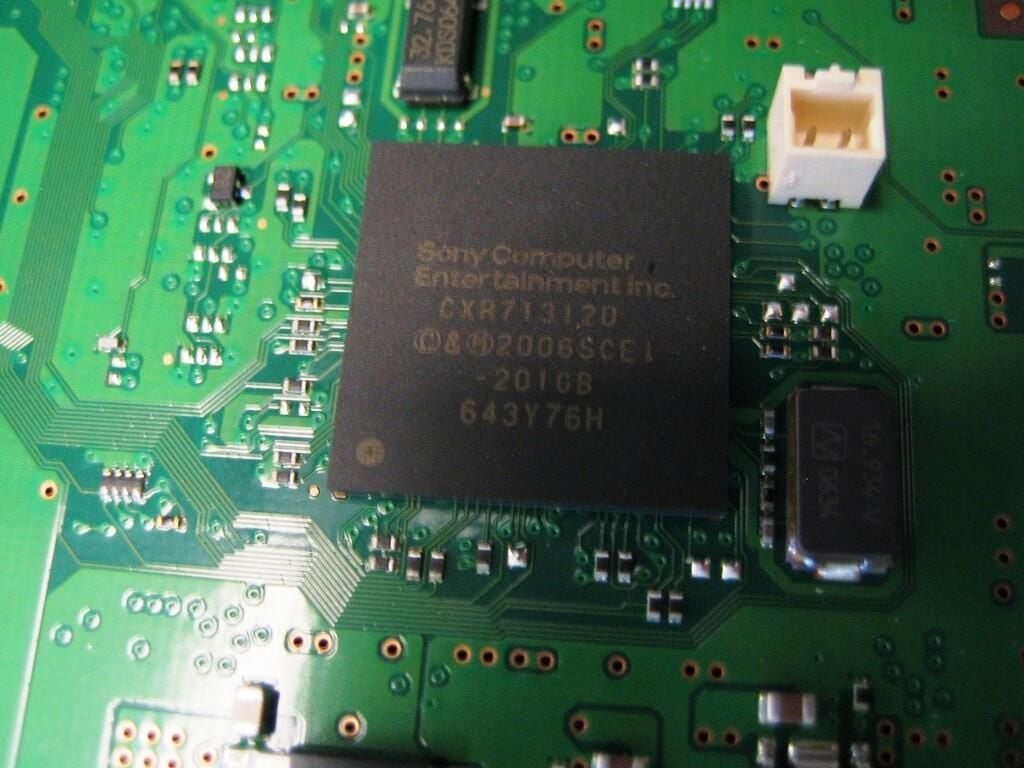
The PlayStation 3 is backward-compatible with PlayStation 2 game. Much of the PS3’s motherboard in used for PS2 components, such as the Sony Emotion Engine Graphics Synthesizer. In this picture, a black, rubber pad protects the top of the processor.

Cracking open the Sony PlayStation 3

Sony Emotion Engine Graphics Synthesizer

Sony Emotion Engine Graphics Synthesizer

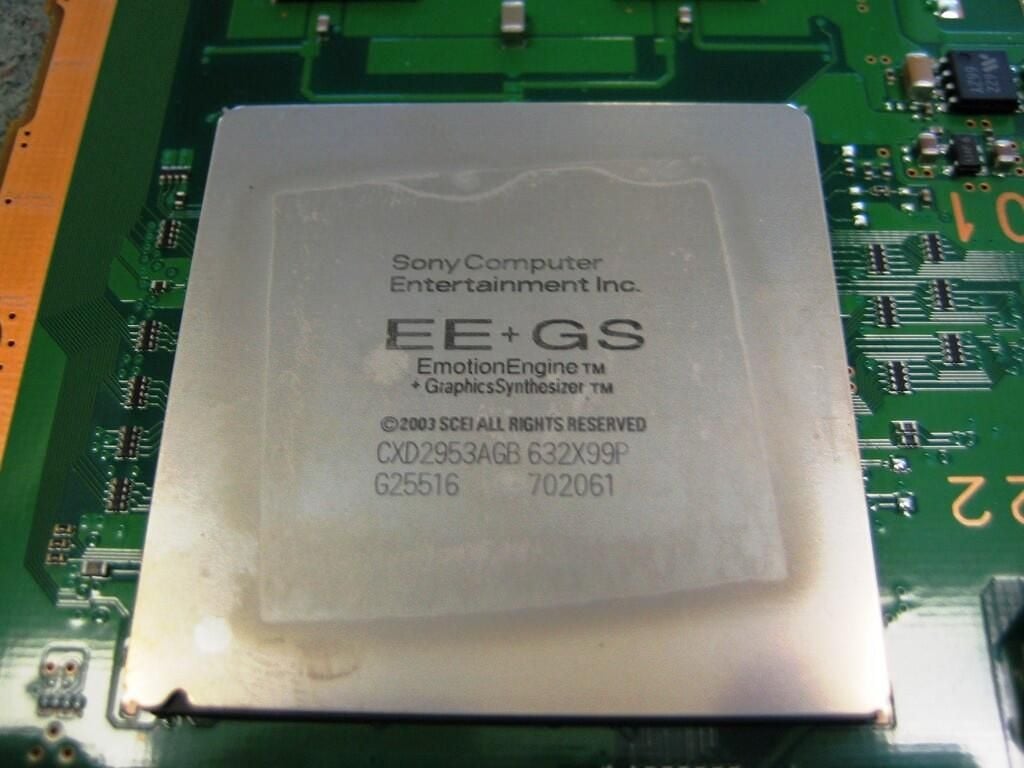
The Sony Emotion Engine Graphics Synthesizer is used as the GPU for PS2 games.

Cracking open the Sony PlayStation 3

PlayStation 2 components and buzzer

PlayStation 2 components and buzzer

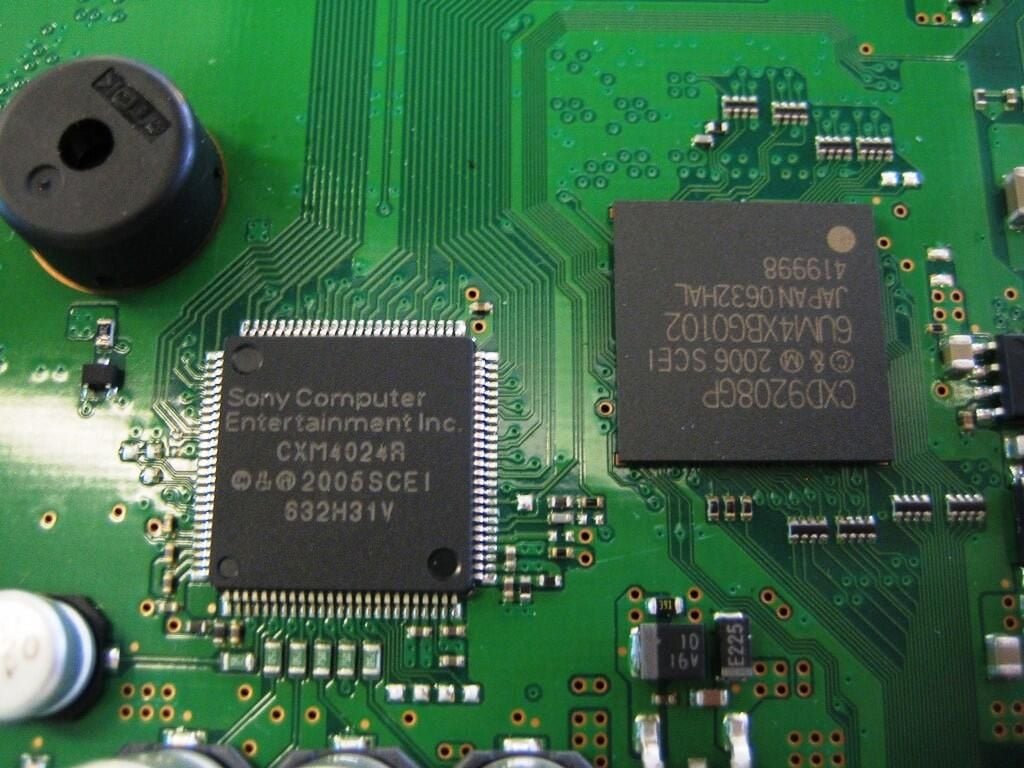
Located above the Sony Emotion Engine Graphics Synthesizer, the components in this picture are also part of the PlayStation 3’s PS2 hardware, including the round buzzer.

Cracking open the Sony PlayStation 3

System battery connector (white) and PlayStation 1 chip

System battery connector (white) and PlayStation 1 chip

Much like Nintendo’s Virtual Console, Sony’s PlayStation Network will allow PlayStation 3 owners to download PlayStation 1 and PlayStation 2 titles to their PS3.

Cracking open the Sony PlayStation 3

PlayStation 3 completely disassembled

PlayStation 3 completely disassembled

I was honestly amazed at how easy the PlayStation 3 was to disassemble. When compared with the Microsoft Xbox 360 and Nintendo Wii, the PS3 gave me the least problems. The Wii was the most difficult (I hate Tri-wing screws) and the Xbox 360 was in the middle. Sony seems to have had disassembly in mind when they designed the PS3.

Cracking open the Sony PlayStation 3

Madden NFL 07

Madden NFL 07

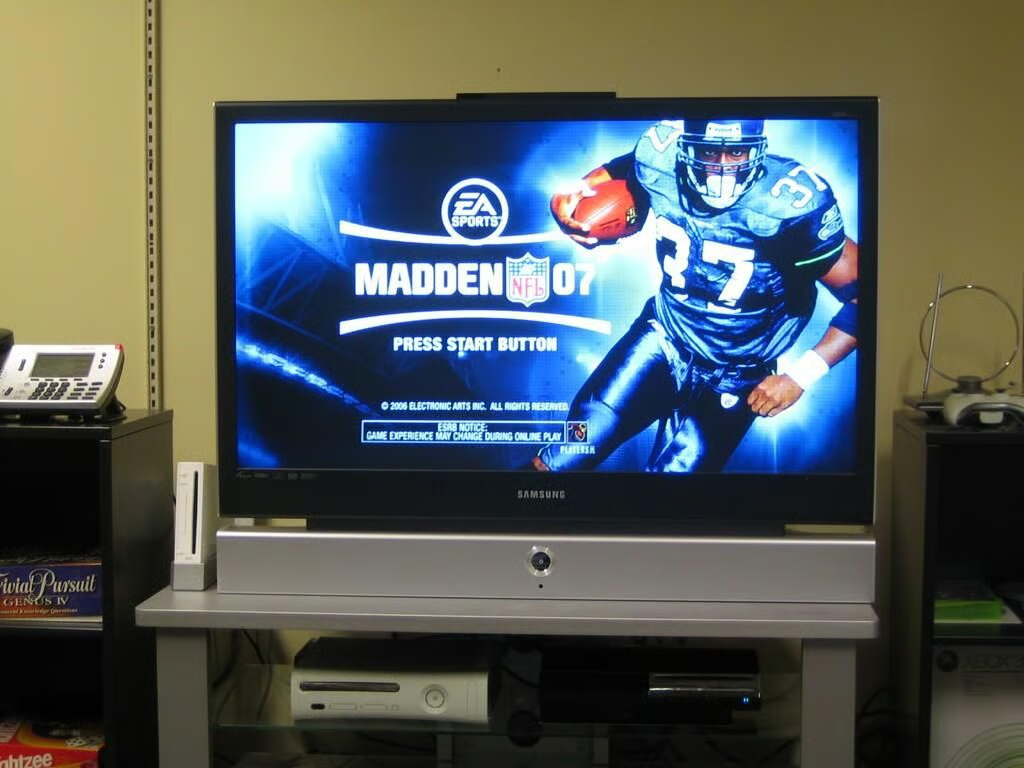
To test the Blu-Ray Disc (BD)/DVD/CD drive, I inserted Madden NFL 07. It worked!

Cracking open the Sony PlayStation 3

Internet Browser

Internet Browser

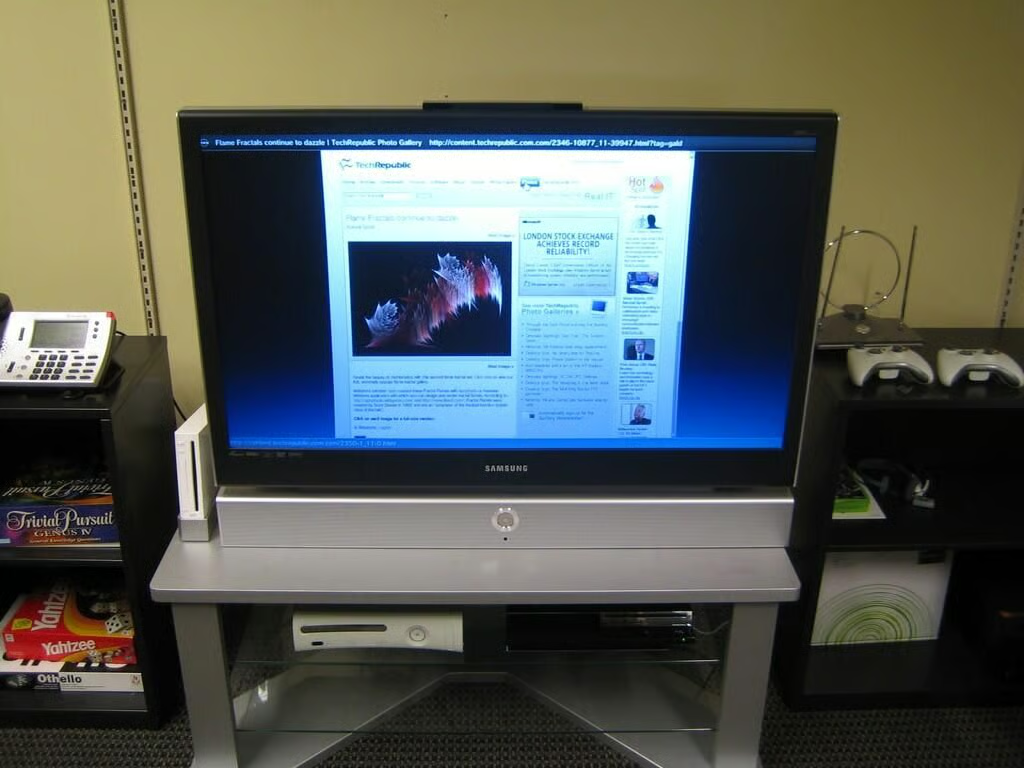
I even tried the Wi-Fi network connection. This photo shows me browsing TechRepublic with the PlayStation 3’s built-in Web browser.

  • After Hours
  • Account Information

    Share with Your Friends

    Cracking open the Sony PlayStation 3

    Your email has been sent

Share: Cracking open the Sony PlayStation 3
Image of Bill Detwiler
By Bill Detwiler
Bill Detwiler is the Editor for Technical Content and Ecosystem at Celonis. He is the former Editor in Chief of TechRepublic and previous host of TechRepublic's Dynamic Developer podcast and Cracking Open, CNET and TechRepublic's popular online show.
  • Account Information

    Contact Bill Detwiler

    Your message has been sent

  • |
  • See all of Bill's content

TechRepublic Premium

  • TechRepublic Premium

    Choosing a payroll service: A guide for business leaders

    For businesses, hiring a service to handle all of the necessary payroll calculation, processing, and documentation saves valuable time and resources better spent on running the business. This guide explains the features you should look for in a payroll service and provides a framework you can use when comparing potential services. From the guide: Regardless ...

    Downloads
    Published:  January 29, 2023, 11:00 AM EST Modified:  January 30, 2023, 2:00 PM EST Read More See more TechRepublic Premium
  • TechRepublic Premium

    Glossary of useful LVM and related commands

    LVM, or Logical Volume Manager, is a feature in Linux which allows on-the-fly management of disk volumes and filesystems. Much more reliable than traditional pre-LVM methods of disk partitioning and formatting, LVM is flexible and can quickly aid in displaying disk and volume information as well as adding, changing or removing disks. With this glossary ...

    Downloads
    Published:  January 29, 2023, 11:00 AM EST Modified:  January 30, 2023, 1:00 PM EST Read More See more TechRepublic Premium
  • TechRepublic Premium

    Hardware inventory policy

    This policy describes guidelines your organization can follow to track, process and decommission IT equipment. From the policy: SUMMARY An organization’s IT hardware inventory constitutes a significant capital investment in order to perform company operations. Because hardware represents a critical asset and often holds organizational data, it is important for the company to track each ...

    Published:  January 23, 2023, 11:00 AM EST Modified:  January 24, 2023, 11:00 AM EST Read More See more TechRepublic Premium
  • TechRepublic Premium

    Malware response checklist

    Whether an infection is the result of a disgruntled employee, hardware vulnerability, software-based threat, social engineering penetration, robotic attack or human error, all organizations must be prepared to immediately respond effectively to such an issue if the corresponding damage is to be minimized. Because even the best protected networks become infected, all organizations must have ...

    Published:  January 22, 2023, 11:00 AM EST Modified:  January 23, 2023, 1:00 PM EST Read More See more TechRepublic Premium

Services

  • About Us
  • Newsletters
  • RSS Feeds
  • Site Map
  • Site Help & Feedback
  • FAQ
  • Advertise
  • Do Not Sell My Information

Explore

  • Downloads
  • TechRepublic Forums
  • Meet the Team
  • TechRepublic Academy
  • TechRepublic Premium
  • Resource Library
  • Photos
  • Videos
  • TechRepublic
  • TechRepublic on Twitter
  • TechRepublic on Facebook
  • TechRepublic on LinkedIn
  • TechRepublic on Flipboard
© 2023 TechnologyAdvice. All rights reserved.
  • Privacy Policy
  • Terms of Use
  • Property of TechnologyAdvice