\n\tIn certain environments and situations, you may want to grant guest-user access to a workstation running Microsoft Windows 7. Best practices dictate that such access be as secure as possible. Here are several steps you can, and should, take before giving access to a guest user in Windows 7.
\n\t
\n\tNote: This tip applies to Windows 7 Professional and Ultimate only. It does not apply to Windows 7 Home Premium.
\n\t
\n\tSecure Guest Account
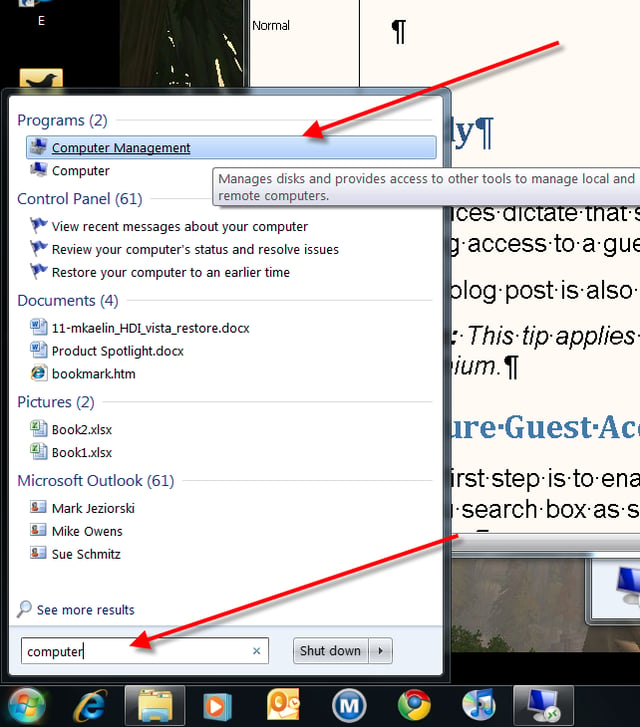
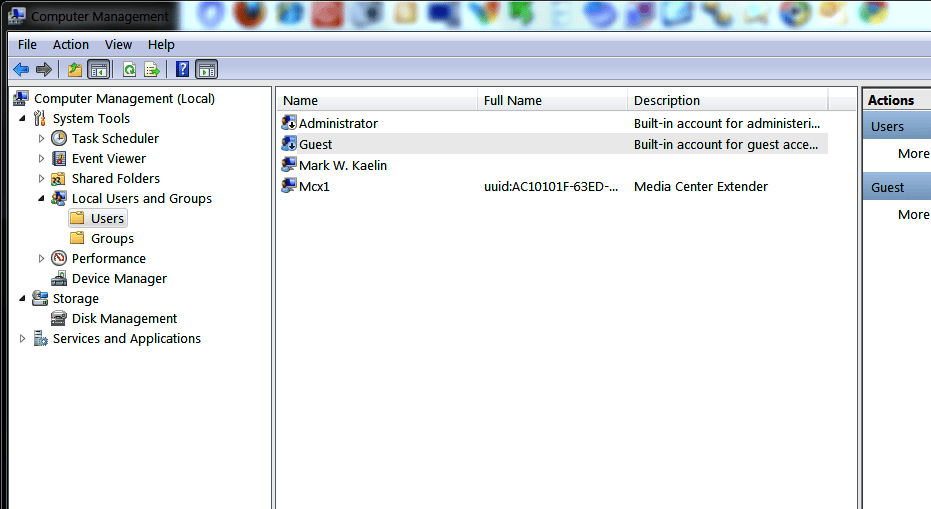
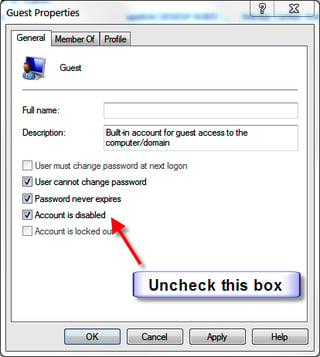
\n\tThe first step is to enable guest accounts, which is disabled by default. Type “computer” into the Start Menu search box as shown and then click on the “Computer Management” item in the results.
\n\t
\n\tThis gallery is also available as a TechRepublic blog post and download. Image created by Mark Kaelin for TechRepublic. The gallery was originally published in August 2010.
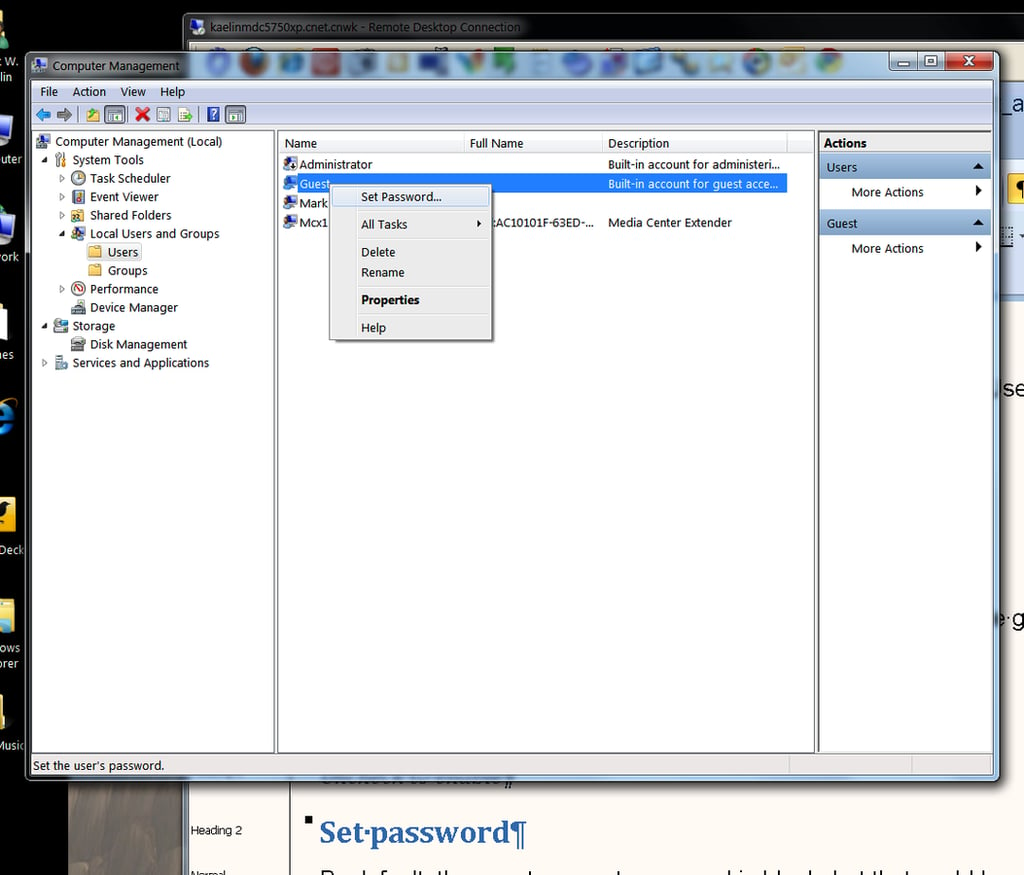
By default, the guest account password is blank, but that is an unnecessary security risk, so you should establish a password. Right-click the Guest entry in the Computer Management console and click the Change Password entry. The ensuing warnings are not a concern if you just enabled the guest account.
This gallery is also available as a TechRepublic blog post and download. Image created by Mark Kaelin for TechRepublic.
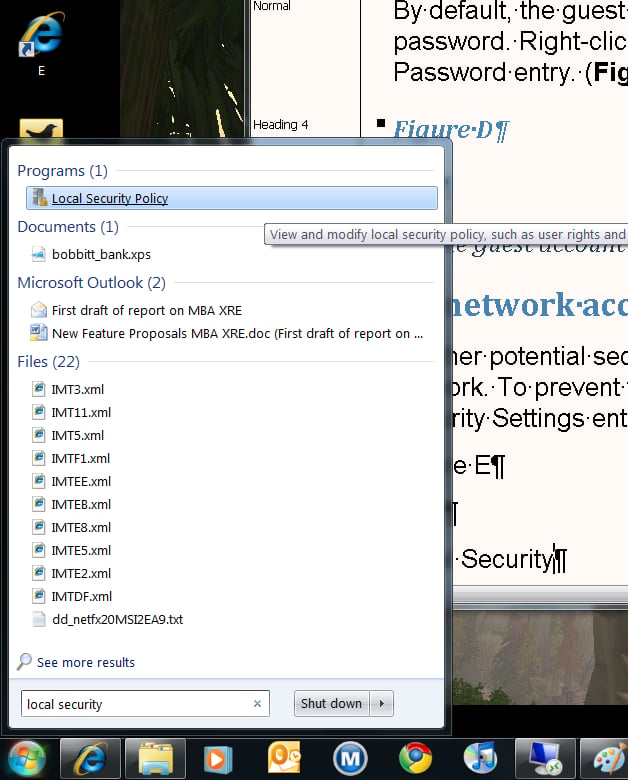
Another potential security problem occurs if the guest account is accessible by other users across the network. To prevent this, type “Local Security” into the Start Menu search box and then click the Local Security Policy entry as shown.
This gallery is also available as a TechRepublic blog post and download. Image created by Mark Kaelin for TechRepublic.
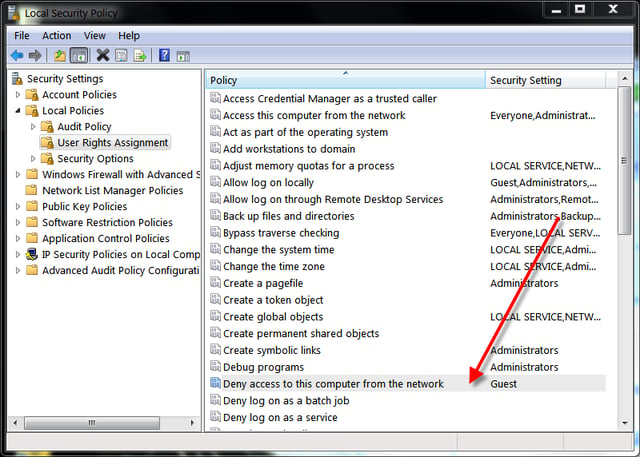
Navigate to the Local Policies | User Rights Assignments entry. Scroll down the list of policies until you find “Deny access to this computer from the Network.” Guest should be one of the denied accounts listed. If it isn’t, add it.
This gallery is also available as a TechRepublic blog post and download. Image created by Mark Kaelin for TechRepublic.
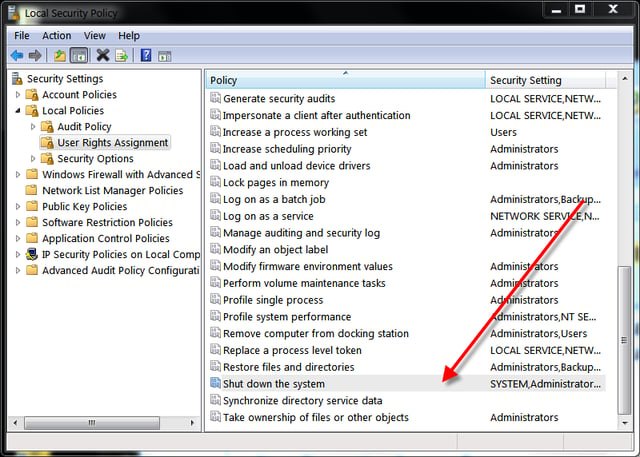
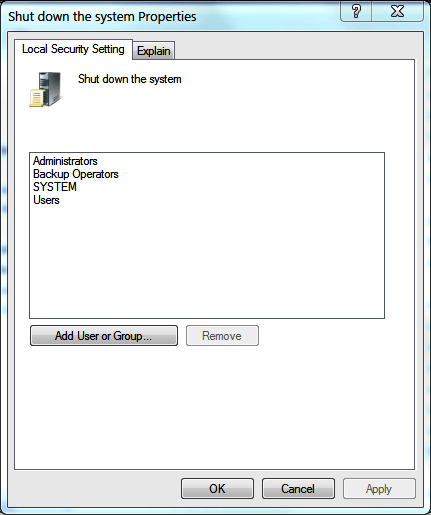
Another potential security vulnerability occurs during the PC shutdown process. You should deny the guest account the ability to shut down a PC. Go back to the Local Security Policy consoled as you did before, navigate to Local Policies | User Rights Assignments and look for the entry “Shut Down the System.”
This gallery is also available as a TechRepublic blog post and download. Image created by Mark Kaelin for TechRepublic.
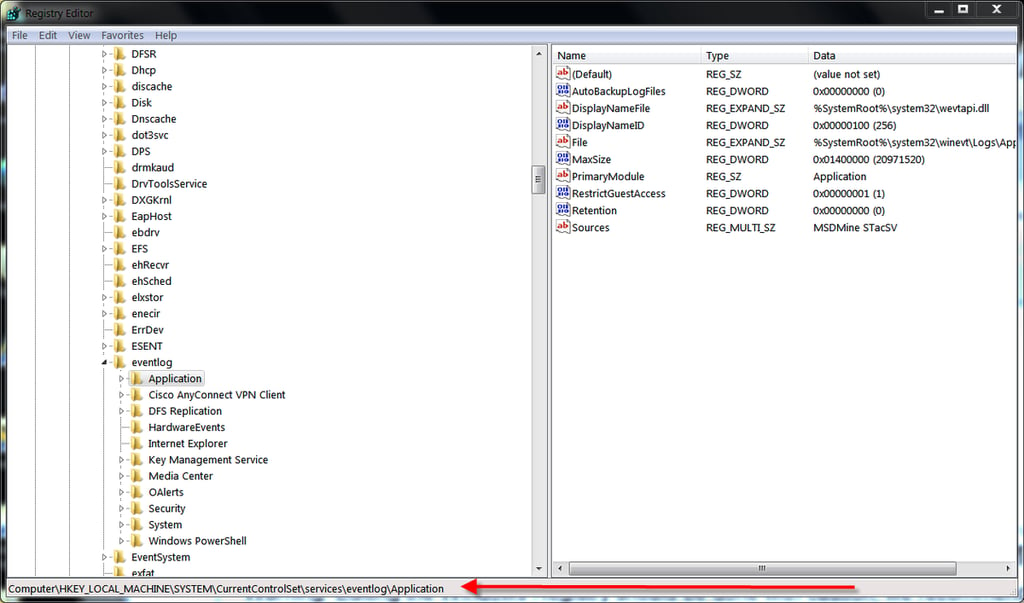
One last security concern is the Event logs \u2013 you don’t want a guest account to have access to that information. The most efficient way to manage these settings is with a Registry edit.
Warning: Editing the Windows Registry should be done with caution; we recommend that you have a verified backup of the file ready in case of a catastrophic failure.
Type in “regedit” into the Start Menu Search box and then click the regedit.exe entry. Navigate down the keys until you reach this entry:
HKEY_LOCAL_MACHINE\\SYSTEM\\CurrentControlSet\\services\\Eventlog
Under this key are three important sub-keys: Application, Security, and System. There should be a key under each section: Restrict Guest Access. And each of those keys should have a corresponding DWORD of “1” that enables this restriction.
This gallery is also available as a TechRepublic blog post and download. Image created by Mark Kaelin for TechRepublic.

Mark W. Kaelin has been writing and editing stories about the information technology industry, software, hardware, gaming, finance, accounting, and technology geekdom for more than 30 years.


