\n\t
\n
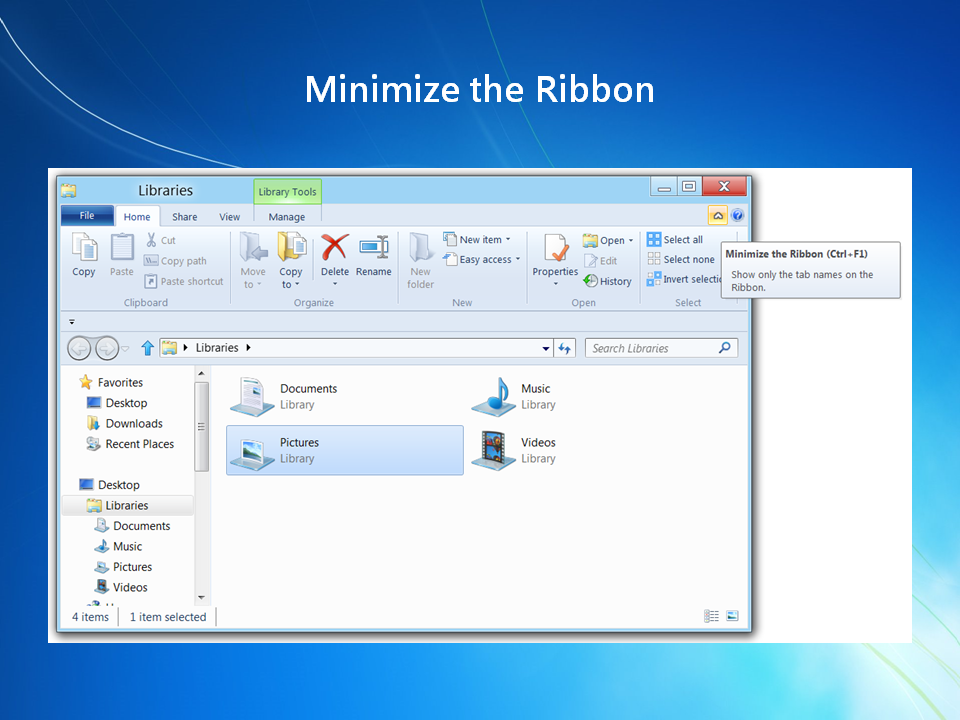
\n\tIf the Ribbon is in the way, just click the Minimize button.
\n
\n\tImage created by Greg Shultz for TechRepublic, all rights reserved.

\n\t
\n
\n\tWhen you want the Ribbon back, just click the Expand button.
\n
\n\tImage created by Greg Shultz for TechRepublic, all rights reserved.
\n\t
\n
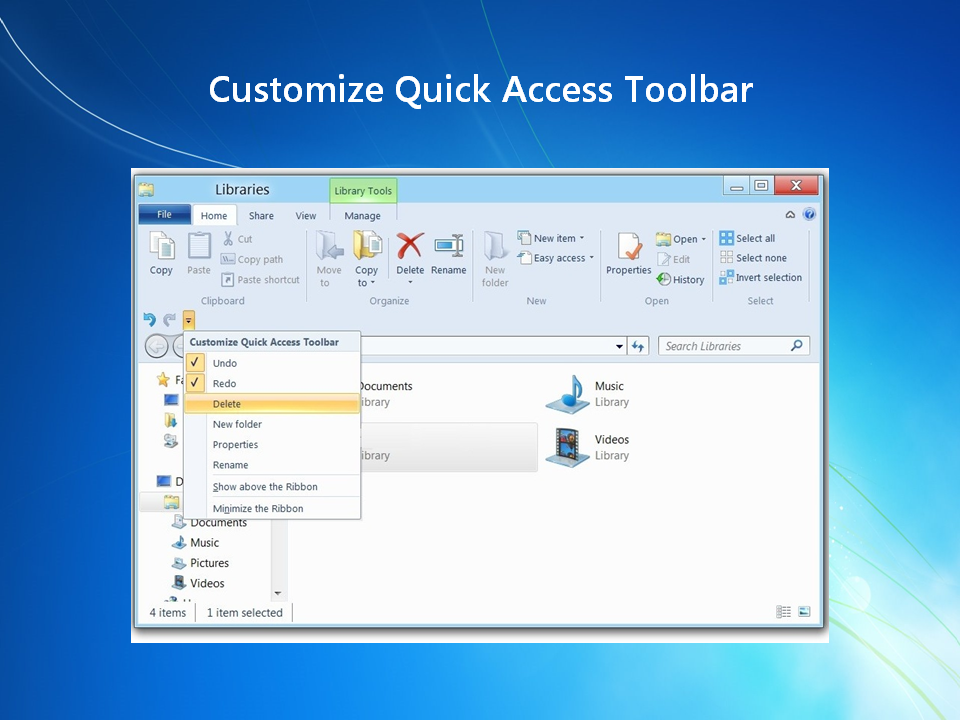
\n\tSelect the Customize Quick Access Toolbar and you can add any of the standard commands.
\n
\n\tImage created by Greg Shultz for TechRepublic, all rights reserved.
\n\t
\n
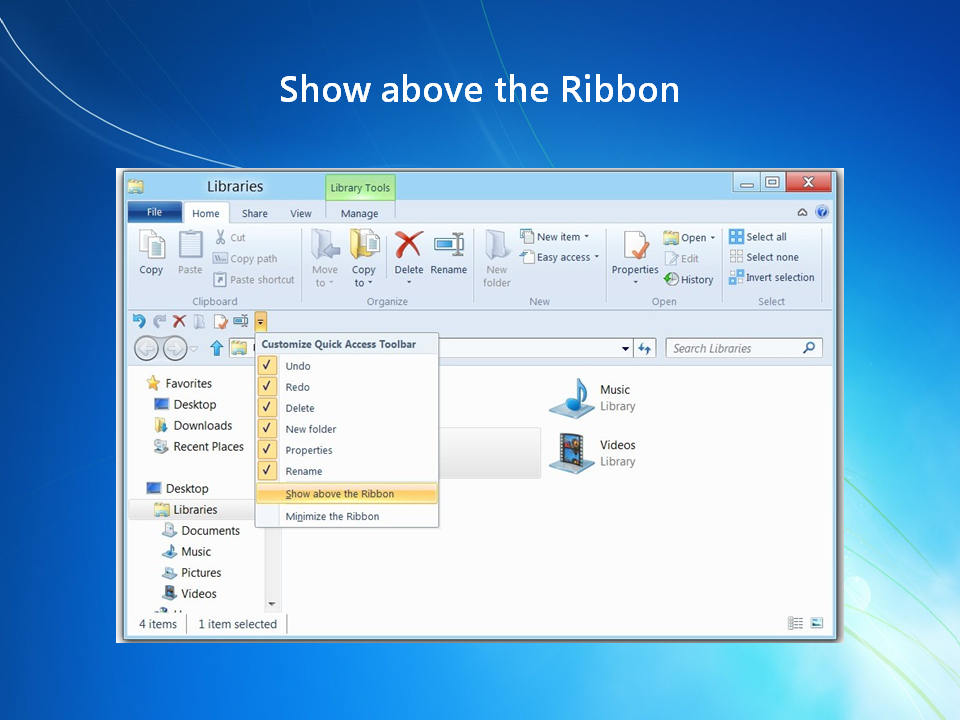
\n\tYou can move the Quick Access Toolbar above the Ribbon.
\n
\n\tImage created by Greg Shultz for TechRepublic, all rights reserved.
\n\t
\n
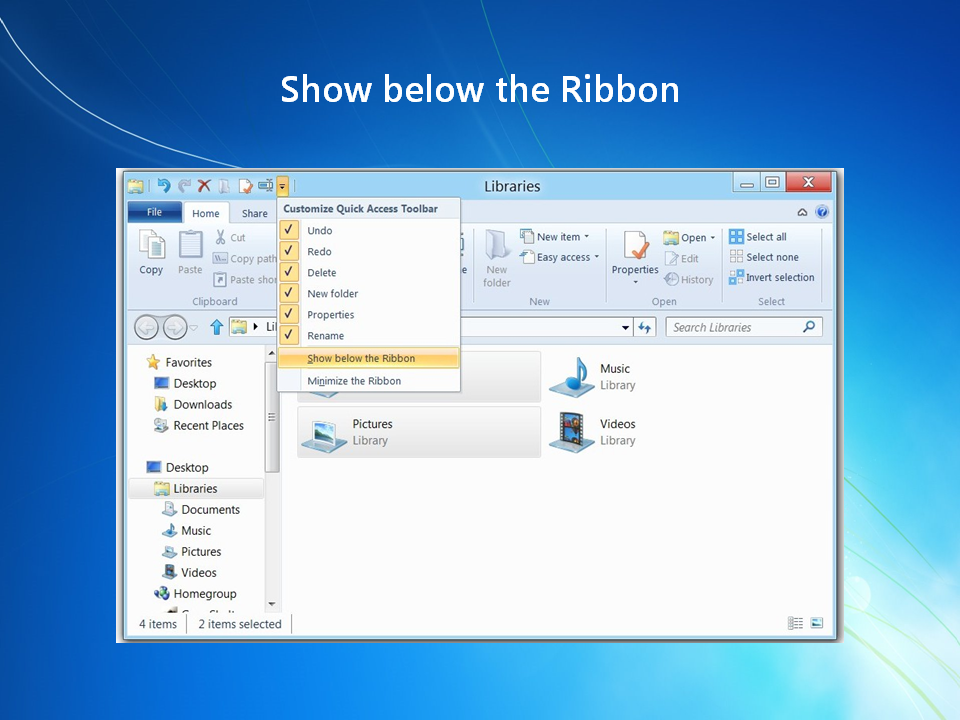
\n\tYou can put the Quick Access Toolbar back below the Ribbon.
\n
\n\tImage created by Greg Shultz for TechRepublic, all rights reserved.
\n\t
\n
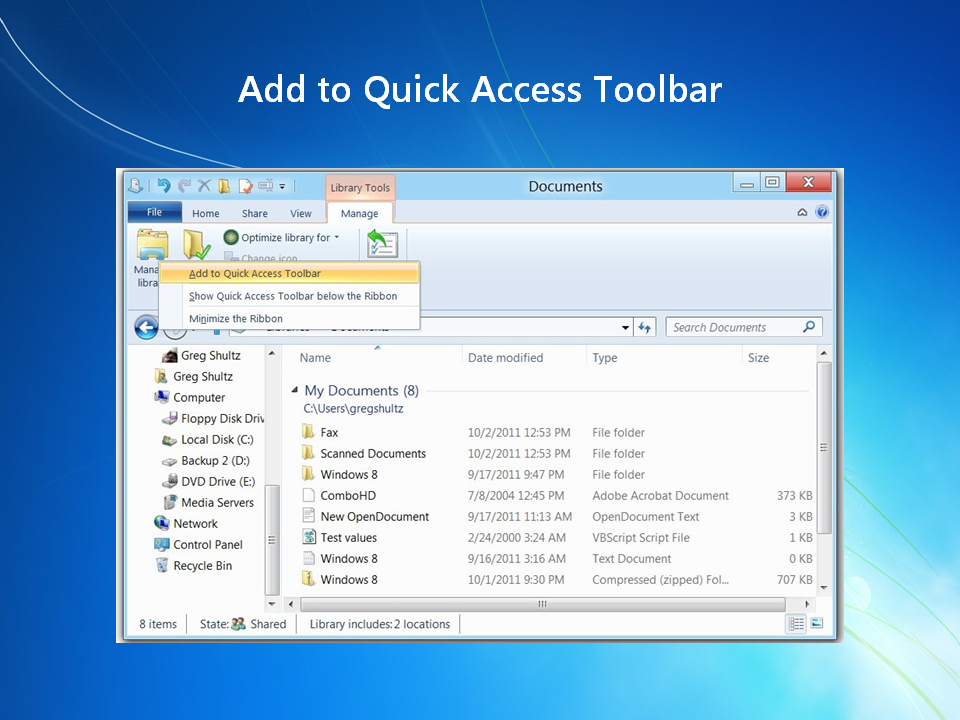
\n\tYou can right click on any command on any tab and add it to the Quick Access Toolbar.
\n
\n\tImage created by Greg Shultz for TechRepublic, all rights reserved.
\n\t
\n
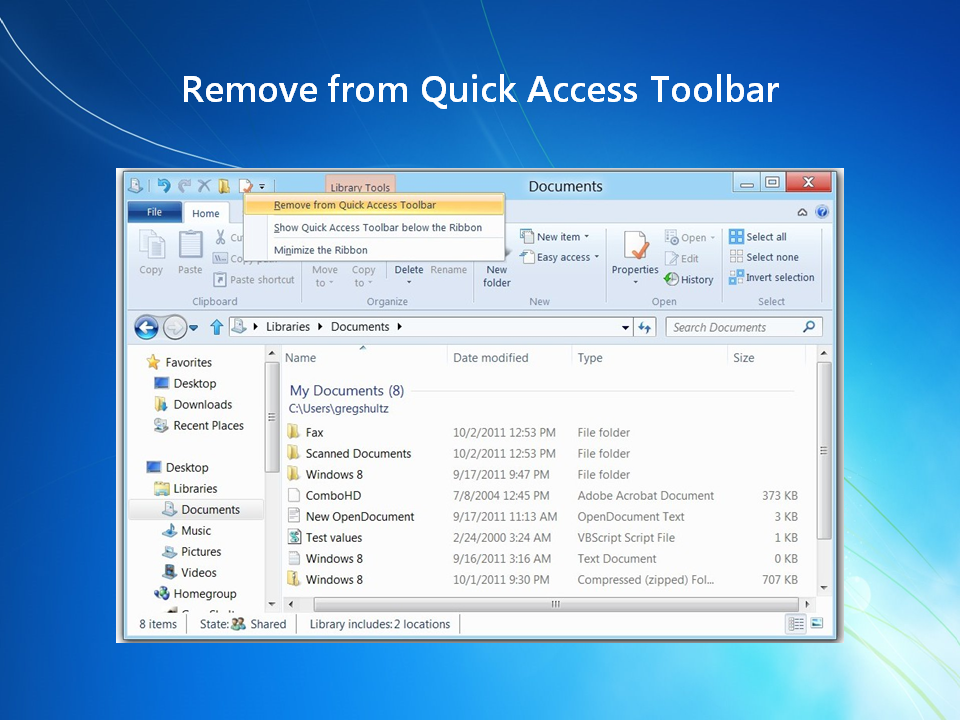
\n\tYou can right click any button and remove it from the Quick Access Toolbar.
\n
\n\tImage created by Greg Shultz for TechRepublic, all rights reserved.
\n\t
\n
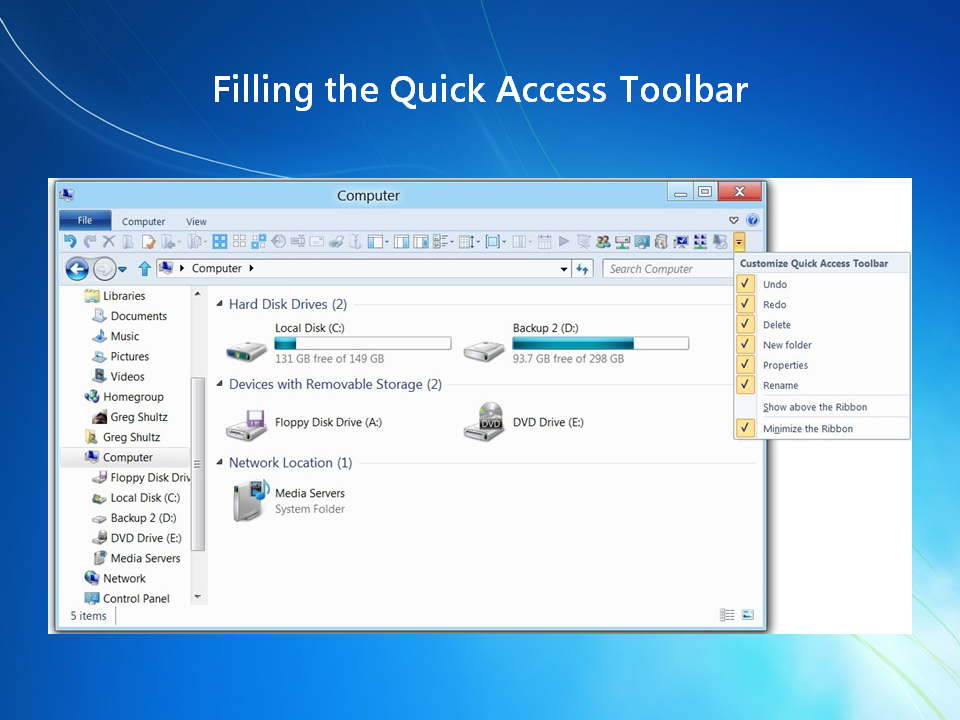
\n\tYou can put just about every command on the various tabs on the Quick Access Toolbar.
\n
\n\tImage created by Greg Shultz for TechRepublic, all rights reserved.

My first computer was a Kaypro 16 \"luggable\" running MS-DOS 2.11 which I obtained while studying computer science in 1986. After two years, I discovered that I had a knack for writing documentation and shifted my focus over to technical writing.

