In December 2010, Google launched a pilot program to test and promote its Chrome OS. Through the program, the company sent specially designed Cr-48 Chrome notebooks to individuals who promised to “use it regularly and send us detailed feedback.”
We got our hands on a Cr-48 notebook and couldn’t wait to see the hardware inside. Follow along as we crack it open.
Photo by: Bill Detwiler / TechRepublic
Caption by: Bill Detwiler
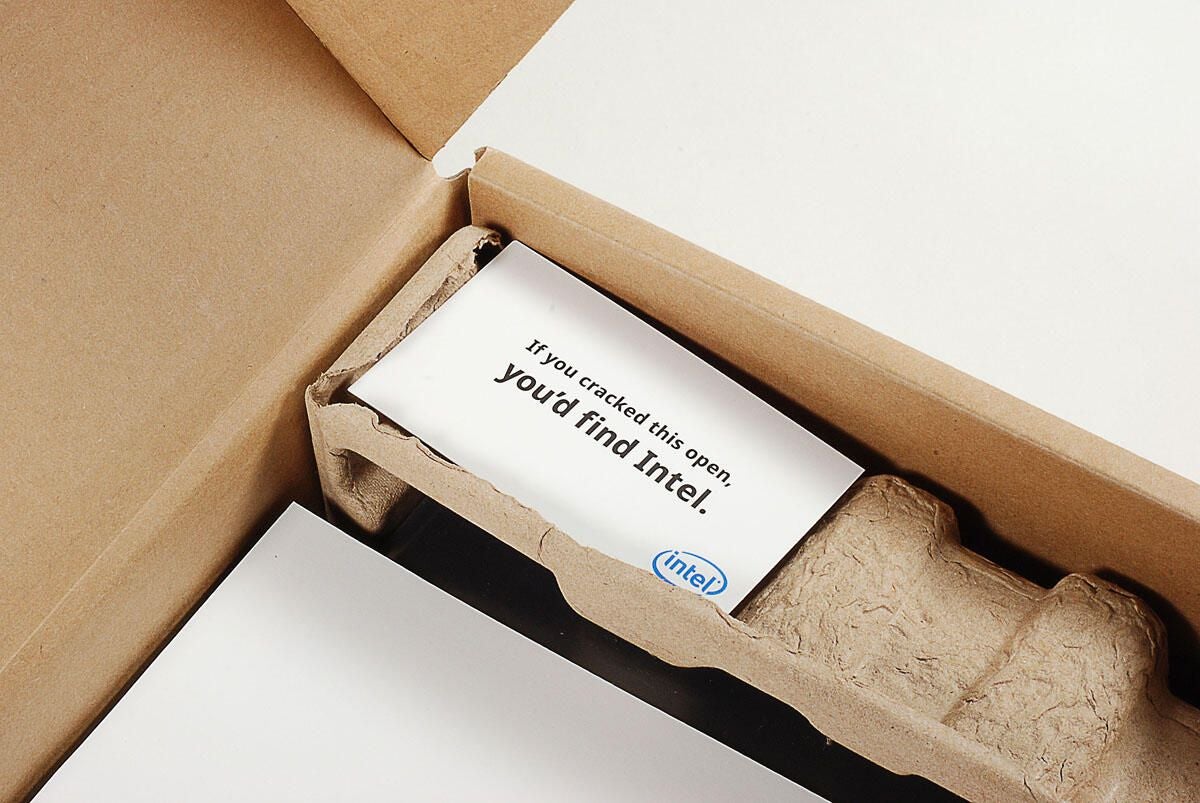
What do they mean IF I cracked it open. Of course I’m going to crack it open, but perhaps this card isn’t aimed at me.
Photo by: Bill Detwiler / TechRepublic
Caption by: Bill Detwiler
Photo by: Bill Detwiler / TechRepublic
Caption by: Bill Detwiler
Photo by: Bill Detwiler / TechRepublic
Caption by: Bill Detwiler
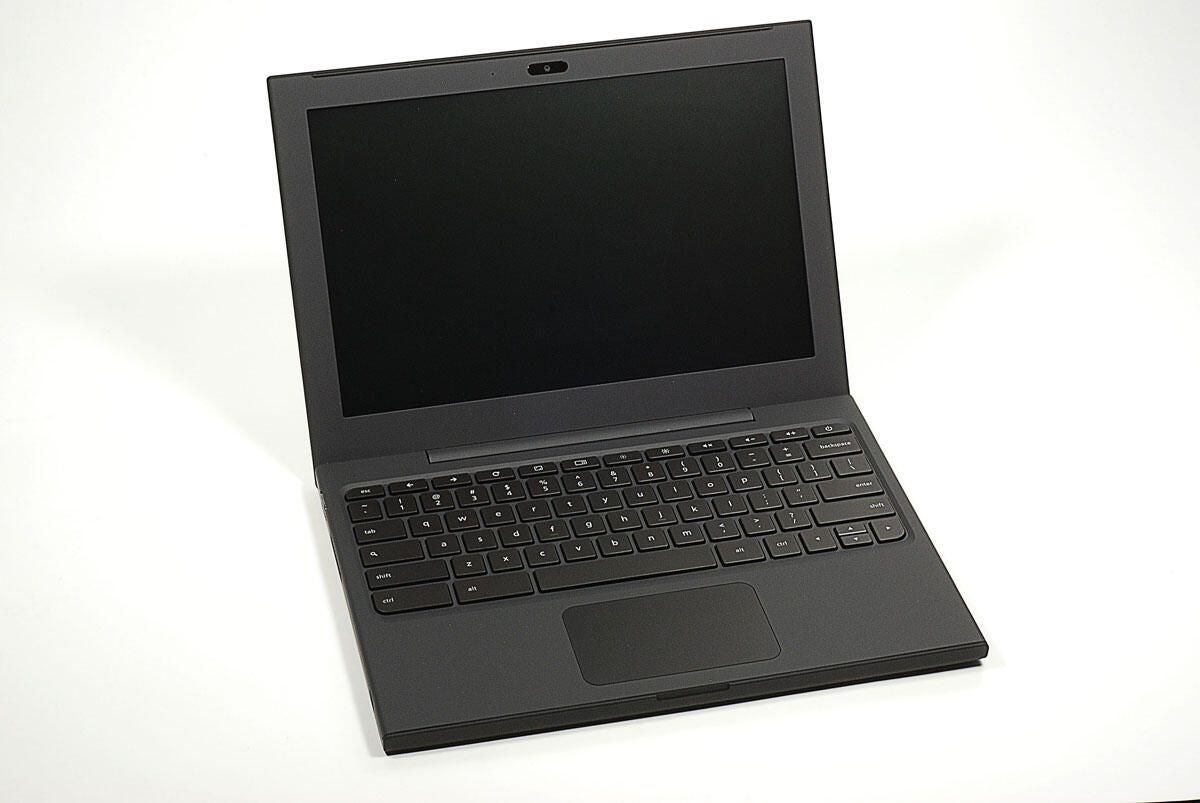
The Cr-48 Chrome notebook has a 12-inch LCD display, built-in webcam, and full-size keyboard.
Photo by: Bill Detwiler / TechRepublic
Caption by: Bill Detwiler
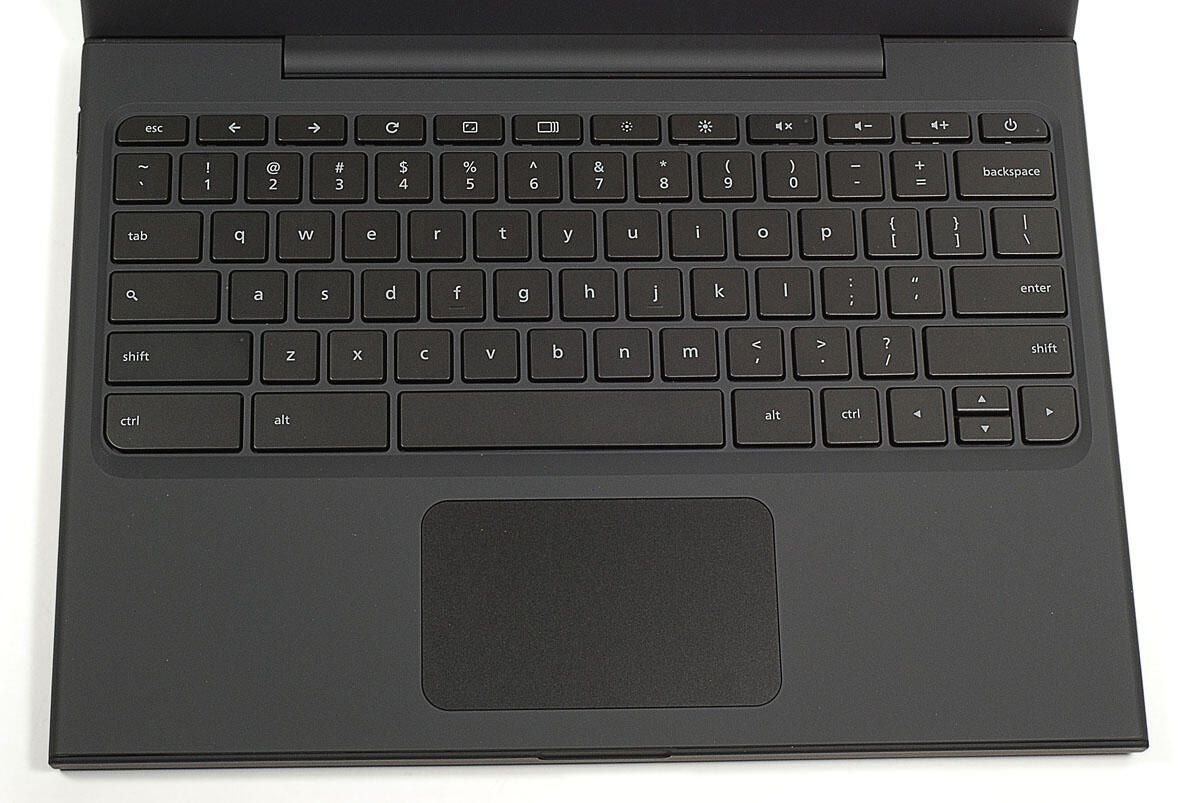
The Cr-48 Chrome notebook has a full-size keyboard, but with some notable exceptions. For example, there is not Caps Lock key. Instead, Google has included several webcentric keys, such as Forward, Back, and Reload.
A standard trackpad rounds out the machine’s built-in input devices.
Photo by: Bill Detwiler / TechRepublic
Caption by: Bill Detwiler
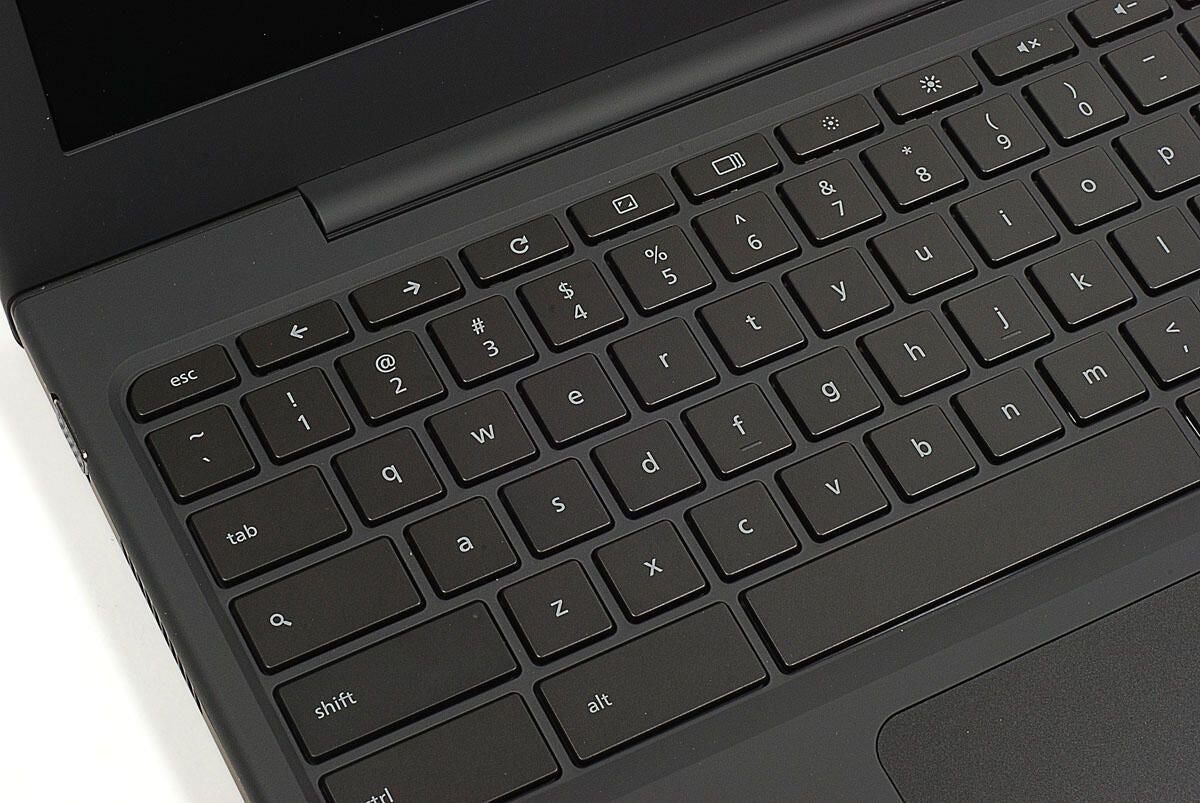
The Cr-48 Chrome notebook forgoes the function keys found on most machines, in favor of several webcentric ones, such as previous browser history page, next browser history page, reload, full-screen mode, next tab/window, and search.
Photo by: Bill Detwiler / TechRepublic
Caption by: Bill Detwiler
Photo by: Bill Detwiler / TechRepublic
Caption by: Bill Detwiler
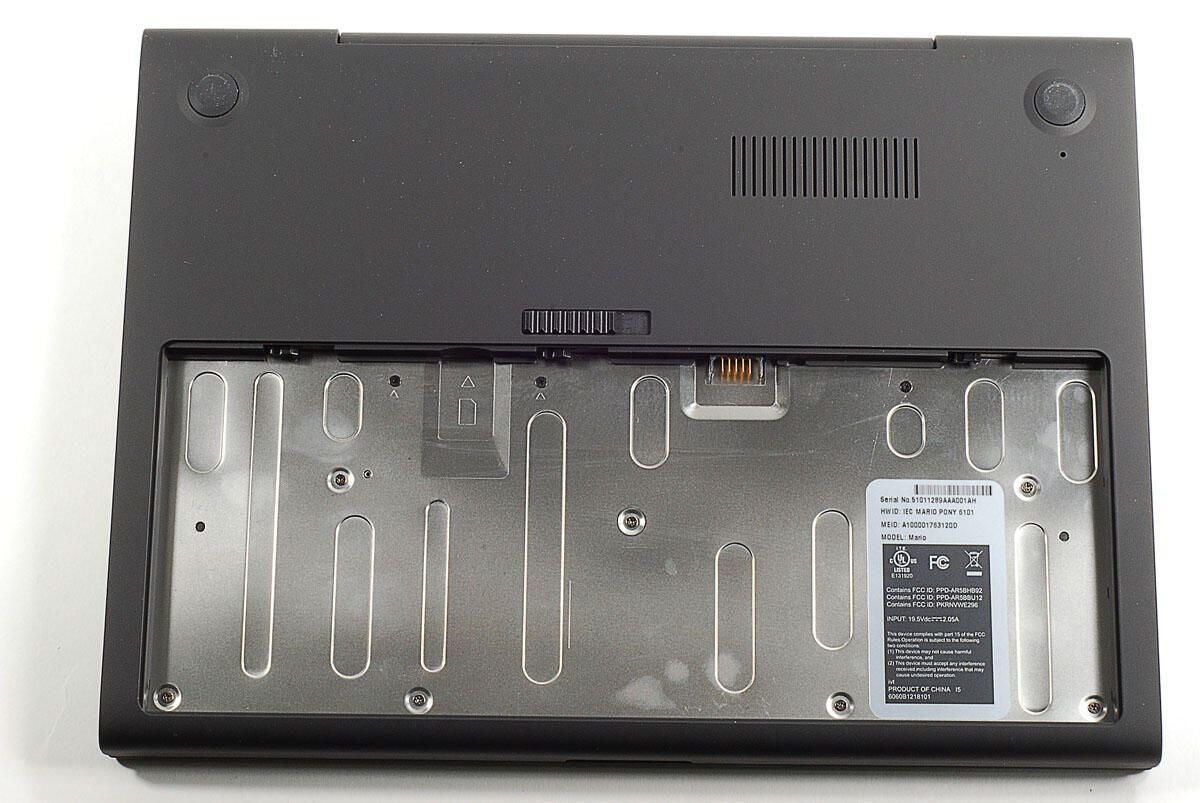
Photo by: Bill Detwiler / TechRepublic
Caption by: Bill Detwiler
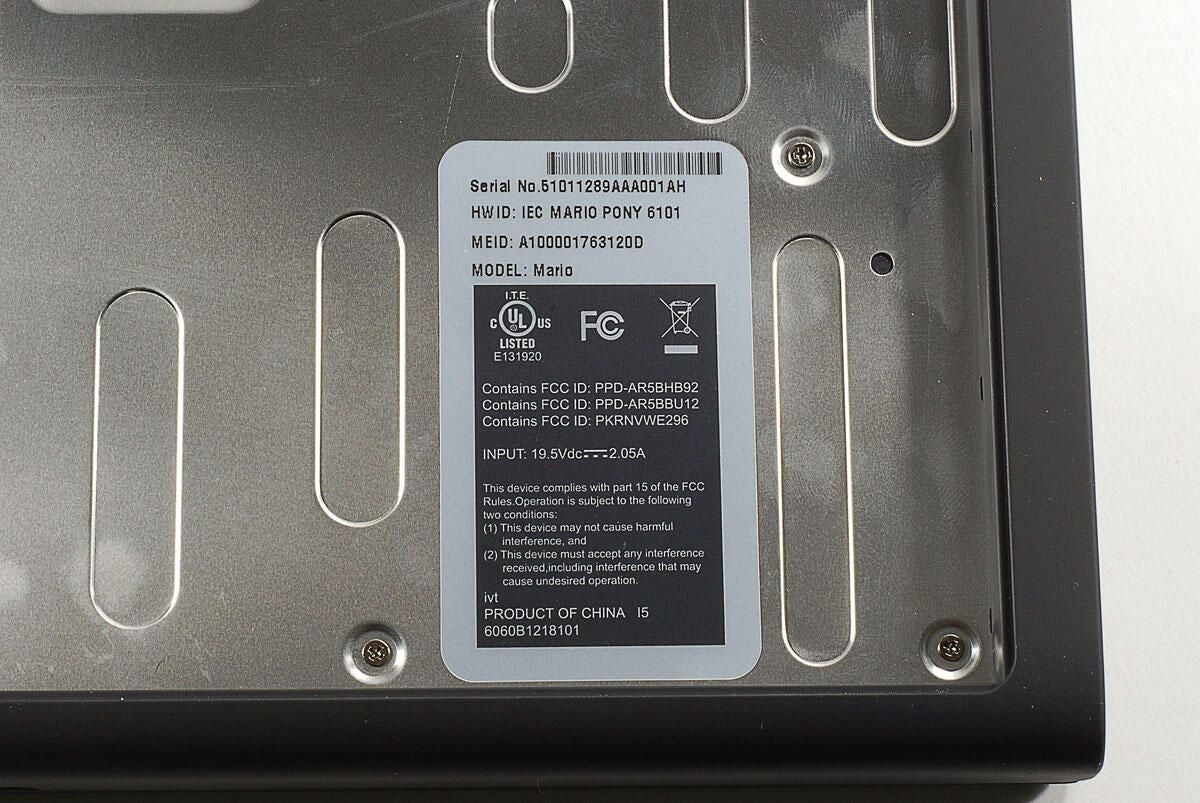
According to various reports, Google has been internally testing Chrome OS on specially designed machines codenamed “Mario” or “Andretti”–after the famous Formula One driver Mario Andretti. Although Google is officially calling these machines the Cr-48 Chrome notebook, the Mario codename is located throughout the device. Cr-48 reportedly refers to a particularly unstable Chromium isotope.
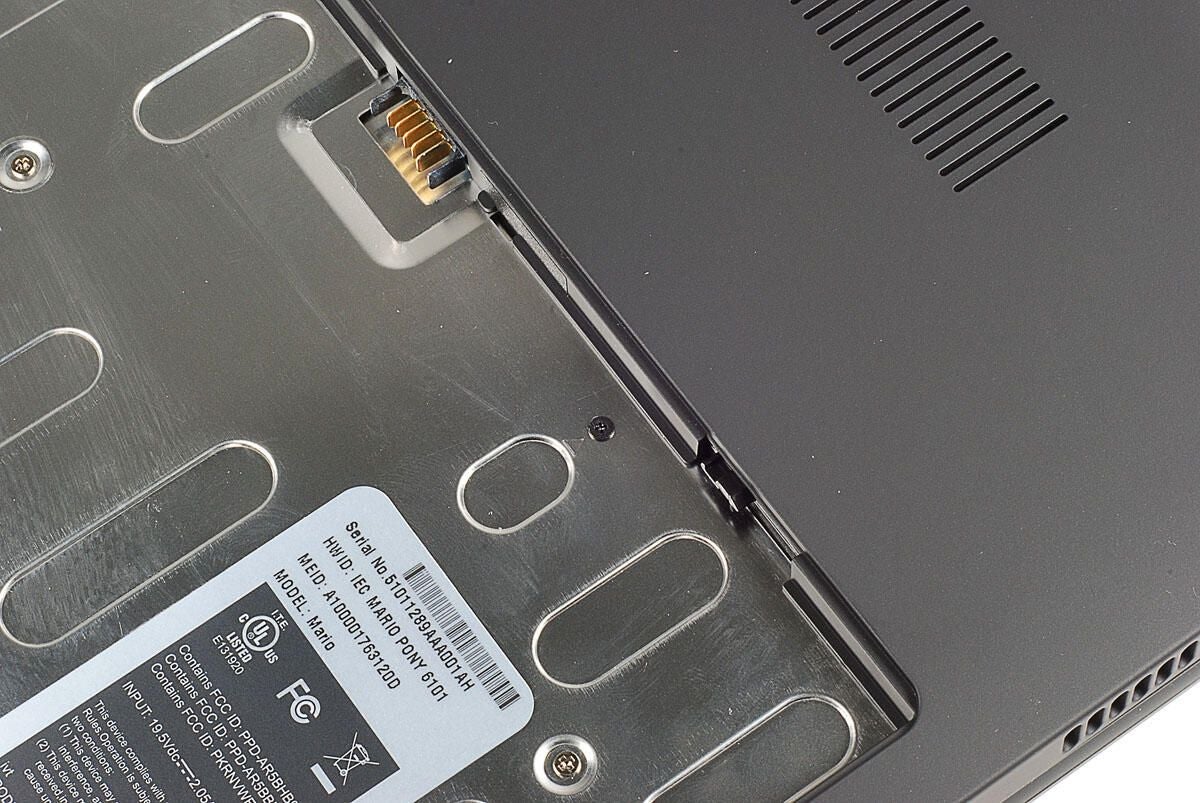
Our test unit has the hardware ID: IEC MARIO PONY 6101
Photo by: Bill Detwiler / TechRepublic
Caption by: Bill Detwiler
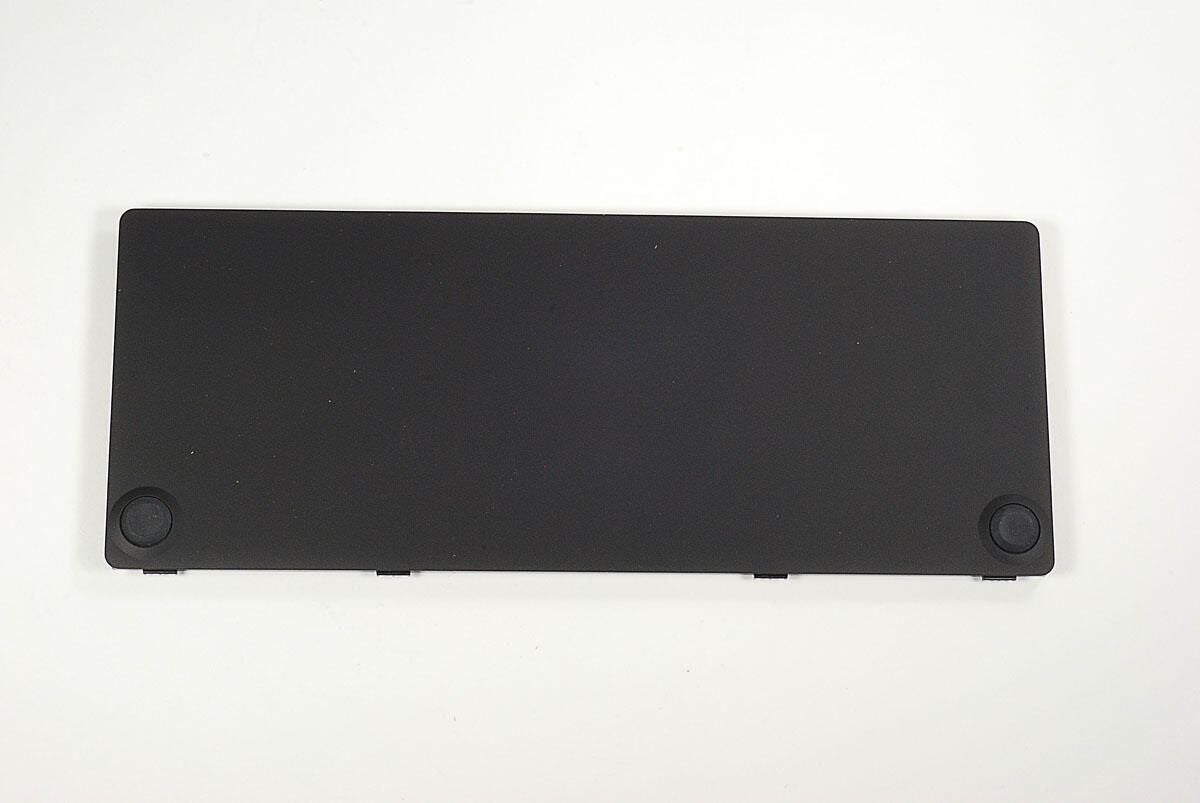
The Cr-48 Chrome notebook’s battery has two of the unit’s rubber feet attached to its outer edge.
Photo by: Bill Detwiler / TechRepublic
Caption by: Bill Detwiler
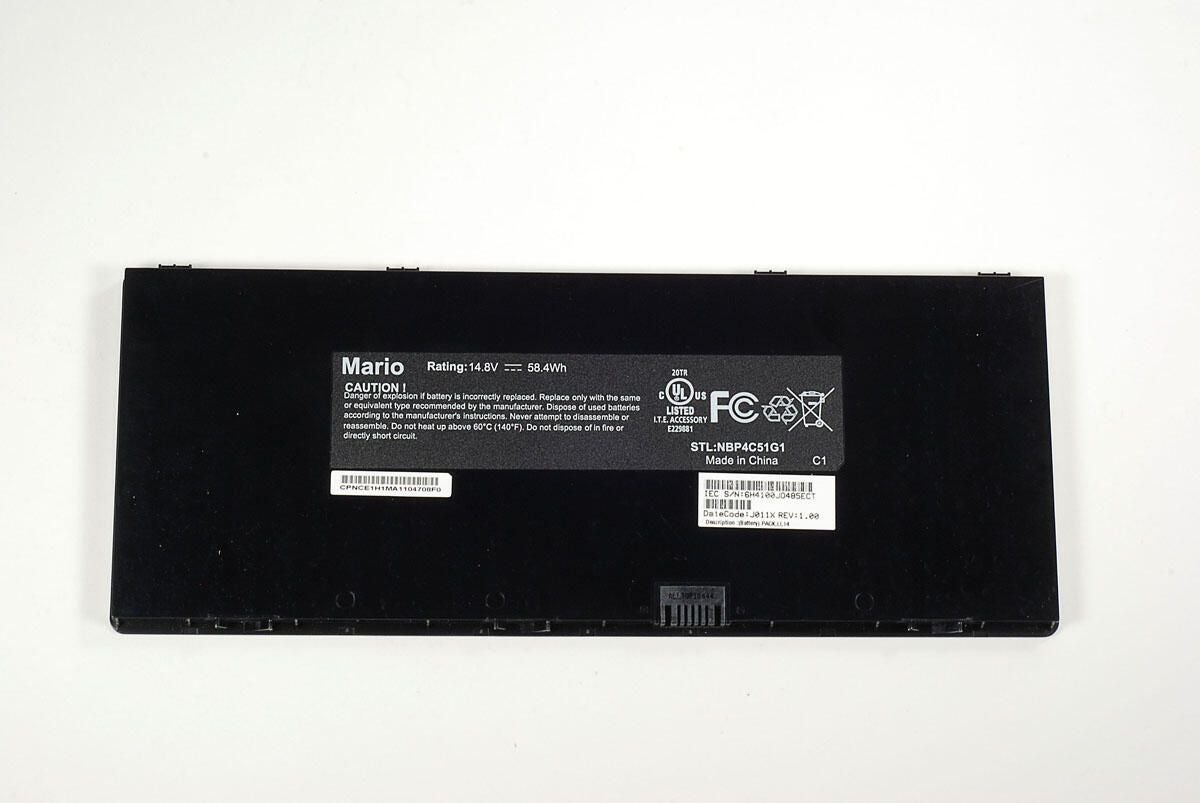
The Cr-48 Chrome notebook uses a 14.8V 58.4Whr battery.
Photo by: Bill Detwiler / TechRepublic
Caption by: Bill Detwiler

Photo by: Bill Detwiler / TechRepublic
Caption by: Bill Detwiler
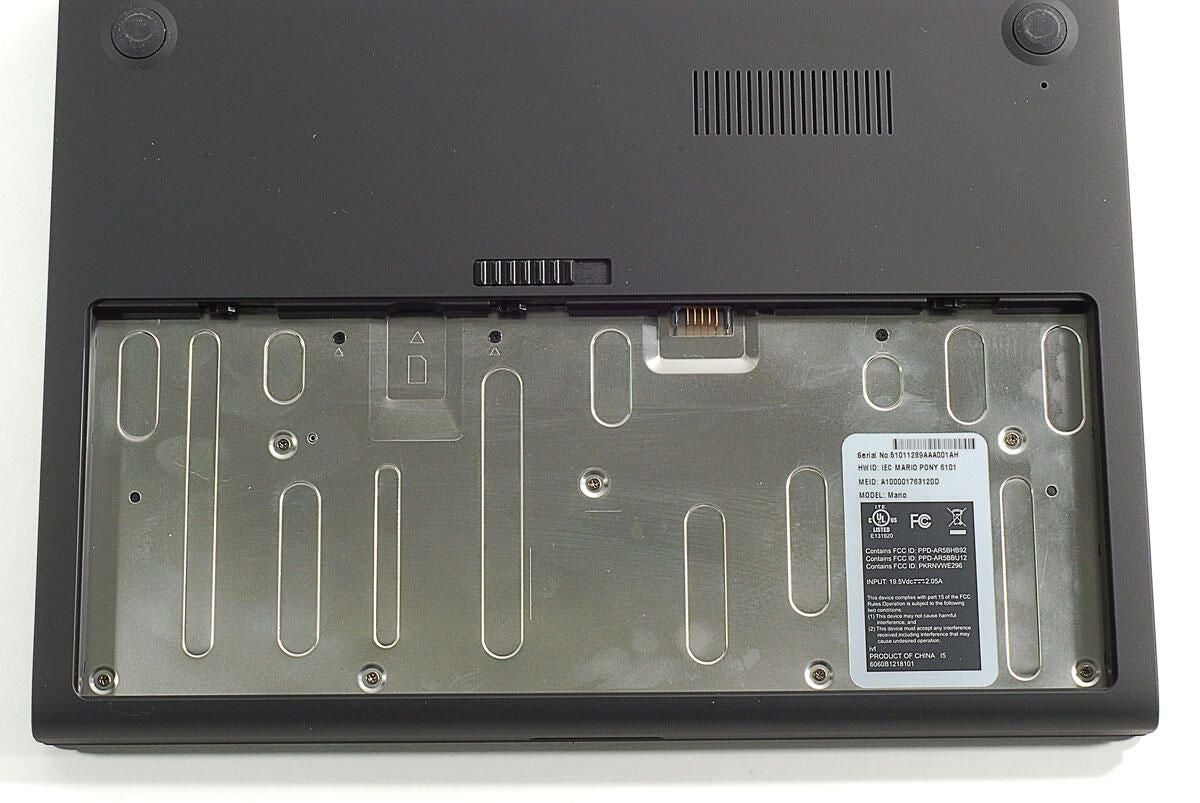
Our first step in disassembling the Google’s Cr-49 chrome notebook is removing the silver and black screws accessible through the battery compartment. Thankfully they are standard Phillips screw–no annoying tamper-resistant Torx or Tri-wing screws to deal with.
Photo by: Bill Detwiler / TechRepublic
Caption by: Bill Detwiler
There are three black screws visible in the Cr-48 Chrome notebook’s battery compartment.
Photo by: Bill Detwiler / TechRepublic
Caption by: Bill Detwiler
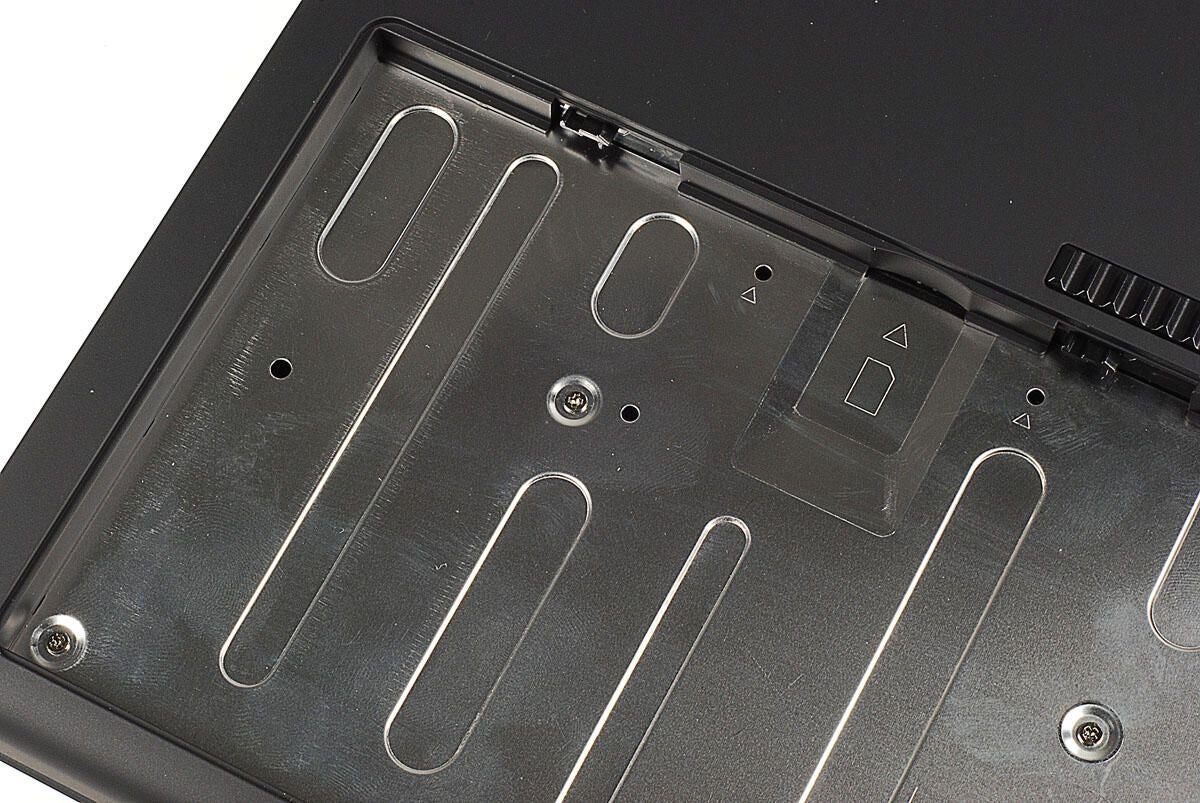
There are seven silver screws visible in the Cr-48 Chrome notebook’s battery compartment.
Photo by: Bill Detwiler / TechRepublic
Caption by: Bill Detwiler
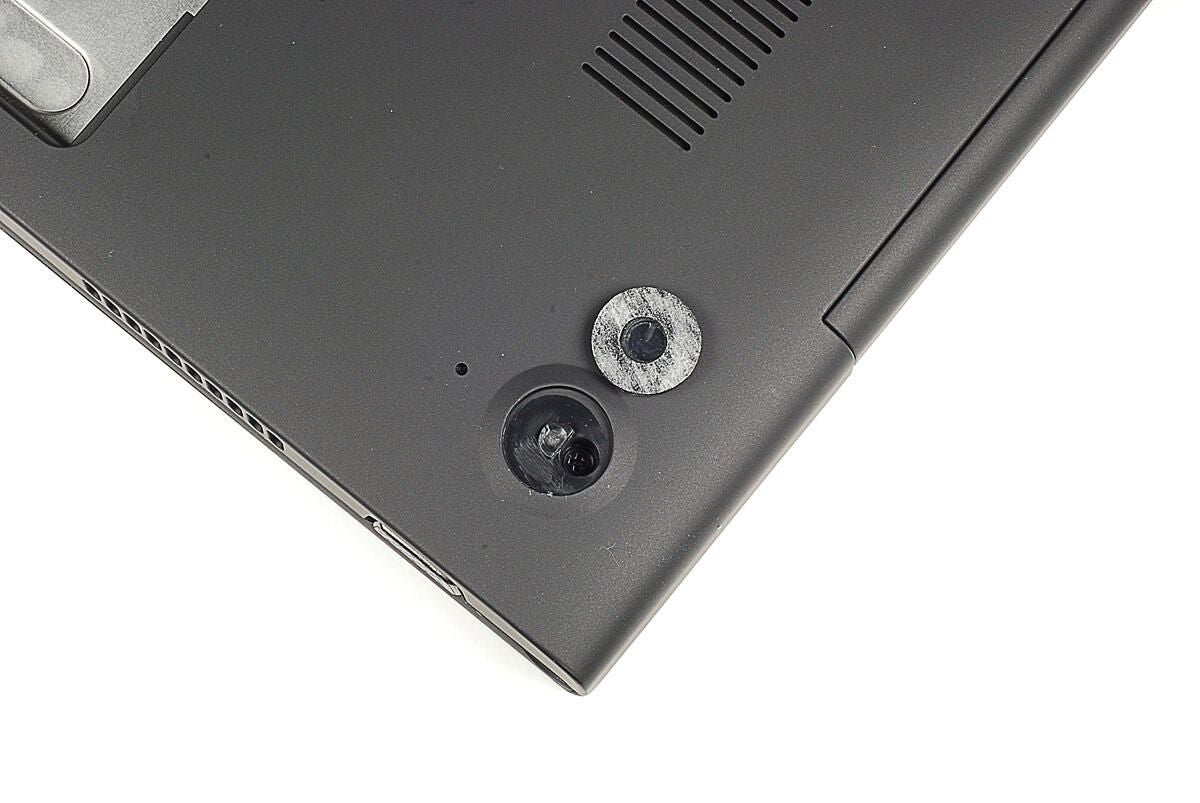
One screw is also hidden under each of the rubber feet on the base of the Cr-48 Chrome notebook.
Photo by: Bill Detwiler / TechRepublic
Caption by: Bill Detwiler
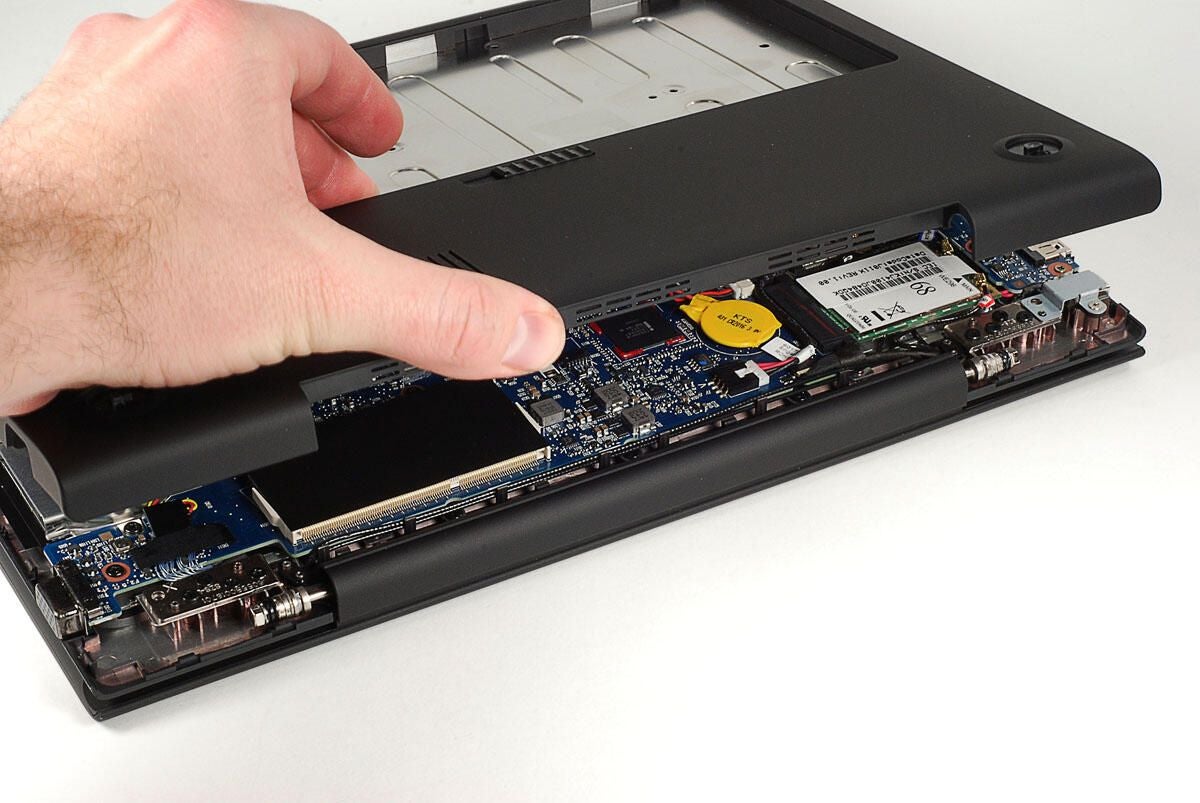
With the screws removed, you can remove the Cr-48’s bottom case panel. You’ll need to use a plastic case opening tool, thin metal blade, or a very strong finger nail to pop the bottom panel’s plastic tabs loose from the upper panel.
Photo by: Bill Detwiler / TechRepublic
Caption by: Bill Detwiler
Removing the bottom case panel pgives us our first look inside the Cr-48 Chrome notebook.
Photo by: Bill Detwiler / TechRepublic
Caption by: Bill Detwiler
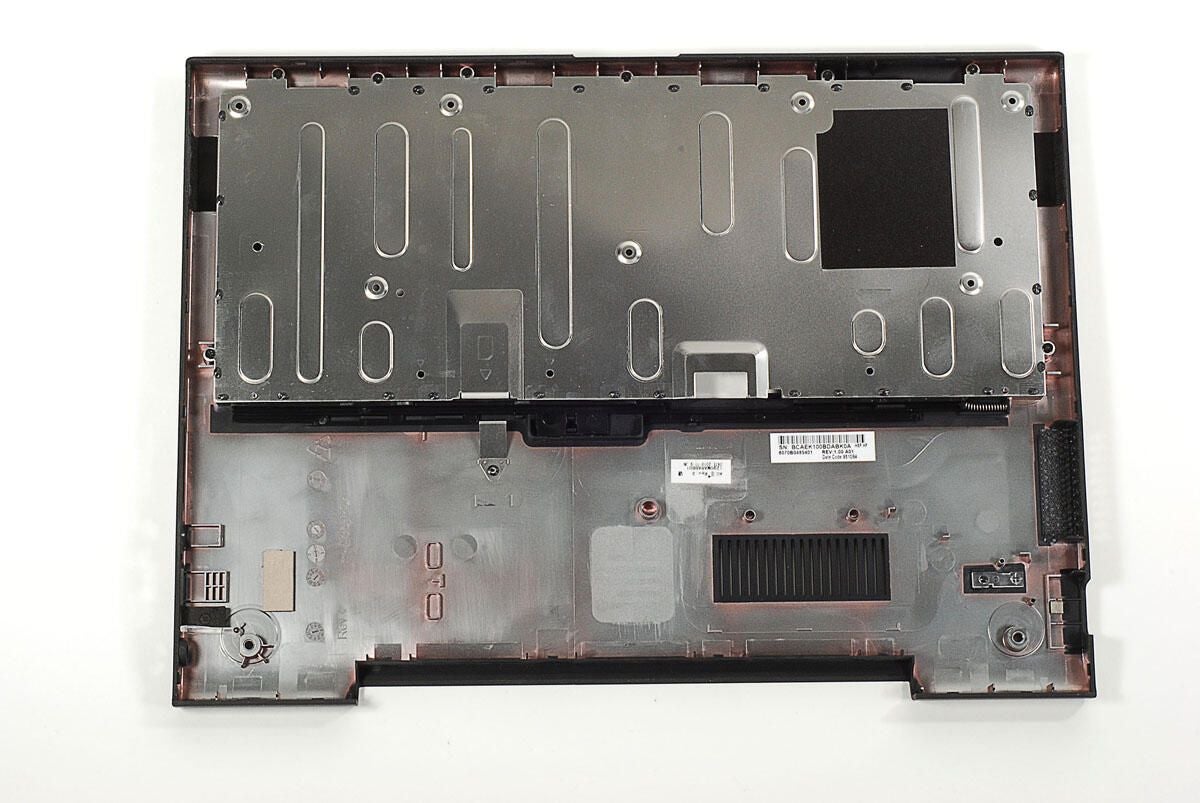
Photo by: Bill Detwiler / TechRepublic
Caption by: Bill Detwiler
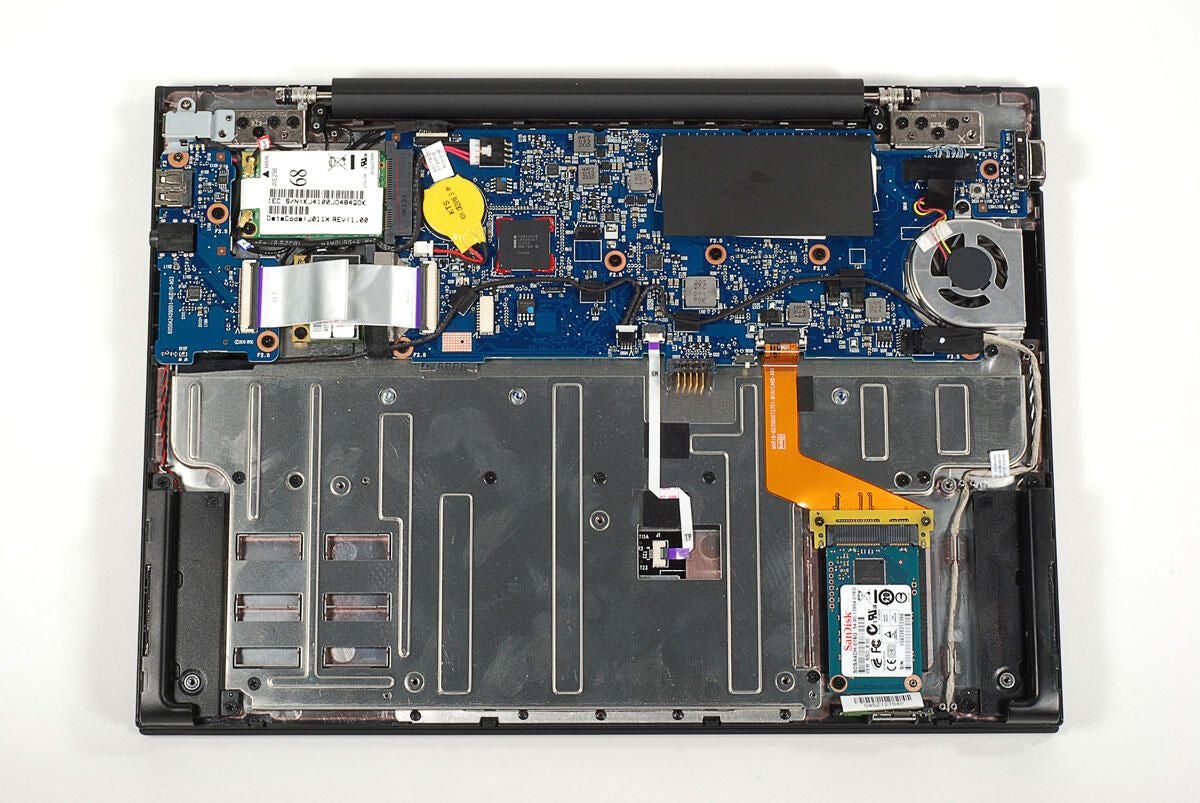
At first glance, the inside of the Cr-48 reminds me of the 13-inch MacBook Air. The Cr-48 has a rectangular motherboard at the back near the lid hinges and an SSD instead of a traditional hard drive.
Let’s look at the SSD first.
Photo by: Bill Detwiler / TechRepublic
Caption by: Bill Detwiler
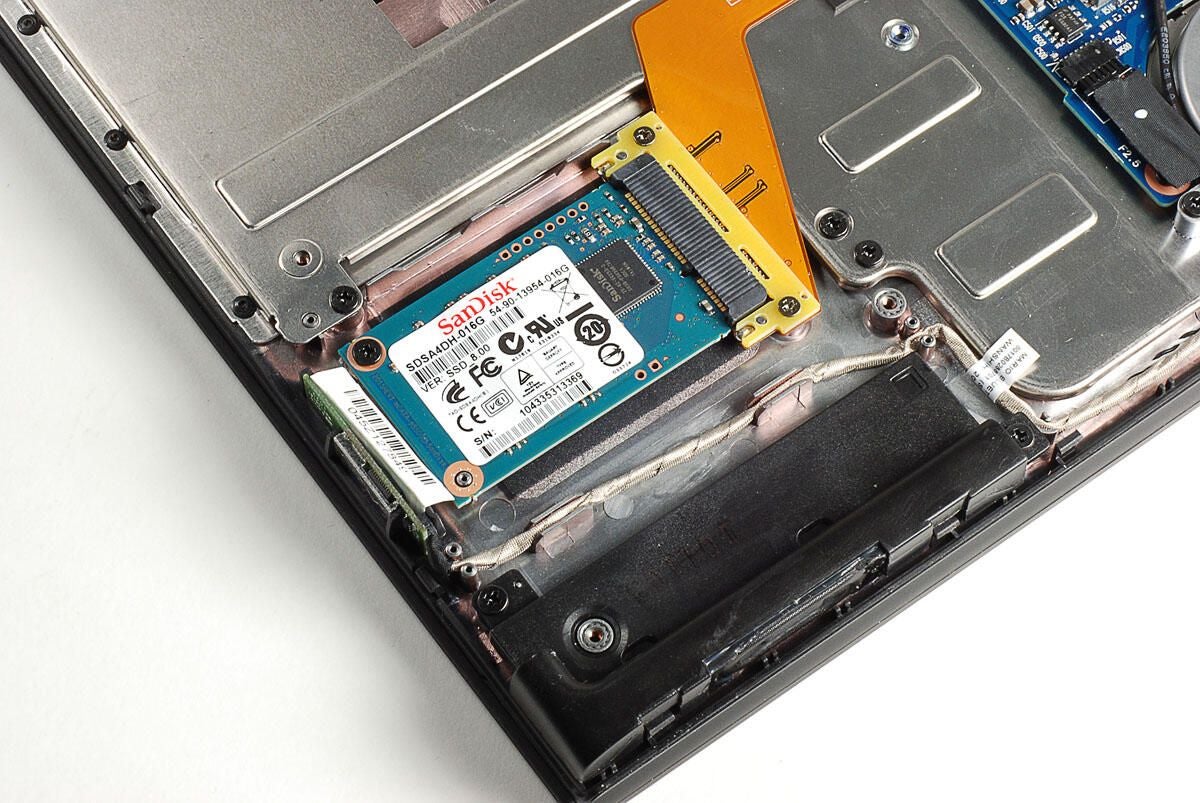
Our Cr-48 Chrome notebook had a 16GB Sandisk SSD (SDSA4DH-016G), which was mounted in a spot that looks like it could have been used to house a traditional laptop hard drive. In contrast, the MacBook Air’s SDD is attached directly to the motherboard.
Photo by: Bill Detwiler / TechRepublic
Caption by: Bill Detwiler
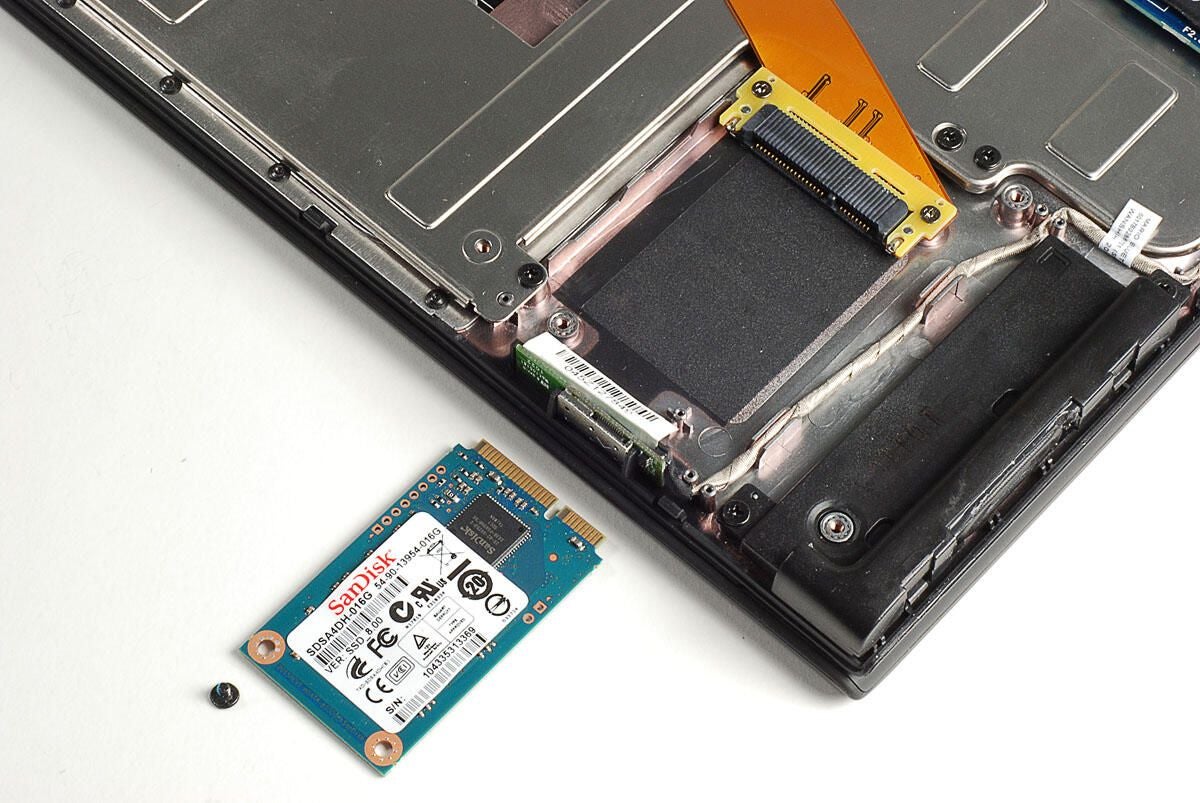
A single Phillips screw holds the SanDisk SSD in place.
Photo by: Bill Detwiler / TechRepublic
Caption by: Bill Detwiler
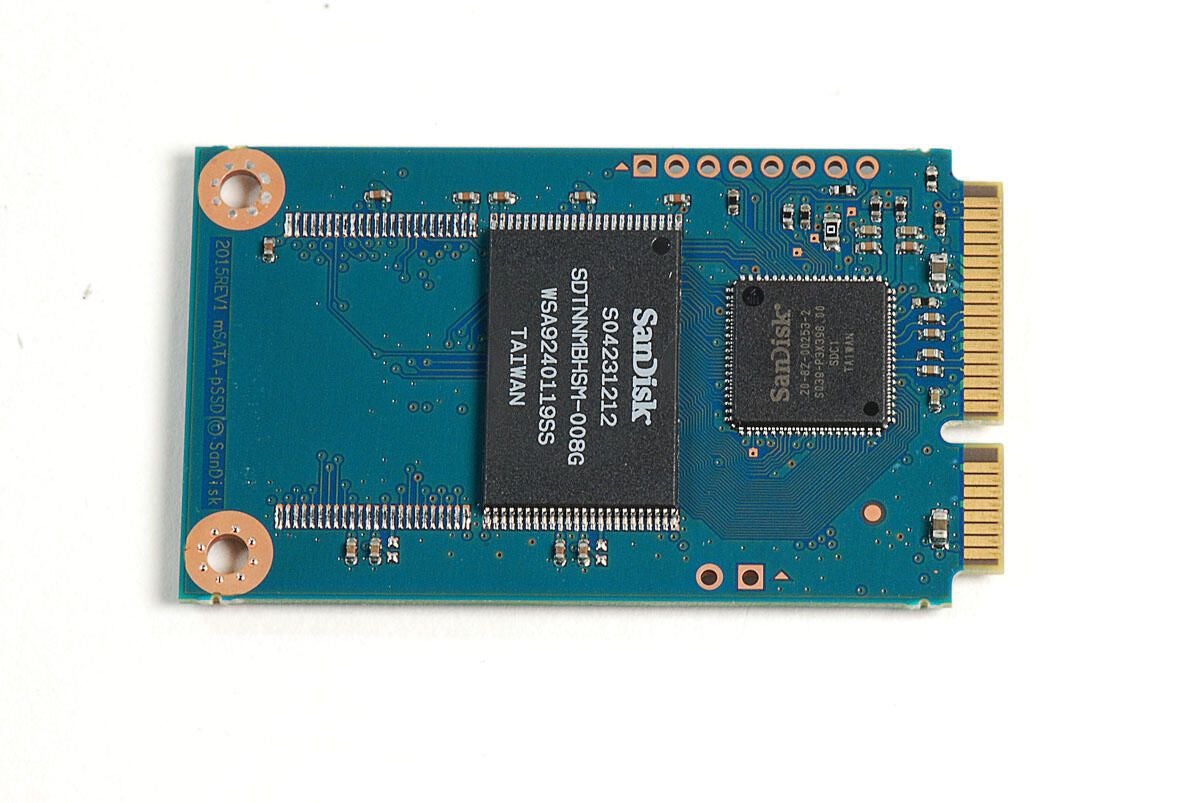
With the stickers removed from the SanDisk SSD, we get a better look at the drive’s chips. The controller chip and an 8GB memory chip are located on the top of the SSD.
Photo by: Bill Detwiler / TechRepublic
Caption by: Bill Detwiler
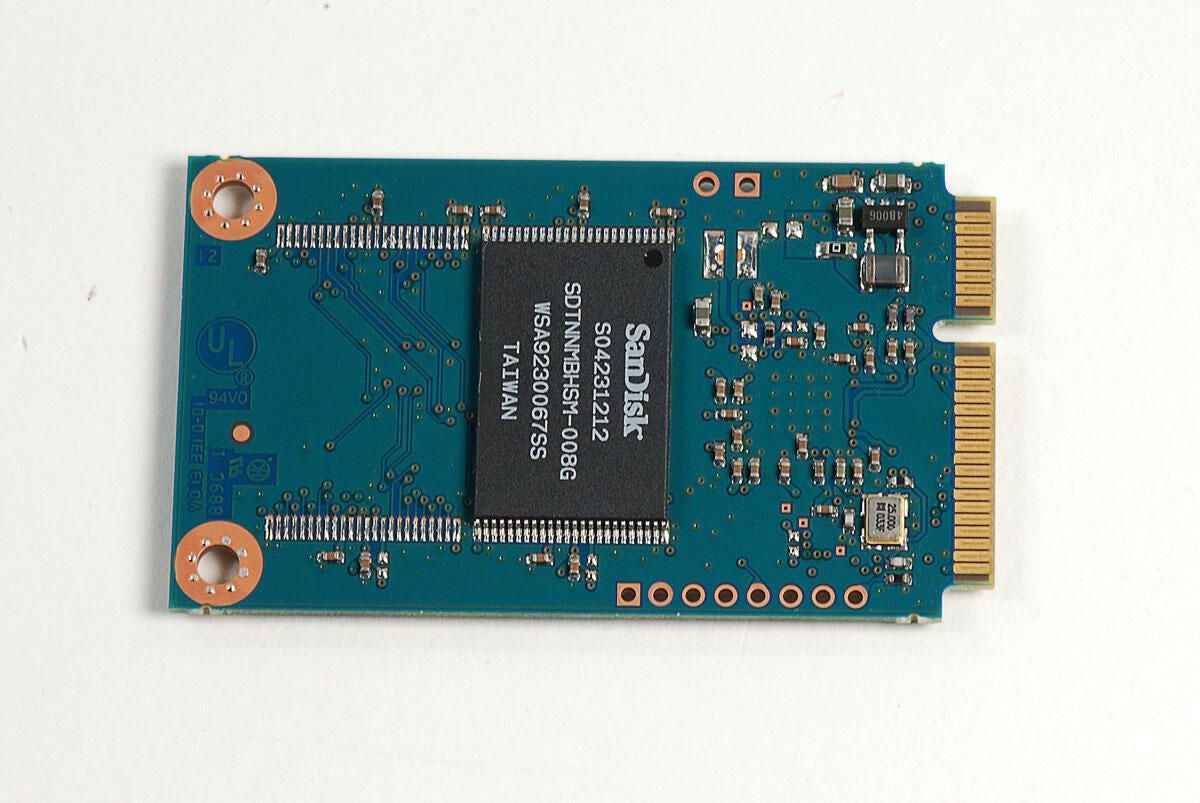
A single memory ship is located on the bottom of the SanDisk SSD.
Photo by: Bill Detwiler / TechRepublic
Caption by: Bill Detwiler
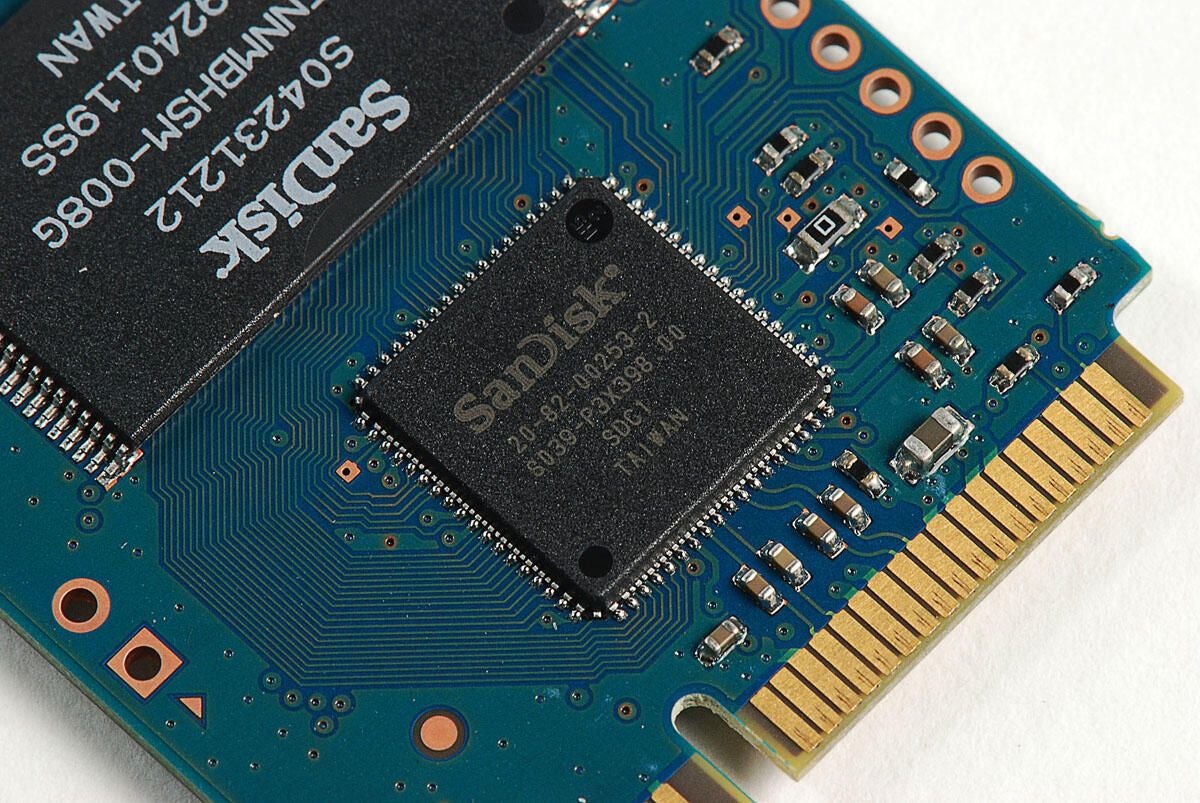
This chip is the SanDisk SSD’s controller. It has the following markings:
20-82-00253-2
S039-P3X398.00
SDC1
TAIWAN
Photo by: Bill Detwiler / TechRepublic
Caption by: Bill Detwiler
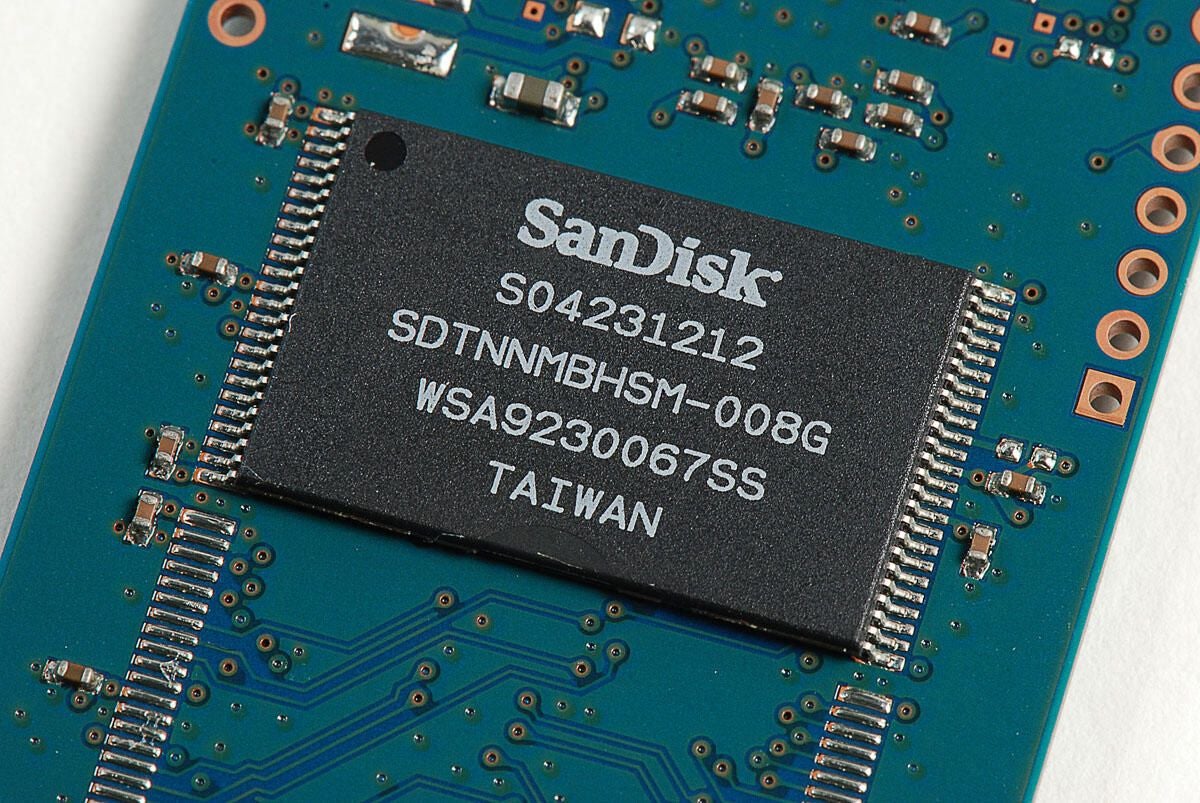
The SanDisk SDD in our Cr-48 Chrome notebook had two, 8GB memory chips with the following markings:
S04231212
SDTNNMBHSM-008G
Photo by: Bill Detwiler / TechRepublic
Caption by: Bill Detwiler
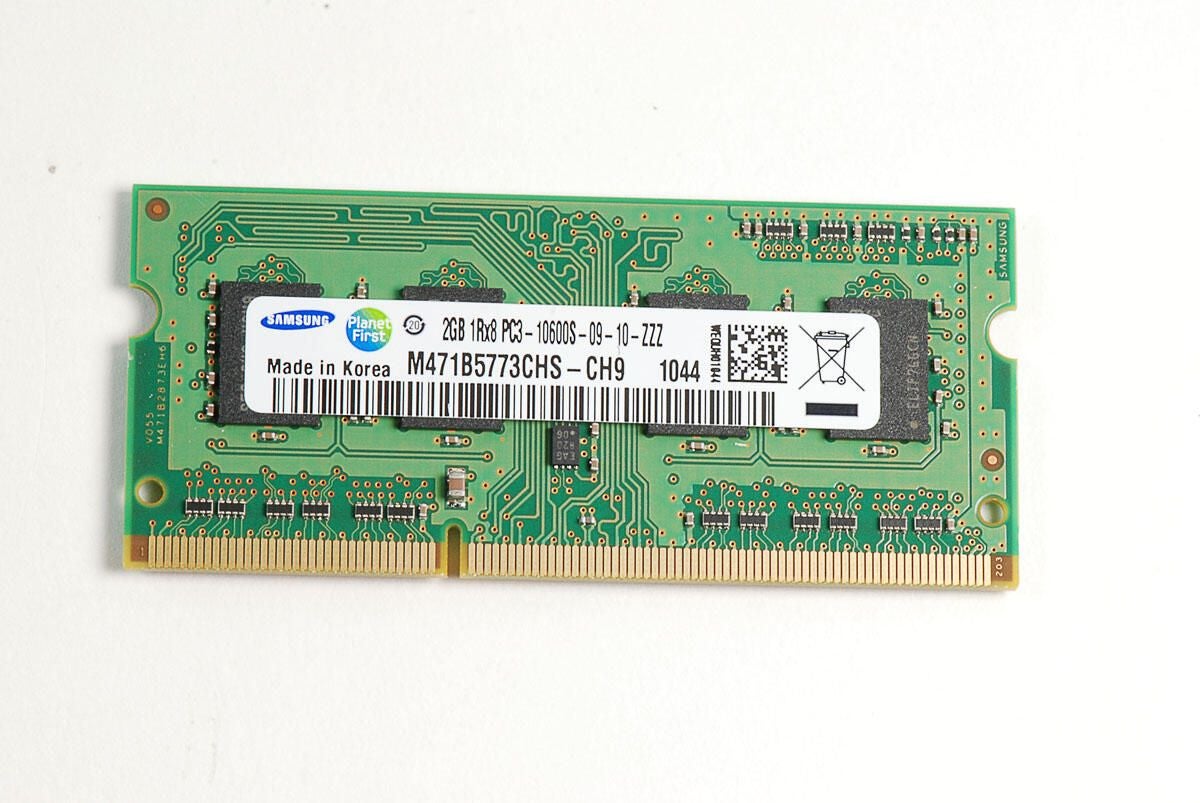
Our Cr-48 machine contained a single Samsung 2GB 1Rx8 PC3-10600S memory module. Given that the Chrome notebook is designed to run application from the web, I can understand why Google would only include 2GB of RAM. Still, it would have been nice to see 4GB.
Photo by: Bill Detwiler / TechRepublic
Caption by: Bill Detwiler
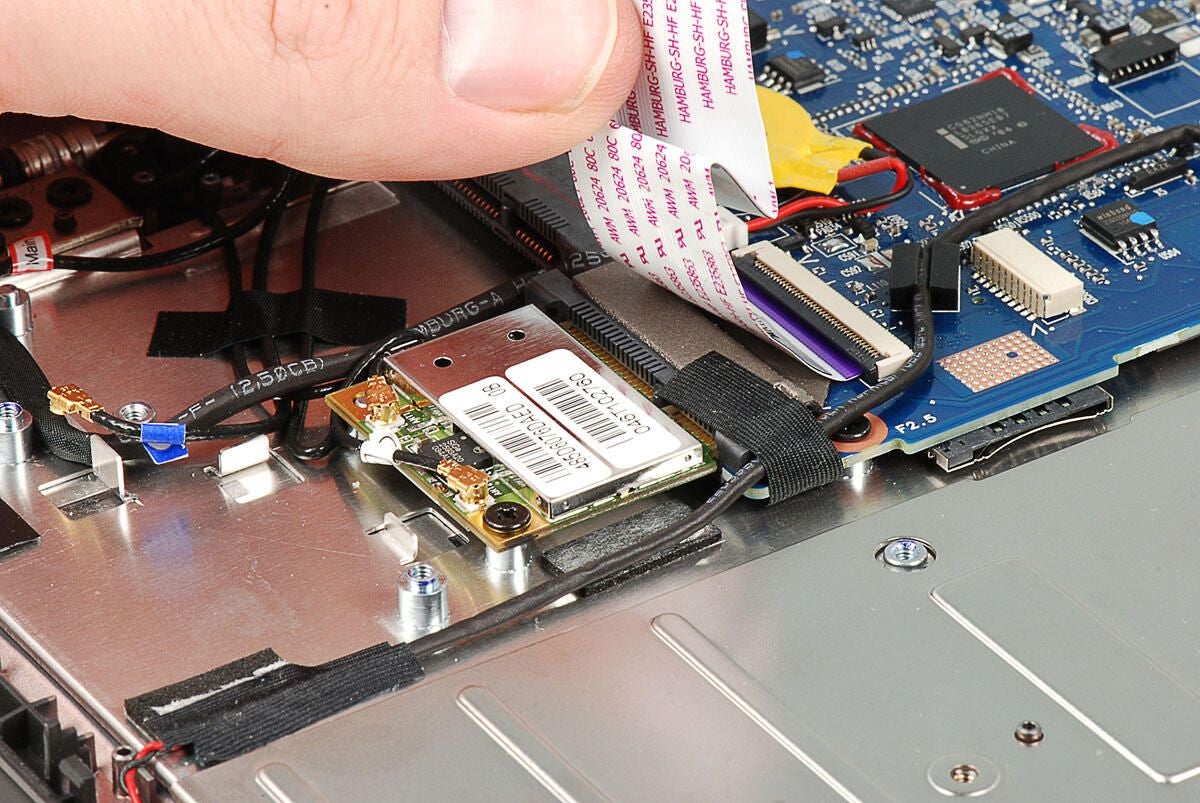
As previously noted, the Cr-48 Chrome notebook comes with two years of free access to Verizon’s 3G network in the US. This Qualcomm Gobi2000 card provides that access. According Qualcomm, the “Gobi2000 delivers multi-mode 3G mobile Internet access on either HSPA or CDMA2000 EV-DO networks.”
Photo by: Bill Detwiler / TechRepublic
Caption by: Bill Detwiler
To remove the Qualcomm Gobi2000 wireless card, you’ll need to disconnect the two antenna cables and remove a single Phillips screw.
Photo by: Bill Detwiler / TechRepublic
Caption by: Bill Detwiler
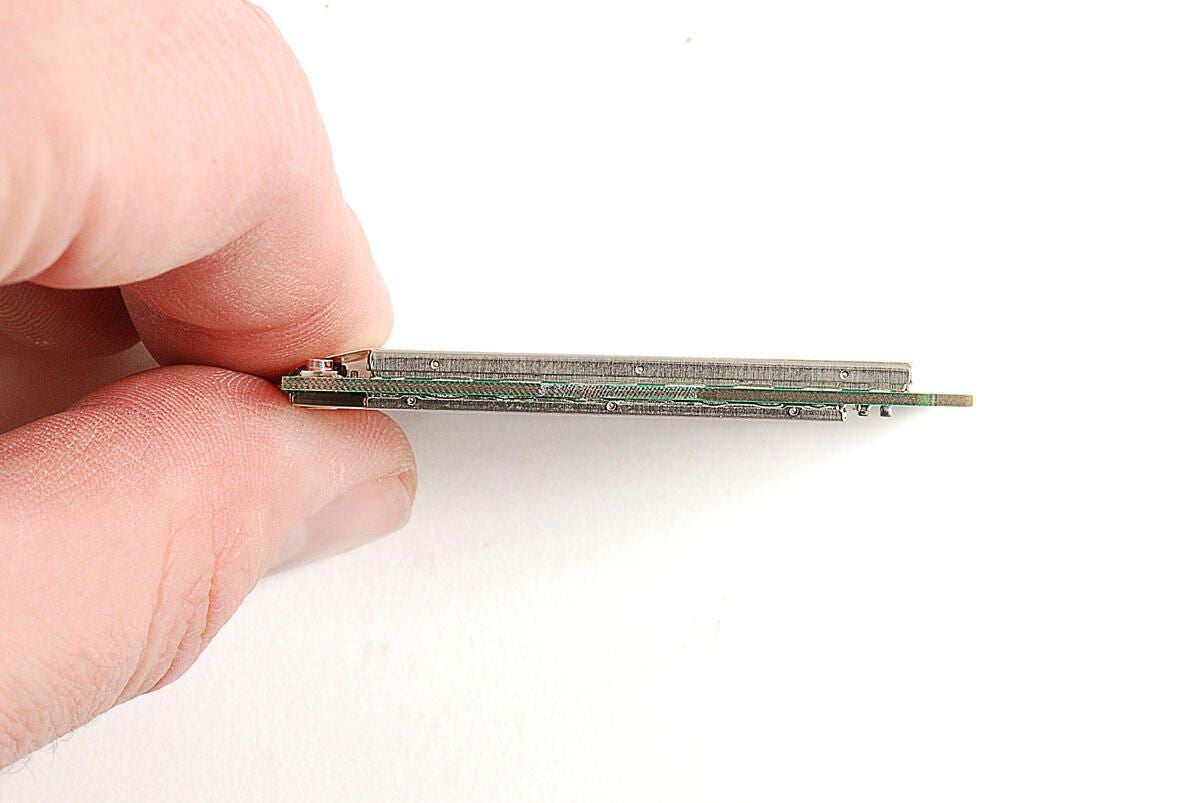
The chips on the Gobi2000 card are protected by EMI shields. We’ll need to pop these shields offer to see the chips.
Photo by: Bill Detwiler / TechRepublic
Caption by: Bill Detwiler
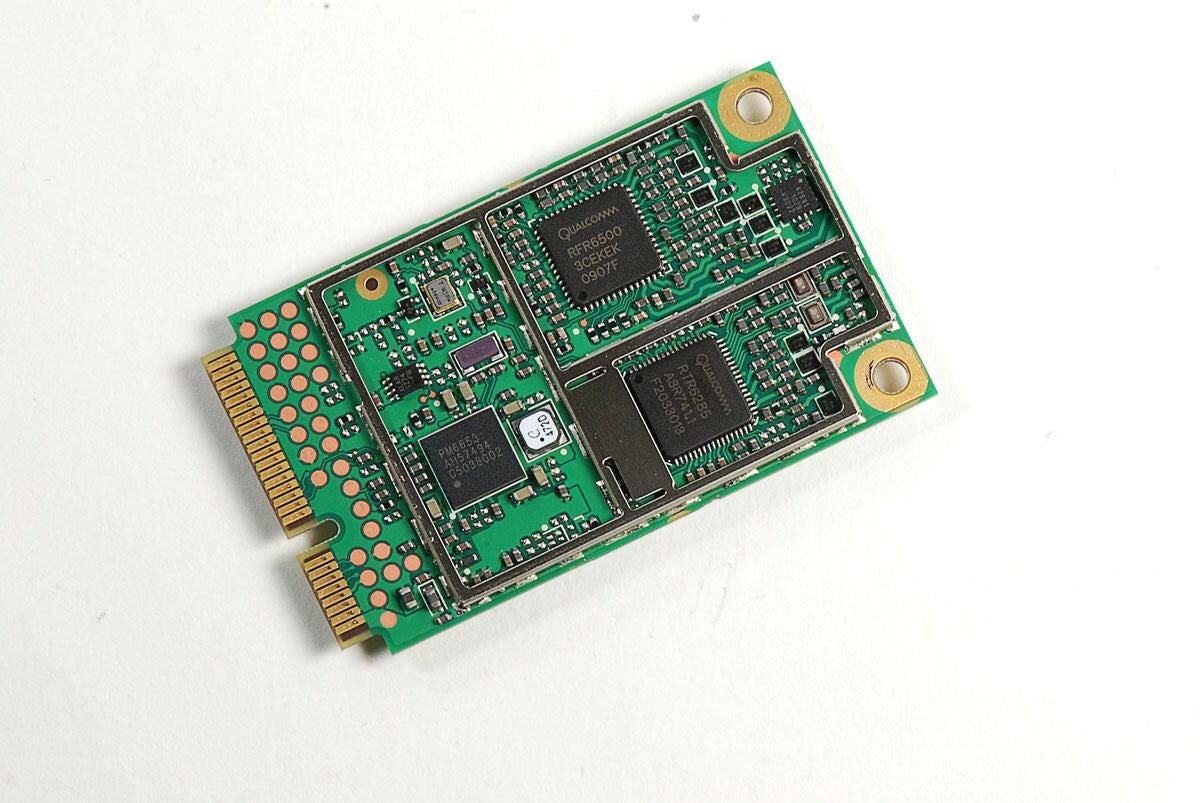
Photo by: Bill Detwiler / TechRepublic
Caption by: Bill Detwiler
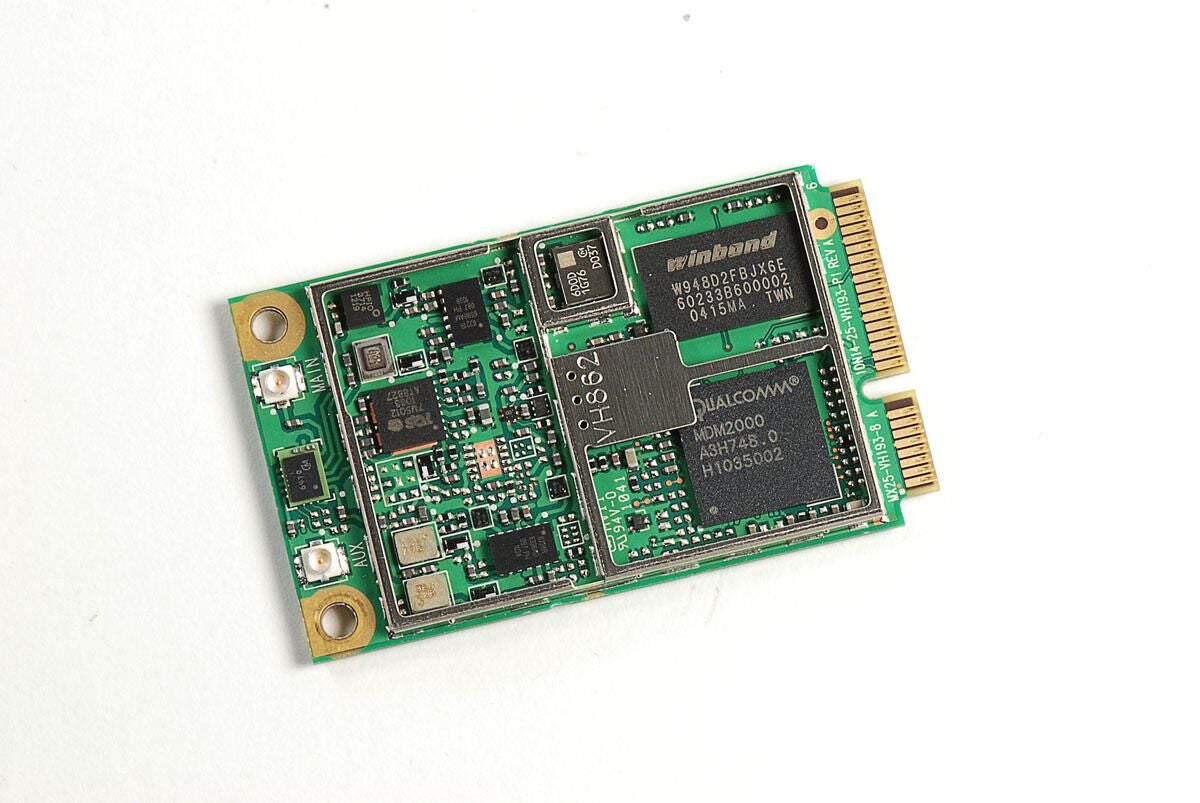
On the underside of the Qualcomm Gobi2000 card is a large chip for the Qualcomm MDM2000 chipset.
Photo by: Bill Detwiler / TechRepublic
Caption by: Bill Detwiler

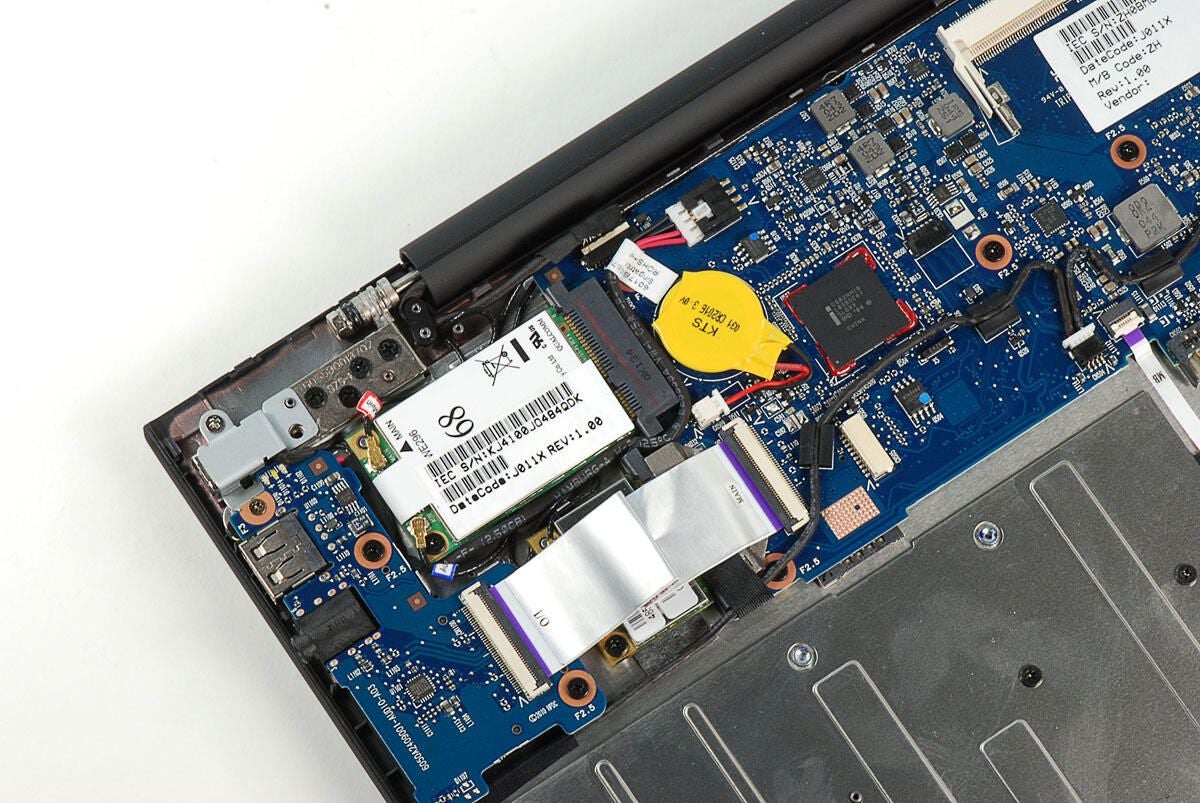
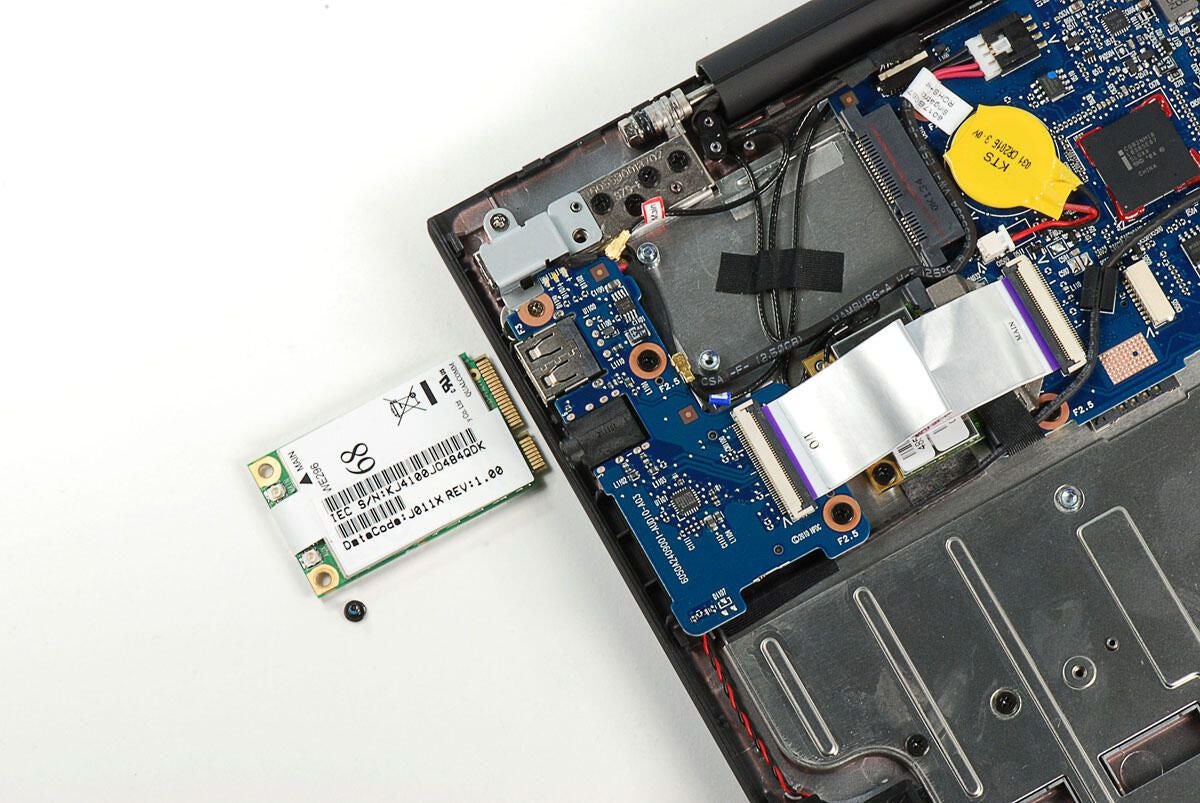
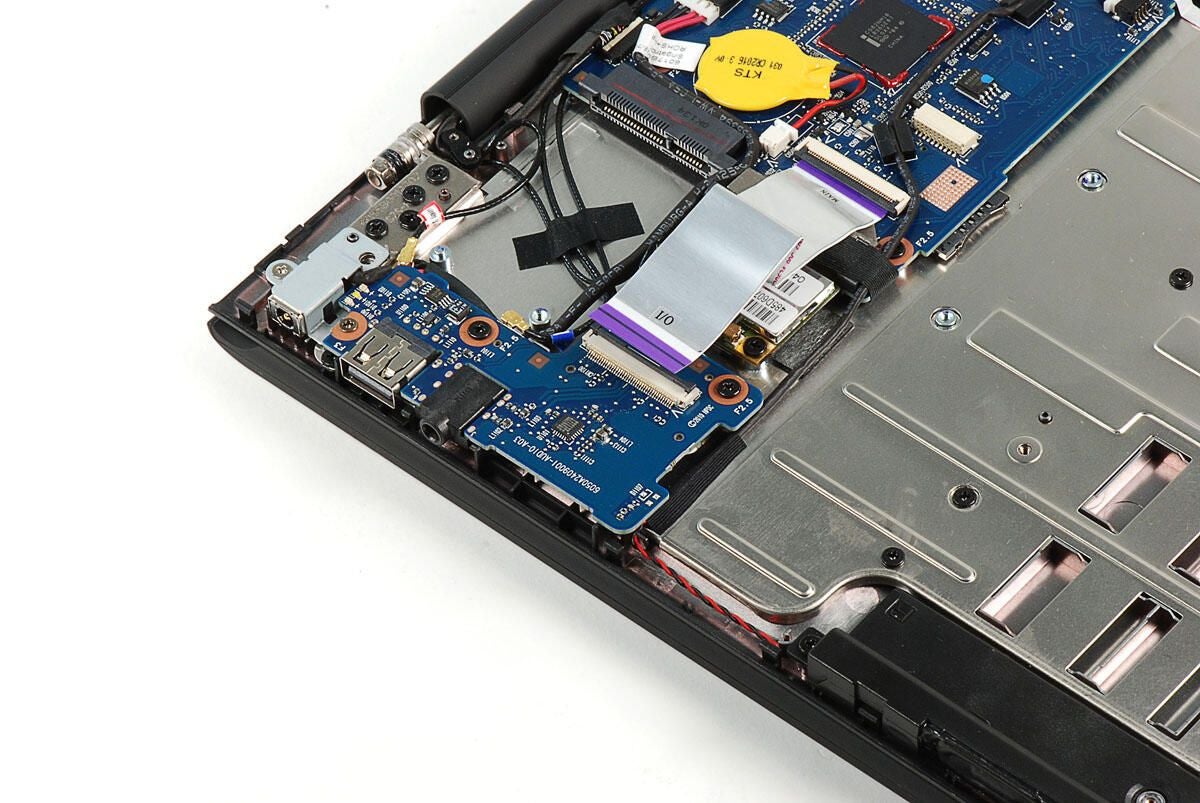
The next target in our teardown of the Cr-48 is the small PCB that contains the USB port and headphone jack.
Photo by: Bill Detwiler / TechRepublic
Caption by: Bill Detwiler
To remove the USB port and headphone jack PCB, we will need to disconnect the thin ribbon cable the connects it to the motherboard and remove three Phillips screws that hold it in place.
Photo by: Bill Detwiler / TechRepublic
Caption by: Bill Detwiler
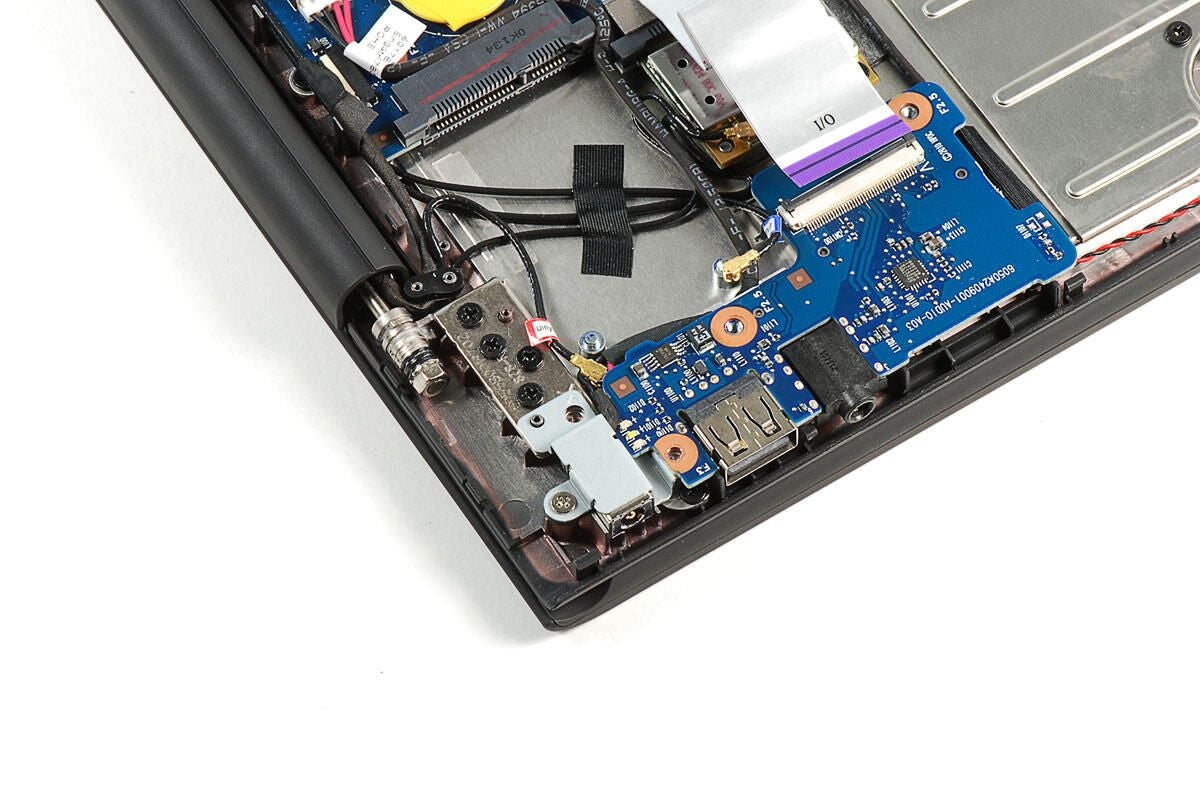
One of the screws that hold the small USB/headphone PCB in place also helps hold the power port in place. I’ll go ahead and remove the second power port screw to make removing the small PCB easier.
Photo by: Bill Detwiler / TechRepublic
Caption by: Bill Detwiler
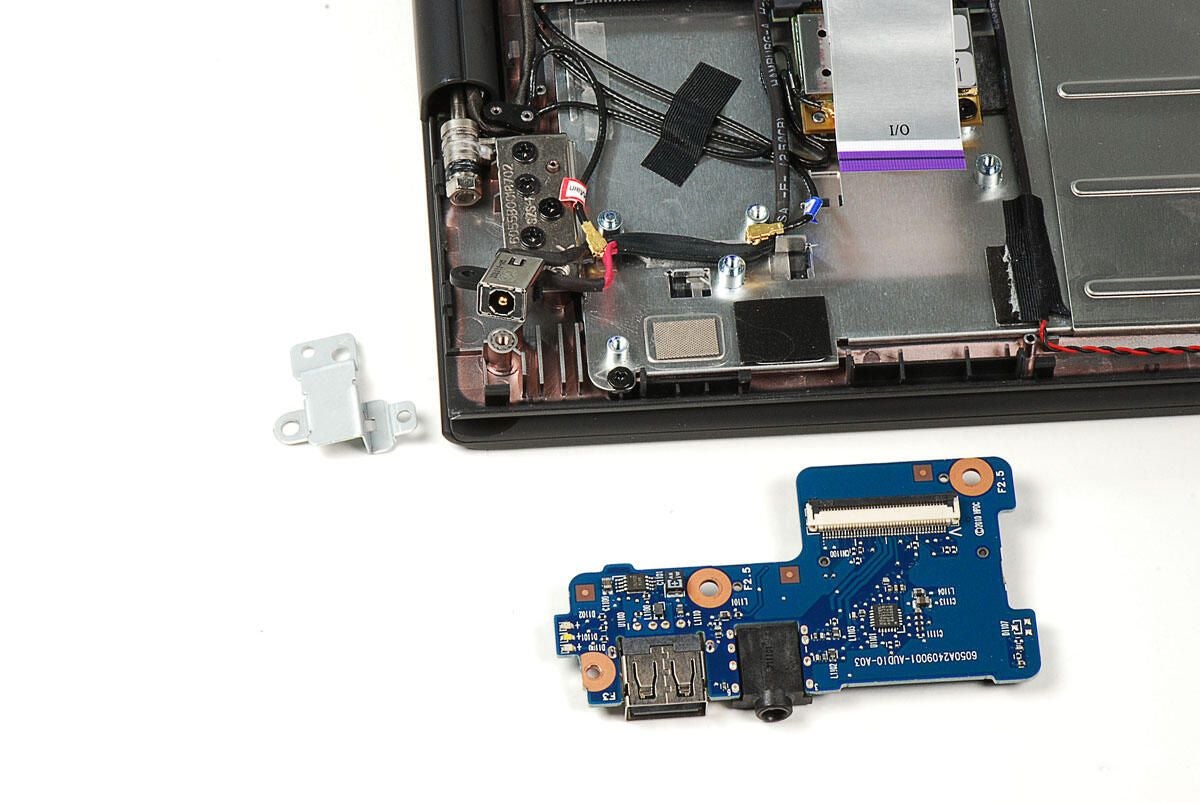
With all the screws removed and the ribbon cable disconnected, you can lift the small PCB away from the Cr-48’s case. I also removed the small metal bracket that covers the power port.
Photo by: Bill Detwiler / TechRepublic
Caption by: Bill Detwiler
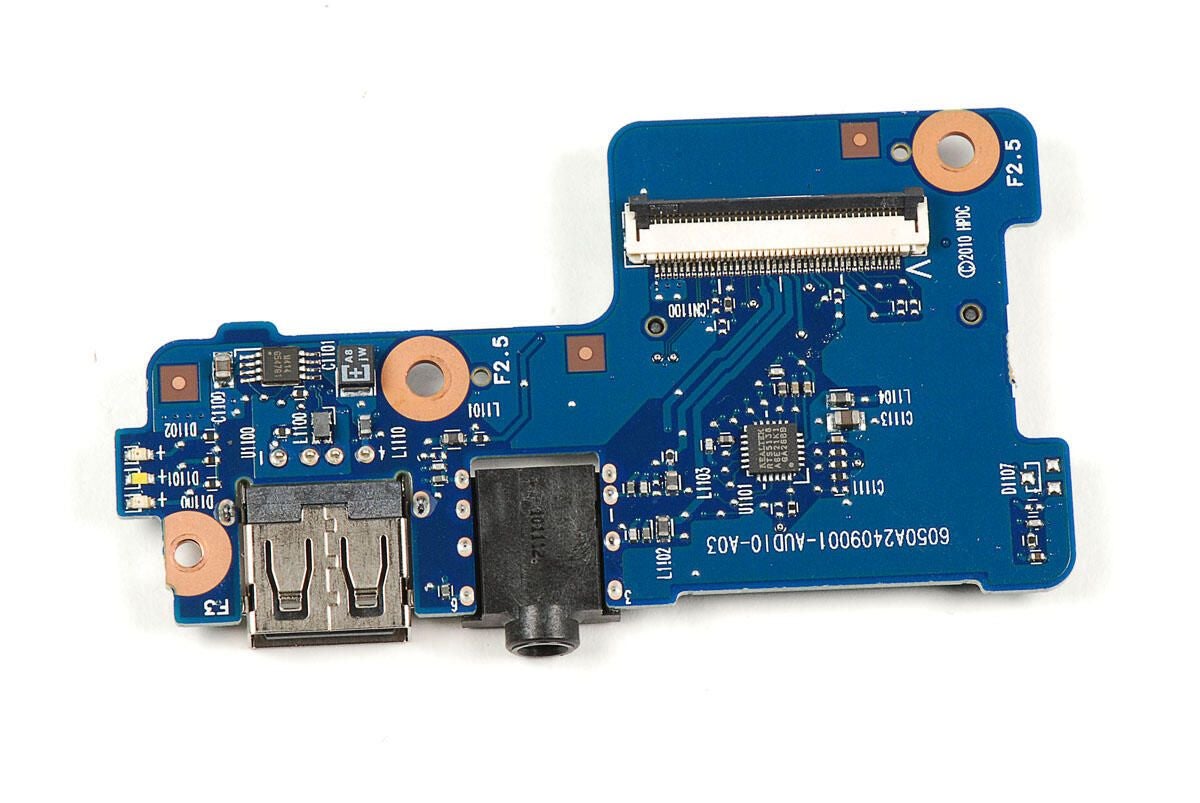
Photo by: Bill Detwiler / TechRepublic
Caption by: Bill Detwiler
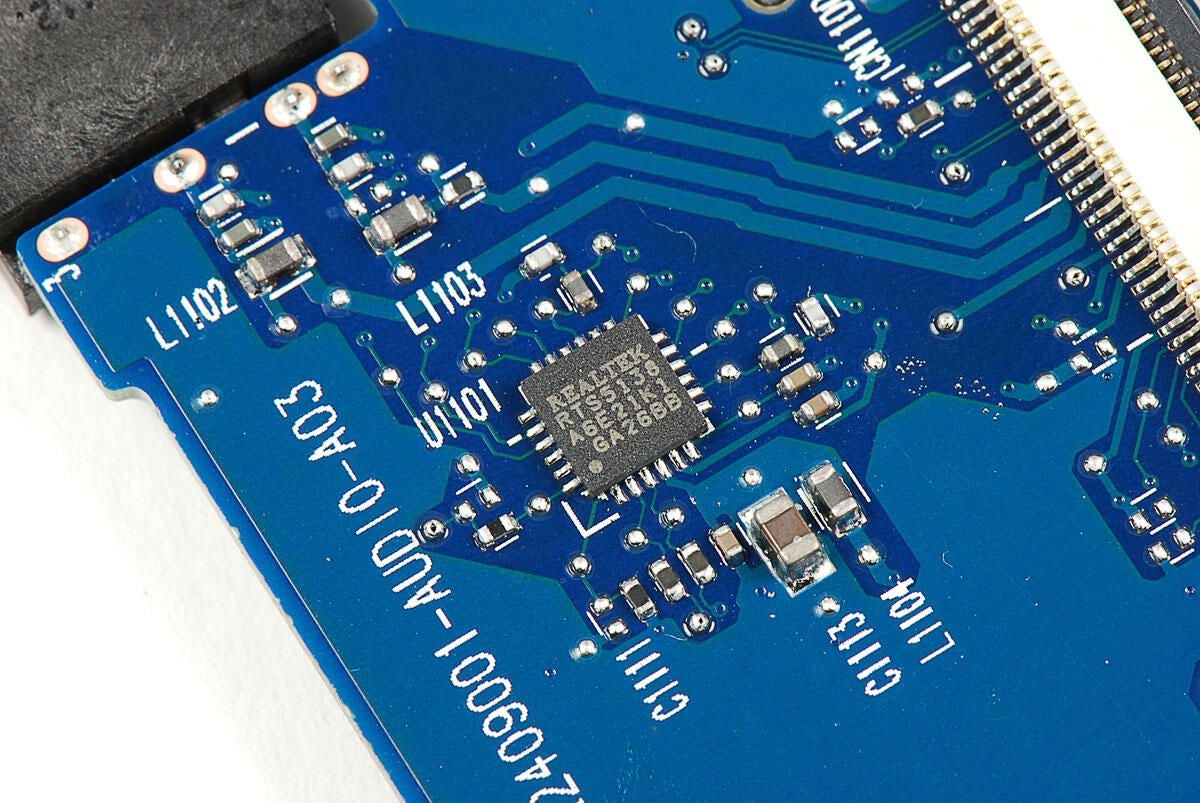
Realtek RTS5138 USB controller
Photo by: Bill Detwiler / TechRepublic
Caption by: Bill Detwiler

Misc. chip with markings M414 G547G1
Photo by: Bill Detwiler / TechRepublic
Caption by: Bill Detwiler

Photo by: Bill Detwiler / TechRepublic
Caption by: Bill Detwiler
The Cr-48 Chrome notebook has an Azurewave AW-NE773 Wi-Fi. It’s located under the thin ribbon cable the connects the small USB/headphone PCN to the motherboard. To remove the card, you’ll need to disconnect the two antenna cables and remove a single Phillips screw. Now is also a good time to remove the thin ribbon cable from the motherboard.
Photo by: Bill Detwiler / TechRepublic
Caption by: Bill Detwiler
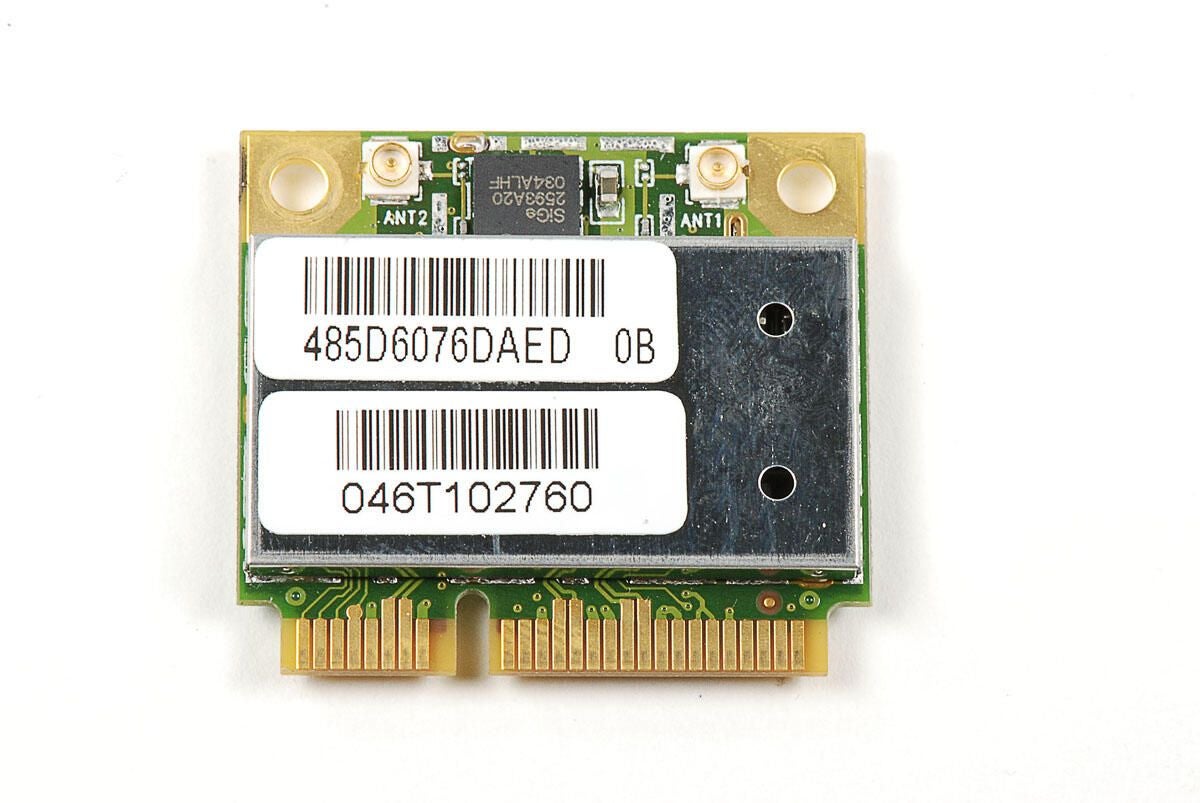
Photo by: Bill Detwiler / TechRepublic
Caption by: Bill Detwiler
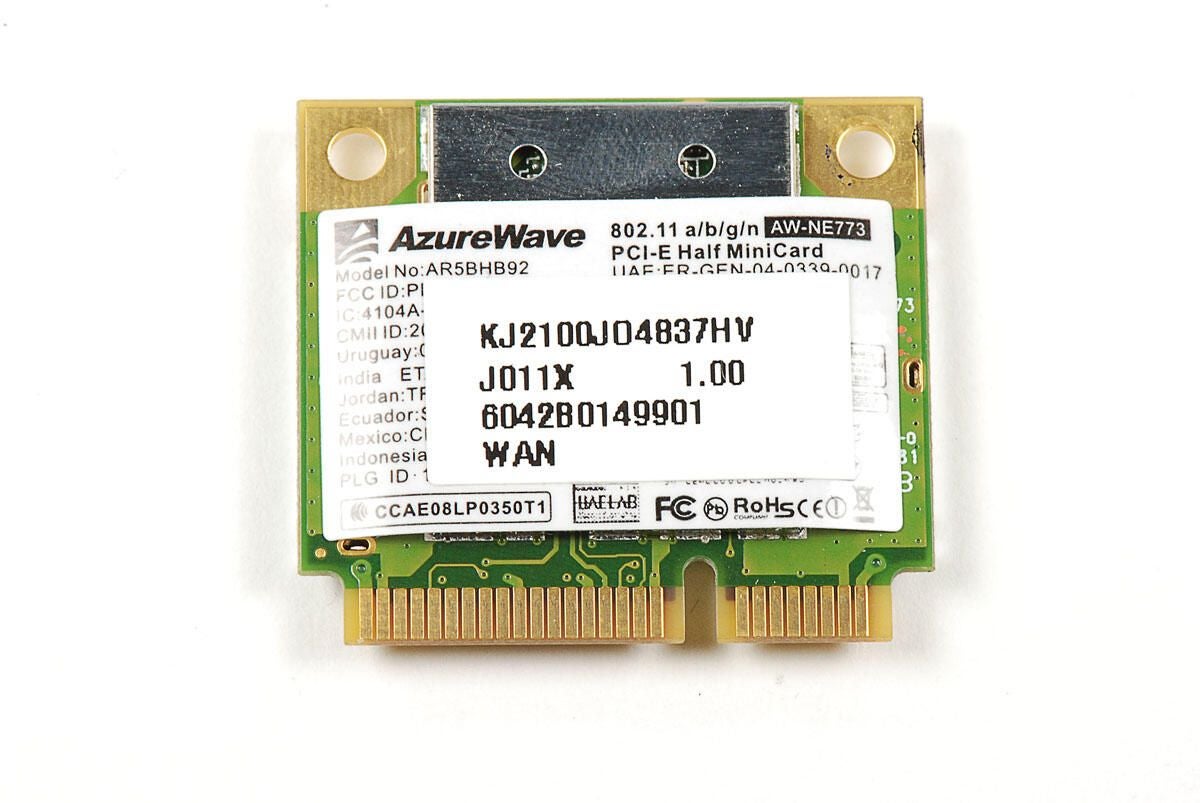
The AW-NE773 IEEE 802.11 a/b/g/n Wireless Mini PCI-Express Module is likely the latest version Azzurewave AW-NE770 module.
Photo by: Bill Detwiler / TechRepublic
Caption by: Bill Detwiler
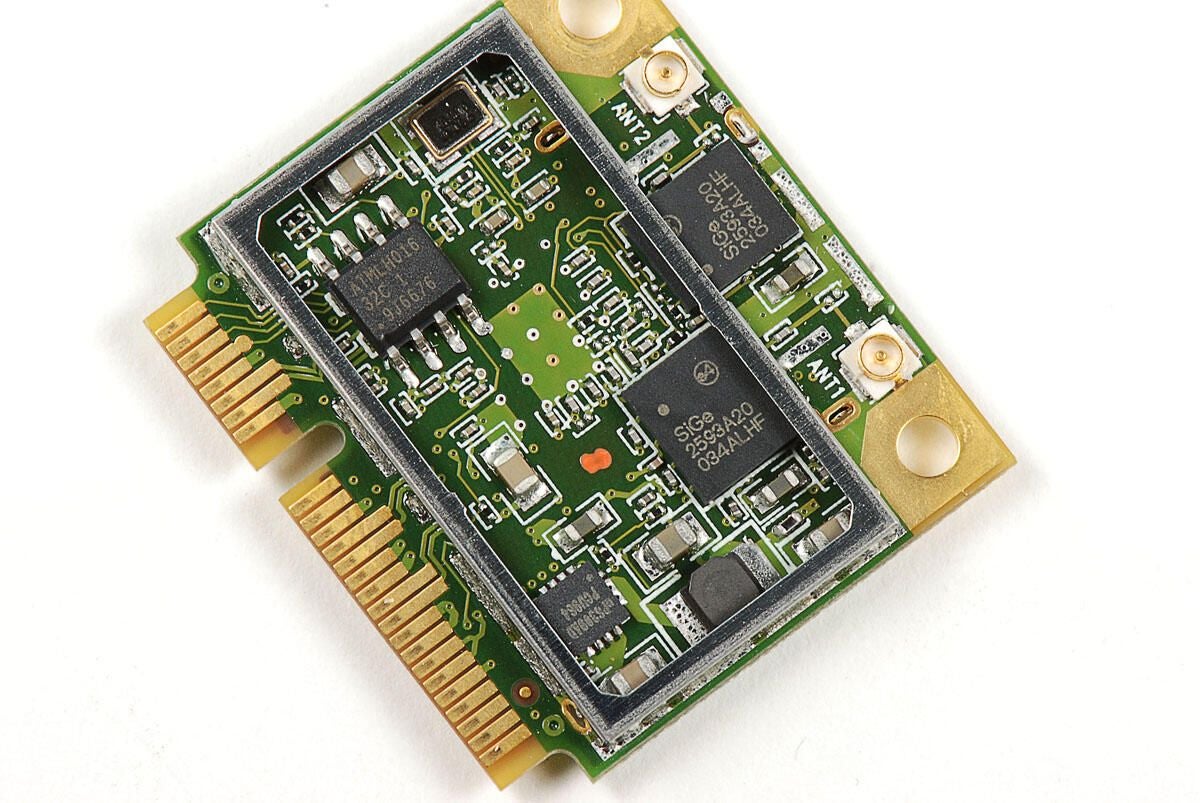
With the EMI shields removed, we can see a few of the chips on the AW-NE773 module. From their markings, all the chips appear to have been manufactured by Atmel.
Photo by: Bill Detwiler / TechRepublic
Caption by: Bill Detwiler
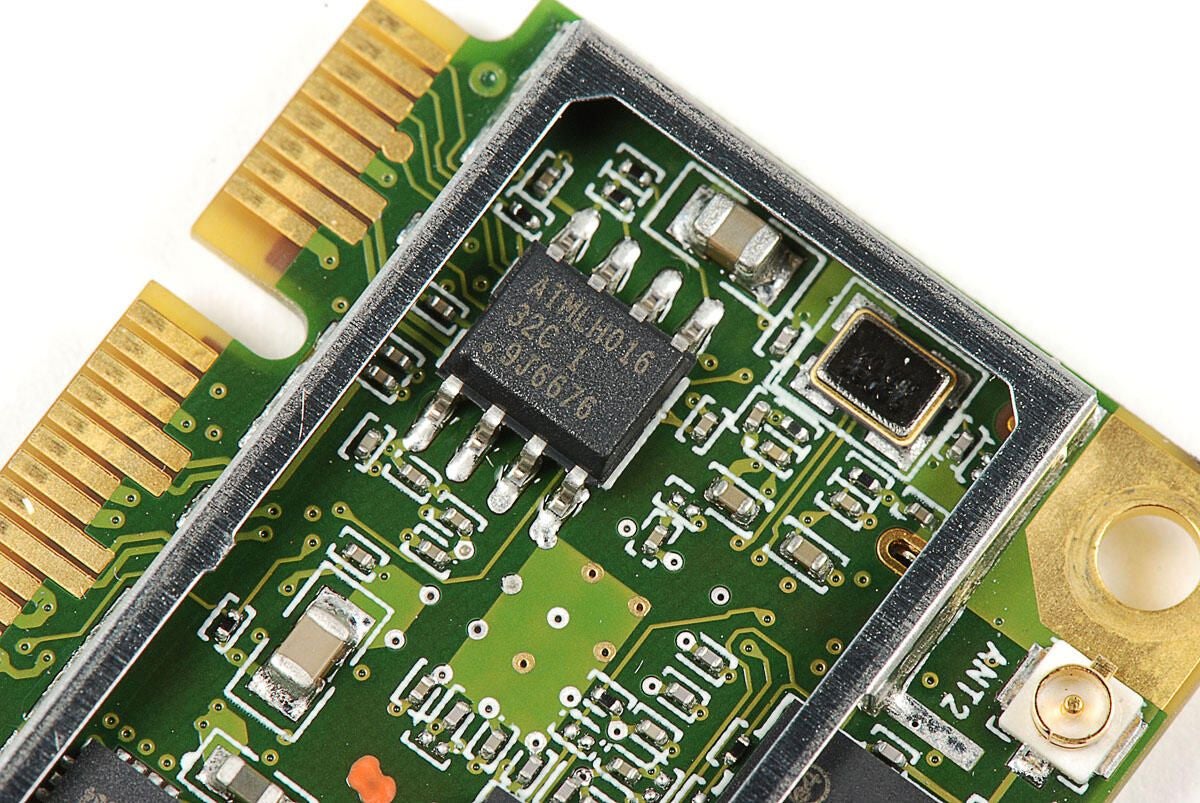
Photo by: Bill Detwiler / TechRepublic
Caption by: Bill Detwiler
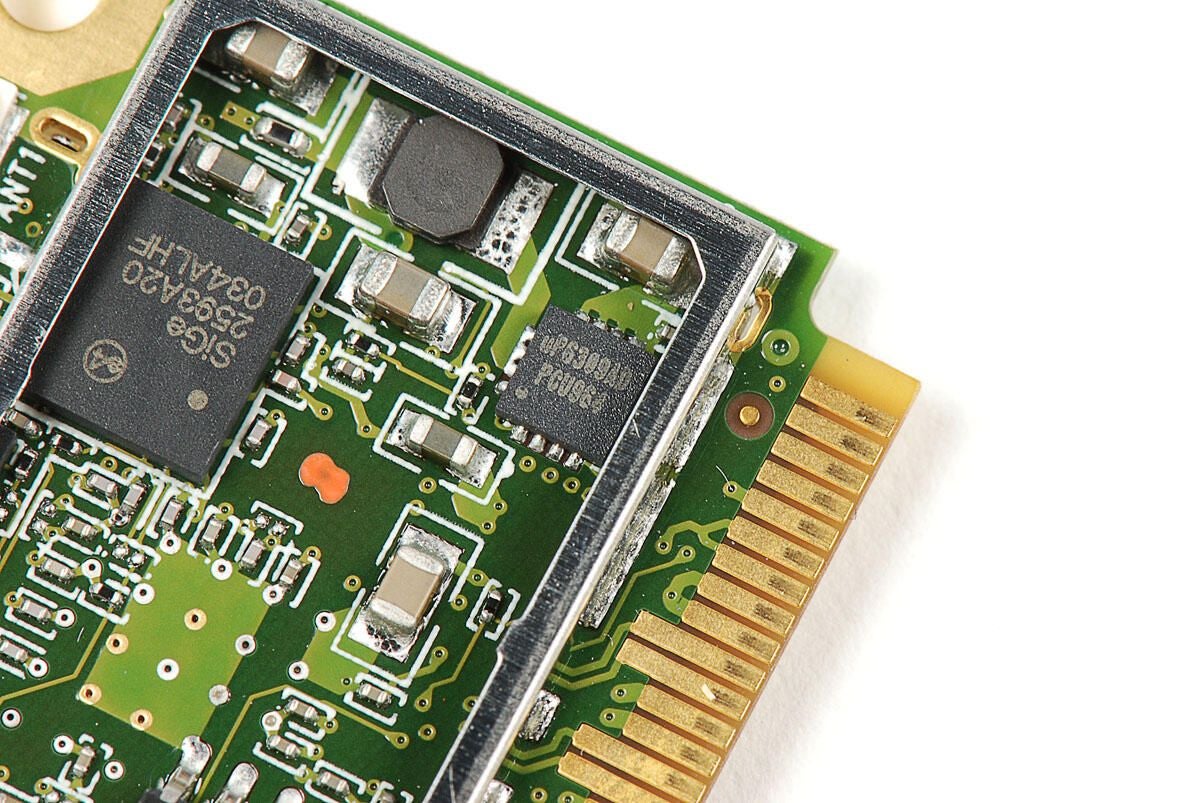
Photo by: Bill Detwiler / TechRepublic
Caption by: Bill Detwiler
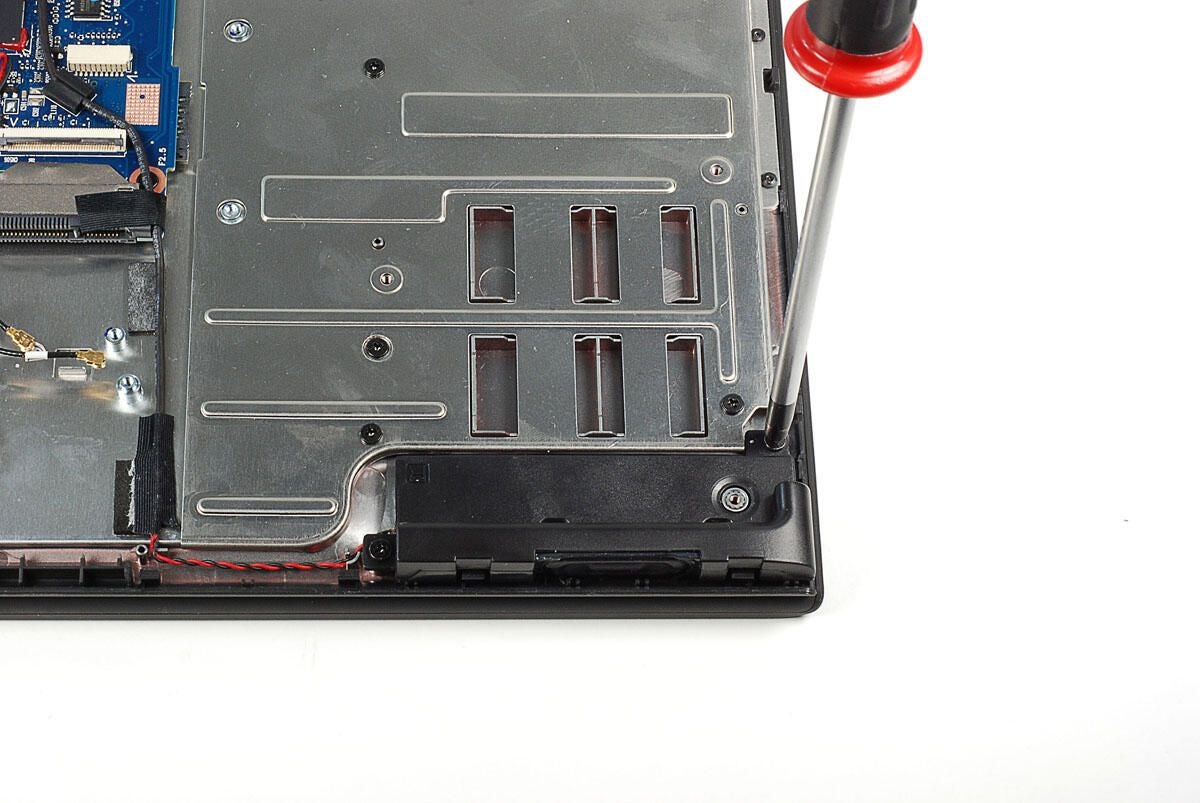
Each speaker is held in place by two Phllips screws.
Photo by: Bill Detwiler / TechRepublic
Caption by: Bill Detwiler

The Y-shaped speaker wire assembly connected to the Cr-48’s motherboard via a single connector. You’ll need to disconnect the wires before removing the speakers.
Photo by: Bill Detwiler / TechRepublic
Caption by: Bill Detwiler
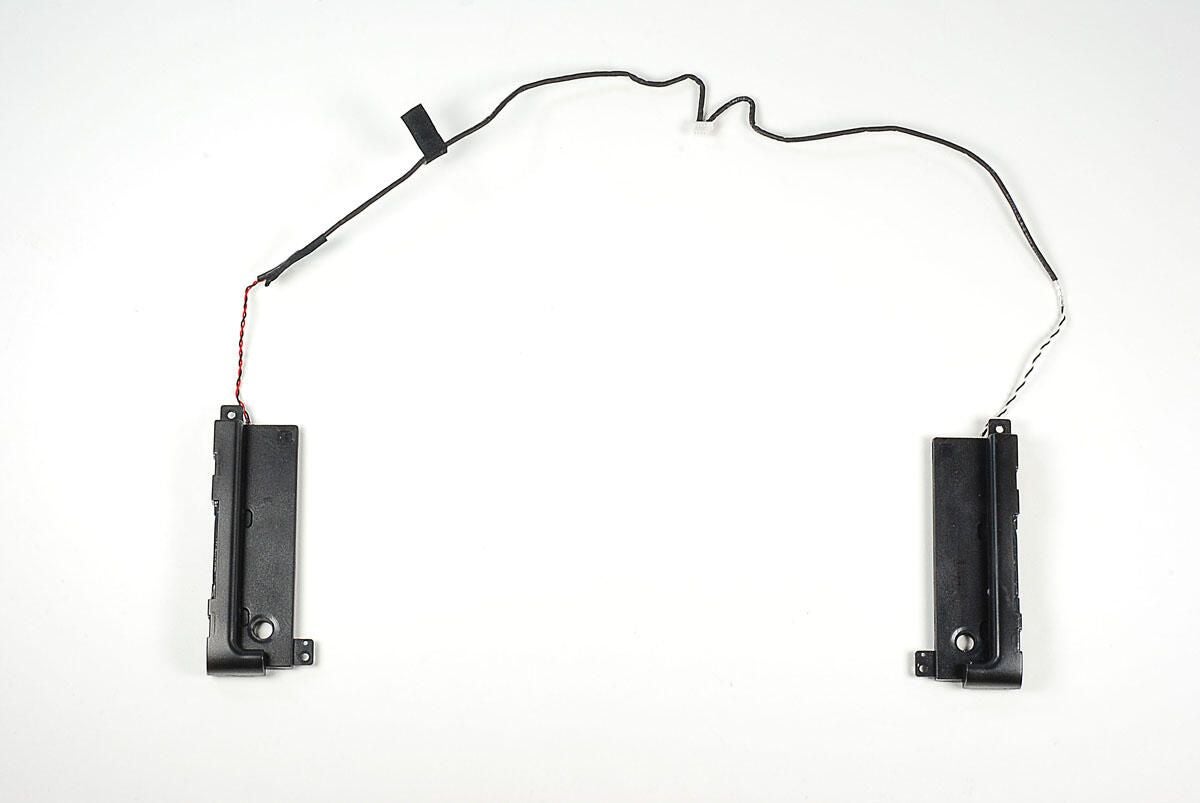
Photo by: Bill Detwiler / TechRepublic
Caption by: Bill Detwiler
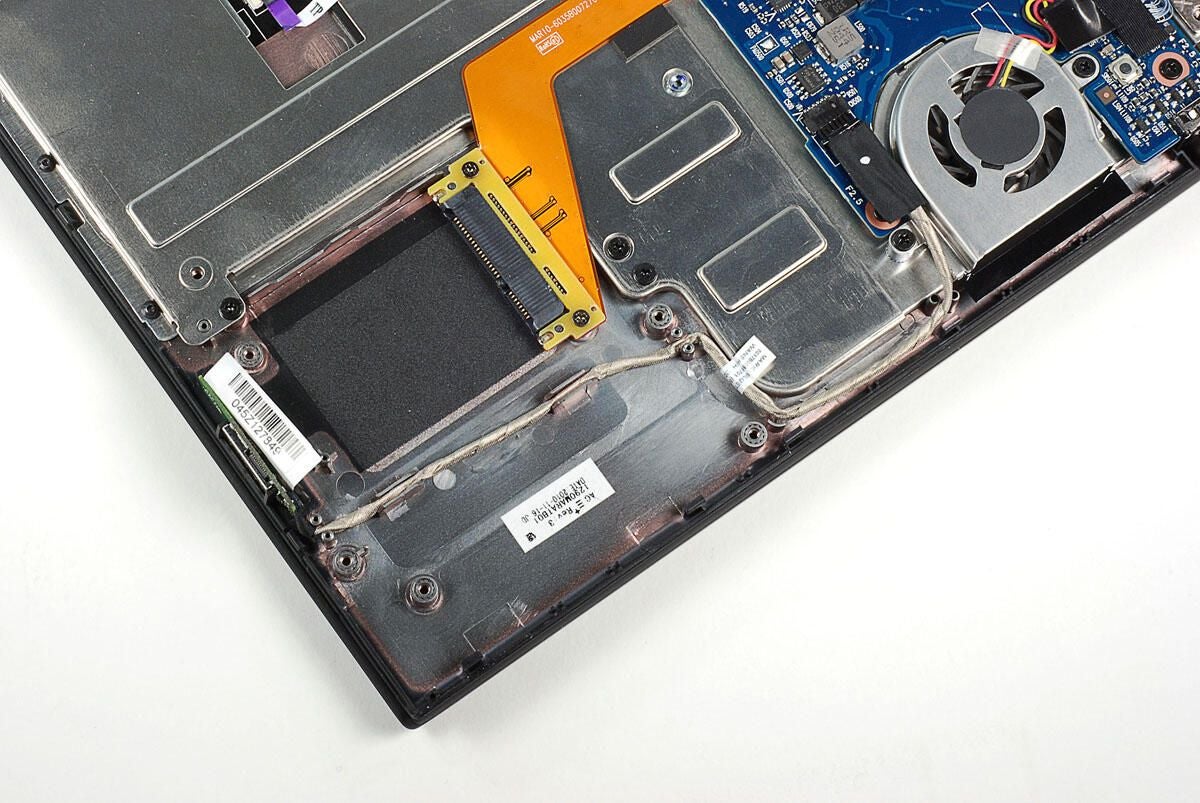
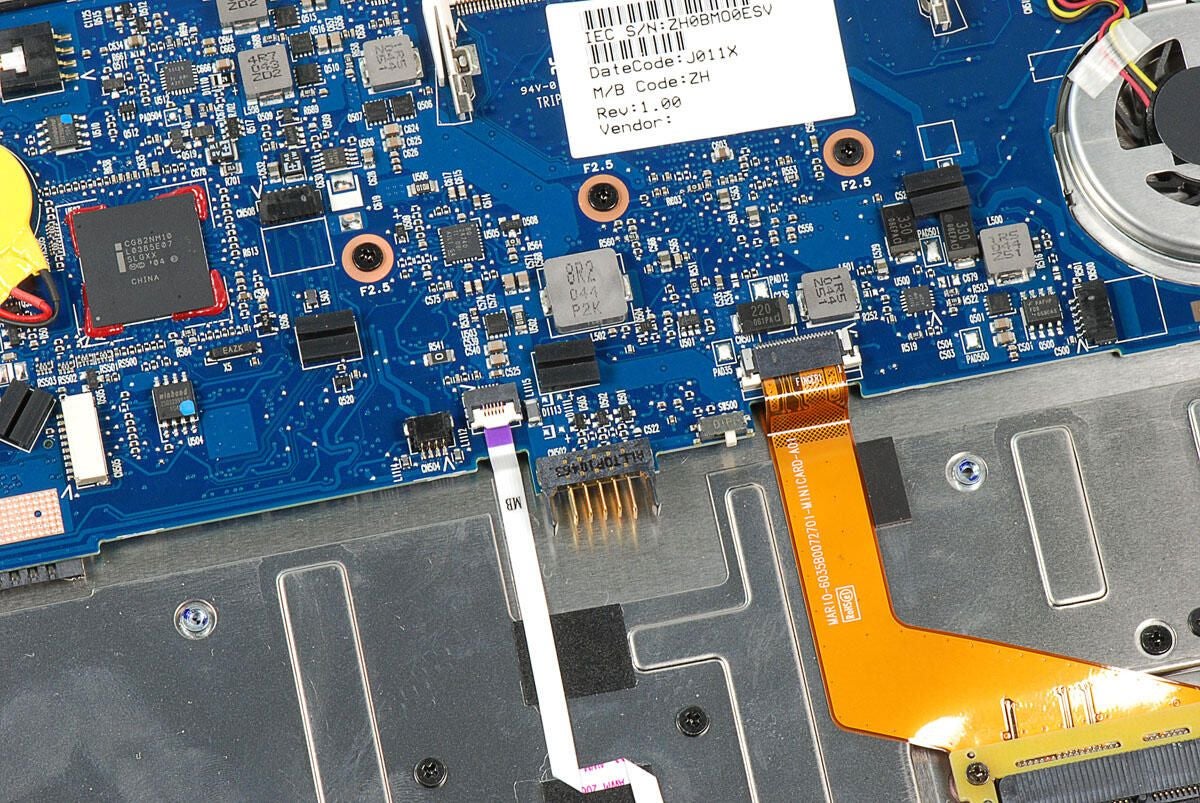
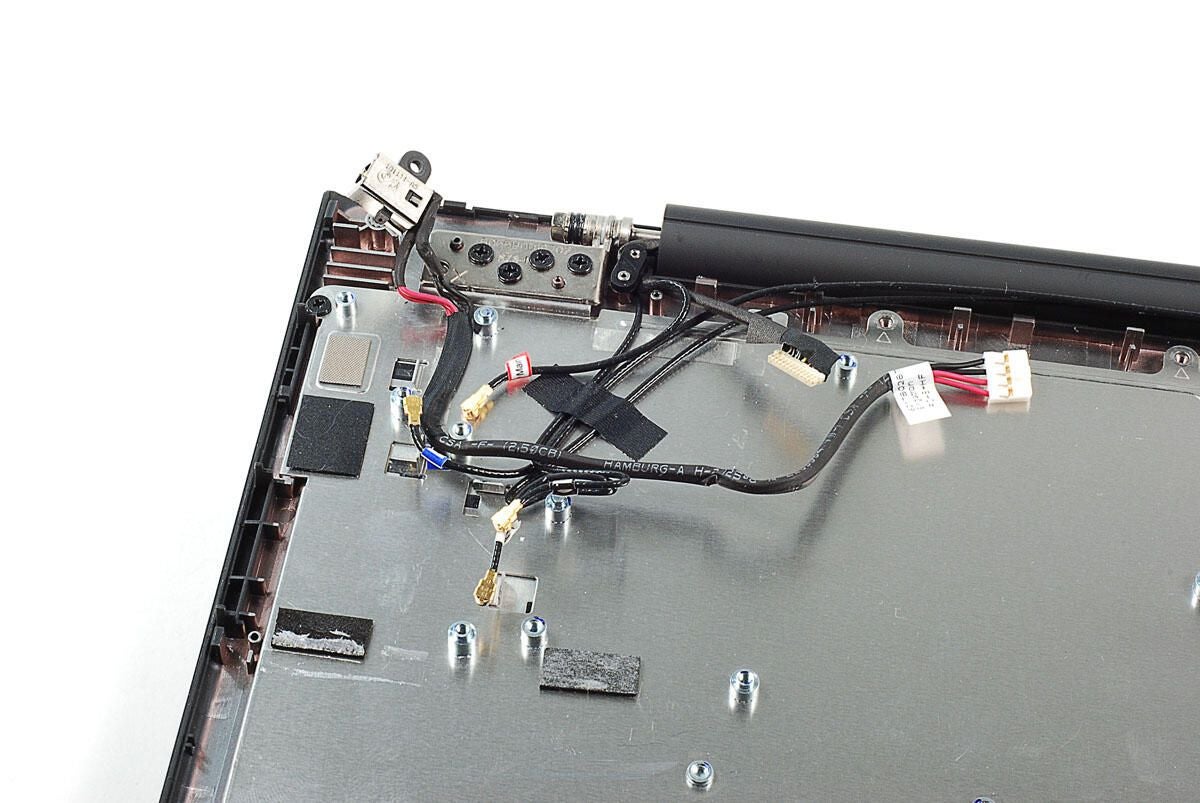
The Cr-48’s bluetooth transceiver is attached to the front of the case and connected to the motherboard by a silver cable.
Photo by: Bill Detwiler / TechRepublic
Caption by: Bill Detwiler
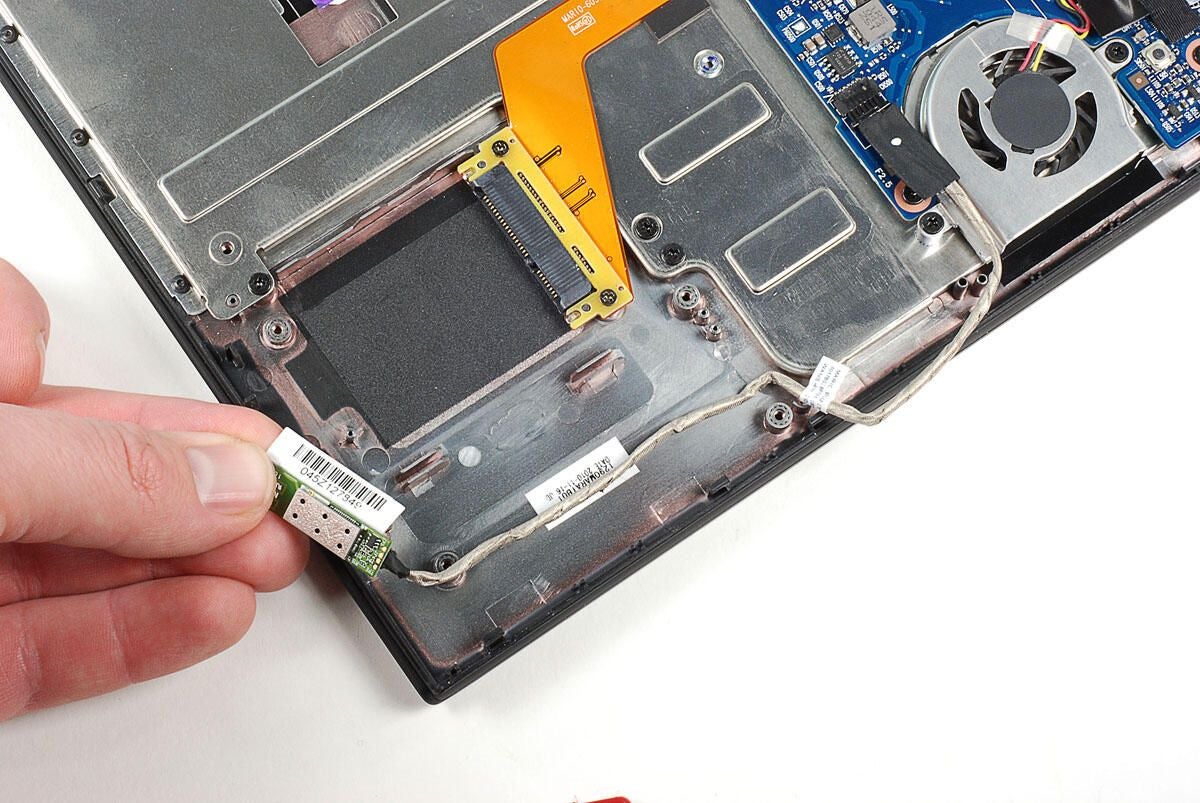
The small PCB that contains the Bluetooth transceiver simply clips onto the front of the Cr-48’s case.
Photo by: Bill Detwiler / TechRepublic
Caption by: Bill Detwiler
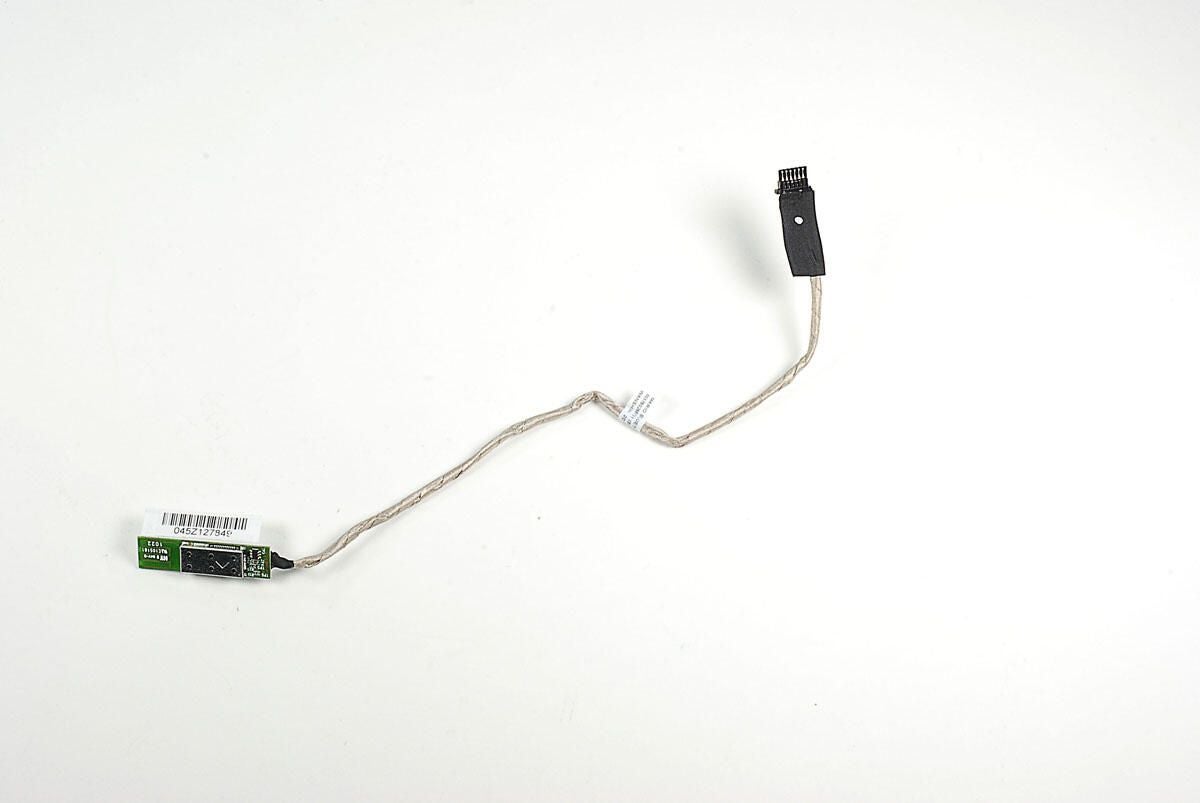
Photo by: Bill Detwiler / TechRepublic
Caption by: Bill Detwiler
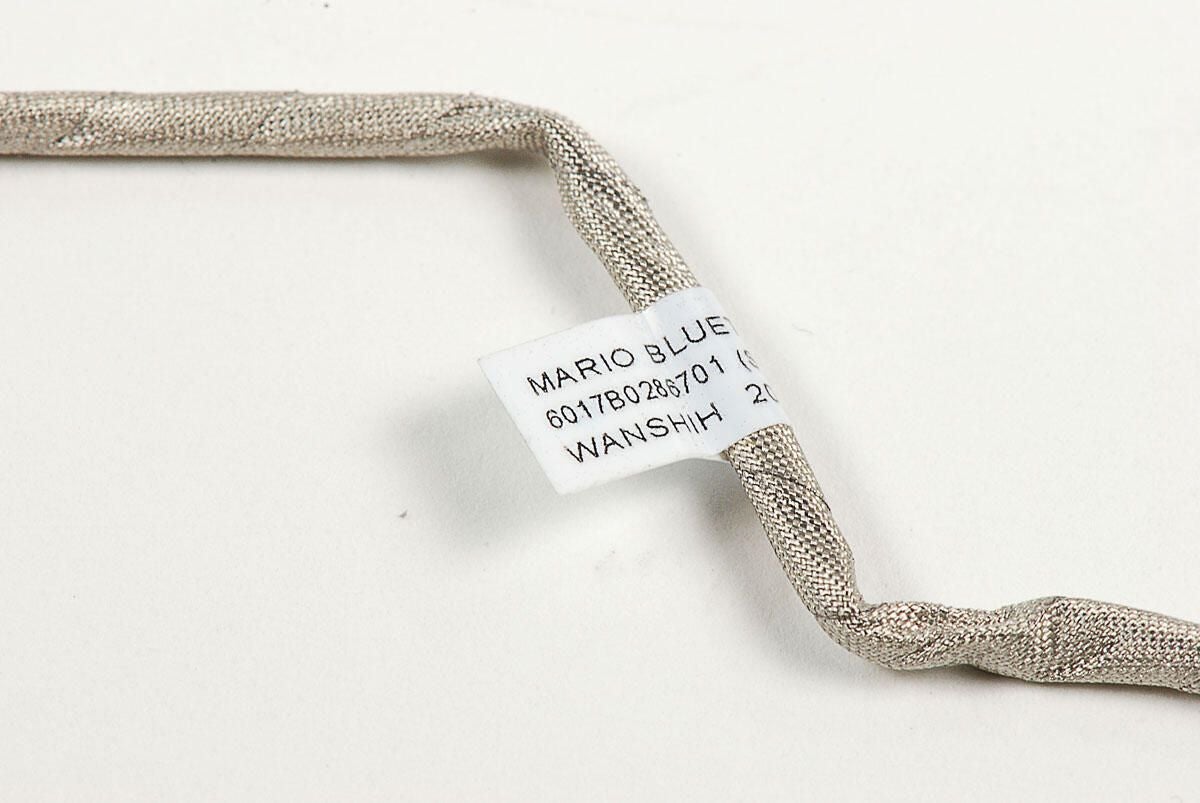
“Mario” crops up again on a small label attached to the Cr-48’s Bluetooth cable.
Photo by: Bill Detwiler / TechRepublic
Caption by: Bill Detwiler
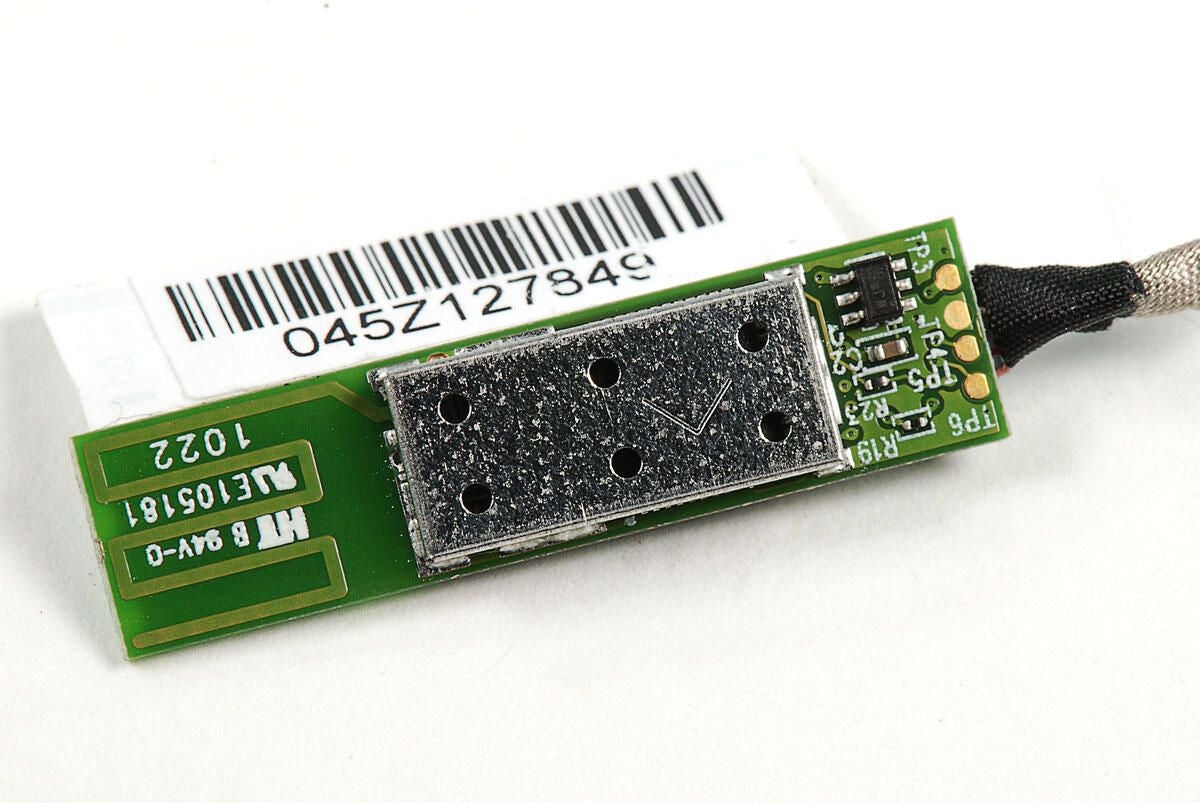
The EMI shield on the small Bluetooth PCB is soldered in place. I won’t be removing this one.
Photo by: Bill Detwiler / TechRepublic
Caption by: Bill Detwiler
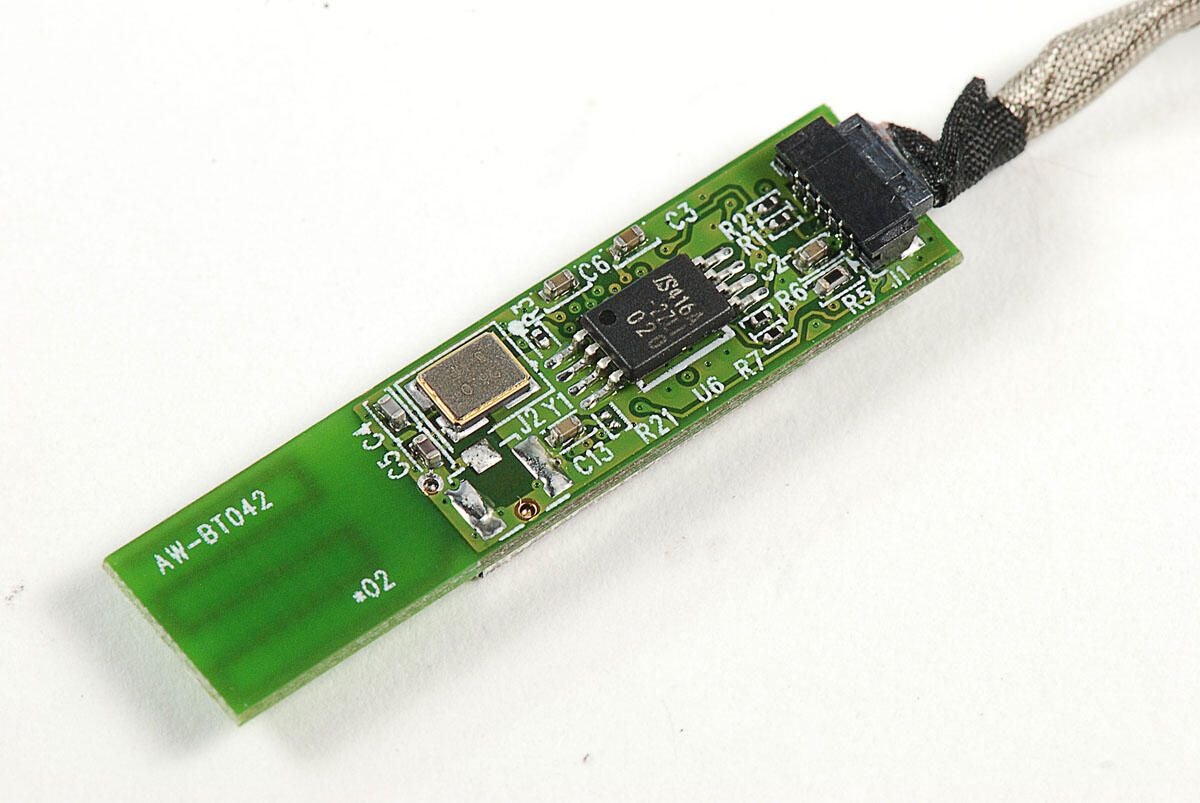
Photo by: Bill Detwiler / TechRepublic
Caption by: Bill Detwiler
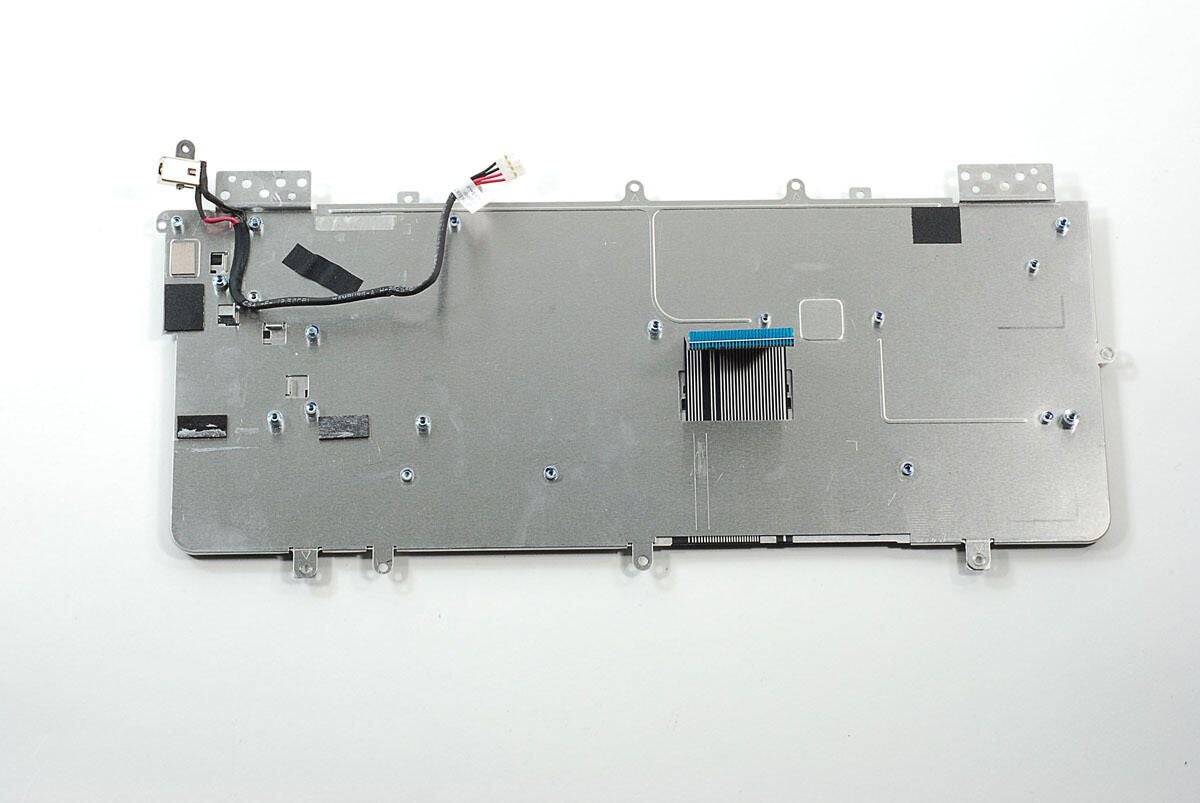
You’ll also need to detach any cables that remain connected to the Cr-48’s motherboard. Here are the connectors from the SSD and the touchpad.
Photo by: Bill Detwiler / TechRepublic
Caption by: Bill Detwiler
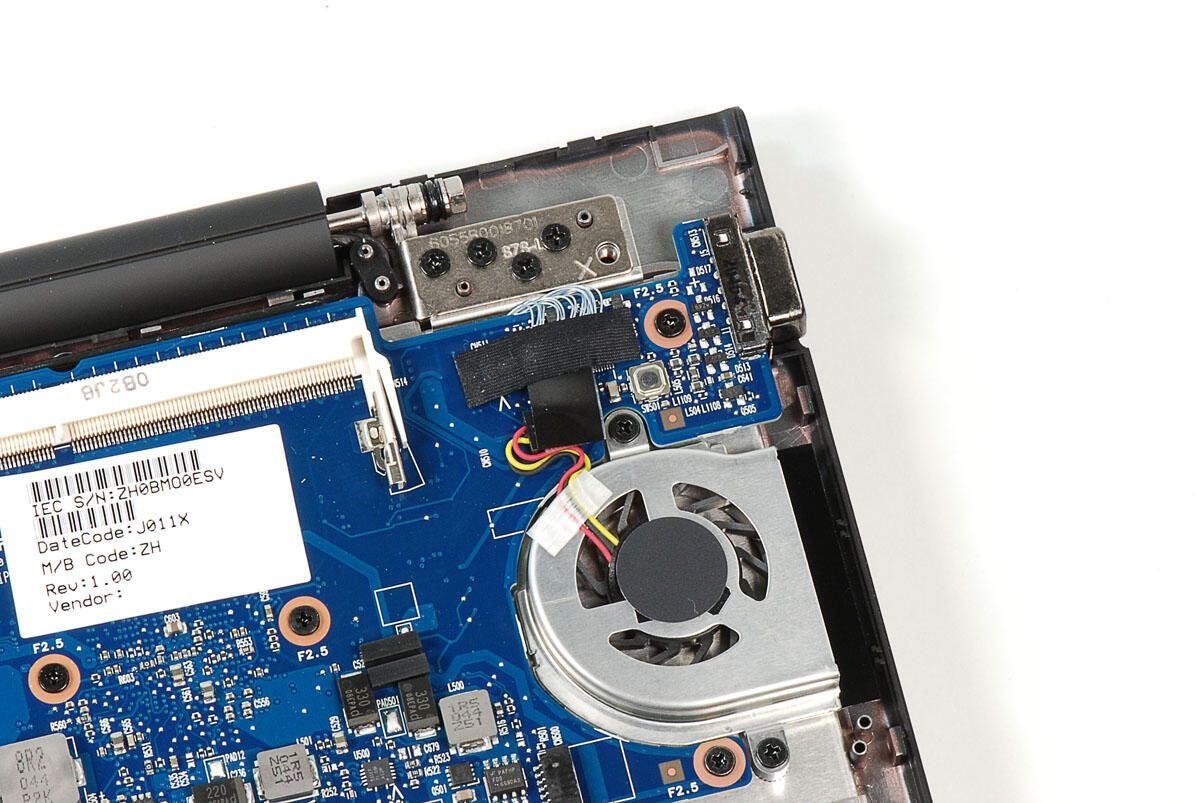
Under these pieces of black tape are connectors for the cooling fan and one of the display cables. You’ll need to disconnect both. Be very careful when disconnecting the display cable. It has several very thin blue wires that could easily break.
Photo by: Bill Detwiler / TechRepublic
Caption by: Bill Detwiler
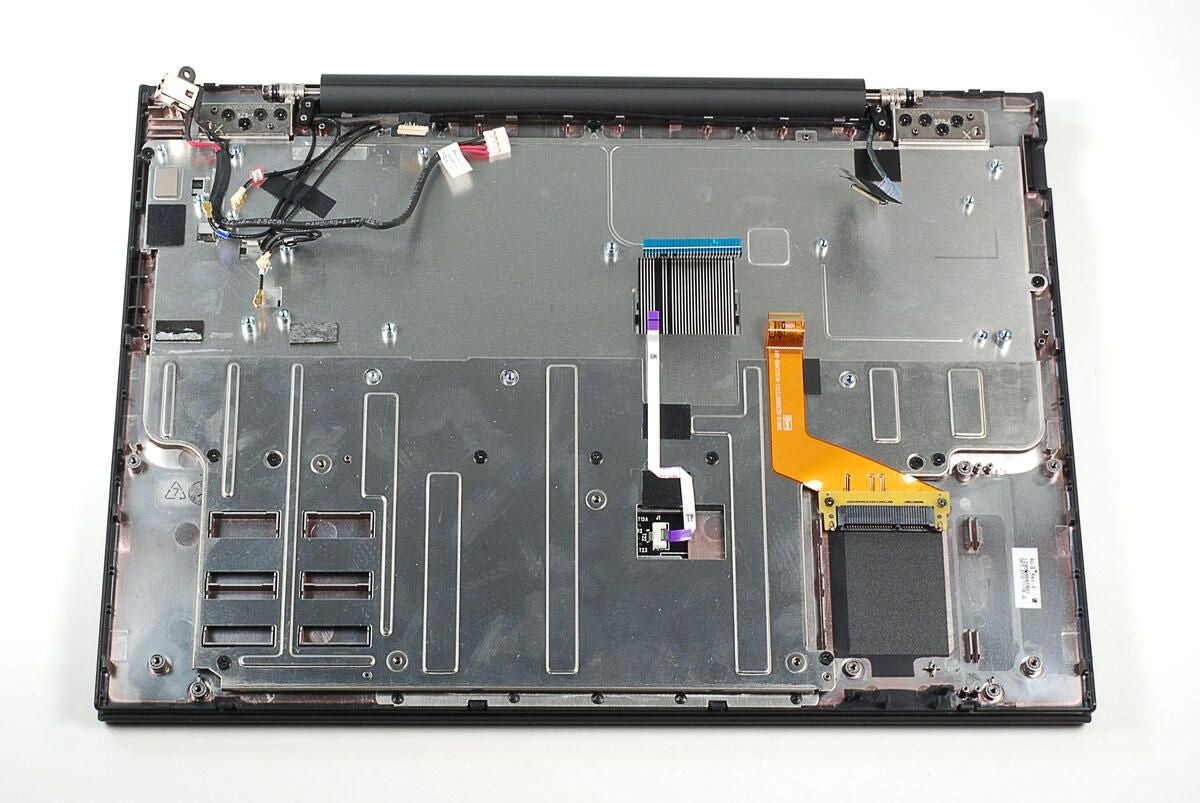
A thin metal frame is attached to the front (lower in this photo) edge of the Cr-48. It covers the back of the touchpad and also holds the touchpad and SSD cables. It is held to the case with nine Phillips screws.
Photo by: Bill Detwiler / TechRepublic
Caption by: Bill Detwiler
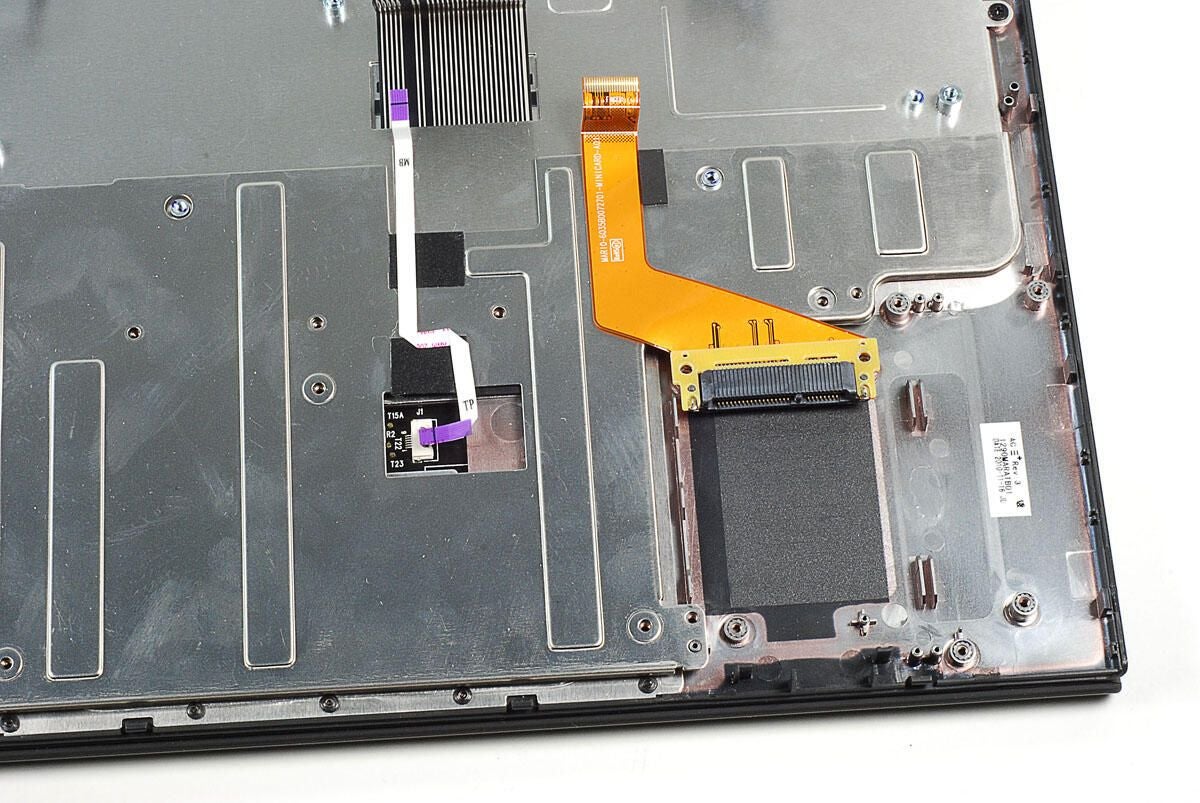
As the SSD ribbon cable is glued to the metal frame, you’ll also need to remove the two screws which hold the SSD connector to the plastic case.
Photo by: Bill Detwiler / TechRepublic
Caption by: Bill Detwiler
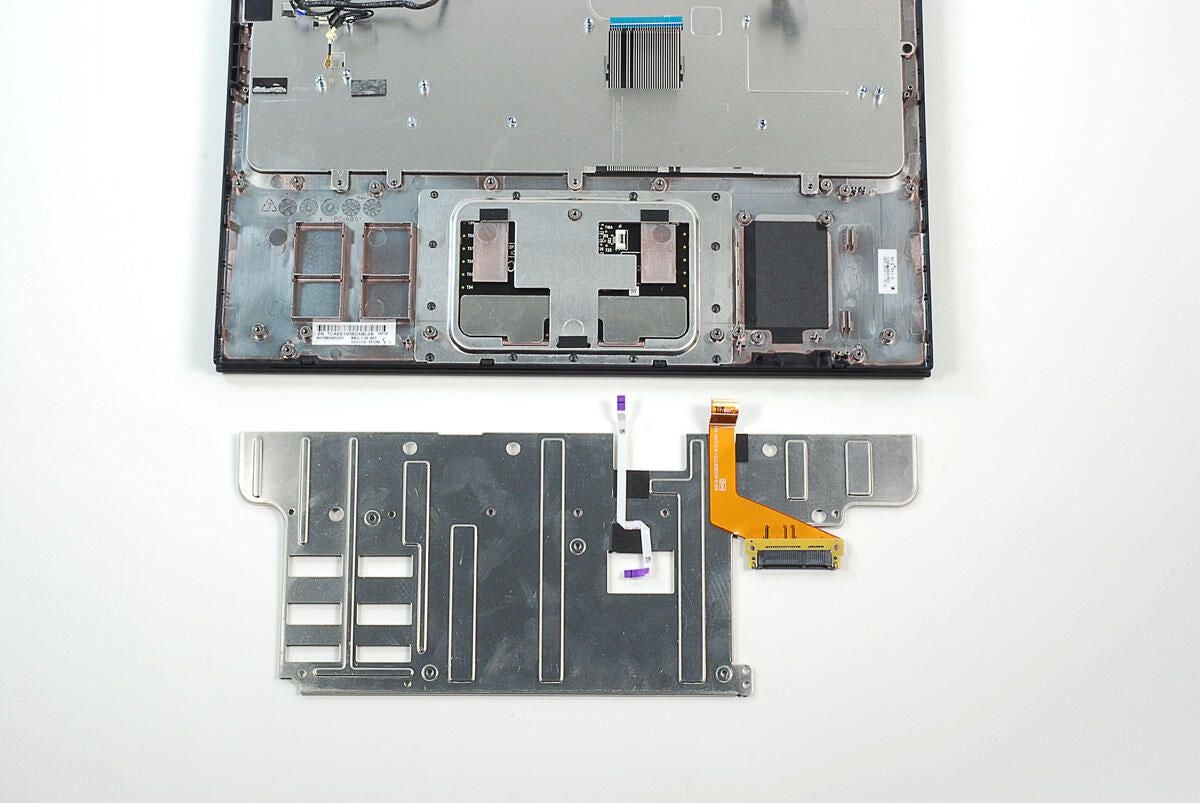
Photo by: Bill Detwiler / TechRepublic
Caption by: Bill Detwiler
The keyboard is held in place with several Phillips screws. Three are located at the top of the keyboard near the Cr-48 lid’s hinge and two are located on either side.
Photo by: Bill Detwiler / TechRepublic
Caption by: Bill Detwiler
You’ll also need to remove the black tape that holds the Wi-Fi and 3G antennas to the underside of the keyboard. You can leave the power port connected if you like.
Photo by: Bill Detwiler / TechRepublic
Caption by: Bill Detwiler
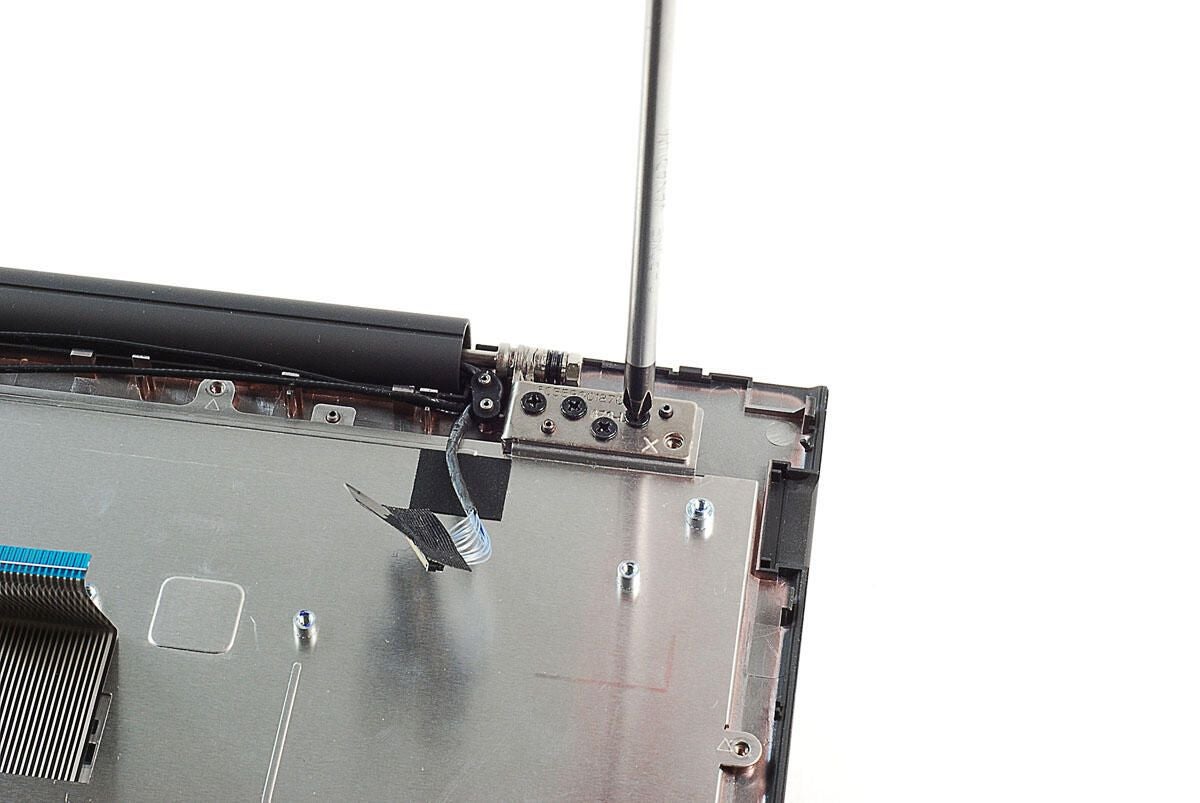
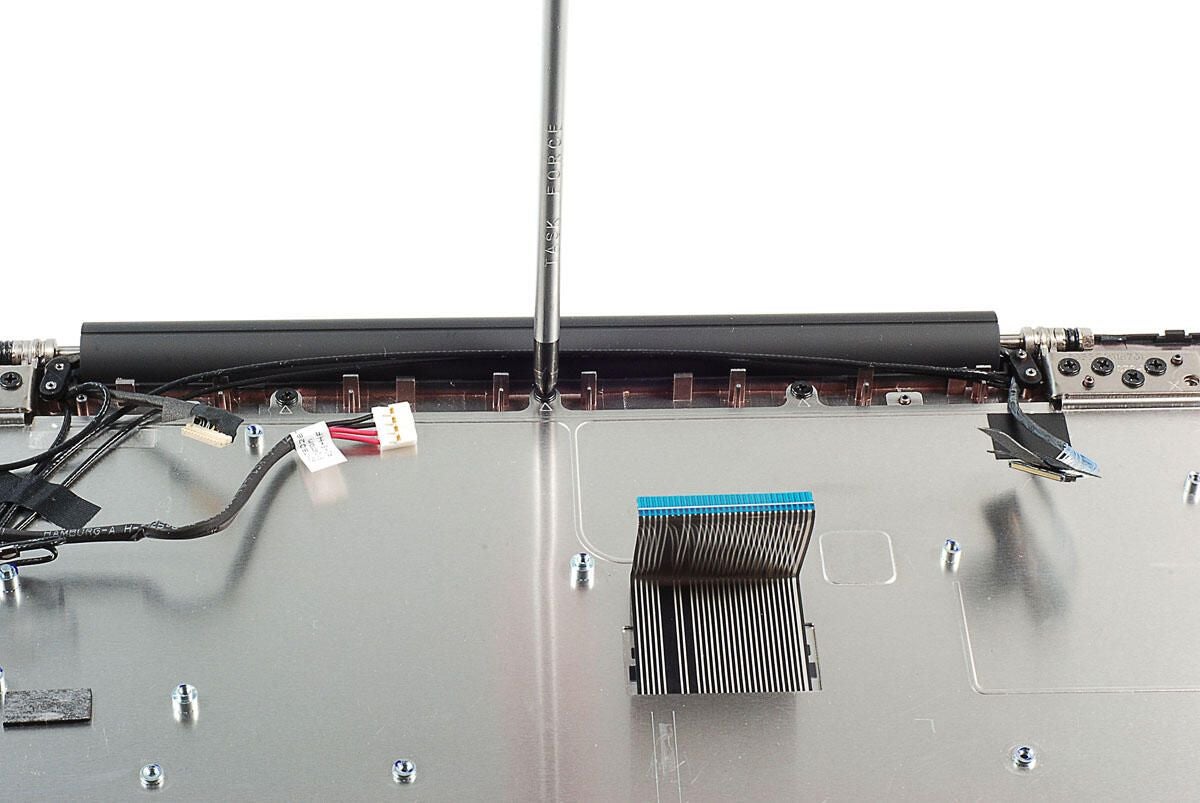
You’ll also need to remove the Cr-48’s lid hinge screws before removing the keyboard.
Photo by: Bill Detwiler / TechRepublic
Caption by: Bill Detwiler
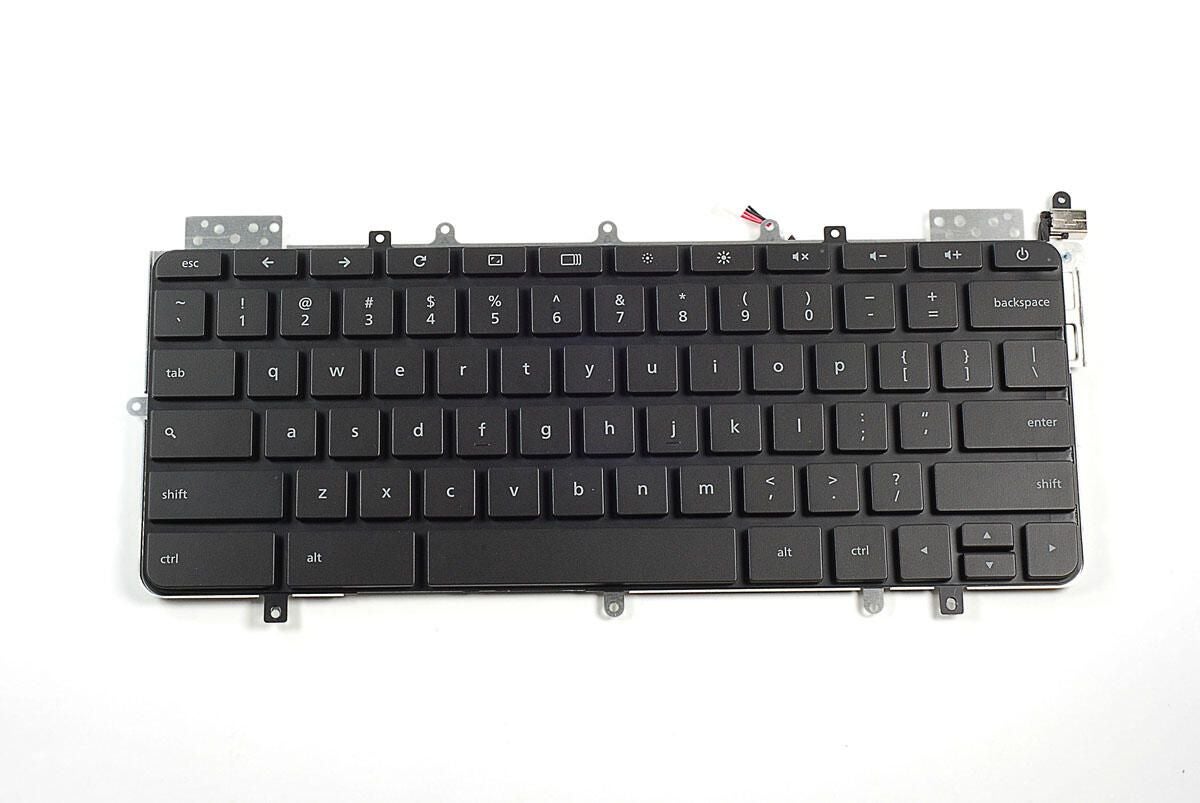
Photo by: Bill Detwiler / TechRepublic
Caption by: Bill Detwiler
As noted, I left the power port and cable connected to the bottom of the keyboard.
Photo by: Bill Detwiler / TechRepublic
Caption by: Bill Detwiler
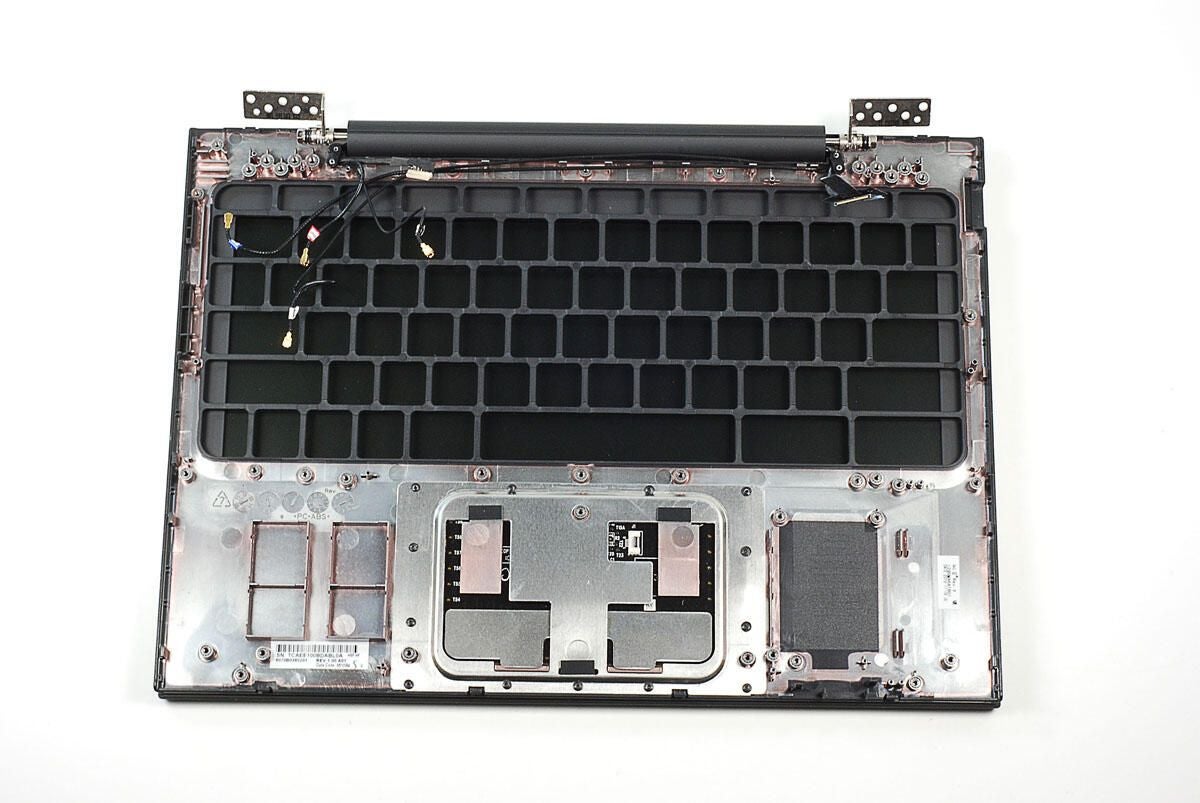
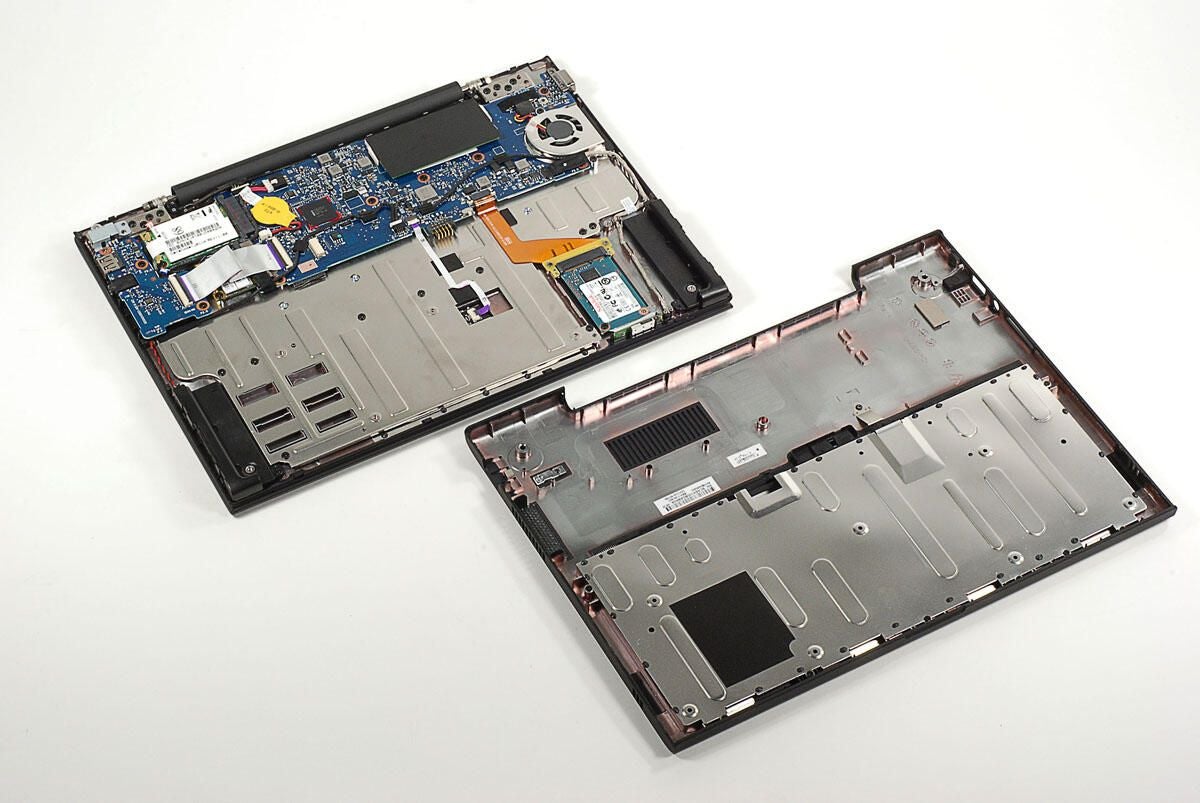
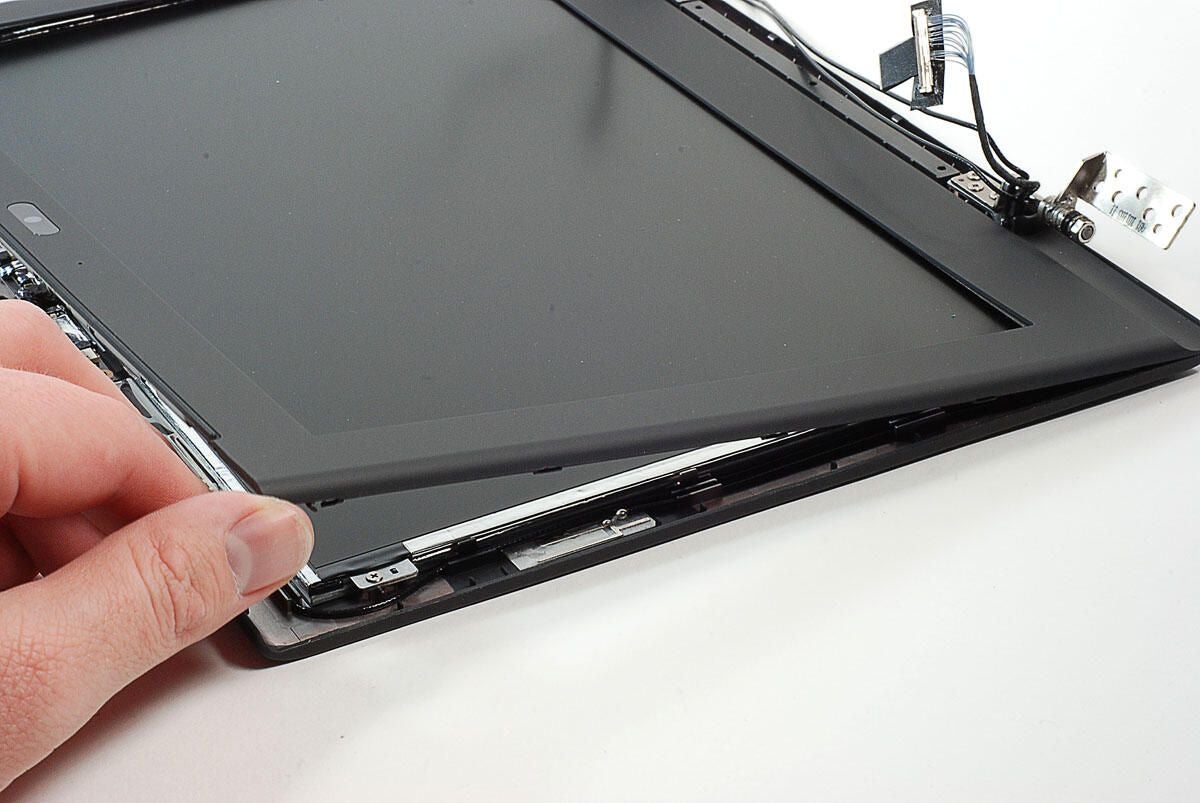
With the keyboard removed, we can move on to the Cr-48’s lid and display.
Photo by: Bill Detwiler / TechRepublic
Caption by: Bill Detwiler
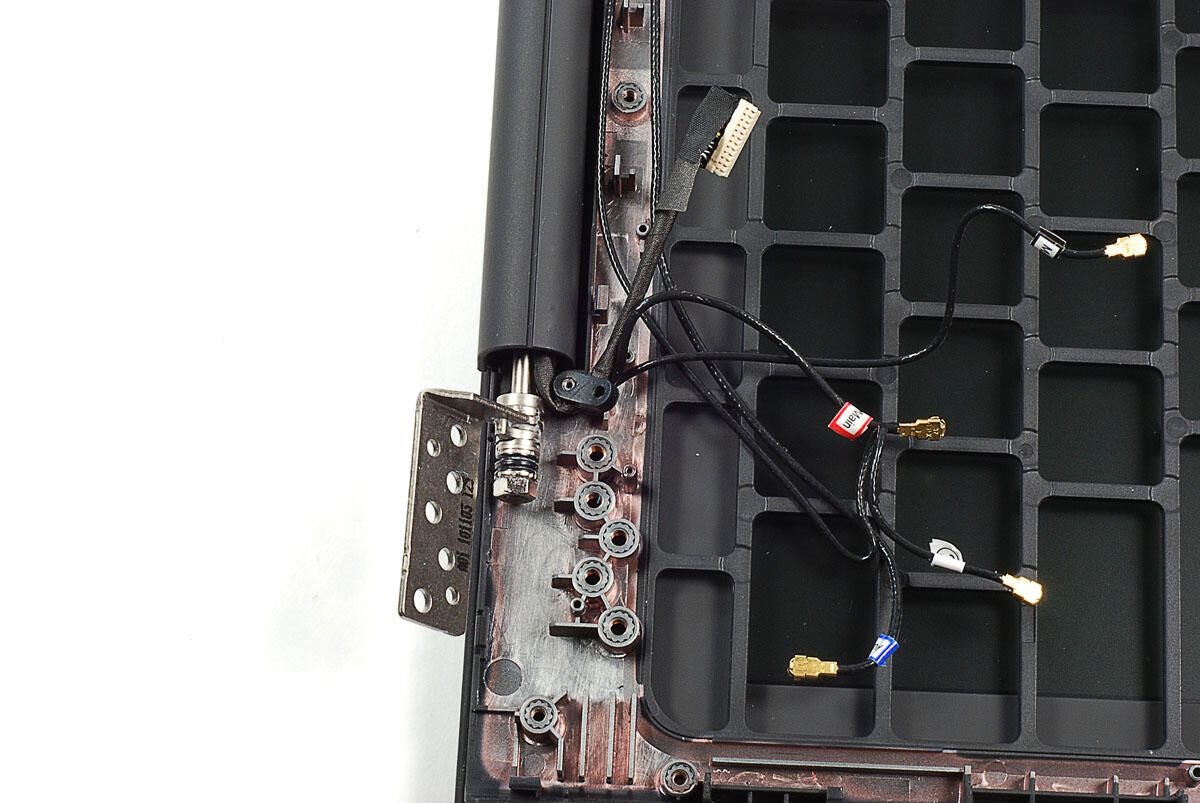
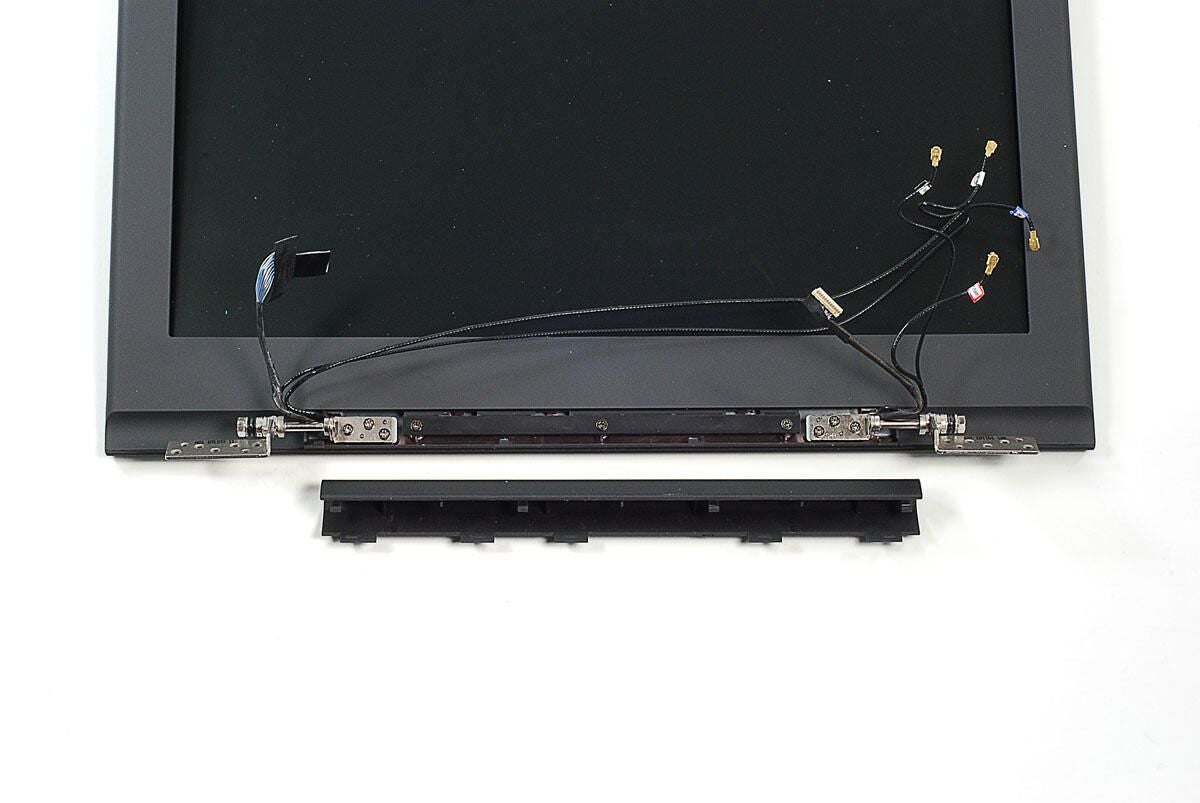
You’ll need to remove two small rubber cable holders (one on each side) before removing the lid/display. With the holders removed and the hinges bent back, you should be able to lift the Cr-48’s upper case panel away from the lid/display assembly.
Photo by: Bill Detwiler / TechRepublic
Caption by: Bill Detwiler
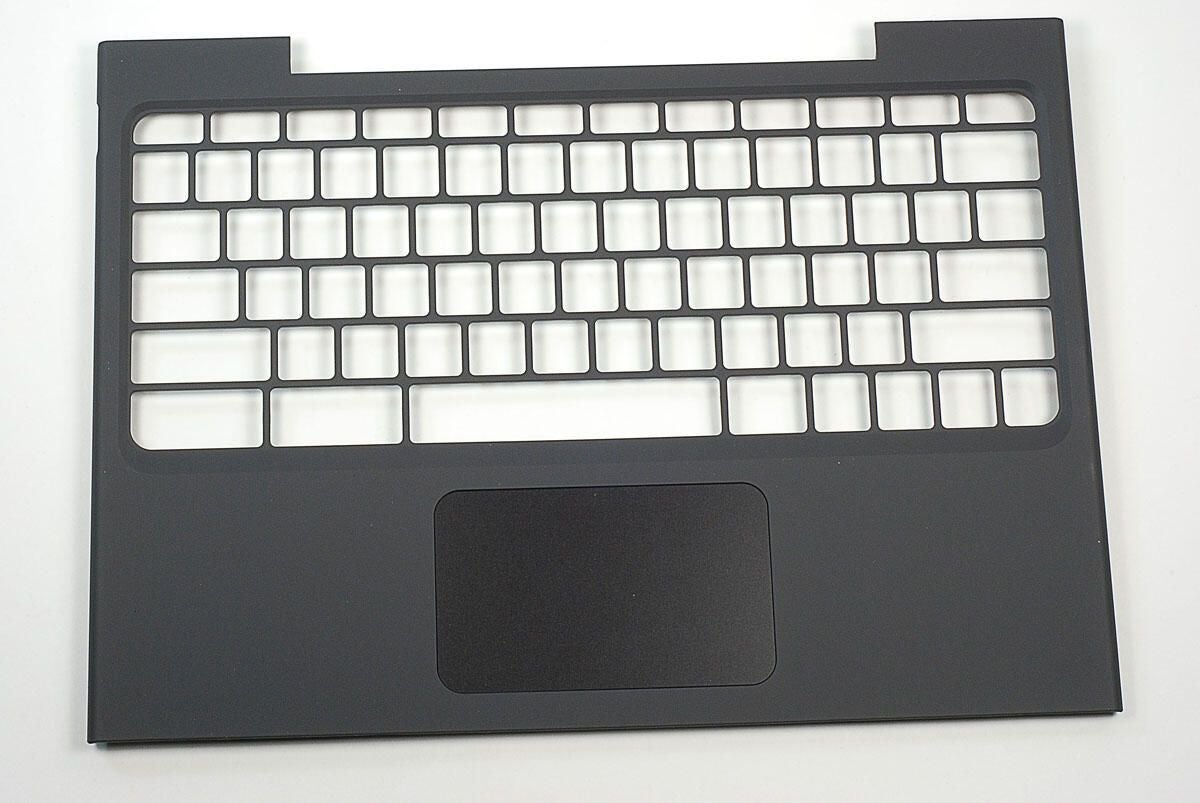
Photo by: Bill Detwiler / TechRepublic
Caption by: Bill Detwiler
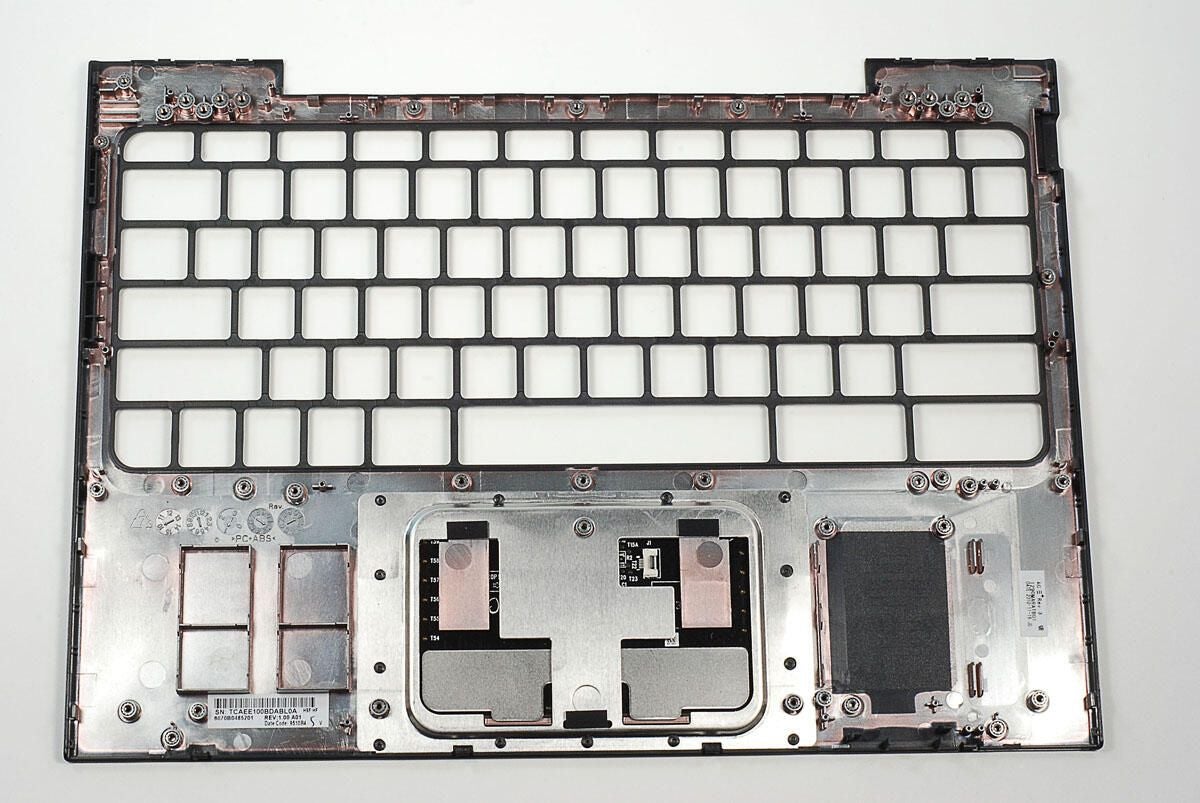
Photo by: Bill Detwiler / TechRepublic
Caption by: Bill Detwiler
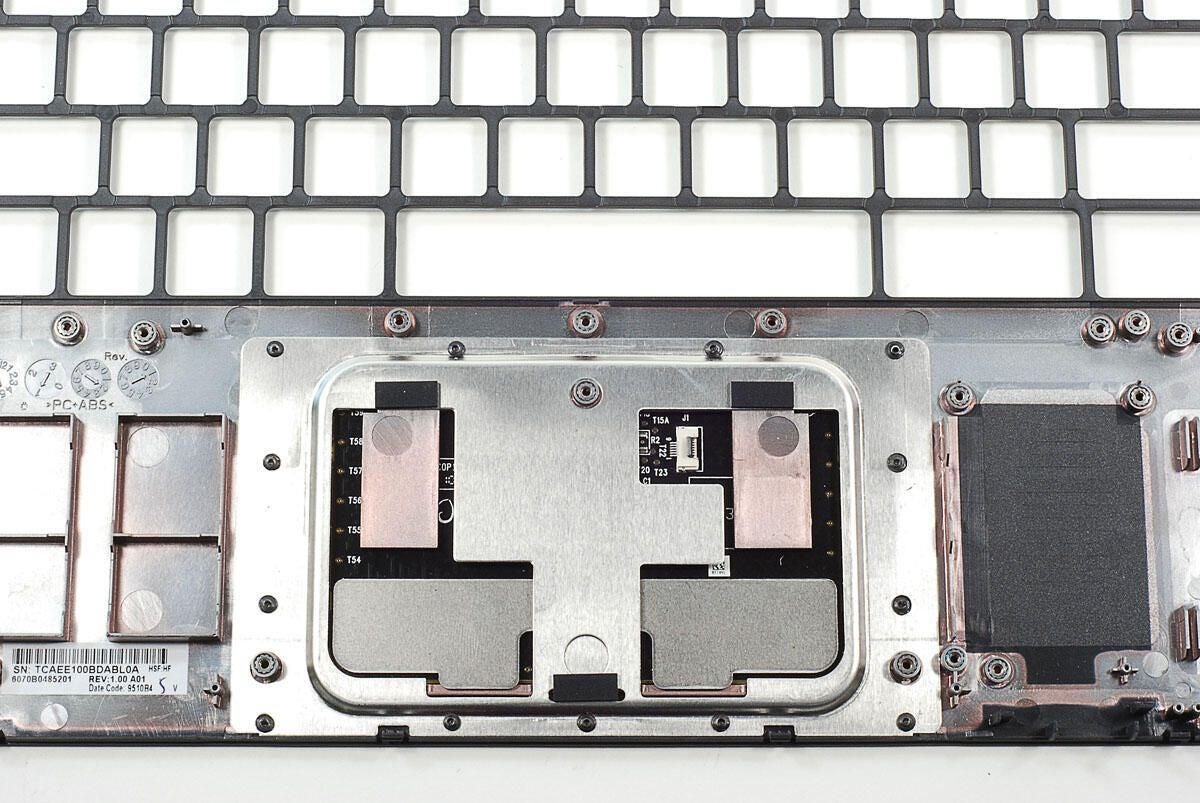
A metal plate covers most of the back of the Cr-48’s touchpad. Both the plate and touchpad are held to the case top panel with plastic rivets. It looks like replacing the touchpad requires a whole new case top panel.
Photo by: Bill Detwiler / TechRepublic
Caption by: Bill Detwiler
Now, let’s look at the lid and display assembly.
Photo by: Bill Detwiler / TechRepublic
Caption by: Bill Detwiler
Our first step in cracking open the Cr-48’s lid is removing the plastic piece that covers the hinge screws. It’s held in place with plastic tabs. You should be able to pop it loose from the lid using a case opening tool, thin metal blade, or your finger nail (if they’re strong enough).
With the hinge cover removed, you can also remove the Phillips screws that hold the hinges to the lid.
Photo by: Bill Detwiler / TechRepublic
Caption by: Bill Detwiler
Using a thin metal blade, I was able to pop loose the plastic bezel that surround the display screen. Unfortunately, I damaged a few of the plastic clips that
Photo by: Bill Detwiler / TechRepublic
Caption by: Bill Detwiler

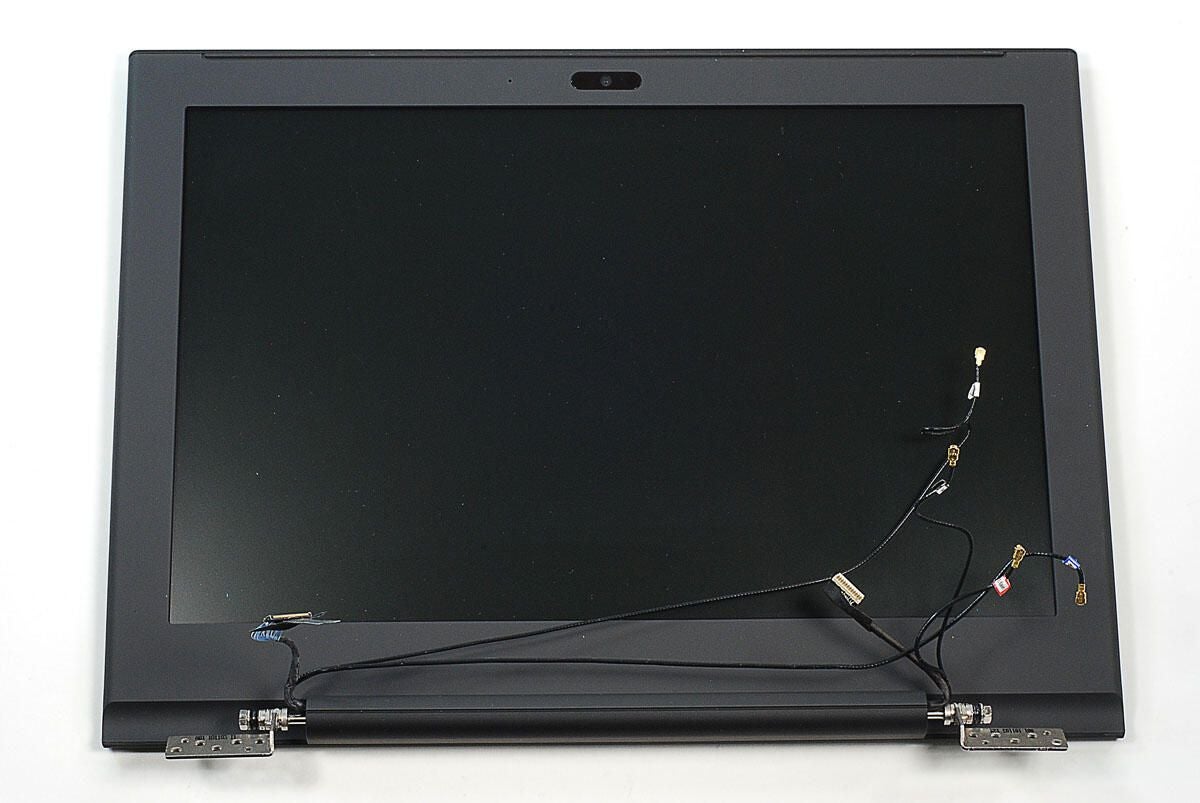
With the Cr-48 Chrome notebook’s front bezel removed, we can see the display mounting, antenna wires, and webcam assembly.
Photo by: Bill Detwiler / TechRepublic
Caption by: Bill Detwiler
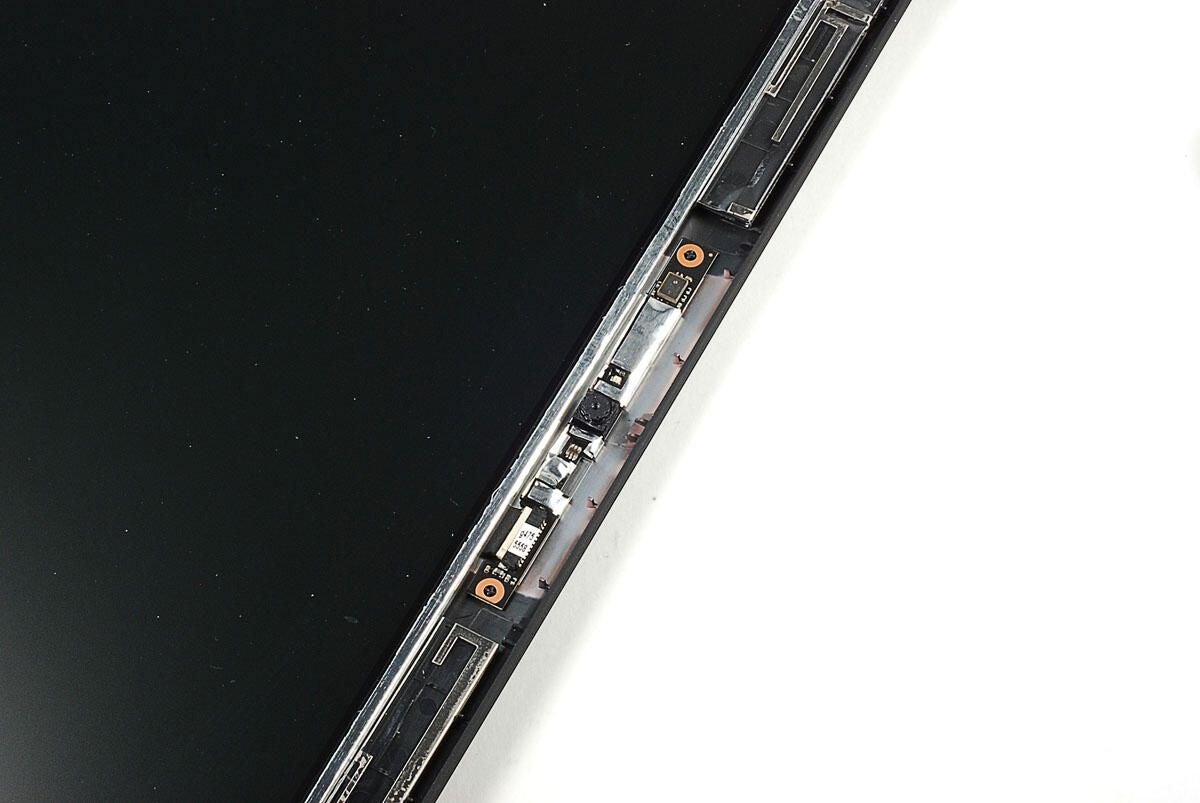
Photo by: Bill Detwiler / TechRepublic
Caption by: Bill Detwiler
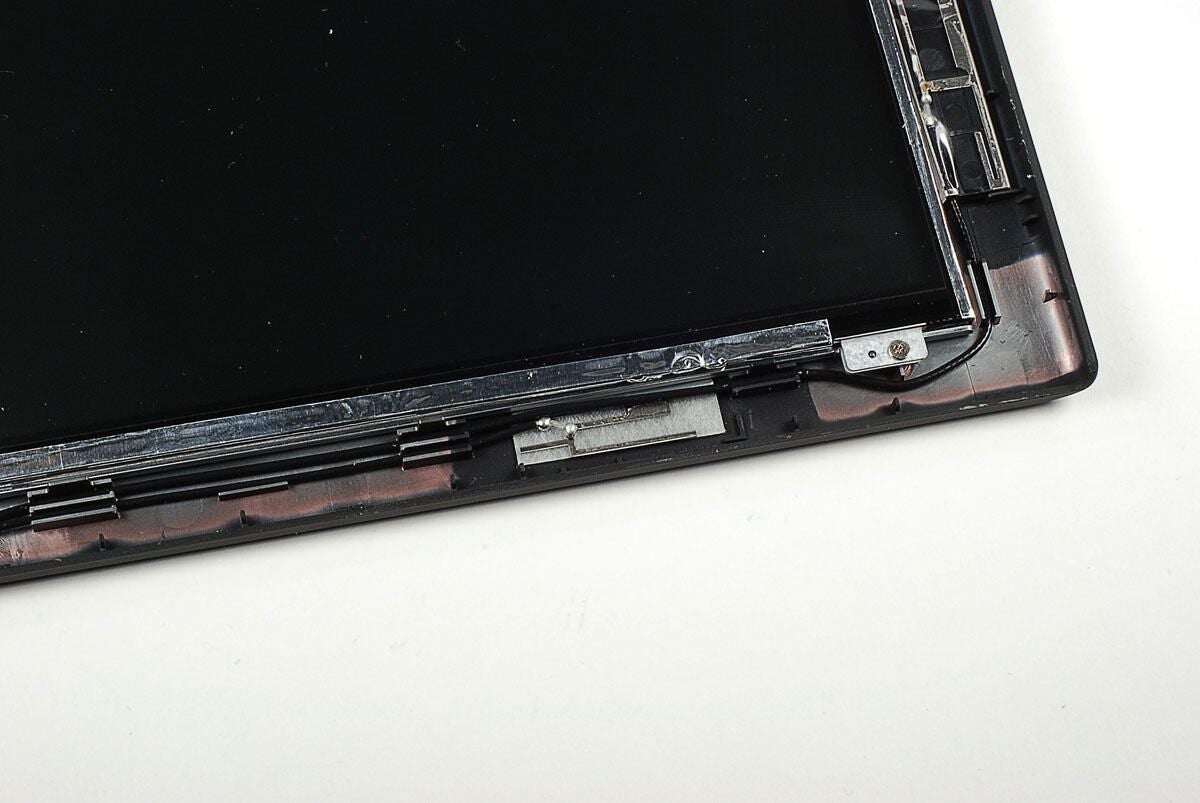
These two solder points connect with a small magnet mounted in the front bezel. The appear to be for one of the Cr-48’s antenna wires.
Photo by: Bill Detwiler / TechRepublic
Caption by: Bill Detwiler
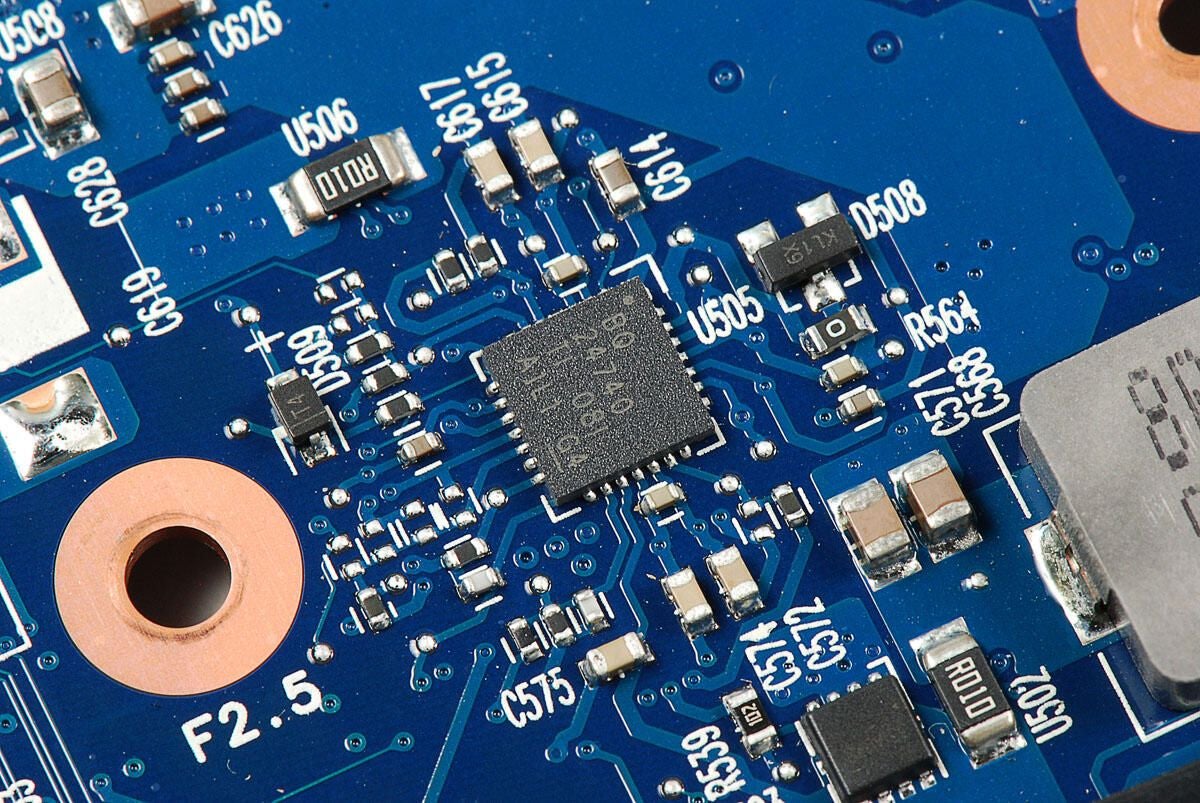
Texas Instruments (BQ24740) Multi-Cell Synchronous Switch-mode Battery Charger
Photo by: Bill Detwiler / TechRepublic
Caption by: Bill Detwiler
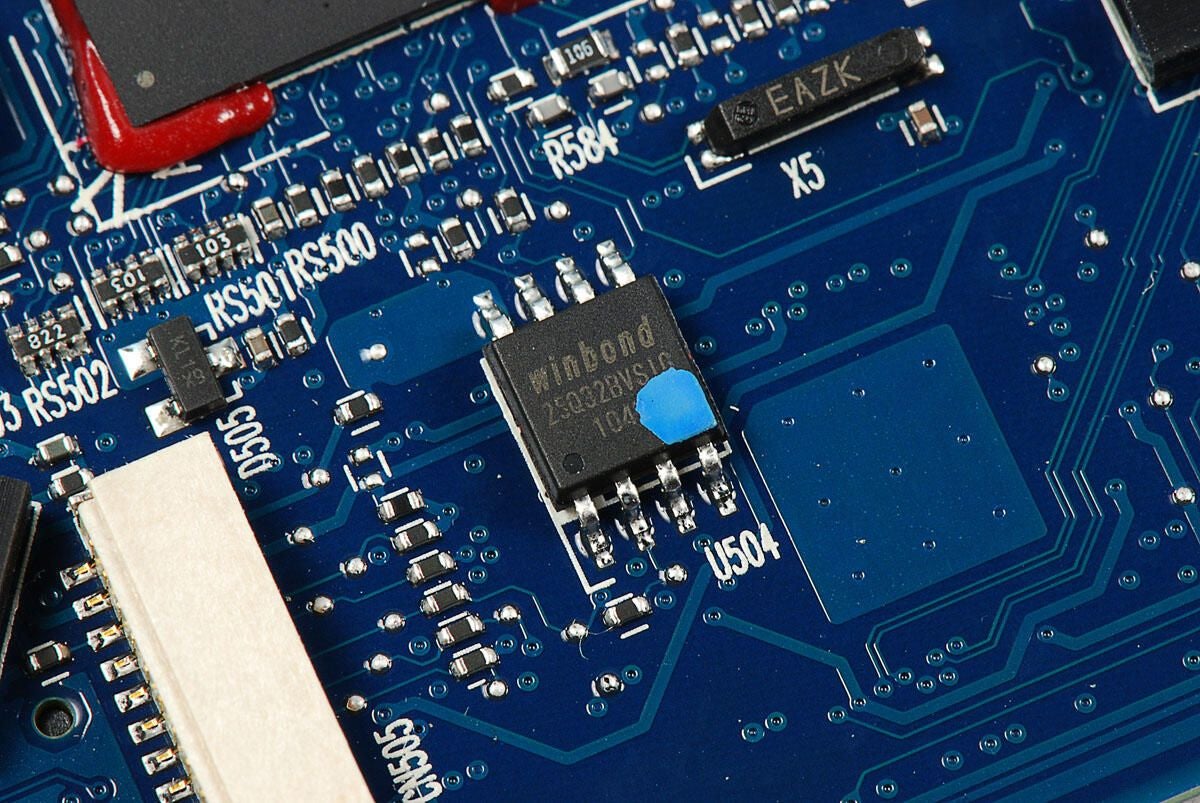
Winbond W25Q32BV (4MB) Serial Flash memory
Photo by: Bill Detwiler / TechRepublic
Caption by: Bill Detwiler
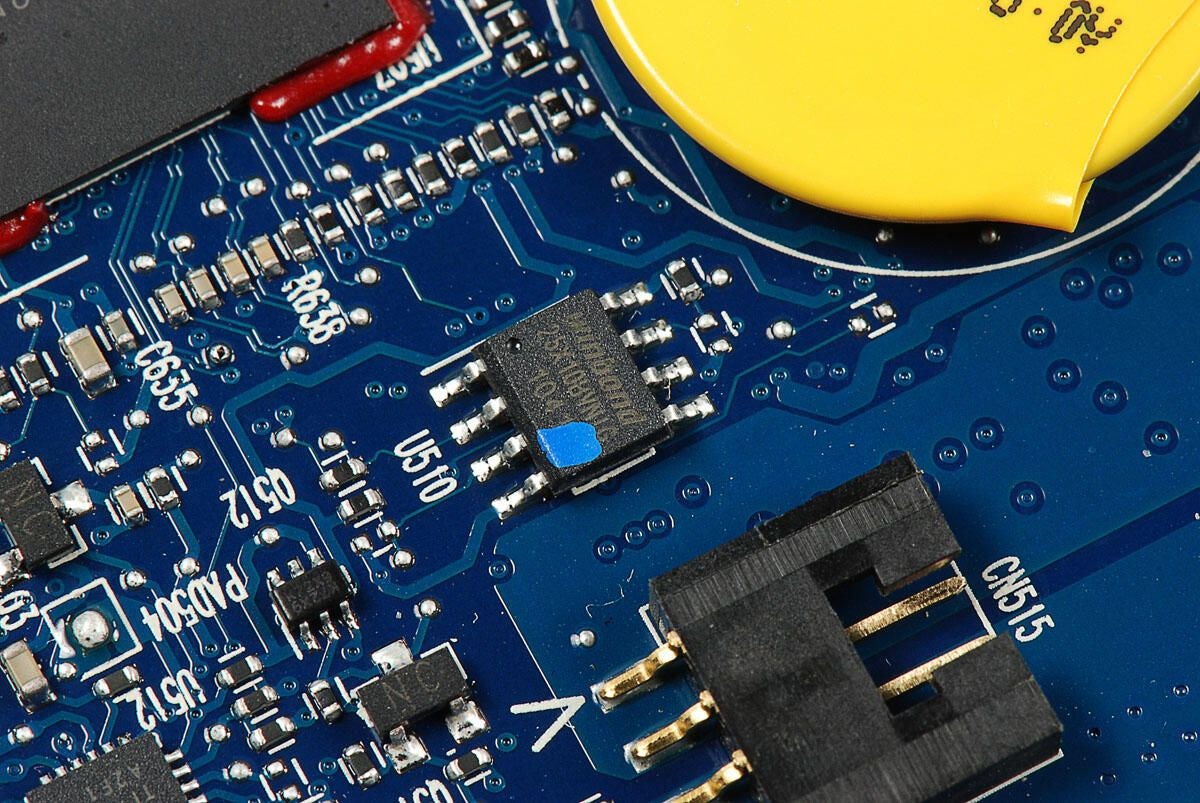
Winbond W25X10BV (1MB) Serial Flash memory
Photo by: Bill Detwiler / TechRepublic
Caption by: Bill Detwiler
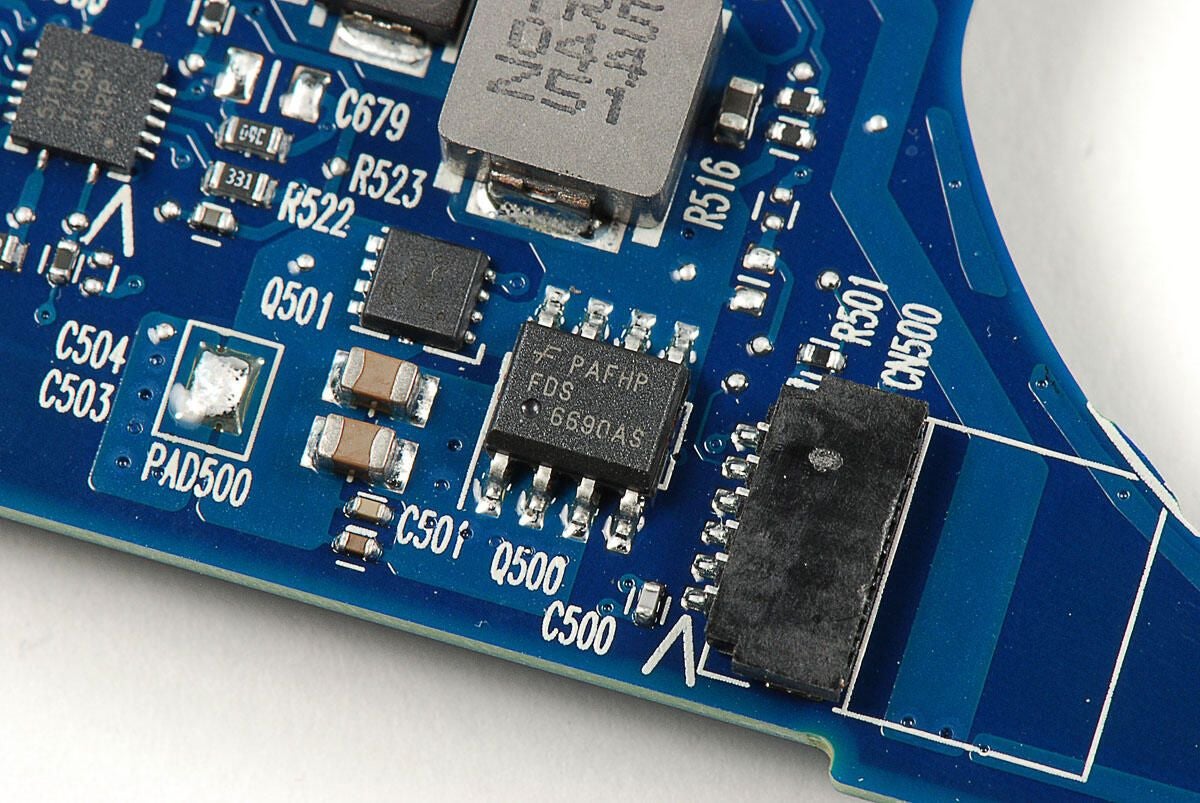
Fairchild Semiconductor (FDS6690AS) 30V N-Channel PowerTrench SyncFET
Photo by: Bill Detwiler / TechRepublic
Caption by: Bill Detwiler
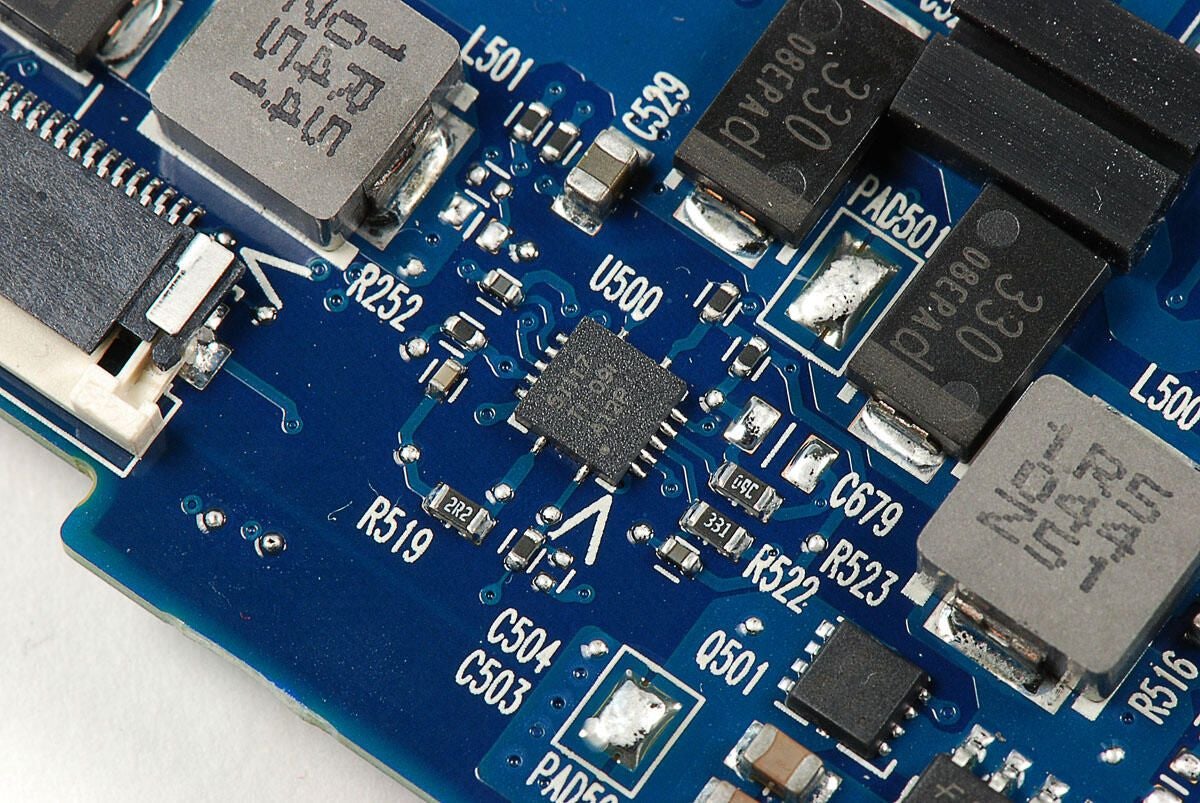
This Texas Instruments chip is likely another linear voltage regulator.
Photo by: Bill Detwiler / TechRepublic
Caption by: Bill Detwiler

Realtek ALC272 High Definition Audio Codec
Photo by: Bill Detwiler / TechRepublic
Caption by: Bill Detwiler
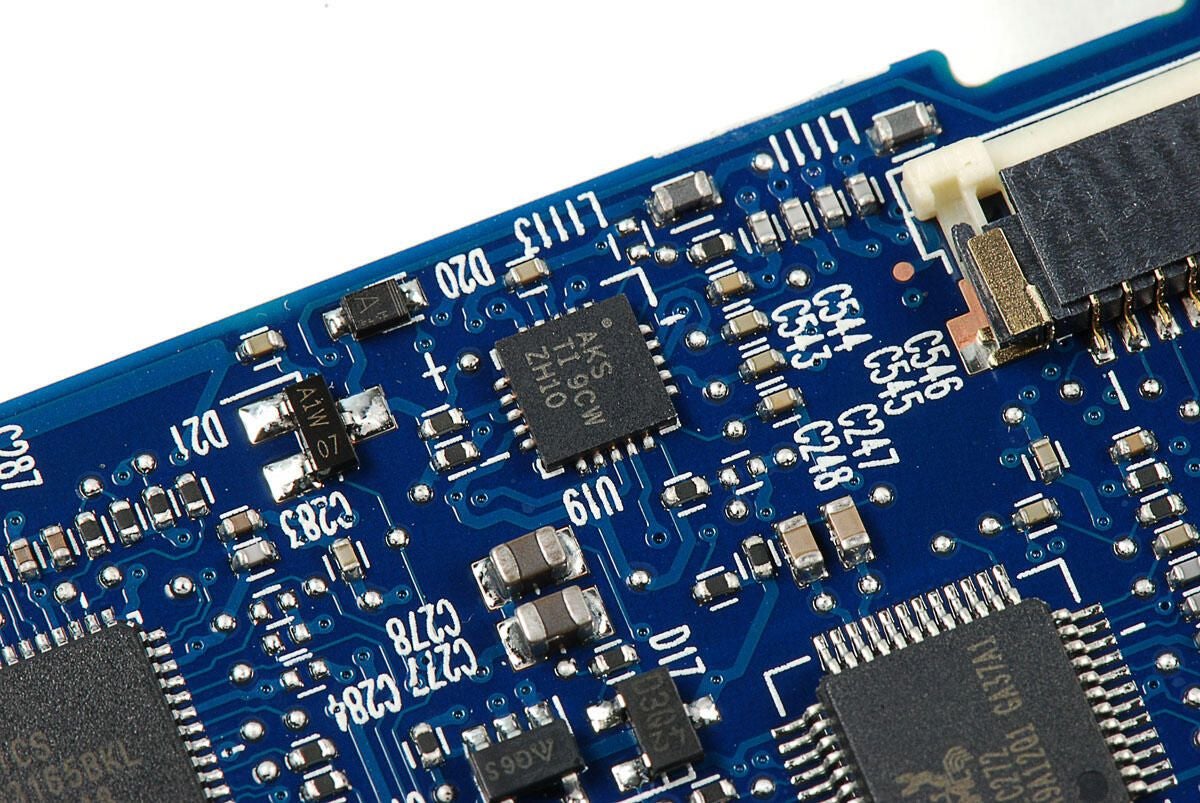
Texas Instruments chips with markings:
AKS TI 9CW ZH10
Photo by: Bill Detwiler / TechRepublic
Caption by: Bill Detwiler
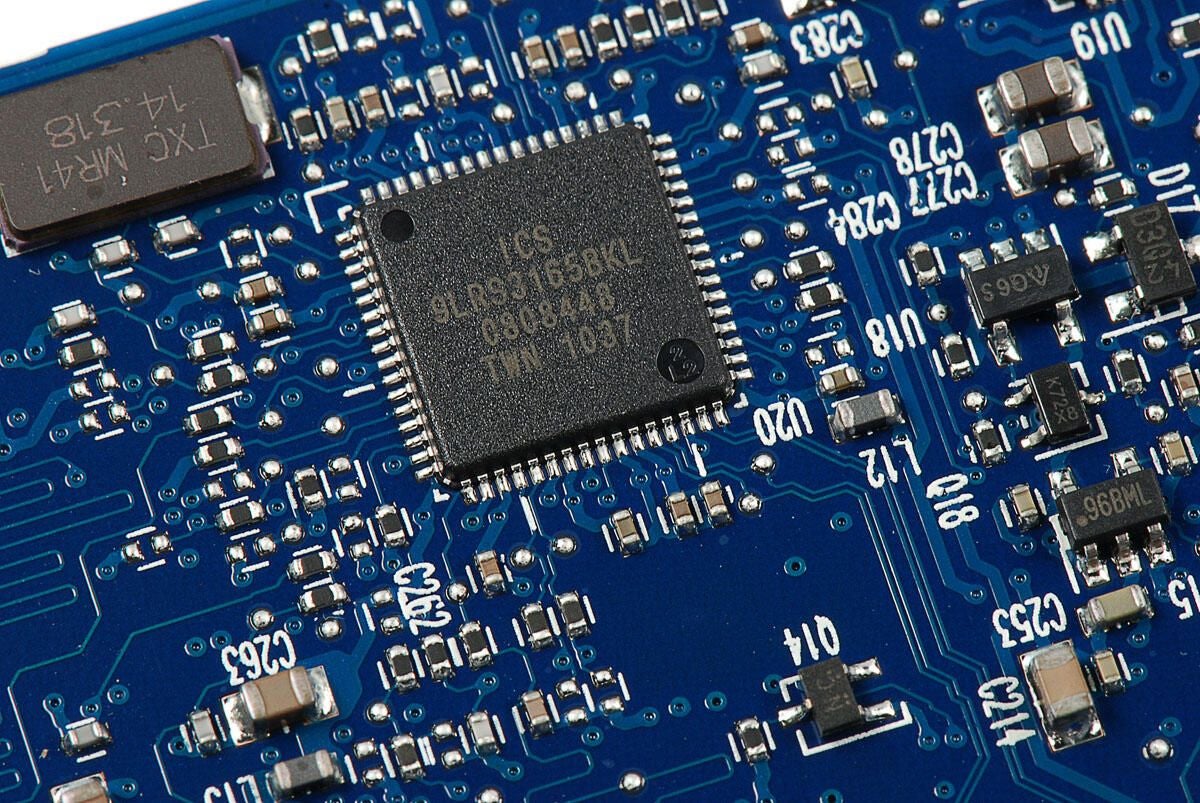
Integrated Device Technology 9LRS3165 PC clock
Photo by: Bill Detwiler / TechRepublic
Caption by: Bill Detwiler
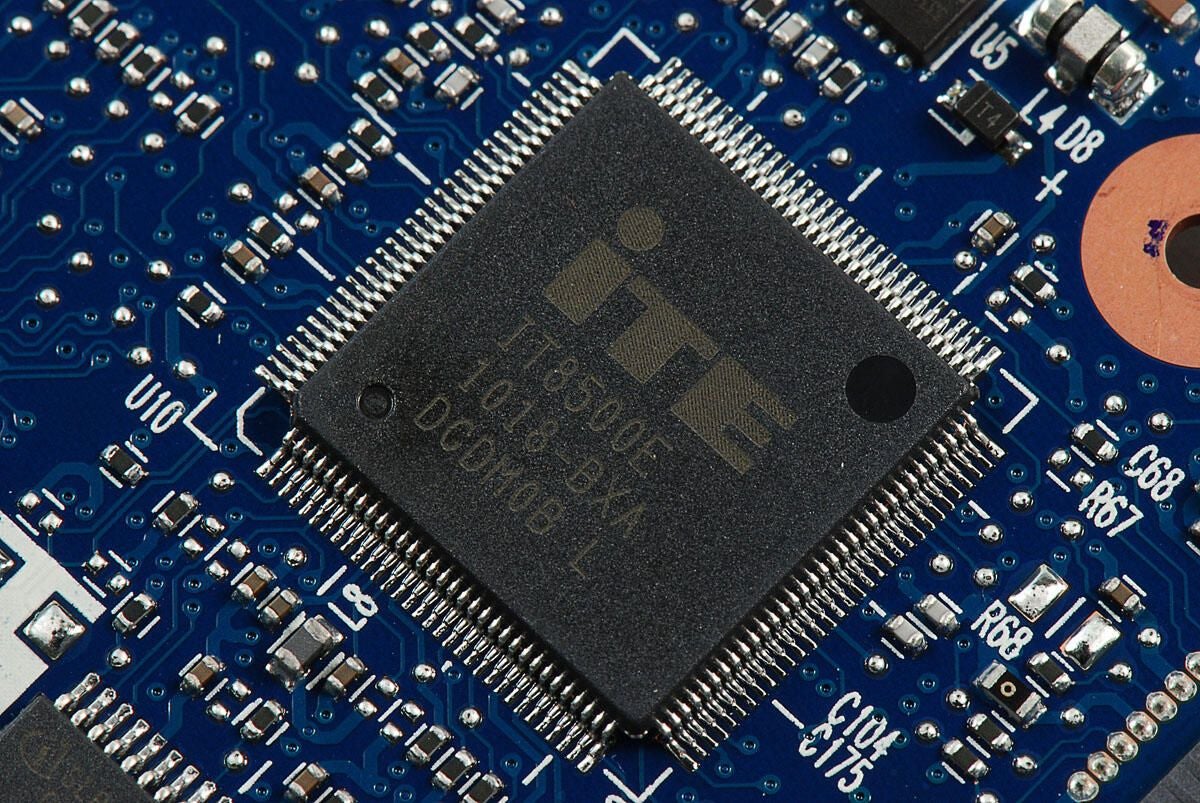
This ITE Tech. IT8500E 1018-BXA DCDM0B L chip is likely and earlier version of the company’s IT8510E embedded controller.
Photo by: Bill Detwiler / TechRepublic
Caption by: Bill Detwiler
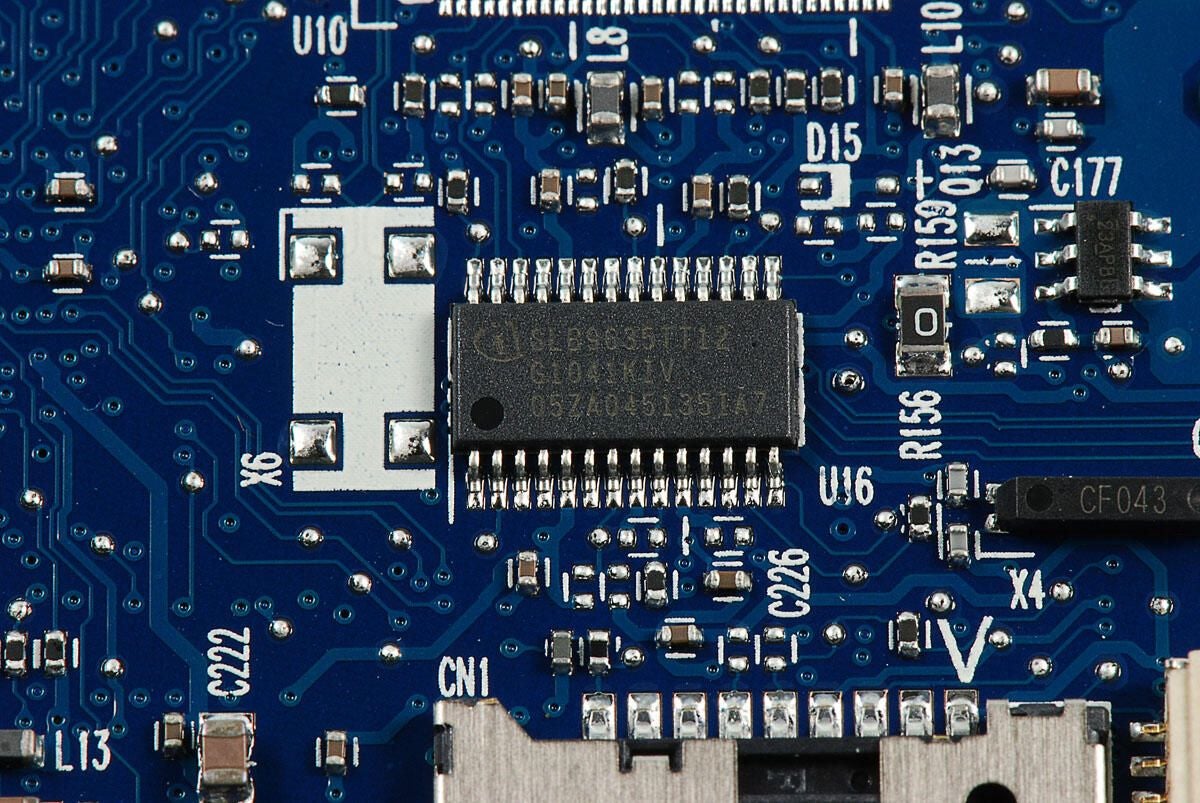
Infineon SLB 9635 TT 1.2 Trusted Mobile Platform (TPM) Security Chip
Photo by: Bill Detwiler / TechRepublic
Caption by: Bill Detwiler
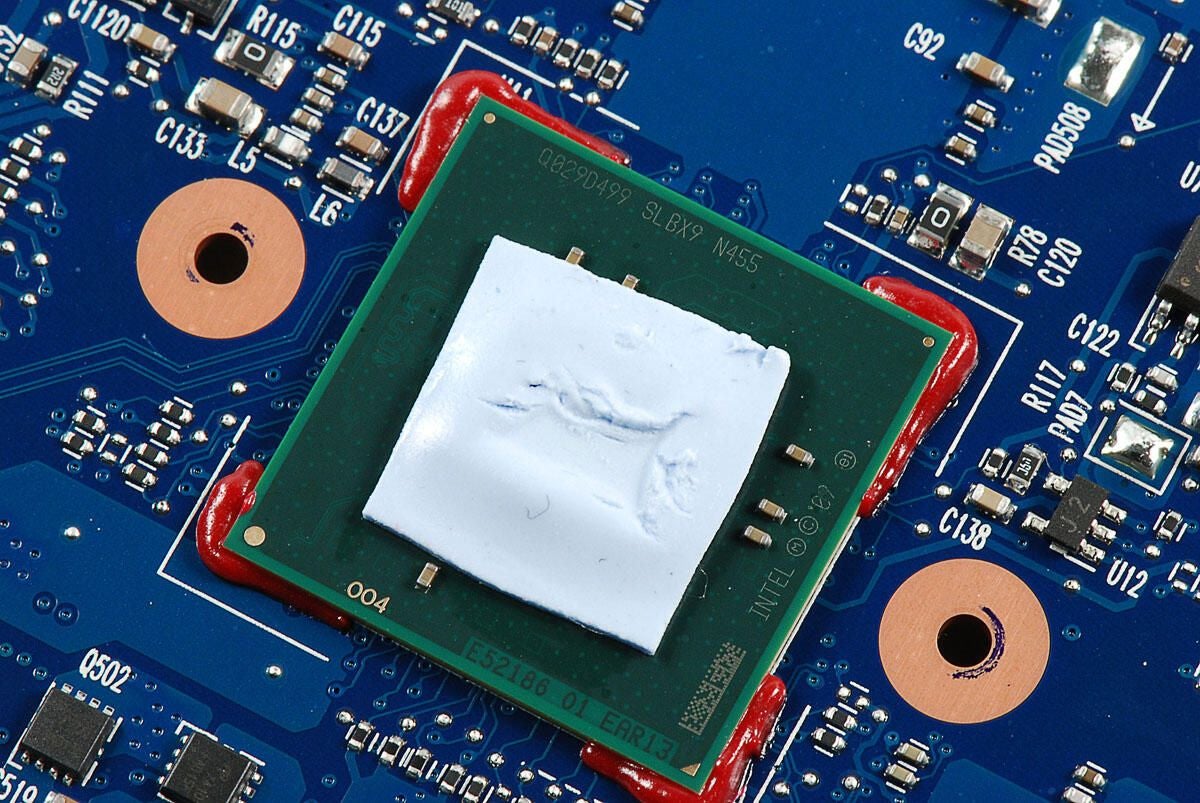
Instead of thermal paste, the Cr-48’s CPU is covered with a phase change thermal pad. These are increasingly common in both laptops and mobile devices. Let’s remove the pad for a better look at the CPU.
Photo by: Bill Detwiler / TechRepublic
Caption by: Bill Detwiler
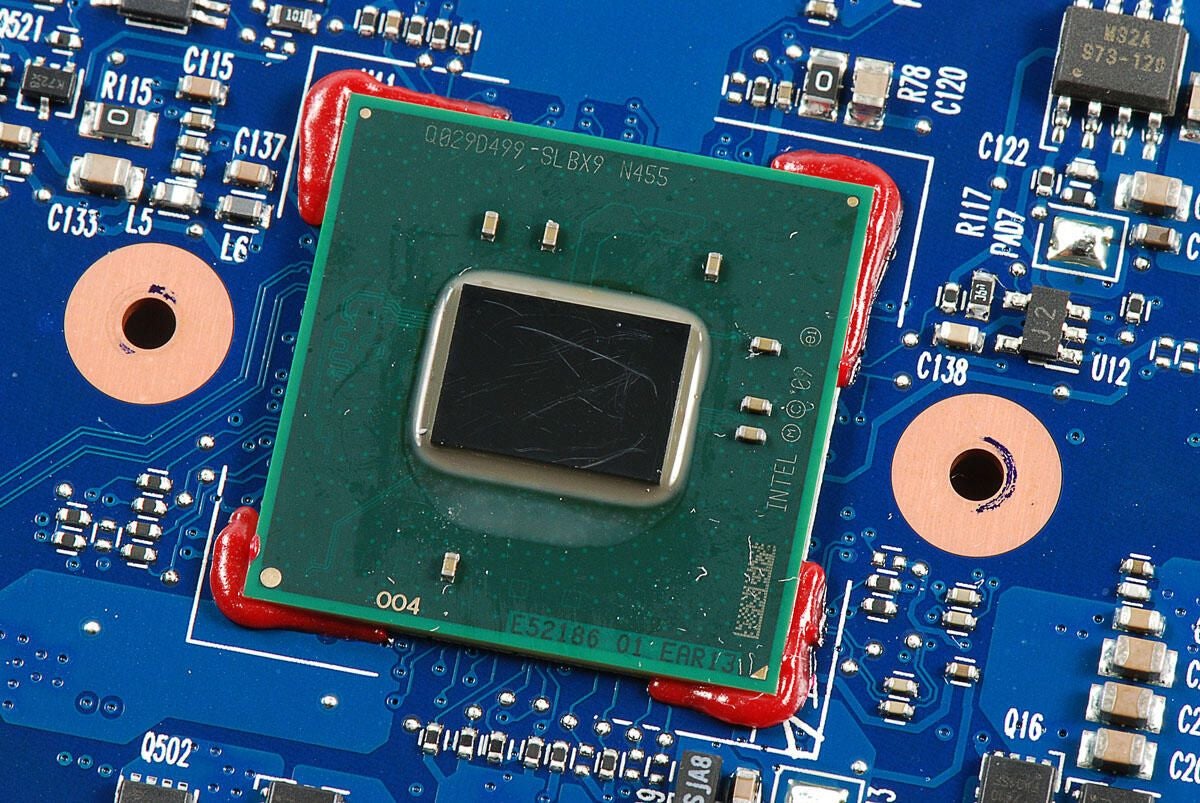
The Google Cr-48 Chrome notebook has a 1.66GHz Intel Atom processor N455 (with 512K Cache). This chip is similar to the Intel Atom D510 found in the ZOTAC ZBOX mini-PC we cracked open in October. But, the D510 has two cores and a 1MB cache.
Photo by: Bill Detwiler / TechRepublic
Caption by: Bill Detwiler
Bill Detwiler is the Editor for Technical Content and Ecosystem at Celonis. He is the former Editor in Chief of TechRepublic and previous host of TechRepublic's Dynamic Developer podcast and Cracking Open, CNET and TechRepublic's popular online show. Previously, Bill was an IT manager in the social research and energy industries. He has bachelor's and master's degrees from the University of Louisville, where he has also lectured on computer crime and crime prevention.
