\n\tIn December 2010, Google partnered with Samsung to release the Nexus S–a variant of Samsung’s Galaxy S line of phones.
\n
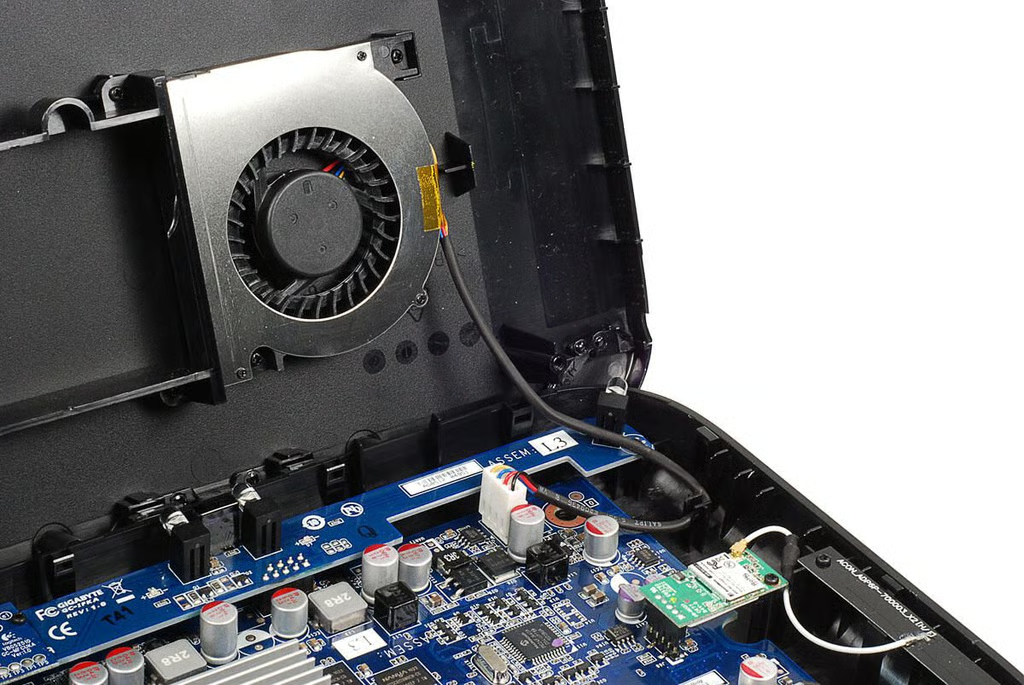
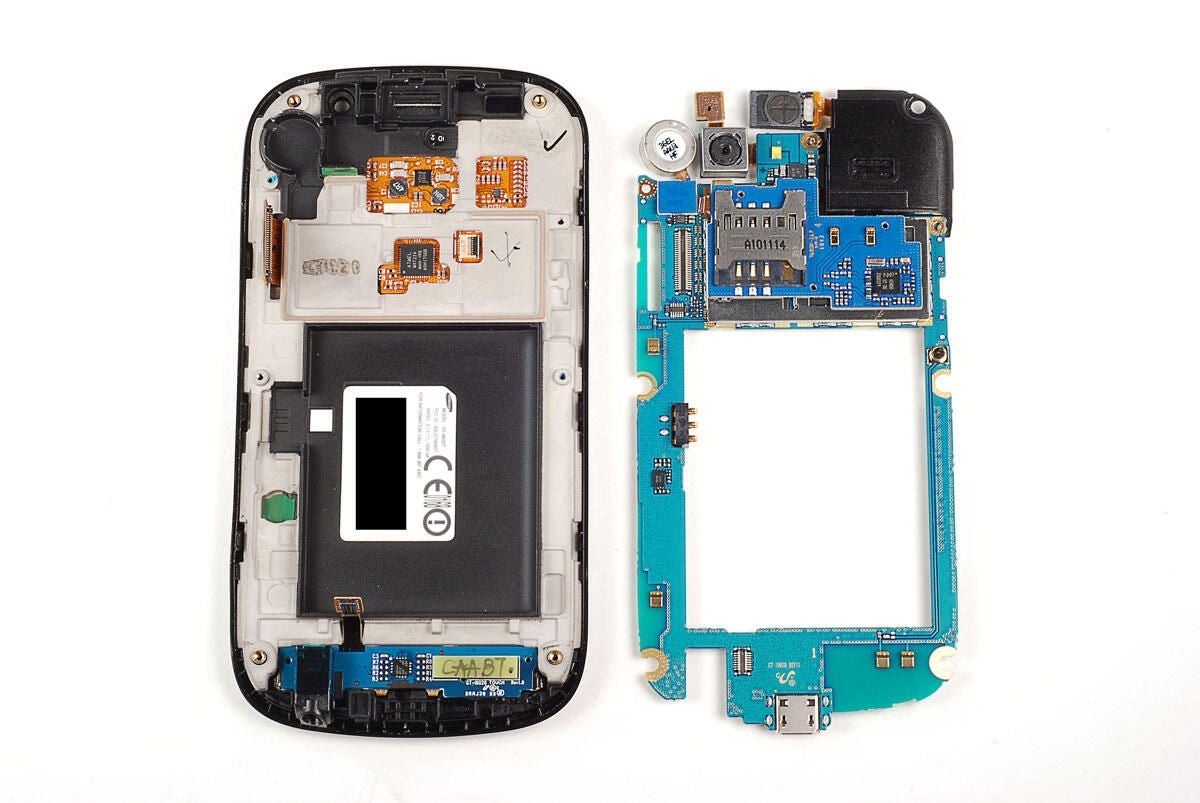
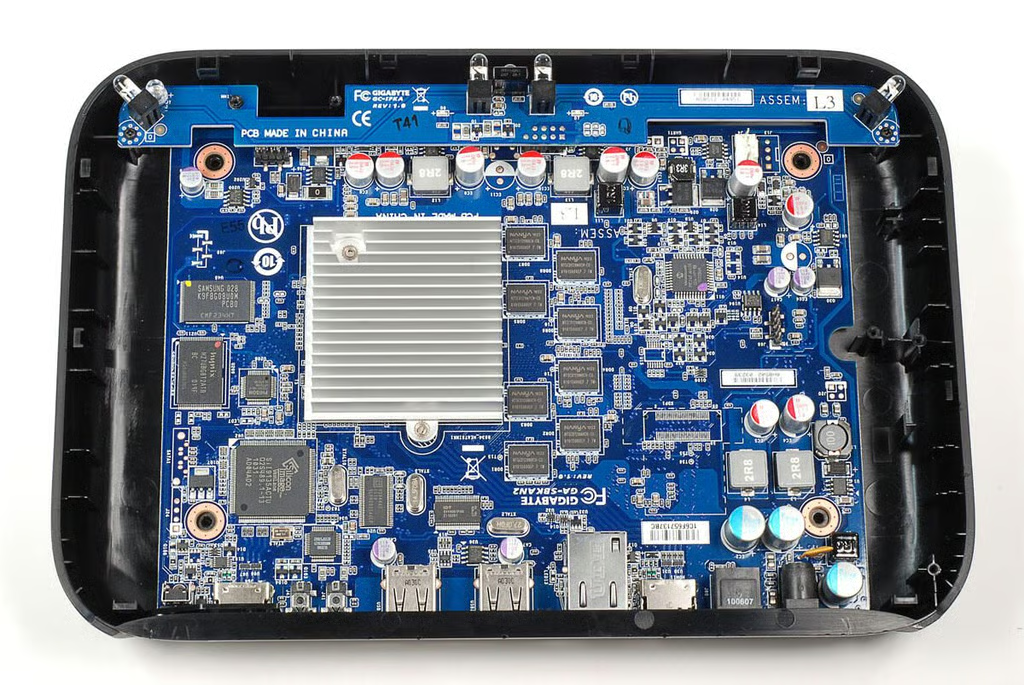
\n\tCheck out our teardown of the Samsung Galaxy S Captivate.
\n
\n\tAfter testing the device, TechRepublic’s Jason Hiner was less than enthusiastic about the new device:
\n\t
\n\t”Overall, the Google Nexus S feels like a step backward for the Nexus line of \u201cGoogle phones,\u201d and not just because of Google’s less ambitious agenda with the product. The Nexus S just doesn’t offer enough important hardware upgrades from the Nexus One to make up for the lower build quality.”
\n\t
\n\tDespite Jason’s lackluster review, we wanted to see the hardware inside this new Google phone. So, follow along as we crack open the Nexus S.
\n\t
\n\tPhoto by: Bill Detwiler / TechRepublic
\n\tCaption by: Bill Detwiler
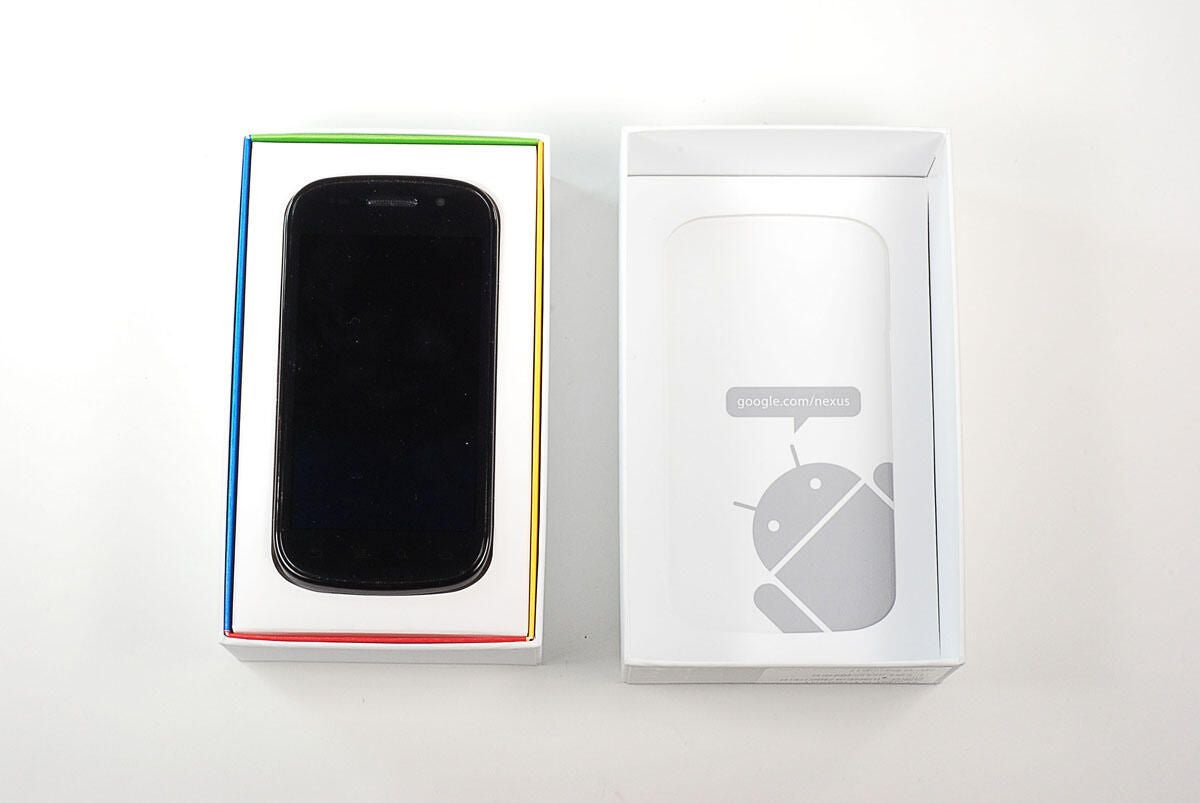
\n\tThe Nexus S is available at Best Buy in the US and Carphone Wharehouse in the UK. The phone is sold unlocked and will work on T-Mobile (US and UK), Vodaphone (UK), Orange (UK), O2 (UK).
\n
\n\tThe Nexus S costs $199 US (with 2-year contract) and $529 (no contract).
\n
\n\t
\n\tPhoto by: Bill Detwiler / TechRepublic
\n\tCaption by: Bill Detwiler
\n\tThe Nexus S runs Android 2.3 (Gingerbread), comes with a 1.0 GHz Cortex A8 (Hummingbird), 512MB RAM, 16GB built-in storage, and a 4-inch Super AMOLED WVGA (800\u00d7480) display.
\n
\n\tPhoto by: Bill Detwiler / TechRepublic
\n\tCaption by: Bill Detwiler
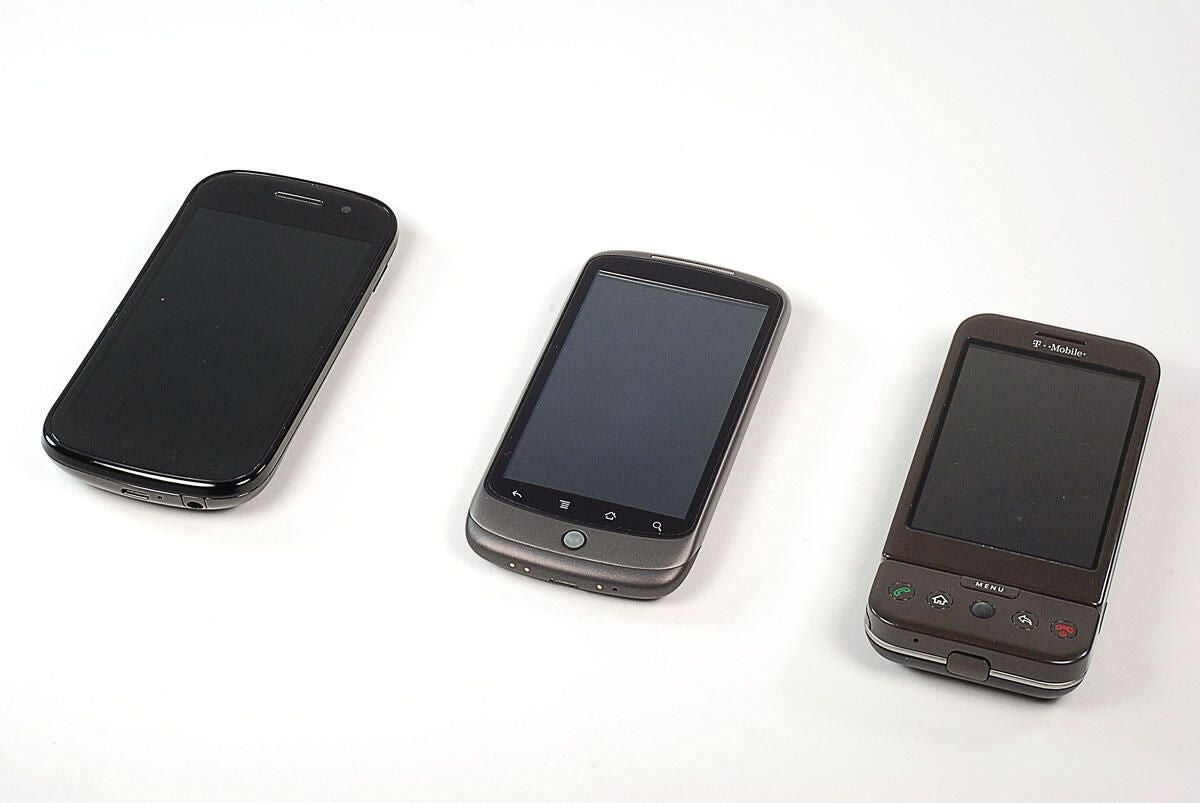
\n\tFrom left to right, the Nexus S, Nexus One, and G1 smartphones.
\n
\n\tPhoto by: Bill Detwiler / TechRepublic
\n\tCaption by: Bill Detwiler
\n\tThe Nexus One and G1 were both manufactured by HTC. The Nexus S is manufuctured by Samsung.
\n
\n\tPhoto by: Bill Detwiler / TechRepublic
\n\tCaption by: Bill Detwiler
\n\tThe Nexus S weighs 4.55 ounces (129g) and measures 4.88(h) x 2.48(w) x 0.43(d) inches. It also has an accelerometer, three-axis gyroscope, GPS, digital compass, proximity sensor, and ambient light sensor.
\n
\n\tPhoto by: Bill Detwiler / TechRepublic
\n\tCaption by: Bill Detwiler
\n\tJust like the Galaxy S, the first step in disassembling the Nexus S is to pop off the back cover.
\n
\n\tUnlike the iPhone 4, the battery on the Nexus S is user replaceable.
\n
\n\tAttached to the interior of the back cover is the paper-thin NFC antenna (covered with a black sticker). As I want to reassemble this phone in working order, I’m going to refrain from pealing the antenna off the back cover.
\n
\n\tPhoto by: Bill Detwiler / TechRepublic
\n\tCaption by: Bill Detwiler
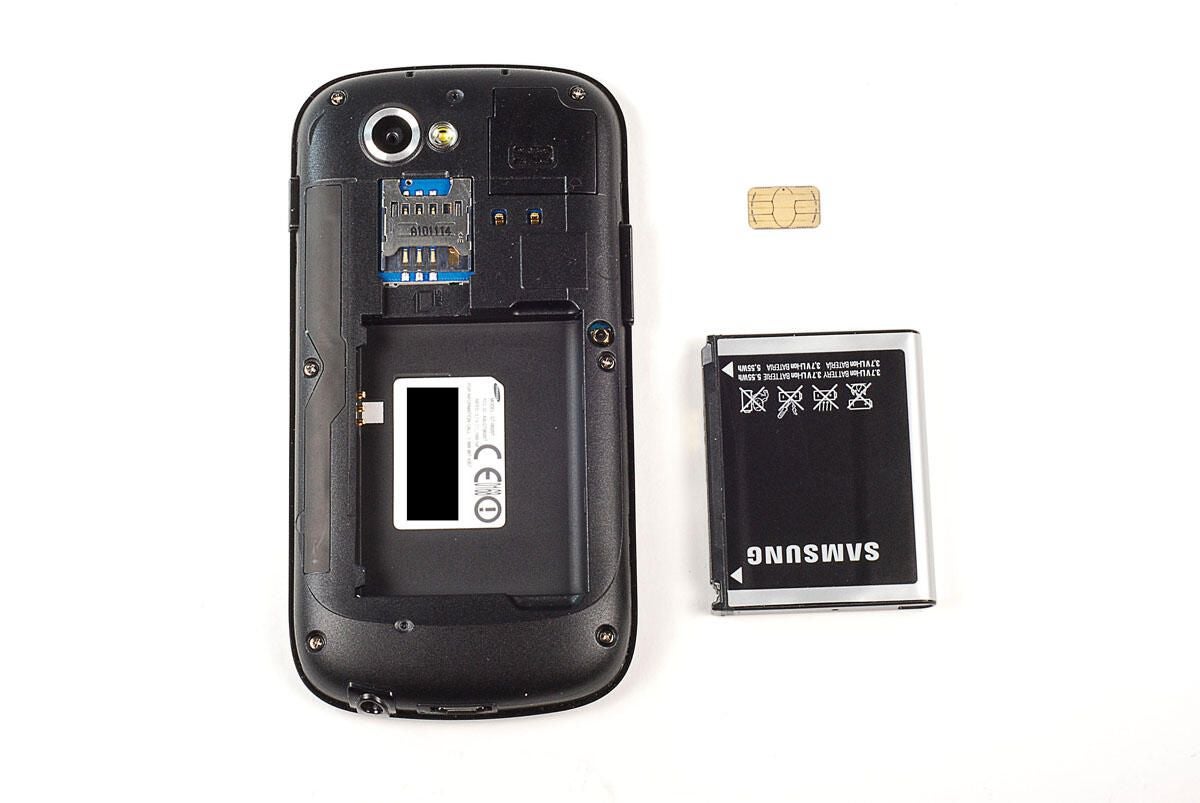
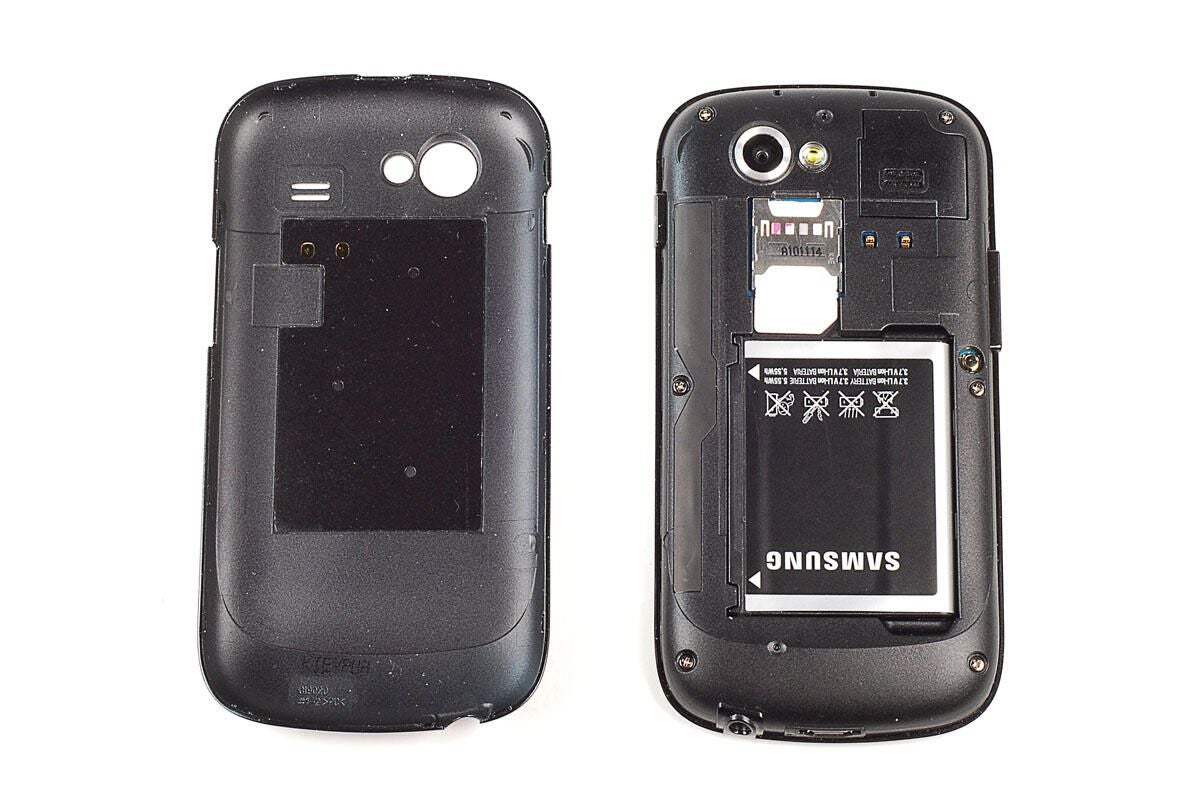
\n\tOnce the back cover is off, you can remove the battery and SIM card.
\n
\n\tPhoto by: Bill Detwiler / TechRepublic
\n\tCaption by: Bill Detwiler
\n\tAfter removing the back cover, battery, and SIM card, you’ll need to remove the six Phillips #00 screws that hold the inner cover in place.
\n
\n\tPhoto by: Bill Detwiler / TechRepublic
\n\tCaption by: Bill Detwiler
\n\tOnce the screws are removed, you can use a thin metal blade or plastic case opening tool to pry off the inner cover.
\n
\n\tPhoto by: Bill Detwiler / TechRepublic
\n\tCaption by: Bill Detwiler
\n\tTake care when removing the inner cover, a thin plastic border surrounds the front half of the phone and snaps to the inner cover. Using too much force on the the inner cover, could break this edging.
\n
\n\tPhoto by: Bill Detwiler / TechRepublic
\n\tCaption by: Bill Detwiler
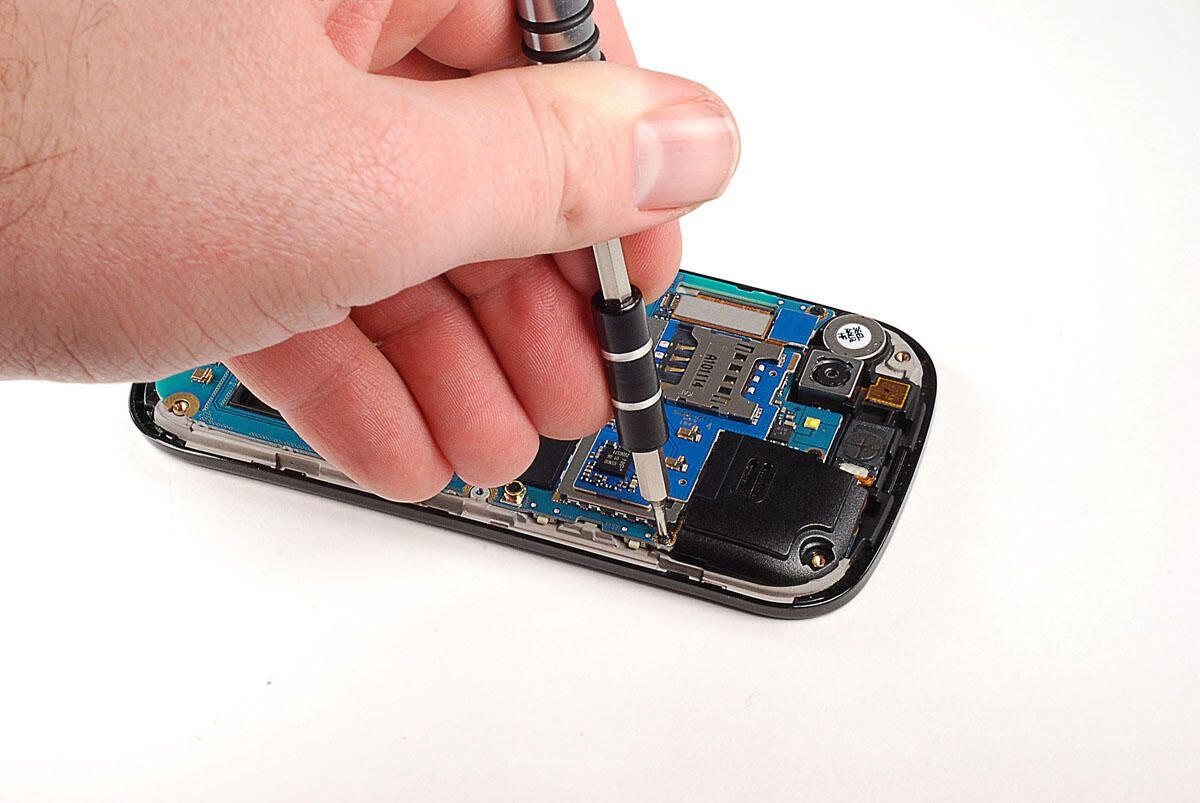
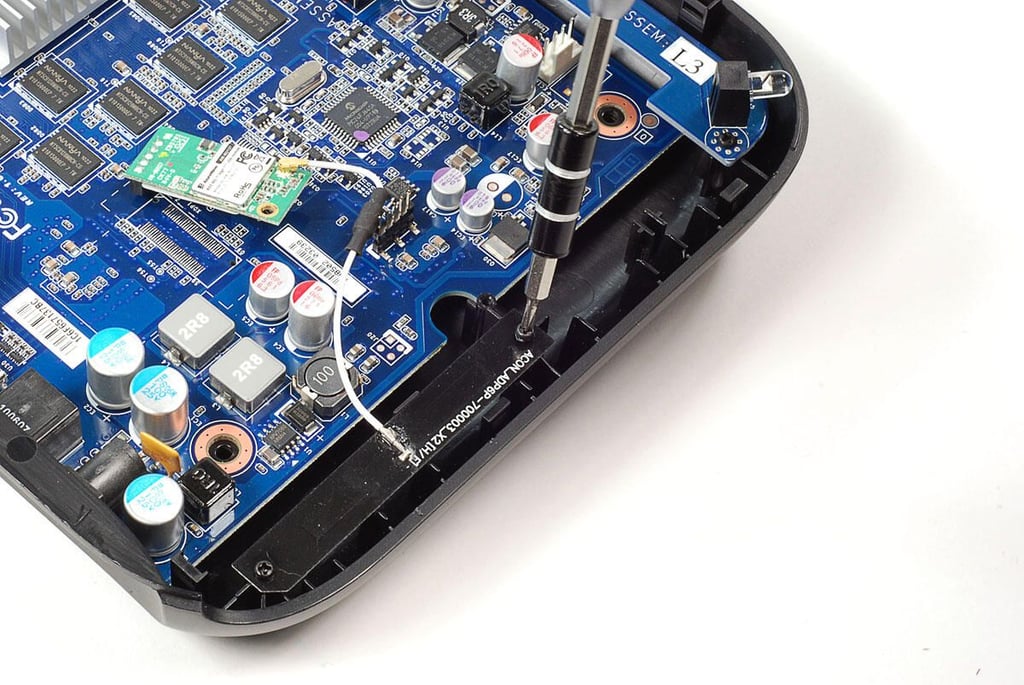
\n\tOur first step in removing the main PCB and attached internal components is to remove the three Phillips #00 screws that hold the main PCB to the Nexus S’ internal frame.
\n
\n\tPhoto by: Bill Detwiler / TechRepublic
\n\tCaption by: Bill Detwiler
\n\tWe’ll also need to detach several cables and connectors from the the main PCB before lifting it away from the Nexus S’ frame.
\n
\n\tThis connector is likely for the small PCB located at the bottom of the phone.
\n
\n\tPhoto by: Bill Detwiler / TechRepublic
\n\tCaption by: Bill Detwiler
\n\tThis connector is likely for the display and digitizer.
\n
\n\tPhoto by: Bill Detwiler / TechRepublic
\n\tCaption by: Bill Detwiler
\n\tWith both connectors detached, you’ll need to pop loose the vibration motor, which is held to the front half of the phone with a small amount of adhesive. Using a small metal blade, I was able to pry it loose without damaging it or the surrounding plastic.
\n
\n\tPhoto by: Bill Detwiler / TechRepublic
\n\tCaption by: Bill Detwiler
\n\tI also suggest you also pop loose the small front speaker, which also sits in a small compartment.
\n
\n\tPhoto by: Bill Detwiler / TechRepublic
\n\tCaption by: Bill Detwiler
\n\tWith the screws removed, connectors detached, and vibration and front speaker dislodged, you can left the main PCB away from the rest of the Nexus S.
\n
\n\tPhoto by: Bill Detwiler / TechRepublic
\n\tCaption by: Bill Detwiler
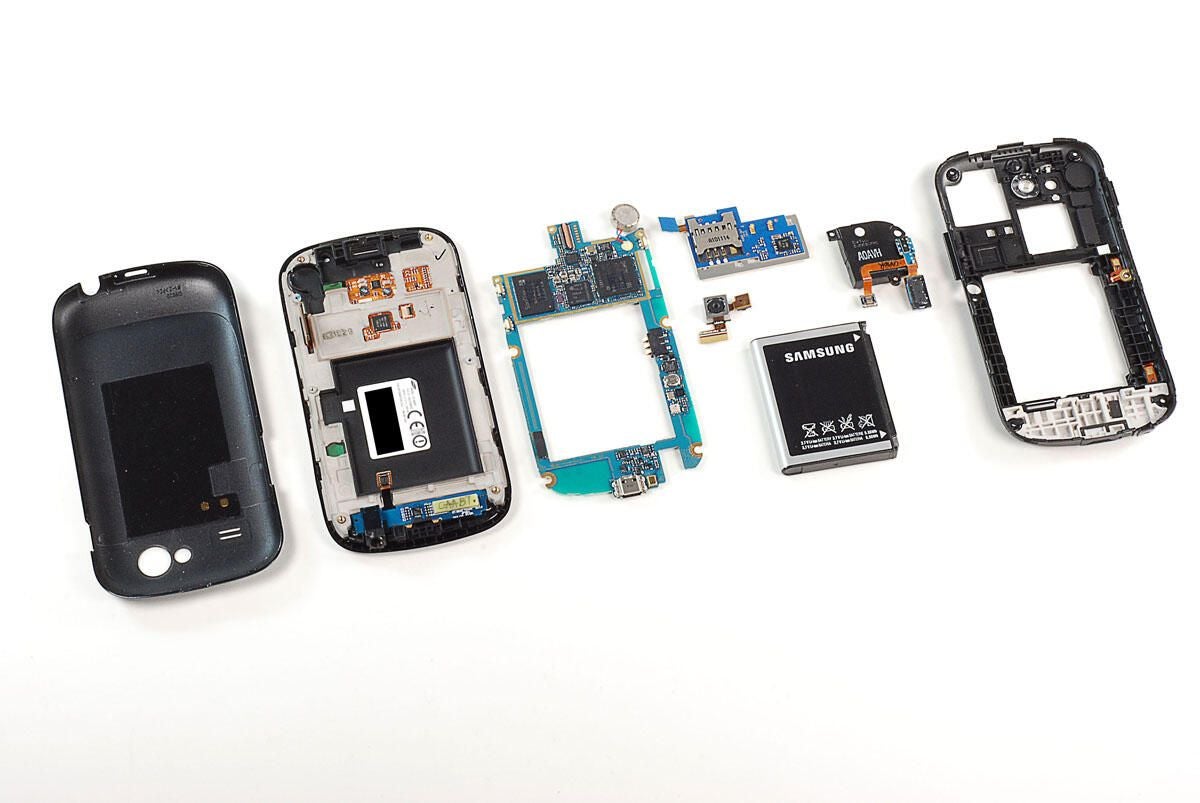
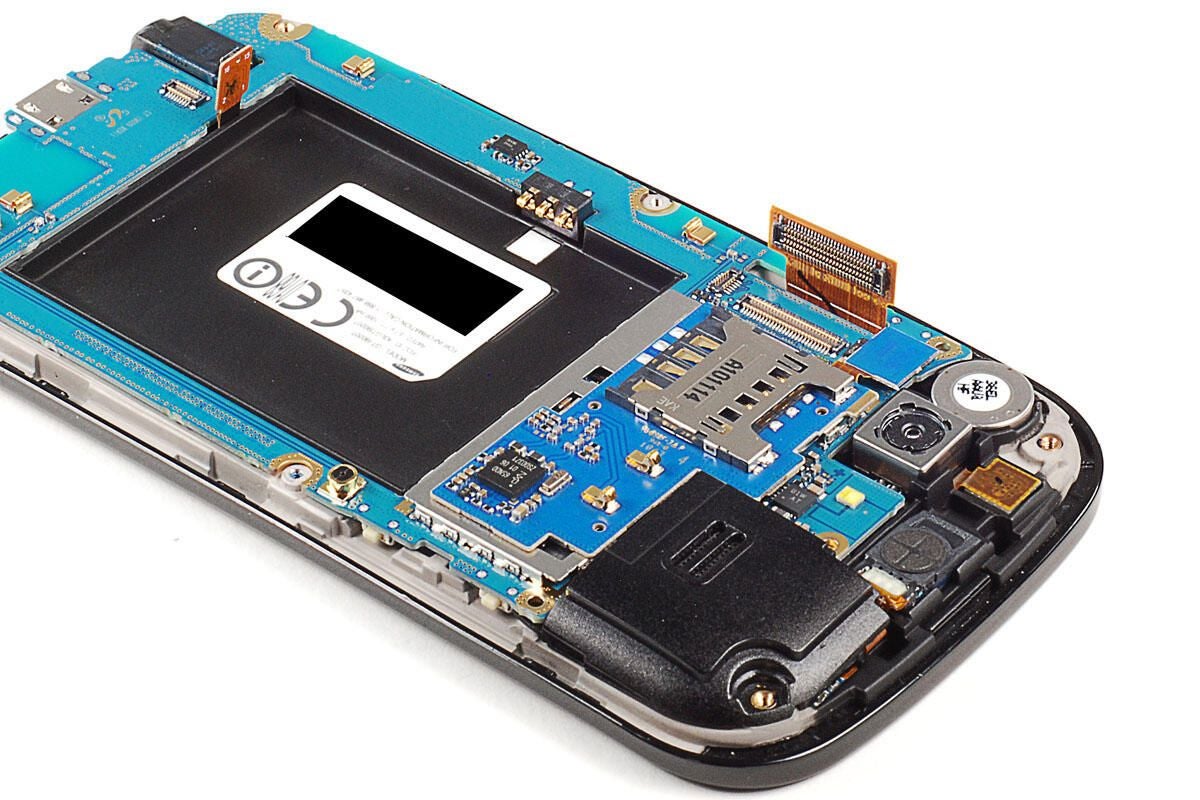
\n\tWith the main PCB removed, we can see the internal metal frame, a smaller PCB along the device’s bottom edge, and several chips associated with the Nexus S’ touch-sensitive display.
\n
\n\tPhoto by: Bill Detwiler / TechRepublic
\n\tCaption by: Bill Detwiler
\n\tThe layout of these chips is very similar to the Samsung Galaxy S (Captivate).
\n
\n\tAnd like its Samsung cousin, the Nexus S uses an Atmel touchscreen microcontroller. In this case, the Atmel MXT224.
\n
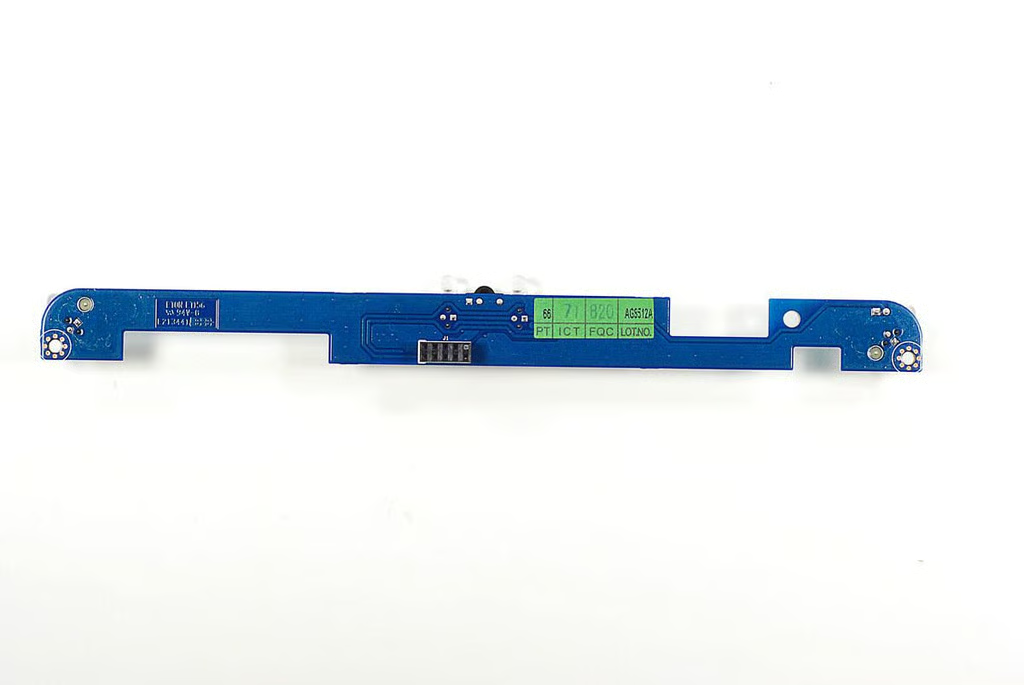
\n\tPhoto by: Bill Detwiler / TechRepublic
\n\tCaption by: Bill Detwiler
\n\tThe smaller PCB at the bottom of the Nexus S
\n
\n\tPhoto by: Bill Detwiler / TechRepublic
\n\tCaption by: Bill Detwiler

\n\tThe cameras, speaker assembly, and stacked PCB are still attached to the main PCB. Next, we’ll remove these components.
\n
\n\tPhoto by: Bill Detwiler / TechRepublic
\n\tCaption by: Bill Detwiler
\n\tWe’ll start our component removal process on the back of the main PCB.
\n
\n\tPhoto by: Bill Detwiler / TechRepublic
\n\tCaption by: Bill Detwiler
\n\tThe camera assembly is connected to the main PCB with a thin ribbon cable.
\n
\n\tPhoto by: Bill Detwiler / TechRepublic
\n\tCaption by: Bill Detwiler
\n\tUsing a thin metal blade, genelty lift up on the camera connector’s locking gate. With the gate open, you can remove the thin ribbon cable and lift the camera away from the main PCB.
\n
\n\tPhoto by: Bill Detwiler / TechRepublic
\n\tCaption by: Bill Detwiler
\n\tThe Nexus S’ front- and rear-facing cameras are part of a single assembly.
\n
\n\tPhoto by: Bill Detwiler / TechRepublic
\n\tCaption by: Bill Detwiler
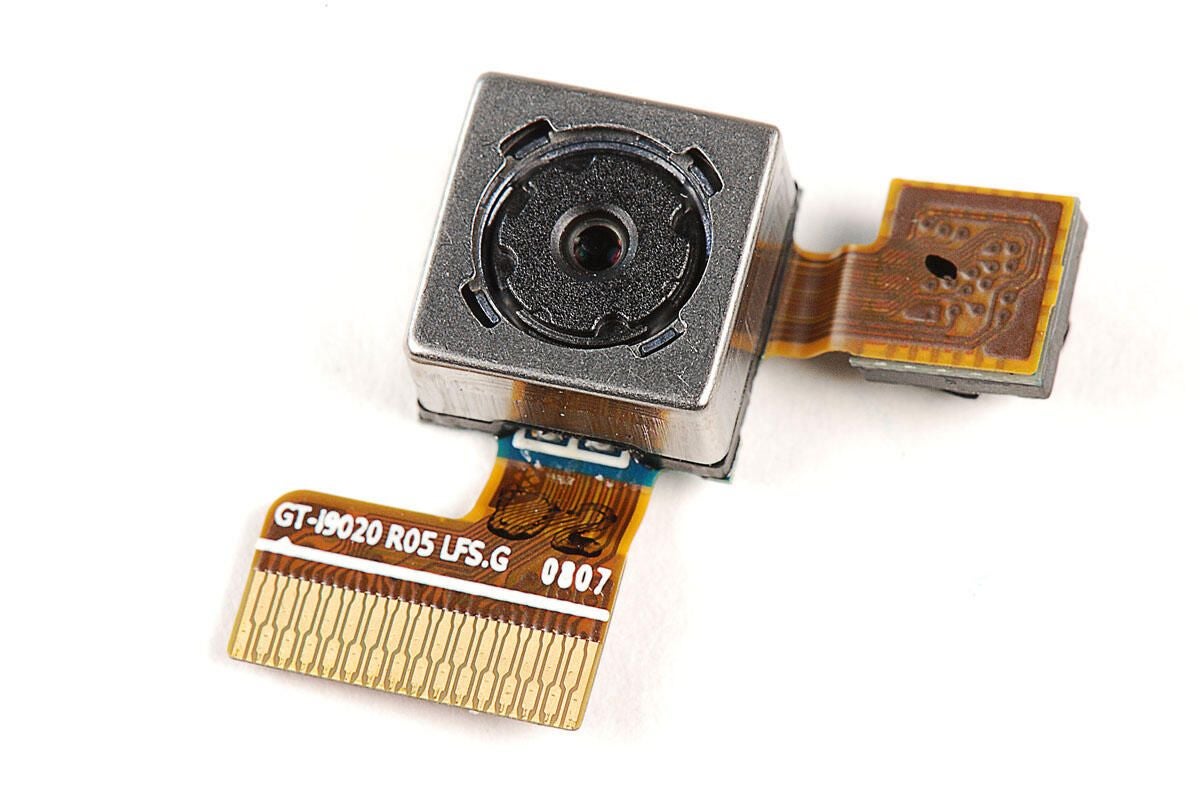
\n\tThe Nexus S has a 5MP rear-facing camera.
\n
\n\tPhoto by: Bill Detwiler / TechRepublic
\n\tCaption by: Bill Detwiler
\n\tThe Nexus S has a front-facing VGA camera that offers a resolution of 640 x 480 pixels.
\n
\n\tPhoto by: Bill Detwiler / TechRepublic
\n\tCaption by: Bill Detwiler
\n\t
\n\tPhoto by: Bill Detwiler / TechRepublic
\n\tCaption by: Bill Detwiler
\n\tNext, we’ll remove the metal EMI shield and attached PCB from atop the main PCB. To do this, we’ll need to detach its connector from the main PCB.
\n
\n\tPhoto by: Bill Detwiler / TechRepublic
\n\tCaption by: Bill Detwiler
\n\tOnce the smaller PCB’s connector is detached, you can pry loose the EMI shield and attached PCB.
\n
\n\tPhoto by: Bill Detwiler / TechRepublic
\n\tCaption by: Bill Detwiler
\n\t
\n\tPhoto by: Bill Detwiler / TechRepublic
\n\tCaption by: Bill Detwiler
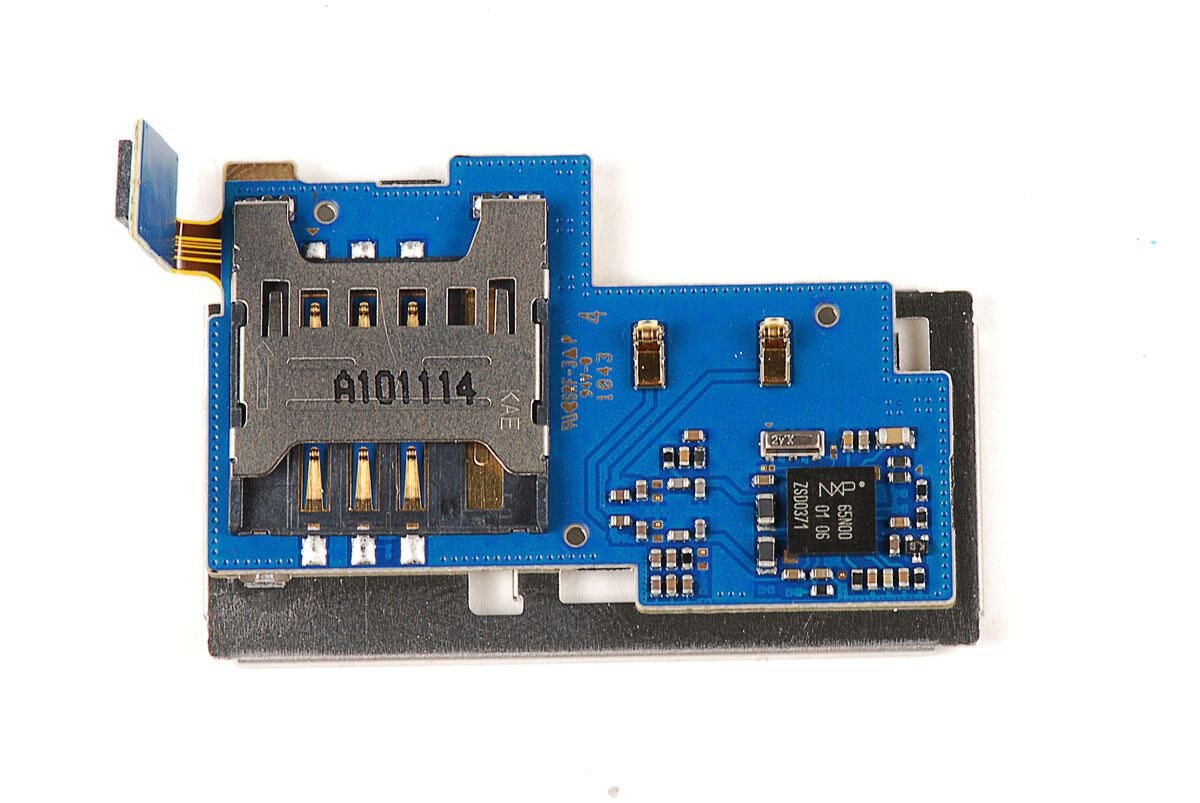
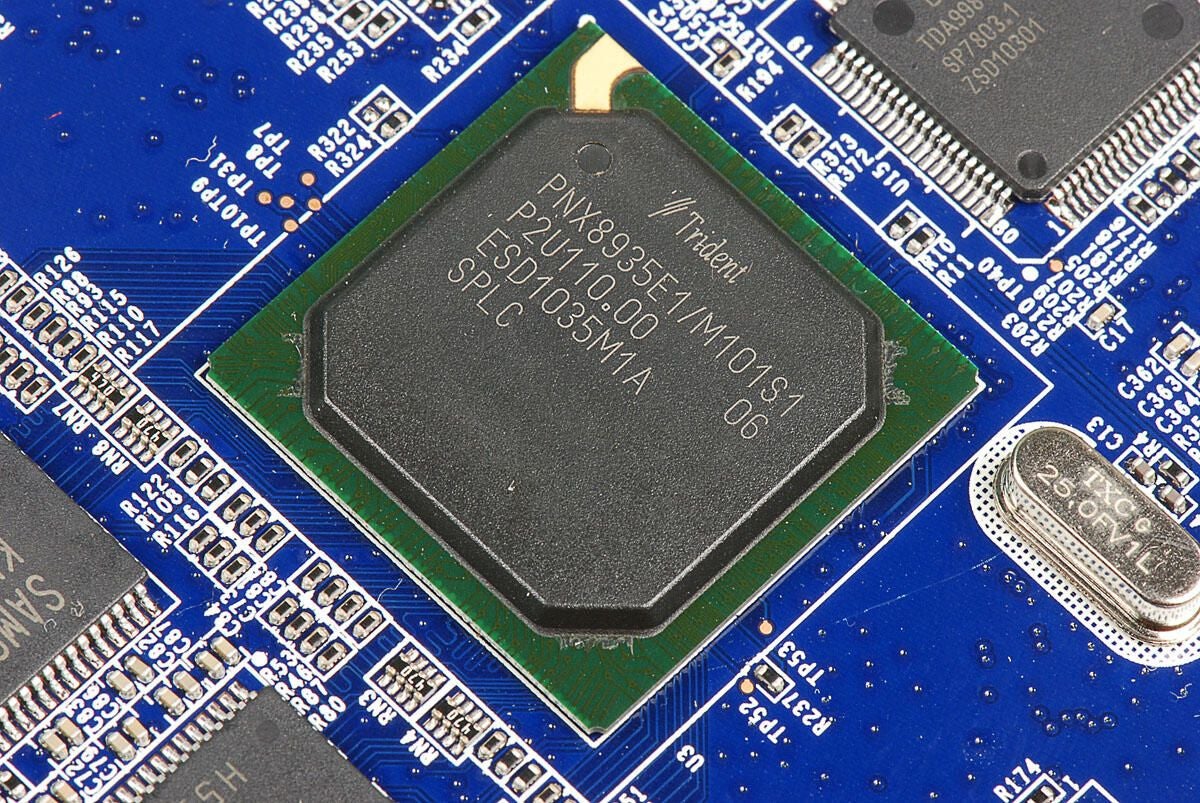
\n\tLocated on the PCB attached to the EMI sheild are the SIM card reader and an NXP chip.
\n
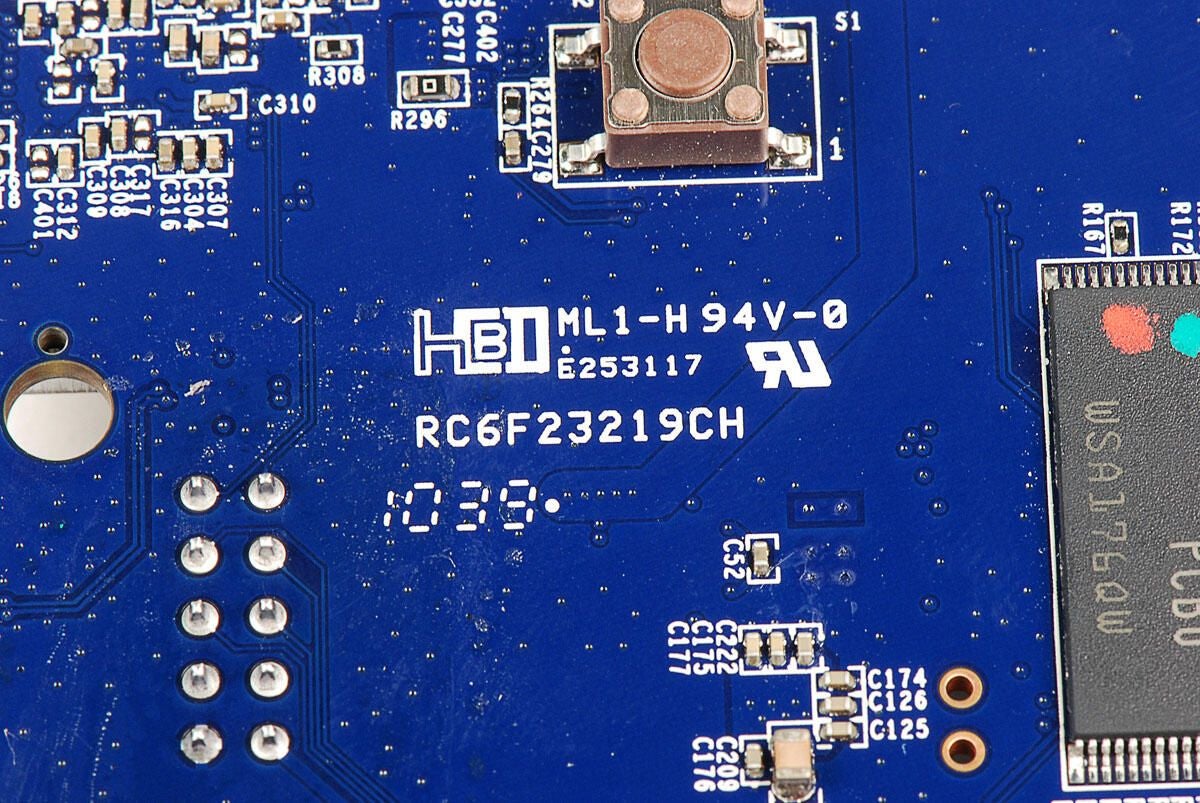
\n\tPhoto by: Bill Detwiler / TechRepublic
\n\tCaption by: Bill Detwiler
\n\tNXP chip with the markings 65N00 01 06 ZSD0371.
\n
\n\tPhoto by: Bill Detwiler / TechRepublic
\n\tCaption by: Bill Detwiler
\n\t
\n\tPhoto by: Bill Detwiler / TechRepublic
\n\tCaption by: Bill Detwiler
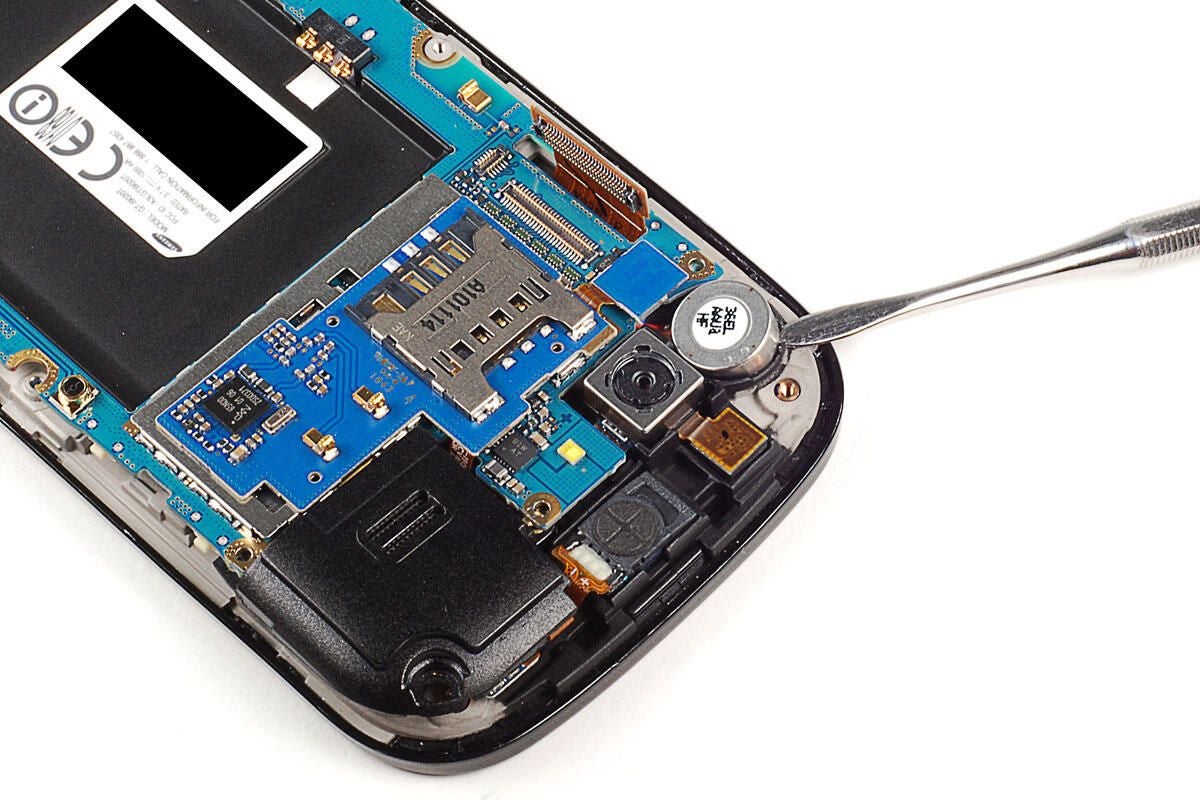
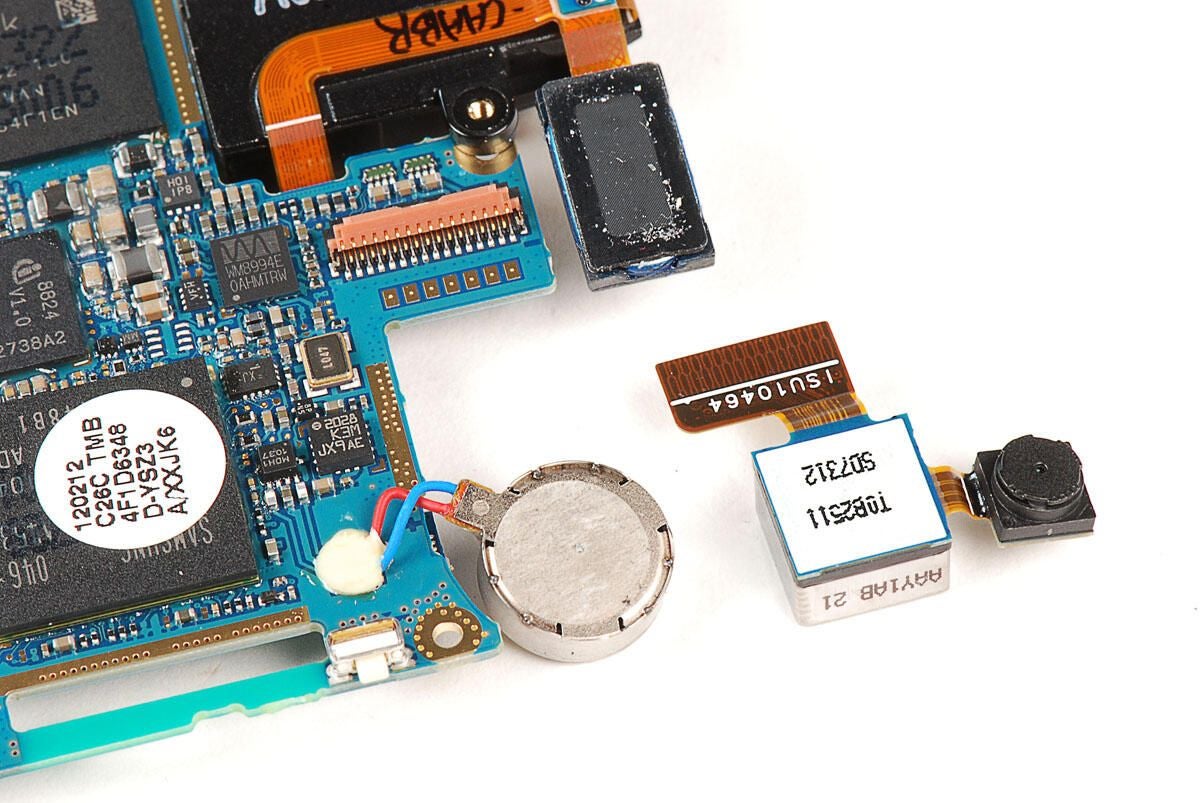
\n\tWe can now remove the speaker assembly on the Nexus S. To do so, detach the assembly’s connector from the main PCB.
\n
\n\tPhoto by: Bill Detwiler / TechRepublic
\n\tCaption by: Bill Detwiler
\n\tPhoto by: Bill Detwiler / TechRepublic
\n\tCaption by: Bill Detwiler
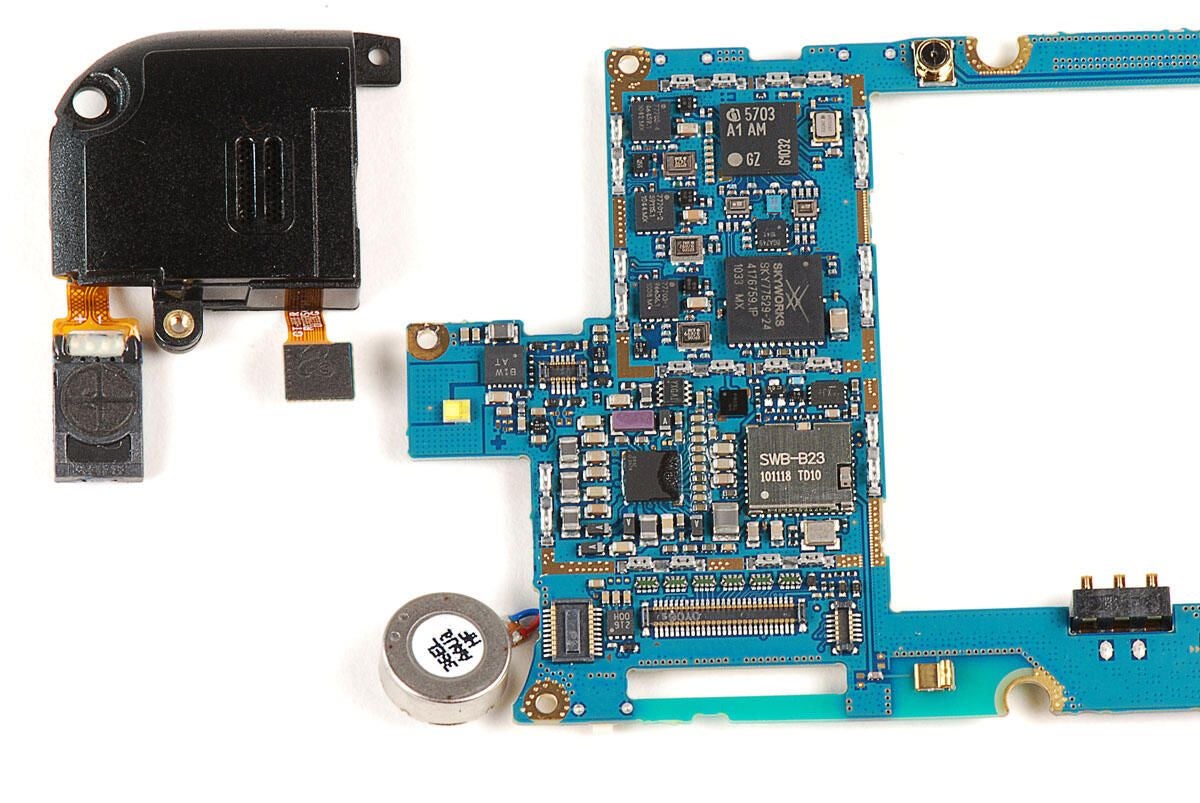
\n\tThe Nexus S’ speaker assembly contains both the front- and rear-facing speakers.
\n
\n\tPhoto by: Bill Detwiler / TechRepublic
\n\tCaption by: Bill Detwiler
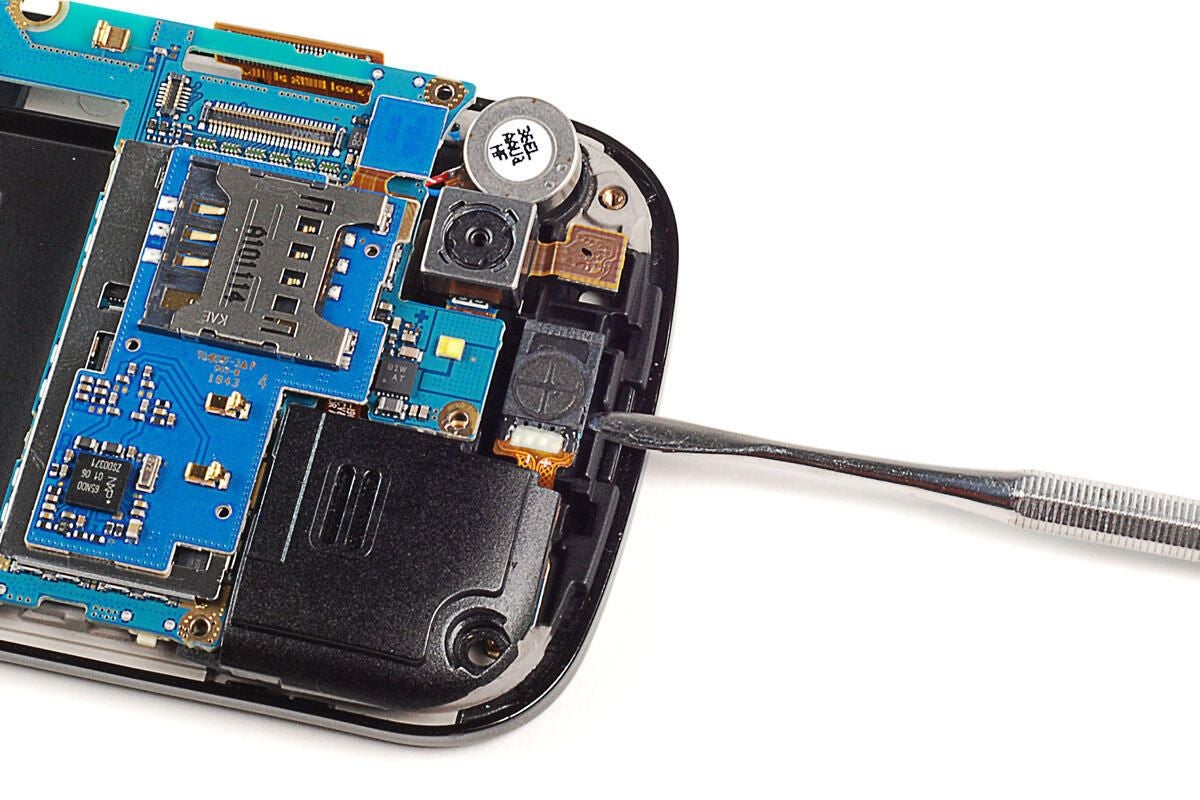
\n\tAlong with the earpiece and speakerphone speakers, the speaker assembly also houses ambient light and proximity sensors (located on the small PCB).
\n
\n\tPhoto by: Bill Detwiler / TechRepublic
\n\tCaption by: Bill Detwiler
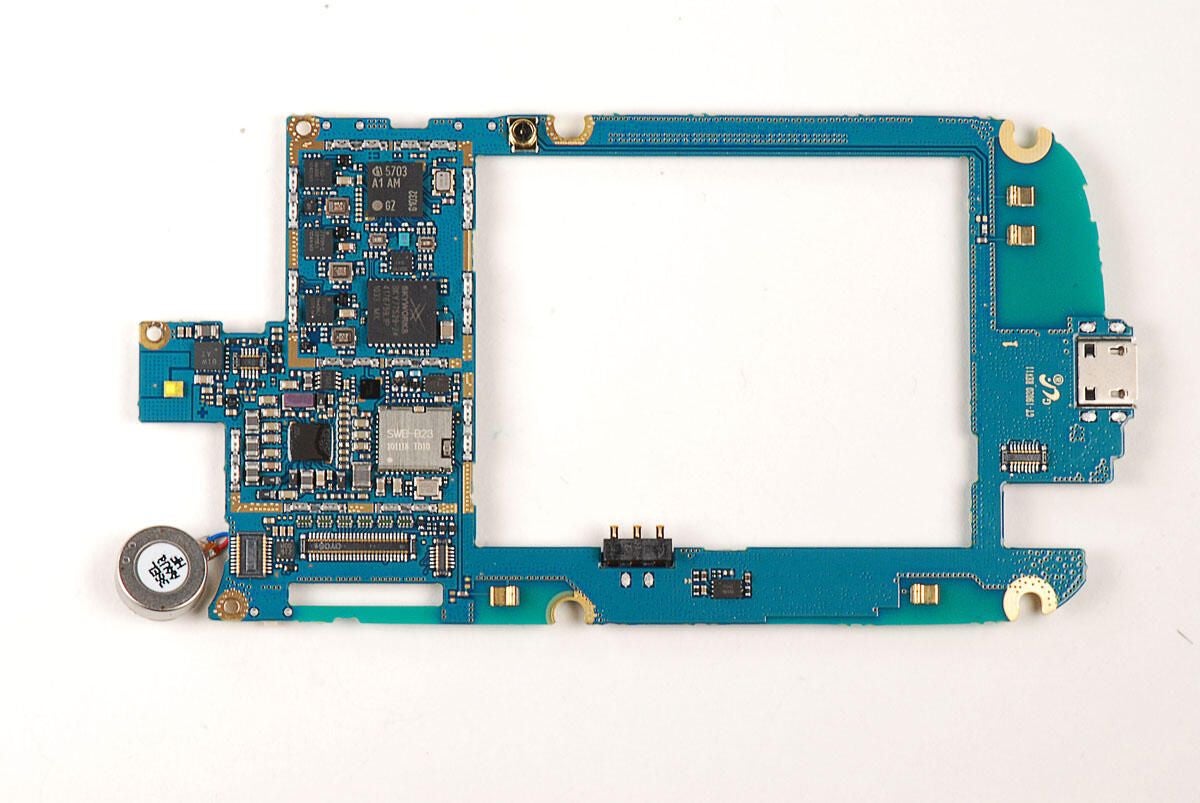
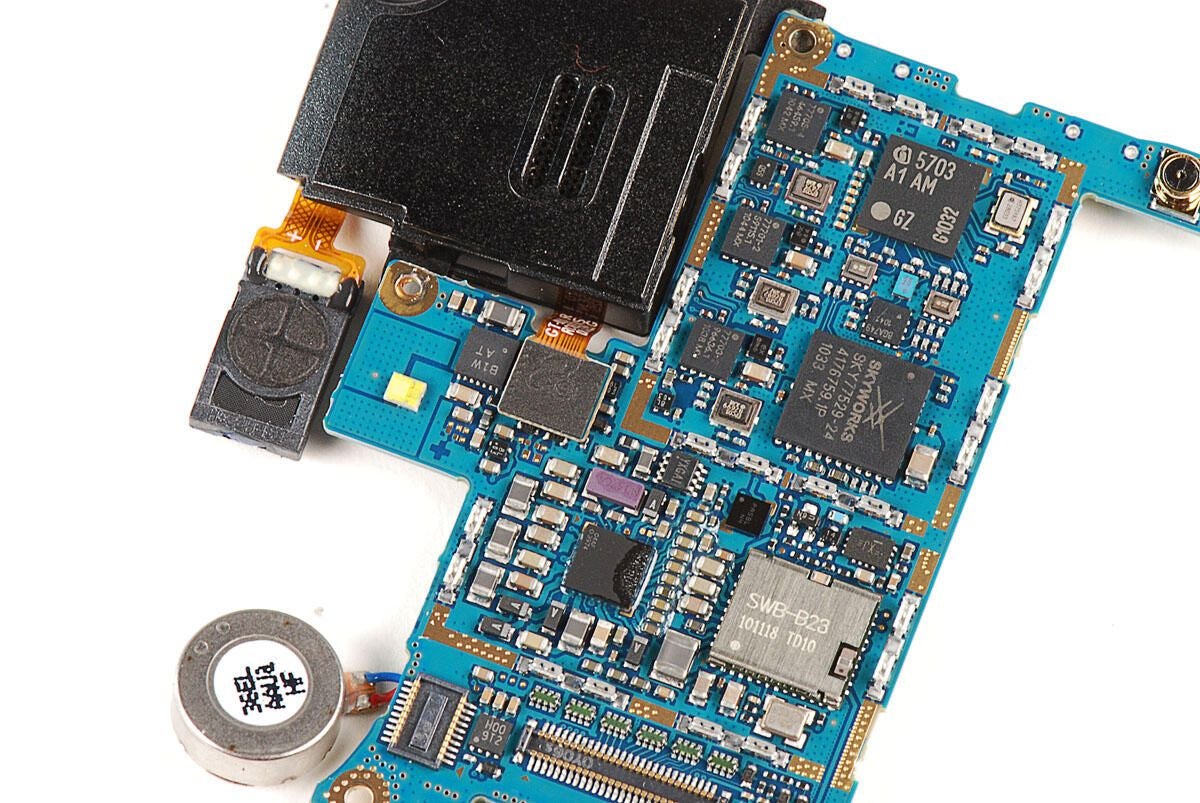
\n\tWith the attached components removed, we can take a closer look at the chips on the main PCB.
\n
\n\tAs I noted earlier, the Nexus S has a PCB that spans the length of the device. The Samsung Galaxy S (Captivate) however, uses a smaller PCB located at the top of the phone.
\n
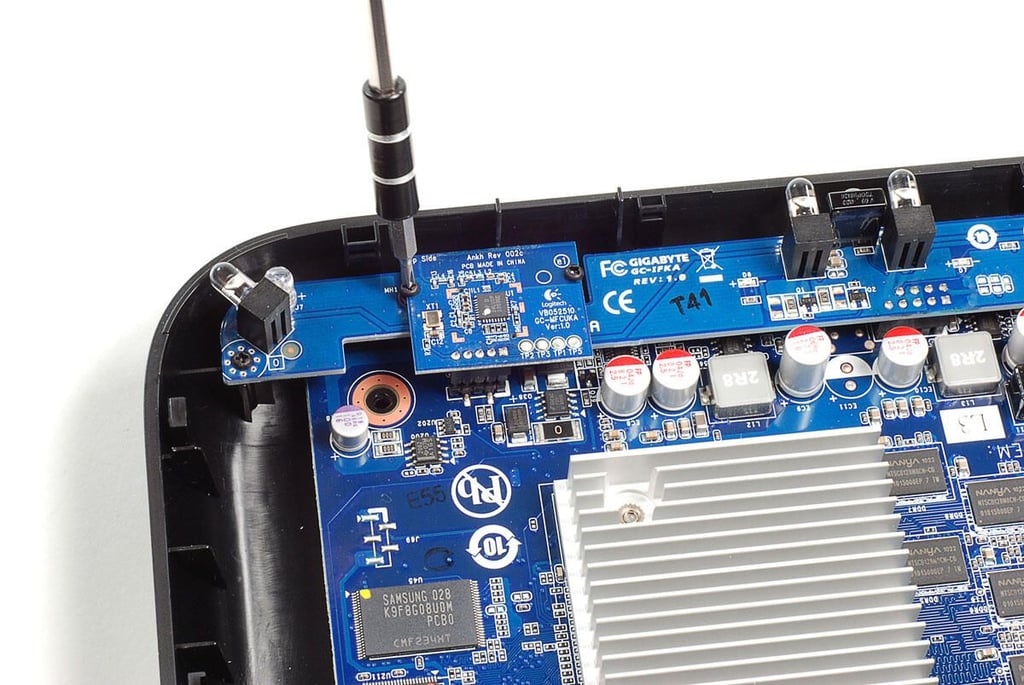
\n\tPhoto by: Bill Detwiler / TechRepublic
\n\tCaption by: Bill Detwiler
\n\tThis Samsung SWB-B23 Bluetooth IC was on the Samsung Focus (Windows Phone 7) and on the Samsung Galaxy S (Captivate).
\n
\n\tPhoto by: Bill Detwiler / TechRepublic
\n\tCaption by: Bill Detwiler
\n\tUnknown chip with markings 04AF 3974
\n
\n\tPhoto by: Bill Detwiler / TechRepublic
\n\tCaption by: Bill Detwiler
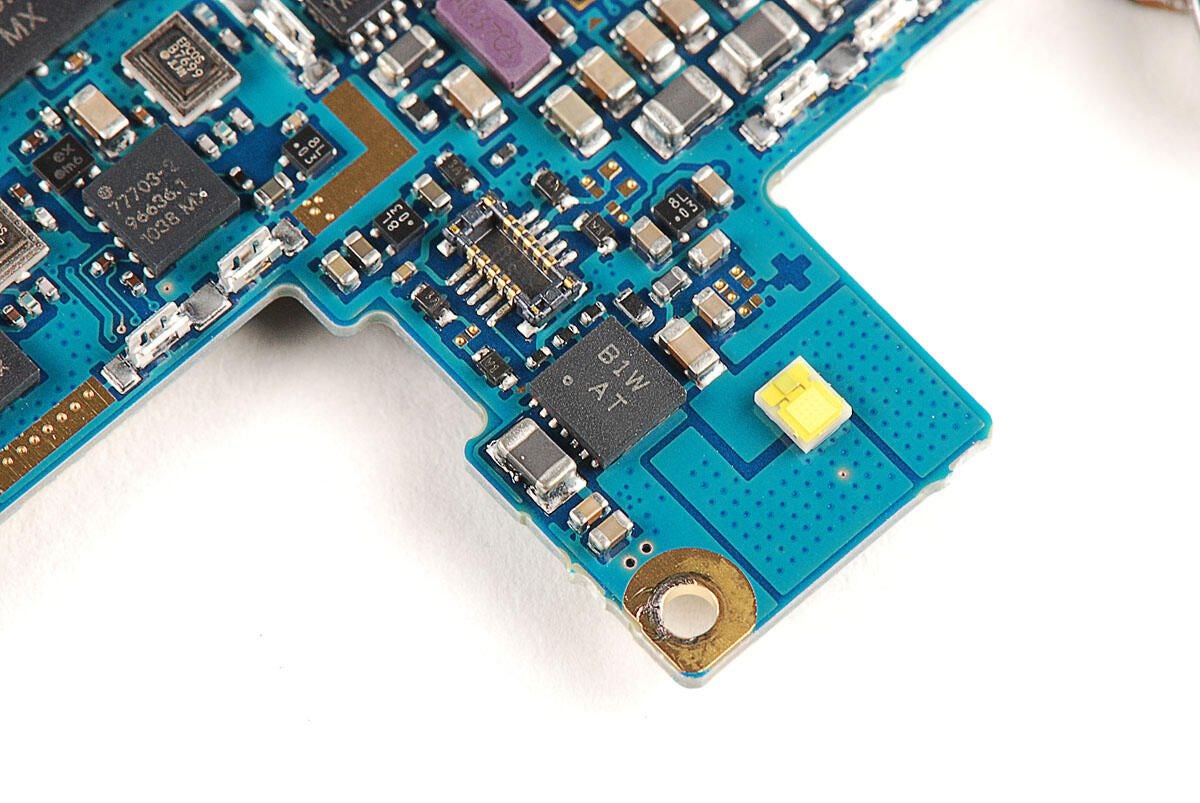
\n\tUnknown chip with markings B1W AT
\n\tPhoto by: Bill Detwiler / TechRepublic
\n\tCaption by: Bill Detwiler

\n\tSkyworks SKY77529 Tx Front-End Module (FEM) for Quad-Band GSM / EDGE
\n
\n\tPhoto by: Bill Detwiler / TechRepublic
\n\tCaption by: Bill Detwiler
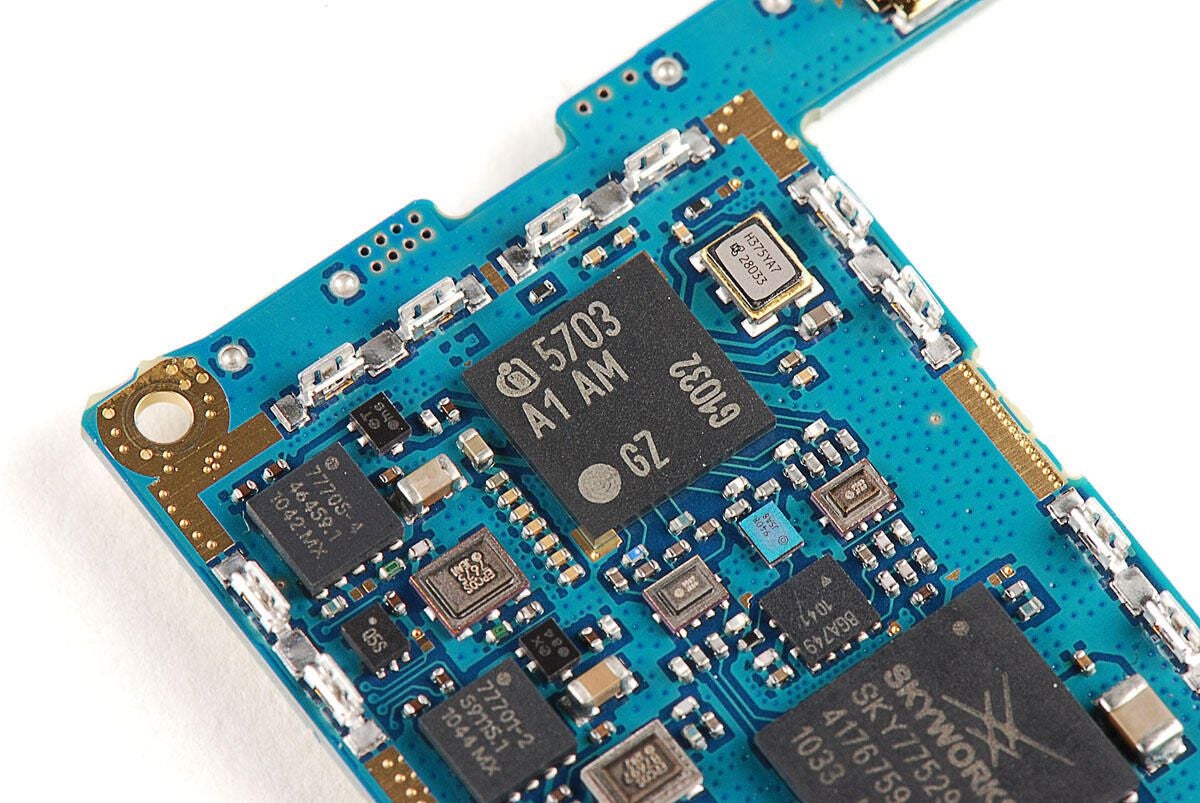
\n\tThis chip is an Infineon SMARTi UE – PMB 5703 single-chip dual-mode UMTS / EDGE Transceiver IC.
\n
\n\tPhoto by: Bill Detwiler / TechRepublic
\n\tCaption by: Bill Detwiler

\n\tSeries of three unknown chips with sequencial markings.
\n
\n\tPhoto by: Bill Detwiler / TechRepublic
\n\tCaption by: Bill Detwiler
\n\tAfter exploring the chips on the front of the PCB, let’s explore the back.
\n
\n\tPhoto by: Bill Detwiler / TechRepublic
\n\tCaption by: Bill Detwiler
\n\tSanDisk SDIN4C2 16GB MLC NAND flash
\n
\n\tPhoto by: Bill Detwiler / TechRepublic
\n\tCaption by: Bill Detwiler
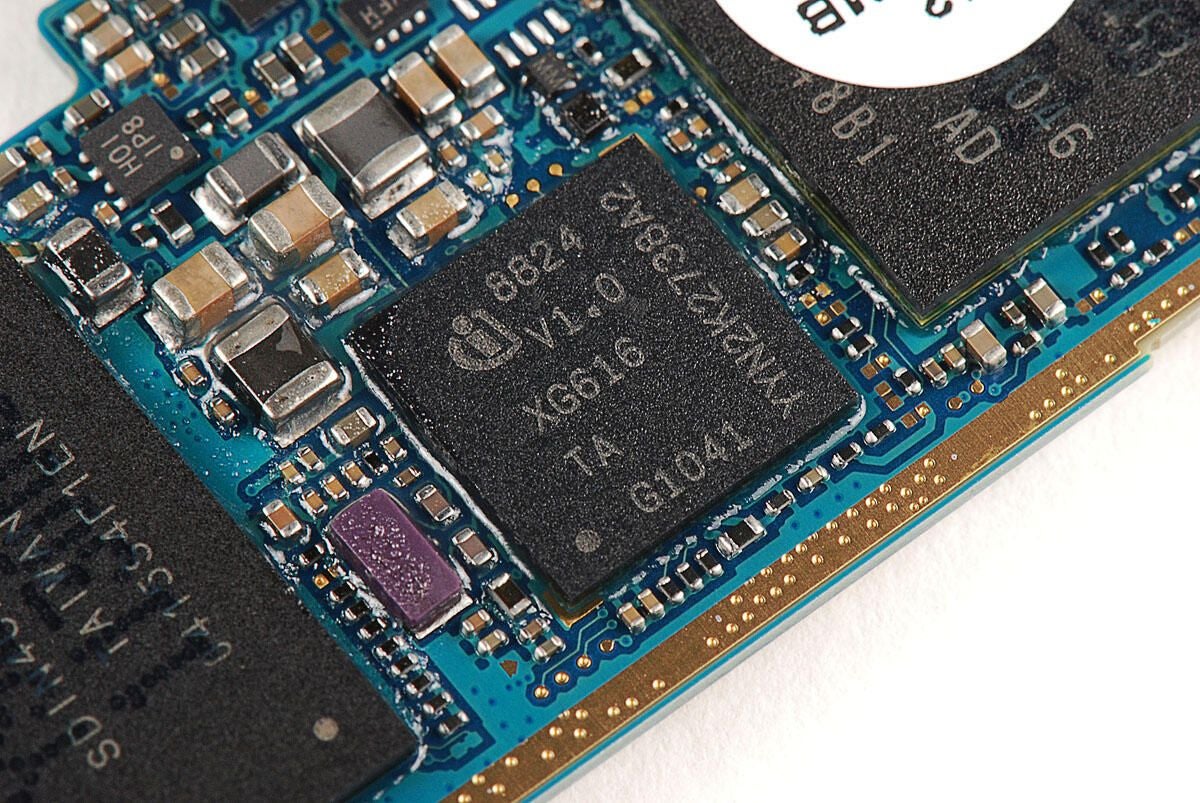
\n\tInfineon X-GOLD 616 baseband and SMARTi UE RF transceiver with markings 8824 V1.0 XG616 TA G1041 YYN2K2738A2
\n
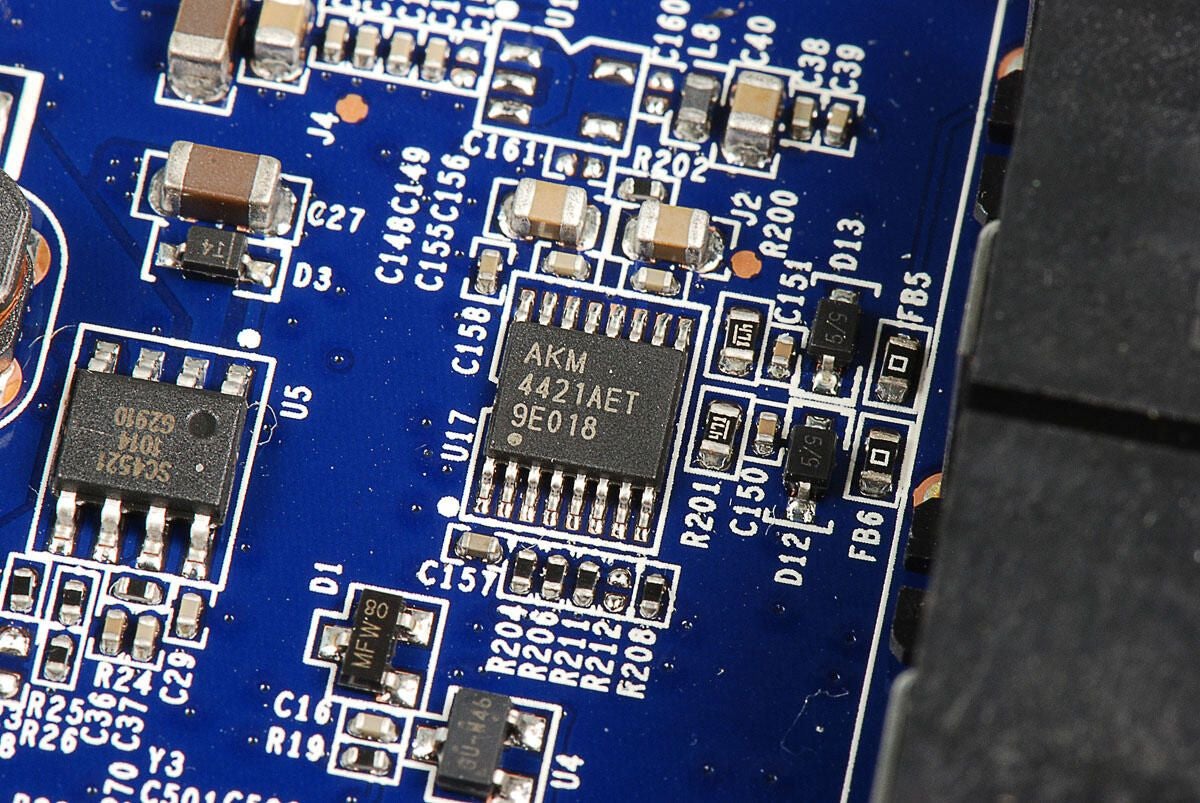
\n\tPhoto by: Bill Detwiler / TechRepublic
\n\tCaption by: Bill Detwiler
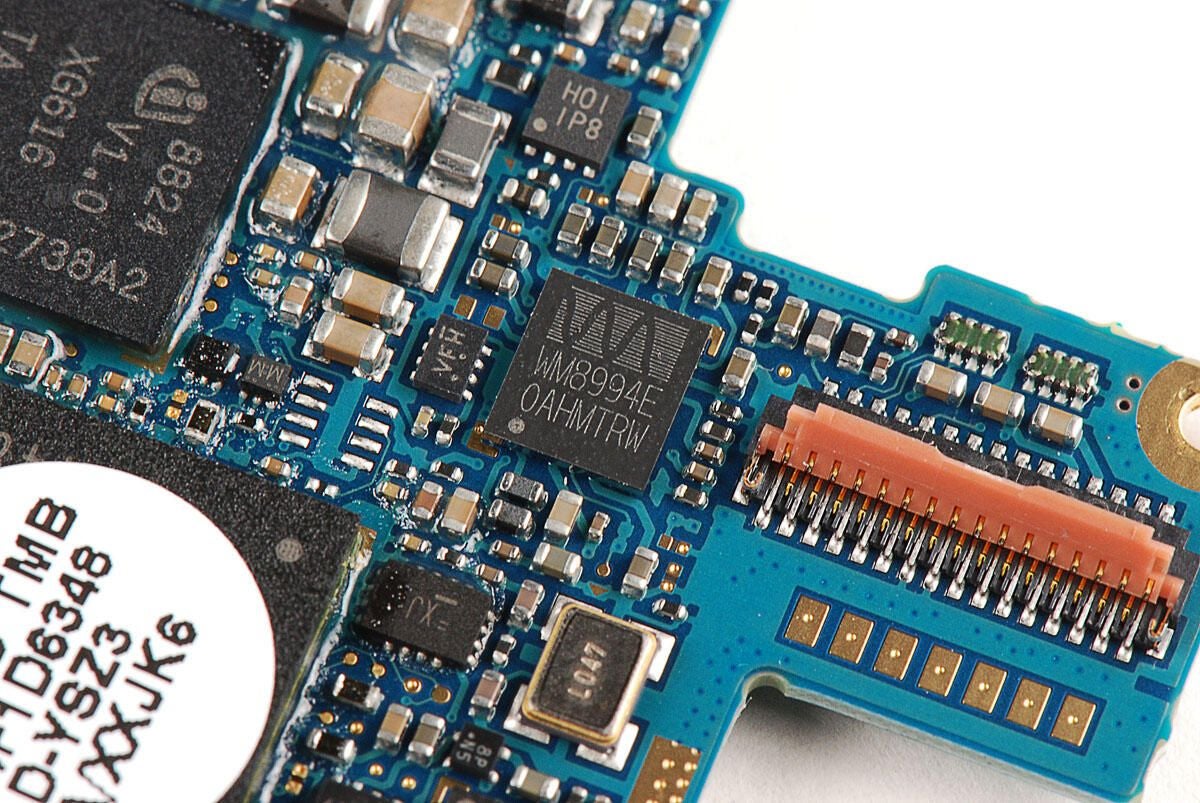
\n\tThe Nexus S uses the Wolfson Microelectronics WM8994 audio codec. This is the same Wolfson audio chip used on the Samsung Galaxy Tab.
\n
\n\tPhoto by: Bill Detwiler / TechRepublic
\n\tCaption by: Bill Detwiler

\n\tA round, white sticker covers the Nexus S’ 1.0 GHz Cortex A8 (Hummingbird) processor.
\n
\n\tPhoto by: Bill Detwiler / TechRepublic
\n\tCaption by: Bill Detwiler
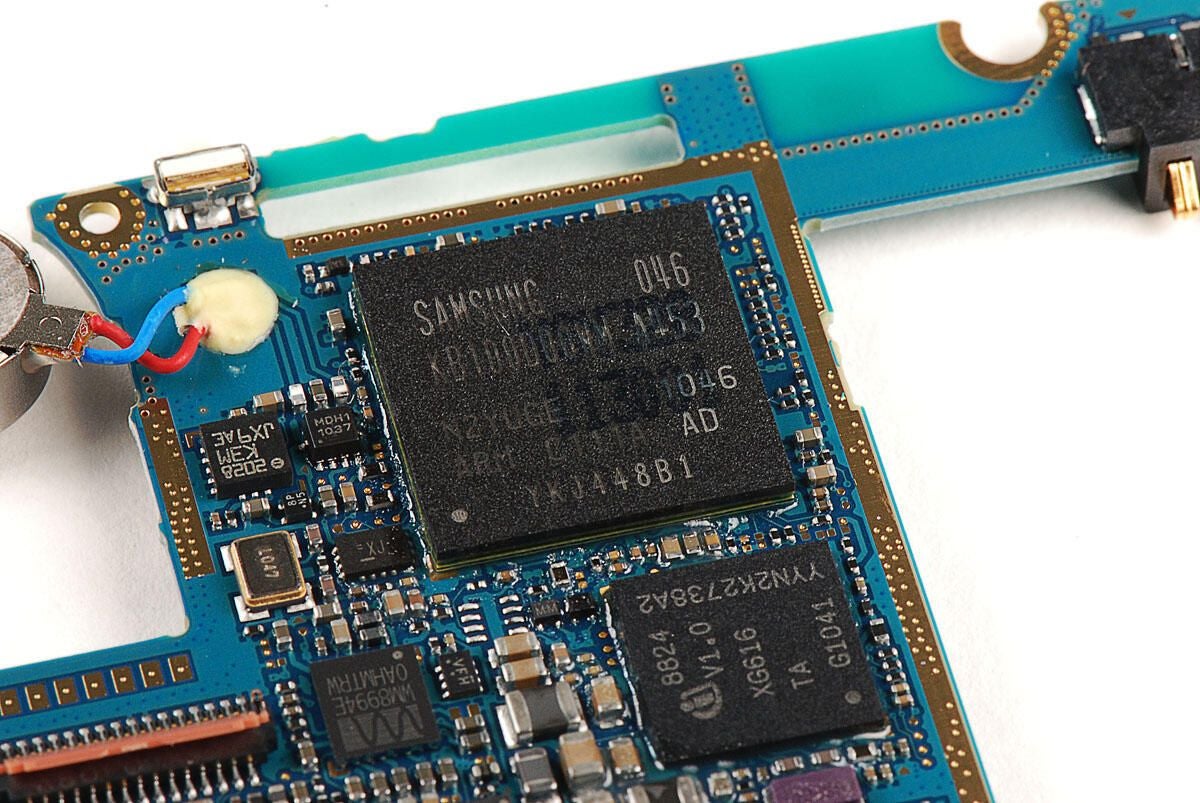
\n\tLike the Samsung Galaxy S (Captivate), the Nexus S uses a 1.0 GHz Cortex A8 (Hummingbird) processor. This chip’s markings are nearly identical to the Galaxy S chip.
\n
\n\tPhoto by: Bill Detwiler / TechRepublic
\n\tCaption by: Bill Detwiler

\n\tBroadcom BCM4751 Integrated Monolithic GPS Receiver
\n
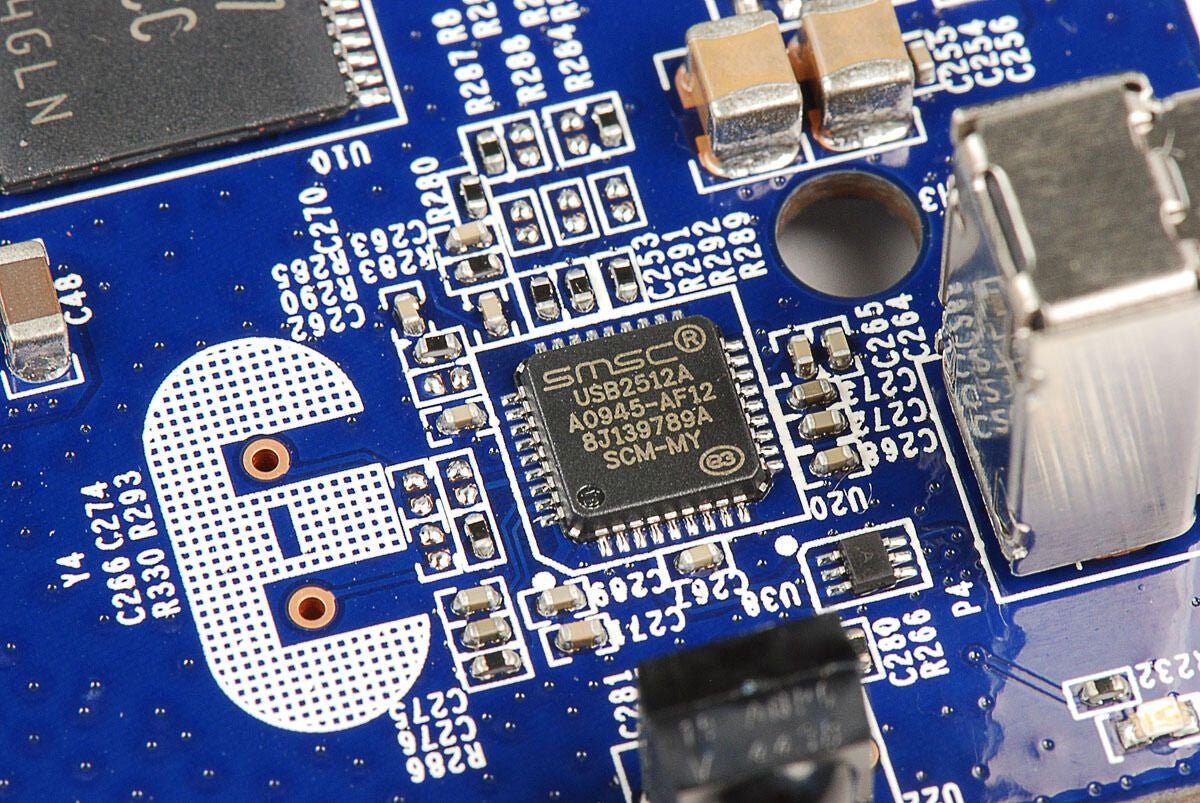
\n\tPhoto by: Bill Detwiler / TechRepublic
\n\tCaption by: Bill Detwiler
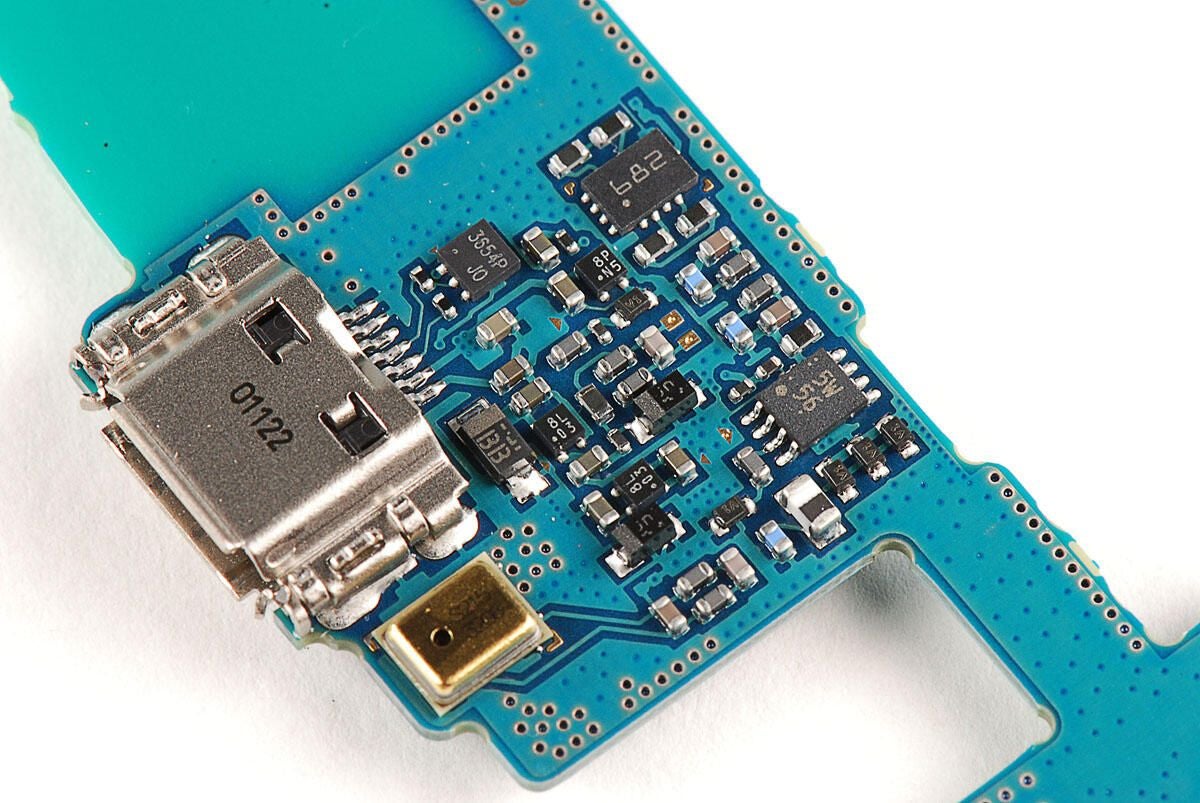
\n\tA collection of chips near the USB port.
\n
\n\tPhoto by: Bill Detwiler / TechRepublic
\n\tCaption by: Bill Detwiler
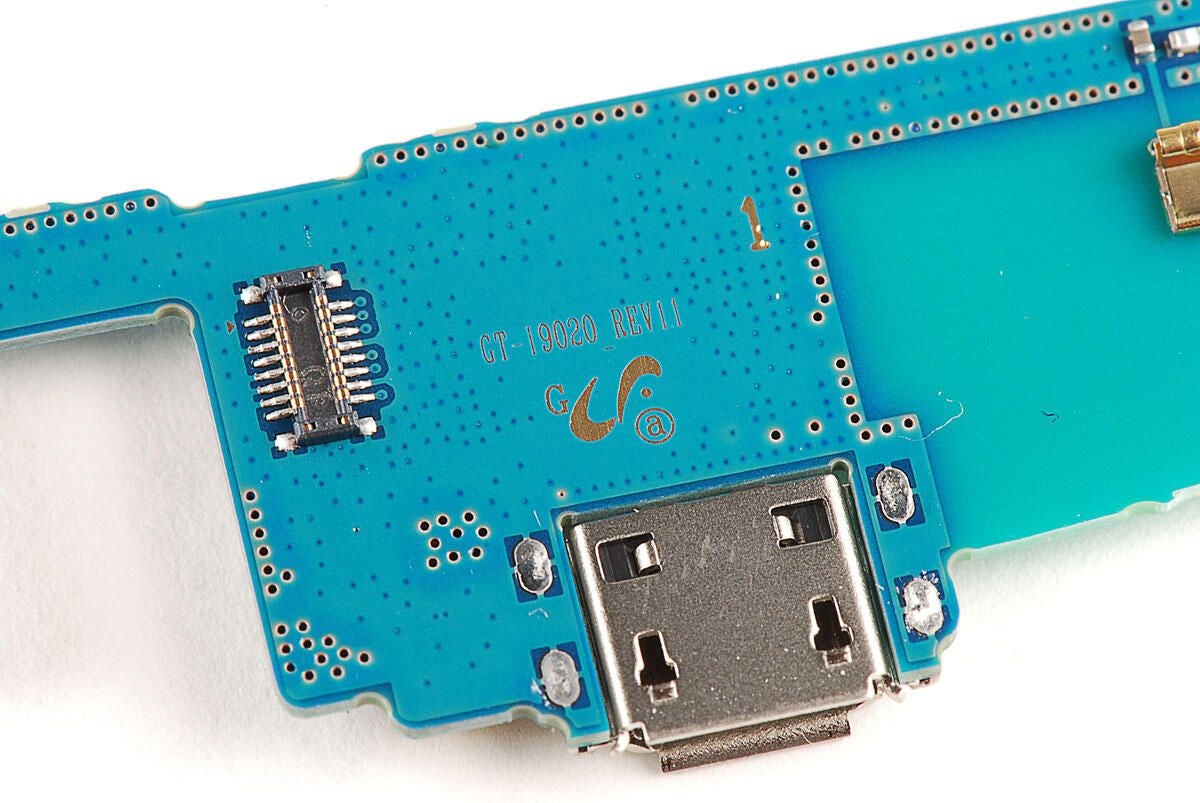
\n\tThe PCB has the markings GT-19020 REV1.1.
\n
\n\tPhoto by: Bill Detwiler / TechRepublic
\n\tCaption by: Bill Detwiler
Bill Detwiler is the Editor for Technical Content and Ecosystem at Celonis. He is the former Editor in Chief of TechRepublic and previous host of TechRepublic's Dynamic Developer podcast and Cracking Open, CNET and TechRepublic's popular online show. Previously, Bill was an IT manager in the social research and energy industries. He has bachelor's and master's degrees from the University of Louisville, where he has also lectured on computer crime and crime prevention.


