Would you like to be using Microsoft Windows 7, but are sticking with Windows XP because you have been using it for close to 10 years and have a lot invested in it? Well, what if I told you that you could easily move your existing Windows XP system to a virtual machine that you could then run in Windows 7? Well you can, with Paragon Go Virtual – and the best part is that it won’t cost you a penny.
Paragon Go Virtual is a conversion tool that creates virtual machines which can be run by VMware Workstation/Player or VMware Fusion on a Mac, Microsoft Virtual PC, or Oracle VirtualBox. The software comes in both 32-bit and 64-bit versions and in addition to converting Windows XP into a virtual machine, it can also convert Windows 2000, Windows Vista, and Windows 7.
In this edition of the Windows Desktop Report, I’ll show you how to use Paragon Go Virtual, which is a free tool, to move your Windows XP installation into Windows 7 and run it with Windows Virtual PC.
My example configuration
In my example, I’ll be using two different computers: one computer running Windows XP and one computer running Windows 7. I’ll install the Paragon Go Virtual on the Windows XP system and use it to create the virtual machine on an external drive. I’ll then move the virtual machine over to Windows 7 and run the virtual machine there using Windows Virtual PC.
Converting your system
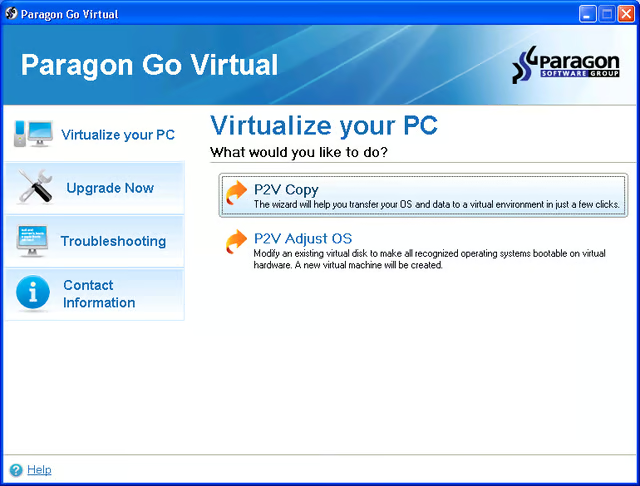
Paragon Go Virtual installation is a snap and after a reboot, you’ll be ready to create your virtual machine -just use the desktop shortcut to launch it. When you see the initial screen you’ll select the first option: P2V Copy. (The P2V Adjust OS option is designed to revive a botched conversion as well as to make Windows Vista/7 backups bootable on virtual hardware. Keep in mind that I did not evaluate either of the P2V Adjust OS options at this time.)
This gallery is also available as a TechRepublic blog post and download. Image created by Mark Kaelin for TechRepublic.
Paragon Go Virtual is available in the TechRepublic Software Library: 32-bit and 64-bit.
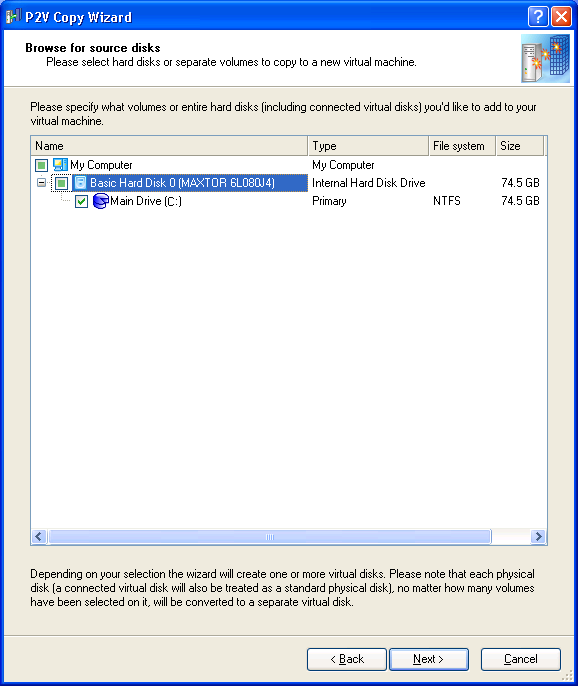
After you work through the P2V Copy Wizard Welcome screen, you’ll be prompted to choose the hard disks that you want to convert to a virtual machine. As you can see, on my example system, I’ll be converting a Maxtor 80GB hard disk.
This gallery is also available as a TechRepublic blog post and download. Image created by Mark Kaelin for TechRepublic.
Paragon Go Virtual is available in the TechRepublic Software Library: 32-bit and 64-bit.
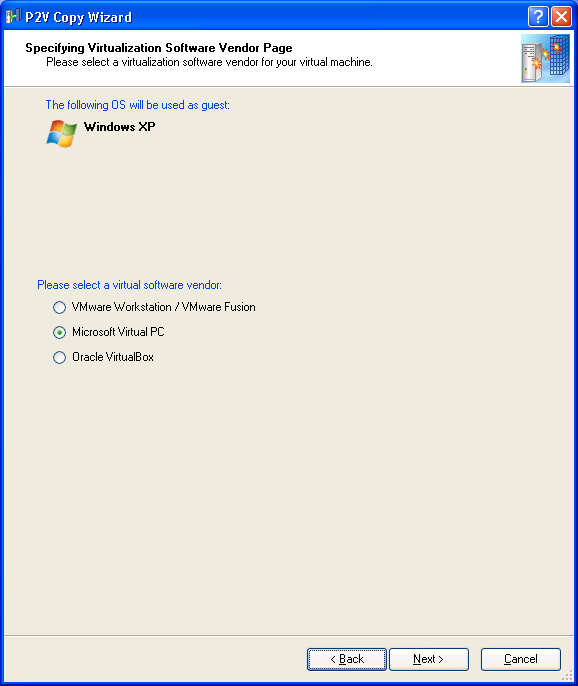
When you click next, the P2V Copy Wizard will identify the guest operating system and prompt you to choose the software that you will use to run the virtual machine on the host system. Since my example Windows XP system is under the 128GB virtual hard disk size limit for Windows Virtual PC, I have chosen Microsoft Virtual PC. As such, I’ll be able to run my XP system in Windows 7 natively using the Windows Virtual PC. Now, if your Windows XP system is larger than 128GB, you’ll want to use something like VMware Player to run the virtual machine on the host system.
This gallery is also available as a TechRepublic blog post and download. Image created by Mark Kaelin for TechRepublic.
Paragon Go Virtual is available in the TechRepublic Software Library: 32-bit and 64-bit.
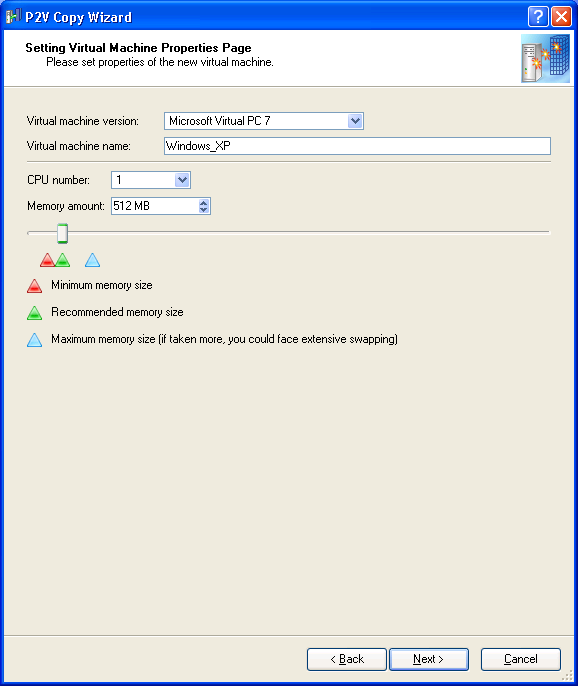
When you click Next, you can specify the Virtual machine version, name, and hardware, as shown. As you can see, I have selected Microsoft Virtual PC 7 as the virtual machine version and left the CPU and memory amount settings at the default values, so that they match my existing physical system.
This gallery is also available as a TechRepublic blog post and download. Image created by Mark Kaelin for TechRepublic.
Paragon Go Virtual is available in the TechRepublic Software Library: 32-bit and 64-bit.
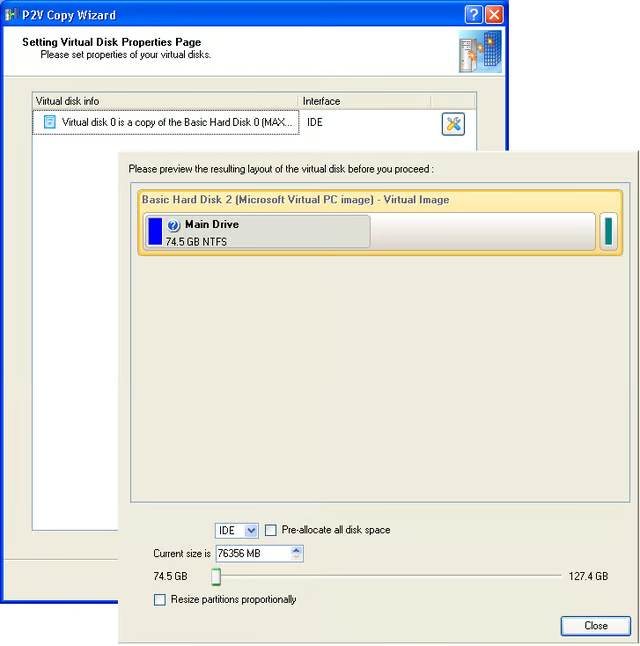
When you click Next, you be prompted to set the virtual hard disk properties. Again, I have accepted the default values. However, you can click the tools icon and resize the hard disk to make it as large as the virtual software supports. Since I selected Microsoft Virtual PC, I can increase the size of the hard disk up to 128GB, as shown.
This gallery is also available as a TechRepublic blog post and download. Image created by Mark Kaelin for TechRepublic.
Paragon Go Virtual is available in the TechRepublic Software Library: 32-bit and 64-bit.
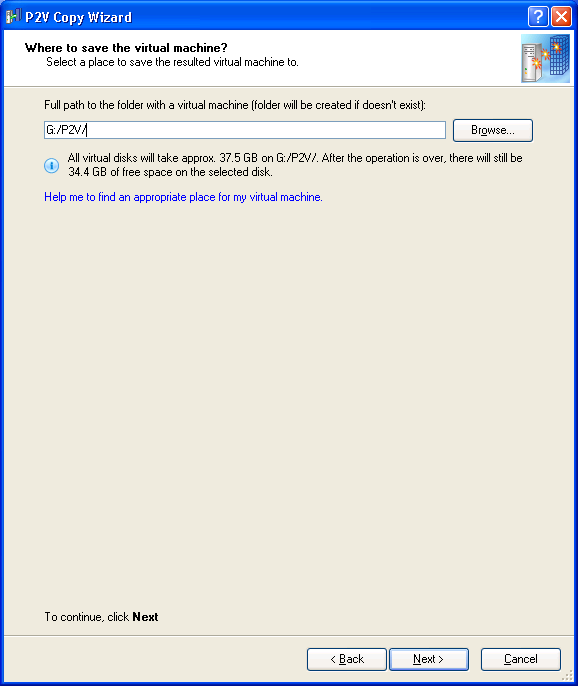
You’ll then be prompted to select a folder in which to create the virtual machine. As you can see, I have chosen an external USB hard disk. Doing so will make it easy to transport my virtual machine over to my Windows 7 system.
This gallery is also available as a TechRepublic blog post and download. Image created by Mark Kaelin for TechRepublic.
Paragon Go Virtual is available in the TechRepublic Software Library: 32-bit and 64-bit.
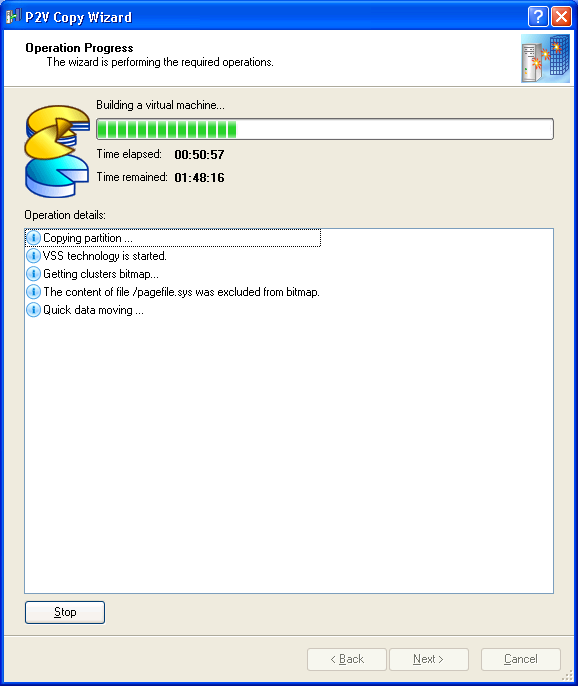
Once you click Next, the actual conversion procedure will begin. Throughout the process, the P2V Copy Wizard will let you know what is happening in the Operation details panel. The animated status bar along with the figures will let you know the elapsed time as well as the time remaining.
This gallery is also available as a TechRepublic blog post and download. Image created by Mark Kaelin for TechRepublic.
Paragon Go Virtual is available in the TechRepublic Software Library: 32-bit and 64-bit.
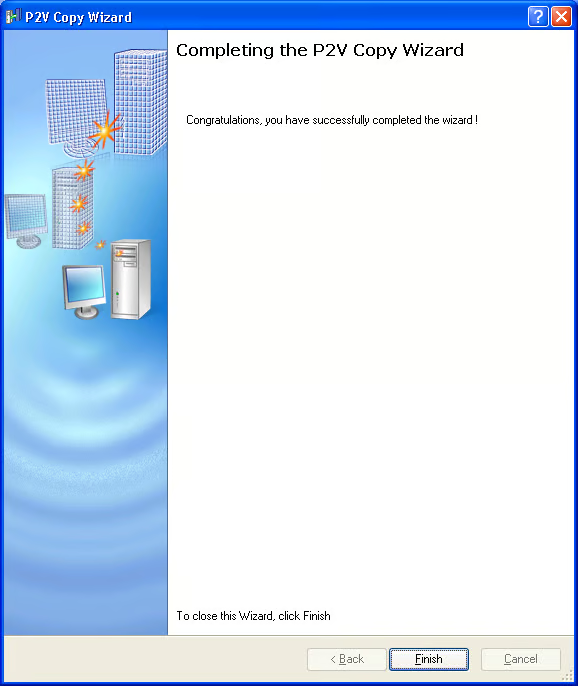
Depending on how large your hard disk is and the location of your destination folder, the process can take a long while to complete. For instance, my XP system with about 40GB on an 80GB drive took just a little over two hours to complete the conversion and transfer to an external USB hard disk. When the operation is complete, you’ll see the screen shown here.
This gallery is also available as a TechRepublic blog post and download. Image created by Mark Kaelin for TechRepublic.
Paragon Go Virtual is available in the TechRepublic Software Library: 32-bit and 64-bit.
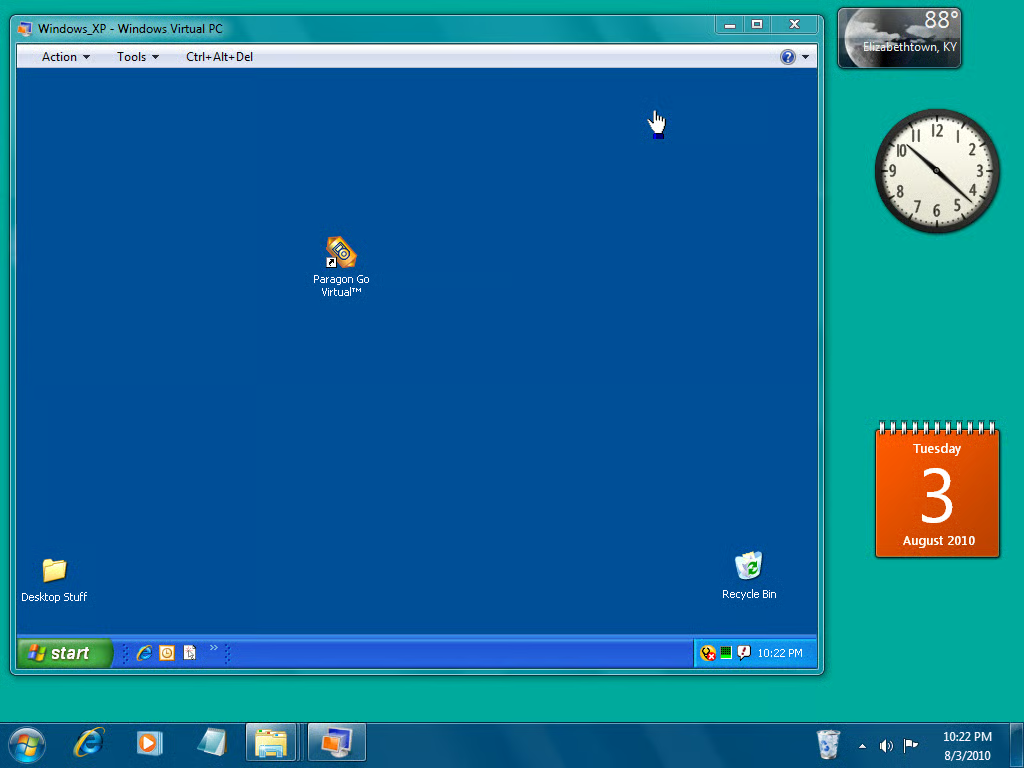
Once I copied my virtual Windows XP system’s files (Windows_XP.vmc and vdisk0.vhd) over to my Windows 7 system, launching and running Windows XP was a snap. I just double clicked the Windows_XP.vmc, and in a moment, Windows Virtual PC converted the .vmc file to a .vmcx file and Windows XP began booting up.
Of course I had to do a bit of tweaking in order to get my XP system running and because XP was now running on a new system, I had to reactivate Windows XP. However all of that was relatively painless and I was able to run my existing Windows XP installation in Window 7.
This gallery is also available as a TechRepublic blog post and download. Image created by Mark Kaelin for TechRepublic.
Paragon Go Virtual is available in the TechRepublic Software Library: 32-bit and 64-bit.

Mark W. Kaelin has been writing and editing stories about the information technology industry, software, hardware, gaming, finance, accounting, and technology geekdom for more than 30 years.


