Skip to content

TechRepublic

  • Top Products
  • AI
  • Developer
  • Payroll
  • Security
  • Project Management
  • Accounting
  • CRM
  • Academy
Resources
  • TechRepublic Premium
  • TechRepublic Academy
  • Newsletters
  • Resource Library
  • Forums
  • Sponsored
Go Premium
Popular Topics
  • Top Products
  • AI
  • Developer
  • Payroll
  • Security
  • Project Management
  • Accounting
  • CRM
  • Academy
  • Project Management
  • Innovation
  • Cheat Sheets
  • Big Data
  • Tech Jobs
View All Topics
Go Premium
Microsoft

How to create a Windows Vista VPN connection

By adminuser2 April 7, 2007, 11:35 AM PDT

Image
1
of 24

How to create a Windows Vista VPN connection

Network console

Network console

VPNs can be a lifesaver. Secure remote access enables additional productivity, saves travel time and empowers administrators and other staff. Here’s how to create an ever-popular VPN connection in Windows Vista.

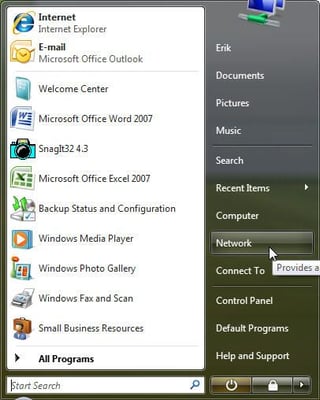
Use Windows Vista’s Network console (reached from the Start menu) to create a VPN connection.

How to create a Windows Vista VPN connection

The network console

The network console

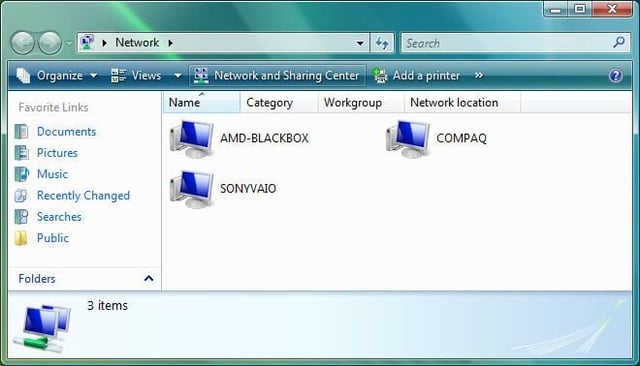
Windows Vista’s Network console. Click Network And Sharing Center to proceed.

How to create a Windows Vista VPN connection

Network And Sharing Center

Network And Sharing Center

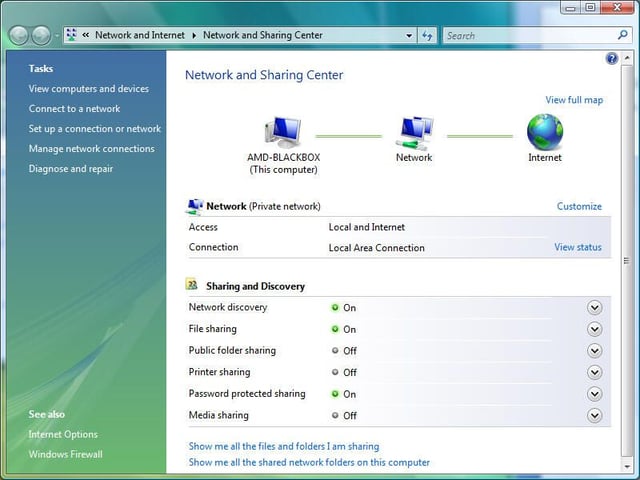
The Network And Sharing Center appears. Click Connect To A Network (or Set Up Connection Or Network).

How to create a Windows Vista VPN connection

Connect to a network

Connect to a network

The Connect To A Network window will appear. Highlight Set Up A Connection Or Network and click Connect.

How to create a Windows Vista VPN connection

Choose a connection option

Choose a connection option

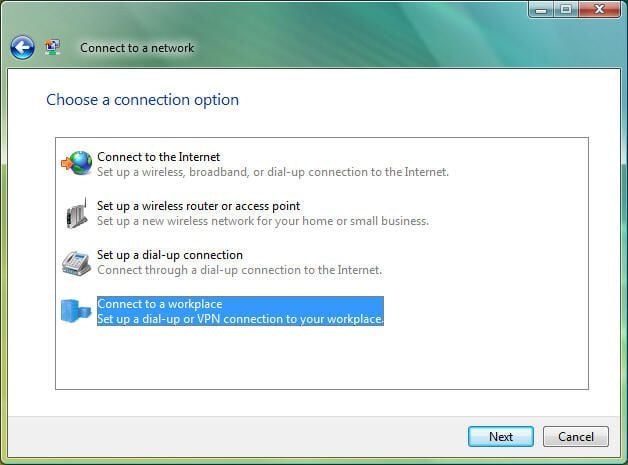
Specify the type of network connection you wish to create (to create a VPN connection, choose the Connect To A Workplace option, then click the Next button).

How to create a Windows Vista VPN connection

Connect to a workplace

Connect to a workplace

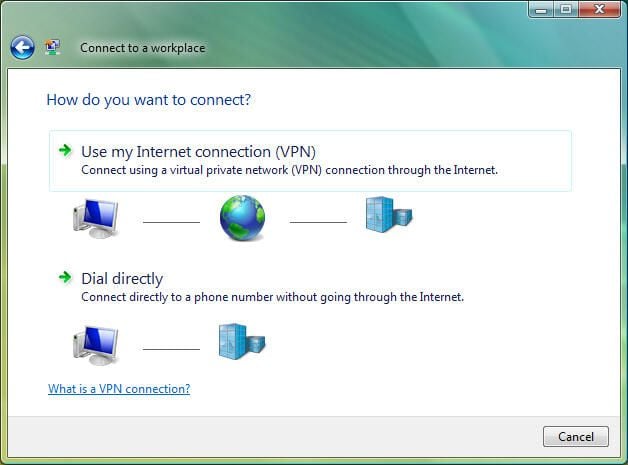
Specify how you wish to connect. In this example, we’ll use the most common scenario (using the existing Internet Connection VPN).

How to create a Windows Vista VPN connection

Internet address and destination name

Internet address and destination name

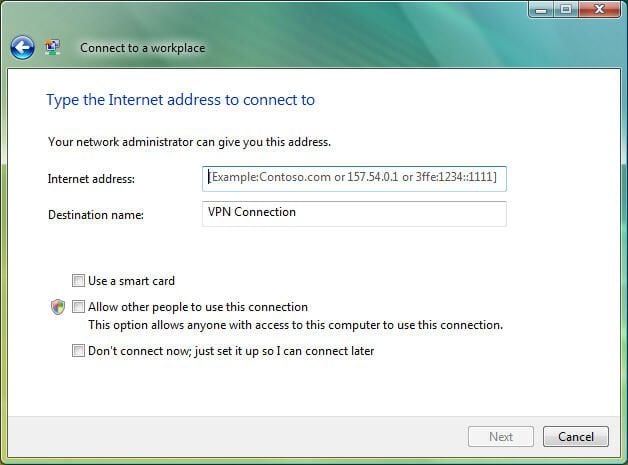
Enter the Internet address and destination name for the VPN connection in the supplied fields. In addition, specify whether you wish to connect now, a smart card is to be used and other users should be permitted to use the connection using the supplied checkboxes, then click Next.

How to create a Windows Vista VPN connection

Enter username and password

Enter username and password

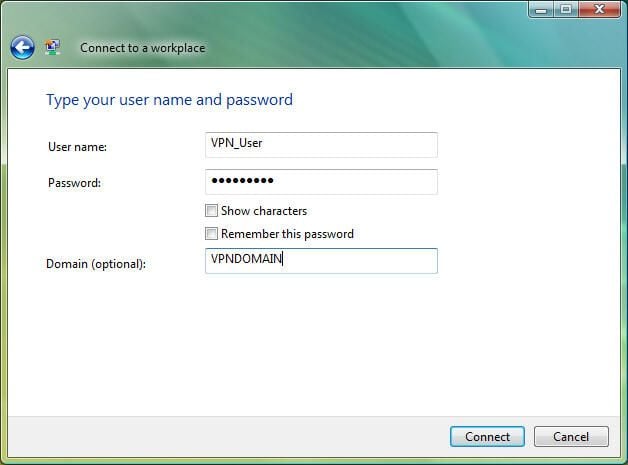
Supply a valid username and password possessing remote access rights. In addition, enter the domain name and click Connect.

How to create a Windows Vista VPN connection

Connection complete

Connection complete

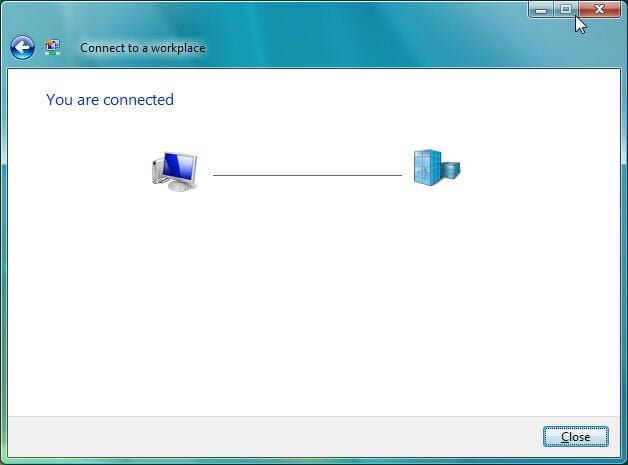
Once Vista completes the VPN connection, Windows displays a confirmation message.

How to create a Windows Vista VPN connection

System tray icon

System tray icon

Windows also leverages the network icon (the two computers with the earth logo) to confirm that a VPN connection is active.

How to create a Windows Vista VPN connection

Set network location

Set network location

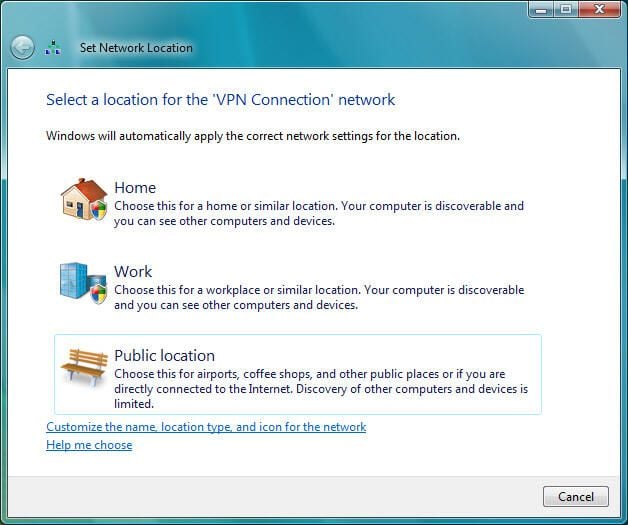
Windows Vista prompts users to specify the location from which the user is connecting to the VPN network. Options include Home, Work and Public Location.

How to create a Windows Vista VPN connection

Successfully set network settings

Successfully set network settings

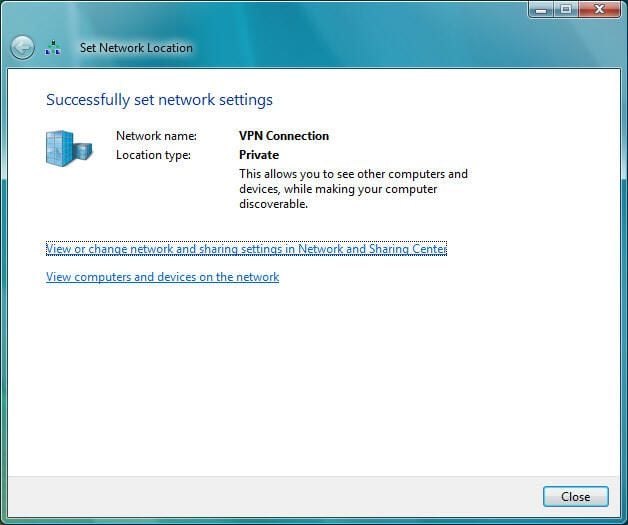
Windows Vista confirms network settings have been successfully set (once the user specifies the network location).

How to create a Windows Vista VPN connection

Network and Sharing Center addition

Network and Sharing Center addition

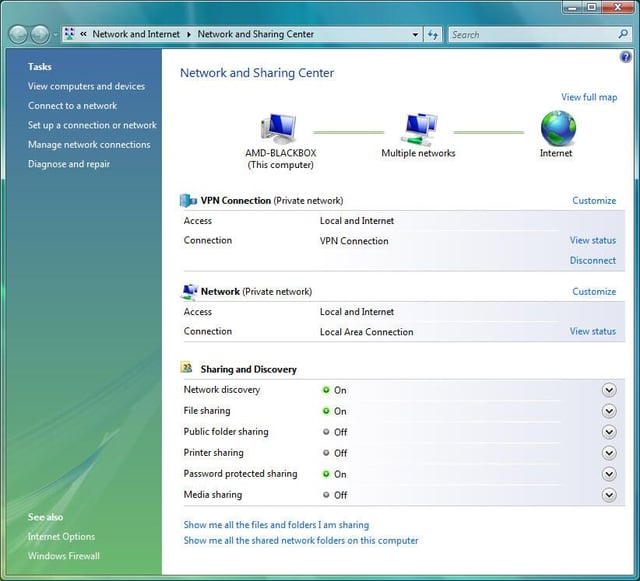
Now that the new VPN connection is created, it appears within the Network And Sharing Center.

How to create a Windows Vista VPN connection

VPN connection status

VPN connection status

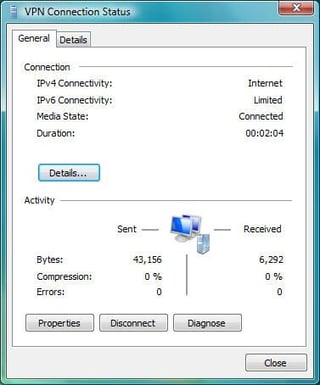
Users can view a VPN’s connection status at any time by opening the Network console’s Network And Sharing Center and clicking the View Status link for the respective VPN.

How to create a Windows Vista VPN connection

Connecting to the VPN

Connecting to the VPN

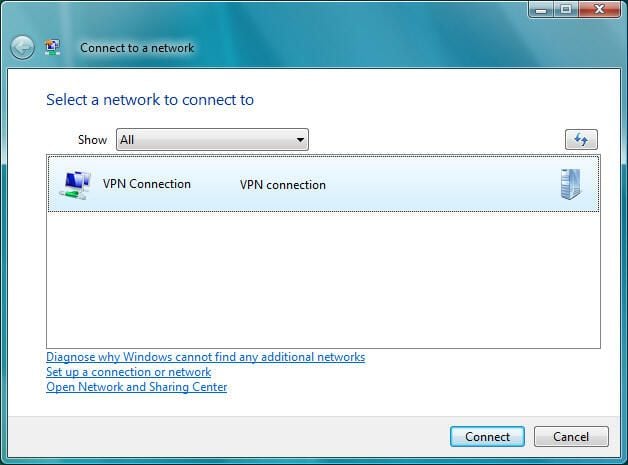
Once the VPN connection is created, Windows Vista users can connect to the VPN using the Connect link found within the Network And Sharing Center. Clicking the Connect link displays this dialog box (which is used to create the VPN connection).

How to create a Windows Vista VPN connection

VPN credentials

VPN credentials

If users choose not to save the user name and password, Windows Vista prompts users to enter the password.

How to create a Windows Vista VPN connection

VPN Connection Properties - General Tab

VPN Connection Properties - General Tab

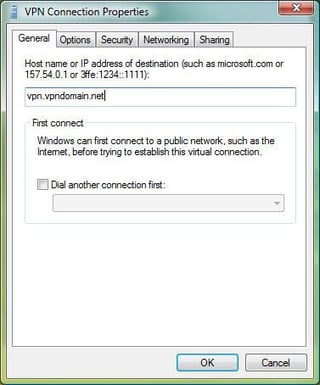
A VPN connection’s Properties can be set by clicking Manage Network Settings within Vista’s Network And Sharing Center and selecting Properties. Here you can see the settings configured using the General tab.

How to create a Windows Vista VPN connection

VPN Connection Properties - Options Tab

VPN Connection Properties - Options Tab

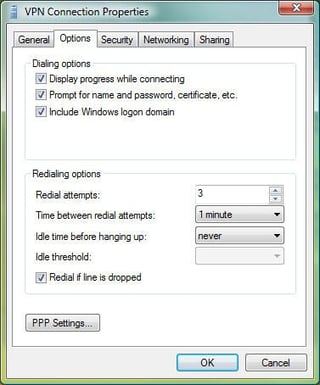
Among the options you can configure for a VPN connection are displaying connection progress, prompting for user names and passwords, including the Windows logon domain and more.

How to create a Windows Vista VPN connection

VPN Connection Properties - Security Tab

VPN Connection Properties - Security Tab

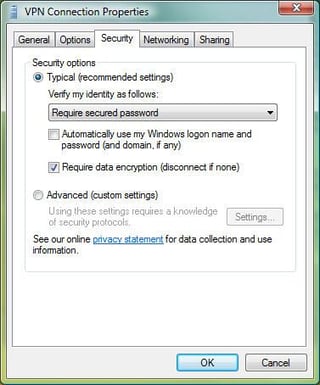
Using the Security tab, Vista users configure data encryption and identity verification parameters.

How to create a Windows Vista VPN connection

VPN Connection Properties - Networking Tab

VPN Connection Properties - Networking Tab

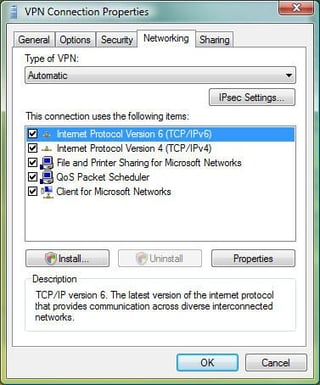
The Networking tab displays the items the VPN connection uses (such as TCP/IP and Client for Microsoft Networks). Settings for these items is configured by highlighting the item and clicking Properties.

How to create a Windows Vista VPN connection

VPN Connection Properties - Sharing Tab

VPN Connection Properties - Sharing Tab

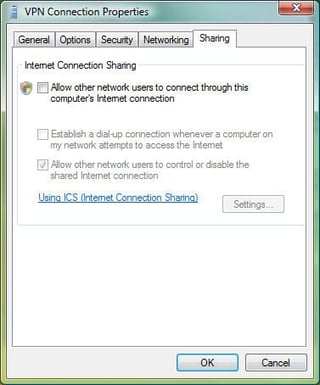
Windows Vista users wishing to share their Internet connection with other users must configure Internet Connection Sharing (using the Sharing tab).

How to create a Windows Vista VPN connection

VPN connection shortcut icon

VPN connection shortcut icon

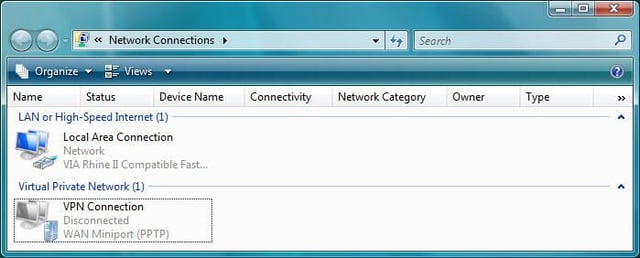
Once a new VPN connection is created within Windows Vista, a shortcut icon is created for that connection. You can access the icon within the Network Connections window.

How to create a Windows Vista VPN connection

Disconnecting a VPN connection

Disconnecting a VPN connection

To disconnect an active VPN connection, Windows Vista users need only double-click the System Tray Network icon and select Connect Or Disconnect, which will display this window for an active VPN connection. Users can then highlight the respective network connection and click the Disconnect button.

How to create a Windows Vista VPN connection

Disconnection complete

Disconnection complete

Once Windows Vista successfully disconnects a VPN connection, a confirmation window appears.

  • Microsoft
  • Account Information

    Share with Your Friends

    How to create a Windows Vista VPN connection

    Your email has been sent

Share: How to create a Windows Vista VPN connection
Image of adminuser2
By adminuser2
  • Account Information

    Contact adminuser2

    Your message has been sent

  • |
  • See all of adminuser2's content

Daily Tech Insider

If you can only read one tech story a day, this is it.

TechRepublic TechRepublic
  • TechRepublic on Facebook
  • TechRepublic on X
  • TechRepublic on LinkedIn
  • TechRepublic on YouTube
  • TechRepublic on Pinterest
  • TechRepublic RSS
Services
  • About Us
  • Newsletters
  • RSS Feeds
  • Site Map
  • Site Help & Feedback
  • FAQ
  • Advertise
  • Do Not Sell My Information
  • Careers
Explore
  • Downloads
  • TechRepublic Forums
  • Meet the Team
  • TechRepublic Academy
  • TechRepublic Premium
  • Resource Library
  • Photos
  • Videos
  • Editorial Policy
  • Legal Terms
  • Privacy Policy
© 2025 TechnologyAdvice. All rights reserved.
CLOSE

Create a TechRepublic Account

Get the web's best business technology news, tutorials, reviews, trends, and analysis—in your inbox. Let's start with the basics.

Already registered? Sign In
Use Facebook
Use Linkedin

* - indicates required fields

CLOSE

Sign in to TechRepublic

Not a member? Create an account
Use Facebook
Use Linkedin

Lost your password? Request a new password

CLOSE

Reset Password

Please enter your email adress. You will receive an email message with instructions on how to reset your password.

Check your email for a password reset link. If you didn't receive an email don't forgot to check your spam folder, otherwise contact support.

Back to login
1 Finish Profile
2 Newsletter Preferences
CLOSE

Welcome. Tell us a little bit about you.

This will help us provide you with customized content.

No thanks, continue without
1 Finish Profile
2 Newsletter Preferences
CLOSE

Want to receive more TechRepublic news?

Newsletter Name
Subscribe
Daily Tech Insider
Daily Tech Insider AU
TechRepublic UK
TechRepublic News and Special Offers
TechRepublic News and Special Offers International
Executive Briefing
Innovation Insider
Project Management Insider
Microsoft Weekly
Cloud Insider
Data Insider
Developer Insider
TechRepublic Premium
Apple Weekly
Cybersecurity Insider
Google Weekly
Toggle All
No thanks, continue without

You're All Set

Thanks for signing up! Keep an eye out for a confirmation email from our team. To ensure any newsletters you subscribed to hit your inbox, make sure to add [email protected] to your contacts list.

Back to Home Page
×