
\n\tThe Nintendo 3DS doesn’t have the fastest processor among mobile gaming devices. Nor does it have the highest resolution screen, most storage capacity, or longest battery life. But what it lacks in hardware muscle, it makes up for with an innovative glasses-free 3D gaming experience.
\n
\n\tFollow along as I crack open the Nintendo 3DS.
\n\t
\n\tPhoto by: Bill Detwiler / TechRepublic
\n\tCaption by: Bill Detwiler
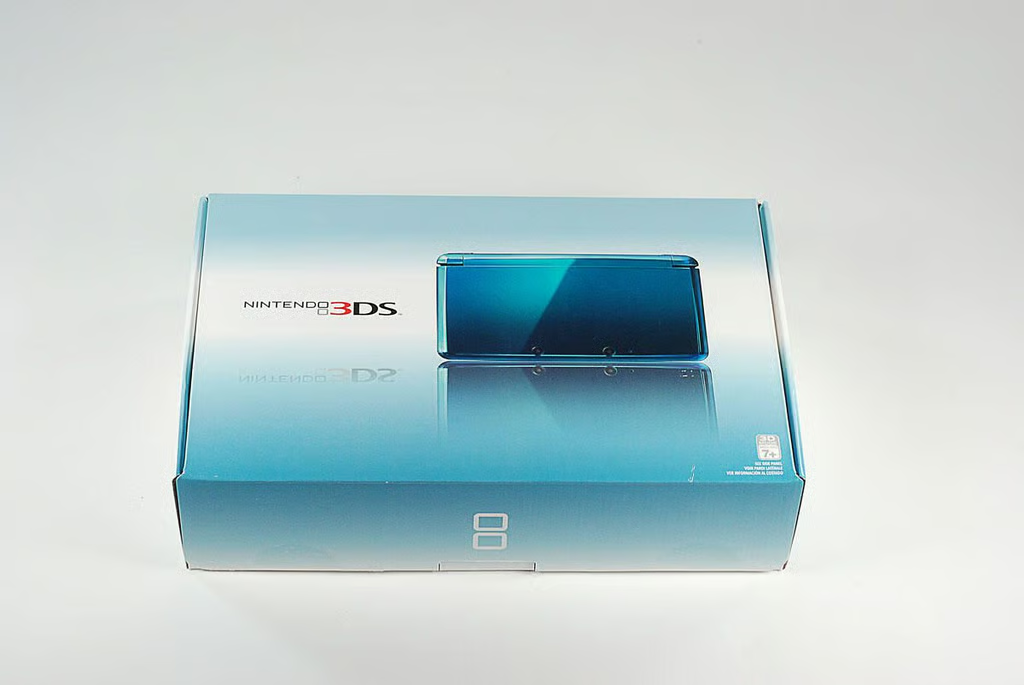
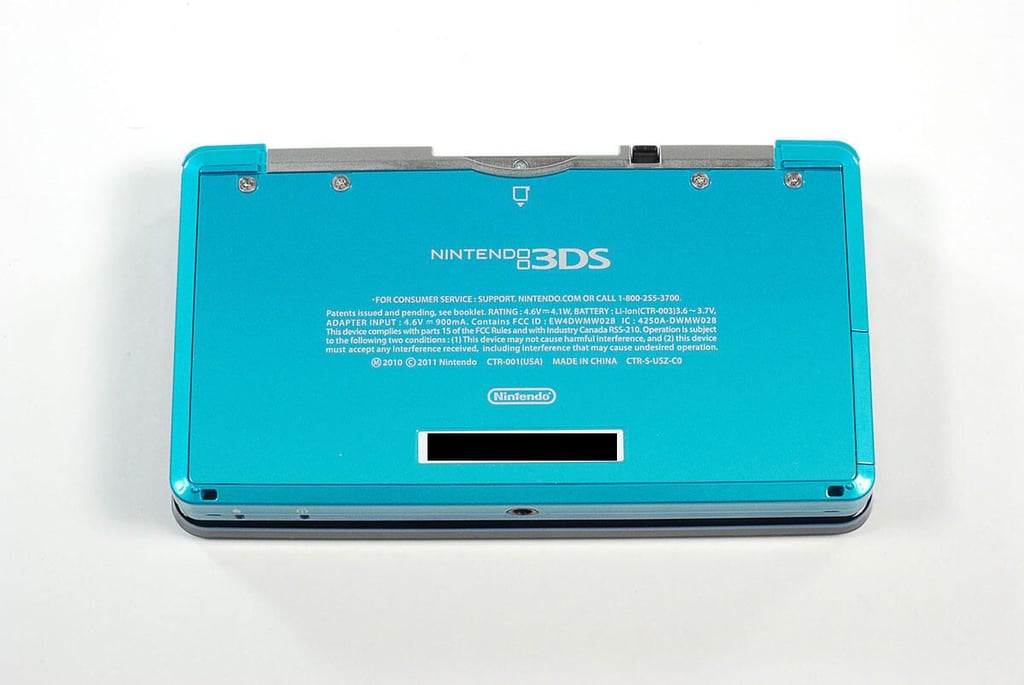
\n\tAt launch, the Nintendo 3DS has a $249.99 (US) MSRP and comes in Aqua Blue or Cosmo Black. The 3DS measures 2.9 inches high, 5.3 inches long, and 0.8 inches deep. The handheld weighs about 8 ounces.
\n
\n\tPhoto by: Bill Detwiler / TechRepublic
\n\tCaption by: Bill Detwiler
\n\tPhoto by: Bill Detwiler / TechRepublic
\n\tCaption by: Bill Detwiler

\n\tPhoto by: Bill Detwiler / TechRepublic
\n\tCaption by: Bill Detwiler
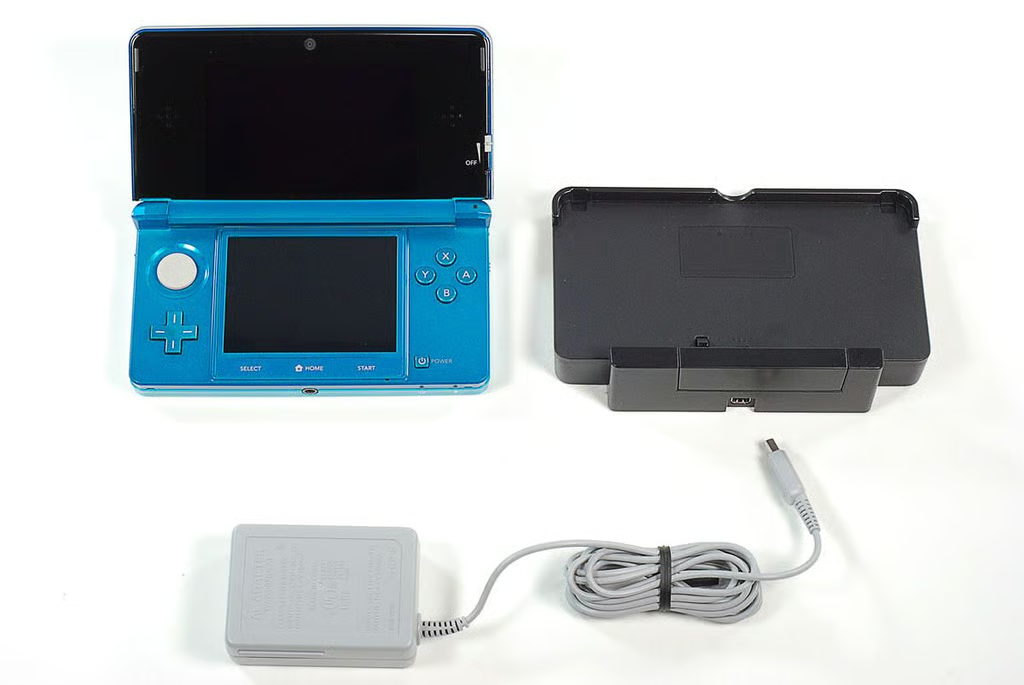
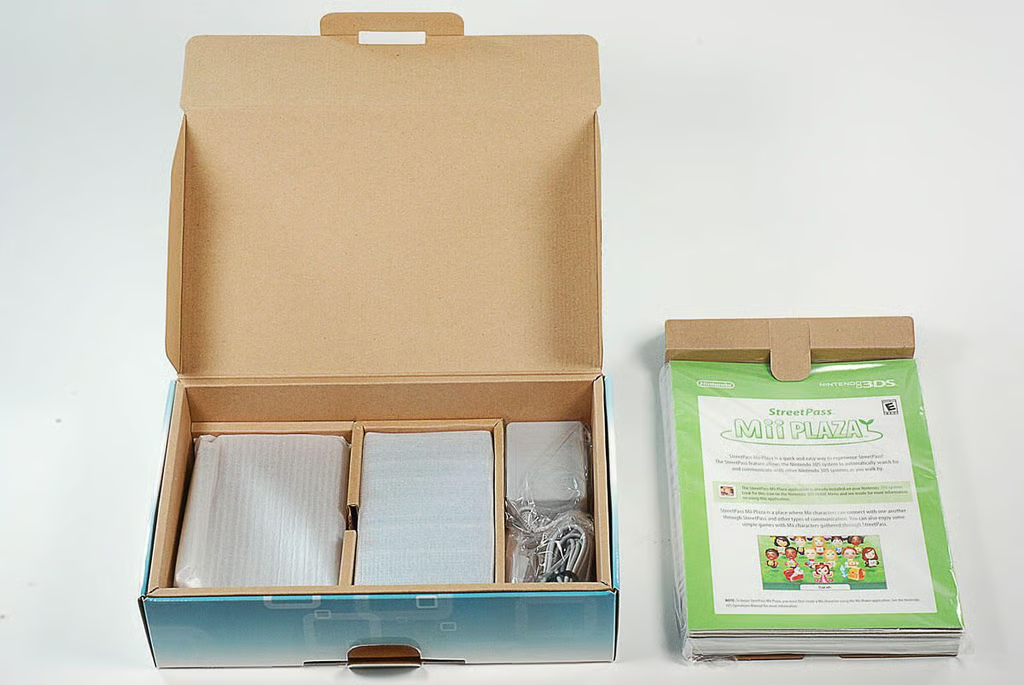
\n\tInside the Nintendo 3DS’ box are the Nintendo 3DS system, charging cradle, AC power adapter, stylus, and 2GB SD Memory Card (located inside the 3DS).
\n
\n\tPhoto by: Bill Detwiler / TechRepublic
\n\tCaption by: Bill Detwiler
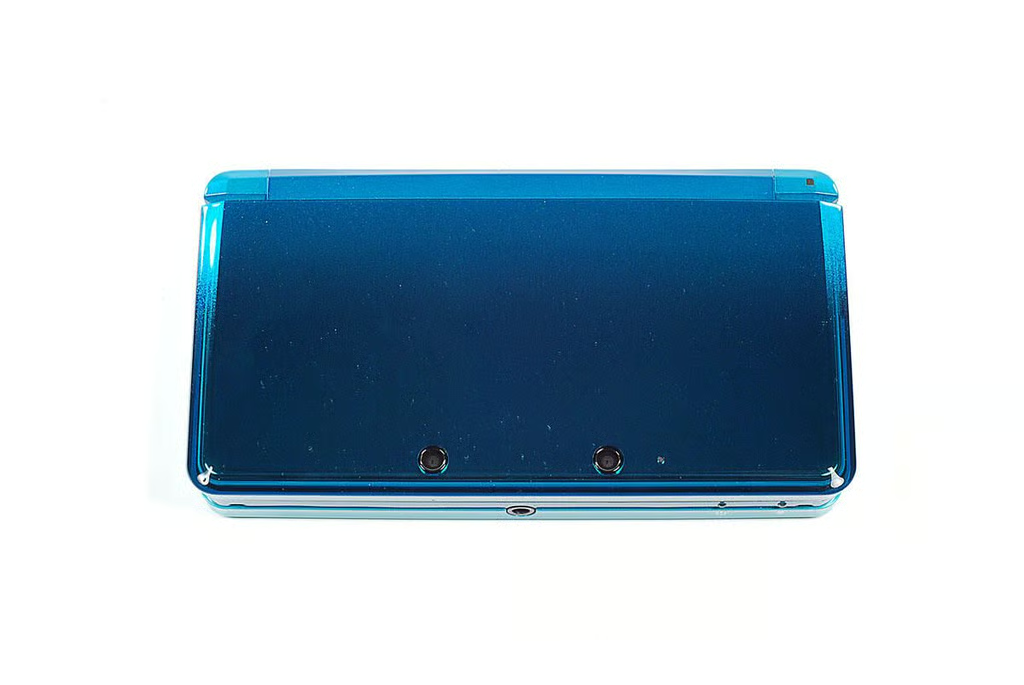
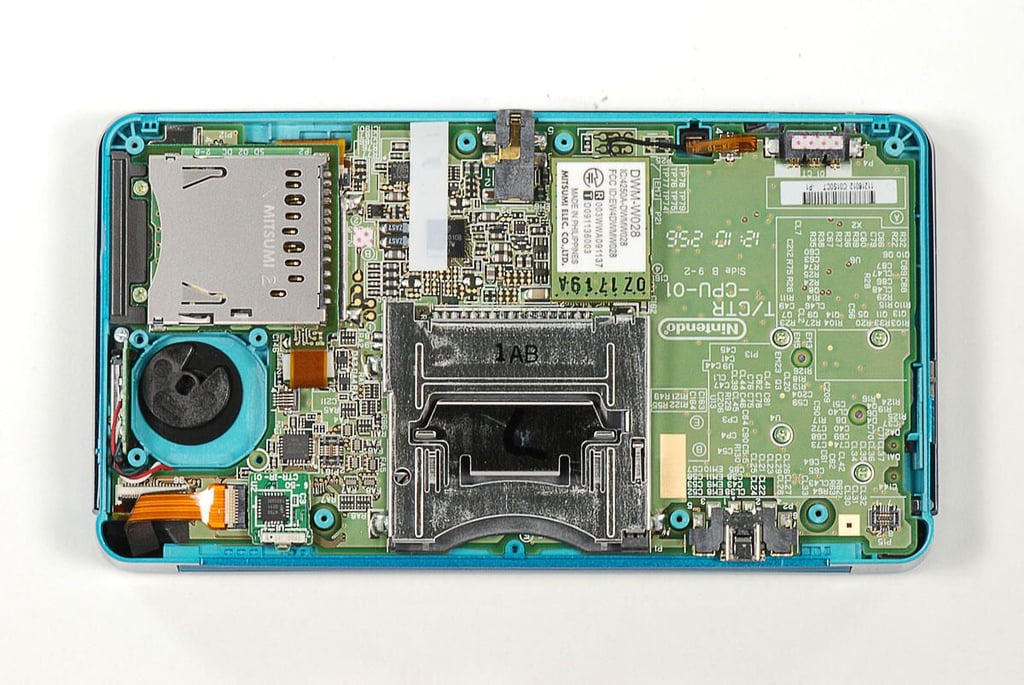
\n\tThe Nintendo 3DS has three camers–two outer-facing and one inner-facing. The outer-facing cameras allow you to take 3D photo and play augmented reality games. The two outer-facing cameras are located along the leading edge of the top cover. Next to the cameras is the camera LED, which lights up when the cameras are in use.
\n
\n\tPhoto by: Bill Detwiler / TechRepublic
\n\tCaption by: Bill Detwiler

\n\tAlong the front of the Nintendo 3DS are the stereo headphone jack, power LED, and battery recharge LED.
\n
\n\tPhoto by: Bill Detwiler / TechRepublic
\n\tCaption by: Bill Detwiler

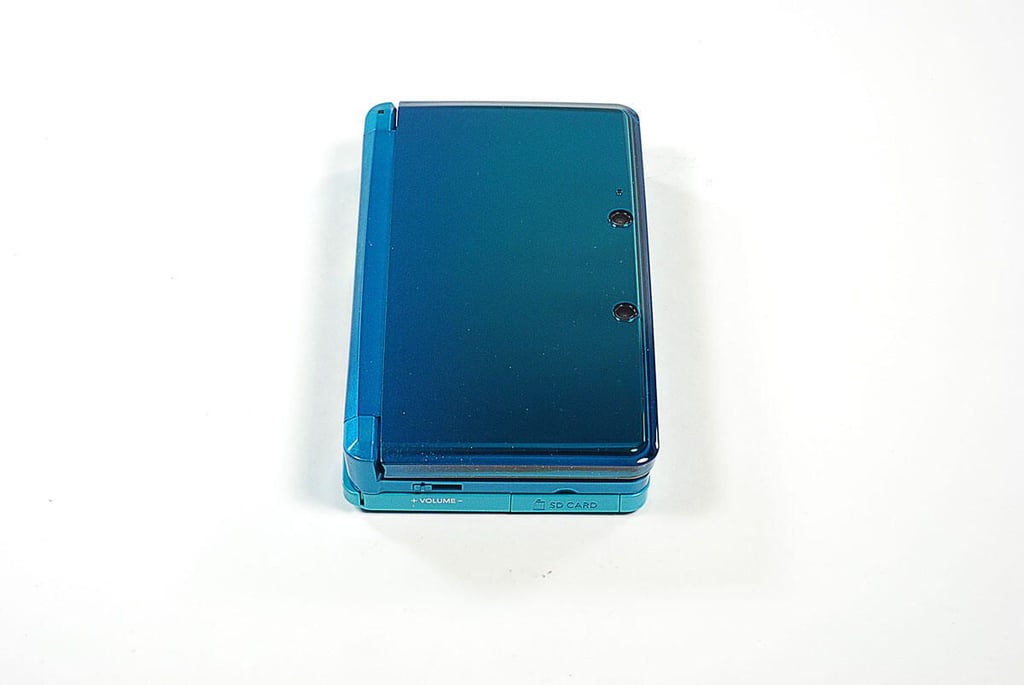
\n\tAlong the right side of the Nintendo 3DS are the Wireless LED, Wireless switch, and 3D Depth Slider.
\n
\n\tPhoto by: Bill Detwiler / TechRepublic
\n\tCaption by: Bill Detwiler

\n\tAlong the rear edge of the Nintendo 3DS are the R button, cradle connectors, AC power adapter connector, Game Card slot, stylus holder, Infrared transceiver, and L button.
\n
\n\tPhoto by: Bill Detwiler / TechRepublic
\n\tCaption by: Bill Detwiler
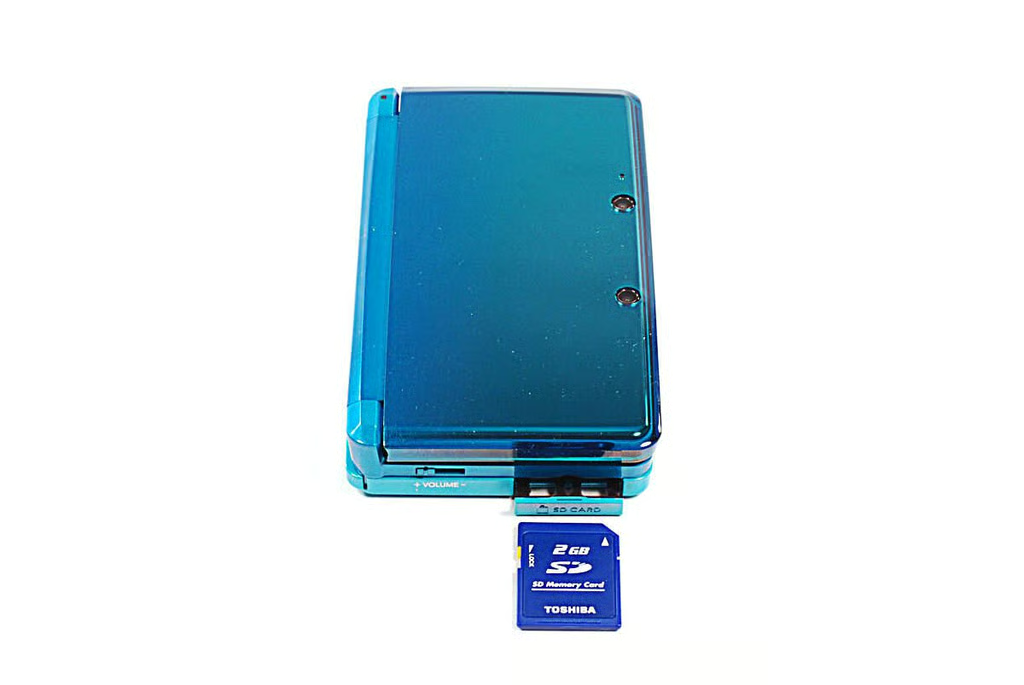
\n\tAlong the left side of the Nintendo 3DS are the Volume control and SD card slot.
\n
\n\tPhoto by: Bill Detwiler / TechRepublic
\n\tCaption by: Bill Detwiler
\n\tPhoto by: Bill Detwiler / TechRepublic
\n\tCaption by: Bill Detwiler
\n\tPhoto by: Bill Detwiler / TechRepublic
\n\tCaption by: Bill Detwiler
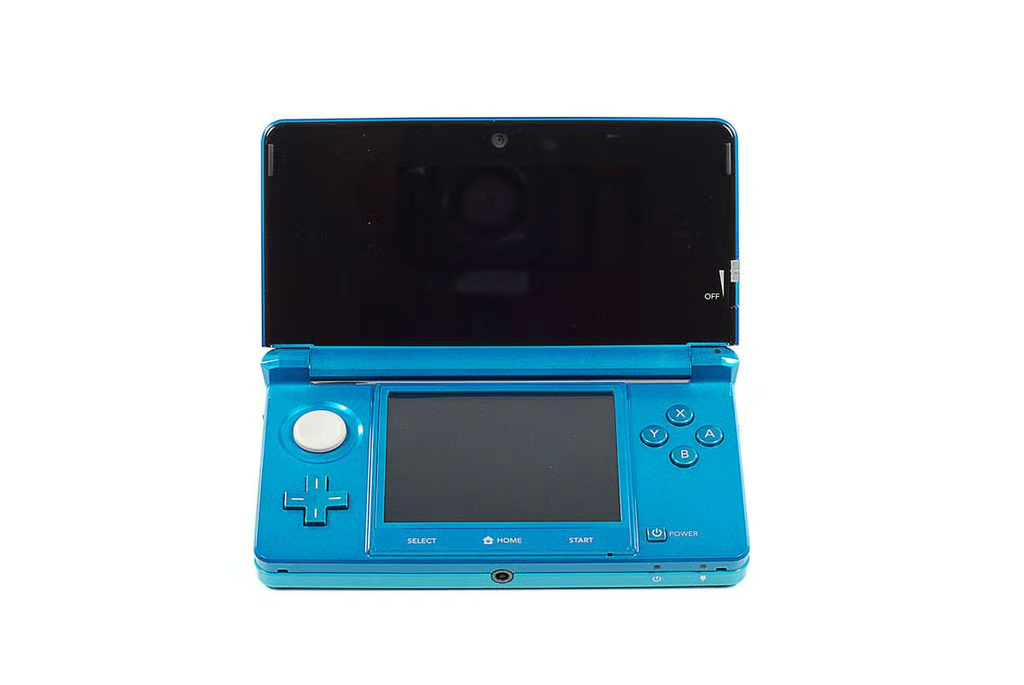
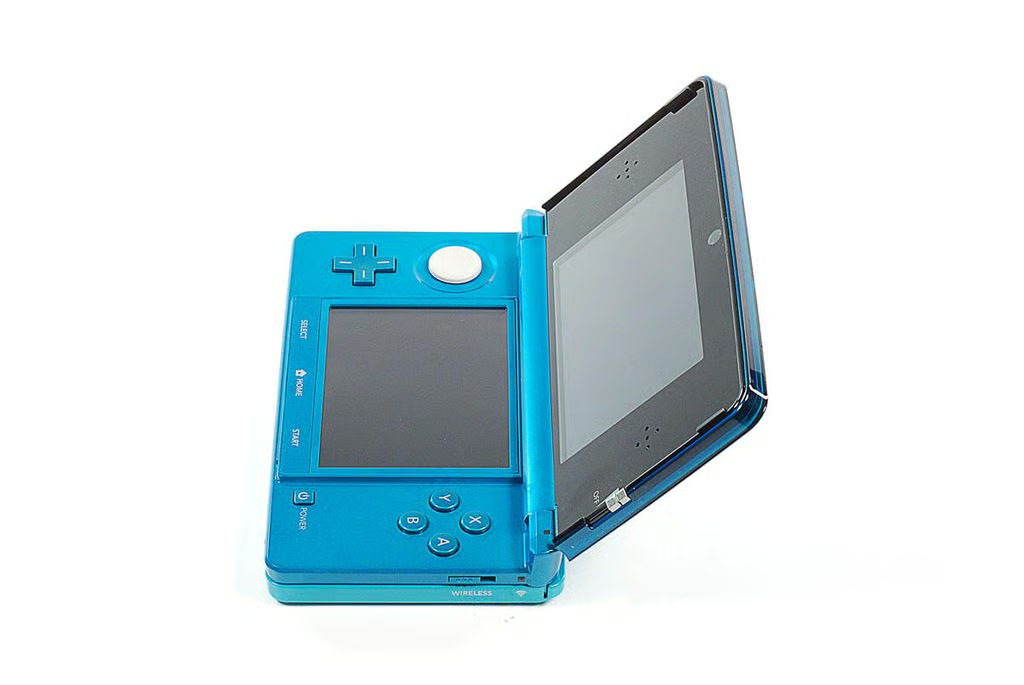
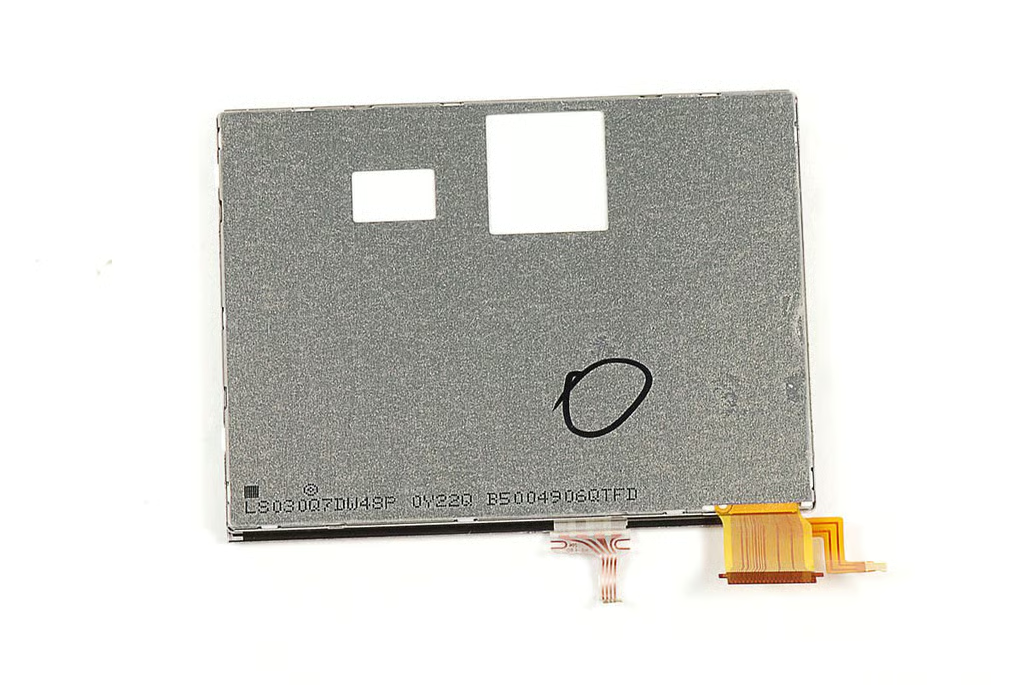
\n\tWith the Nintendo 3DS’ lid opened, we can see the two LCD screens, Circle Pad, + Control Pad, Control buttons, left and right speakers, Select button, Home button, Start button, power button, and inner-facing camera.
\n
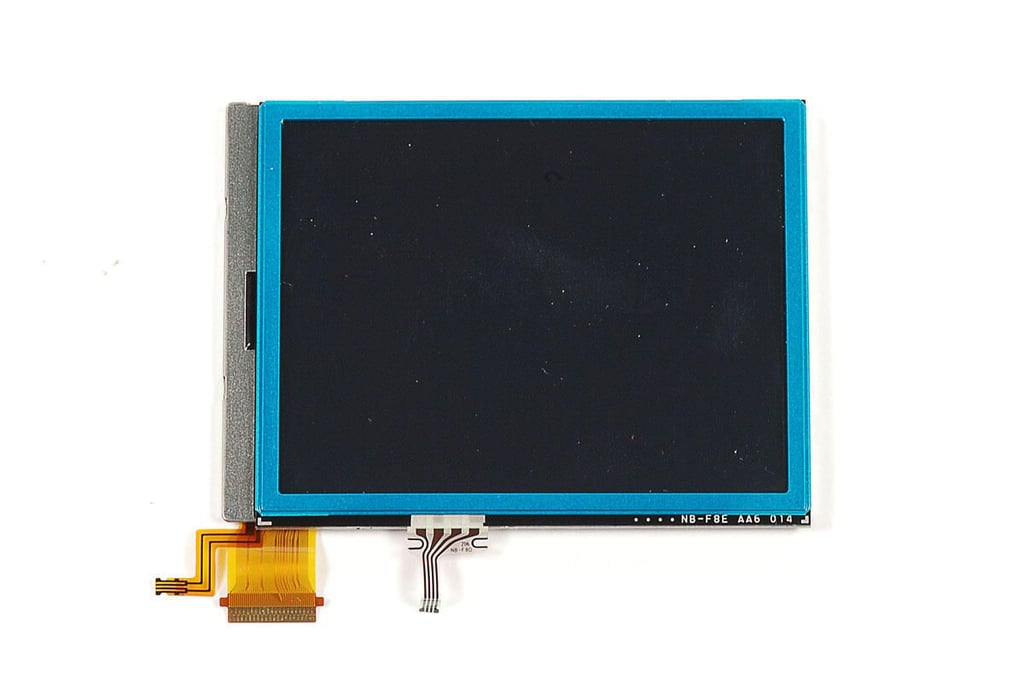
\n\tThe upper LCD panel measure 3.53 inches (diagonal) and delivers a maximum resolution of 800 x 240 pixels (400 x 240 pixels in 3D mode).
\n
\n\tThe lower LCD panel measures 3.02 inches (diagonal) and delivers s resolution of 320 x 240 pixels.
\n
\n\t
\n\t
\n\tPhoto by: Bill Detwiler / TechRepublic
\n\tCaption by: Bill Detwiler
\n\tPhoto by: Bill Detwiler / TechRepublic
\n\tCaption by: Bill Detwiler

\n\tPhoto by: Bill Detwiler / TechRepublic
\n\tCaption by: Bill Detwiler
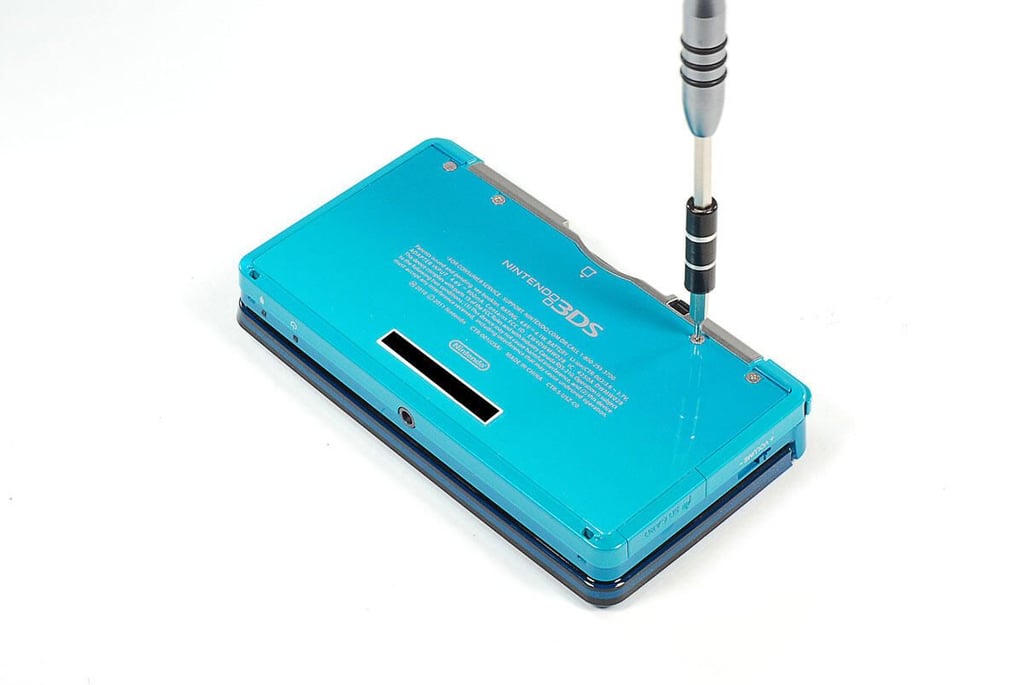
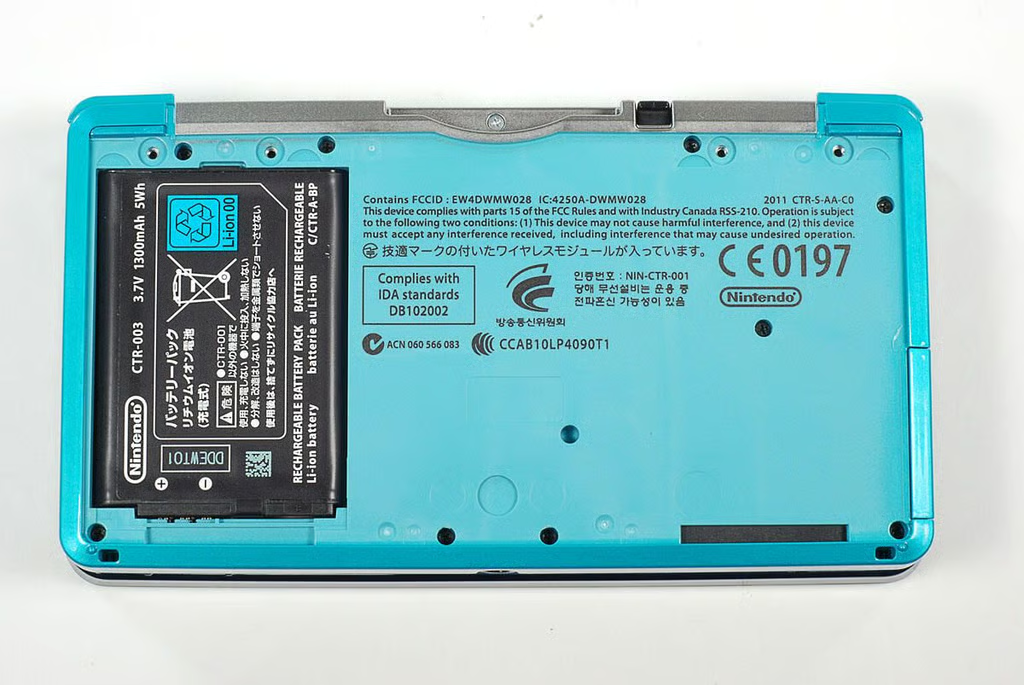
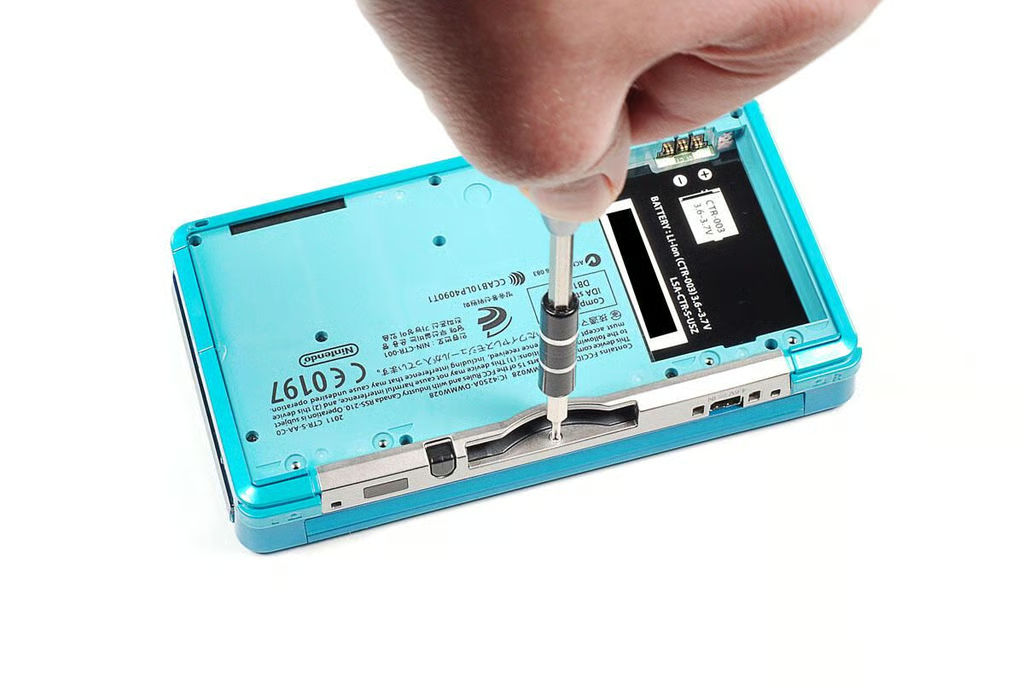
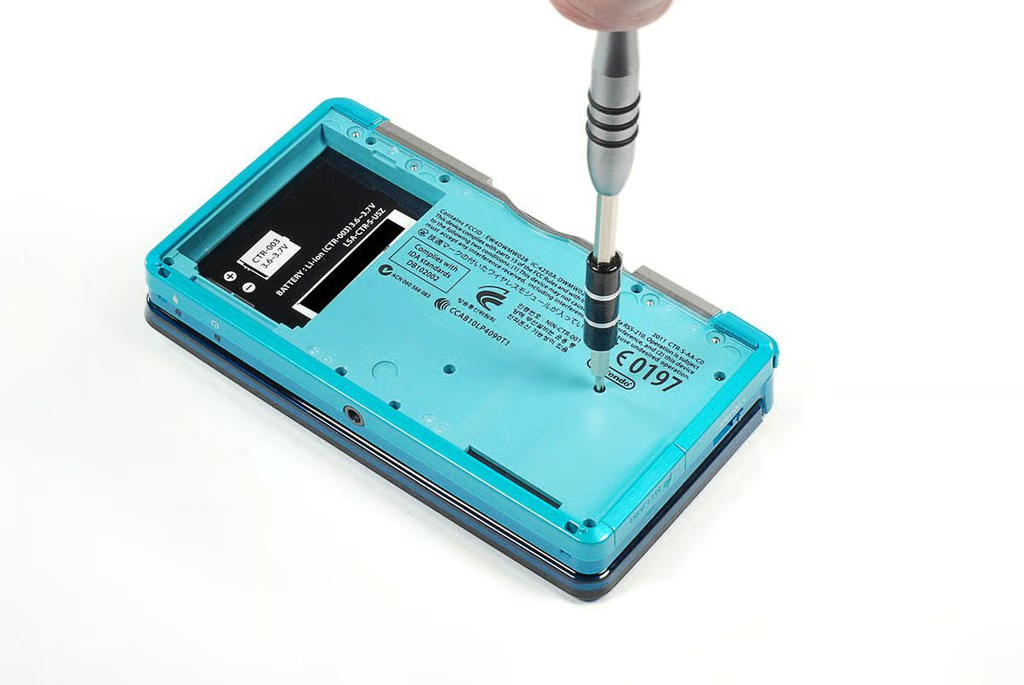
\n\tFour Phillips #000 screws hold the Nintendo 3DS’ battery cover in place.
\n
\n\tPhoto by: Bill Detwiler / TechRepublic
\n\tCaption by: Bill Detwiler
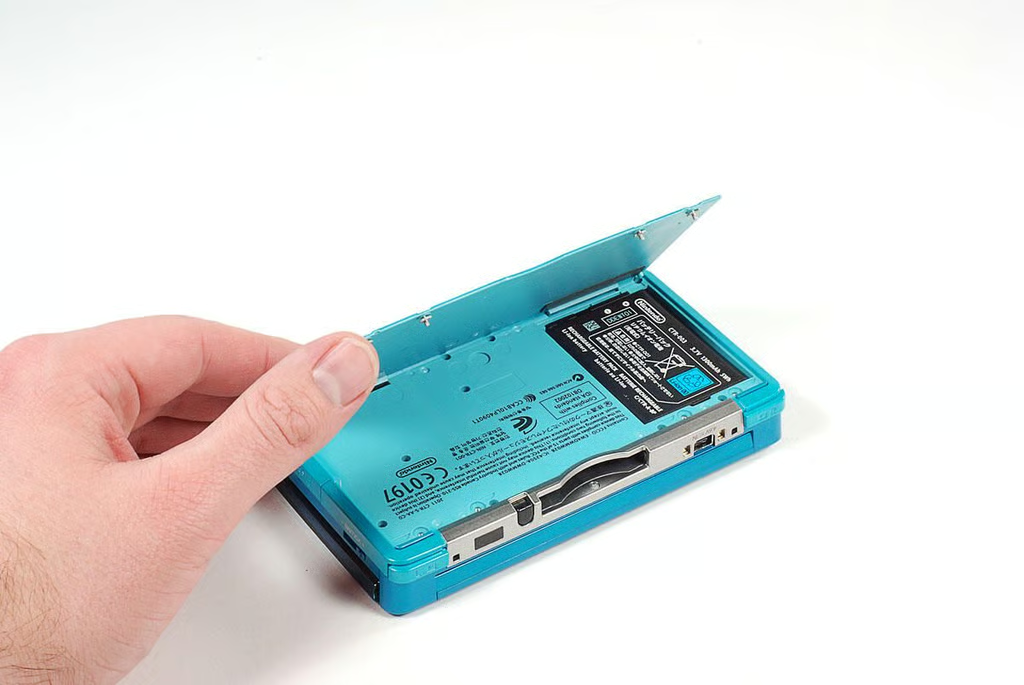
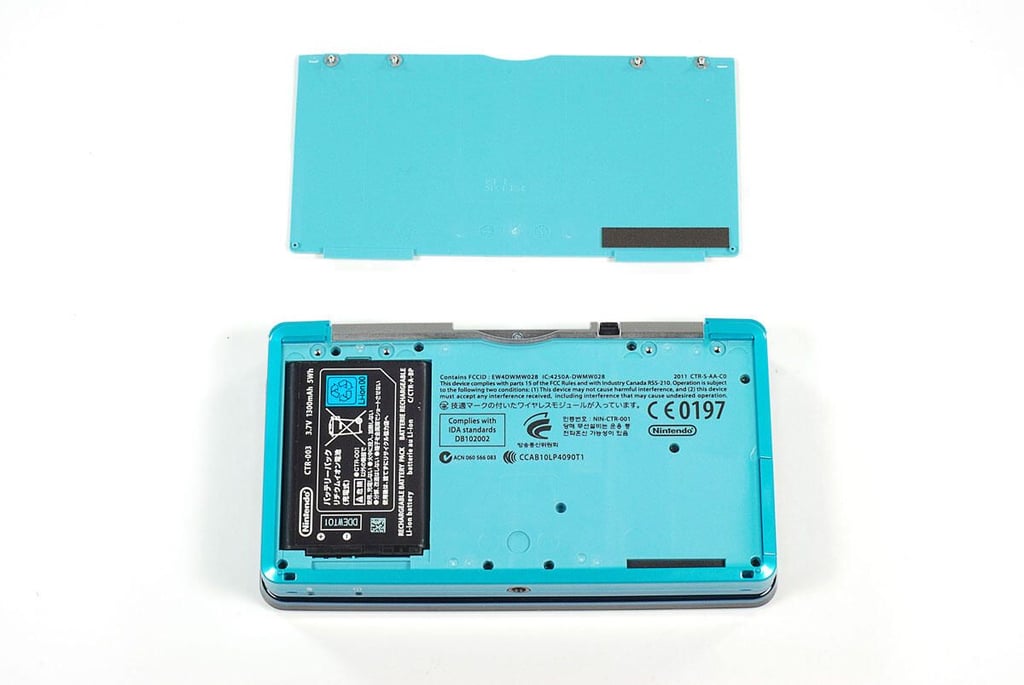
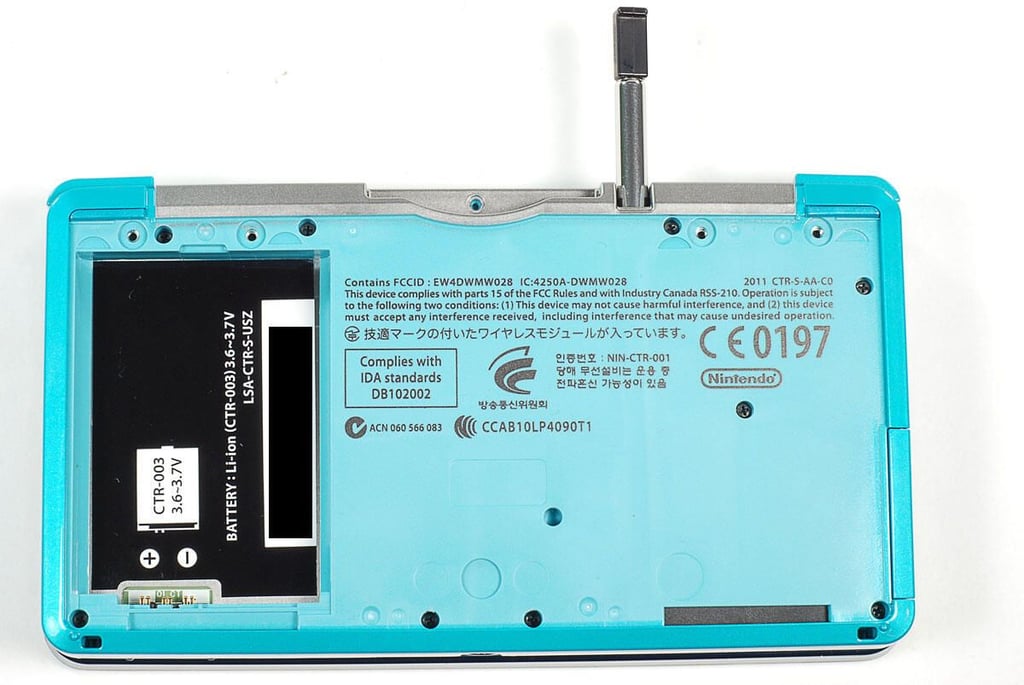
\n\tThe bottom cover’s screws will release from the Nintendo 3DS’ case, but reamin attached to the cover. With the screws removed, I was able to lift off the batter cover.
\n
\n\tPhoto by: Bill Detwiler / TechRepublic
\n\tCaption by: Bill Detwiler
\n\tPhoto by: Bill Detwiler / TechRepublic
\n\tCaption by: Bill Detwiler
\n\tPhoto by: Bill Detwiler / TechRepublic
\n\tCaption by: Bill Detwiler
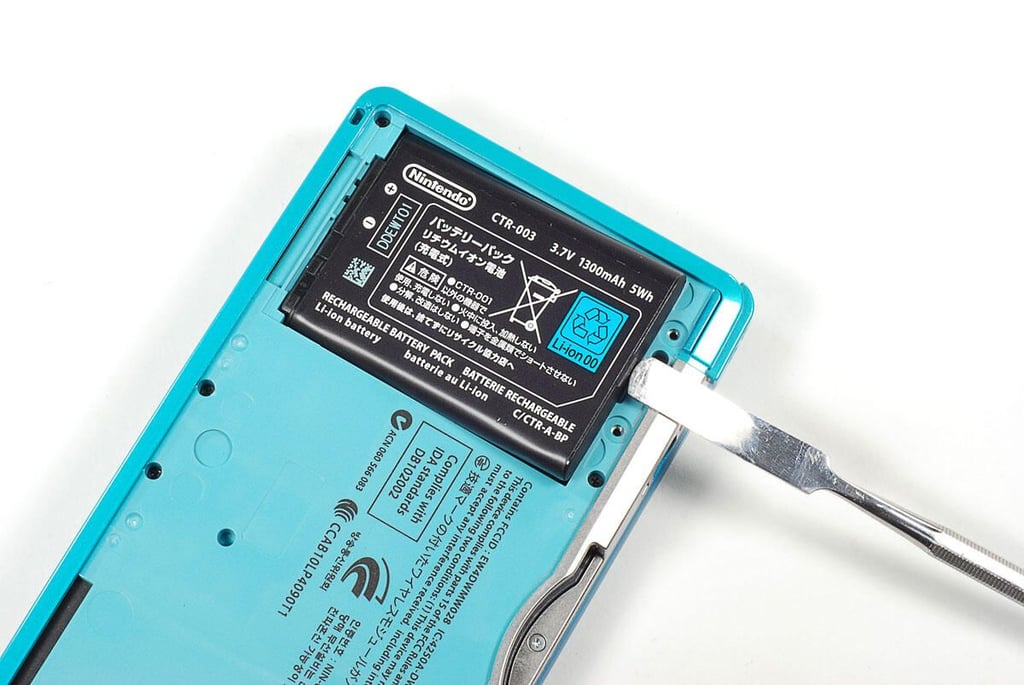
\n\tUsing a thin metal blade, I popped the battery loose from the Nintendo 3DS’ case.
\n
\n\tPhoto by: Bill Detwiler / TechRepublic
\n\tCaption by: Bill Detwiler
\n\tPhoto by: Bill Detwiler / TechRepublic
\n\tCaption by: Bill Detwiler
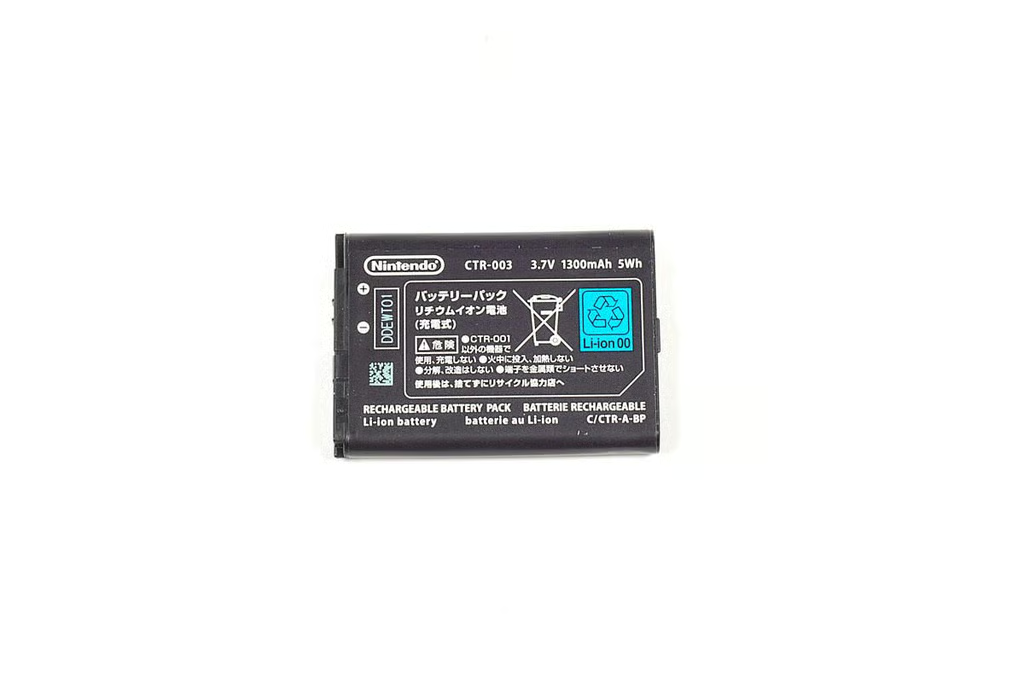
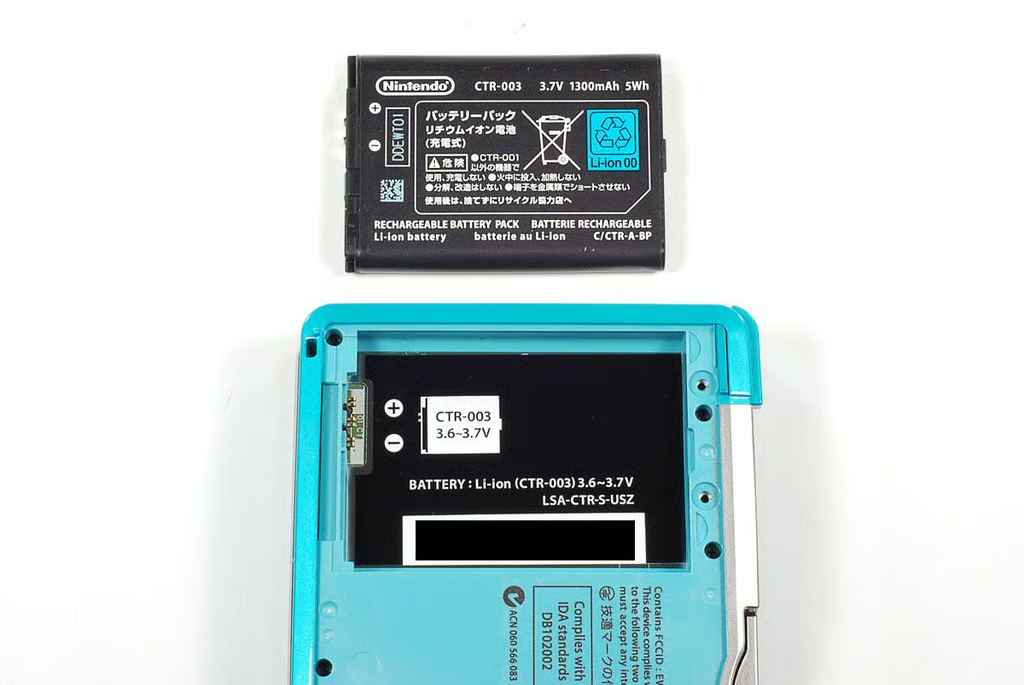
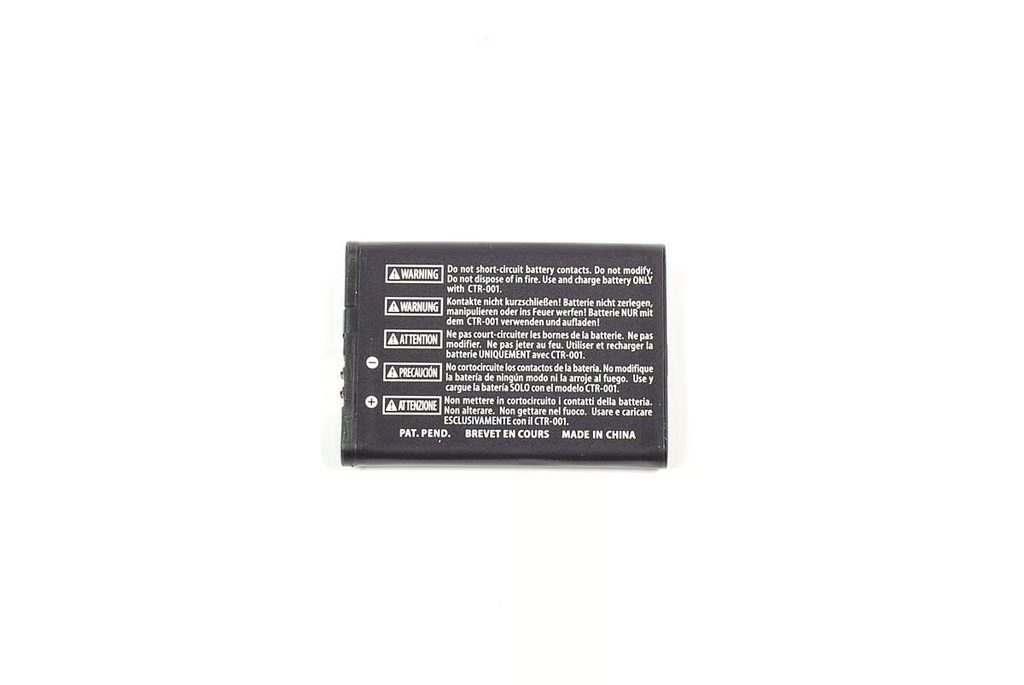
\n\tThe Nintendo 3DS has a 3.7V 1300mAh 5Wh Li-Ion battery, which provides about 3-5 hours of battery life.
\n
\n\tPhoto by: Bill Detwiler / TechRepublic
\n\tCaption by: Bill Detwiler
\n\tPhoto by: Bill Detwiler / TechRepublic
\n\tCaption by: Bill Detwiler

\n\tPhoto by: Bill Detwiler / TechRepublic
\n\tCaption by: Bill Detwiler
\n\tTen Phillips screws hold the Nintendo 3DS’ inner case in place. I removed the single screw located in the Game Card slot first.
\n
\n\tPhoto by: Bill Detwiler / TechRepublic
\n\tCaption by: Bill Detwiler
\n\tAfter removing the Game Card slot screw, I removed the Nintendo 3DS’ stylus.
\n
\n\tPhoto by: Bill Detwiler / TechRepublic
\n\tCaption by: Bill Detwiler
\n\tAfter removing the Nintendo 3DS’ stylus, I removed the remaining nine Phillips screws.
\n
\n\tPhoto by: Bill Detwiler / TechRepublic
\n\tCaption by: Bill Detwiler
\n\tWith all the screws removed, you can lift the lower case cover up away from the rest of the Nintendo 3DS. Be carfull when does this, as several ribbon cables will still be connected to the main PCB.
\n
\n\tPhoto by: Bill Detwiler / TechRepublic
\n\tCaption by: Bill Detwiler
\n\tTwo small ribbon cables connect the lower half of the Nintendo 3DS’ case to the main PCB.
\n
\n\tPhoto by: Bill Detwiler / TechRepublic
\n\tCaption by: Bill Detwiler
\n\tPhoto by: Bill Detwiler / TechRepublic
\n\tCaption by: Bill Detwiler
\n\tPhoto by: Bill Detwiler / TechRepublic
\n\tCaption by: Bill Detwiler
\n\tPhoto by: Bill Detwiler / TechRepublic
\n\tCaption by: Bill Detwiler
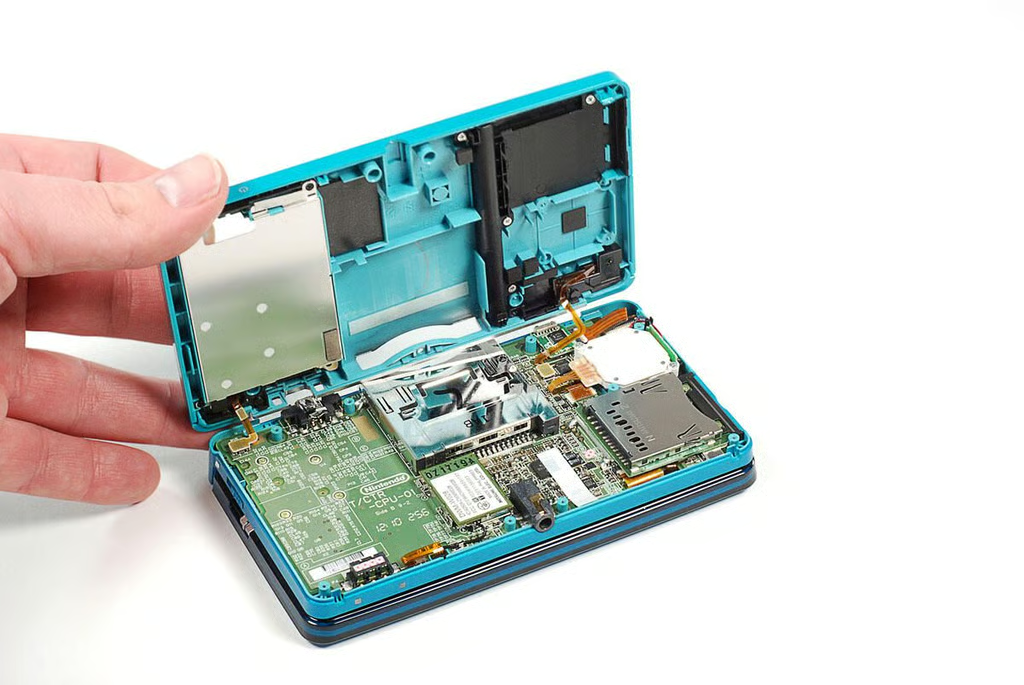
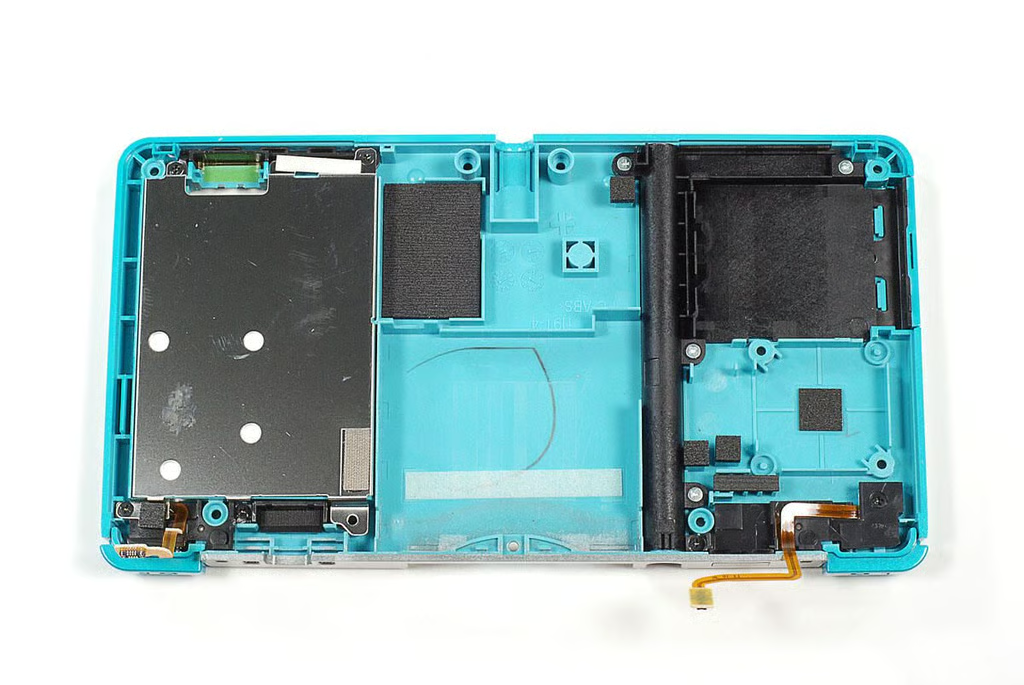
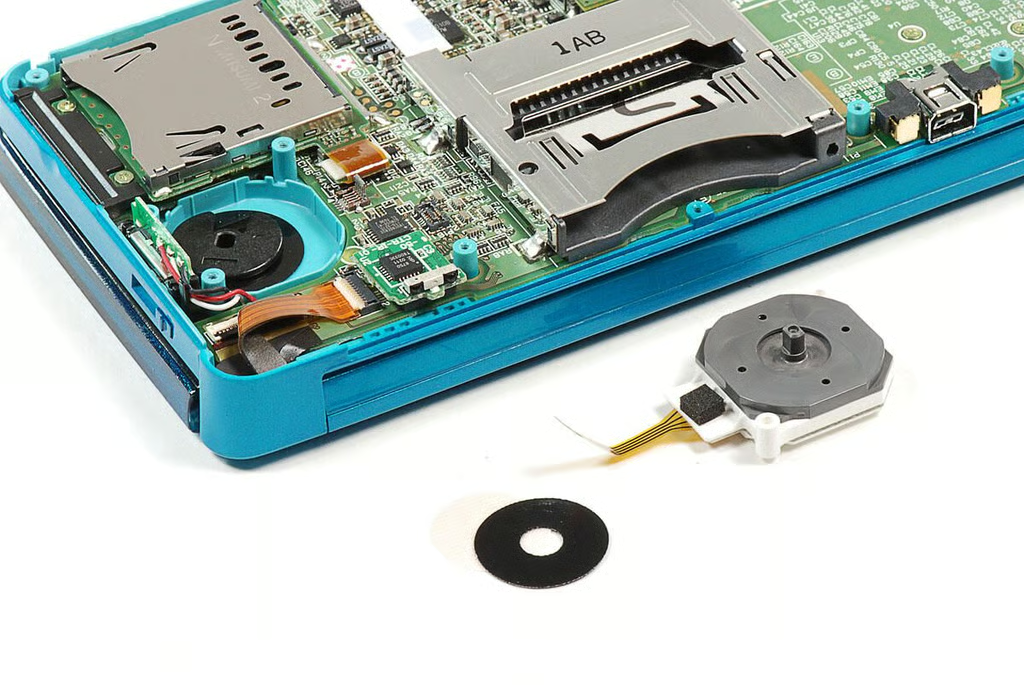
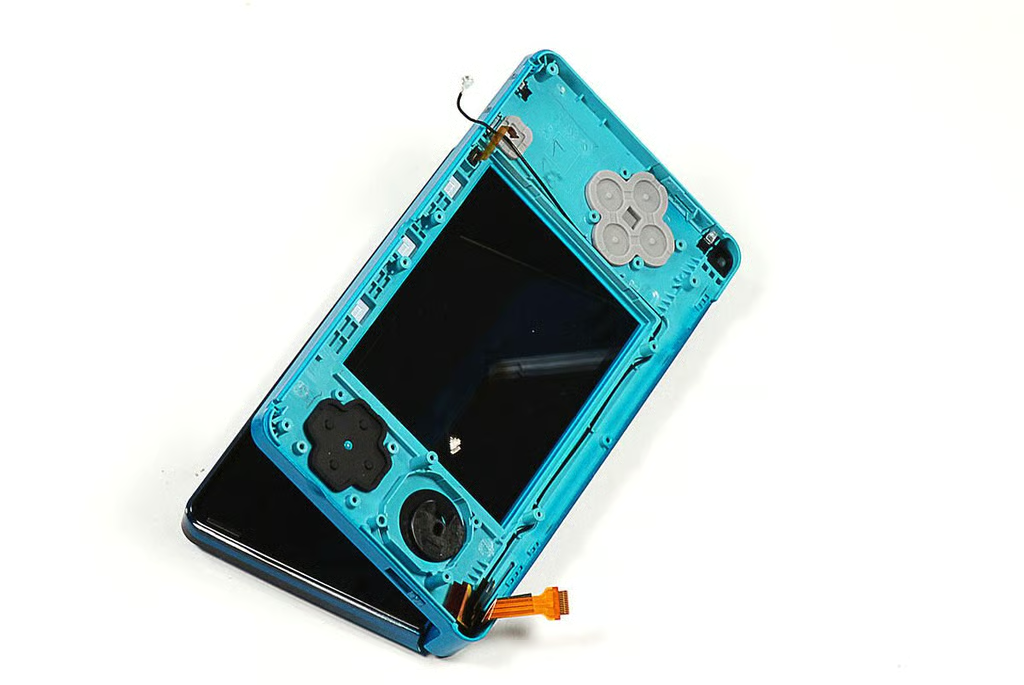
\n\tWith the lower half of the Nintendo 3DS’ case removed, we get our first good look at that hardware inside the device.
\n
\n\tPhoto by: Bill Detwiler / TechRepublic
\n\tCaption by: Bill Detwiler
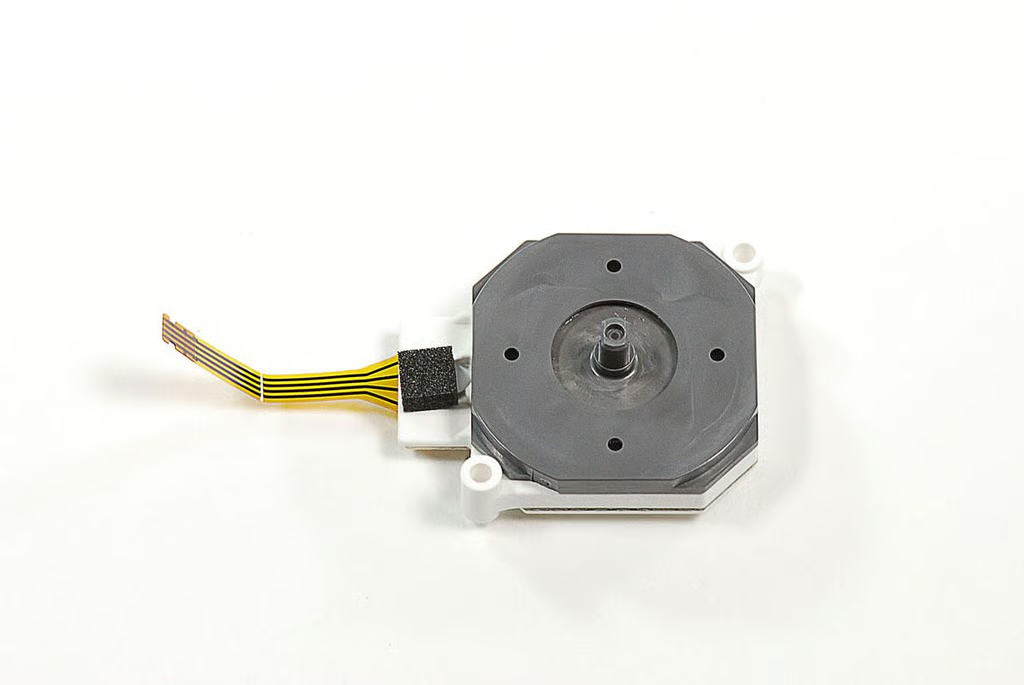
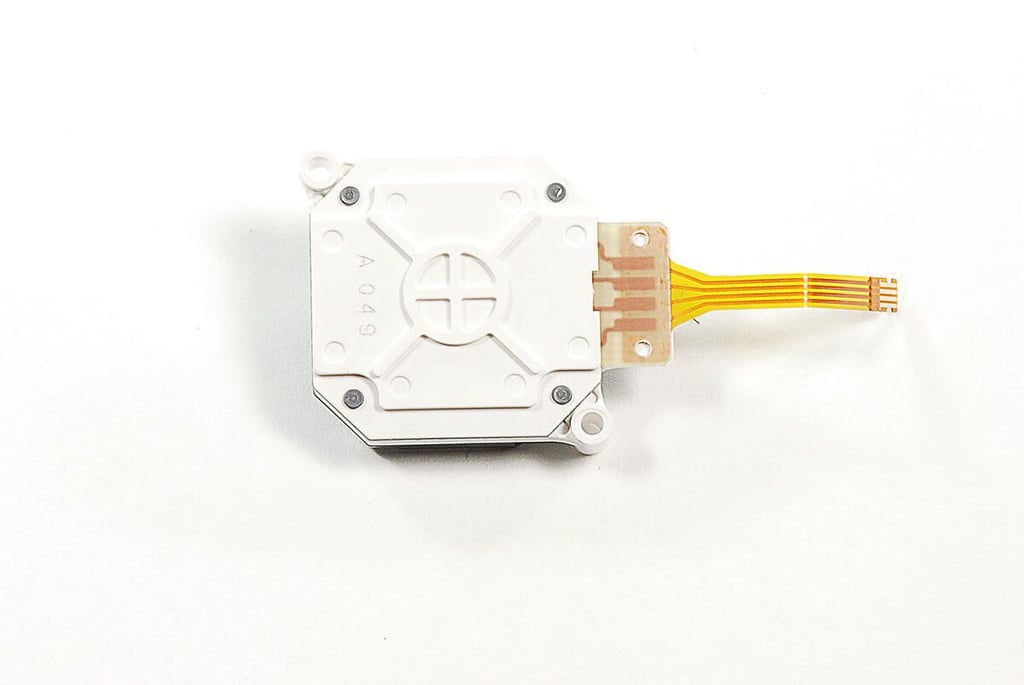
\n\tThe Nintendo 3DS’ Circle Pad controller is held in place with two Phillips screws.
\n
\n\tPhoto by: Bill Detwiler / TechRepublic
\n\tCaption by: Bill Detwiler
\n\tA pair of thin washers/rings are located between the Circle Pad controller mechanism and the Nintendo 3DS’ plastic case.
\n
\n\tPhoto by: Bill Detwiler / TechRepublic
\n\tCaption by: Bill Detwiler
\n\tPhoto by: Bill Detwiler / TechRepublic
\n\tCaption by: Bill Detwiler
\n\tPhoto by: Bill Detwiler / TechRepublic
\n\tCaption by: Bill Detwiler
\n\tPhoto by: Bill Detwiler / TechRepublic
\n\tCaption by: Bill Detwiler
\n\tAfter removing the Circle Pad controller mechanism, I turned my attention to the Nintendo 3DS’ Wi-Fi card.
\n
\n\tPhoto by: Bill Detwiler / TechRepublic
\n\tCaption by: Bill Detwiler
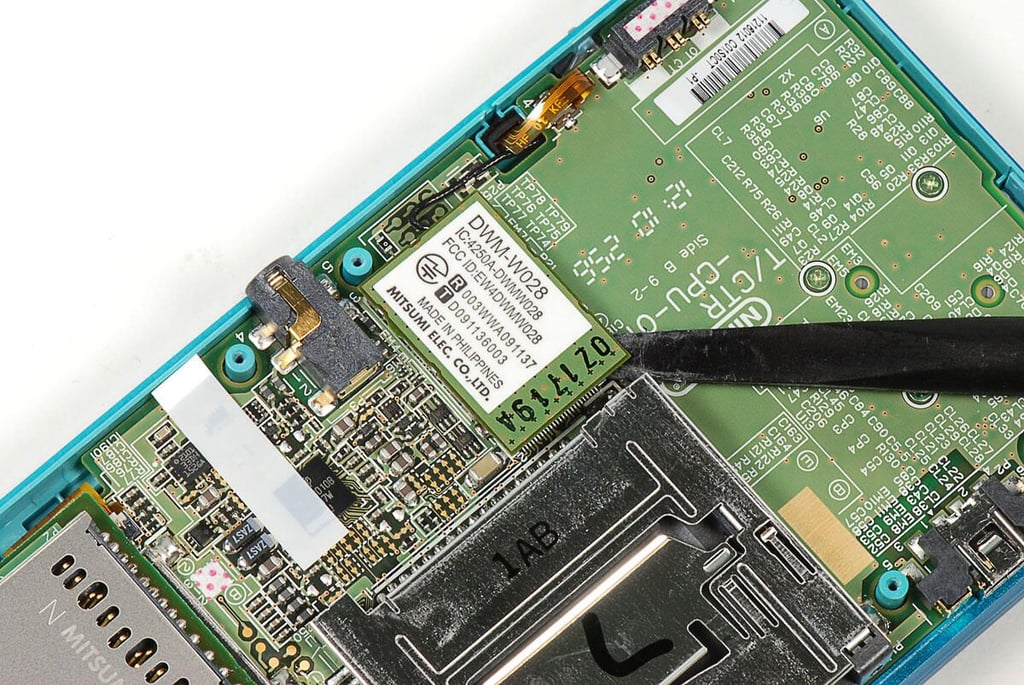
\n\tNext, I removed the Wi-Fi card using a plastic spudger.
\n
\n\tPhoto by: Bill Detwiler / TechRepublic
\n\tCaption by: Bill Detwiler
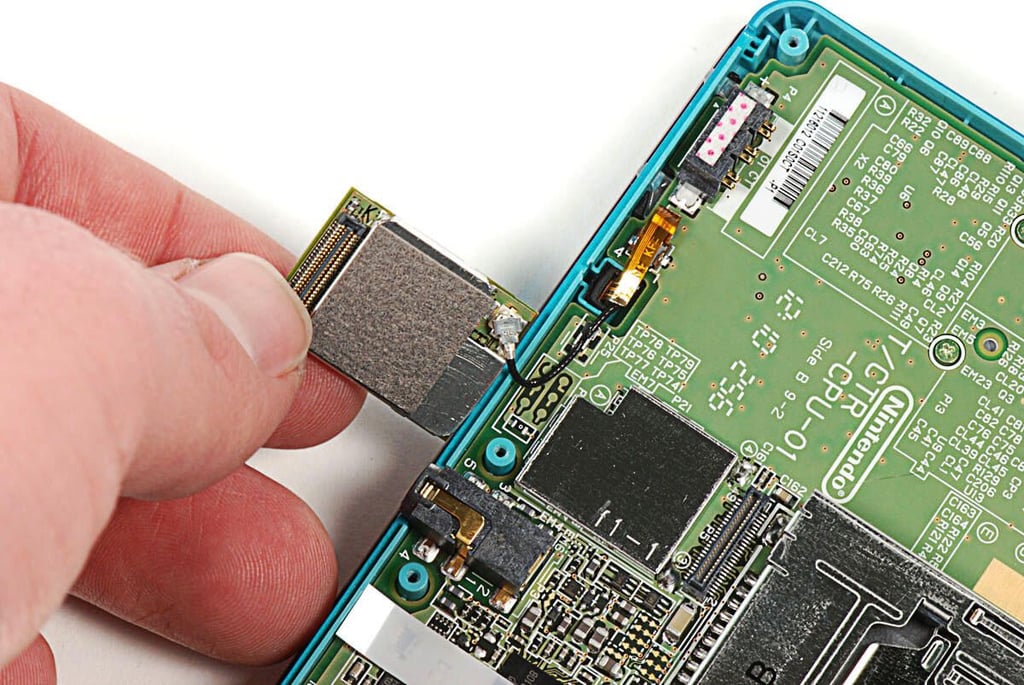
\n\tA single antena wire is attached to the bottom of the Nintendo 3DS’ Wi-Fi card.
\n
\n\tPhoto by: Bill Detwiler / TechRepublic
\n\tCaption by: Bill Detwiler
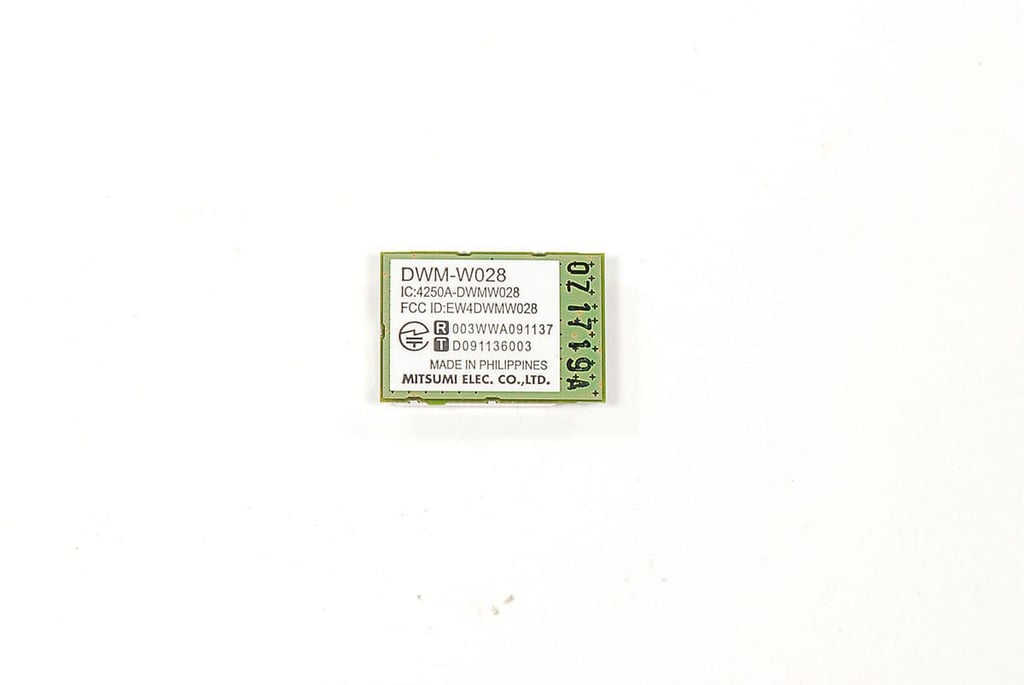
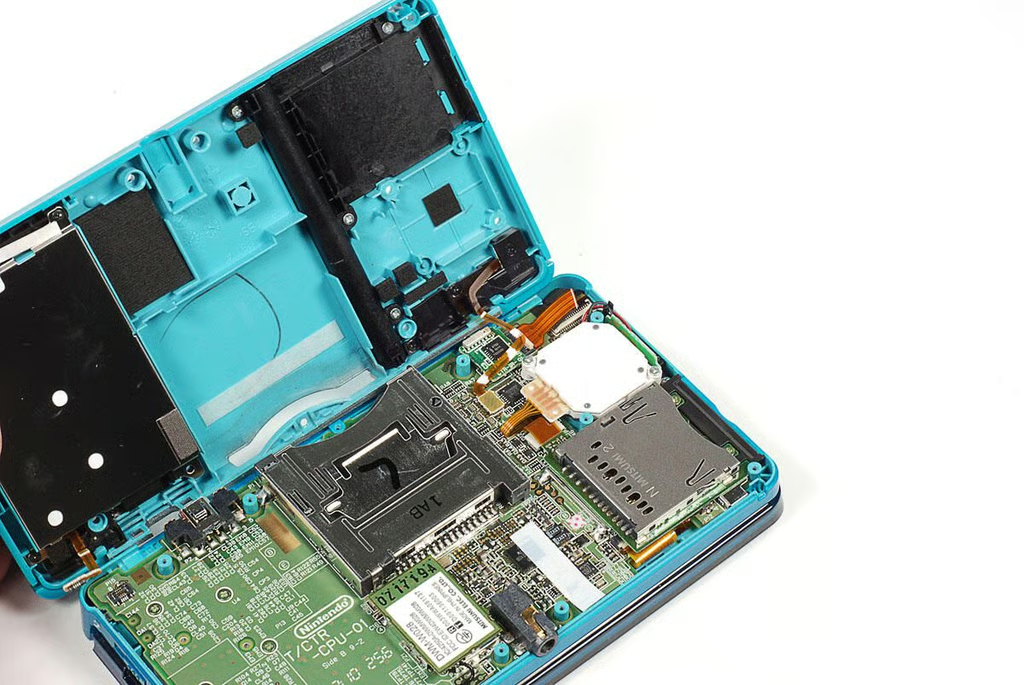
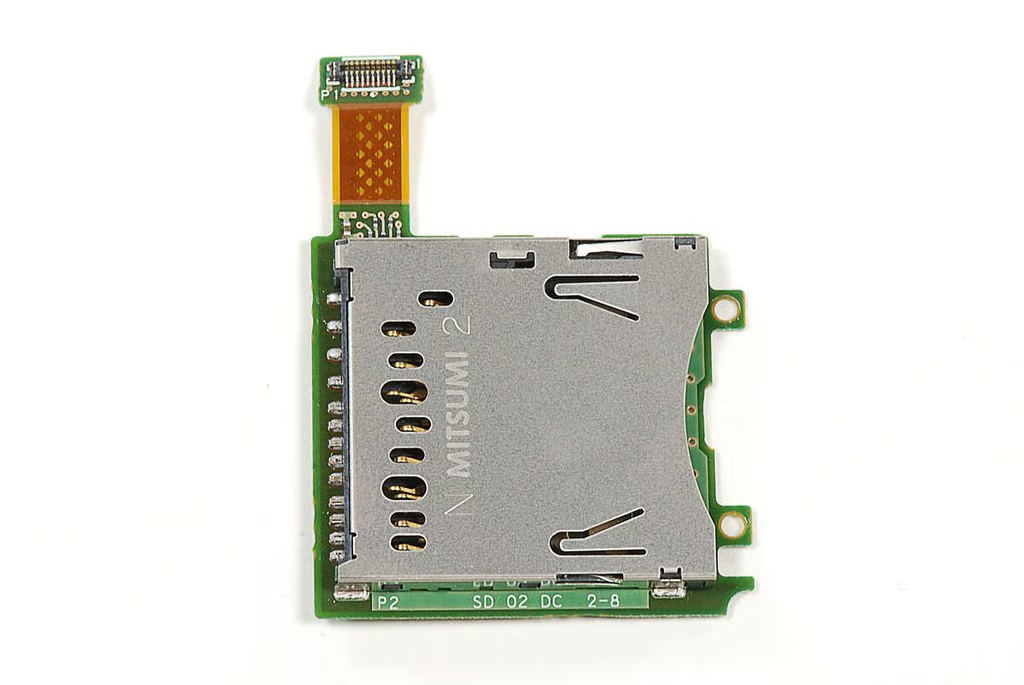
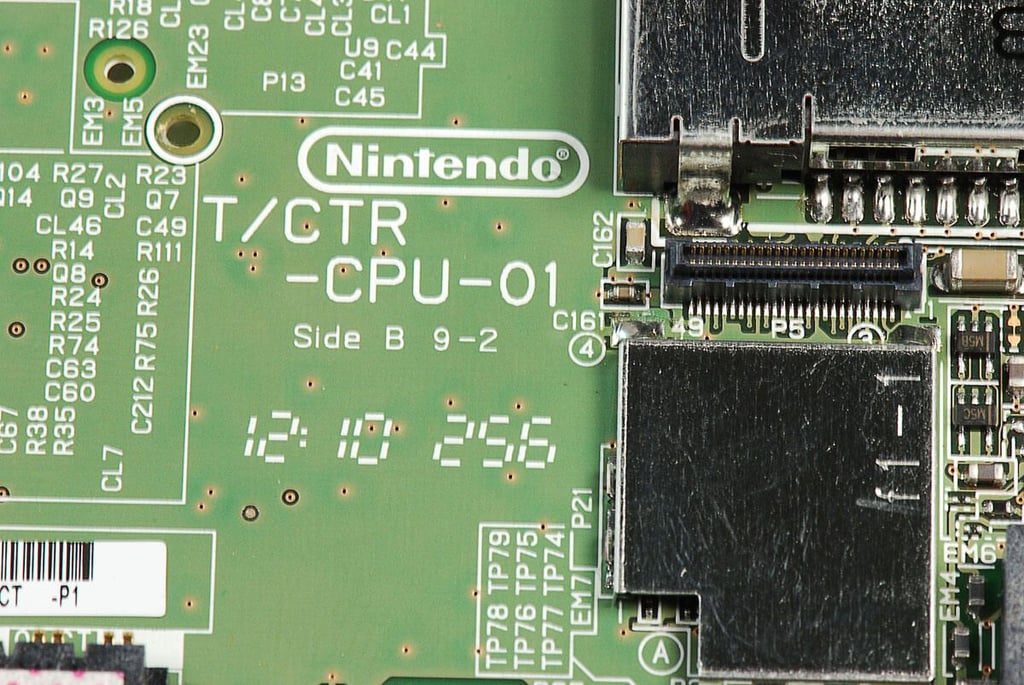
\n\tThe Nintendo 3DS uses a Mitsumi DWM-W02 Wi-Fi card.
\n
\n\tPhoto by: Bill Detwiler / TechRepublic
\n\tCaption by: Bill Detwiler
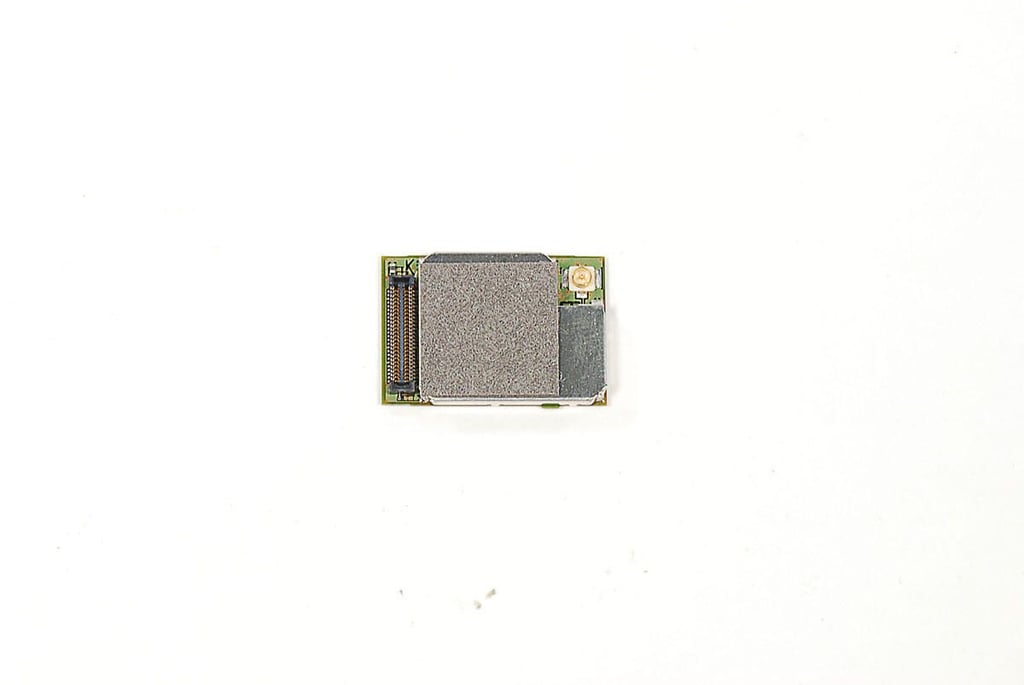
\n\tUnfortunately the Wi-Fi card’s metal EMI shield is soldered to the PCB so, I won’t be able to show you the Atheros chip that sits underneath.
\n
\n\tPhoto by: Bill Detwiler / TechRepublic
\n\tCaption by: Bill Detwiler
\n\tPhoto by: Bill Detwiler / TechRepublic
\n\tCaption by: Bill Detwiler
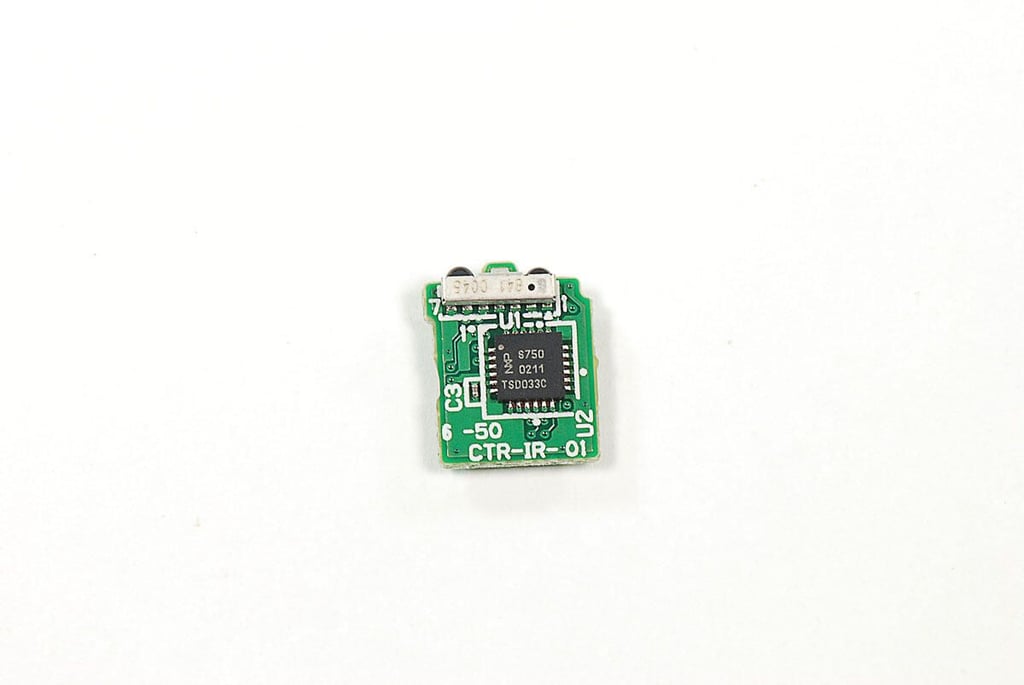
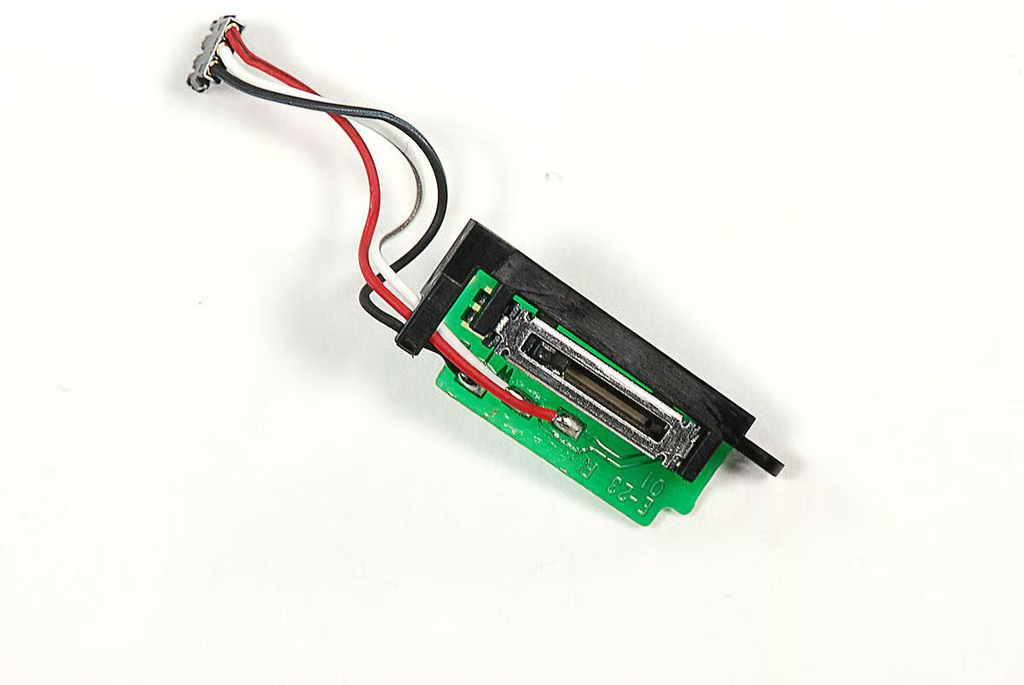
\n\tThe Nintendo 3DS’ IR board has an NXP chip with markings 8750 0211 TSD033C.
\n
\n\tPhoto by: Bill Detwiler / TechRepublic
\n\tCaption by: Bill Detwiler
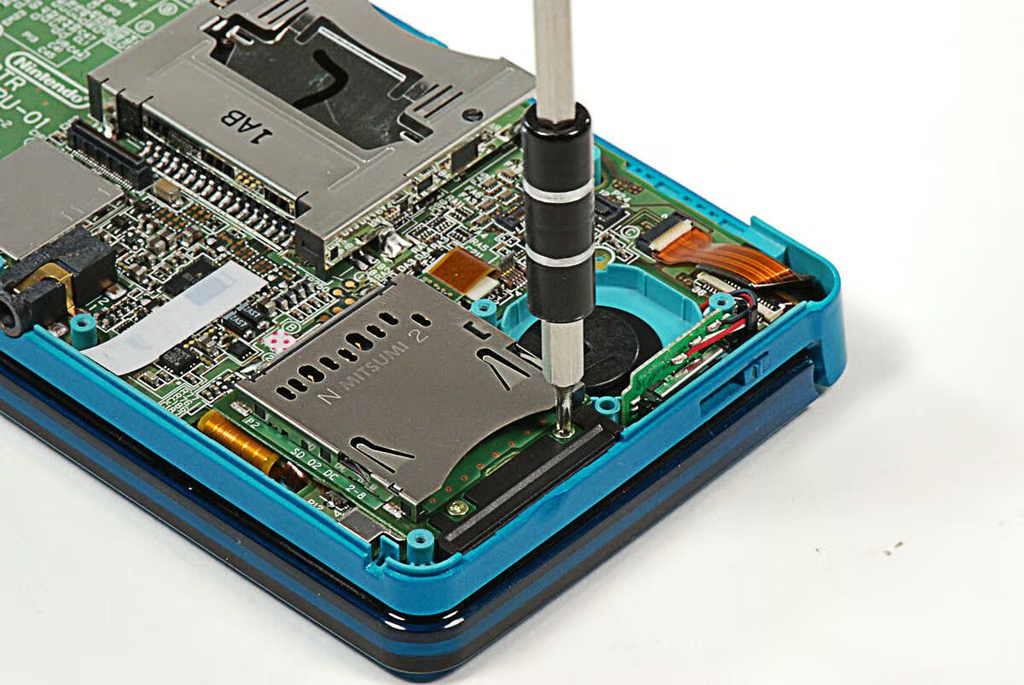
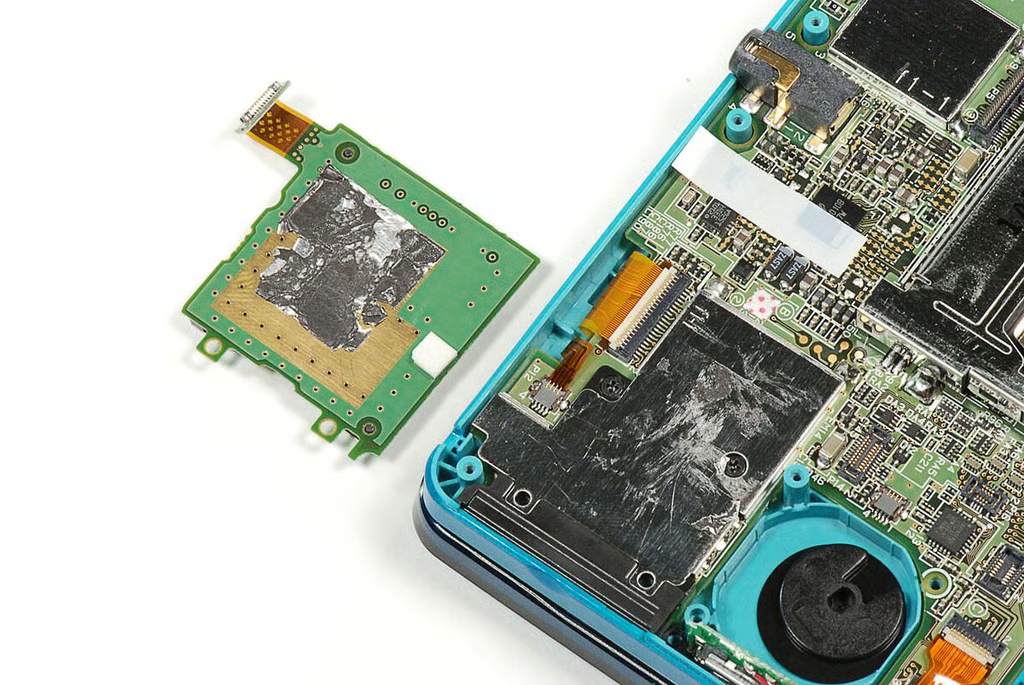
\n\tNext, I removed the screws holding the Nintendo 3DS’ SD card slot to the case.
\n
\n\tPhoto by: Bill Detwiler / TechRepublic
\n\tCaption by: Bill Detwiler
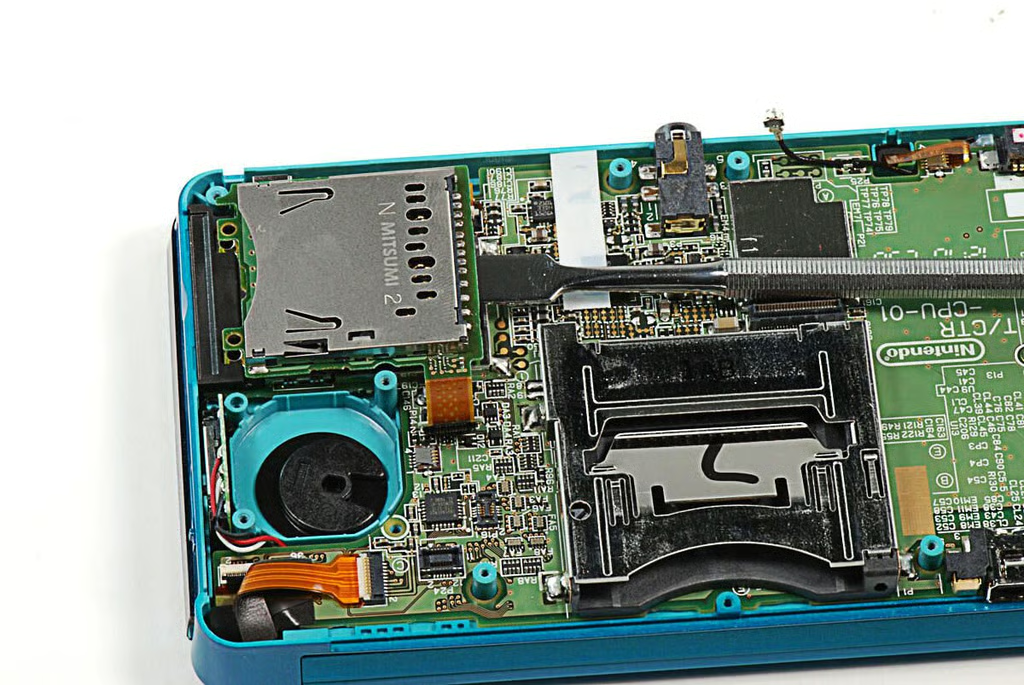
\n\tAfter removed the SD card slot’s screws and popping loose its connector, I used a thin metal blade to gently pry it loose from the EMI shield that it is glued to. I was able to do this without damaging either component.
\n
\n\tPhoto by: Bill Detwiler / TechRepublic
\n\tCaption by: Bill Detwiler
\n\tPhoto by: Bill Detwiler / TechRepublic
\n\tCaption by: Bill Detwiler
\n\tPhoto by: Bill Detwiler / TechRepublic
\n\tCaption by: Bill Detwiler
\n\tPhoto by: Bill Detwiler / TechRepublic
\n\tCaption by: Bill Detwiler
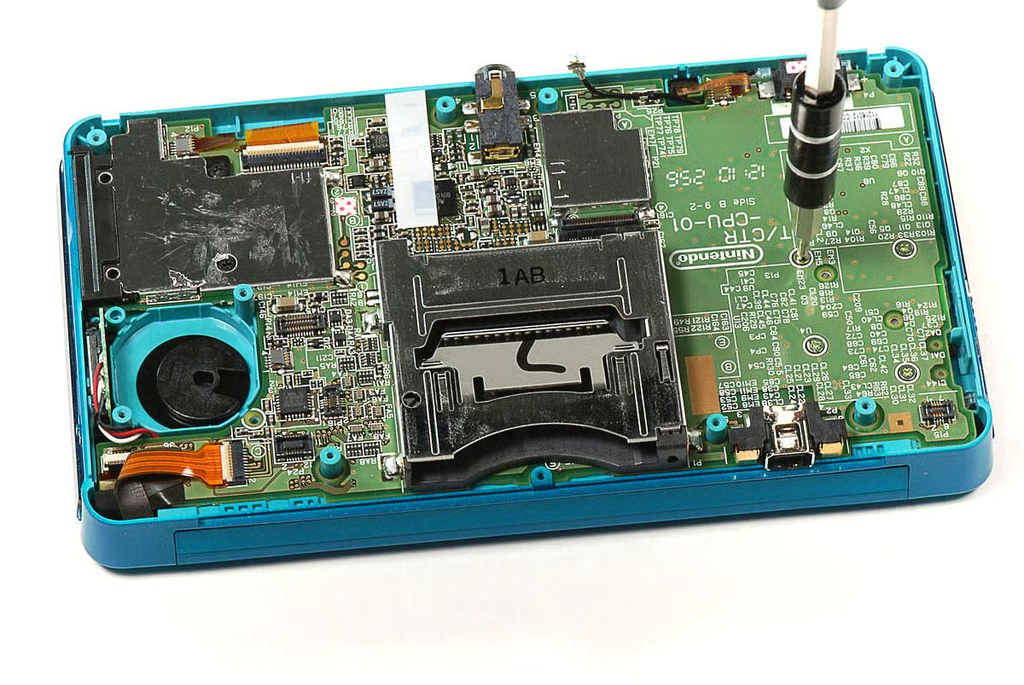
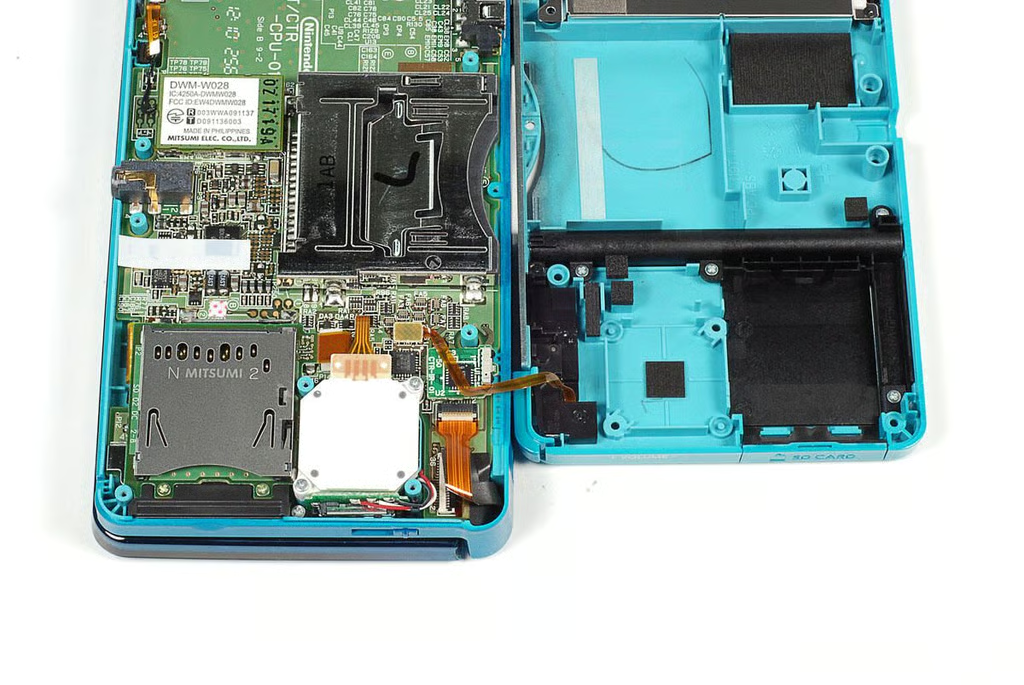
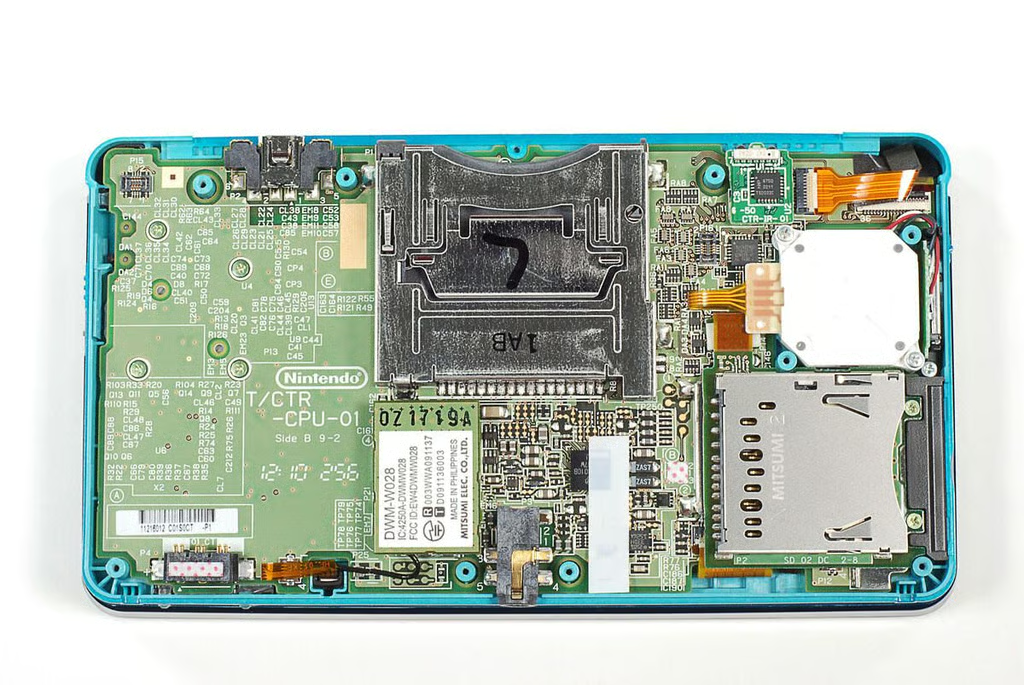
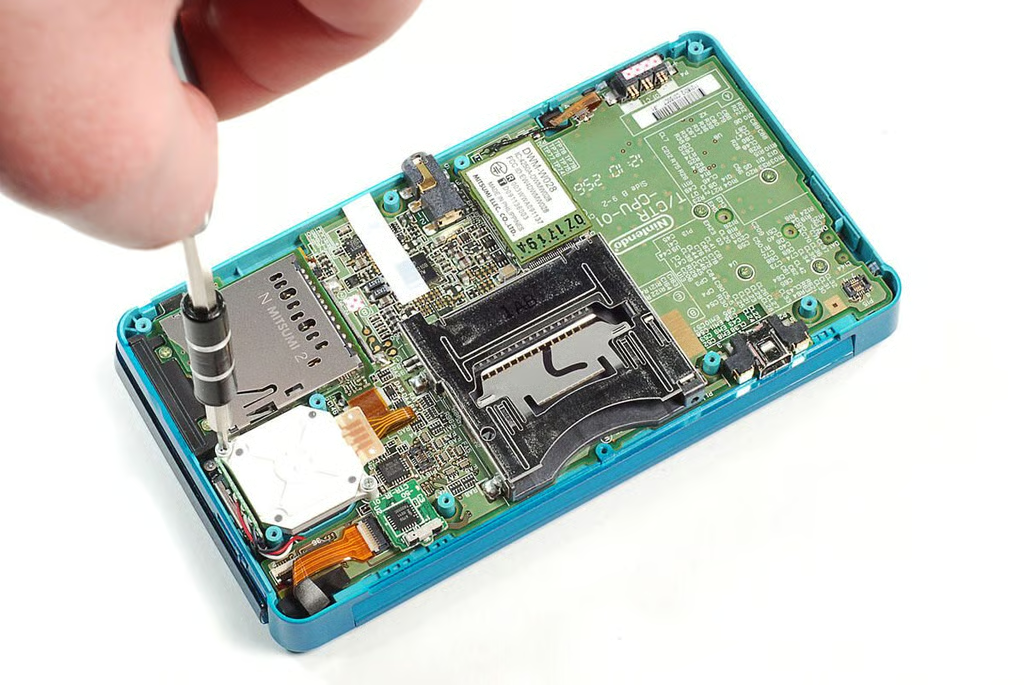
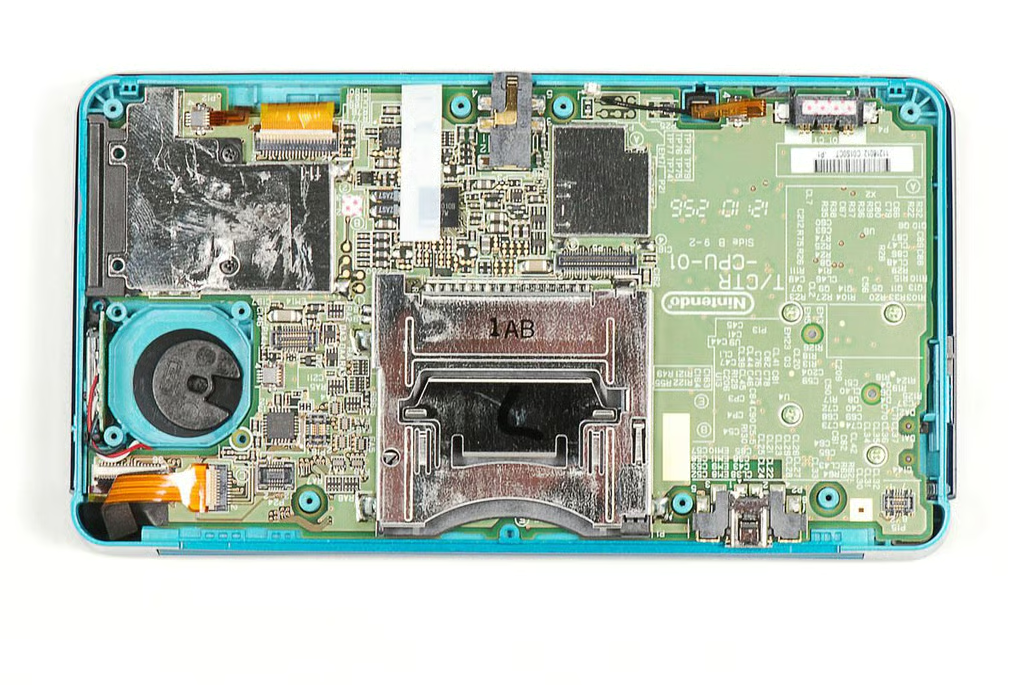
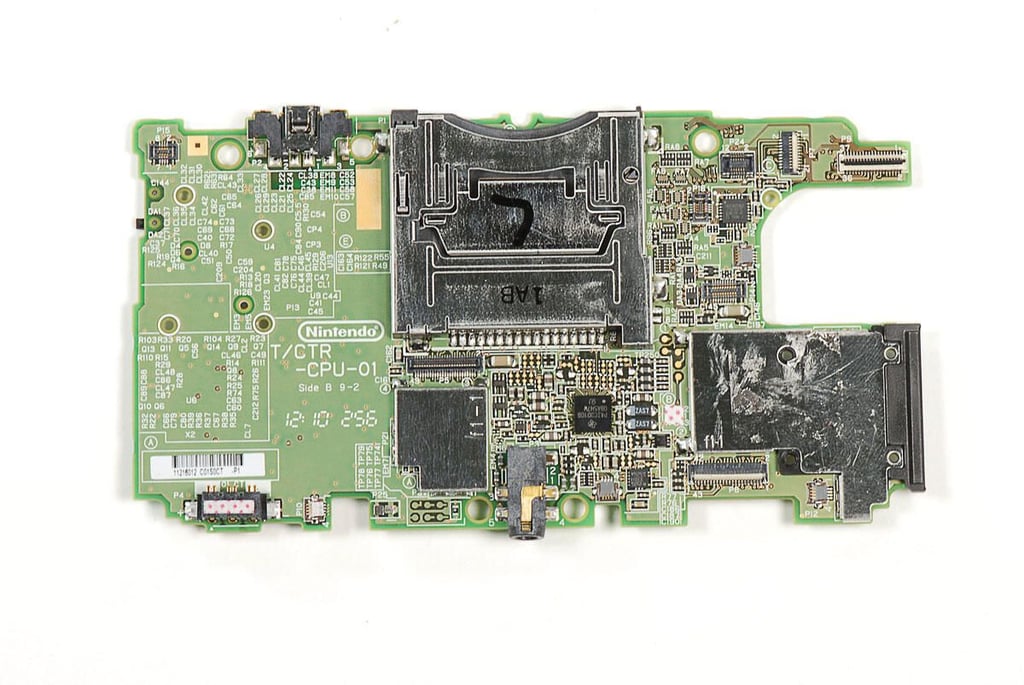
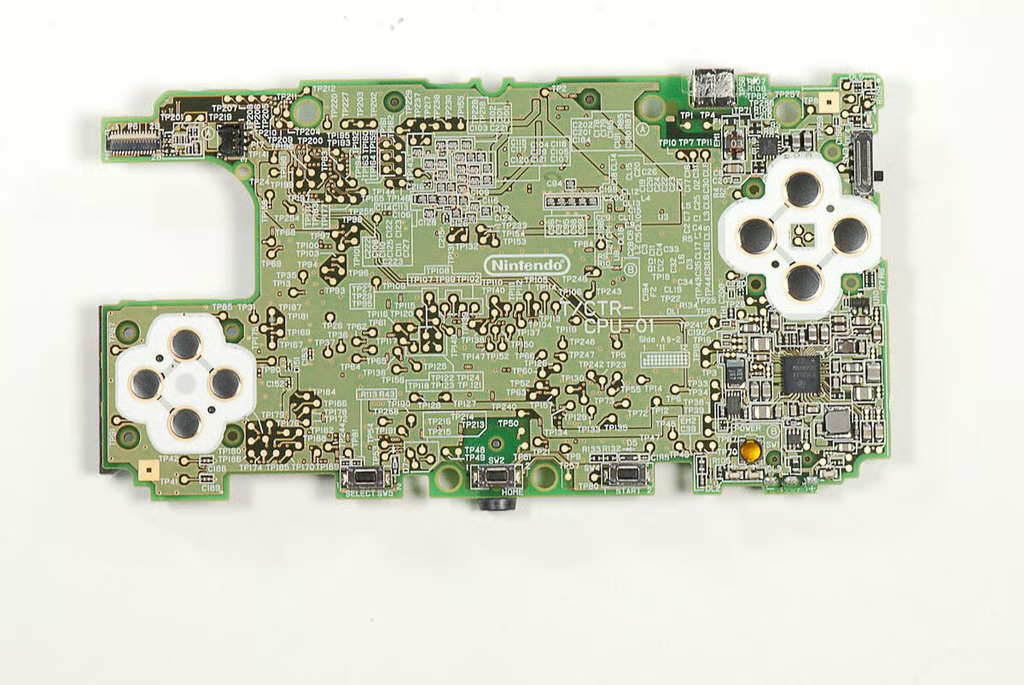
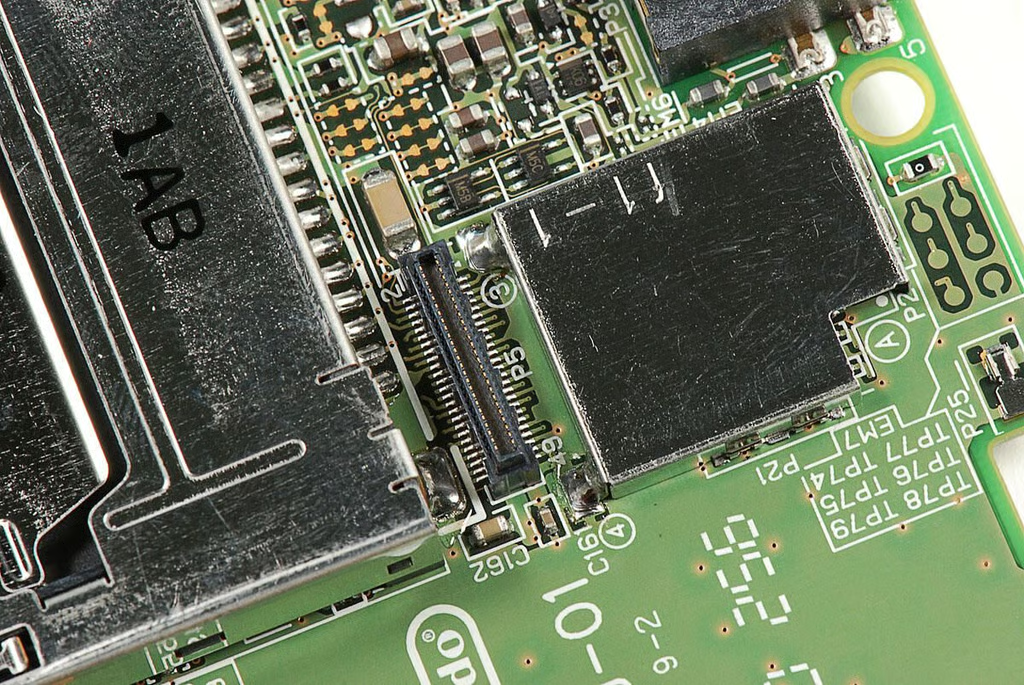
\n\tNext, I turned my attention to removing the Nintendo 3DS’ main PCB. Several screws hold it to the upper half of the case and had to be removed.
\n
\n\tPhoto by: Bill Detwiler / TechRepublic
\n\tCaption by: Bill Detwiler
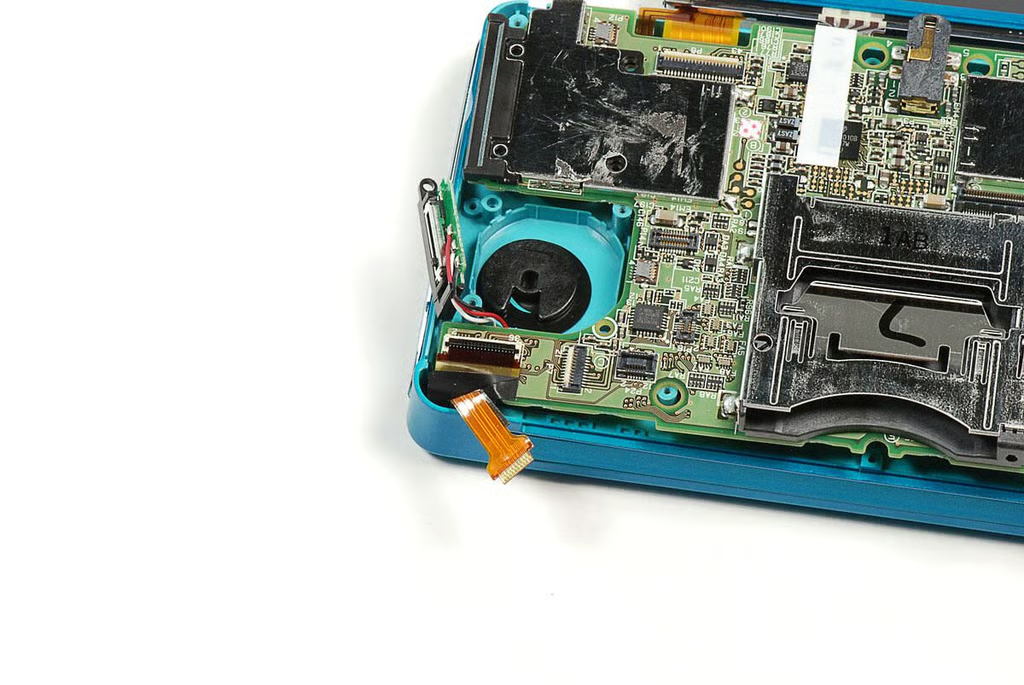
\n\tYou must also detach any remaining ribbon cables and connectors from the main PCB.
\n
\n\tPhoto by: Bill Detwiler / TechRepublic
\n\tCaption by: Bill Detwiler
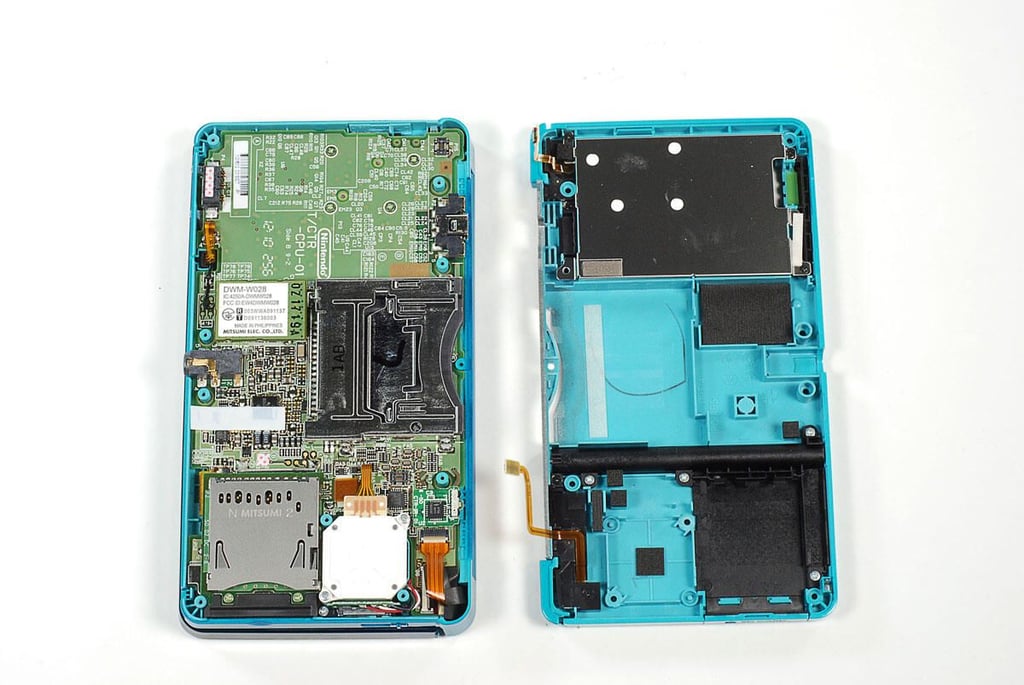
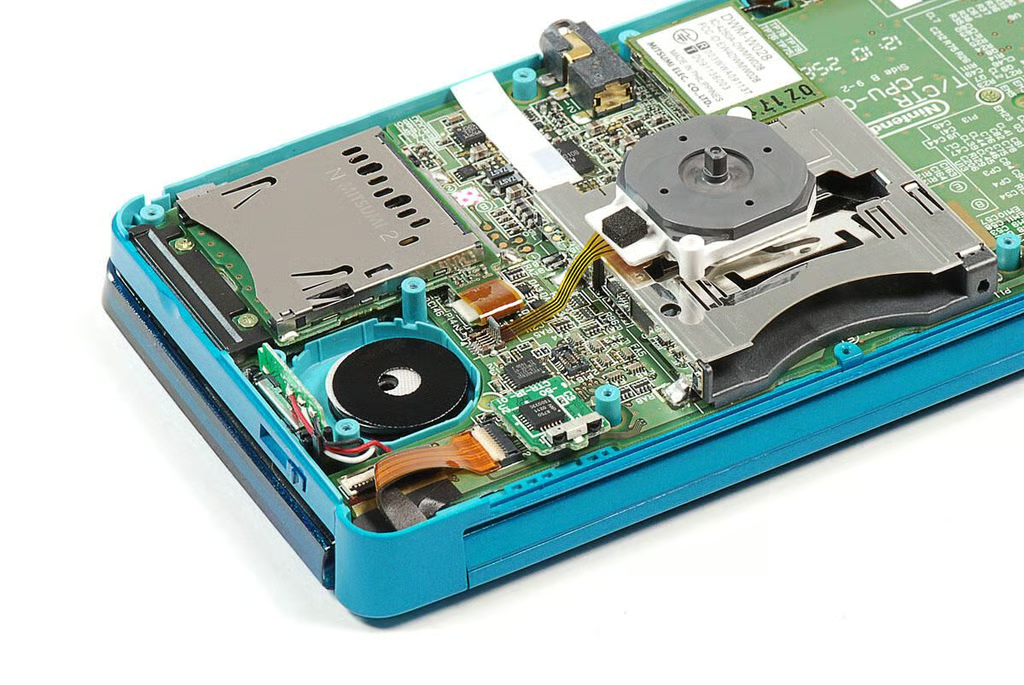
\n\tWith the screws removed and ribbon cables detached, you can lift the main PCB away from the Nintendo 3DS.
\n
\n\tPhoto by: Bill Detwiler / TechRepublic
\n\tCaption by: Bill Detwiler
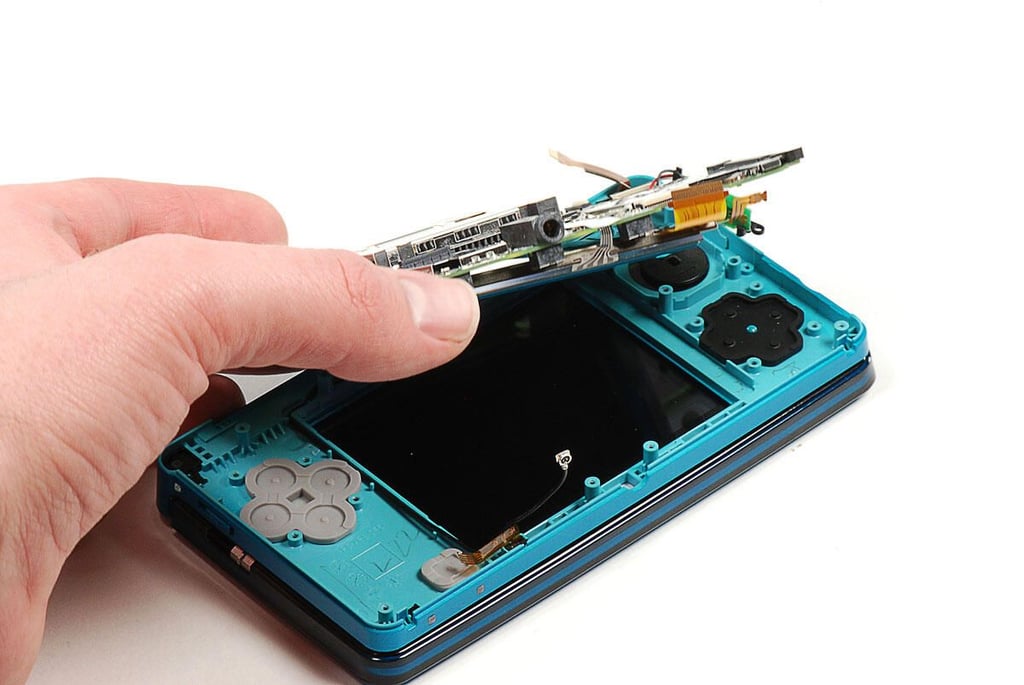
\n\tYou’ll also need to disconnect a ribbon cable from the underside of the main PCB.
\n
\n\tPhoto by: Bill Detwiler / TechRepublic
\n\tCaption by: Bill Detwiler
\n\tFor now, I left the lower LCD screen attached to the main PCB. I’ll disconnect it later.
\n
\n\tPhoto by: Bill Detwiler / TechRepublic
\n\tCaption by: Bill Detwiler
\n\tPhoto by: Bill Detwiler / TechRepublic
\n\tCaption by: Bill Detwiler
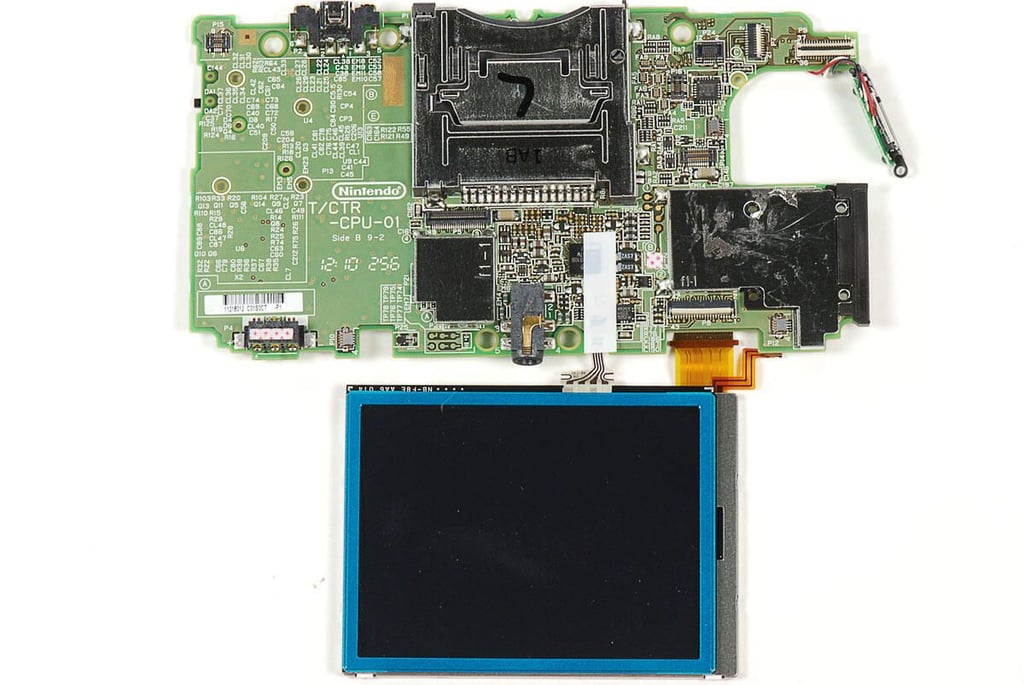
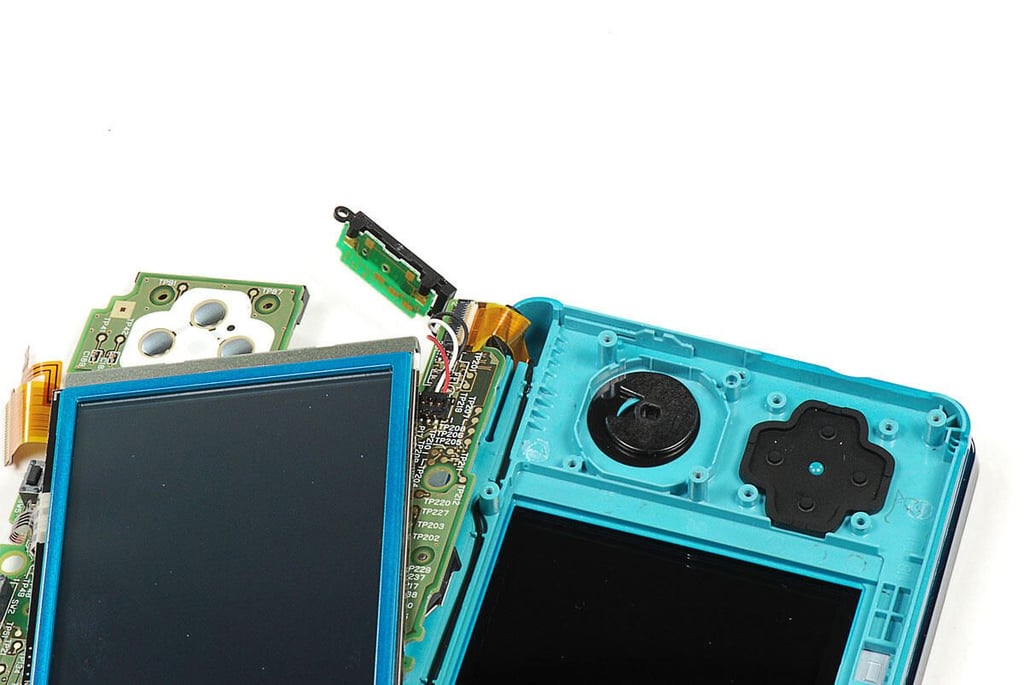
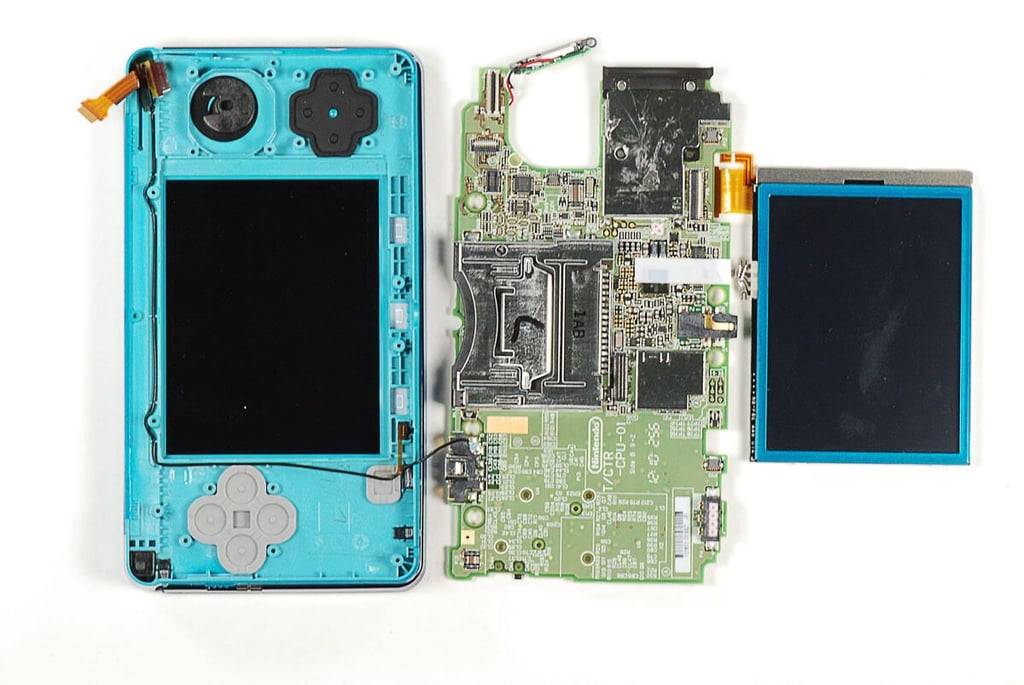
\n\tWith the main PCB removed from the case, I disconnected the Nintendo 3DS’ lower LCD screen.
\n
\n\tPhoto by: Bill Detwiler / TechRepublic
\n\tCaption by: Bill Detwiler
\n\tPhoto by: Bill Detwiler / TechRepublic
\n\tCaption by: Bill Detwiler
\n\tPhoto by: Bill Detwiler / TechRepublic
\n\tCaption by: Bill Detwiler
\n\tPhoto by: Bill Detwiler / TechRepublic
\n\tCaption by: Bill Detwiler
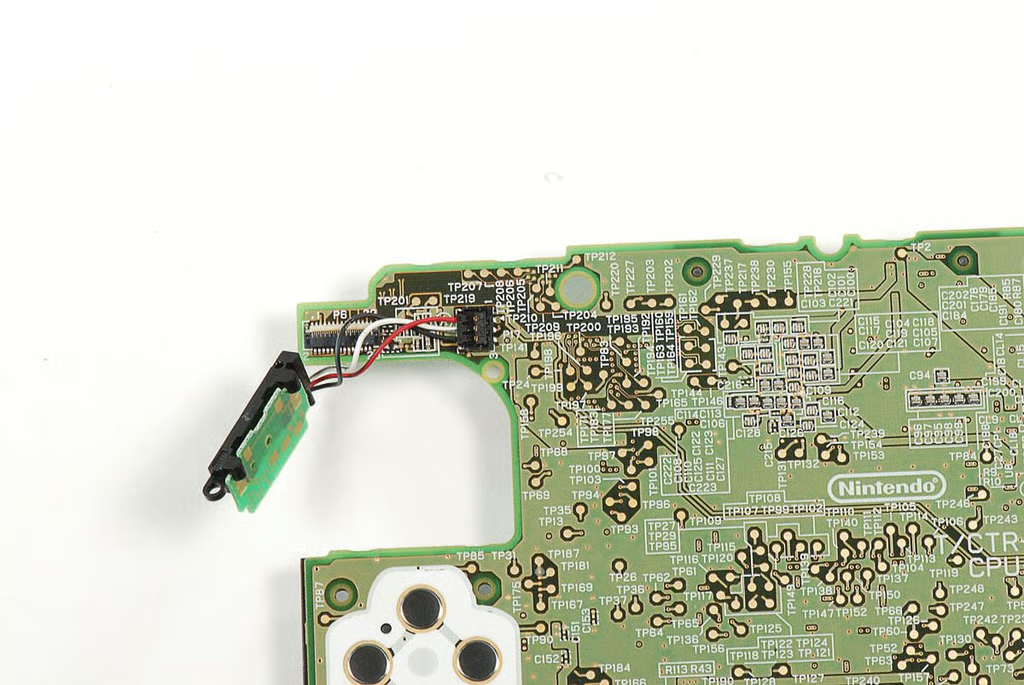
\n\tThe volume control slider is attached to the underside of the main PCB.
\n
\n\tPhoto by: Bill Detwiler / TechRepublic
\n\tCaption by: Bill Detwiler
\n\tPhoto by: Bill Detwiler / TechRepublic
\n\tCaption by: Bill Detwiler
\n\tPhoto by: Bill Detwiler / TechRepublic
\n\tCaption by: Bill Detwiler
\n\tPhoto by: Bill Detwiler / TechRepublic
\n\tCaption by: Bill Detwiler
\n\tPhoto by: Bill Detwiler / TechRepublic
\n\tCaption by: Bill Detwiler
\n\tPhoto by: Bill Detwiler / TechRepublic
\n\tCaption by: Bill Detwiler
\n\tPhoto by: Bill Detwiler / TechRepublic
\n\tCaption by: Bill Detwiler
\n\tPhoto by: Bill Detwiler / TechRepublic
\n\tCaption by: Bill Detwiler
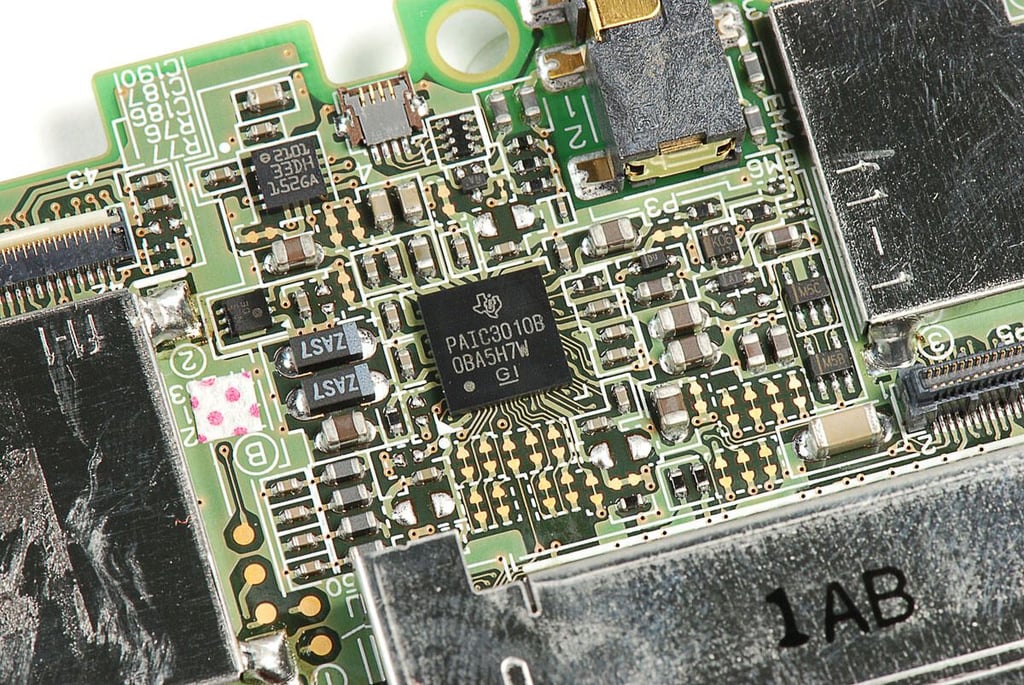
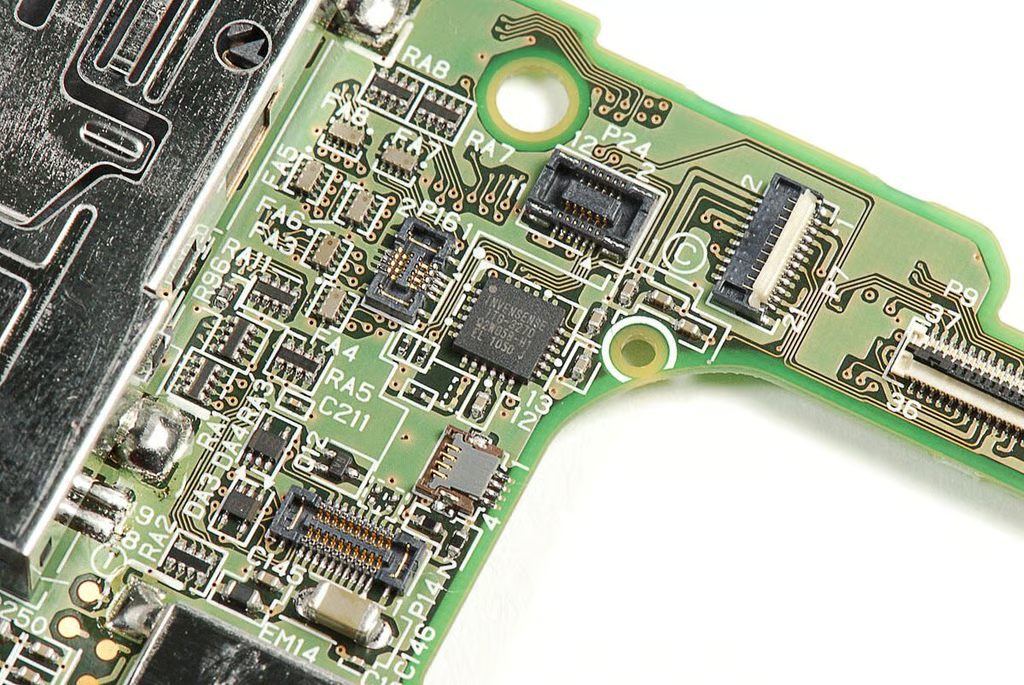
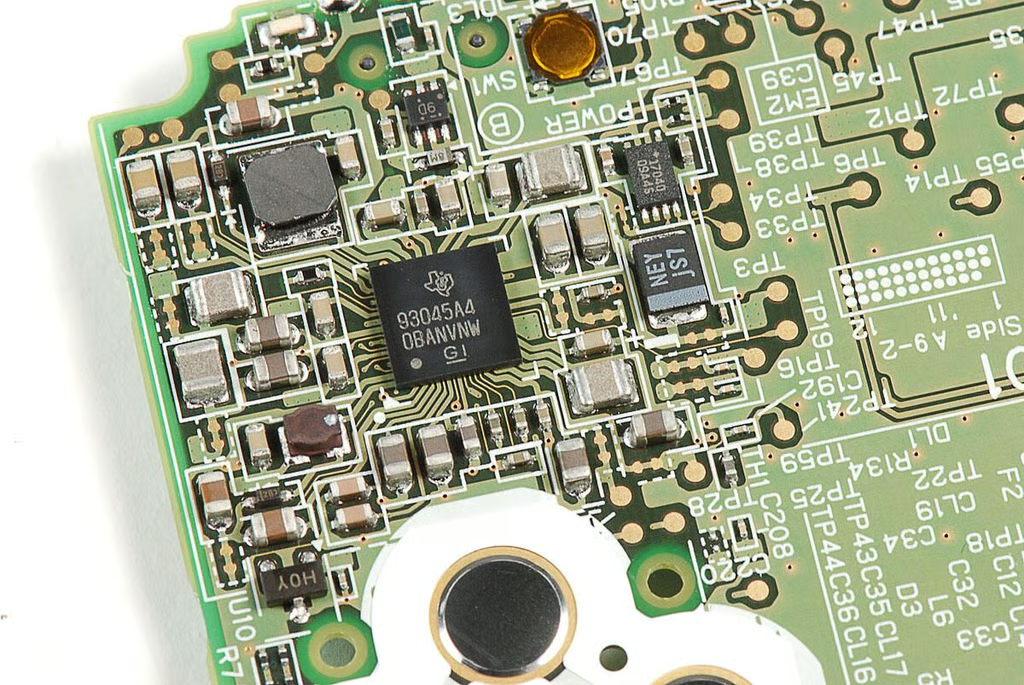
\n\tUnfortunately, most of the interesting chips on the Nintendo 3DS’ main PCB are covered by EMI shields, which are soldered to the PCB. As I want to put this machine back together in working order, I’m not going to remove the shields and risk damaging the PCB or chips.
\n
\n\tFor a look at the chips under these shields, I’ve included a photo from friends over at iFixit. They disassembled a Japaneese version of the 3DS a few weeks back and did remove the shields.
\n
\n\tPhoto by: Bill Detwiler / TechRepublic
\n\tCaption by: Bill Detwiler

\n\tOur friends over at iFixit obtained a Japanese version of the Nintendo 3DS a few weeks ago, and did a complete teardown. Here’s one of the photos from their gallery that shows all the chips on the 3DS’ main PCB.
\n
\n\tAs I noted earlier, most of the chips are covered by metal EMi shields that are soldered to the main PCB. As I wanted to reassemble our test unit in working order, I decided not to remove the shields.
\n
\n\tPhoto by: iFixit.com / Reused with permission
\n\tCaption by: Bill Detwiler
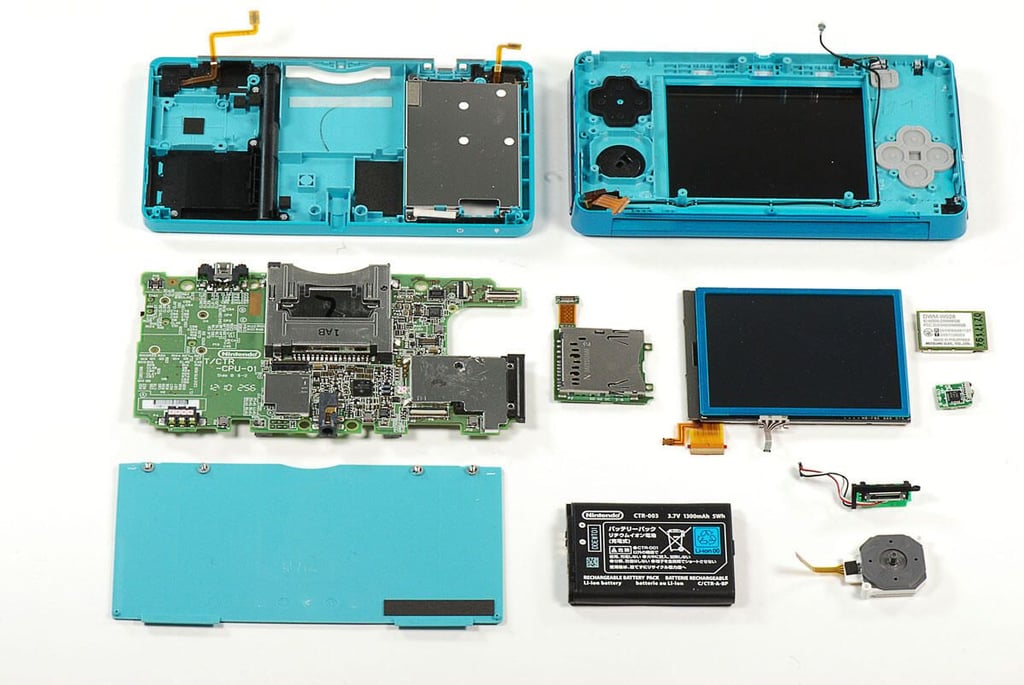
\n\tThanks to its standard (aleit small) Phillips screws, the Nintendo 3DS isn’t too difficult to open. Unfortunatley once you’re inside, things get a bit more complicated.
\n
\n\tThe 3DS contains many small ribbon cables and connectors. You could easily break one of them during the cracking open process. I actually knocked the lock off one of the tiny ribbon cable connectors, and then spent the next 20 minutes reattaching it. At least the battery is easy to change.
\n
\n\tPhoto by: Bill Detwiler / TechRepublic
\n\tCaption by: Bill Detwiler
Bill Detwiler is the Editor for Technical Content and Ecosystem at Celonis. He is the former Editor in Chief of TechRepublic and previous host of TechRepublic's Dynamic Developer podcast and Cracking Open, CNET and TechRepublic's popular online show. Previously, Bill was an IT manager in the social research and energy industries. He has bachelor's and master's degrees from the University of Louisville, where he has also lectured on computer crime and crime prevention.


