
This\r\ngallery is also available as a TechRepublic article.
In a previous set of articles, I covered most of the tools\r\nfound on the Windows 8 Recovery Drive that you can use to get your system back\r\nup and running in the event of a disaster. In case you missed any of them, here\r\nis a list:
\r\n\r\n
\r\n
\r\n
\r\n
\r\n
\r\n
\r\n
\r\n
\r\n\r\n
Now,\r\nwhile the focus of those articles was mainly on the new tools in Windows 8, the\r\nvenerable System Restore, which has been around since Windows XP, is still a\r\nrecovery tool that you should keep in mind when it comes to getting your\r\nsystem back up and running in the event of a problem. In fact, System Restore is one\r\nof the options that you can run from the Recovery Drive. However, you can still\r\nrun and configure System Restore right from within Windows 8.
\r\n\r\nIn this article, I’ll show you how to configure\r\nand use System Restore in Windows 8. As I do, I’ll show you how to manually\r\ncreate a restore point and then show you how to restore your system to an\r\nearlier point in time. I’ll also show you how to undo a restore point.
\r\n\r\nCredit: Images by Greg Shultz for TechRepublic
\r\n\r\n
As you may know, System Restore works by automatically taking\r\nsnapshots of your system’s state before any operation that makes significant\r\nchanges to the operating system. These snapshots are called restore points and include crucial operating\r\nsystem files and certain parts of the registry that could be altered by the\r\npending change operation.
\r\n\r\n
For example, System Restore will automatically create a\r\nrestore point anytime you install a new application or perform a major Windows\r\nUpdate operation. If something goes awry during such an operation and your\r\nsystem begins behaving oddly, you can then use System Restore to bring your\r\nsystem back to the state it was in right before the change was implemented.
\r\n\r\n
While System Restore does a good job of automatically\r\ncreating restore points, what about when you make changes to the operating\r\nsystem? For example, maybe you want to implement a technique that involves\r\nediting the registry. Fortunately, you can manually create a restore point\r\nbefore you perform those types of operations.
\r\n\r\n
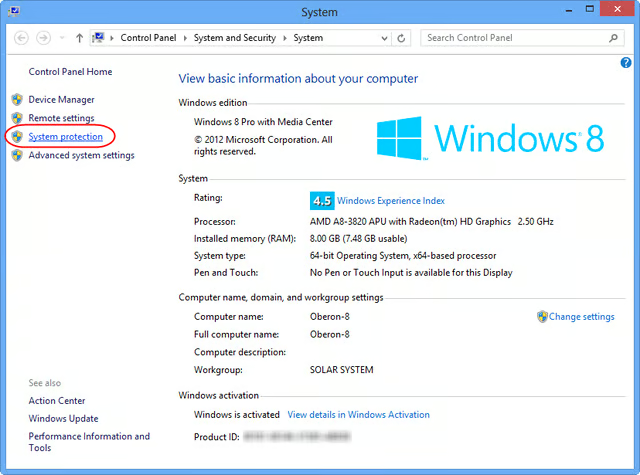
\r\n\r\nThere are several ways that\r\nyou can launch System Restore in Windows\r\n8; however, the easiest way to do so is with a Windows key shortcut. To use\r\nthis shortcut, press [Windows] + [Break] to bring up the System window. Then,\r\nselect System protection on the left of the screen, as shown in Figure A.
\r\n\r\nCredit: Images by Greg Shultz for TechRepublic
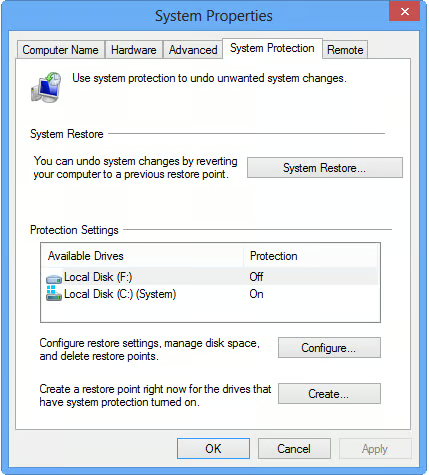
You’ll\r\nthen see the System Protection tab of the System Properties dialog box, as\r\nshown in Figure B, where you can launch\r\na restore operation, configure System Restore’s settings, and manually create\r\nrestore points.
\r\n\r\nCredit: Images by Greg Shultz for TechRepublic
As you can see, I have two hard disks connected to this\r\nexample system – the main hard disk and an external USB hard disk. By default, system\r\nprotection is turned off for secondary hard disks. Since additional drives usually\r\nstore data or data backups, there’s no reason to have System Restore monitor\r\nthem.
\r\n\r\n
\r\n\r\n
While System Restore is automatically configured when you\r\ninstall Windows 8, you may want to change its settings. Fortunately, doing so\r\nis easy.
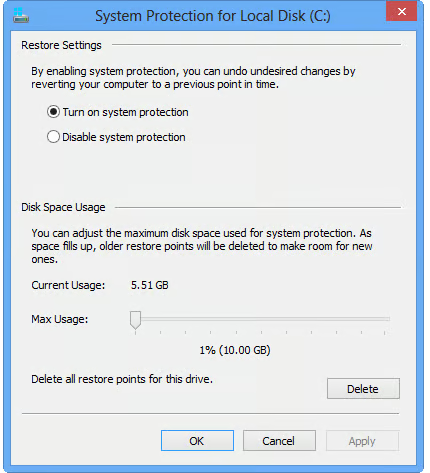
\r\n\r\nFrom the System Protection\r\ntab, select the Configure button. When you see the configuration dialog box,\r\nshown in Figure C, the first thing\r\nthat you will notice is that at you can disable System Restore. It’s not\r\nrecommended, but you can do so if you wish.
\r\n\r\nCredit: Images by Greg Shultz for TechRepublic
By default, System Restore is configured to use between one\r\nand three percent of the space on your hard disk. The amount that it uses will\r\nvary depending on the total size of your hard disk. As the allotted of space\r\nfills up with restore points, System Restore deletes older restore points to\r\nmake room for new ones. This system works well, but if you want to be able to\r\nhave more restore points available, you can increase the size by adjusting the\r\nposition of the Max Usage slider.
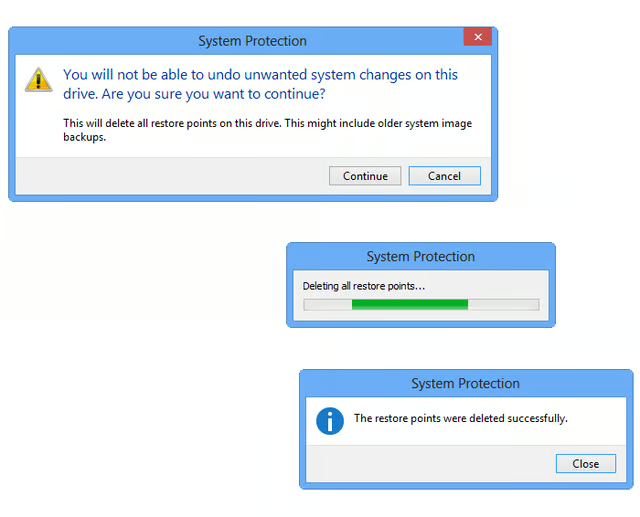
\r\n\r\nNow, if you decide that you\r\nwant to start with a clean slate, you can click the Delete button to delete all\r\nof the current restore points. When you do, you will be prompted to confirm the\r\noperation. The Delete operation is illustrated in Figure D.
\r\n\r\nCredit: Images by Greg Shultz for TechRepublic
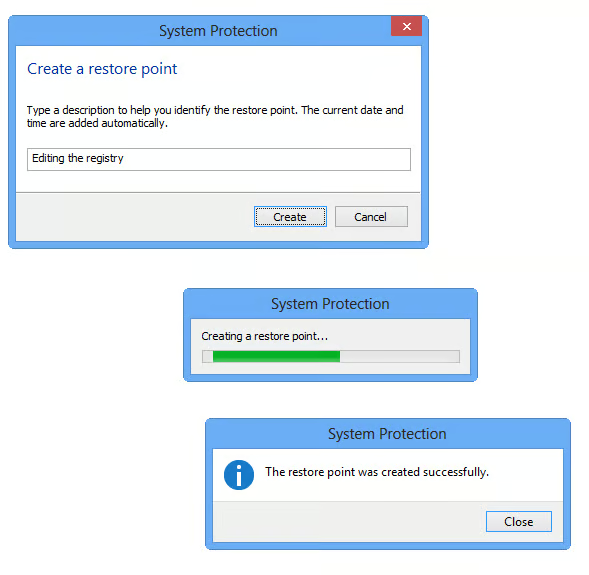
\r\n\r\nAs I mentioned, there may\r\nbe situations where you should manually create a restore point before you make\r\nchanges to your system, such as editing the registry. To manually create a\r\nrestore point, just click the Create button on the System Protection tab and you’ll\r\nbe prompted to give the restore point a name. When you initiate the operation,\r\nit will take a few minutes to occur. The creation process is illustrated in Figure E.
\r\n\r\nCredit: Images by Greg Shultz for TechRepublic
\r\n\r\n
When a change causes your system to act strangely, you can\r\nundo that change by performing a system restore operation. If Windows will not\r\nstart, you can use the Recovery\r\nDrive to launch System Restore. If Windows does start, you can launch\r\nSystem Restore from within Windows.
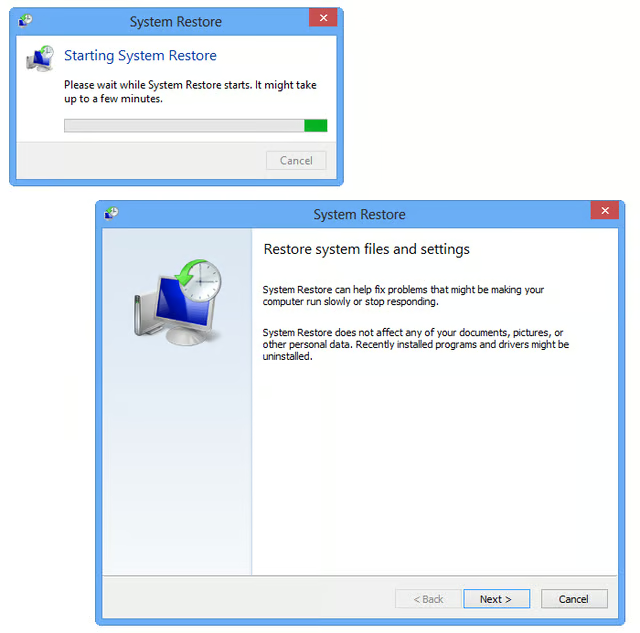
\r\n\r\nTo do so, access the System\r\nProtection tab and click the System Restore button. In a moment, System Restore\r\nwill begin an initialization process and you’ll then see the introductory\r\nscreen in the wizard driven interface, as shown in Figure F.
\r\n\r\nCredit: Images by Greg Shultz for TechRepublic
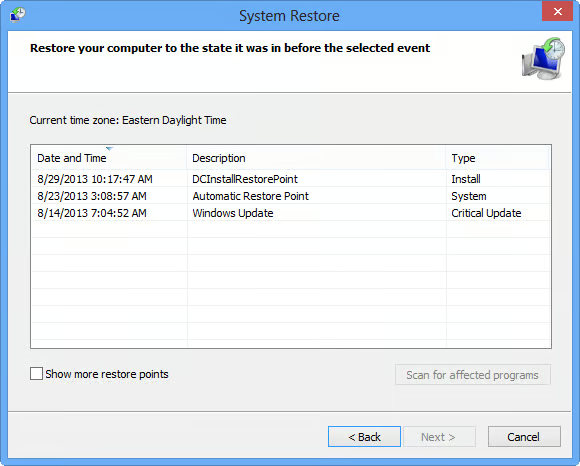
When\r\nyou click Next, you’ll see a table showing the most recent restore points, as\r\nshown in Figure G. If you select the\r\nShow more restore points check box, you will see any older restore points that\r\nare still available.
\r\n\r\nCredit: Images by Greg Shultz for TechRepublic
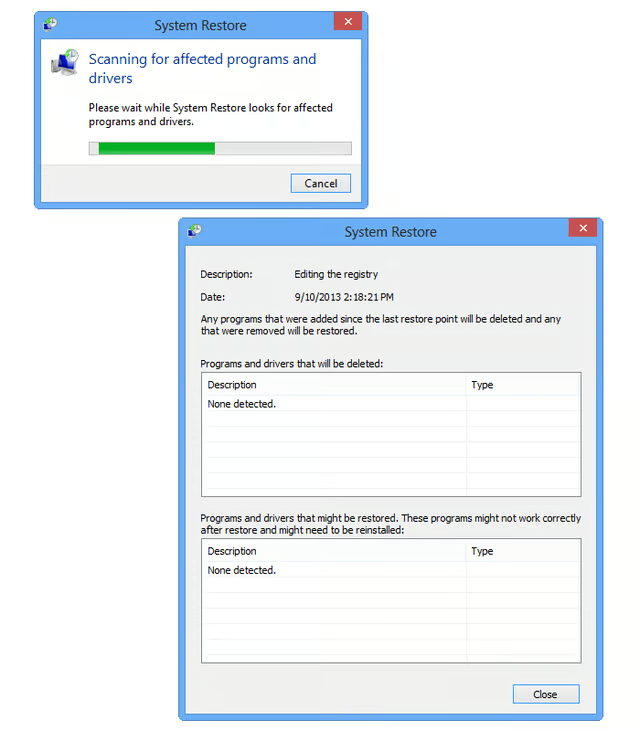
Once you choose a restore point, the Scan for affected\r\nprograms button is activated and you should click it to see a list of any\r\nprograms or drivers that have been added to the system since the last restore\r\npoint and will be lost by restoring your system to an earlier point in time. It\r\nwill also show you any programs or drivers that were uninstalled since the last\r\nrestore point and that will be revived by restoring your system to an earlier\r\npoint in time.
\r\n\r\nAs you can see in Figure H, on my particular example\r\nsystem, the list is blank. However, I can’t stress enough how important it is\r\nto run this check before you perform a system restore. Knowing ahead of time\r\nabout any side-effects caused by restoring can save you time and frustration\r\nlater.
\r\n\r\nCredit: Images by Greg Shultz for TechRepublic
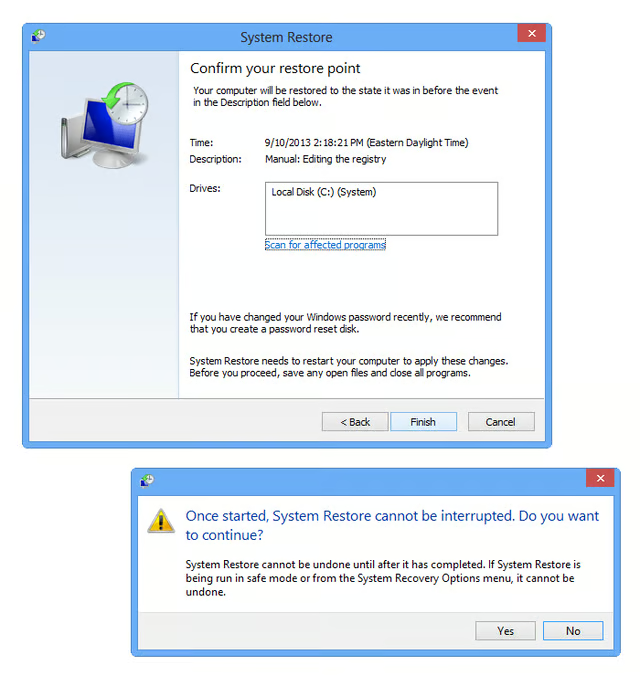
When\r\nyou click Next, you’ll be prompted to confirm the restore operation. When you\r\nclick Finish, you’ll encounter warning dialog box, as illustrated in Figure I.
\r\n\r\nCredit: Images by Greg Shultz for TechRepublic

When\r\nyou click Yes, System restore will prepare the restore operation and then restart\r\nyour system, as illustrated in Figure J.\r\nThis part of the operation runs rather quickly.
\r\n\r\nCredit: Images by Greg Shultz for TechRepublic
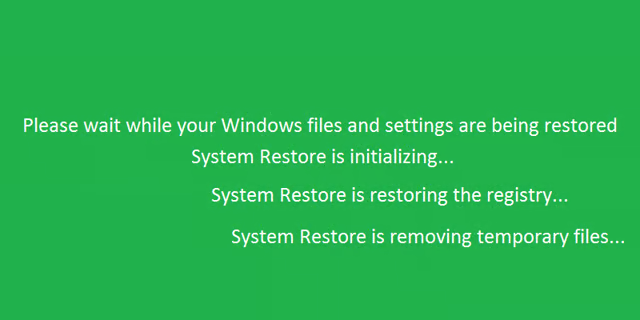
Once\r\nyou system restarts, the restore operation will begin and you’ll see a screen\r\nthat lets you know the progress of the operation as it cycles through\r\ninitializing, restoring the registry, and finally removing temporary files. This\r\nprocess will take some time and is illustrated in Figure K.
\r\n\r\nCredit: Images by Greg Shultz for TechRepublic
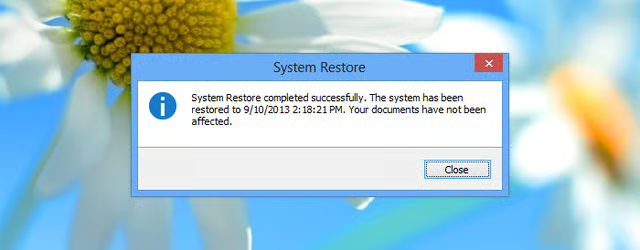
After\r\nthe temporary files are removed, System Restore will once again restart your\r\nsystem. After you login to your system, you’ll see a dialog box in the center\r\nof the screen, as shown in Figure L,\r\ninforming you that the restore operation was successfully completed.
\r\n\r\nCredit: Images by Greg Shultz for TechRepublic
\r\n\r\n
If after you perform a restore operation you determine that\r\nthe problem still exists or new problems are now present, you can undo the restore\r\noperation. However, keep in mind that if you plan to undo a restore operation,\r\nyou should do so before you make any major changes to the operating system.
\r\n\r\n
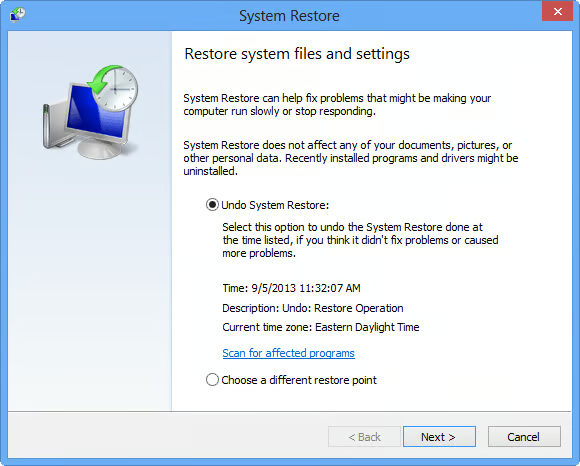
When you run System Restore soon after you have performed a\r\nrestore operation, you’ll see that the System Restore screen now contains an Undo\r\nSystem Restore option, as shown in Figure\r\nM. As you can see, the screen shows you the exact time and date that the restore\r\noperation was performed. You’ll also notice that you have the option to check\r\nto see if any programs will be affected by undoing the restore operation.
\r\n\r\n
When you click Next, the undo operation will commence and\r\nfrom this point forward it will function exactly the same as running a restore\r\noperation. Your system will restart, the registry will be restored, temporary\r\nfiles will be deleted, and your system will restart again.
\r\n\r\n
\r\n\r\nHave\r\nyou used System Restore in the past? If so, what was your experience?As always, if you have comments or information\r\nto share about this topic, please take a moment to drop by the TechRepublic\r\nCommunity Forums and let us hear from you.
\r\n\r\nCredit: Images by Greg Shultz for TechRepublic

My first computer was a Kaypro 16 \"luggable\" running MS-DOS 2.11 which I obtained while studying computer science in 1986. After two years, I discovered that I had a knack for writing documentation and shifted my focus over to technical writing.


