Skip to content

TechRepublic

  • Top Products
  • AI
  • Developer
  • Payroll
  • Security
  • Project Management
  • Accounting
  • CRM
  • Academy
Resources
  • TechRepublic Premium
  • TechRepublic Academy
  • Newsletters
  • Resource Library
  • Forums
  • Sponsored
Go Premium
Popular Topics
  • Top Products
  • AI
  • Developer
  • Payroll
  • Security
  • Project Management
  • Accounting
  • CRM
  • Academy
  • Project Management
  • Innovation
  • Cheat Sheets
  • Big Data
  • Tech Jobs
View All Topics
Go Premium
Storage

Replace an Xbox DVD drive

By Bill Detwiler December 13, 2005, 4:19 AM PST Bill Detwiler on Twitter billdetwiler

Image
1
of 13

Replace an Xbox DVD drive (1 of 13)
Replace an Xbox DVD drive

CNET Networks - sMoRTy71

After suffering intermittent “dirty disc” errors, sMoRTy71 decided to buy a replacement DVD drive for his Xbox. He bought one on eBay for less than $30 shipped. The whole process, which involved removing eights screws and disconnecting IDE and power cables, took less than 10 minutes.rn

rnRead sMoRTy71’s personal blog post about his experience replacing the Xbox DVD drive.
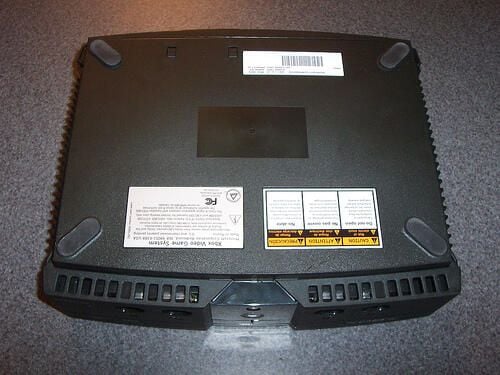
CNET Networks - sMoRTy71
Replace an Xbox DVD drive

Opening the case

rnTo begin, you’ll need to remove six #20 Torx screws from the bottom of the case. Four are hidden under the padded feet and two are hidden under stickers.
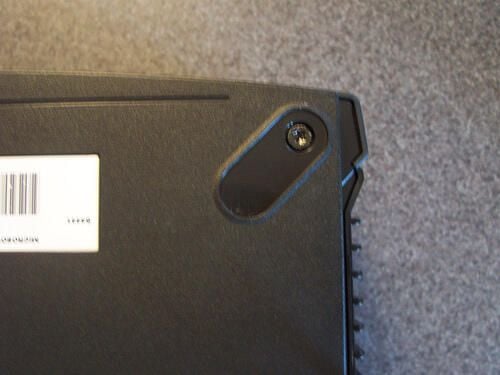
Replace an Xbox DVD drive

Remove the screws

rnA close-up view of the #20 Torx screw hidden under the rubber pads.

Replace an Xbox DVD drive

Screws hiding under stickers

rnMicrosoft hides two of the Torx screws under stickers.
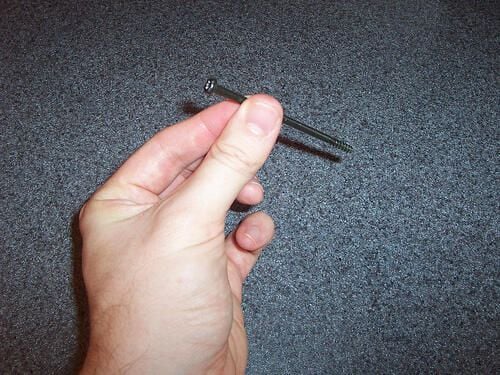
Replace an Xbox DVD drive

#20 Torx screw

rnAnother close-up of the screws that hold the Xbox case in place.
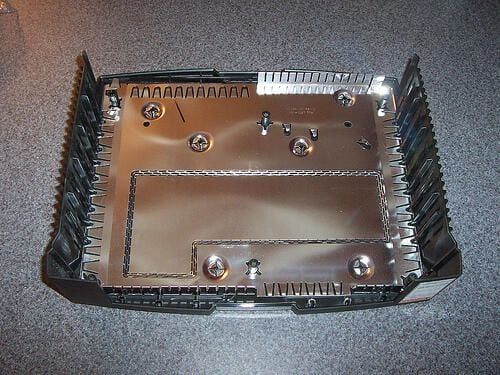
Replace an Xbox DVD drive

Xbox case top

rnWith the screws removed you can set the Xbox case’s top aside.
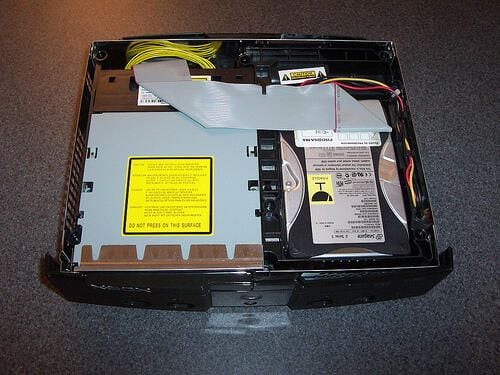
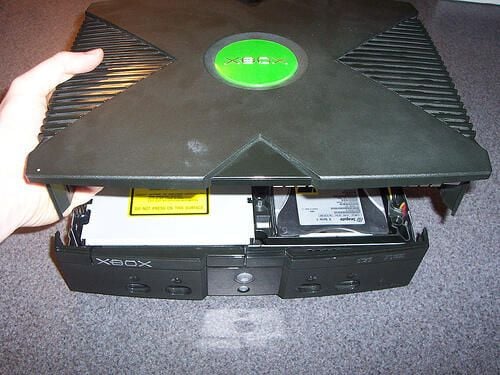
Replace an Xbox DVD drive

Xbox opened

rnWith the top removed, the Xbox’s DVD drive is easily accessible.

Replace an Xbox DVD drive

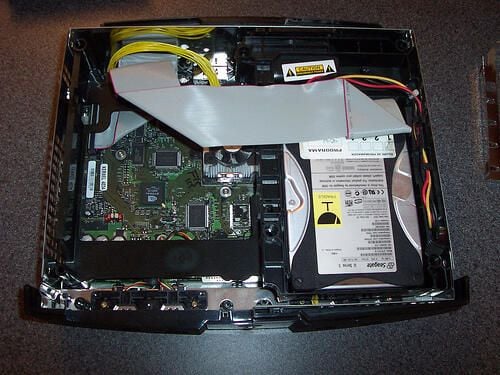
Removing the DVD drive

rnRemove two #10 Torx screws from the plastic bracket attached to the DVD drive. Then, push in the plastic tab and gently pull up to remove the drive.

Disconnect both the IDE and power cables from the drive.
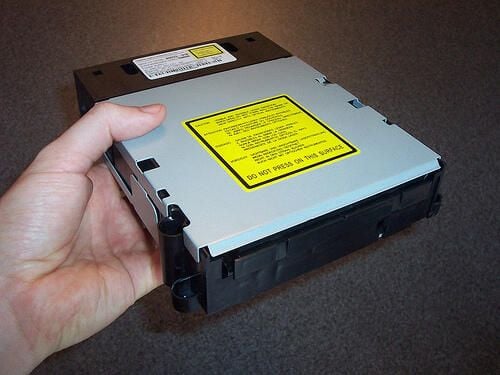
Replace an Xbox DVD drive

The new drive

rnYou are now ready to install the new Xbox DVD drive.

Replace an Xbox DVD drive

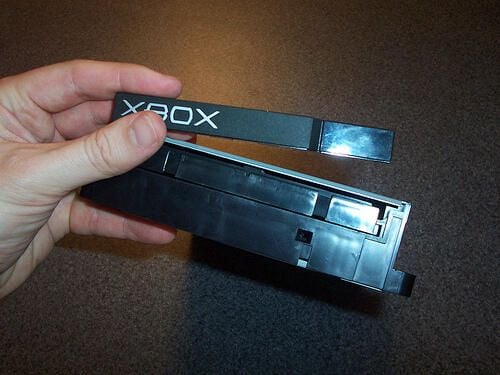
Replace the drive’s faceplate

The Xbox DVD drive has a plastic faceplate. You will need to remove the faceplate from the old drive by pulling out slightly then up. The process for adding the faceplate to the new drive is the reverse. Slide the faceplate down from the top of the drive door.

Replace an Xbox DVD drive

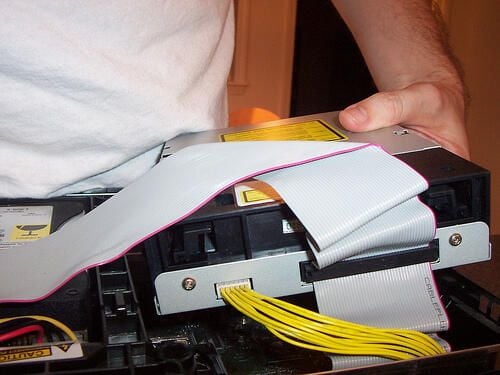
Install the new DVD drive

Securely attach the IDE and power cables to the new drive, then slip the drive into place. You should hear a click when the bracket snaps into place.

Replace an Xbox DVD drive

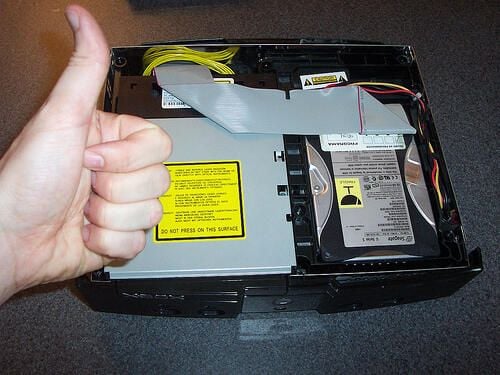
Secure the new drive

Reattach the two #10 Torx screws to secure the drive.

Replace an Xbox DVD drive

Replace the Xbox case’s top

Reattach all six Torx screws in the case and the rubber feet. You’re all done!

  • Storage
  • Account Information

    Share with Your Friends

    Replace an Xbox DVD drive

    Your email has been sent

Share: Replace an Xbox DVD drive
Image of Bill Detwiler
By Bill Detwiler
Bill Detwiler is the Editor for Technical Content and Ecosystem at Celonis. He is the former Editor in Chief of TechRepublic and previous host of TechRepublic's Dynamic Developer podcast and Cracking Open, CNET and TechRepublic's popular online show.
  • Account Information

    Contact Bill Detwiler

    Your message has been sent

  • |
  • See all of Bill's content

Daily Tech Insider

If you can only read one tech story a day, this is it.

TechRepublic TechRepublic
  • TechRepublic on Facebook
  • TechRepublic on X
  • TechRepublic on LinkedIn
  • TechRepublic on YouTube
  • TechRepublic on Pinterest
  • TechRepublic RSS
Services
  • About Us
  • Newsletters
  • RSS Feeds
  • Site Map
  • Site Help & Feedback
  • FAQ
  • Advertise
  • Do Not Sell My Information
  • Careers
Explore
  • Downloads
  • TechRepublic Forums
  • Meet the Team
  • TechRepublic Academy
  • TechRepublic Premium
  • Resource Library
  • Photos
  • Videos
  • Editorial Policy
  • Legal Terms
  • Privacy Policy
© 2025 TechnologyAdvice. All rights reserved.
CLOSE

Create a TechRepublic Account

Get the web's best business technology news, tutorials, reviews, trends, and analysis—in your inbox. Let's start with the basics.

Already registered? Sign In
Use Facebook
Use Linkedin

* - indicates required fields

CLOSE

Sign in to TechRepublic

Not a member? Create an account
Use Facebook
Use Linkedin

Lost your password? Request a new password

CLOSE

Reset Password

Please enter your email adress. You will receive an email message with instructions on how to reset your password.

Check your email for a password reset link. If you didn't receive an email don't forgot to check your spam folder, otherwise contact support.

Back to login
1 Finish Profile
2 Newsletter Preferences
CLOSE

Welcome. Tell us a little bit about you.

This will help us provide you with customized content.

No thanks, continue without
1 Finish Profile
2 Newsletter Preferences
CLOSE

Want to receive more TechRepublic news?

Newsletter Name
Subscribe
Daily Tech Insider
Daily Tech Insider AU
TechRepublic UK
TechRepublic News and Special Offers
TechRepublic News and Special Offers International
Executive Briefing
Innovation Insider
Project Management Insider
Microsoft Weekly
Cloud Insider
Data Insider
Developer Insider
TechRepublic Premium
Apple Weekly
Cybersecurity Insider
Google Weekly
Toggle All
No thanks, continue without

You're All Set

Thanks for signing up! Keep an eye out for a confirmation email from our team. To ensure any newsletters you subscribed to hit your inbox, make sure to add [email protected] to your contacts list.

Back to Home Page
×