\n\tThis gallery is also available as a post in the Windows and Office Blog.
\n
\n\tOne of the new features in Windows 8 is the ability to natively mount an ISO file. This is a very handy feature because it allows you to immediately access the content of an ISO file without having to first burn the ISO to an optical disc. You just double click the ISO file in File Explorer and Windows 8 automatically assigns it a drive letter, thus allowing you to access its contents as a virtual drive.
\n
\n\tMicrosoft has a similar tool for older versions of Windows called Virtual CD-ROM Control Panel. Unfortunately, this tool is unsupported, out-of-date (the files are dated from 2001), and when it does work, you are forced to go through a very kludgy set of steps to use the tool. As such, you will be better served by looking elsewhere.
\n
\n\tWhile there are lots tools out there for mounting and using ISO files, one of the simplest and easiest to use is a FREE program called Virtual CloneDrive developed by SlySoft in collaboration with another company called Elaborate Bytes. (Apparently, these two companies have a close working relationship, so while it will be a bit odd to see different company names, there is nothing to be concerned with.) This program makes using ISO files in Windows XP, Windows Vista, and Windows 7, just as easy as the new feature built into Windows 8.
\n
\n
\n\tAn ISO file contains an image of the contents of an optical disc and is often used to distribute software on the Internet – instead of ordering a CD/DVD that will be sent in the mail, you simply download an ISO file and then burn it to an optical disc. For example, you can purchase the Windows 8 upgrade from the Windows Store and download it as an ISO file. I showed you how this process works in the article Take advantage of the $15 Windows 8 Pro Upgrade Offer. Of course the $15 upgrade offer has long since expired, but the process of downloading the ISO file is the same.
\n
\n
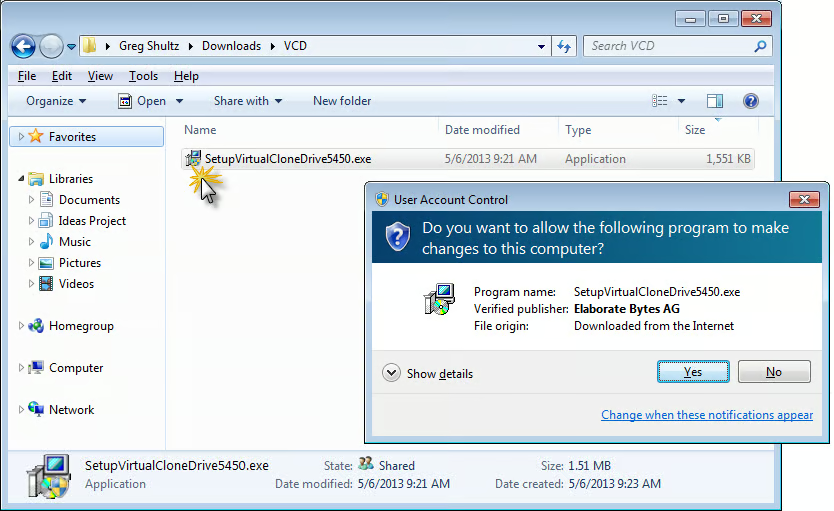
\n\tDownloading and installing Virtual CloneDrive is easy. To begin, point your browser to the Virtual CloneDrive page and follow the Download links. Once you have downloaded the executable file, just double click on it and you’ll see the User Account Control prompt shown in Figure A. You’ll notice a reference to Elaborate Bytes here. To continue, just click, Yes.
\n
\n\tCredit: Images by Greg Shultz for TechRepublic
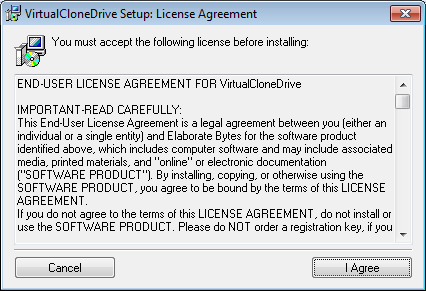
\n\tIn a moment, you’ll be prompted to accept the license agreement, as shown in Figure B.
\n
\n\tCredit: Images by Greg Shultz for TechRepublic
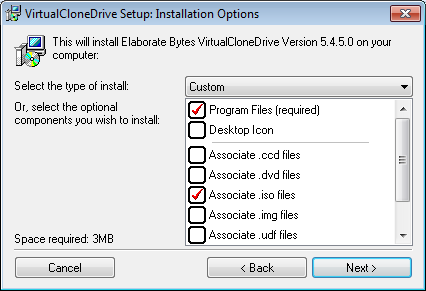
\n\tYou’ll then be prompted to select the installation options. As you can see in Figure C, I just selected the program files and to associate the program with ISO files.
\n
\n\tCredit: Images by Greg Shultz for TechRepublic
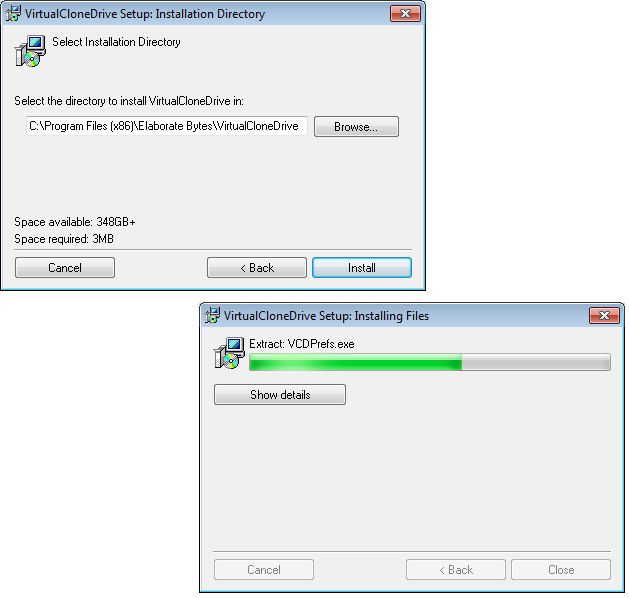
\n\tWhen you click Next, you will then perform the first part of the installation, as shown in Figure D.
\n
\n\tCredit: Images by Greg Shultz for TechRepublic
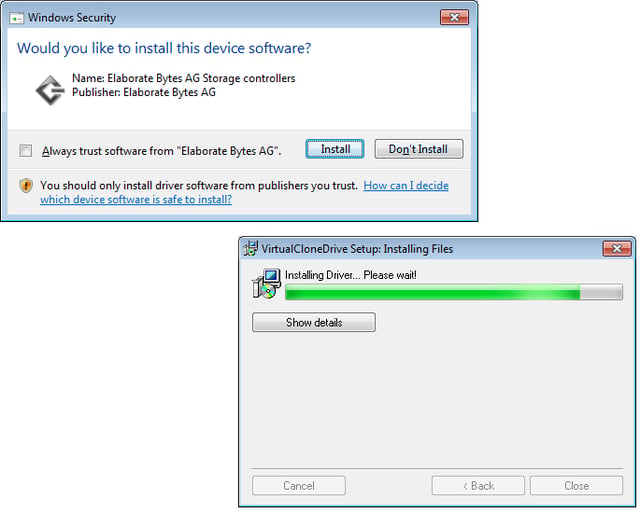
\n\tOnce the program is installed, you’ll perform the second part of the installation procedure, which installs the Elaborate Bytes driver, as shown in Figure E.
\n
\n\tCredit: Images by Greg Shultz for TechRepublic
\n
\n\tAfter you have Virtual CloneDrive installed using it is easy as the program is integrated into Windows Explorer. However, a configuration tool and a link to a user manual are installed on the Start menu.
\n
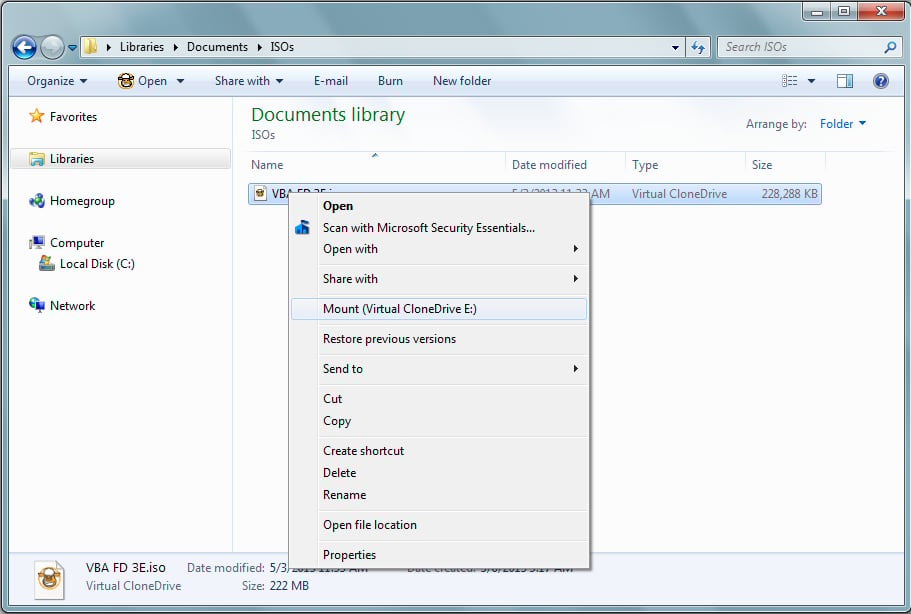
\n\tTo begin using Virtual CloneDrive, just locate your ISO file in Windows Explorer, right click, and select the Mount command, as shown in Figure F.
\n
\n\tCredit: Images by Greg Shultz for TechRepublic
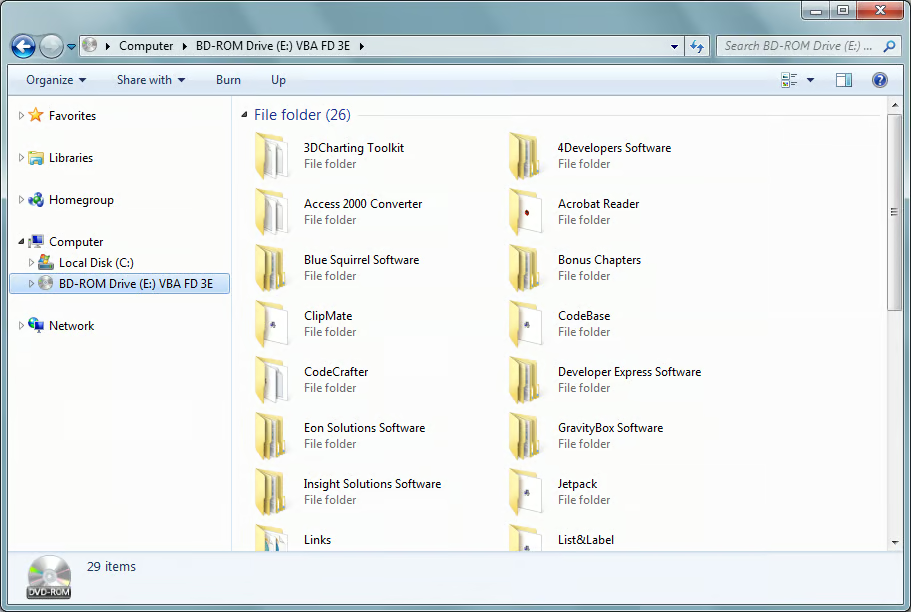
\n\tAs soon as, the ISO file is mounted, you’ll find a new device in Computer called a BD-ROM Drive. If you access that drive, you’ll find the contents of your ISO file, like the one shown in Figure G.
\n
\n\tCredit: Images by Greg Shultz for TechRepublic
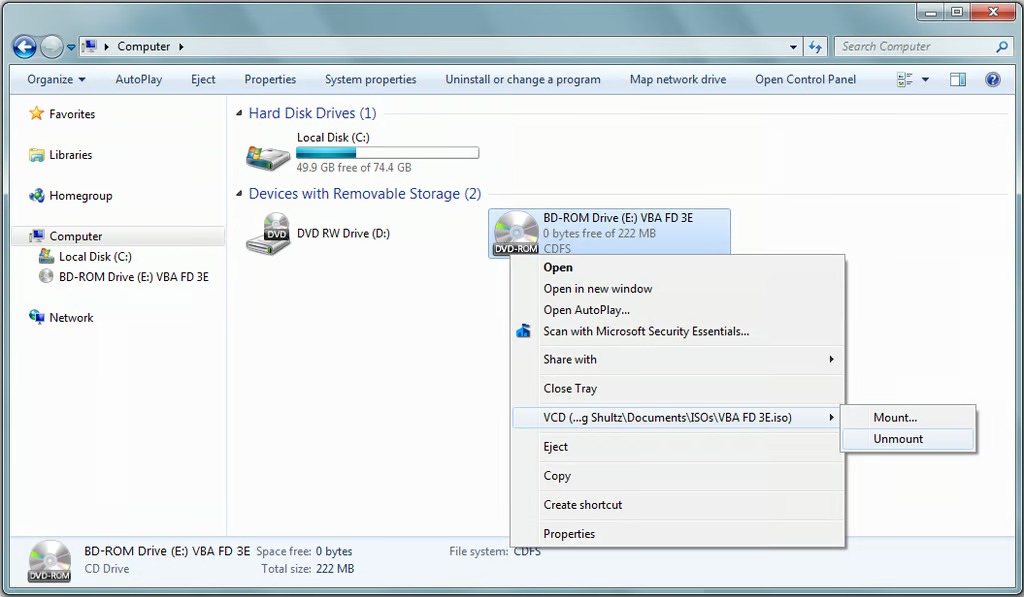
\n\tWhen you are finished using the ISO file, you can simply right click, and select the Unmount command, as shown in Figure H.
\n
\n\tAs you can see, Virtual CloneDrive makes working with ISO files in Windows XP, Windows Vista and Windows 7, just as easy as the new feature built into Windows 8.
\n
\n\tCredit: Images by Greg Shultz for TechRepublic

My first computer was a Kaypro 16 \"luggable\" running MS-DOS 2.11 which I obtained while studying computer science in 1986. After two years, I discovered that I had a knack for writing documentation and shifted my focus over to technical writing.


