\n\tThis gallery is also available as an article in the TechRepublic Windows and Office Blog.
\n
\n\tMicrosoft announced that they are ending support for Windows XP SP3 on April 8th 2014. Since that official announcement I have been receiving a lot of email from Windows XP users making the move to Windows 8 and wondering about support for something like Windows 7’s XP Mode. In other words, they want to be able to move to Windows 8 and take Windows XP with them so that they have something to fall back on as they get used to Windows 8.
\n
\n\tWell, unfortunately Microsoft did not incorporate anything similar to XP Mode in Windows 8. However, if you are running a 64-bit version of Windows 8 Professional or Windows 8 Enterprise, these versions of the operating system come with a new virtualization tool called Client Hyper-V that you can use to run a virtual Windows XP machine inside of Windows 8.
\n
\n\tOf course, in order to be able to run Client Hyper-V, your system must meet several hardware requirements. For instance, the 64-bit CPU in your system must support Second Level Address Translation (SLAT) technology and your system must have at least 4GB of RAM. (There are several other system requirements that must be in place as well, but I’ll cover these in a moment.)
\n
\n\tIn most cases, the procedure of setting up is Windows 8’s Client Hyper-V is relatively straightforward. However, as I have corresponded with various users performing the necessary steps, I’ve learned that the procedure can be tricky and confusing – especially if the users were not sure how to get started or ran into problems along the way.
\n
\n\tOne of the most common problems people were encountering has to do with a key virtualization feature being disabled in the computer’s firmware and them not knowing it. Unfortunately, you can’t install Client Hyper-V without these features being enabled and as you can imagine the problem just snowballs from there.
\n
\n\tAs I worked through this problem, I developed a set of steps that eventually led these users to success. To save other users who may be thinking of incorporating Client Hyper-V from frustration, I decided to write an article showing you how to get started with Windows 8’s Client Hyper-V the right way.
\n
\n
\n
\n\tLet me begin with a brief reiteration of the most obvious requirements. As I mentioned, Windows 8’s Client Hyper-V is only available in the 64-bit versions of Windows 8 Pro and Windows 8 Enterprise. It is not available in the 32-bit versions nor is it available in Windows 8 basic or in Windows RT.
\n
\n\tAgain, your system must have at least 4GB of RAM and your 64-bit CPU must support Second Level Address Translation (SLAT) technology. Most of the current crop of 64-bit CPUs from Intel and AMD provide SLAT support.
\n
\n
\n\tBefore you attempt to install Windows 8’s Client Hyper-V, you need to verify that everything in your system is ready to run a virtualized environment. Unbeknownst to many Windows 8 users, Microsoft added new information gathering features to the old System Information tool thus making it very easy to verify whether your Windows 8 system can run Client Hyper-V.
\n
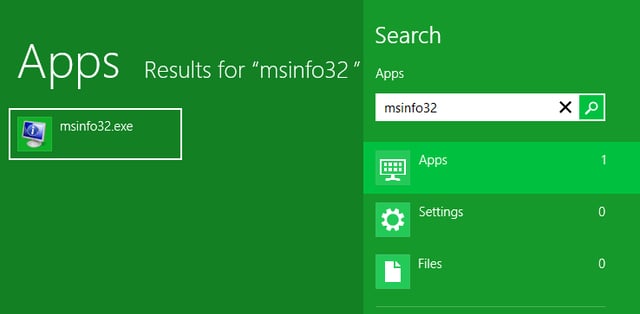
\n\tTo launch System Information in Windows 8, use the [Windows] + Q keystroke to access the Apps Search page. Then, type msinfo32 in the text box and click msinfo32.exe, as shown in Figure A. If you prefer, you can use the [Windows] + R keystroke to bring up the Run dialog box, type msinfo32 in the Open text box, and click OK.
\n
\n\tCredit: Images by Greg Shultz for TechRepublic
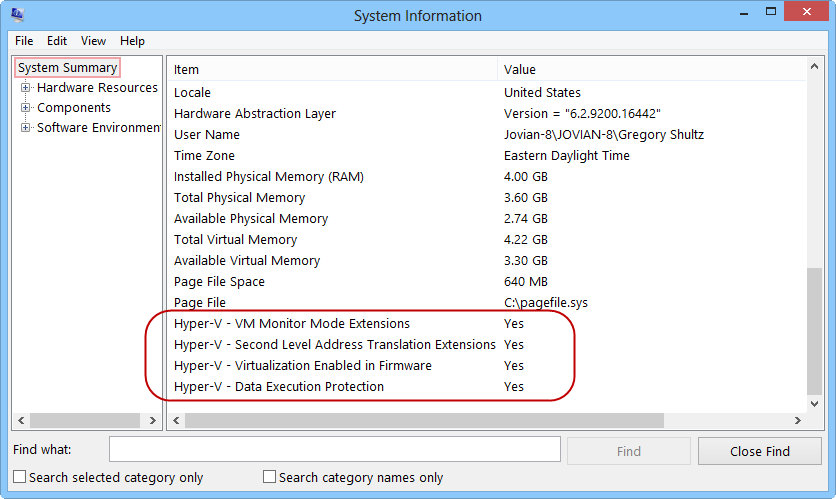
\n\tEither way you launch the System Information, once it is up and running, you’ll want to remain on the System Summary screen, which appears by default. Now, scroll to the bottom of the right panel. When you do, you’ll see four key pieces of information about your system’s ability to run Hyper-V. As shown in Figure B, all of them should have a value of Yes.
\n
\n\tCredit: Images by Greg Shultz for TechRepublic
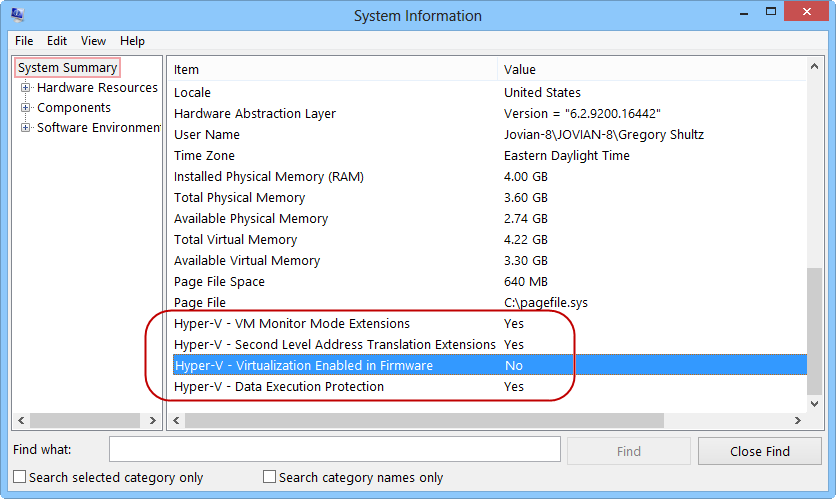
\n\tNow, if any of the key virtualization features are disabled in the computer’s firmware, System Information will alert you to that fact immediately. My test system for this article is an HP Pavilion P2-1124 and when I ran System Information, I discovered that the Virtualization Enabled in Firmware had a value of No, as shown in Figure C. What this means is that the system has the capability to provide virtualization support, but the feature is disabled in the firmware. So, you just have to enable it.
\n
\n\tIn general, if either the Virtualization Enabled in Firmware or the VM Monitor Mode Extensions are set to No, you can enable those features in the firmware. However, if the Second Level Address Translation Extensions or the Data Execution Protection settings are set to No, then you will not be able to use Windows 8’s Client Hyper-V.
\n
\n\tCredit: Images by Greg Shultz for TechRepublic
\n
\n\tAs you can imagine, there are a wide variety of interfaces and naming conventions when it comes to accessing and changing the Virtualization support in a computer’s firmware, so you may want to begin by investigating the technical support section of your computer manufacturer’s Web site to learn more about the specifics of your particular system’s firmware
\n
\n\tAs I mentioned, my test system for this article is an HP Pavilion P2-1124 and the only setting that needs to be changed is the Virtualization Enabled in Firmware. However, if on your system the VM Monitor Mode Extensions are also set to No, you should be able to enable them in the firmware. Again, check the technical support section of your computer manufacturer’s Web site.
\n
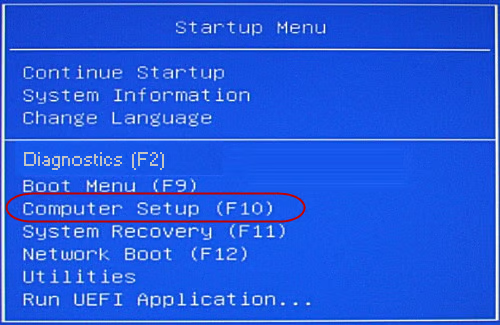
\n\tTo access my HP computer’s firmware Setup Utility, I must press the [Esc] when I am prompted to do so as the system is booting up. I then saw the Startup Menu and selected the Computer Setup item, as shown in Figure D.
\n
\n\tCredit: Images by Greg Shultz for TechRepublic
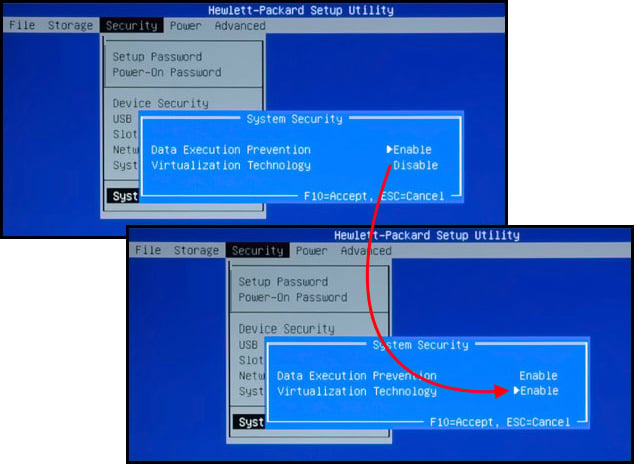
\n\tOnce in the Hewlett-Packard Setup Utility, I pulled down the Security Menu and selected System Security. When I saw the System Security dialog box, I used the arrow keys to change the Virtualization Technology setting from Disable to Enable. This procedure is illustrated in Figure E.
\n
\n\tTo put the setting into play, I pressed [F10] and then selected the Save Changes and Exit command from the File menu. I then encountered an Are you sure prompt and selected Yes. The system then rebooted.
\n
\n\tCredit: Images by Greg Shultz for TechRepublic
\n
\n\tWith the Virtualization Technology setting now enabled, I can install Client Hyper-V correctly on my example system. While Client Hyper-V is built into the 64-bit versions of Windows 8 Pro and Windows 8 Enterprise, it is not installed by default. However, you can do so easily from the Programs and Features tool.
\n
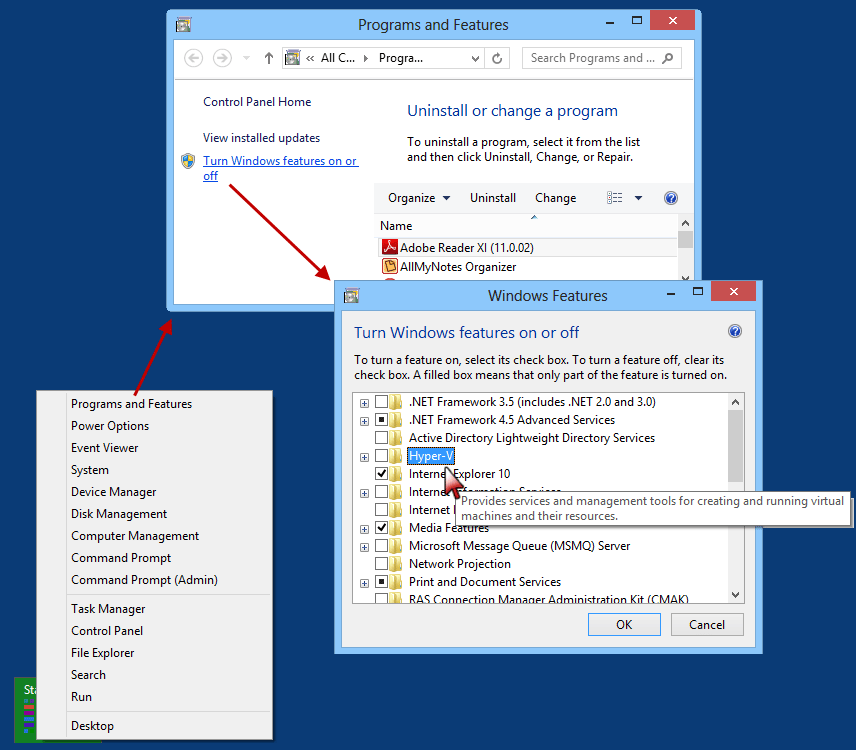
\n\tTo install Client Hyper-V, you begin by pressing [Windows] + X to access the WinX menu and then select Programs and Features. When the Programs and Features dialog box appears, you select Turn Windows features on or off. You’ll then see the Windows Feature dialog box and will locate the Hyper-V in the list. This process is illustrated in Figure F.
\n
\n\tCredit: Images by Greg Shultz for TechRepublic
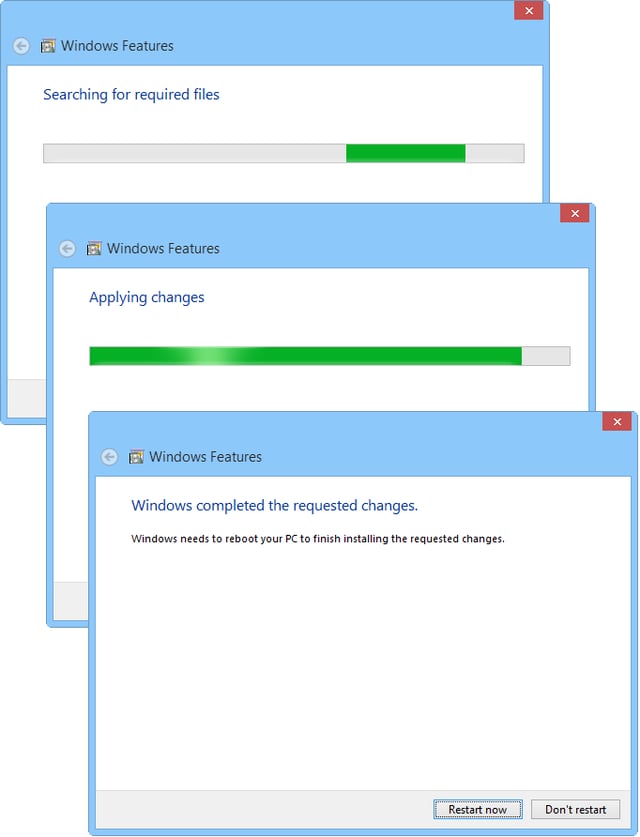
\n\tWhen you click OK, Windows Features will install Client Hyper-V and then prompt you to Restart your system. This process is illustrated in Figure H.
\n
\n\tCredit: Images by Greg Shultz for TechRepublic
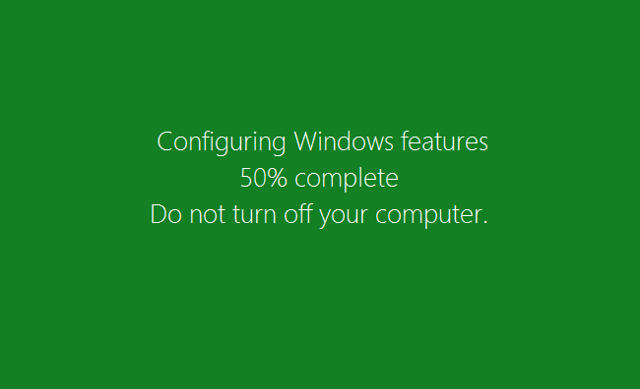
\n\tAs the operating system processes the installation, you’ll see messages on the screen similar to the one shown in Figure I, both before and after the initial restart.
\n
\n\tCredit: Images by Greg Shultz for TechRepublic
\n\tHead image

My first computer was a Kaypro 16 \"luggable\" running MS-DOS 2.11 which I obtained while studying computer science in 1986. After two years, I discovered that I had a knack for writing documentation and shifted my focus over to technical writing.


