Screenshots: Use Clonezilla to clone a hard drive
Image 1 of 23
Cloning a hard drive with Clonezilla
Cloning or imaging is the process by which the contents of a computer’s hard drive are copied — in their entirety — to a file (or numbered sequence of files) with the purpose of backing a computer’s system state so that it may later be restored in an identical state on a different computer.
Cloning programs exist for all operating systems, though most are native to the OS and will only produce restorable images for use with the same OS with which the image was created. However, Clonezilla by NCHC Free Software Labs supports dozens of file systems from various operating systems, which means it can be used on just about any computer running Windows, OS X, Linux, or derivative there of to produce 100% compatible cloned images.
Clonezilla comes in two flavors: Live and SE (Server Edition). Each support 32-bit/64-bit hardware and may be installed locally on a hard drive, USB flash drive, hosted from a server, or booted from a Live CD.
Though the requirements are minimal, let’s review what you’ll need in order to get Clonezilla Live working properly.
- rn
- Clonezilla Live ISO
- Bootable USB flash drive or CD with Clonezilla copied to it
- Source computer to create image from
- Destination drive to store image on (USB flash drive, server share, external HDD, secondary partition)
With the Clonezilla software installed to USB flash drive / burned to CD and a source computer with destination drive connected, you’re now ready to create an image of the source drive. Follow these steps in this screenshot gallery.
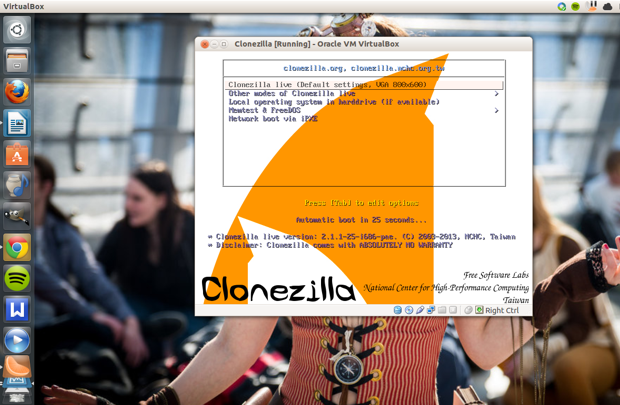
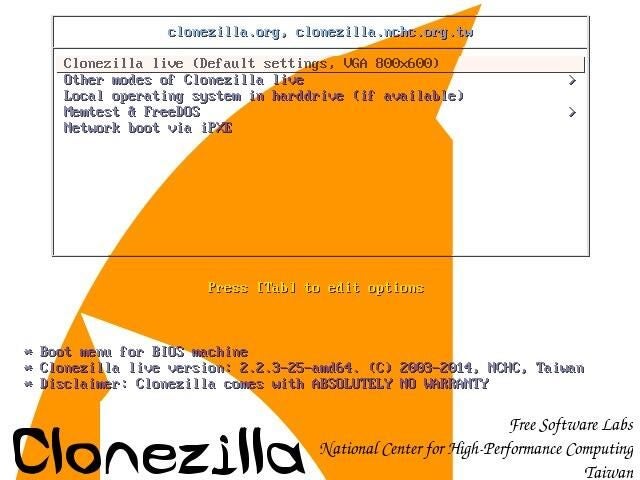
Clonezilla Live boot screen
First, boot the source computer with the boot media and connect the destination drive.
When the computer has booted from the Clonezilla media, you’ll be greeted by the Clonezilla Live boot screen. Selecting the default settings will begin the setup for the cloning process.
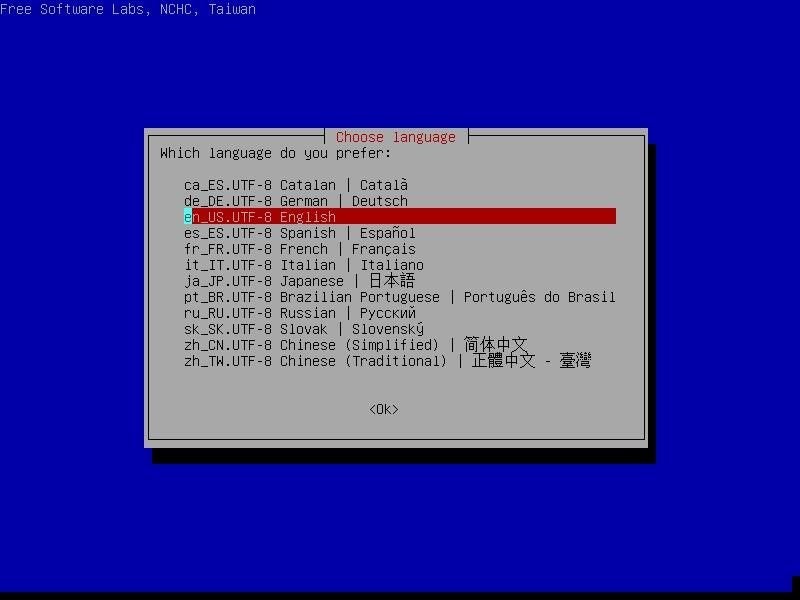
Language preference
Select the language preference, then click OK.
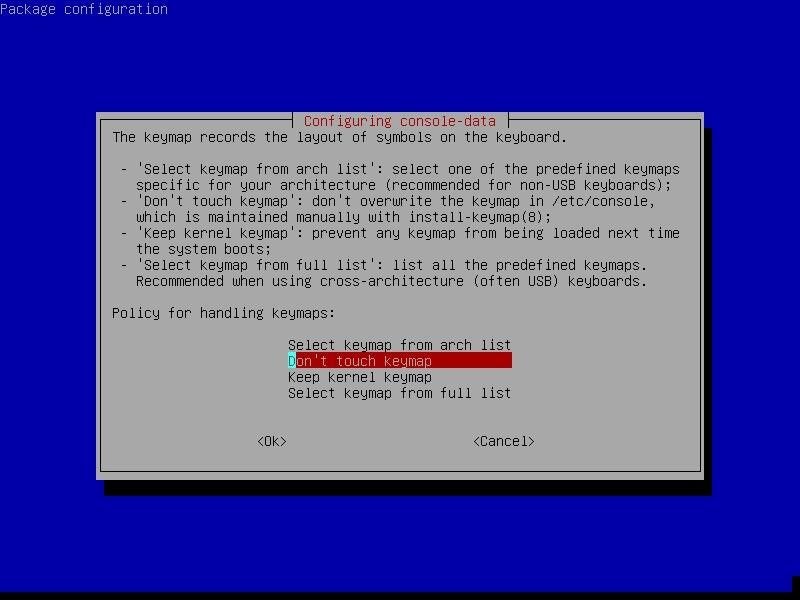
Keymap page
The keymap page will allow you to configure your hardware for continued use of Clonezilla, even if you have a non-standard keyboard. By default, Don’t touch keymap is highlighted.
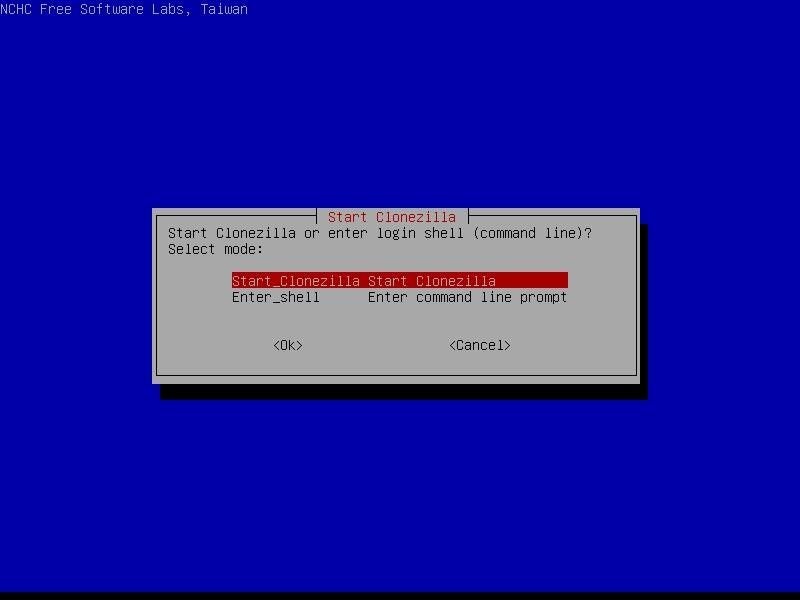
How you start Clonezilla
Next, you’ll be prompted to either start Clonezilla or enter the shell (command line) in the event that you wish to invoke command arguments to run Clonezilla with certain parameters.
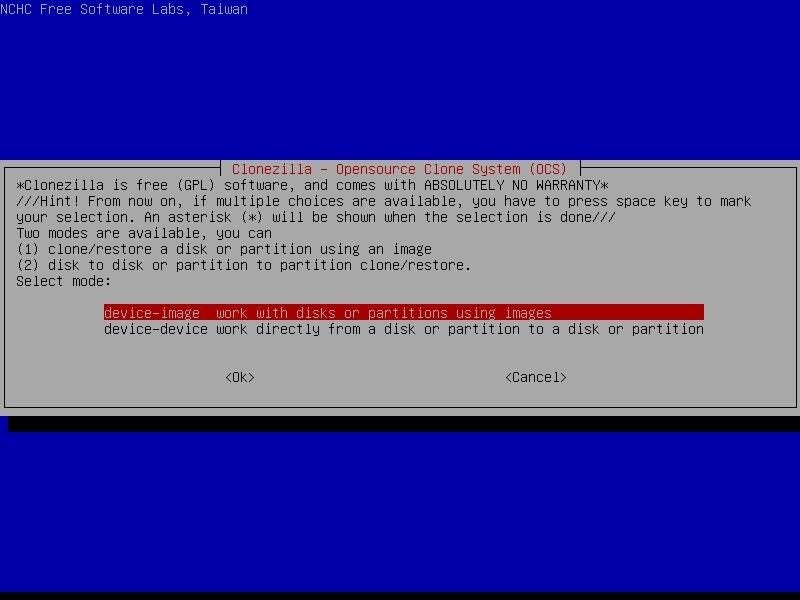
Select the method of creating an image
The following page will prompt you to select the method of creating an image: Device to image or Device to device. For the purposes of this tutorial, Device to image is chosen. This will create a reusable image that can be transferred to other computers or stored on server shares for later deployment.
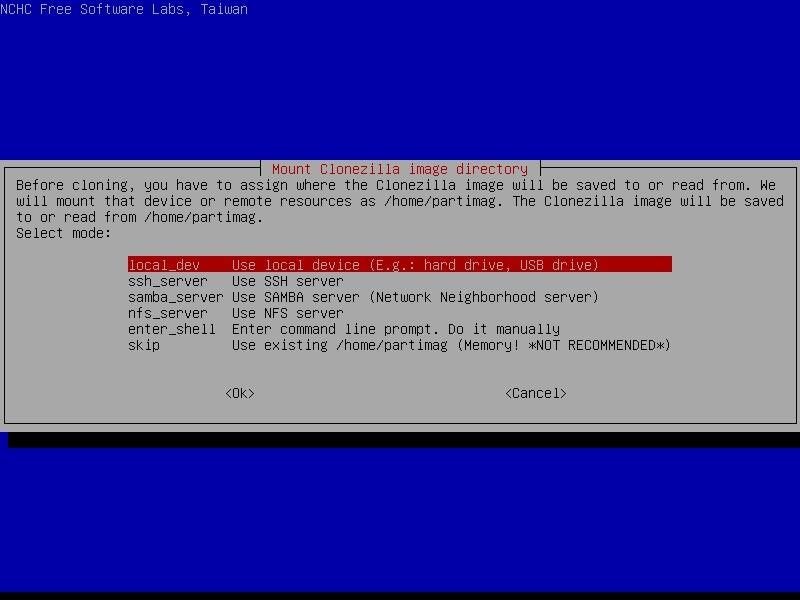

Choose the location where the image will be stored
Choose the location where the image will be stored
The next selection allow you to choose the location where the image will be stored. If you’re planning to store the image on a server, your choices will be SSH, NFS, or SAMBA servers. Again, for the purpose of this tutorial, selecting Local_Dev will allow the process to store the image on locally connected peripherals, such as an external hard drive.
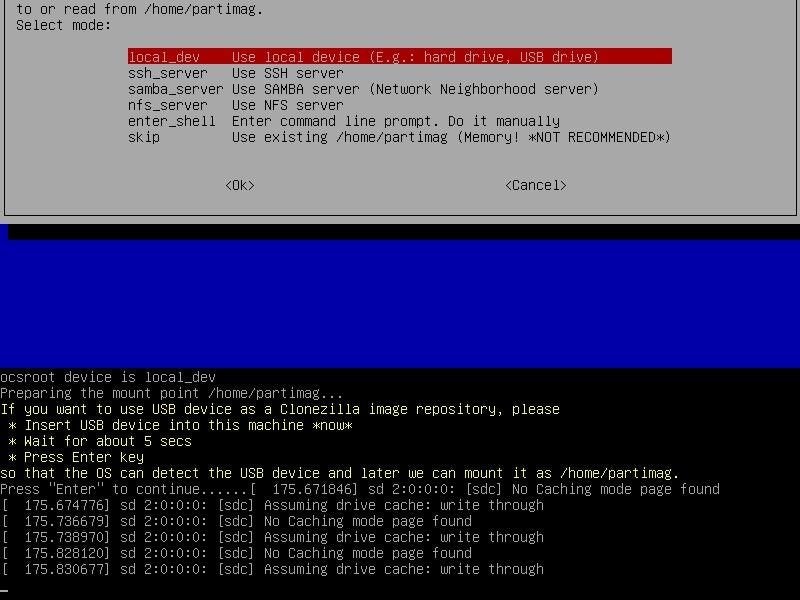

Clonezilla will attempt to load the external device
Clonezilla will attempt to load the external device
After clicking OK, Clonezilla will attempt to load the external device. Once it’s detected, press Enter again to proceed with the cloning process.
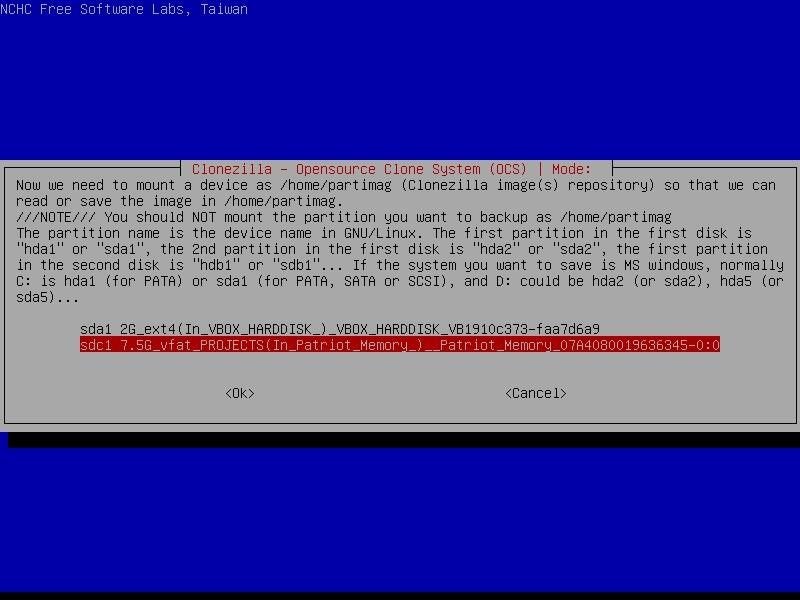
Select the destination location
On the next screen, select the destination location. Clicking OK will confirm the settings.
Select the directory for the destination location
Next, you’ll select the directory for the destination location. By default, the top or root directory is selected. Click OK if this setting doesn’t conflict with any other resources stored on the destination drive.
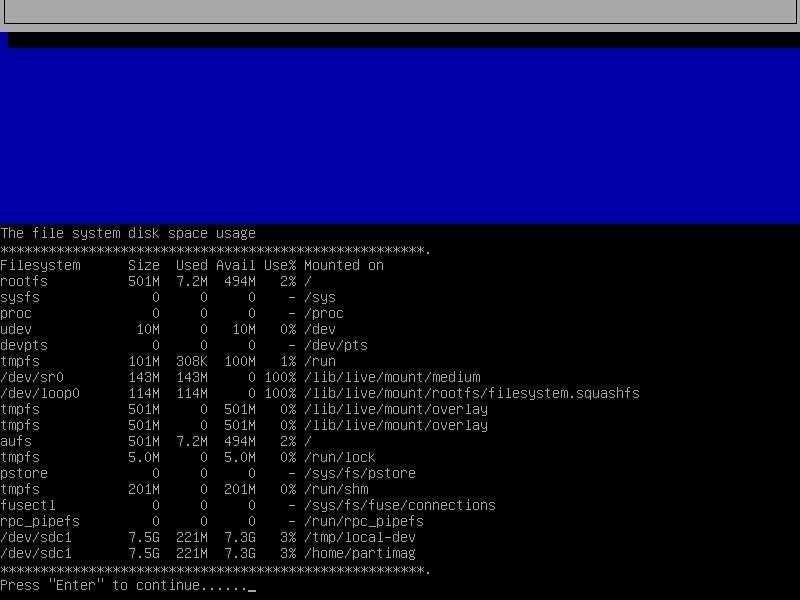
Continuing the setup process
After setting the destination location in Clonezilla, the file system of the source drive will be identified, and pressing Enter will continue the setup process.
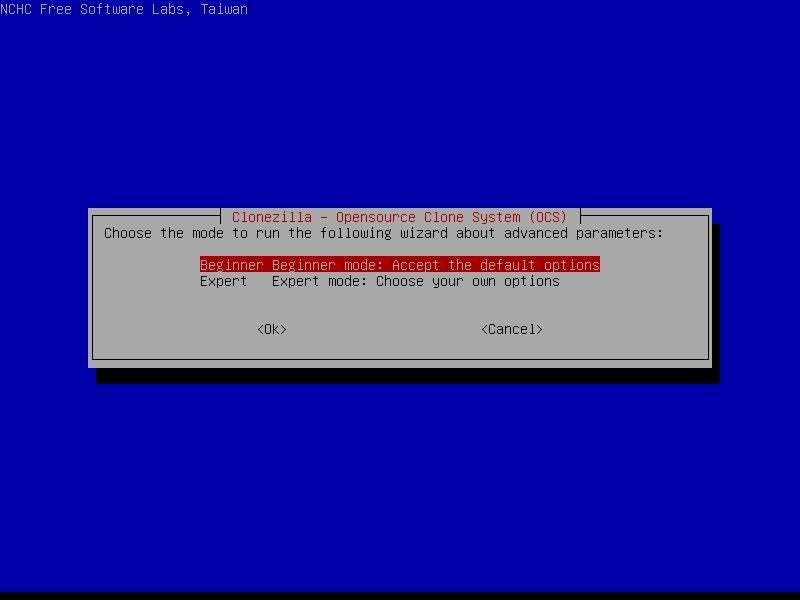
Select either Beginner or Expert mode
Select either Beginner or Expert mode. Beginner mode is selected by default, and Clonezilla’s default settings are utilized throughout the remainder of the process.
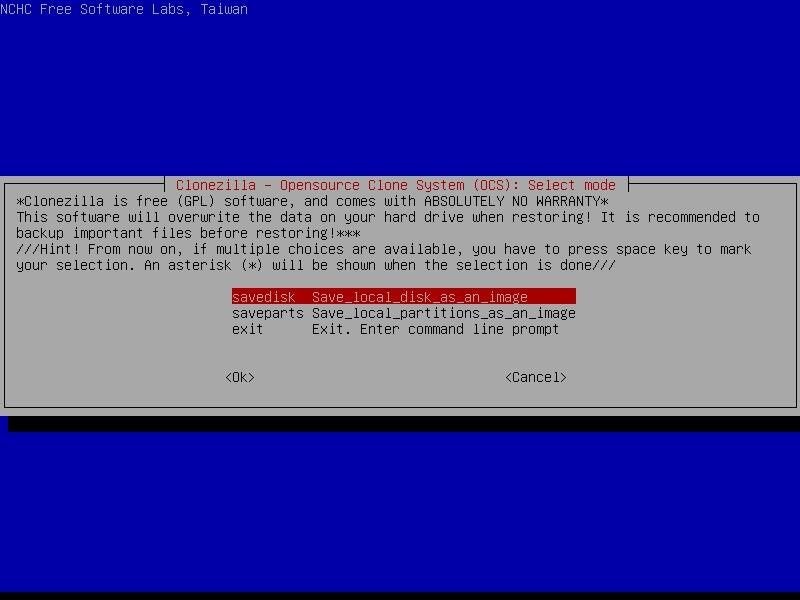
Select a command
Either select the savedisk command, which will allow an image to be created from the whole disk, or the saveparts command, which will create the image from a selected partition. Make your choice and click OK.
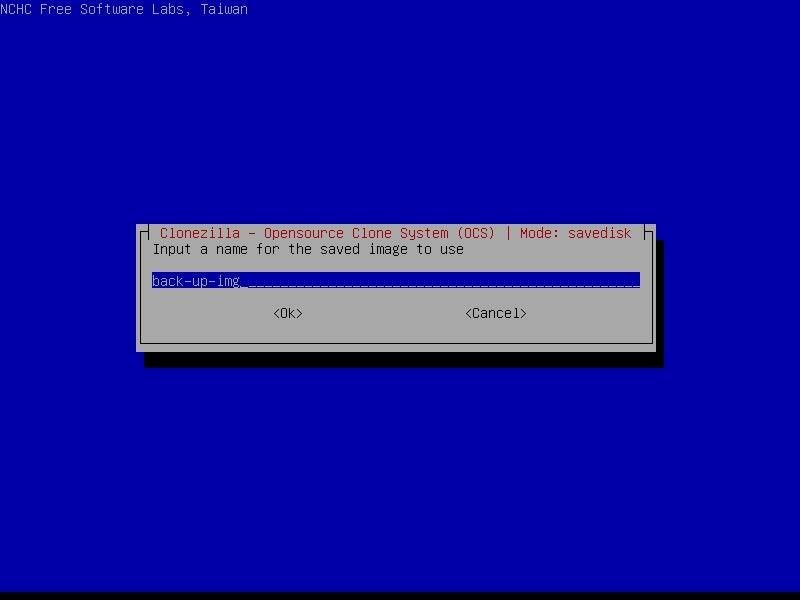
Enter a unique name
On the next page, enter a unique name for the clone image, then click OK.
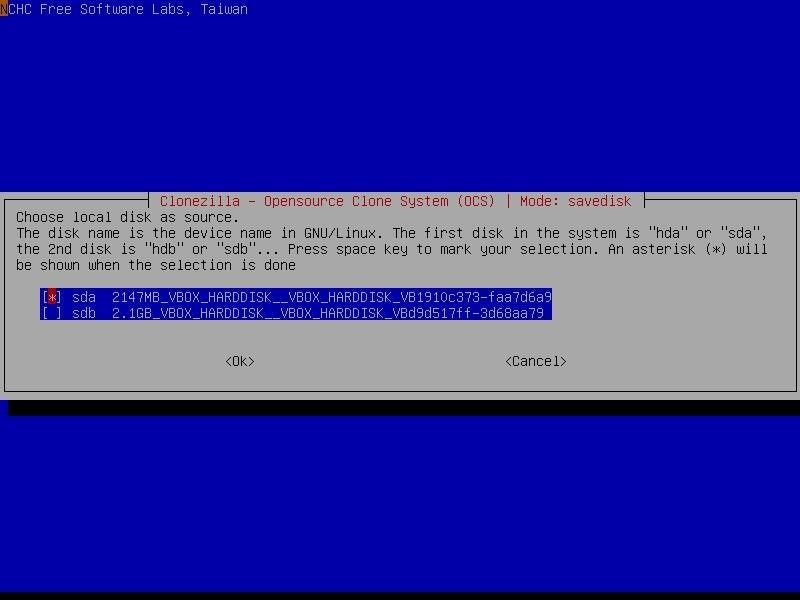
Select the local source disk
The following prompt will ask you to select the local source disk by highlighting the selection and pressing the spacebar once. Click OK to confirm the selection.
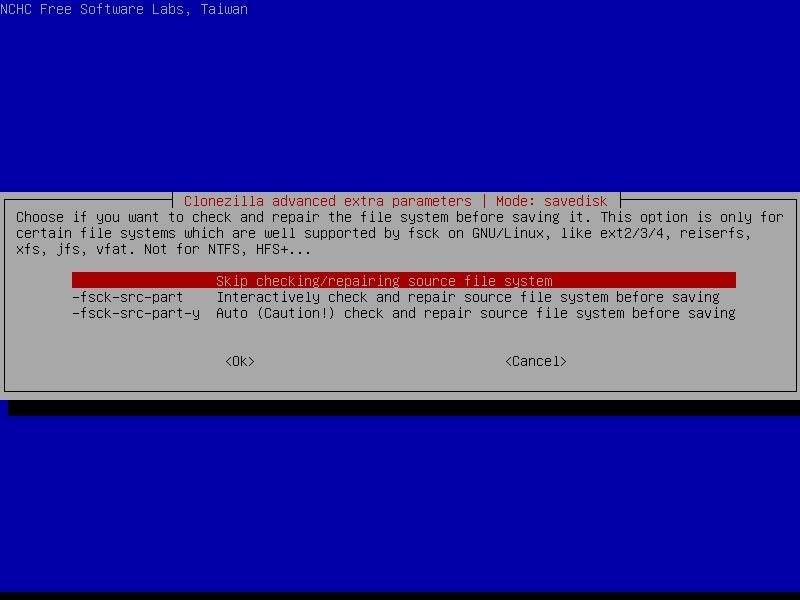
Check and repair the source file system
You have the option to check and repair the source file system before saving the image file. You can select an Interactive check, an Automated check, or skip the check altogether. Click OK after making your selection.
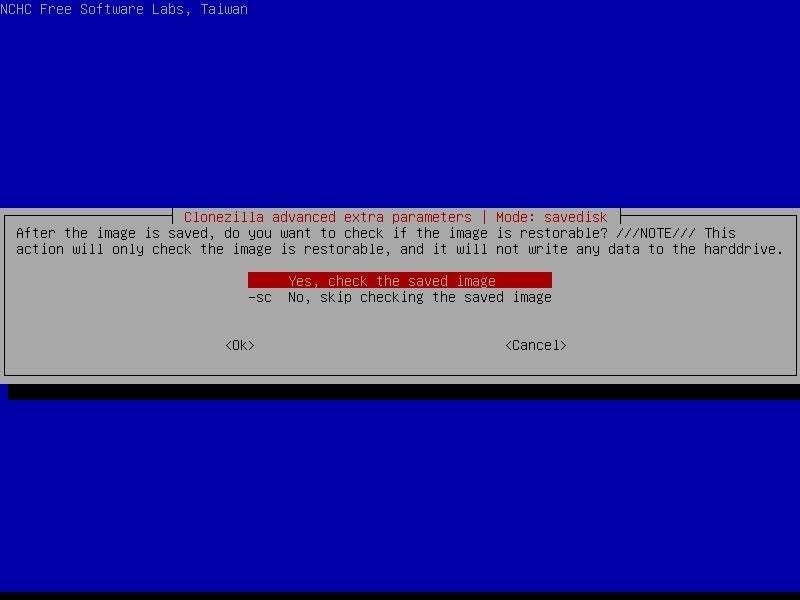
Check the saved image file
You also have the option to check the saved image file after it’s created. Select Yes or No to skip the task, then click OK.
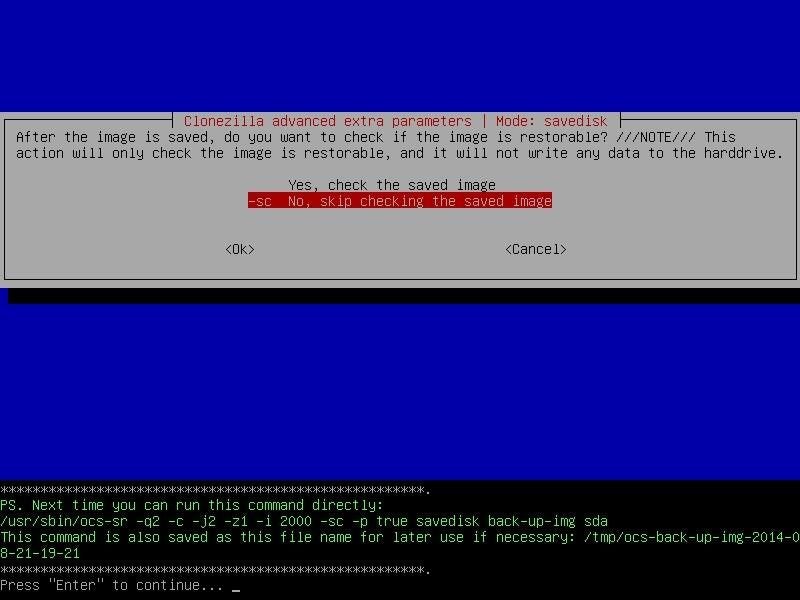
Confirm your previous selection
Confirm your previous selection, and press the Enter key to continue.
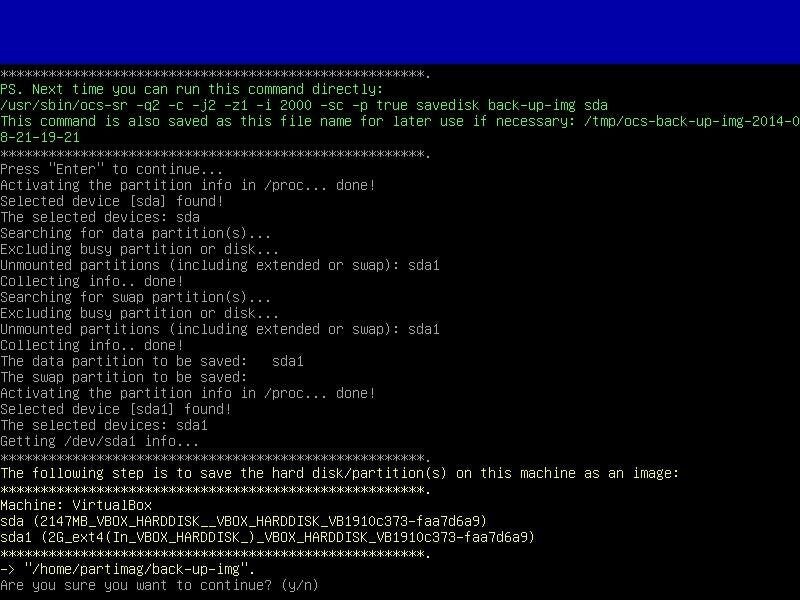
Confirm that you want to proceed
Clonezilla will process all of your previous selections and display the information on an output onscreen. To confirm that you wish to proceed, type Y and press the Enter key.
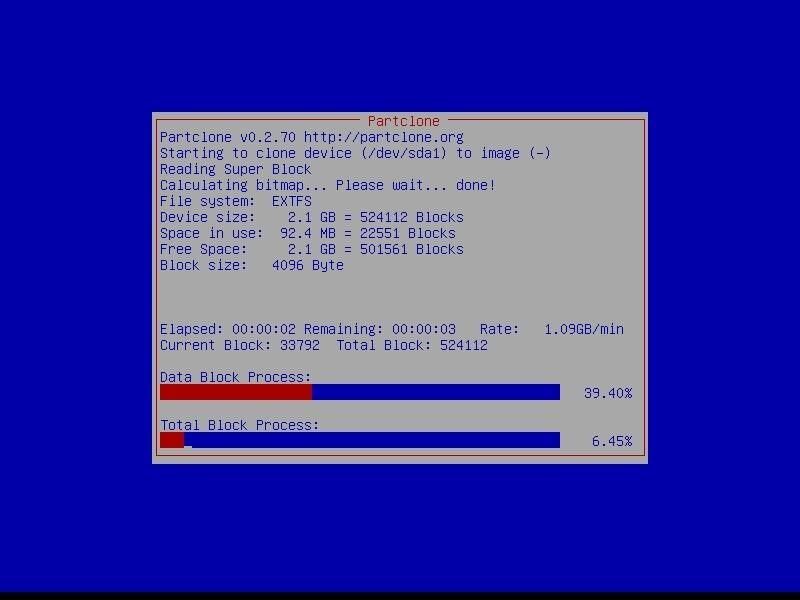
The cloning process will begin
Finally, the cloning process will begin by copying each bit from the destination drive to the destination location, and the progress bar will follow the process.
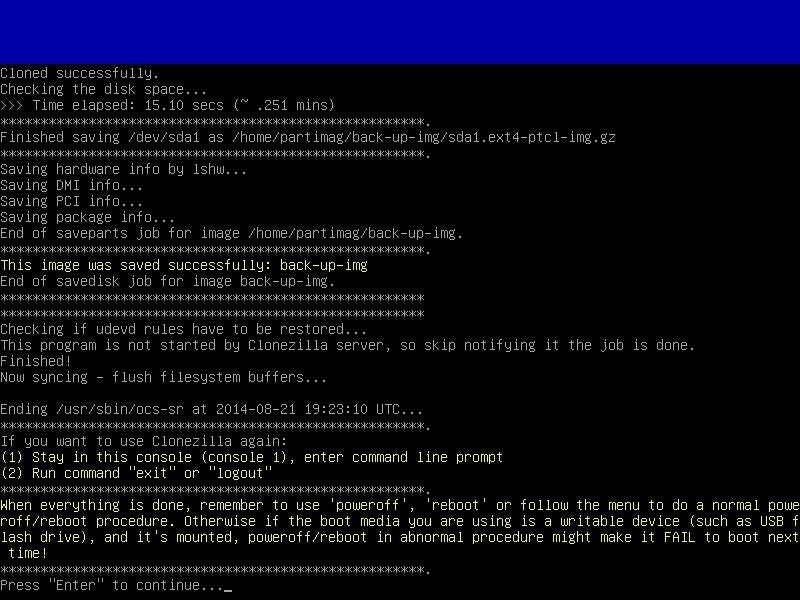
Output log
Once the process has completed, the output log will display the details of the cloning operation. Press Enter to continue.
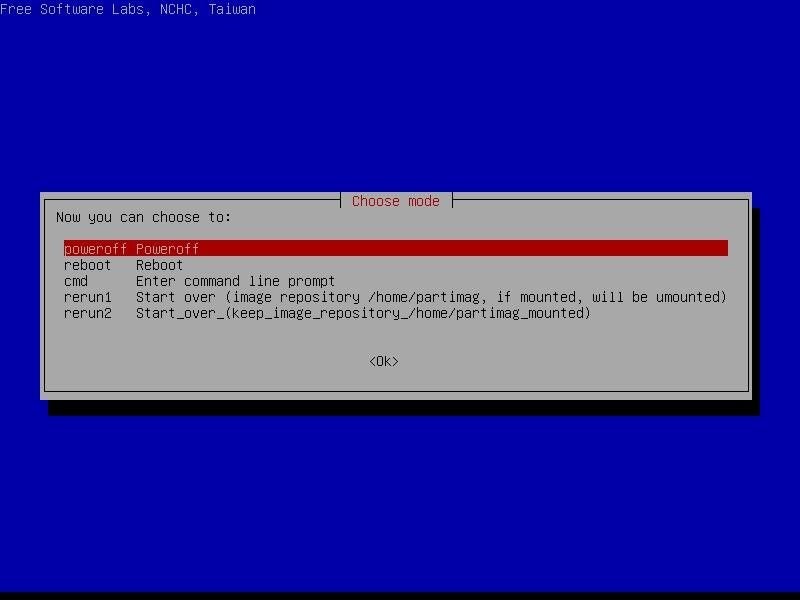
Final steps
The last selection allows you to PowerOff, Reboot, exit to the command line, or rerun the process based on the previous selections. Click OK to execute the desired command.
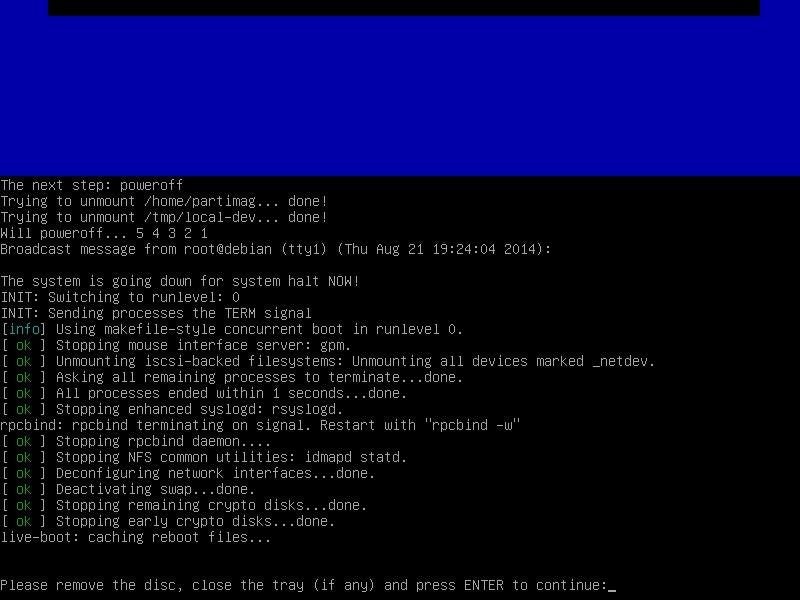
Shutdown command
By default, PowerOff is chosen. Pressing Enter will execute the shutdown command as the process completes each step in verbose-mode on the screen.
Though setting up Clonezilla is a lengthy and involved process, it’s also an OS-agnostic, lightweight piece of software that allows technicians and system admins the ability to clone just about any OS they may support within their organization.
Furthermore, Clonezilla supports full execution from the command line and may be completely scripted — beginning to end — so that it runs simply by copying and pasting the desired command and pressing the Enter key.
When combined with Clonezilla SE (server edition), you can realize the true power of Clonezilla. Setting up a compact server with modest resources will allow for PXE booting machines on the network, directly to the Clonezilla server to multicast images out to several nodes at once per session. This shifts the “heavy lifting” of deploying customized OS images to hundreds of machines at once over to the bandwidth and switches that power the enterprise networks’ backbone.
-
Account Information
Contact Jesus Vigo
- |
- See all of Jesus's content
