If you work in any kind of environment where there are multiple users, chances are you will need to share one or more folders out to your colleagues. For many administrators, this is a very simple task. For some, however, this task seems to be rather elusive. And what happens when you want to give your end-users the ability to share out the necessary folders to everyone? Are you going to walk through the sometimes complicated task of folder sharing? Or what about training your junior-admins on the art of folder sharing?
For those end users (or even for some administrators with less knowledge of such tasks) there is a very easy to use Microsoft Windows Wizard for sharing folders. This wizard is the Shared Folder Wizard and it is included in Windows XP Pro, Vista, and Windows 7. This wizard makes the process of sharing folders incredibly easy \u2013 for any level of user.
In this How Do I photo gallery, I walk you through a very simple wizard which will, in turn, allow you to show your end-users (or junior admins) a fast and easy way to share folders (or just make your job a little bit easier). In the end, regardless of your reasons for using this wizard, folder sharing will be made all the more easy.
Step 1: Open the Wizard
Open Shared Folder Wizard by opening the run dialog box and then typing shrpubw.exe in the resulting window. Or you could click Start | Run then enter shrpubw.exe in the run dialog. In Windows 7, you can simply type shrpubw in the search box and press [Enter].
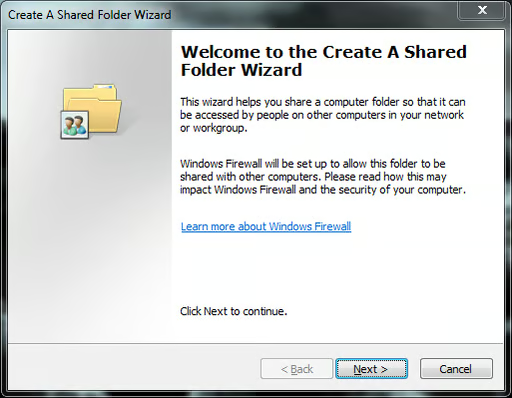
Step 2: Click through the welcome page
If you need to learn more about your Windows Firewall, you can click the link. Otherwise click Next to continue as shown in this screenshot.
This gallery is also available as a TechRepublic blog post and download. Image created by Jack Wallen for TechRepublic.
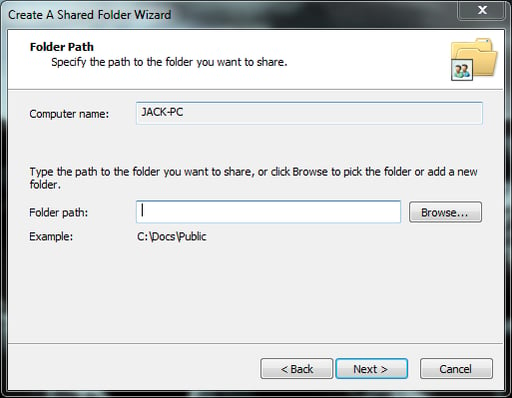
Step 3: Set up your folder
In this step you are going to name your share. You also can name (or re-name) your PC. You should probably leave your computer name as is, as changing this here could cause conflicts with your computer name as defined by the system. You will need to set up the folder to be shared by clicking the Browse button. Once the new window opens, navigate to the folder you want to share and click OK and then click Next.
This gallery is also available as a TechRepublic blog post and download. Image created by Jack Wallen for TechRepublic.
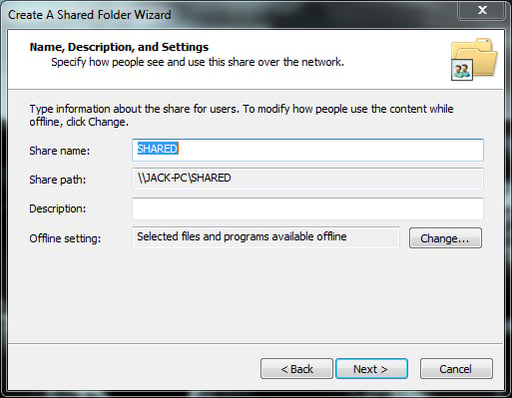
Step 4: Naming your share
In the next window you need to first give your share a name and (optionally) a description. The share path is already configured from the previous screen.
This gallery is also available as a TechRepublic blog post and download. Image created by Jack Wallen for TechRepublic.
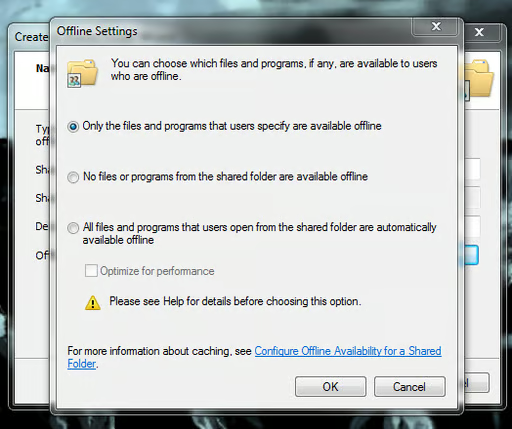
Step 5: Offline settings
In this same window you can click the Change button to make changes to the offline settings. This allows you to give offline access to users.
A note on offline storage – this can be a potential security issue when secure files are cached on a non-secure machine. Please make sure you enable this option with care. Once you have finished with this, click Next to continue.
This gallery is also available as a TechRepublic blog post and download. Image created by Jack Wallen for TechRepublic.
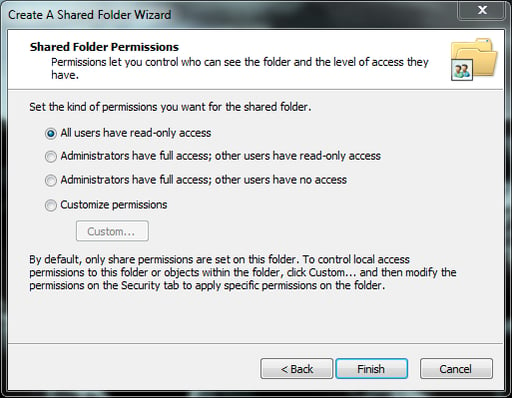
Step 6: Permissions
In the next window, you set up permissions for users. You have four options:
When you’ve established permissions how you want them, click Finish.
This gallery is also available as a TechRepublic blog post and download. Image created by Jack Wallen for TechRepublic.
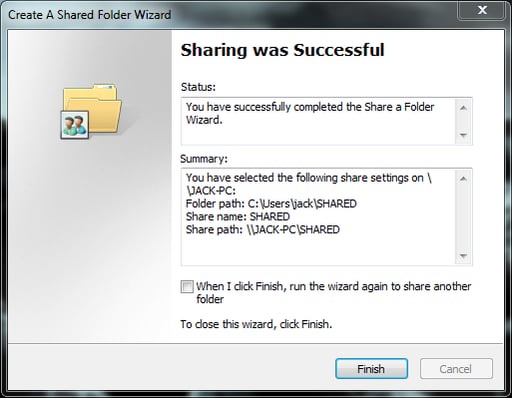
Step 7: Complete the share
In the last screen you have the option to complete this share and/or start over to set up another share.
Final thoughts
You should now have a shared folder ready for your other users to access. I’m always surprised that this tool is more readily accessible by the user. But even though Microsoft has seen to it to obfuscate this tool from the user, it is still readily available to make sharing folders as easy as just about any other task in Windows.
This gallery is also available as a TechRepublic blog post and download. Image created by Jack Wallen for TechRepublic.

Jack Wallen is an award-winning writer for TechRepublic, The New Stack, and Linux New Media. He's covered a variety of topics for over twenty years and is an avid promoter of open source. For more news about Jack Wallen, visit his website jackwallen.com.


