\n\tIn 1981, Sinclair Research released the ZX81 as a follow-up to their earlier ZX80. The ZX81 was manufactured by the Timex Corporation and sold as a kit (\u00a349.95) or fully assembled (\u00a369.95). In 1982, Timex started selling the ZX81 in the US for $99.95 as the Timex Sinclair 1000.
\n
\n\tFollow along as we take a peak at the hardware inside one of the first low-cost home computers.
\n\t
\n\tPhoto by: Bill Detwiler / TechRepublic
\n\tCaption by: Bill Detwiler
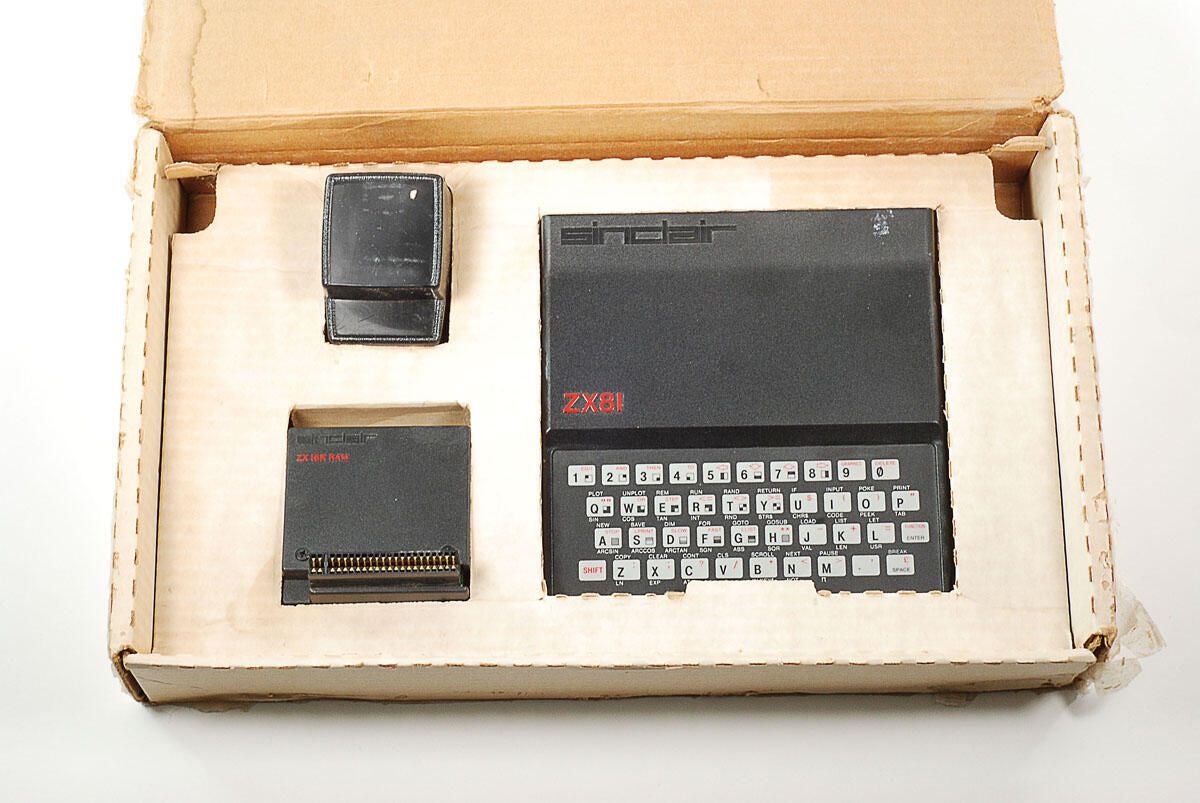
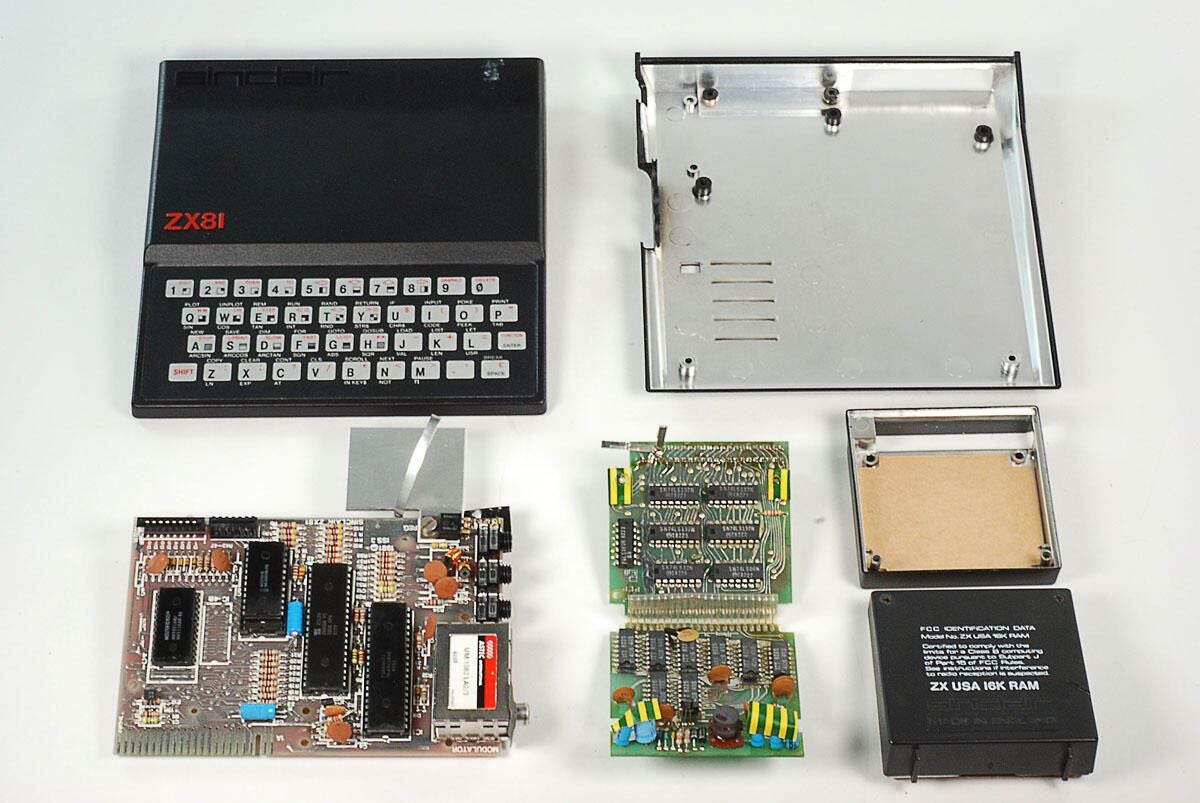
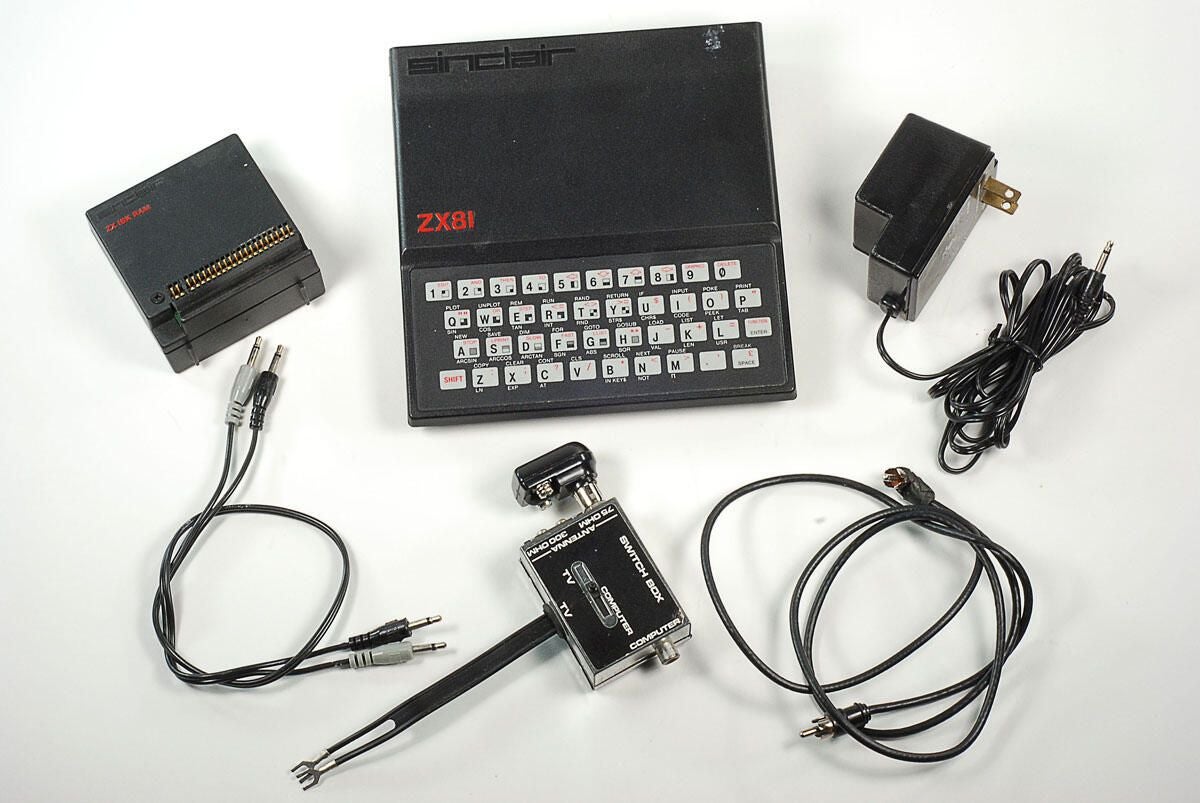
\n\tWe purchased this Sinclair ZX81 from an online auction. The unit came in the original box and shipped with power adapter, 16kB external memory module, cables, and product documentation.
\n\tPhoto by: Bill Detwiler / TechRepublic
\n\tCaption by: Bill Detwiler
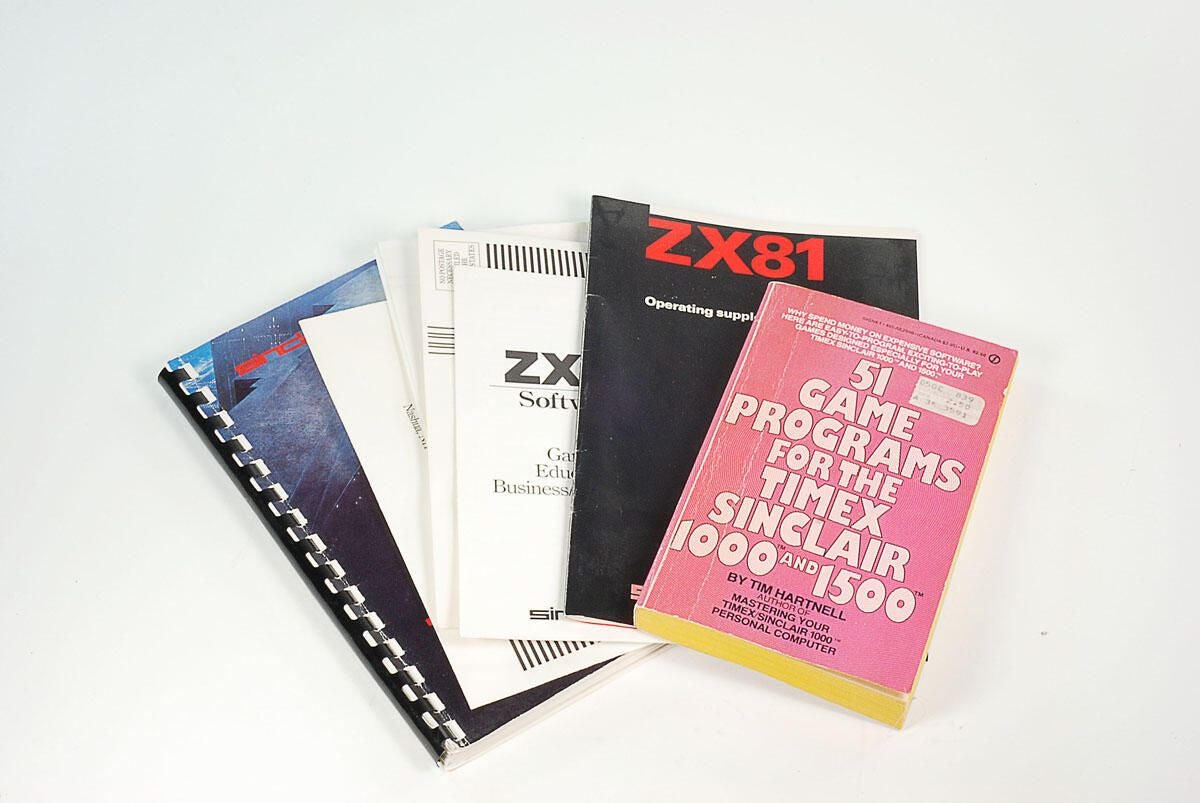
\n\tAlong with the actual Sinclair ZX81 manual, the sell of this machine included a book of game programs.
\n
\n\tPhoto by: Bill Detwiler / TechRepublic
\n\tCaption by: Bill Detwiler
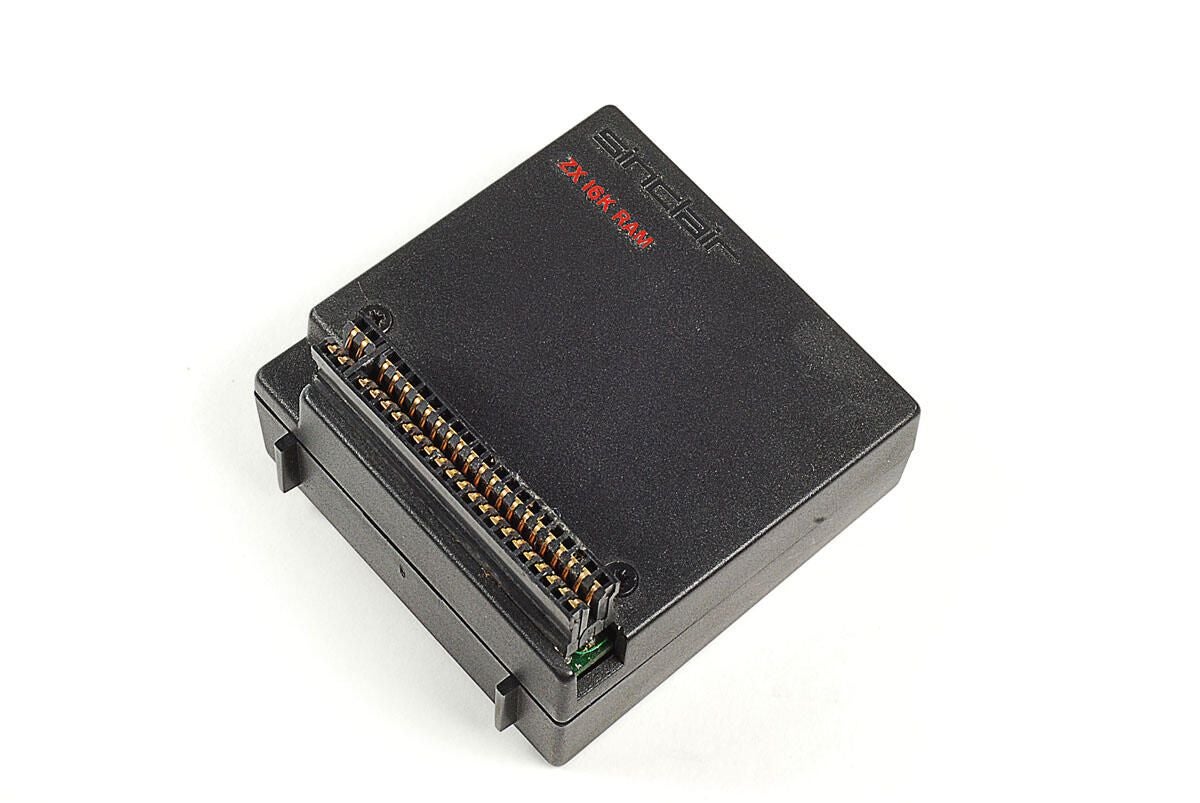
\n\tThe Sinclair ZX81 has only 1kB of memory–a small amount even in 1981. Luckily, this external module let’s you expand the unit’s memory to 16kB.
\n
\n\tPhoto by: Bill Detwiler / TechRepublic
\n\tCaption by: Bill Detwiler
\n\tPhoto by: Bill Detwiler / TechRepublic
\n\tCaption by: Bill Detwiler
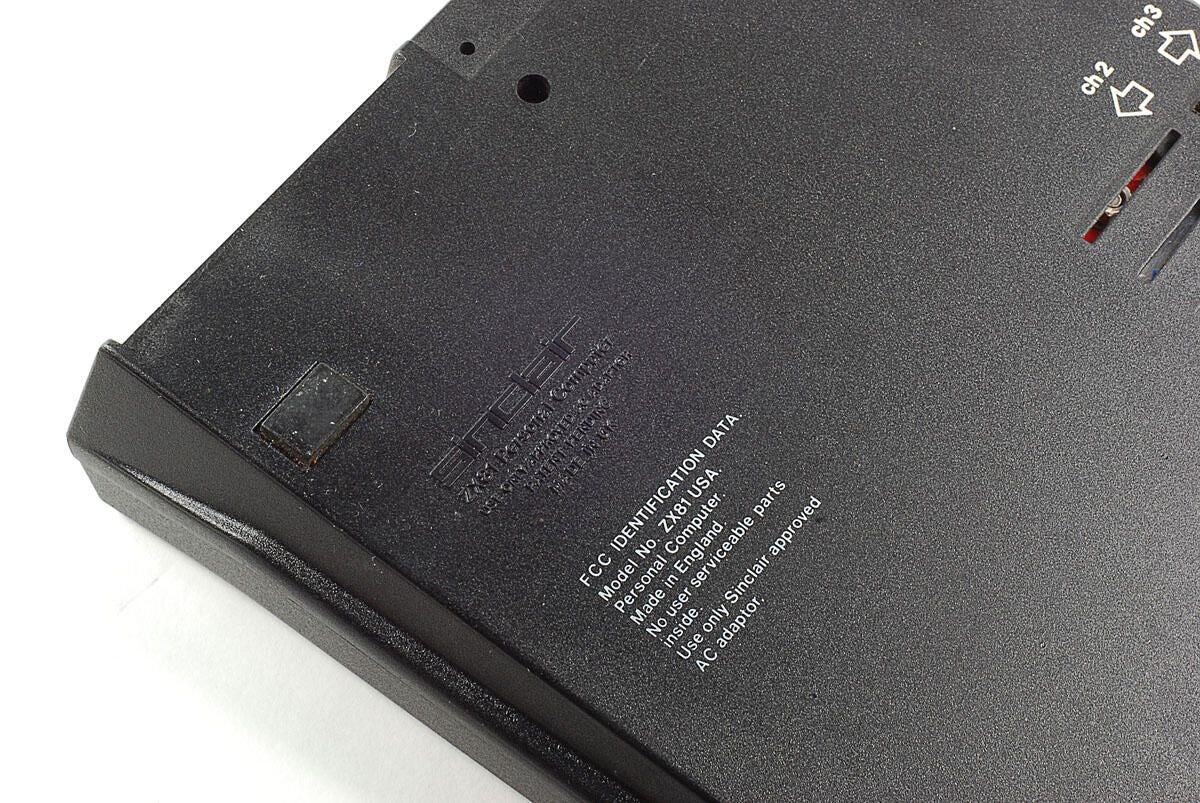
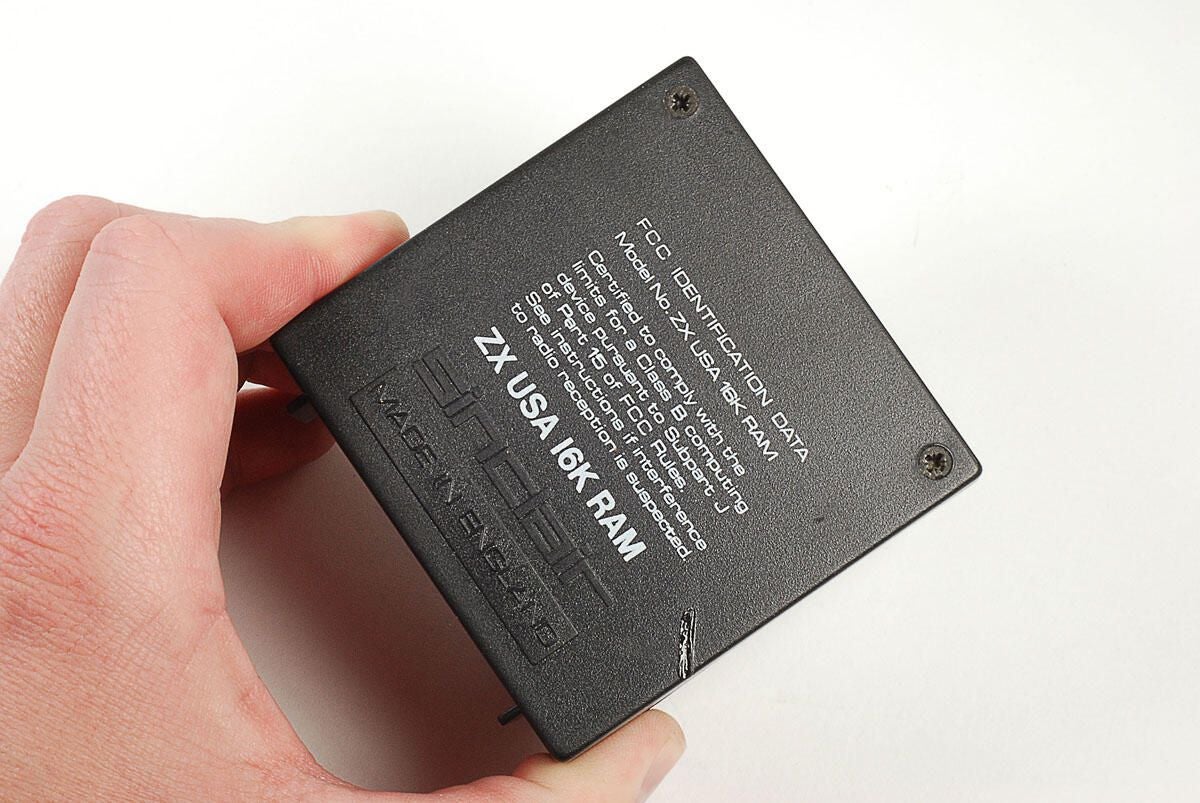
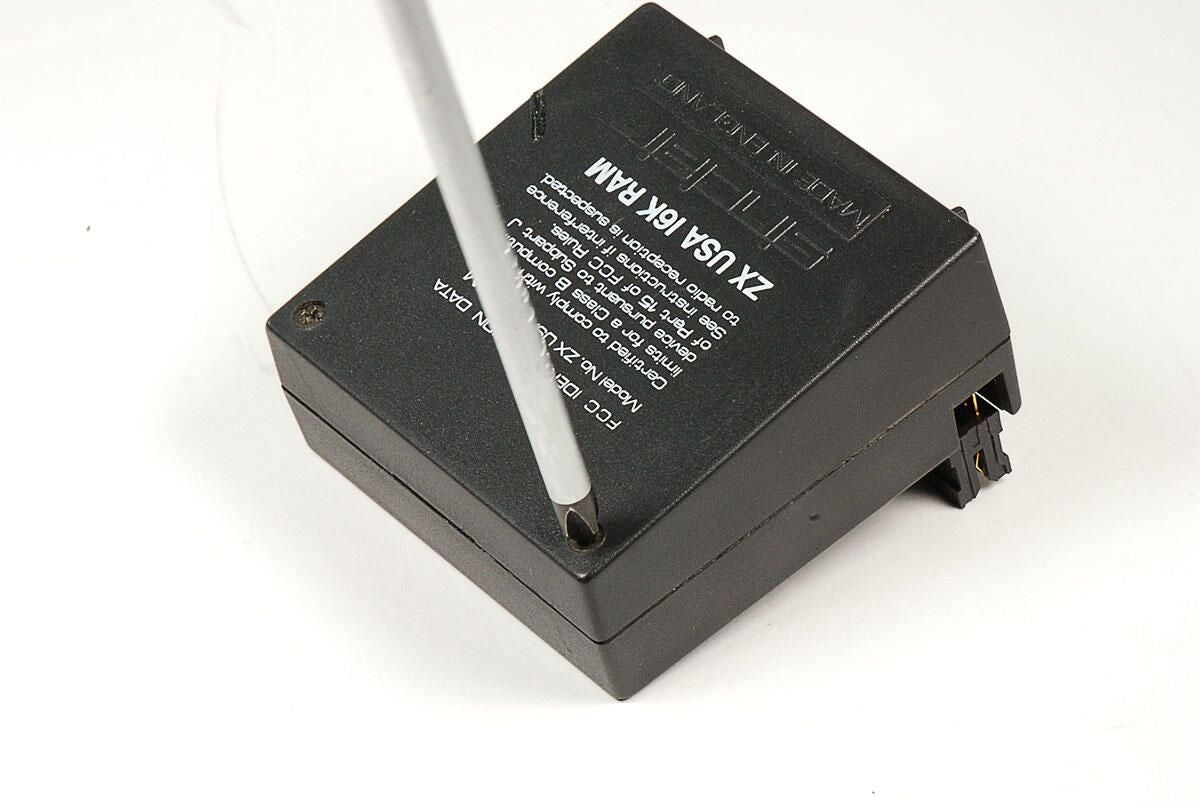
\n\tThis particular machine has the model number ZX81 USA. There’s also a reminder that there are no “user serviceable” parts inside. Guess we’ll have to open the case and find out.
\n
\n\tPhoto by: Bill Detwiler / TechRepublic
\n\tCaption by: Bill Detwiler
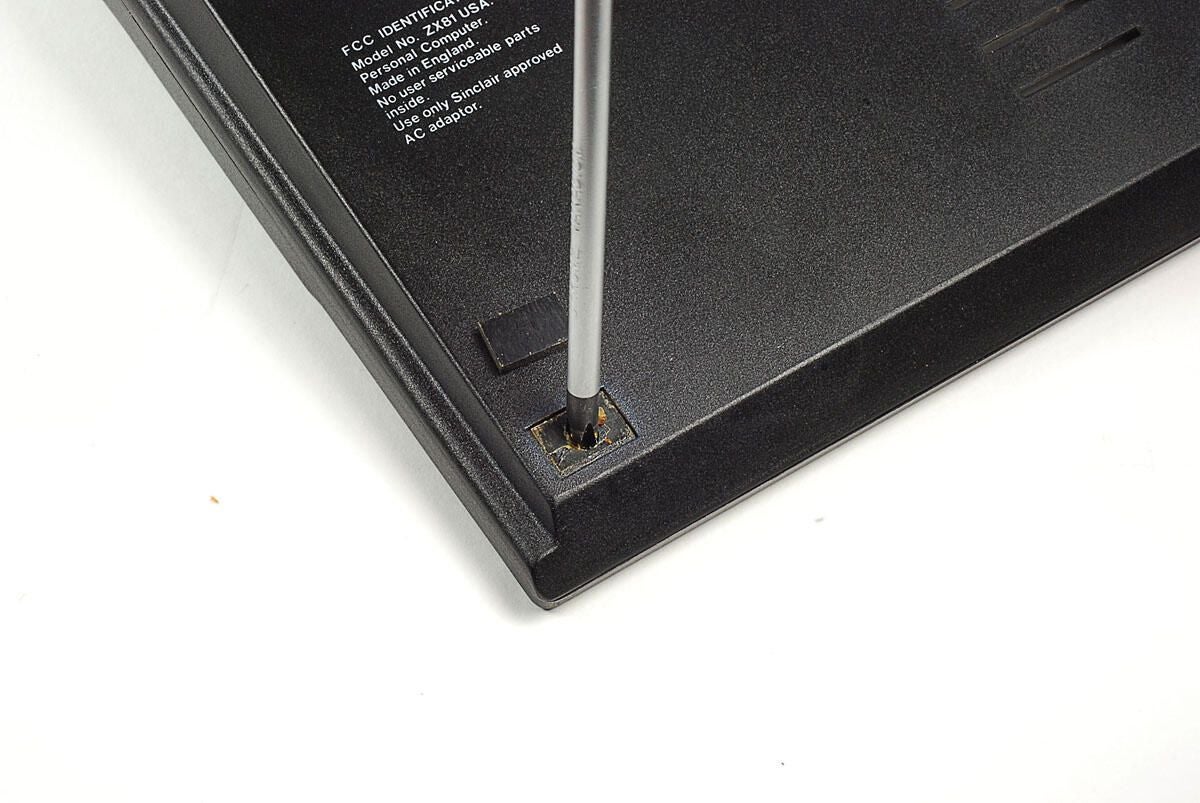
\n\tThe second hidden screw is under the foot near left, front corner of the Sinclair ZX81’s base.
\n
\n\tPhoto by: Bill Detwiler / TechRepublic
\n\tCaption by: Bill Detwiler
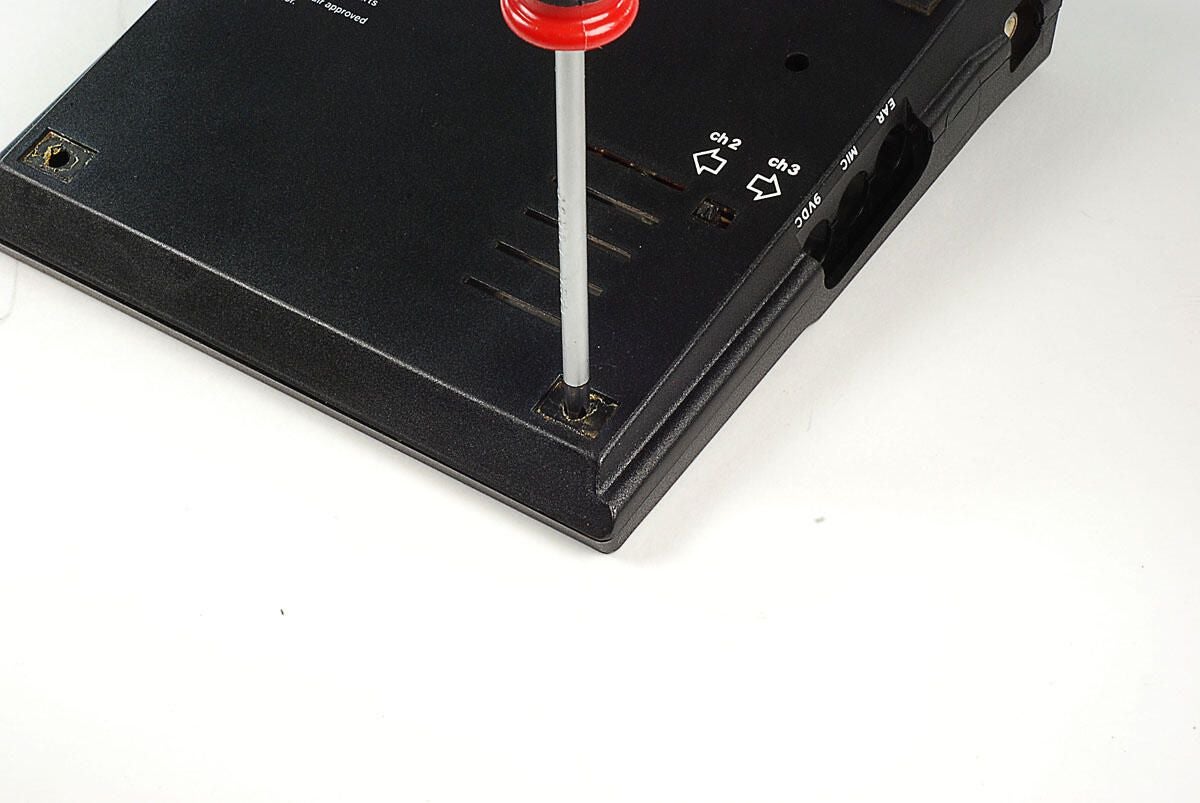
\n\tA third case screw is hidden under the foot near the right, front corner of the Sinclair ZX81’s base.
\n
\n\tPhoto by: Bill Detwiler / TechRepublic
\n\tCaption by: Bill Detwiler
\n\tWith all the case screws removed, we can lift the base of the Sinclair ZX81’s case away from the rest of the unit.
\n
\n\tPhoto by: Bill Detwiler / TechRepublic
\n\tCaption by: Bill Detwiler

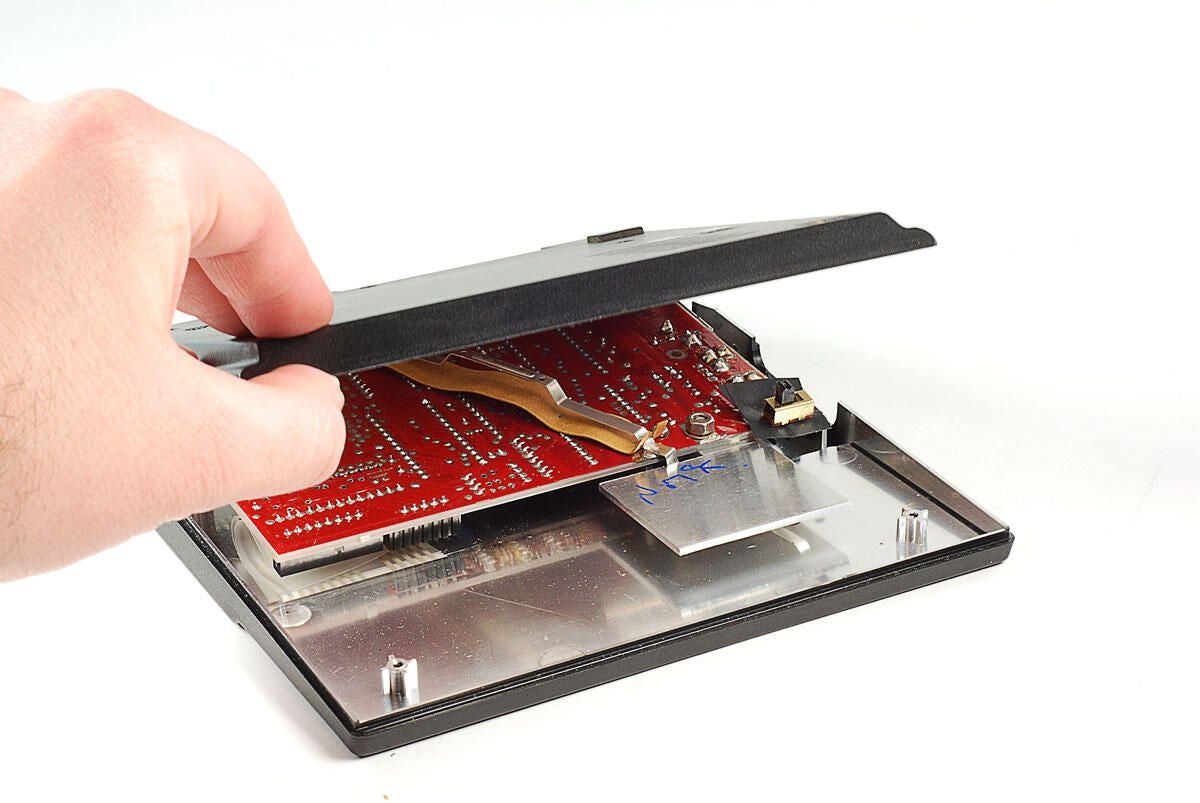
\n\tWith the base removed, we get our first look inside the Sinclair ZX81. At this point, much of the internal hardware is still out of view. All we can really see is the underside of the main PCB.
\n
\n\tThe inside surfaces of both the top and bottom halves of the ZX81’s case are covered with a silver, metalic coating.
\n
\n\tPhoto by: Bill Detwiler / TechRepublic
\n\tCaption by: Bill Detwiler
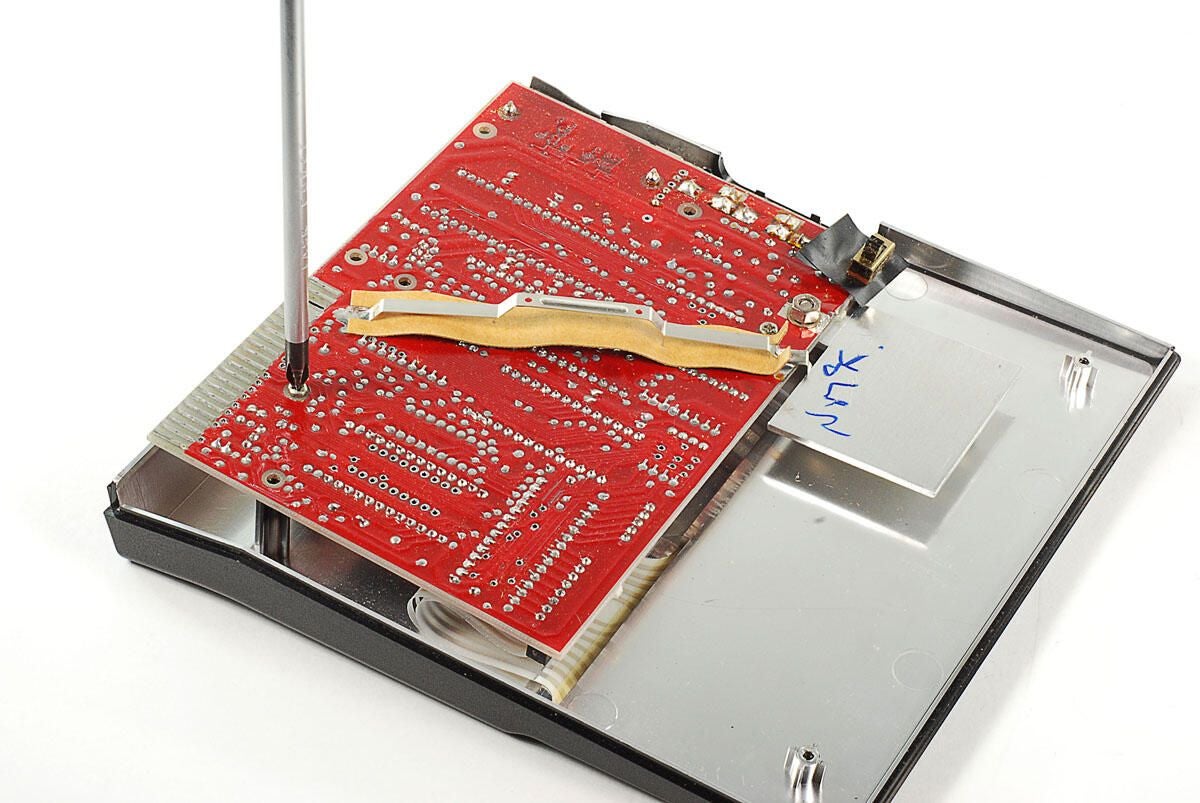
\n\tA pair of Phillips screws hold the main PCB to the upper section of the Sinclair ZX81’s case.
\n
\n\tPhoto by: Bill Detwiler / TechRepublic
\n\tCaption by: Bill Detwiler
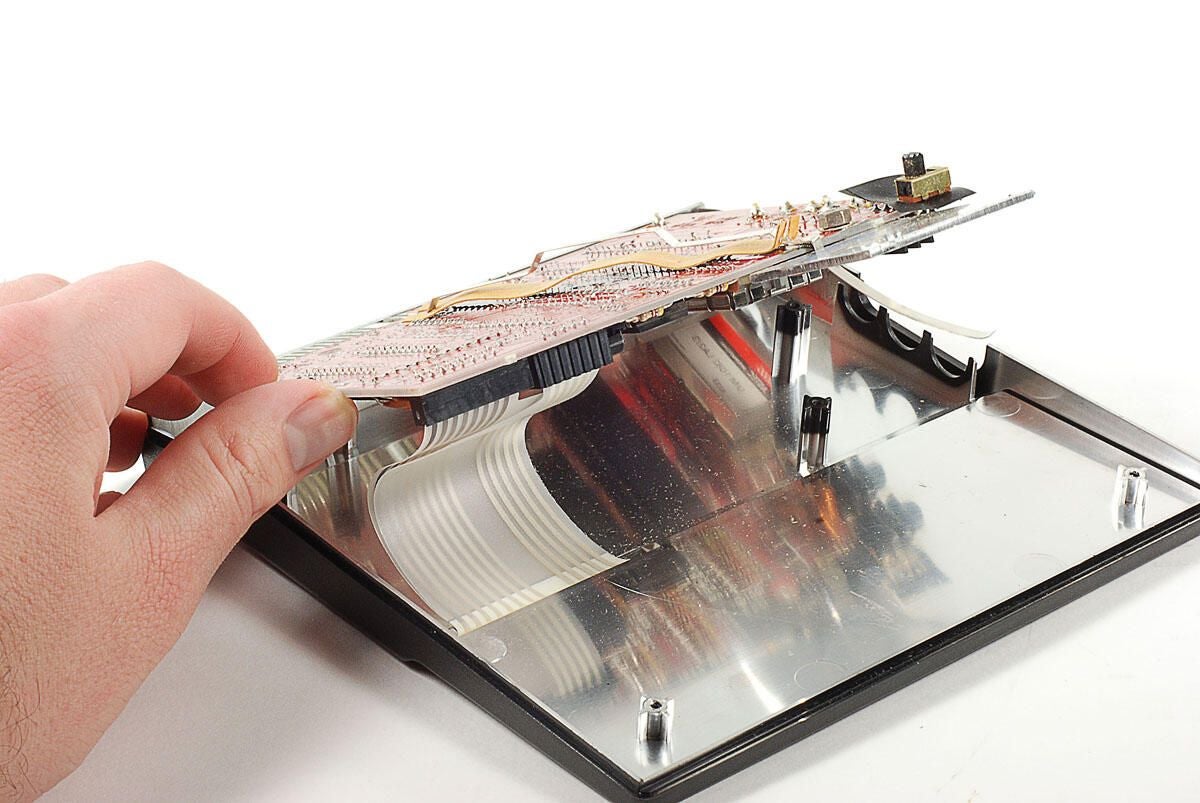
\n\tWith the two Phillips screws remove, you can left the main PCB away from the upper half of the Sinclair ZX81’s case.
\n
\n\tTwo extremely thin ribbon cables connect the touch-sensitive keyboard membrane to the main PCB. You can detach the pair by gripping them close to the PCB-mounted connectors and gently pulling them free.
\n
\n\tPhoto by: Bill Detwiler / TechRepublic
\n\tCaption by: Bill Detwiler
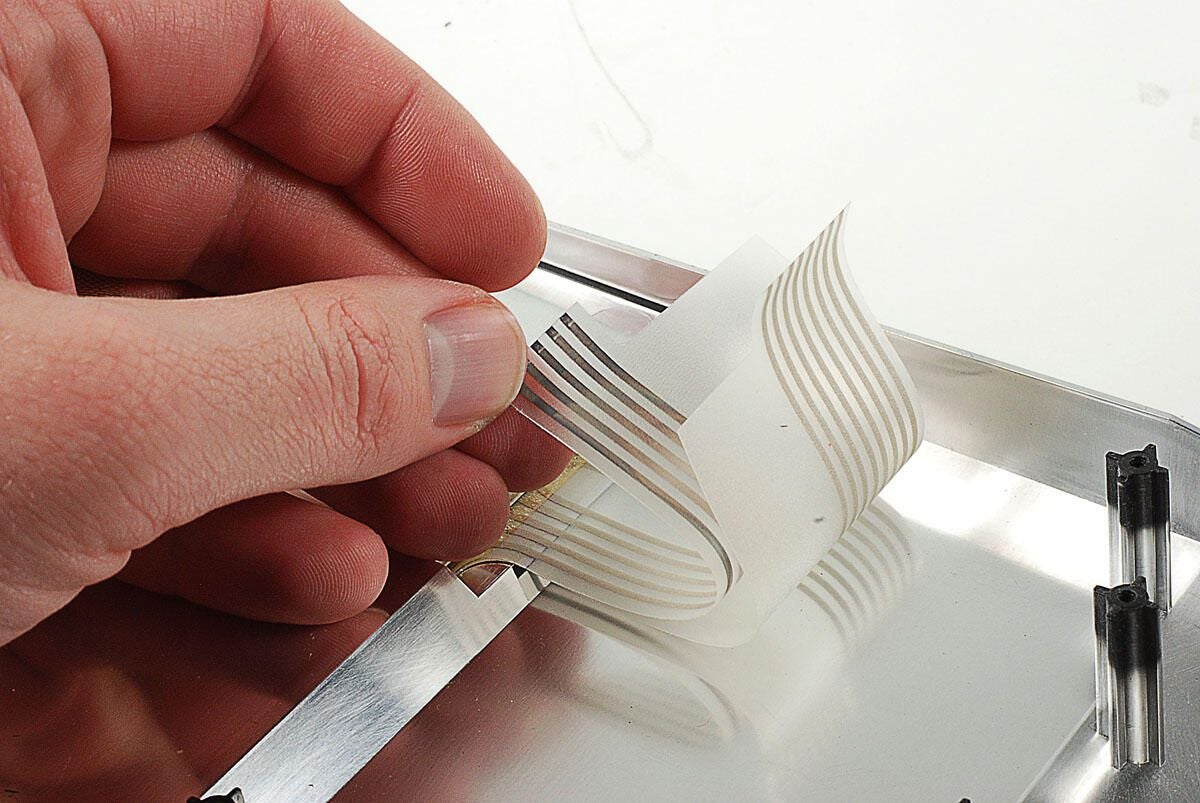
\n\tThese two ribbon cables connect the Sinclair ZX81’s touch-sensitive keyboard membrane to the main PCB. They are probably the thinnest ribbon cables I have ever seen. I thought they might rip as I pulled them from their PCB connectors. Luckily, no such damage occured.
\n
\n\tPhoto by: Bill Detwiler / TechRepublic
\n\tCaption by: Bill Detwiler
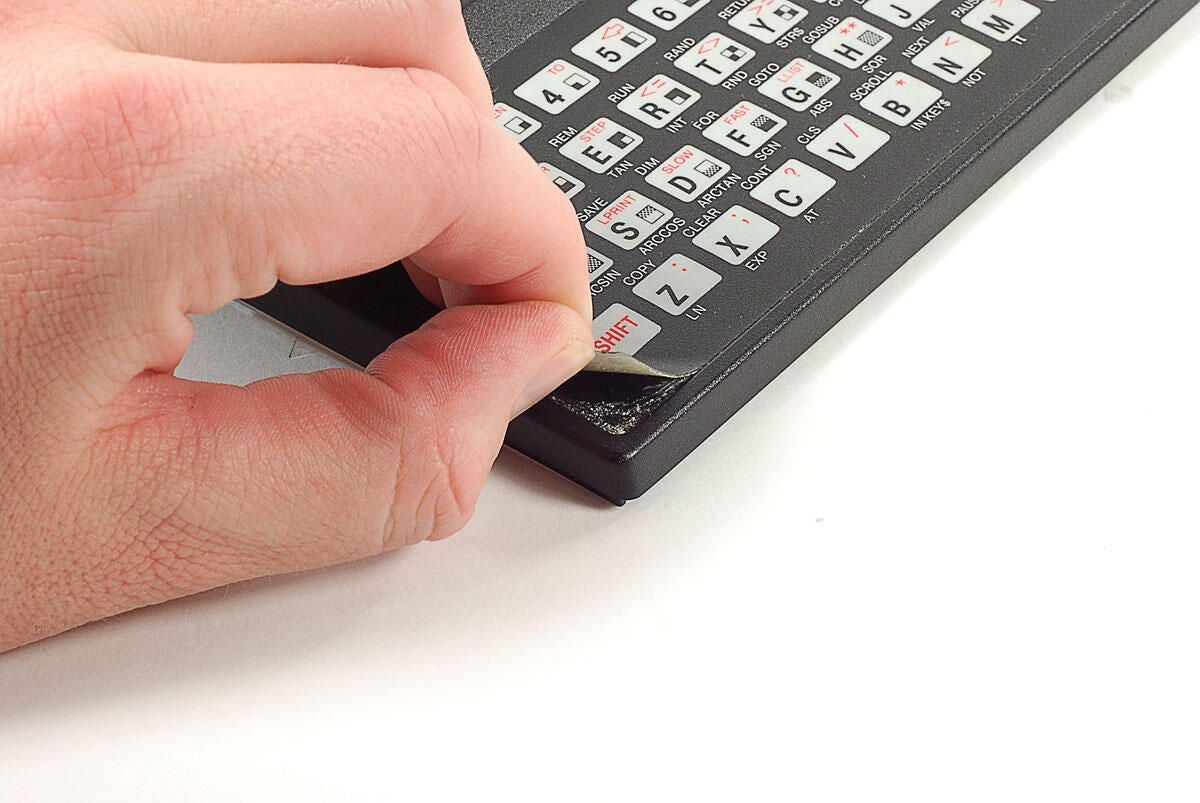
\n\tUsing a touch-sentive membrane instead of a typwriter-style keyboard was one way Sinclair kept the cost of the ZX81 low.
\n
\n\tAs the membrane is glued to the case, I’m going to leave it in place.
\n
\n\tPhoto by: Bill Detwiler / TechRepublic
\n\tCaption by: Bill Detwiler
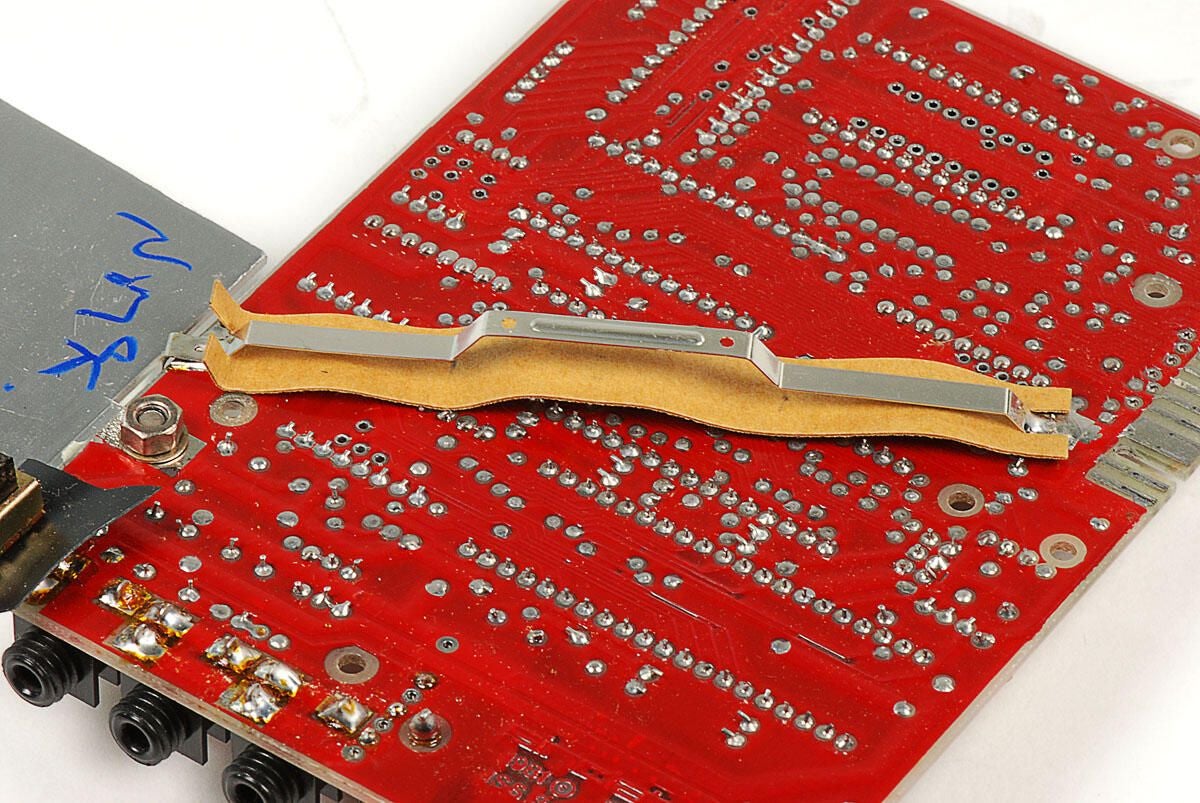
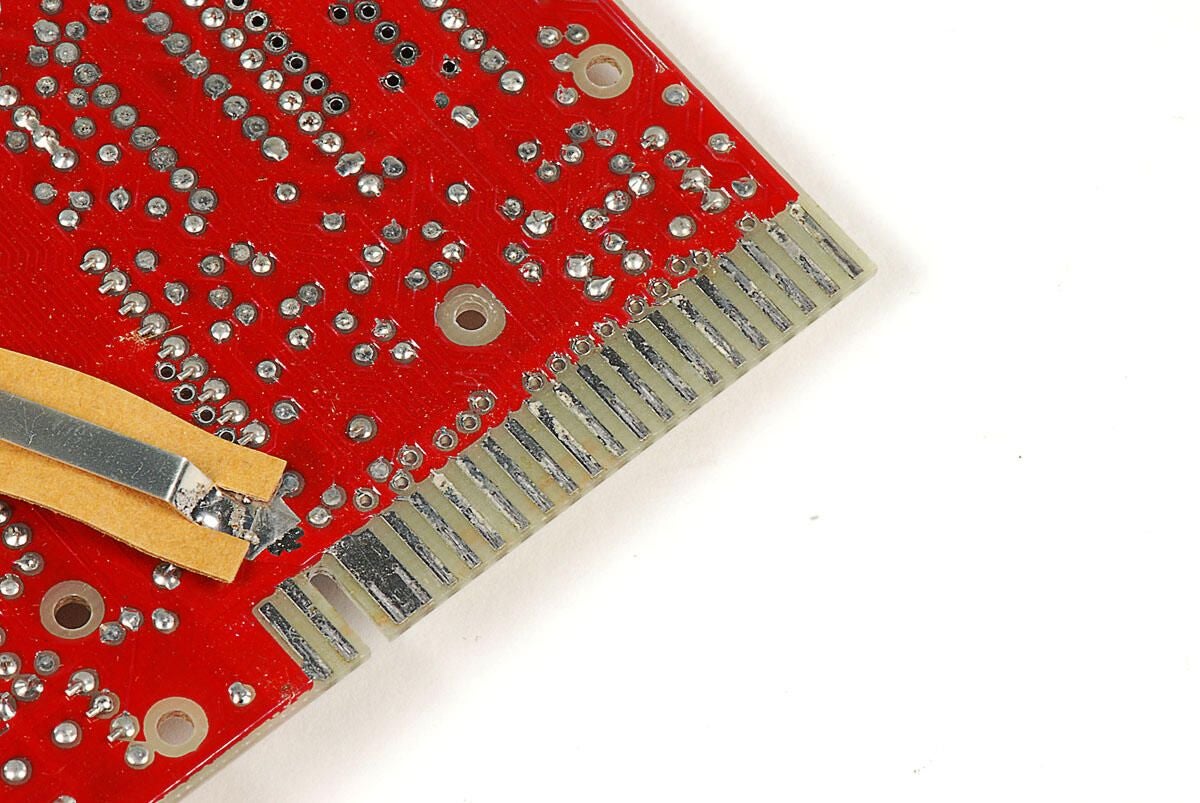
\n\tI’m not exactly sure what purpose this large metal strip serves. Both ends are soldered to the main PCB and there’s a cardboard strip positioned under it–to prevent it from touching any of the other solder pionts. Judging from the strip’s shape, it appears to touch the inside of the case’s lower half.
\n
\n\tI’ve seen photos of other ZX81 PCBs that lack both this metal strip and the silver-colored coating inside the case.
\n
\n\tPhoto by: Bill Detwiler / TechRepublic
\n\tCaption by: Bill Detwiler
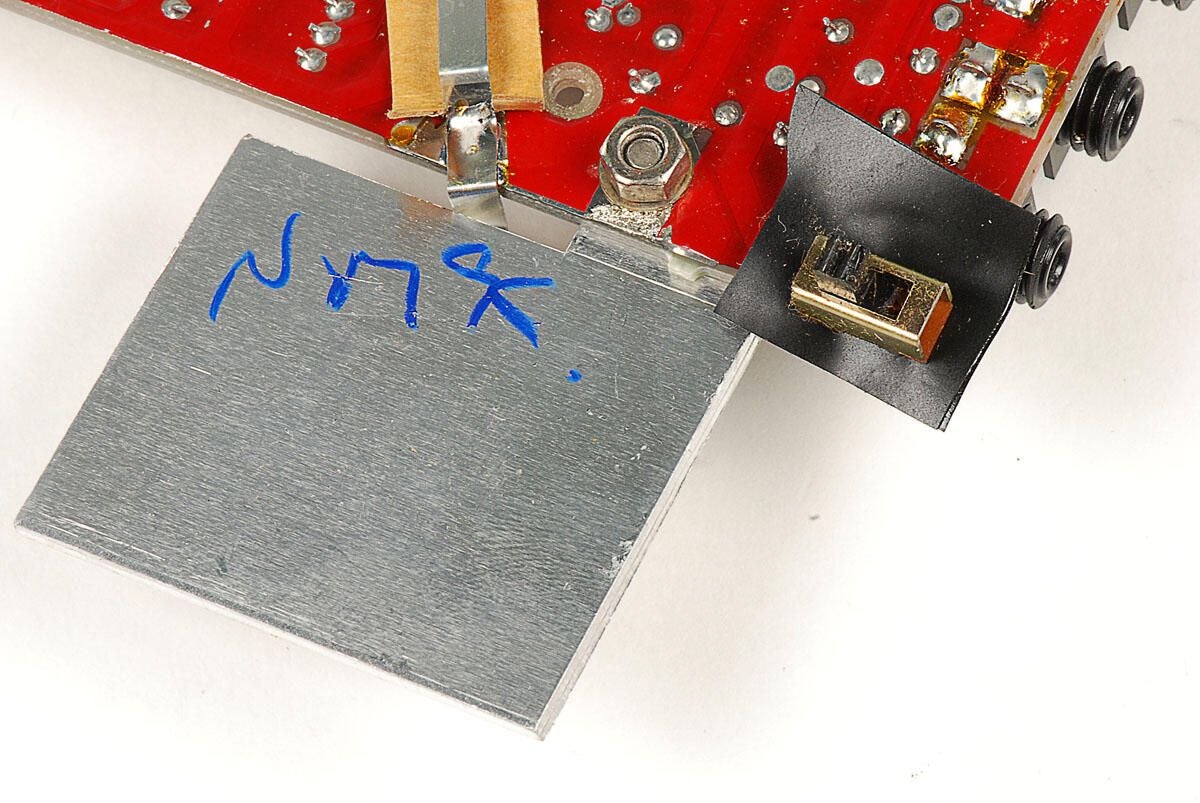
\n\tAs with the thin metal strip running along the bottom of the PCB, I’m not exactly sure about the purpose of this large metal fin. On the other side, it’s attached to the same point on the PCB as a positive voltage regulator.
\n
\n\tAnd the metal strip, shown in the previous photo, is bent over it.
\n
\n\tPhoto by: Bill Detwiler / TechRepublic
\n\tCaption by: Bill Detwiler
\n\tPhoto by: Bill Detwiler / TechRepublic
\n\tCaption by: Bill Detwiler

\n\tPhoto by: Bill Detwiler / TechRepublic
\n\tCaption by: Bill Detwiler
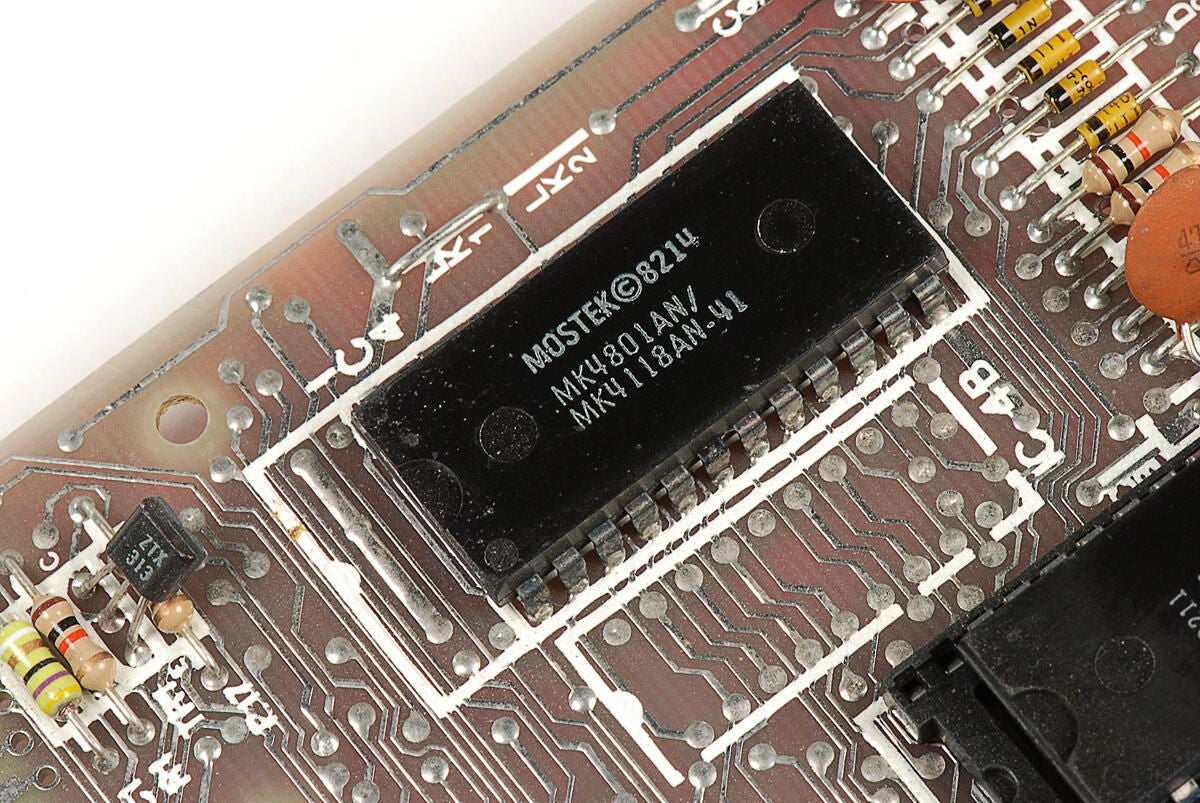
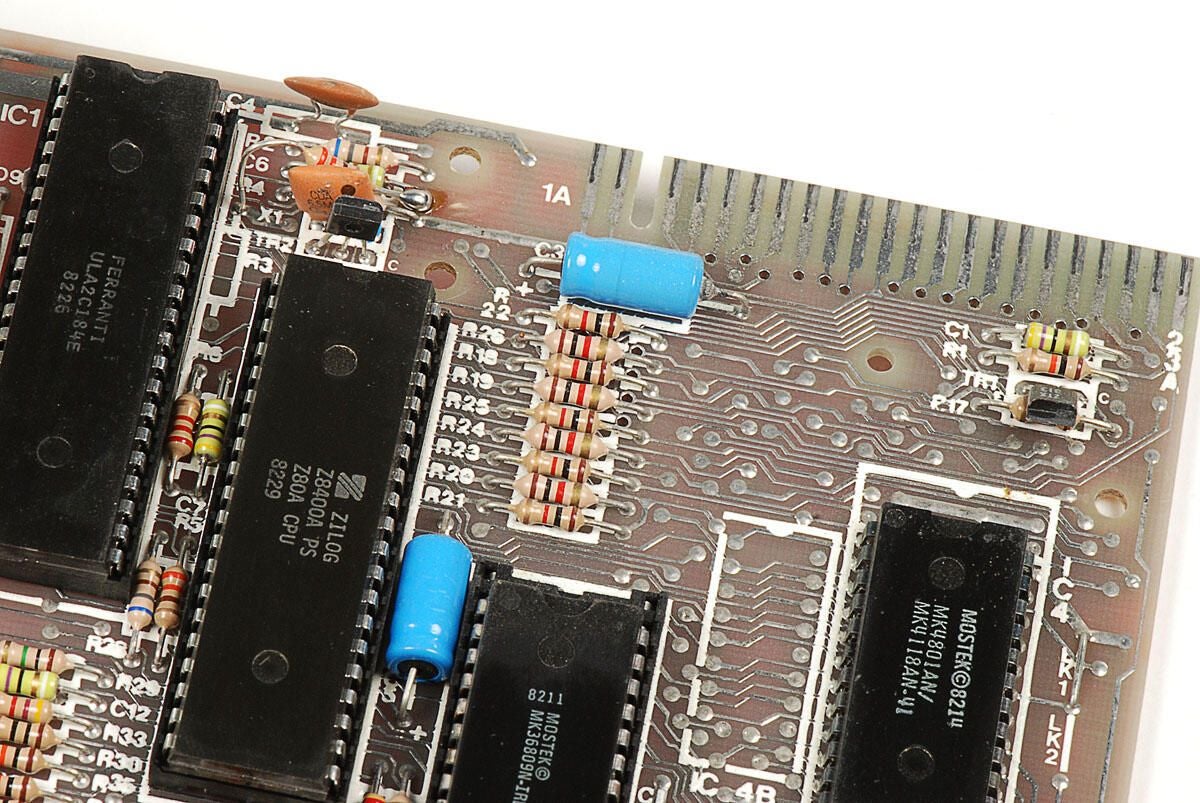
\n\tThe Sinclair ZX81 had 1kB of integrated RAM. The memory was provided by either one 4118 chip or two 2118 chips. This ZX81 has a single Mostek MK4801 / MK4118 chip.
\n
\n\tPhoto by: Bill Detwiler / TechRepublic
\n\tCaption by: Bill Detwiler
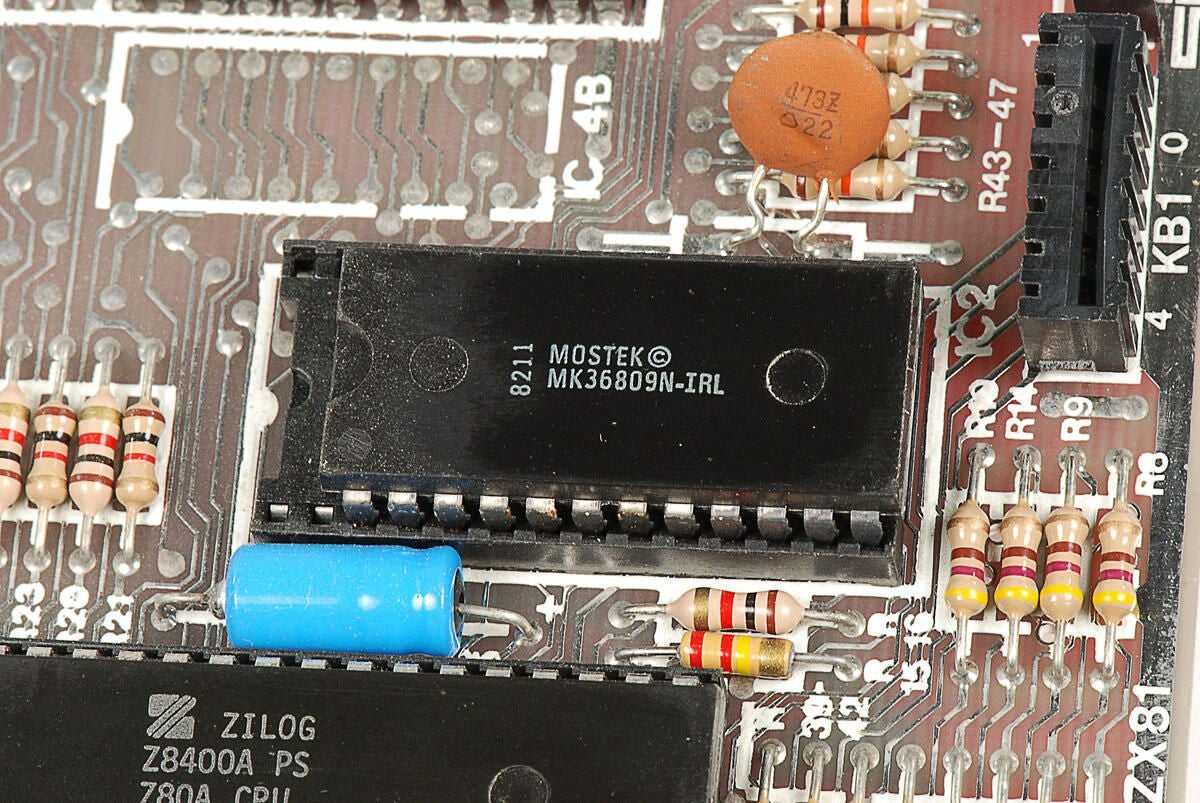
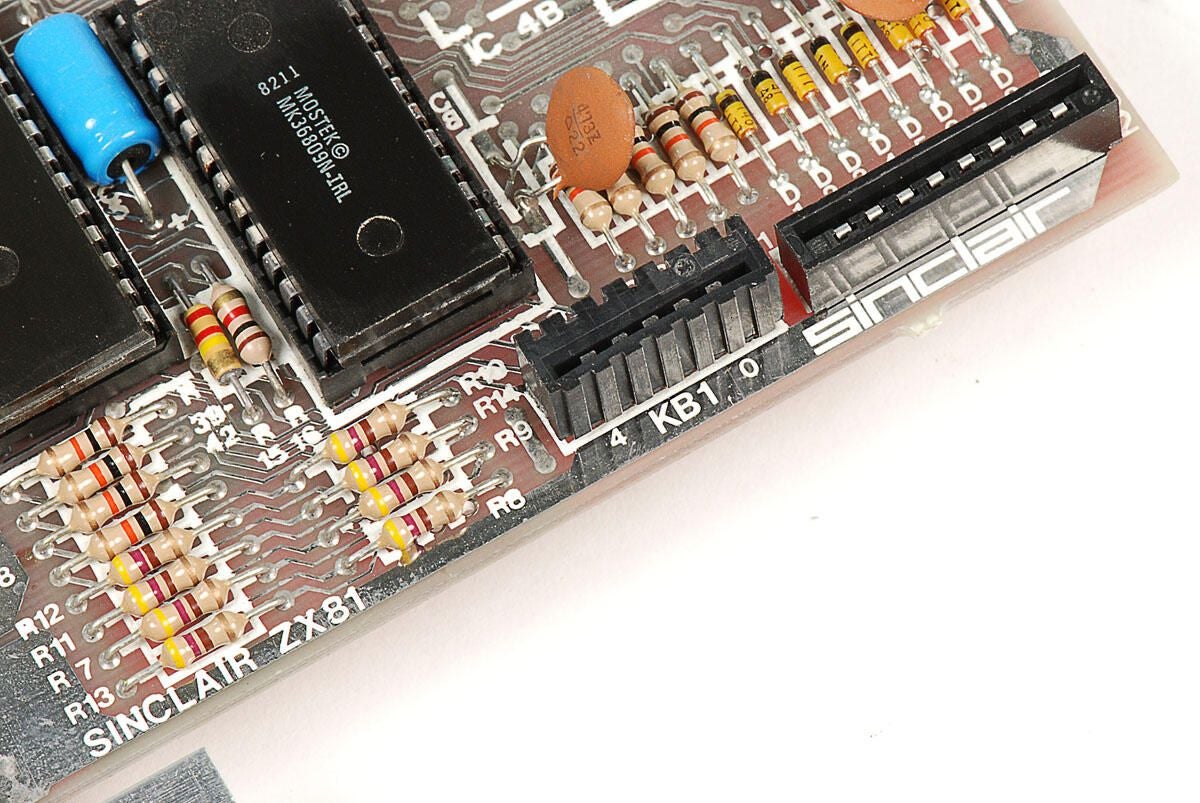
\n\tThis Mostek 8kB ROM (MK36809N-IRL) was used to store the Sinclair ZX81’s BASIC interpreter.
\n
\n\tPhoto by: Bill Detwiler / TechRepublic
\n\tCaption by: Bill Detwiler
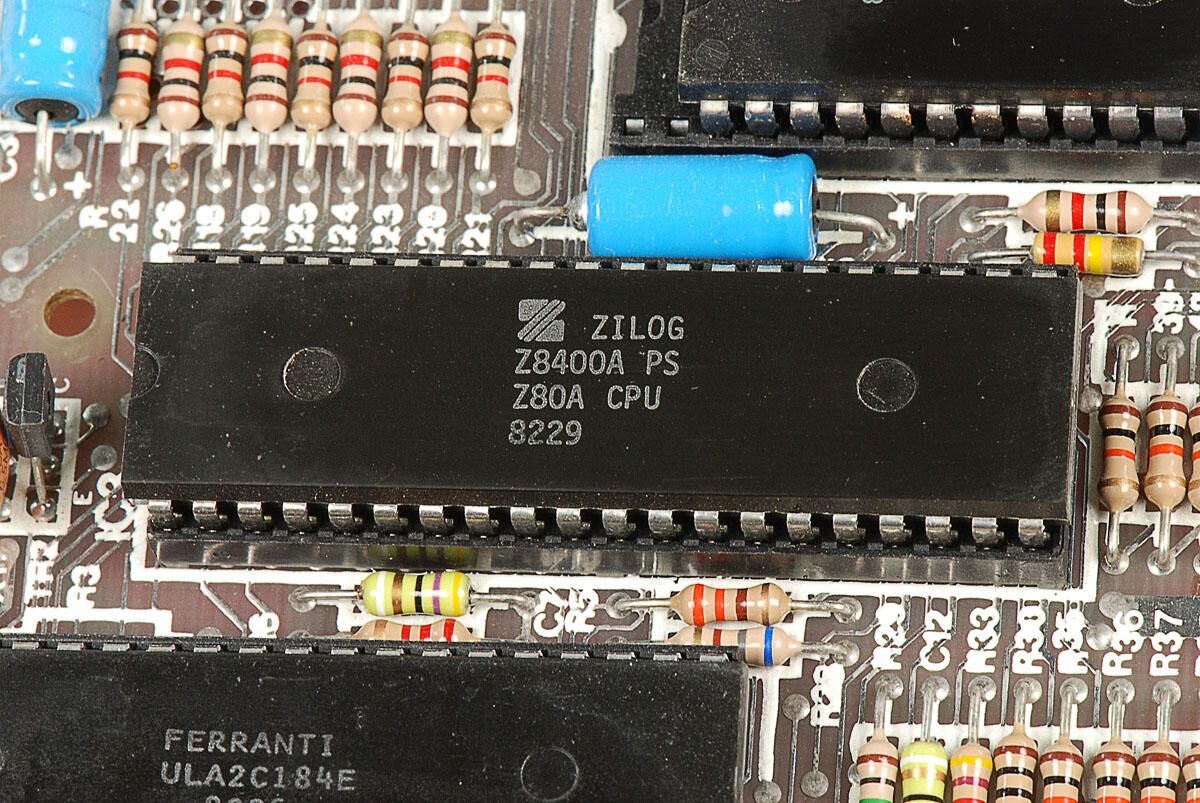
\n\tThis Sinclair ZX81 has a Zilog 3.5MHz Z80 processor (Z8400A PS Z80A CPU 8229). Nippon Electric Company (now more commoly known as NEC) also made Z80A CPUs for the ZX81.
\n
\n\tPhoto by: Bill Detwiler / TechRepublic
\n\tCaption by: Bill Detwiler
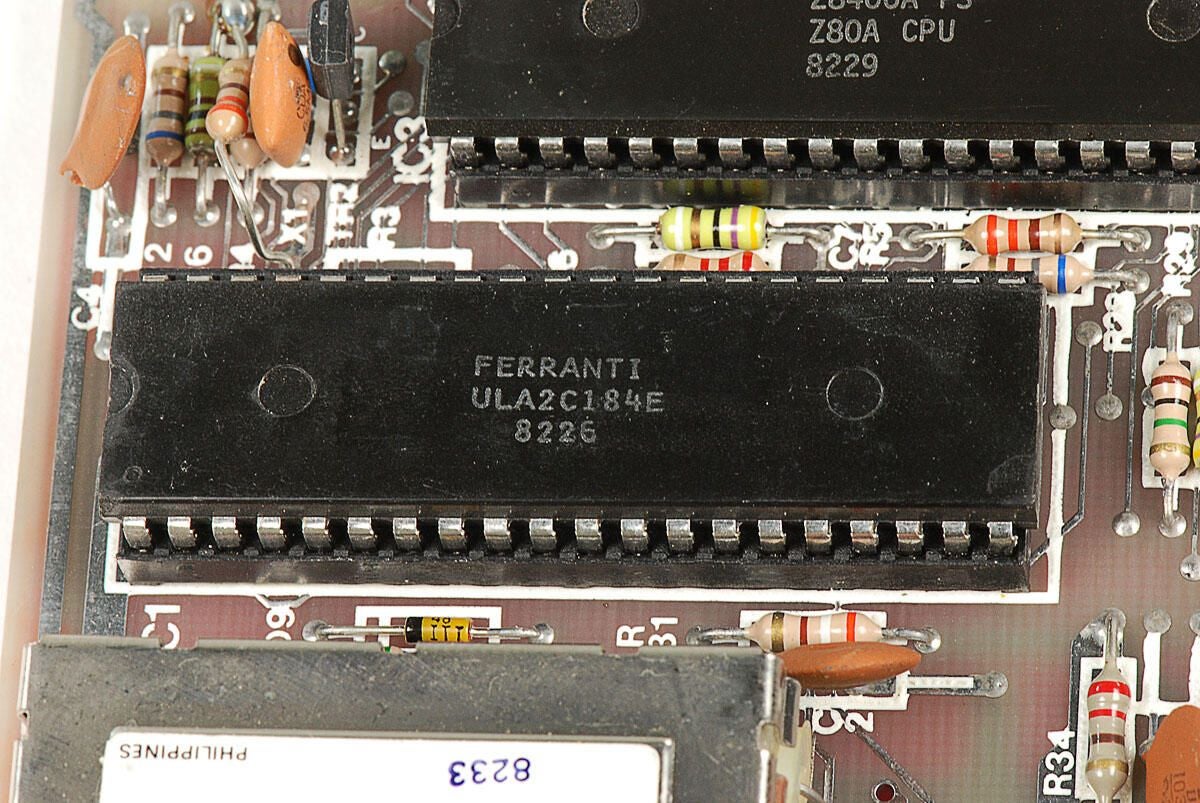
\n\tThe Ferranti uncommitted logic array (ULA) chip (ULA2C184E 8226) handled several functions for the Sinclair ZX81, such as detecting keyboard activity, synchronizing the display, and processing the audio signals used for saving and retrieving data from the cassette tape.
\n
\n\tPhoto by: Bill Detwiler / TechRepublic
\n\tCaption by: Bill Detwiler
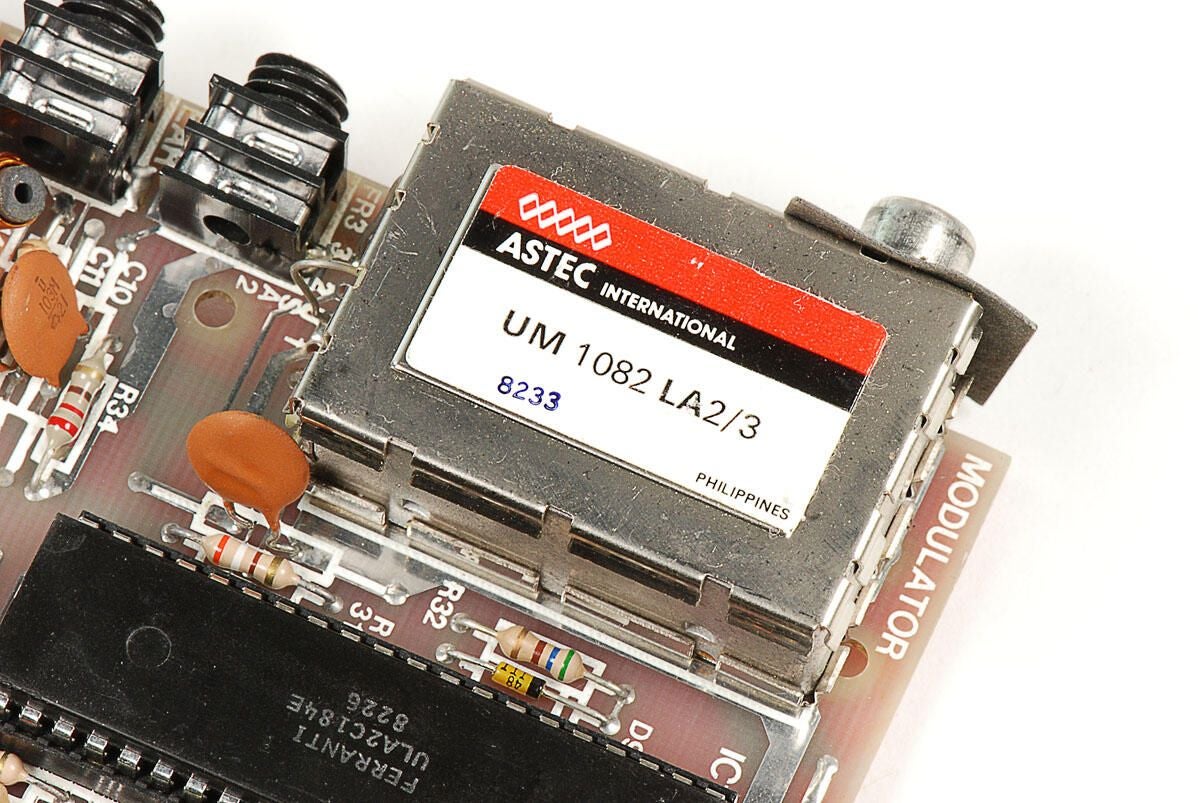
\n\tThe Sinclair ZX81’s ASTEC (UM 1082 LA2/3) RF Modulator can generate signals for both UHF and VHF televisions. Being manufactured for sale in the United States, this unit is likely set for VHF.
\n
\n\tPhoto by: Bill Detwiler / TechRepublic
\n\tCaption by: Bill Detwiler
\n\tPhoto by: Bill Detwiler / TechRepublic
\n\tCaption by: Bill Detwiler
\n\tPhoto by: Bill Detwiler / TechRepublic
\n\tCaption by: Bill Detwiler
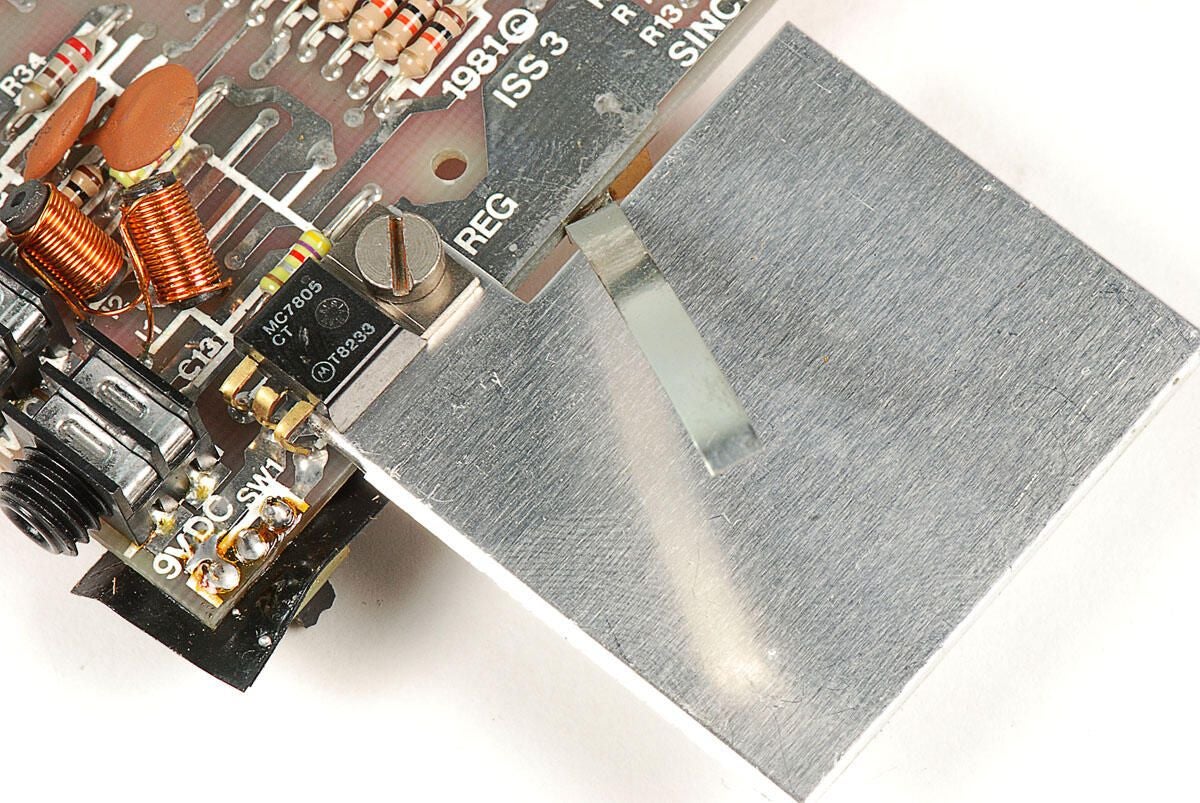
\n\tOn top of the Sinclair ZX81’s PCB, the thin metal strip and larger metal square meet. The metal strip is bent in such a way that when the ZX81’s case is closed, the strip should touch both the square and the plastic case’s inner wall.
\n
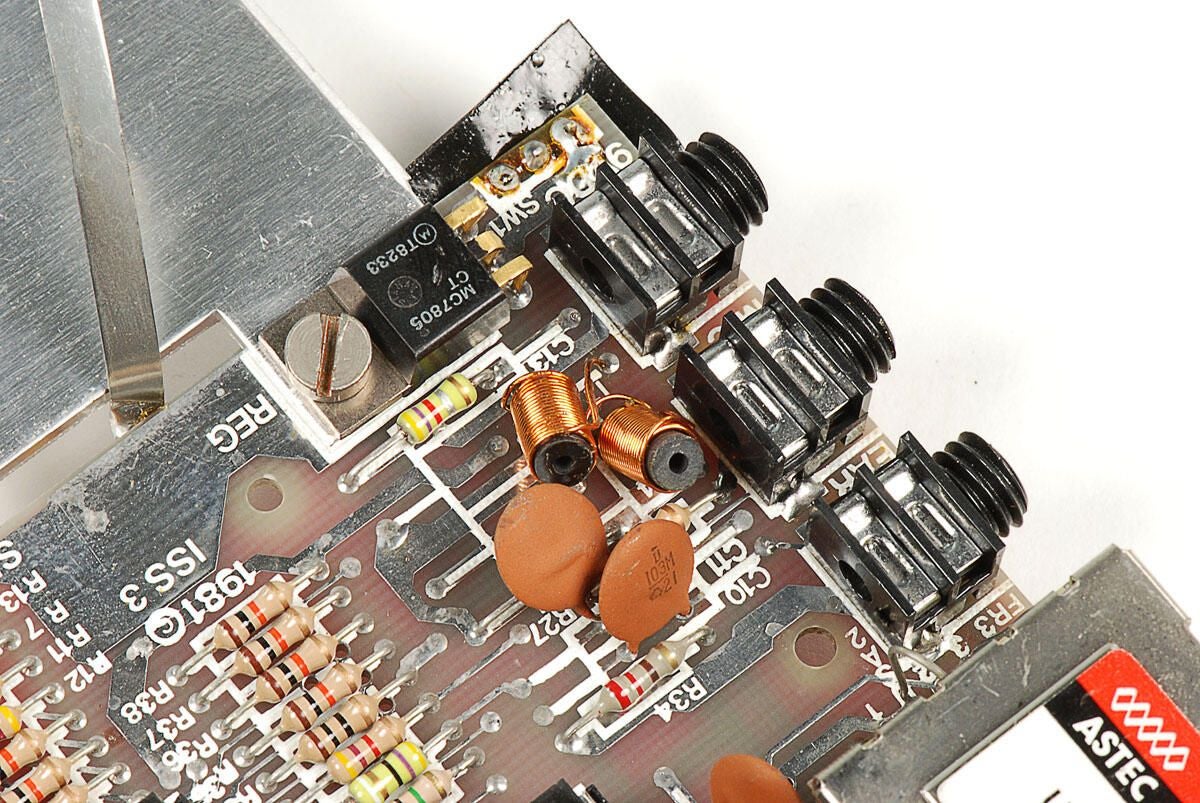
\n\tAn MC7805 positive voltage regulator is also mounted to the same contact point as the metal square.
\n
\n\tPhoto by: Bill Detwiler / TechRepublic
\n\tCaption by: Bill Detwiler
\n\tPhoto by: Bill Detwiler / TechRepublic
\n\tCaption by: Bill Detwiler
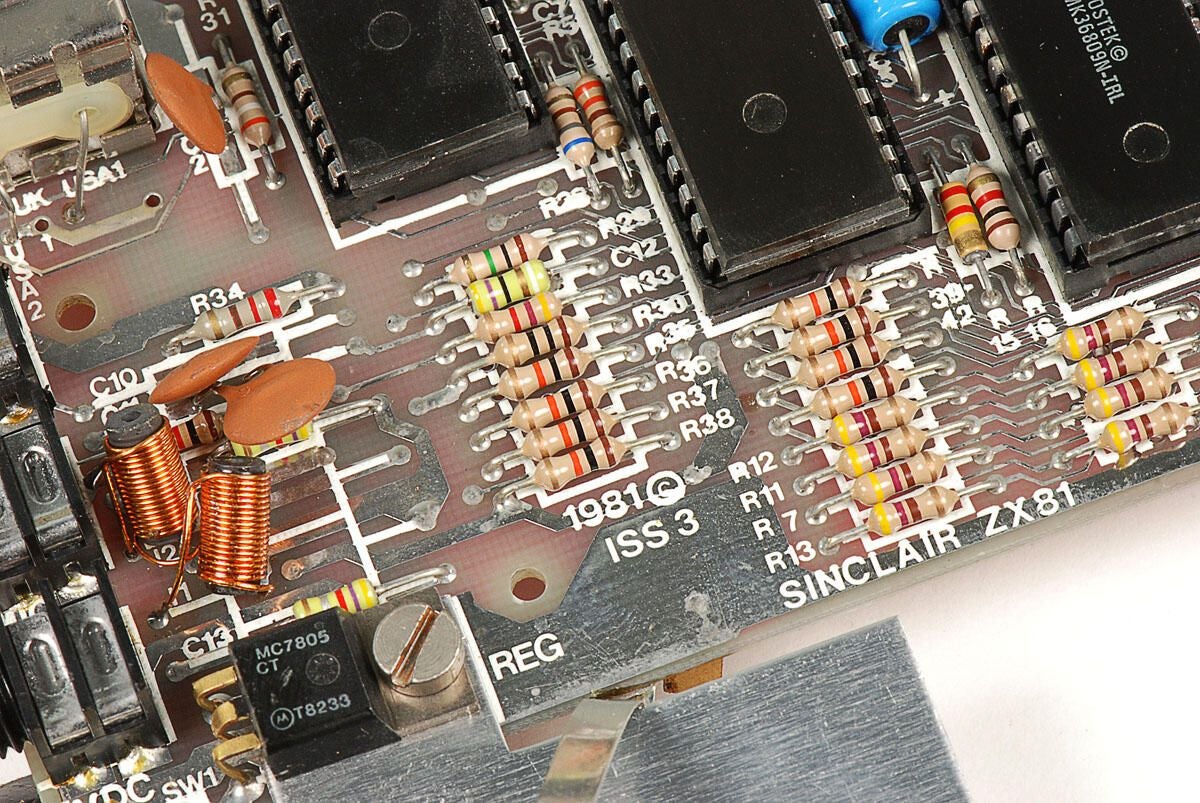
\n\tAlong with the four main chips, the Sinclair ZX81’s main PCB is filled with resistors and capasitors.
\n
\n\tThat about does it for the ZX81, let’s look at the 16kB external memory module.
\n
\n\tPhoto by: Bill Detwiler / TechRepublic
\n\tCaption by: Bill Detwiler
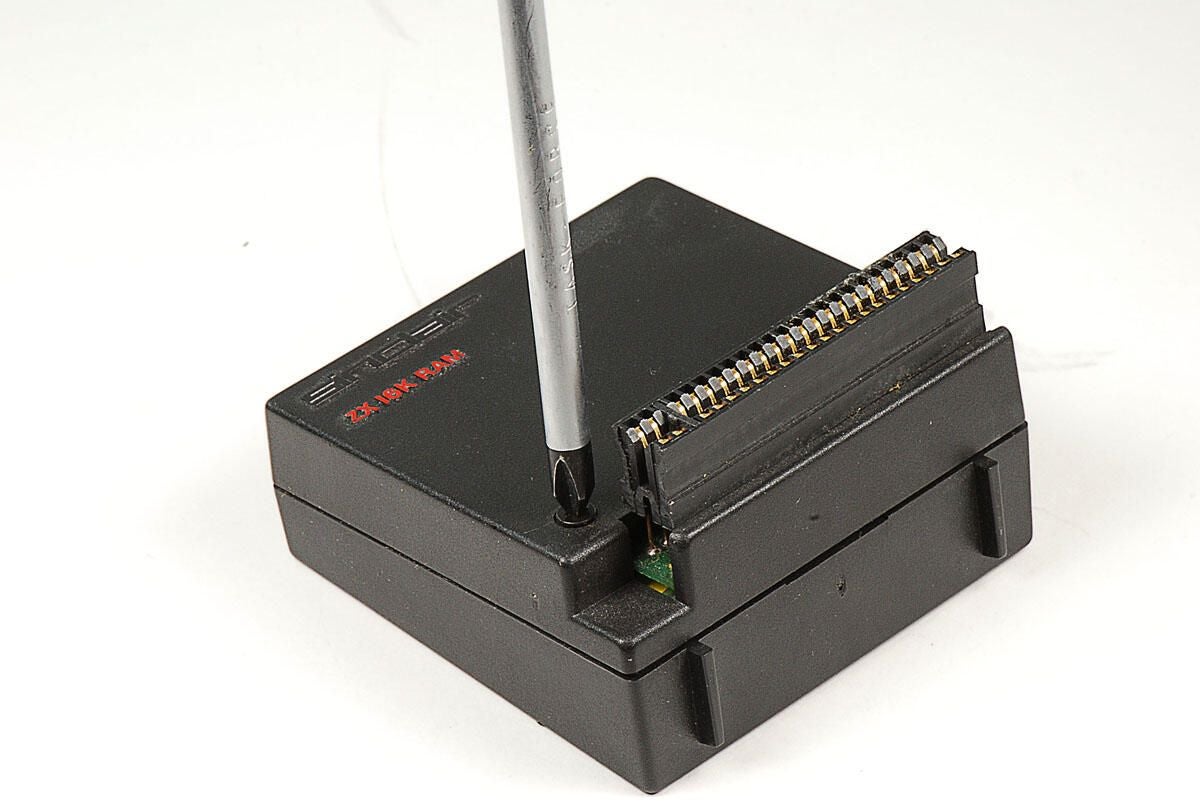
\n\tAs I noted earlier, the Sinclair ZX81 has 1kB of integrated RAM. You could expand the unit’s memory to 16kB with this ZX 16K RAM module, which connected to the unit via the edge connector.
\n
\n\tLike the ZX81, the RAM module’s case is held in place with standard Phillips screws. There are two screws on the front.
\n
\n\tPhoto by: Bill Detwiler / TechRepublic
\n\tCaption by: Bill Detwiler
\n\tThere are also two screws on the back of the Sinclair ZX81’s ZX 16K RAM module.
\n
\n\tPhoto by: Bill Detwiler / TechRepublic
\n\tCaption by: Bill Detwiler
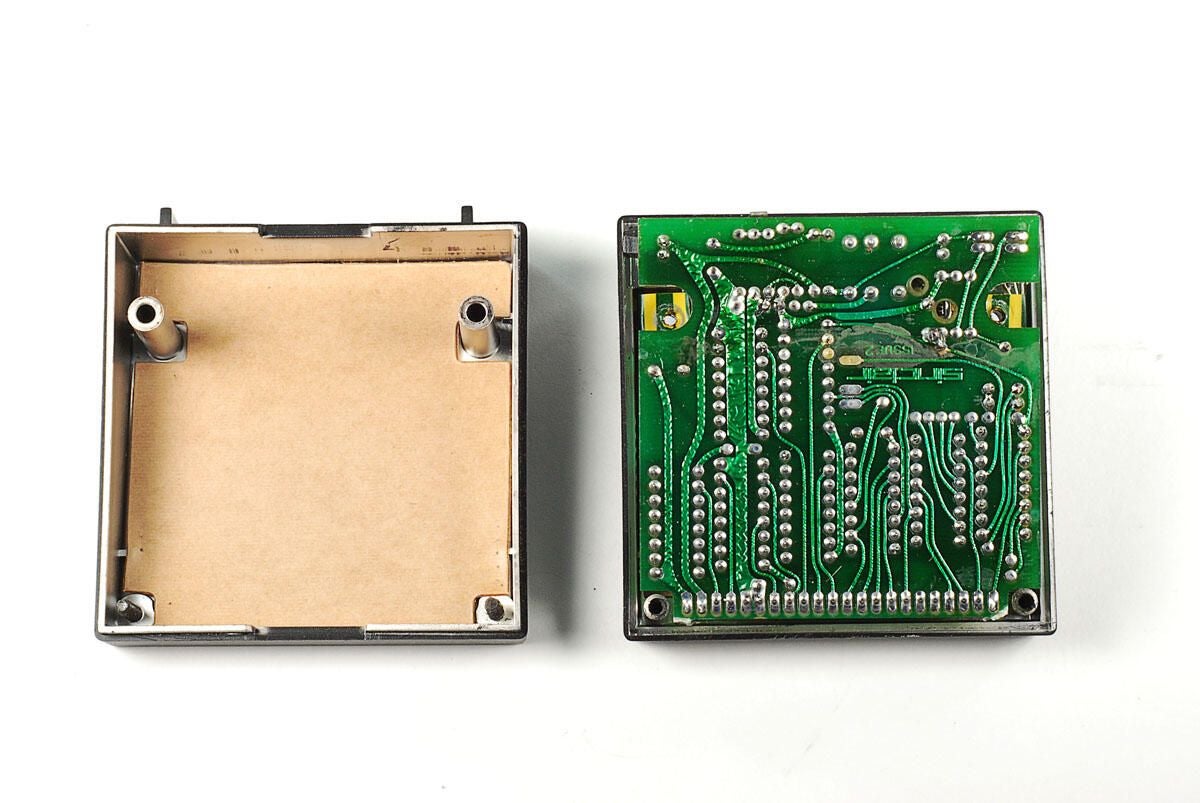
\n\tWith the four case screws removed, you can remove the back half of the ZX 16K RAM module’s case.
\n
\n\tPhoto by: Bill Detwiler / TechRepublic
\n\tCaption by: Bill Detwiler
\n\tA custom-cut piece of cardboard protects the solder points on the PCBs inside the ZX 16K RAM module. You don’t see this on modern-day computers.
\n
\n\tPhoto by: Bill Detwiler / TechRepublic
\n\tCaption by: Bill Detwiler
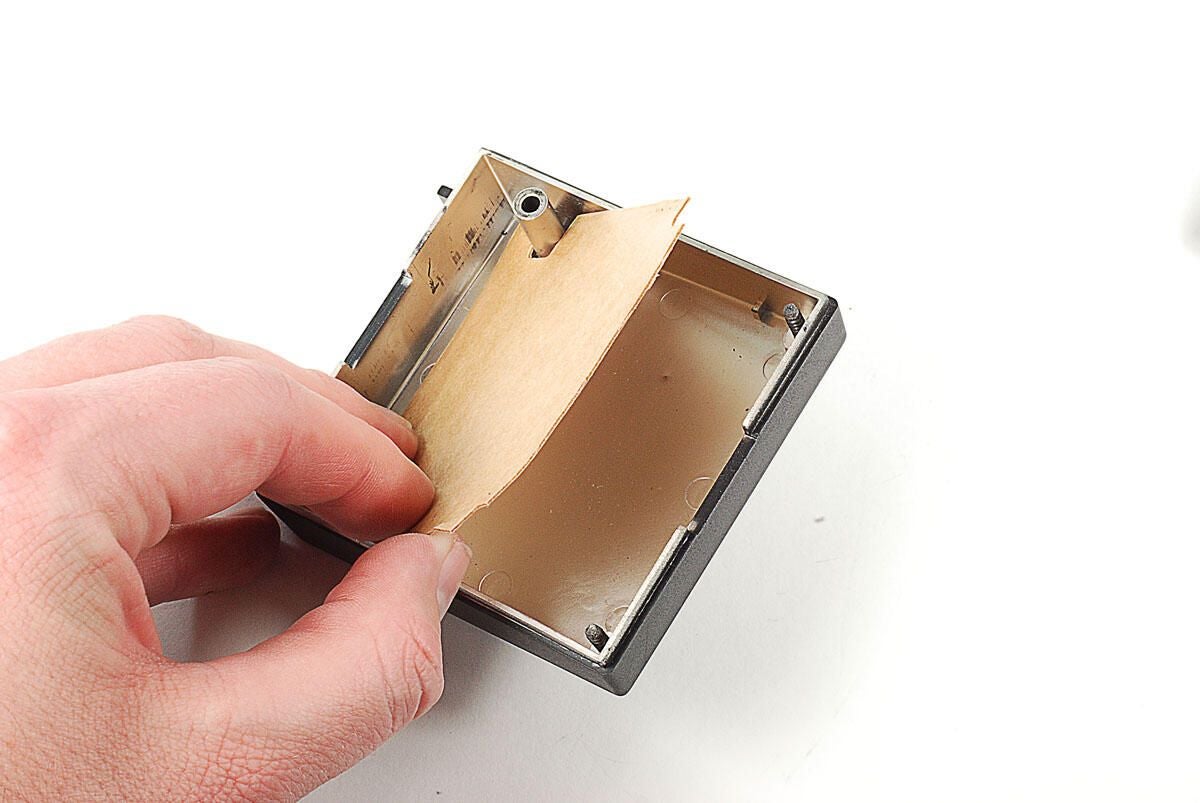
\n\tThe Sinclair ZX81’s ZX 16K RAM module conains two PCBs folded on top of each other. The PCBs are attached to each other with a short, bendable ribbon cable. You can lift both PCBs away from the front half of the plastic case as a single unit.
\n
\n\tPhoto by: Bill Detwiler / TechRepublic
\n\tCaption by: Bill Detwiler
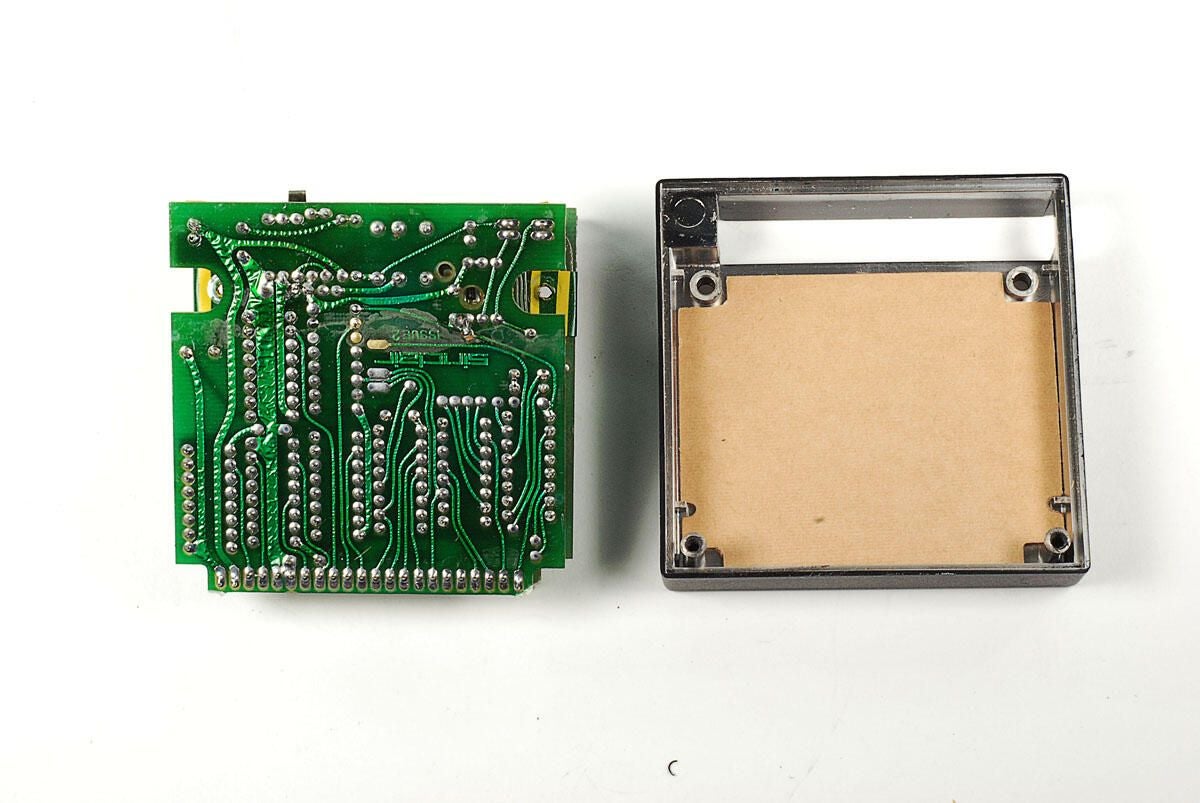
\n\tMore cardboard is located inside the front half of the ZX 16K RAM module’s plastic case.
\n
\n\tPhoto by: Bill Detwiler / TechRepublic
\n\tCaption by: Bill Detwiler

\n\tPhoto by: Bill Detwiler / TechRepublic
\n\tCaption by: Bill Detwiler
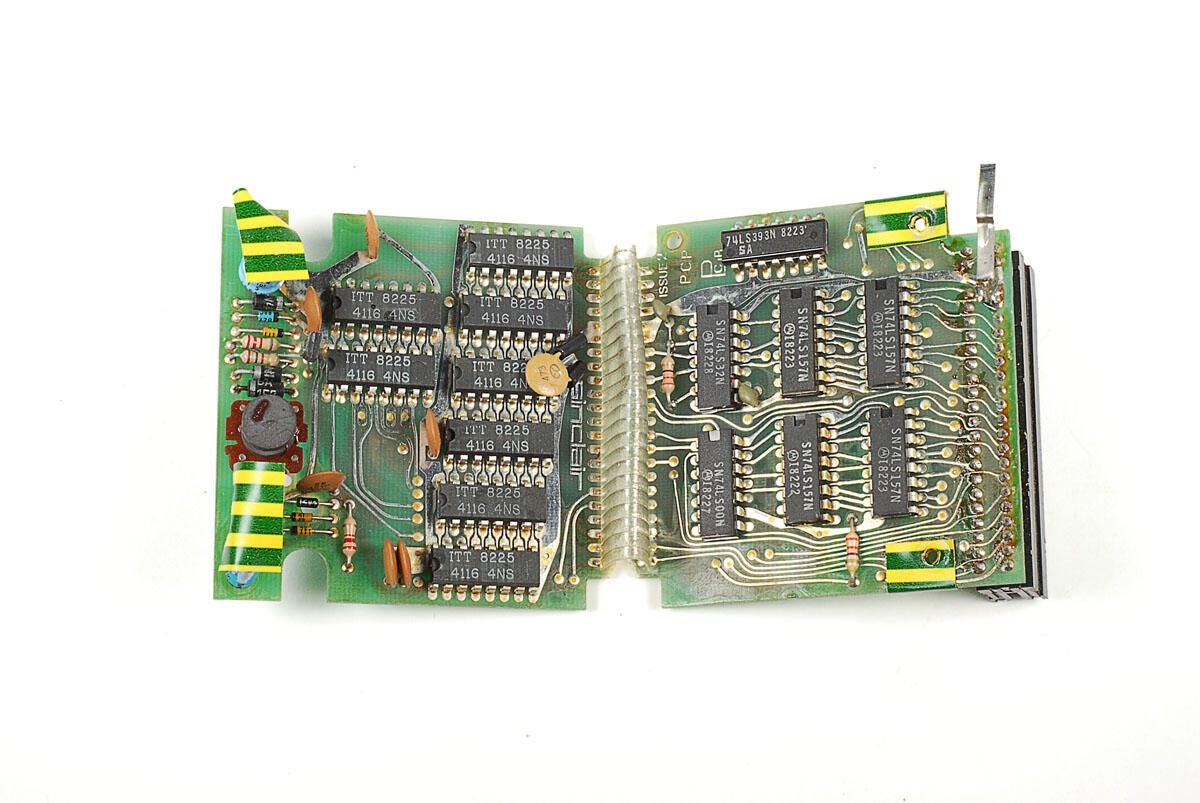
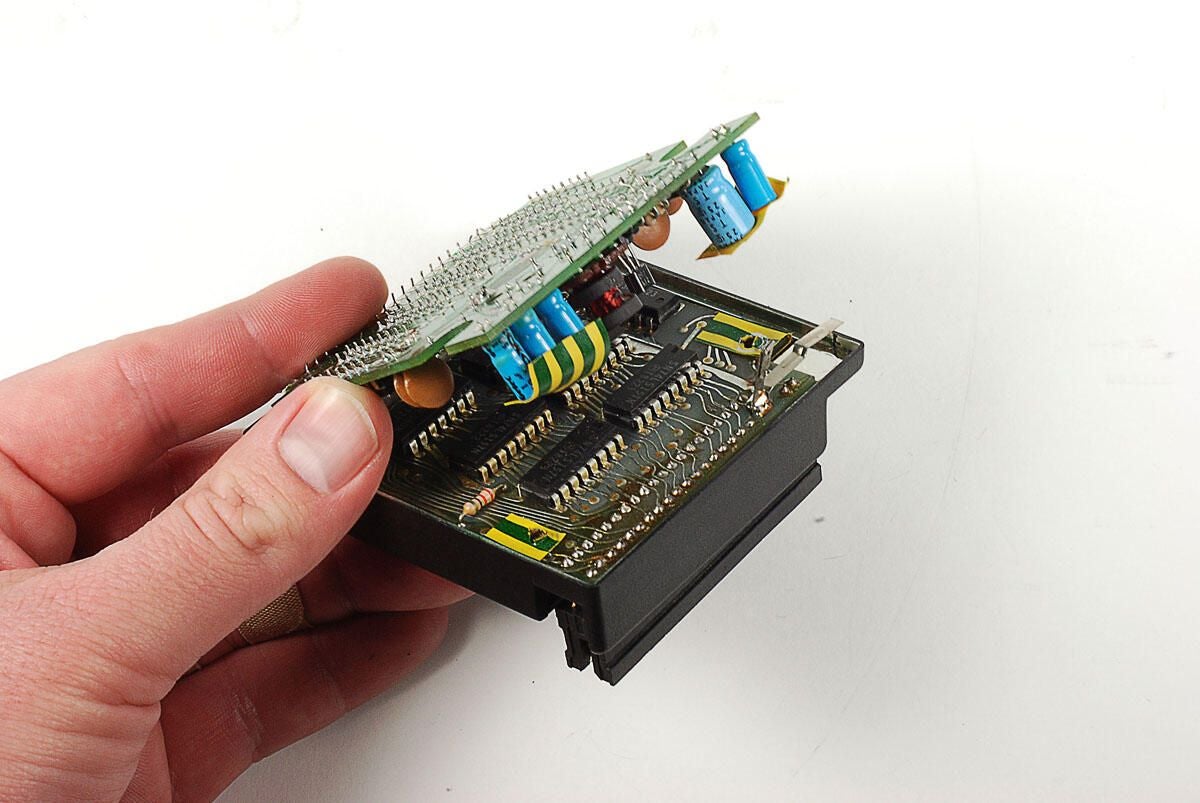
\n\tUnfolding the PCBs inside the ZX 16K RAM module, we can see the actual memory chips.
\n
\n\tPhoto by: Bill Detwiler / TechRepublic
\n\tCaption by: Bill Detwiler
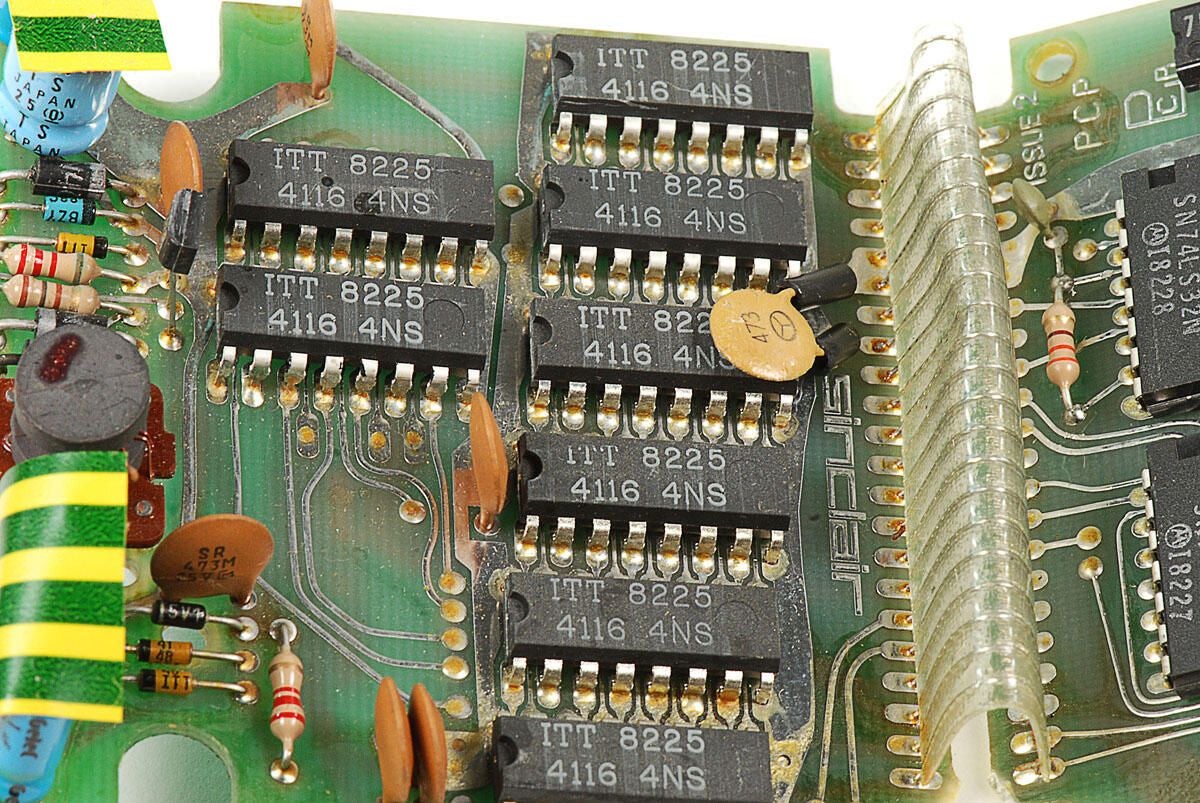
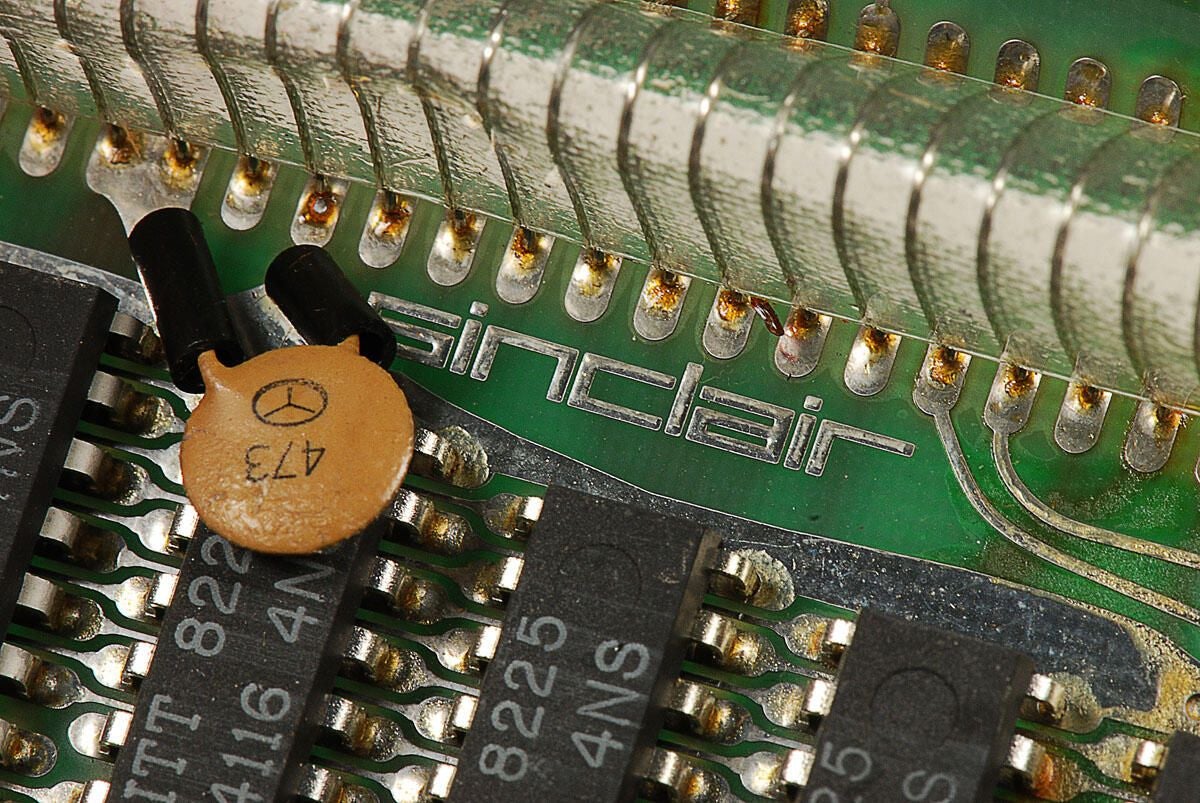
\n\tThe Sinclair ZX81’s ZX 16K RAM module contains eight chips with the markings ITT 8225 4116 4NS.
\n
\n\tPhoto by: Bill Detwiler / TechRepublic
\n\tCaption by: Bill Detwiler
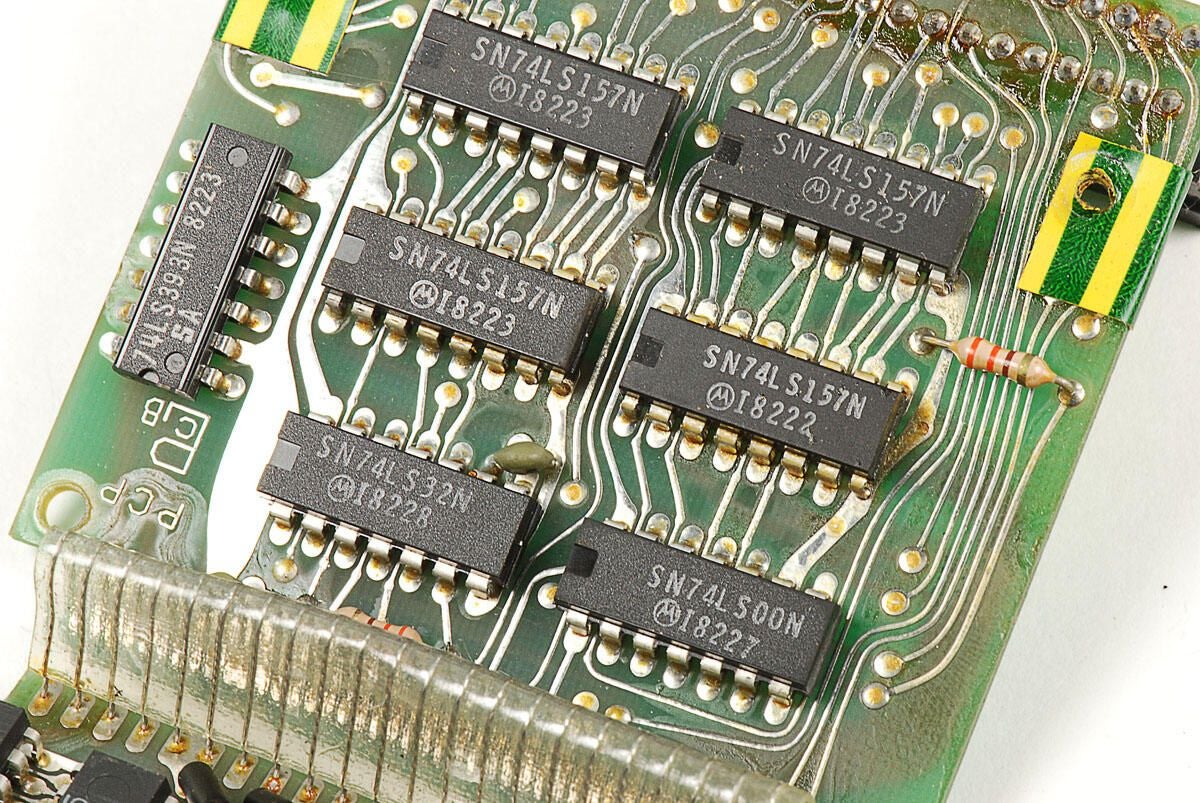
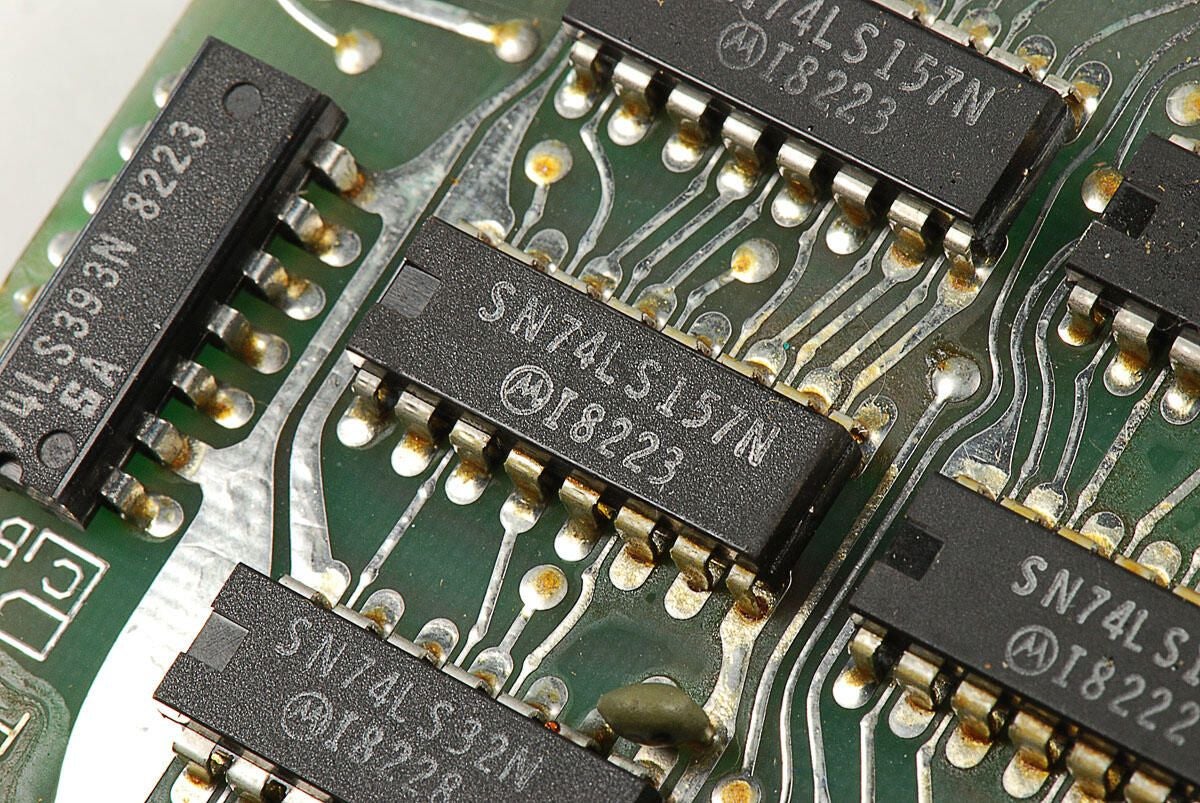
\n\tOn the other PCB inside the Sinclair ZX81’s ZX 16K RAM module are six Motorola chips with the markings SN74LS157N I8222.
\n
\n\tPhoto by: Bill Detwiler / TechRepublic
\n\tCaption by: Bill Detwiler
\n\tPhoto by: Bill Detwiler / TechRepublic
\n\tCaption by: Bill Detwiler
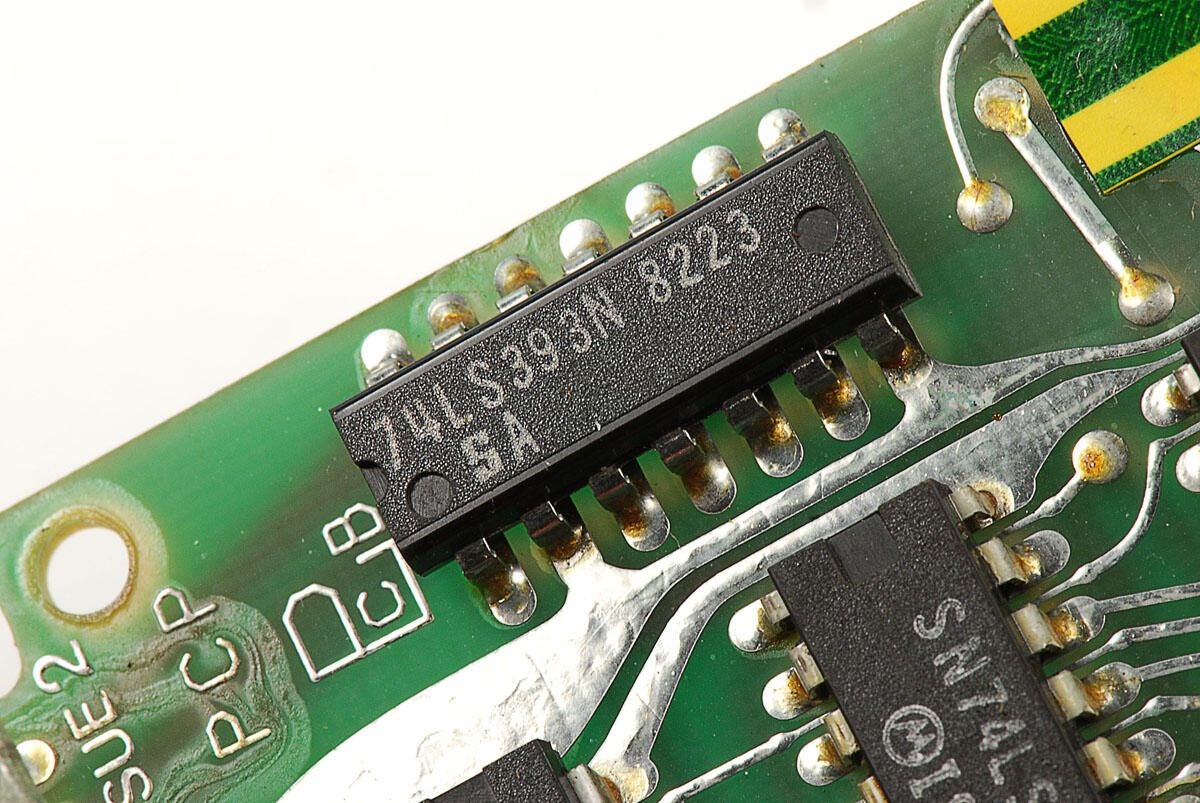
\n\tIn addition to the other two chips types, the Sinclair ZX81 ZX 16K RAM module contians a single chip with the markings 74LS393N 8223 SA.
\n
\n\tPhoto by: Bill Detwiler / TechRepublic
\n\tCaption by: Bill Detwiler
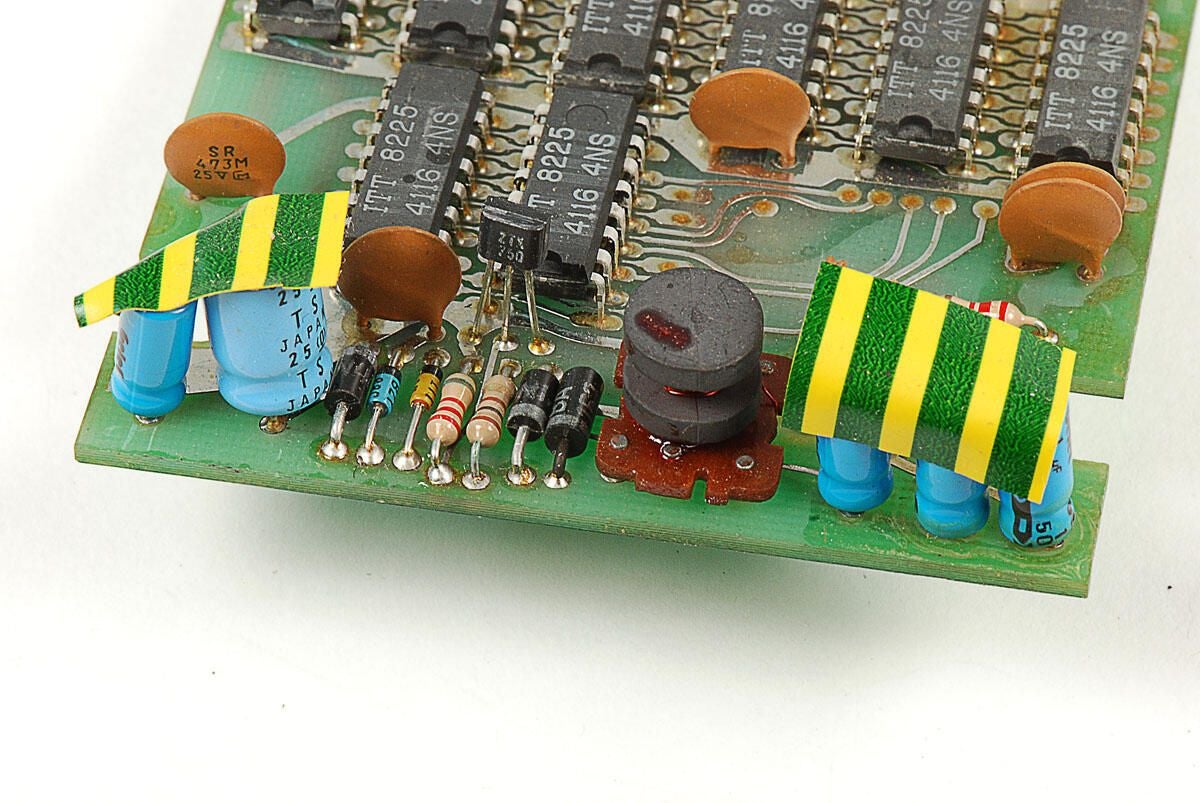
\n\tAlong with the three types of chips, the Sinclair ZX81 ZX 16K RAM module has several resistors, capacitors, and other electronic components.
\n
\n\tPhoto by: Bill Detwiler / TechRepublic
\n\tCaption by: Bill Detwiler
\n\tPhoto by: Bill Detwiler / TechRepublic
\n\tCaption by: Bill Detwiler
Bill Detwiler is the Editor for Technical Content and Ecosystem at Celonis. He is the former Editor in Chief of TechRepublic and previous host of TechRepublic's Dynamic Developer podcast and Cracking Open, CNET and TechRepublic's popular online show. Previously, Bill was an IT manager in the social research and energy industries. He has bachelor's and master's degrees from the University of Louisville, where he has also lectured on computer crime and crime prevention.
