\n\tLots of people have asked me whether I think Microsoft will put the Start Menu back in Windows 8 before the final release. Of course, I’d like to believe that Microsoft would come to their senses and say that it was all a mistake to remove the Start Menu, but I don’t think that’s very likely. In fact, not only is the Start Button gone from the Desktop, but when you click in the place where it used to exist, you get the Metro Start screen. Windows 8 is designed with Metro as the starting point and we’ll just have to get used to it – or will we?
\n
\n\tFortunately, I have discovered an Achilles’ heel in Microsoft’s evil plan to do away with the Start Menu. They may have been able to remove the GUI part of the Start Button/Menu, but they can’t remove the underlying structure of it without crippling the operating system’s backward compatibility support for pre-Windows 8 applications.
\n
\n\tIn this edition of the Windows Desktop Report, I’ll show you how to take advantage of this chink in the armor and revive a classic version of the Start Menu.
\n
\n\tNote: Keep in mind that this technique is being written for the Windows 8 Consumer Preview and the features I will discuss here may very well change between now and the time the operating system is actually released.
\n
\n\t\n\n
\n
\n
\n\tWhen you install any standard Windows application in Windows 8, the operating system redirects the installation procedure to create a tile in Metro. Even so, the installation procedure is designed to create folders and shortcuts to the application in the directory where the Start menu lives. In the case of Windows 7 and Windows 8, that directory is C:\\ProgramData\\Microsoft\\Windows\\Start Menu. Since that directory still exists in Windows 8 for the sake of backwards compatibility, you can take advantage of that fact along with the Taskbar’s Toolbar feature to revive a classic version of the Start Menu. Let’s take a closer look.
\n
\n
\n\tIn order to create your own Classic Start Menu in Windows 8, you’ll use the Toolbar feature. This feature has been a part of the Windows operating system for a long time and it allows you to create Toolbars right on the Taskbar.
\n
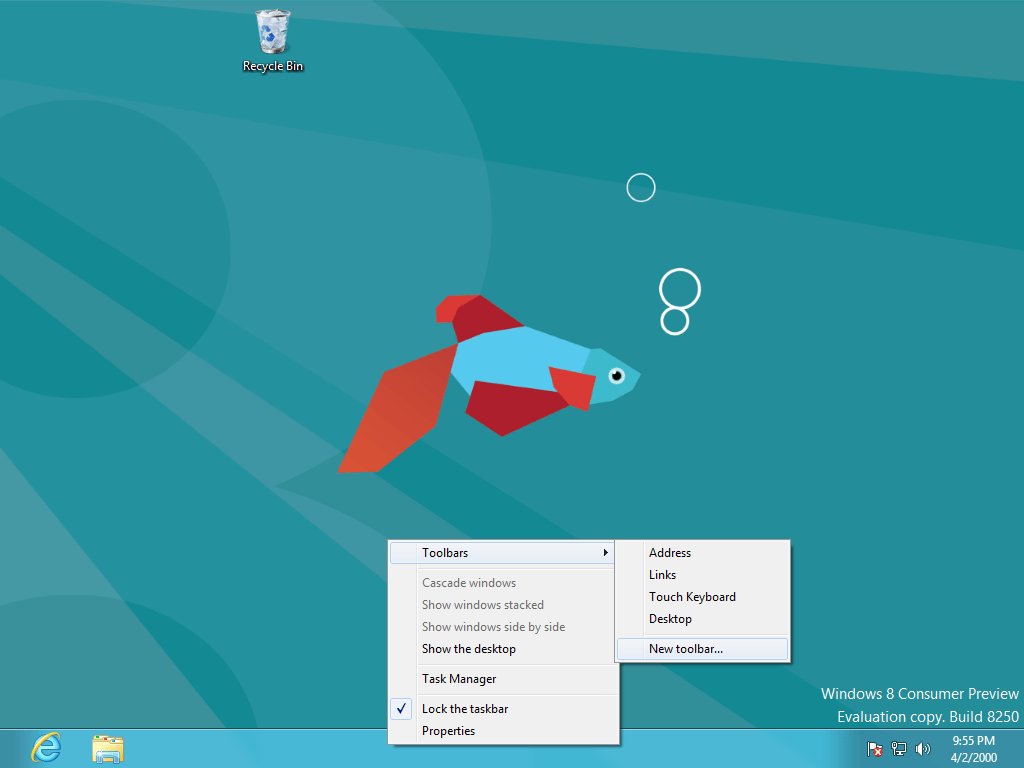
\n\tTo begin, right click an empty spot on the Taskbar, hover over Toolbars, and select the New Toolbar command, as shown. (Take note of the Lock the taskbar command, you’ll need to use it in an upcoming step.)
\n
\n
\n\t
\n\t\tThis gallery is also available as TechRepublic Microsoft Windows Blog post.
\n
\n
\n\tImages created by Greg Shultz for TechRepublic.
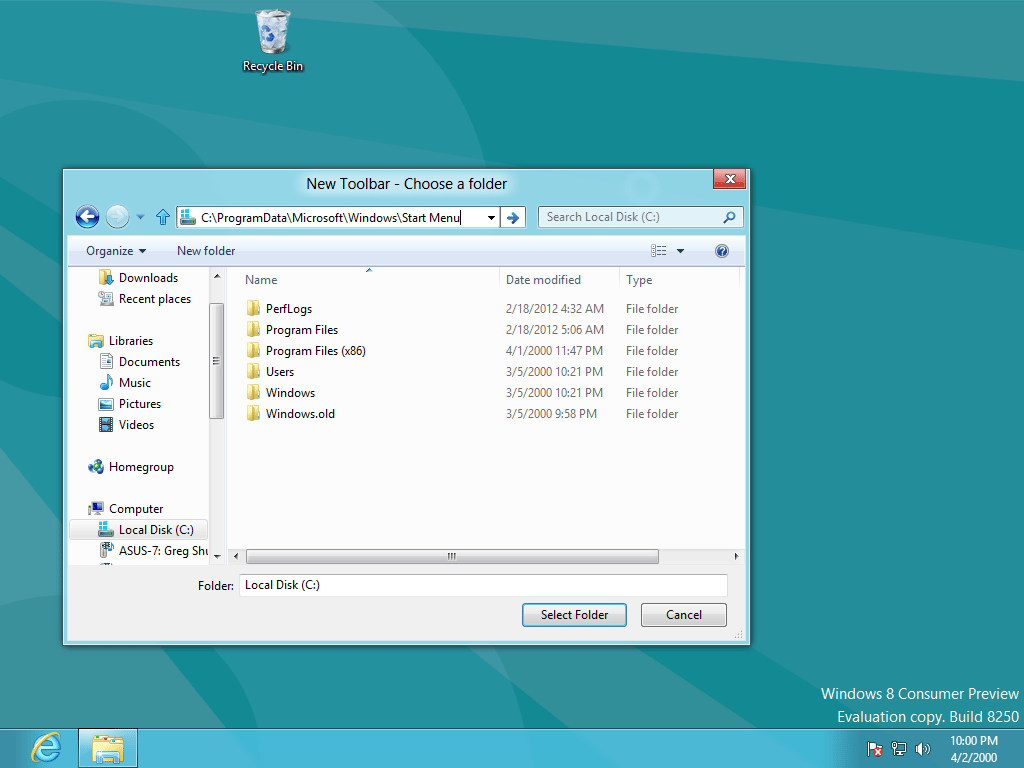
\n\tWhen you see the New Toolbar – Choose a folder dialog box; type the following path in the Folder text box, as shown.
\n
\n\tC:\\ProgramData\\Microsoft\\Windows\\Start Menu
\n
\n
\n\tImages created by Greg Shultz for TechRepublic.
\n\tTo continue, click the Select Folder button. You will then see the Start Menu Toolbar appear next to the Notification Area.
\n
\n
\n\tImages created by Greg Shultz for TechRepublic.
\n
\n\tAt this point, your Classic Start Menu contains the Programs menu and Windows Update. The Classic Start Menu also provides links to Documents, Settings, Search, and Shutdown. Fortunately, you can populate your Classic Start Menu with all these links. To do so, you will need to create shortcuts on your desktop and then move them to the C:\\ProgramData\\Microsoft\\Windows\\Start Menu folder.
\n
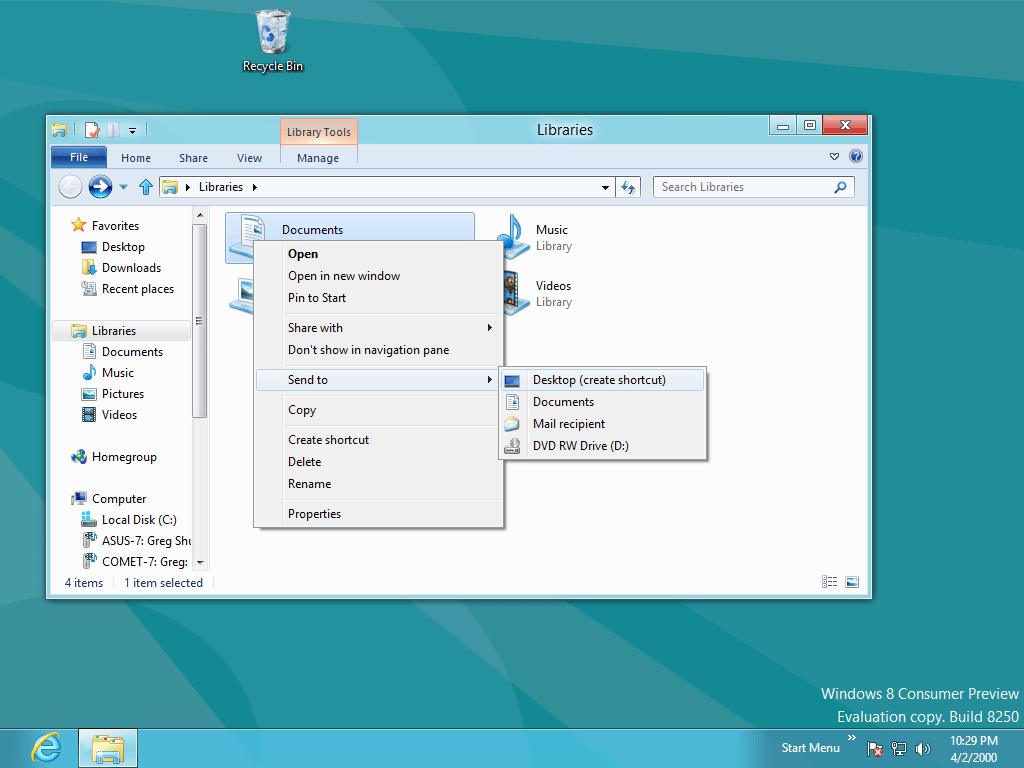
\n\tDocuments: To create a shortcut to Documents, launch Windows Explorer and it will open to the Libraries folder. Then, right click on Documents and select Send to | Desktop (create shortcut) command. You can repeat this step if you want to put Pictures, Music, and Videos on your Start Menu.
\n
\n
\n\tImages created by Greg Shultz for TechRepublic.
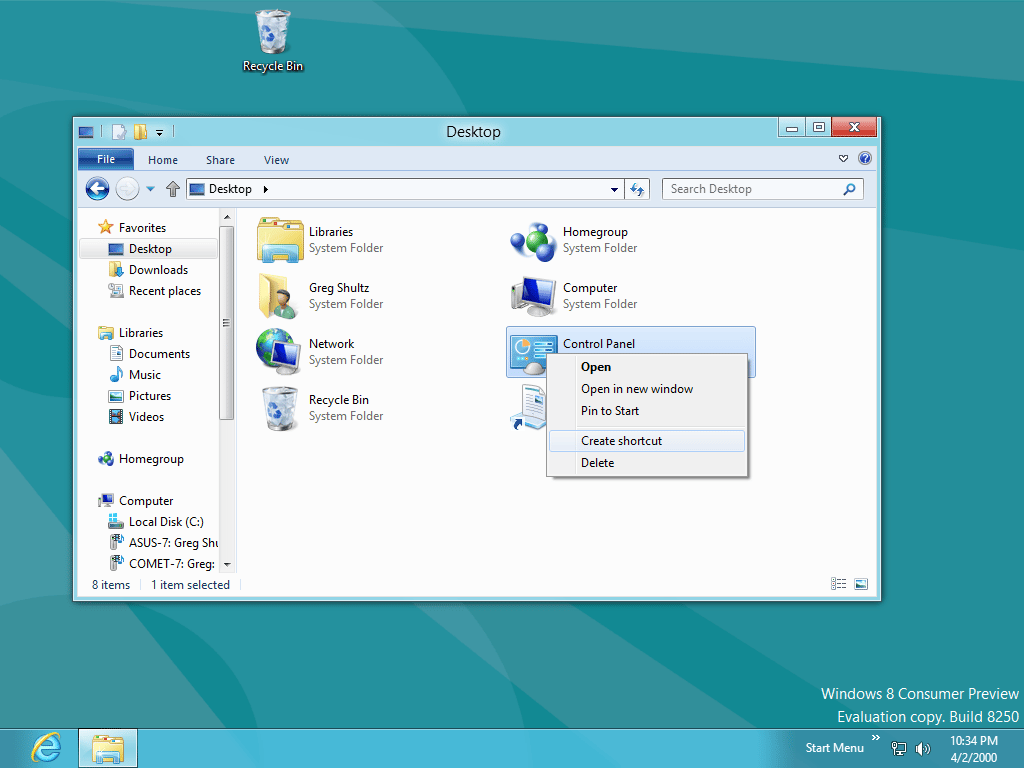
\n\tControl Panel: To create a shortcut to the Control Panel, select Desktop under the Favorites list in Windows Explorer. Then, right click on Control Panel and select Create shortcut. You can repeat this step is you want to put Computer and Network on your Start menu.
\n
\n
\n\tImages created by Greg Shultz for TechRepublic.
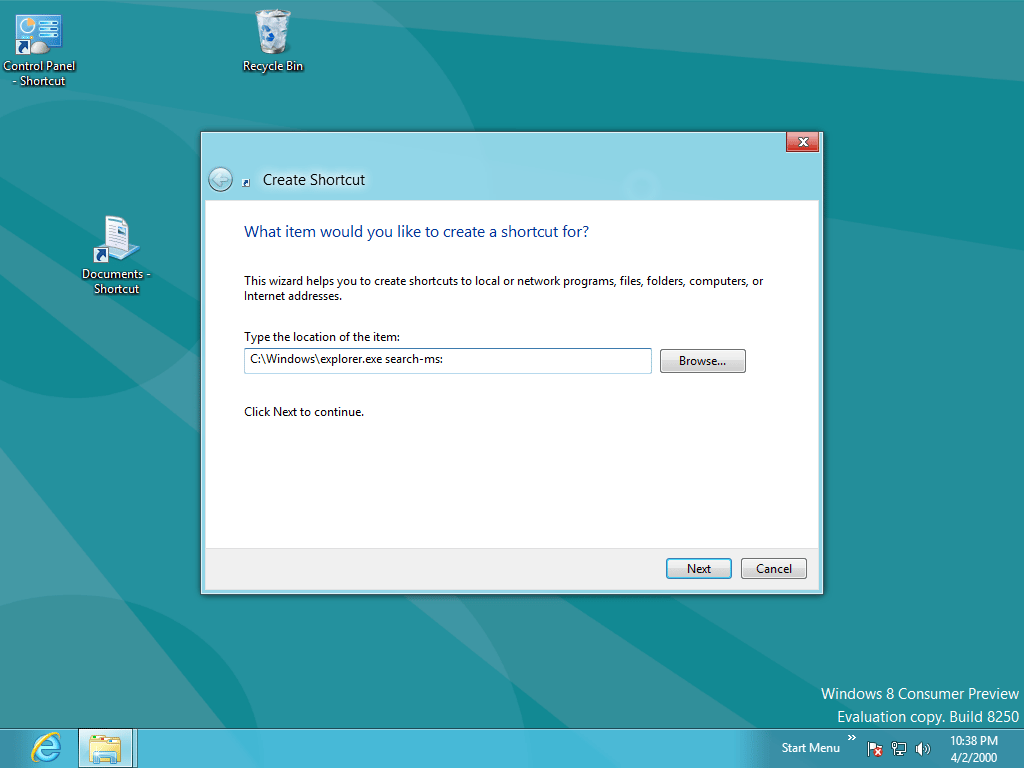
\n\tSearch: To create a shortcut to Search, right click on the Desktop and select the New | Shortcut command. When you see the Create Shortcut dialog box, type the following command in the Location text box. Be sure to include the colon at the very end of the command.
\n
\n\tC:\\Windows\\explorer.exe search-ms:
\n
\n\tTo continue, click Next and save the shortcut with the name Search.
\n
\n
\n\tImages created by Greg Shultz for TechRepublic.
\n\tShut Down: To create a shortcut to Shut down the computer, right click on the Desktop and select the New | Shortcut command. When you see the Create Shortcut dialog box, type the following in the Location text box:
\n
\n\tShutdown.exe -s
\n
\n\tTo continue, click Next and save the shortcut with the name Shut Down.
\n
\n\tWhen you create these shortcuts, Windows 8 appends “- shortcut” to each one. You can rename each to remove the unnecessary words.
\n
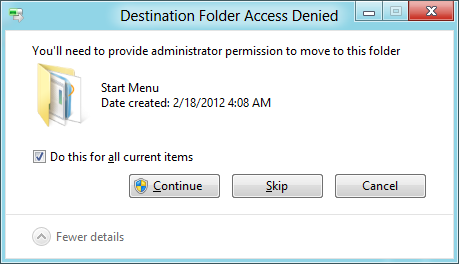
\n\tAt this point, launch Windows Explorer and navigate to the C:\\ProgramData\\Microsoft\\Windows\\Start Menu folder. Next, move all the shortcuts from your Desktop to the Start Menu folder. Because this folder is a special system folder, you will see a Destination Folder Access Denied dialog box, like the one shown. Select the Do this for all current items check box and click the Continue button to proceed with the Move operation.
\n
\n\tOf course, you can put the shortcuts to any of your applications that you want to appear on your Start Menu in this folder as well.
\n
\n
\n\tImages created by Greg Shultz for TechRepublic.
\n
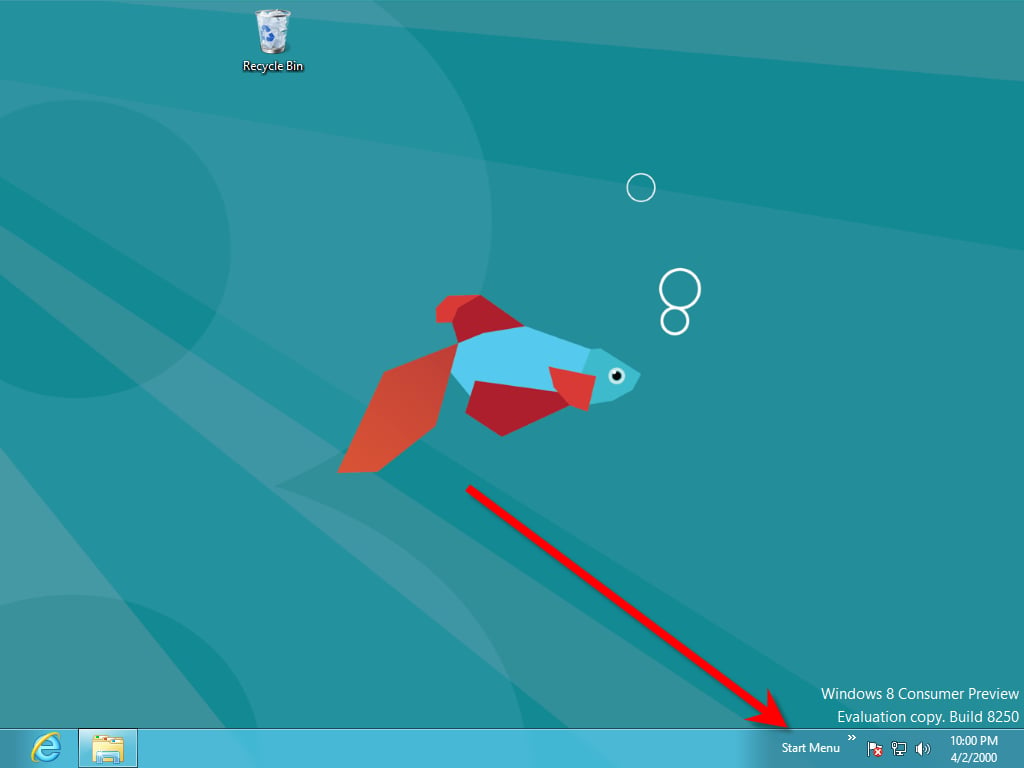
\n\tNow that you have created the Start Menu Toolbar, you’ll want to move it the left corner where the Start button used to be. Right click on the Taskbar and select Lock the taskbar to remove the check mark. Once the Taskbar is unlocked, hover your mouse pointer over the Toolbar handle, just to the left of the “S” in Start Menu. When the pointer turns into a double headed arrow, just click and drag the Toolbar handle over towards the left corner, as shown. As you do, drag the handle slightly under or over the icons on the Taskbar in order to get the Start Menu Toolbar to its new position.
\n
\n
\n\tImages created by Greg Shultz for TechRepublic.
\n\tWhen you position it, you’ll see all the folders inside of the Start Menu folder. To hide them, click and drag the Taskbar handle next to the Internet Explorer icon to the left to cover up those folders. Now, right click on the Taskbar and select the Lock the taskbar command. When you do, you’ll notice a slight side effect – just an edge of the Windows Update icon appears; however, it is nothing to worry about.
\n
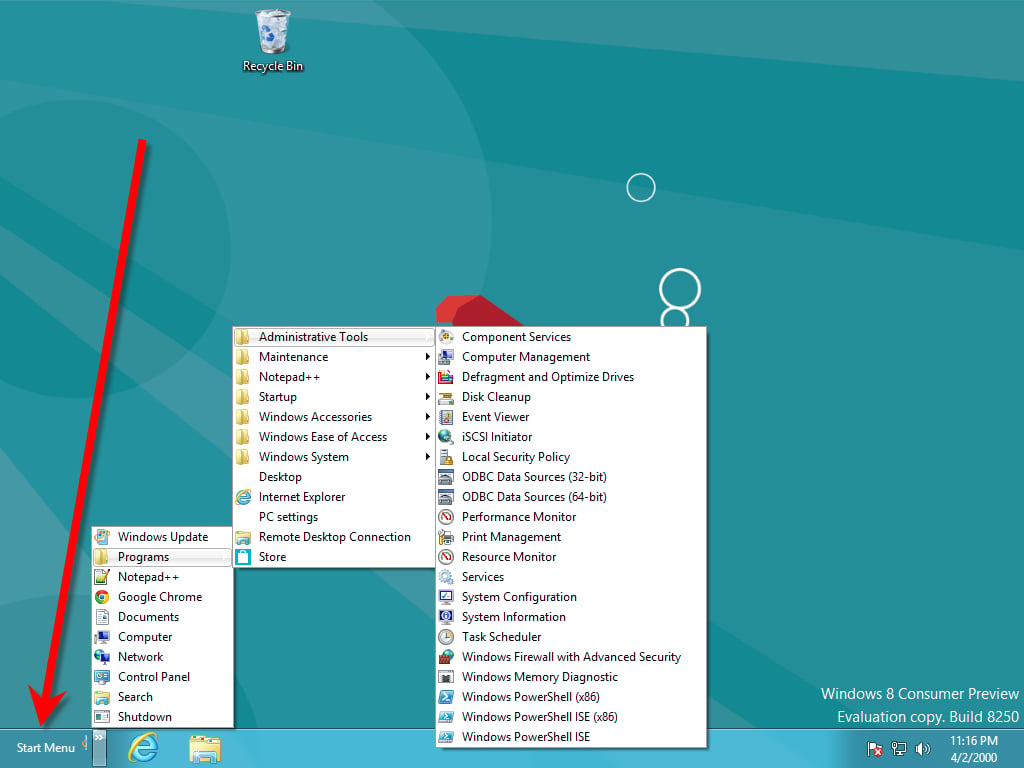
\n\tWhen you complete the operation, you will have your own Classic Start Menu in Windows 8.
\n
\n
\n\tImages created by Greg Shultz for TechRepublic.

My first computer was a Kaypro 16 \"luggable\" running MS-DOS 2.11 which I obtained while studying computer science in 1986. After two years, I discovered that I had a knack for writing documentation and shifted my focus over to technical writing.


