\n\tIn an issue of the Windows Desktop Report, Greg Shultz shows you how to find and use the mastered optical disc format in Windows 7. (If you want to learn more about Windows 7’s Live File System disc format, check out his Windows Blog post, Augment your data storage options with Windows 7 Live File System format.
\n
\n
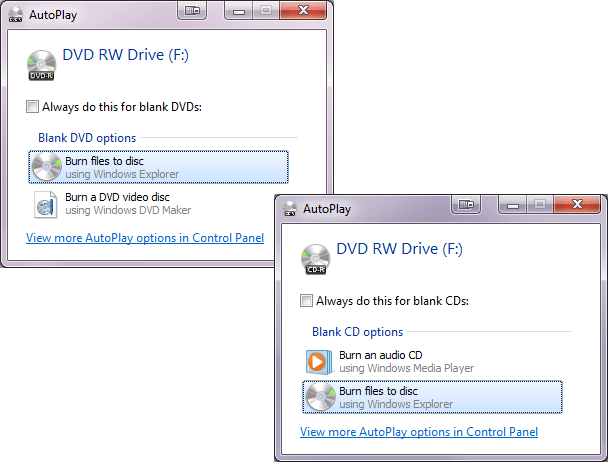
\n\tWhen you insert a blank optical disc into a CD-R or DVD-R drive, you’ll see the AutoPlay dialog box as shown. As you can see, by default, Windows 7 assumes that you will be formatting a data disc. To continue, you can press [Enter] or click the Burn Files To Disc button.
\n
\n\tThis Photo Gallery is also available in the TechRepublic Microsoft Windows Blog.
\n
\n\tImages by Greg Shultz for TechRepublic.
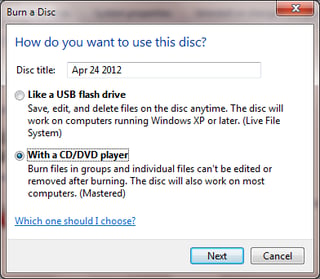
\n\tWhen you see the Burn a Disc dialog box, you’ll select the With a CD/DVD player option, as shown. As you can see in the description, this is the Mastered disc format. By default, Windows 7 places the current date in the Disc Title, but you can change it if you prefer.
\n
\n\tImages by Greg Shultz for TechRepublic.
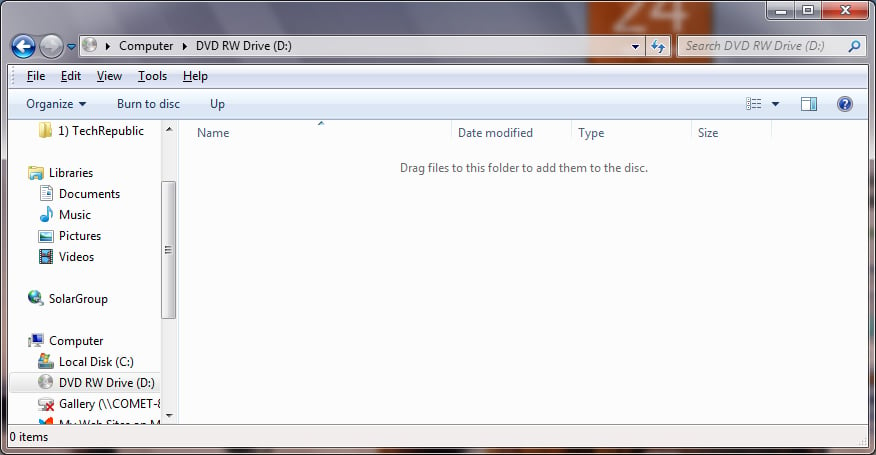
\n\tAs soon as you click Next, the disc is prepped for the Mastered disc format and a drive window will appear. You’ll see the Drag files to this folder to add them to the disc message at the top of the file pane, as shown. At this point, you can begin dragging and dropping files to the drive.
\n
\n\tImages by Greg Shultz for TechRepublic.
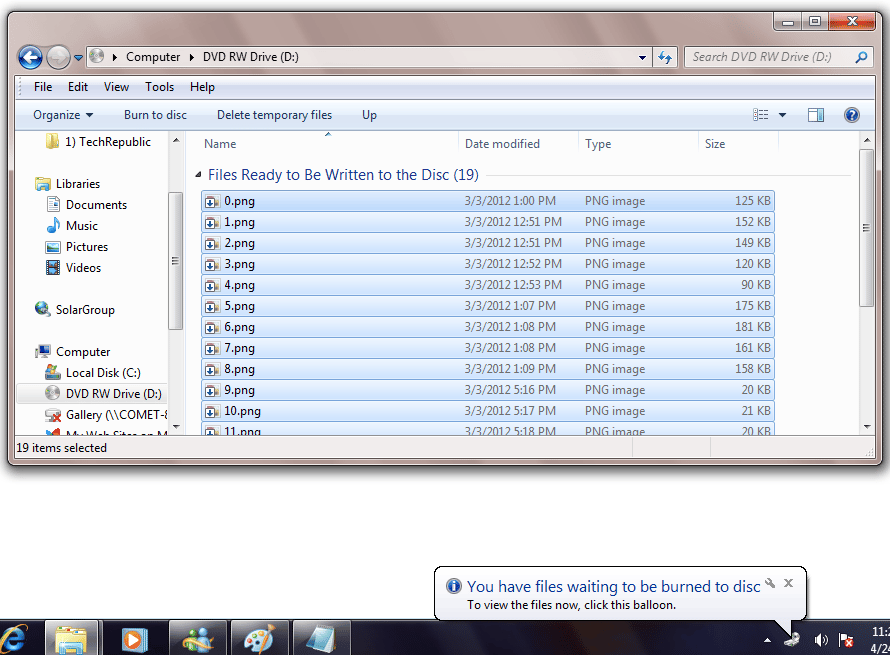
\n\tAfter you drag a group of files to the drive, you’ll see a message in the notification area telling you that you have files waiting to be burned to disc, as shown. To begin the burn operation, just click the Burn to Disc button on the toolbar.
\n
\n\tImages by Greg Shultz for TechRepublic.
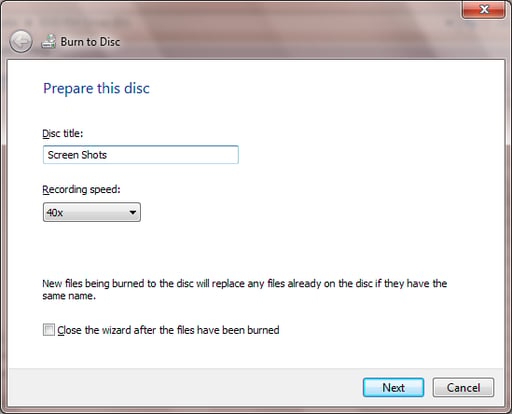
\n\tYou’ll then see the Burn To Disc wizard and will again have the opportunity to fill in the Disc Title text box. By default, Windows sets the recording speed to the fastest speed available. Of course, higher recording speeds get the job done faster but can result in errors. Therefore, if you do encounter problems with the burn operation, you might experiment with lower speeds. If this will be a onetime burn operation, you can save yourself some time if you select the Close the wizard after the files have been written check box. To continue, click Next.
\n
\n\tImages by Greg Shultz for TechRepublic.

My first computer was a Kaypro 16 \"luggable\" running MS-DOS 2.11 which I obtained while studying computer science in 1986. After two years, I discovered that I had a knack for writing documentation and shifted my focus over to technical writing.


