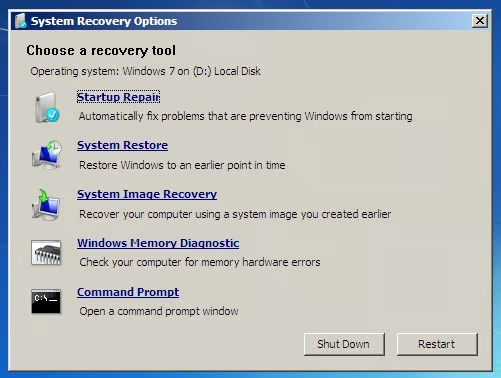
\n\tHave you used Microsoft Windows 7’s Backup and Restore to create a system image of your hard disk? If so, do you update it on a regular basis? If so, then you are prepared for a problem that leaves your hard disk in an un-repairable predicament, such as the one that I described in my recent blog post, “Access More Troubleshooting Tools with Windows 7 System Recovery Options.” This is the predicament where the Startup Repair Tool can’t repair the problem and you then access the System Recovery Options menu, as shown, which provides you with a set of tools that can help you revive your system. If for some reason neither Startup Repair nor System Restore is able to get you back up and running, you can use the System Image Recovery option to revive an unbootable system.
\n
\n\tWhile knowing that you have a system image provides you with a certain level of comfort, using it is another story. The reason being that the only time you’ll ever get to see what a System Image Recovery operation looks like is when you need to perform one. And, chances are that you’ll be pretty stressed at that point and won’t really want any more uncertainty in your life.
\n
\n\tWith that in mind, in this edition of the Windows Desktop Report, I’ll show you how to use System Image Recovery. That way, if the time comes when you need to use it, you’ll know exactly what to expect.
\n\tA system image includes the operating system and all your system settings, your programs, and all your files. However, keep in mind that when you restore your computer from a system image, it will actually perform a complete restoration of your entire system, which means that all your current programs, system settings, and files will be replaced with the versions that were current when you made the system image.
\n
\n
\n\tTo begin, make sure that you have your system image available – if you created an image on optical discs, have the last disc in the set inserted into the drive or if you created an image on an external hard drive, have the drive connected to your system. For my example, I created an image on an external hard drive.
\n
\n\tThen, access the System Recovery Option menu. To recap, there are several ways that you can get there:
\n
\n\t
\n\t
\n
\n
\n\tFor more details, see the Getting to the System Recovery Options section of the “Access More Troubleshooting Tools with Windows 7 System Recovery Options,” blog post.
\n
\n
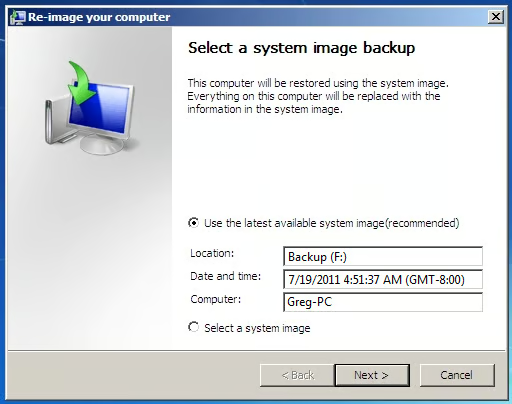
\n\tWhen you select the System Image Recovery option, the procedure will immediately locate the most recent system image connected to your system and display that information in the first screen of the Re-image your computer wizard, as shown. As you can see, my system image is on drive F, the drive letter assigned to my external hard drive, it was created on 7/19 at 4:51 AM, and it is the image for the computer named Greg-PC.
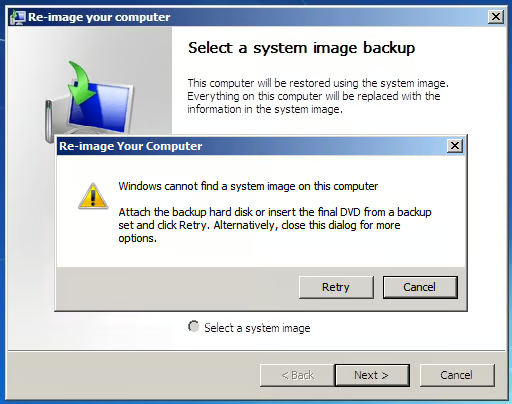
\n\tJust for the sake of thoroughness, if the System Image Recovery procedure cannot locate a recent system image, you will see a warning message, like the one shown, that prompts you to connect the external drive or insert the last optical disc in the set into the optical drive and click Retry. If your system image is on a network drive, you can click Cancel and follow the prompts to connect to a network location and manually select your system image.
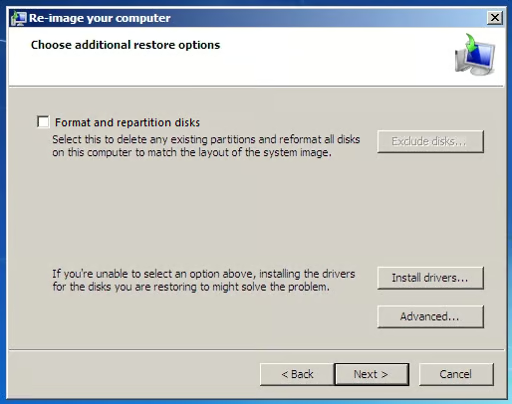
\n\tReturning to our example, just click Next. You’ll then see the second screen of the Re-image your computer wizard, as shown. As you can see, this screen provides you with several options. If you are restoring to the same hard disk, you don’t need to select the Format and repartition disks check box. If you are restoring to a new hard disk, chances are that the Format and repartition disks check box will be selected by default and will be unavailable. If that is the case, there is nothing to worry about as long as the new hard disk is of the same capacity or greater than the old one.
\n\tSince there are no other drives in my example, the Exclude disks button is unavailable. If you have multiple drives you can click the Exclude disks button and choose the drive you want to restore.
\n
\n\tIf none of the options are available on this screen, you may have to install drivers for the disks you are restoring by clicking the Install drivers button. However, since Windows 7 has such great built-in driver support, that is unlikely.
\n
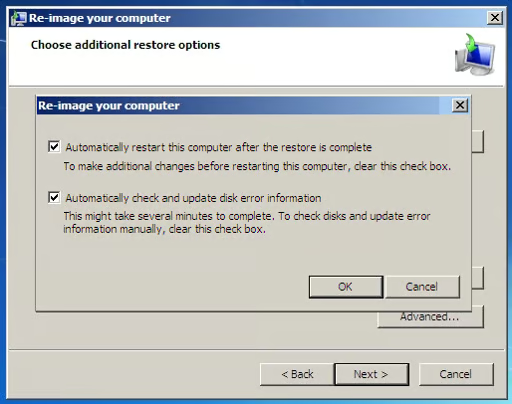
\n\tNow, if you click the Advanced button, you’ll see the dialog box shown. The Automatically restart check box will be selected by default and you’ll have the option to enable a disk check operation as a part of the procedure.
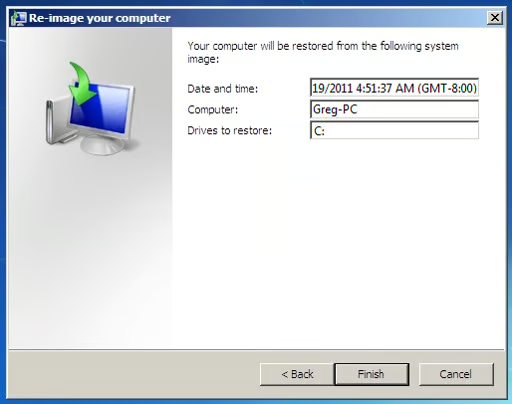
\n\tWhen you click Next, you’ll see the confirmation screen of the Re-image your computer wizard, as shown. To continue, just click Finish.
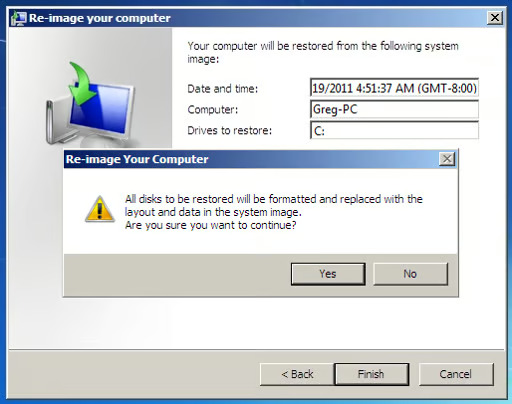
\n\tOf course, there is one more confirmation to work through, as shown. Just click Yes to get started.

\n\tIn a moment, the restore operation will begin. As the restore operation progresses, you’ll see the progress bar, as shown. Depending on how big your hard disk is, the restore operation can take a few hours. Now that the restore is under way, it might be a good idea to step away for a while. Go get a cup of coffee or watch some TV. When it is done, your system will restart and you’ll see the familiar logon screen.
\n
\n
\n\tNow that you know how a System Image Recovery procedure works, you will be prepared if the time comes when you are forced to restore your computer. If you have performed a System Image Recovery procedure before, what was your experience? As always, if you have comments or information to share about this topic, please take a moment to drop by the TechRepublic Community Forums and let us hear from you.

My first computer was a Kaypro 16 \"luggable\" running MS-DOS 2.11 which I obtained while studying computer science in 1986. After two years, I discovered that I had a knack for writing documentation and shifted my focus over to technical writing.


