\n\tThis gallery is also available as a post in the Windows and Office Blog.
\n
\n\tWhile Microsoft went to every effort to ensure that Windows 8 is a solid operating system, sometimes your system can become unstable. Perhaps you have recently recovered from a nasty virus infection, or maybe you installed an incompatible software application, or possibly a wiggy device driver. You could have even installed an update patch that for some reason left your system behaving erratically. Whatever the cause, Windows 8 has several tools that you can use to revise an unstable system.
\n
\n\tOf course, in this type of situation, your first line of defense is to use System Restore to put your system back into the state that it was in when the last restore point was created. However, there could be any number of reasons why this would not result in an effect resolution. In the past, you would have had no choice but to restore your system from a backup or totally reinstall the operating system from scratch.
\n
\n\t\n\n
\n
\n
\n\tWith Windows 8, you have a new intermediary solution called Refresh your PC, which you can access from the Recovery Drive as I showed in a previous post: Be ready to use the Windows 8 Recovery Drive. The Refresh your PC tool will essentially perform a fresh install of Windows 8. More specifically, when you choose this option from the Recovery Drive, the Refresh your PC tool will find and backup all your data, settings, and apps. It will then install a fresh copy of Windows and restore all of your data, settings, and apps. When your PC restarts, you can login with your exact same username and password and find all of your data.
\n
\n\tNow, in its default mode, the Refresh your PC tool does not backup and restore any desktop applications that you have installed. The reasoning is that it is possible that a recently installed desktop application could be the cause of the instability. To help you to remember what desktop applications you had installed, the Refresh your PC tool will create a list of those applications that were not saved or restored, so that you can decide whether you want to reinstall them later.
\n
\n\tIf you have been reading carefully, you noticed that I used the phrase in its default mode in the above paragraph. The reason is that there is a command line tool that will allow you to create your own custom image that will contain your applications. However, preparing for, creating, and using a custom image is a fairly detailed operation that comes with a couple of potential pitfalls. As such, I have decided that the topic warrants its own article, which I will write for next week.
\n
\n\tIn this edition of the Windows Desktop Report, I’ll take a look at using the default mode of the Refresh your PC tool from the Recovery Drive. As I do, I’ll explain how it works.
\n
\n
\n\tBefore we get started there is one more thing you need to be aware of and that is that the Refresh your PC operation works differently when there is an OEM recovery partition involved. In fact, it appears that each OEM has their own method of incorporating a recovery procedure in the Windows 8 Recovery Drive. As such, I cannot really cover an OEM recovery in this article since there isn’t a generic procedure. Therefore, it is imperative that in addition to reading this article, you visit your computer manufacturer’s Web site and investigate their recovery procedure for Windows 8 systems.
\n
\n\tFor demonstrating the Refresh your PC operation in this article, my example system had Windows 8 installed using the clean install procedure I described in the article The complete guide to a Windows 8 clean installation. So there is no OEM recovery partition.
\n
\n
\n\tIn order to run the Refresh your PC tool as I’ll describe in this article, you’ll need to have created a Recovery Drive as I showed you in the article Create a Recovery Drive in Windows 8. You will also need to have your Windows 8 installation DVD.
\n
\n
\n\tAs I mentioned in the introduction, I’m going to cover the use of the Refresh your PC tool from the Recovery Drive. However, you should know that the Refresh your PC tool can also be launched from within Windows. To do so, you would press [Windows]+W to bring up Search Settings and type Refresh in the text box. You can then launch the Refresh your PC tool.
\n
\n\tHowever, when it comes to performing this type of operation, I prefer to launch the Refresh your PC tool from the Recovery Drive. My thought process here is that if the system is unstable and I don’t trust the way that it is behaving, why would I want to launch a recovery operation from an unstable environment? I just think that it is much wiser to launch the recovery process from a stable environment, such as the one provided by booting your system using the Windows Recovery Environment, which is the platform that boots up the Recovery Drive.
\n
\n
\n\tRunning Refresh your PC from the Recovery Drive is easy. While I am booting the Recovery Drive from a USB flash drive, you can just as easily boot the Recovery Drive from the optical disc. (As a part of my research for this article, I ran the Refresh your PC operation after booting from and optical disc and the procedure is basically identical.)
\n
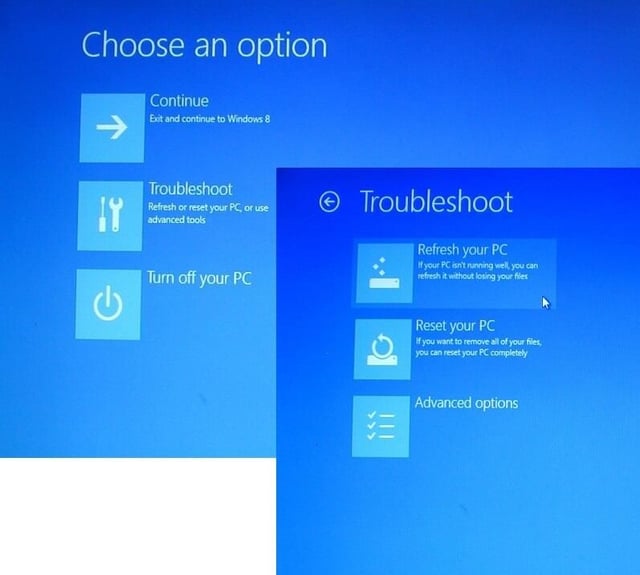
\n\tAfter your system boots from the Recovery Drive and you select the Troubleshoot option from the main menu, you’ll see the Troubleshoot screen shown in Figure A.
\n
\n\tCredit: Images by Greg Shultz for TechRepublic.
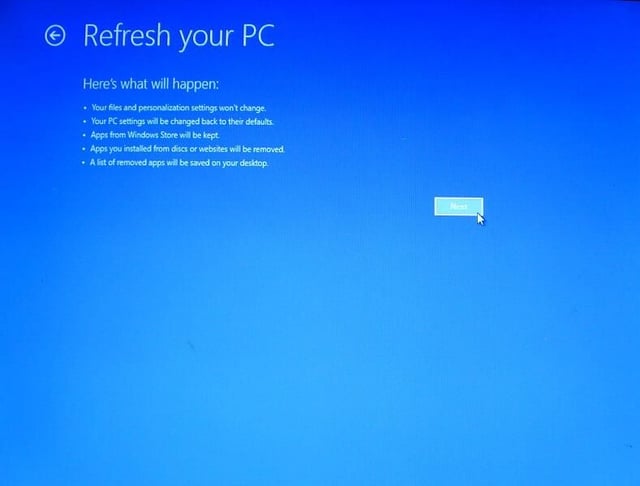
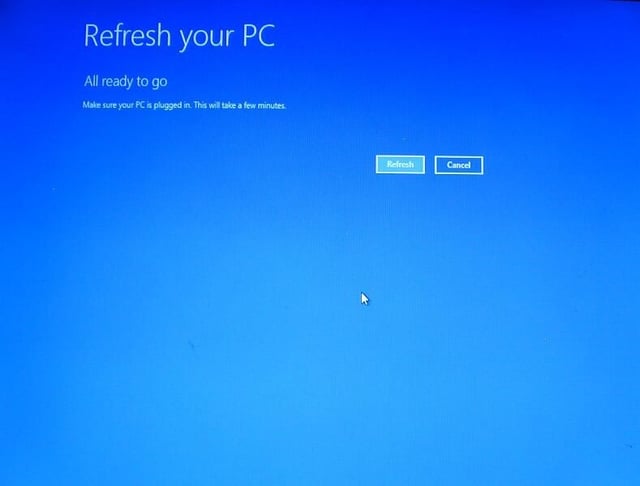
\n\tWhen you select the Refresh your PC option, you’ll see the screen shown in Figure B. After you read through the information on the screen, which I have summarized above, you can click the Next button.
\n
\n\tCredit: Images by Greg Shultz for TechRepublic.
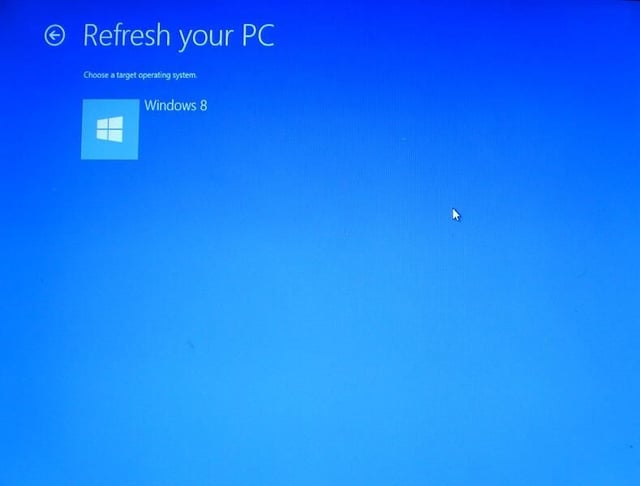
\n\tYou’ll then be prompted to choose the operating system that you want to refresh, as shown in Figure C. At first this seems to be a redundant question, but I suppose you could have a dual-boot configuration with Windows 7 and you want to refresh Windows 8 while leaving Windows 7 as it is. I’ll have to investigate further by performing a refresh operation on a dual-boot configured system to see if this is indeed the case.
\n
\n\tCredit: Images by Greg Shultz for TechRepublic.
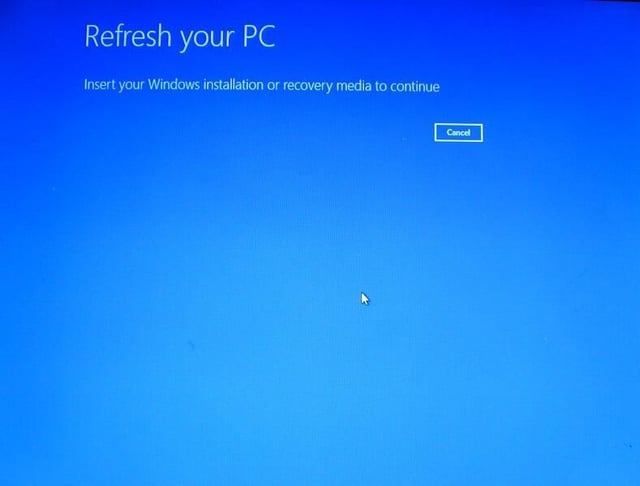
\n\tWhen you see the screen shown in Figure D, which prompts you to insert the Windows 8 installation DVD, you will want to remove the USB Recovery Drive at the same time as you insert the DVD. The reason being that the system will reboot several times and having a bootable USB flash drive connected to the system will cause unnecessary delays. It is not needed from this point forward anyway. Obviously, if you booted from an optical disc, you will have to remove it to insert the Windows 8 installation DVD.
\n
\n\tCredit: Images by Greg Shultz for TechRepublic.
\n\tOnce you insert the Windows 8 installation DVD, the system will immediately recognize it and after a few moments display the screen shown in Figure E. If you are refreshing a laptop, you will want to make sure that it is plugged in and not running on battery because the next phase of the refresh takes a while and you don’t want the system to shut down in the middle of it.
\n
\n\tCredit: Images by Greg Shultz for TechRepublic.
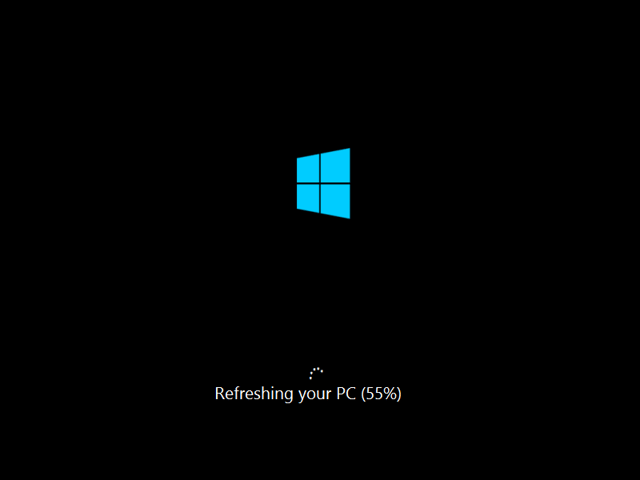
\n\tAs the refresh operation chugs along, you’ll see a screen like the one shown in Figure F that indicates the percentage of the operation that is complete. On my test system, this took somewhere around 40 minutes. When the percentage count hit 99%, I thought that is was ready to finish, but it actually sat at the 99% mark for quite a long time.
\n
\n\tCredit: Images by Greg Shultz for TechRepublic.
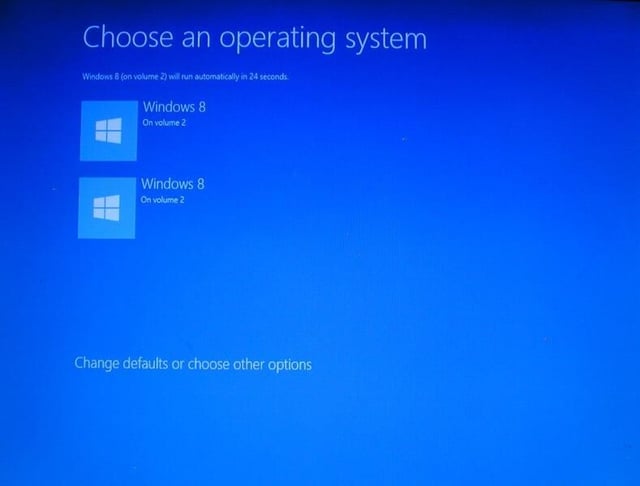
\n\tOnce the Refresh phase is complete, the system will reboot. When it does, you will see a screen like the one shown on Figure G, which prompts you to choose an operating system. You really don’t have to make a selection, as both selections indicate the newly refreshed operating system. Just allow the countdown to complete on its own and the system will reboot.
\n
\n\tCredit: Images by Greg Shultz for TechRepublic.
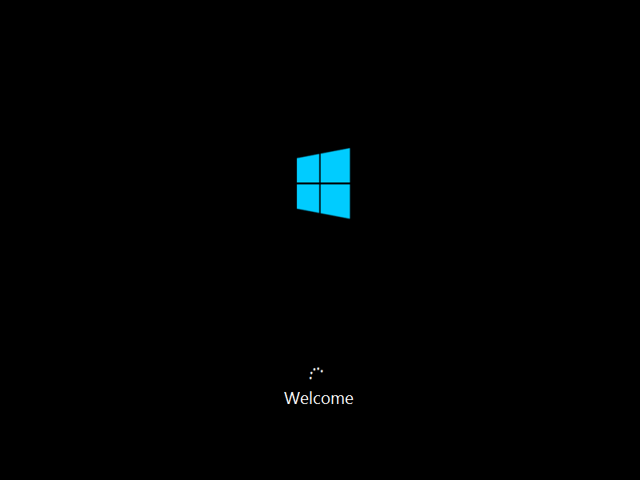
\n\tWhen the system reboots, the setup operation will begin finding and configuring any attached devices. You will then see the Welcome screen shown in Figure H.
\n
\n\tCredit: Images by Greg Shultz for TechRepublic.
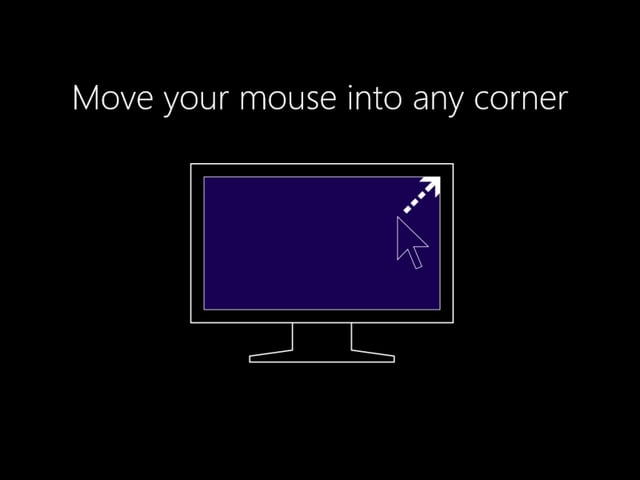
\n\tAfter a few moments, you will see your Login screen and will be able to log in with the same password – just like you always have. When you log in for the first time, some of the standard screens associated with Windows 8’s first run will appear. As promised all of your customized settings will be restored, so you won’t see those screens, but you will see the animated tutorial screens like the one shown in Figure I.
\n
\n\tCredit: Images by Greg Shultz for TechRepublic.
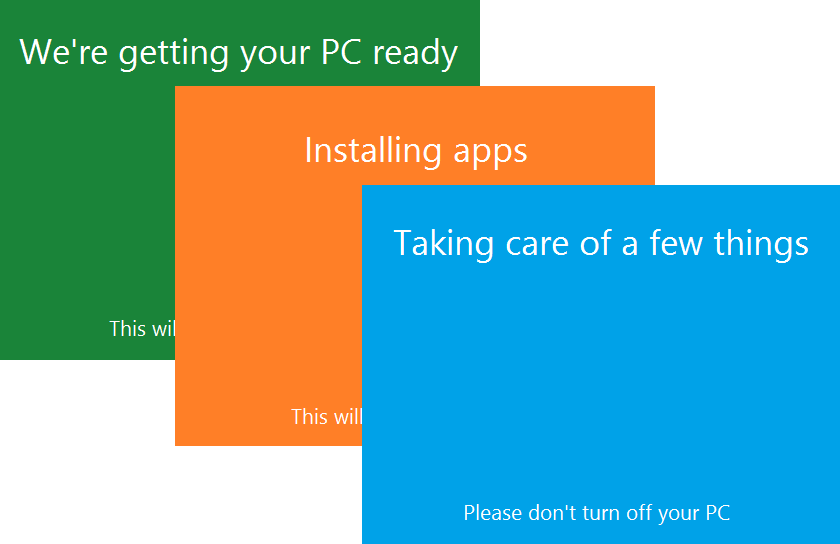
\n\tYou will then encounter a series of three screens that change color as they inform you that Setup is getting your PC ready, reinstalling apps, and taking care of last minute details. This sequence is show in Figure J. In a moment you will see the Start screen and will find that all of the apps that you had installed are back in place.
\n
\n\tCredit: Images by Greg Shultz for TechRepublic.
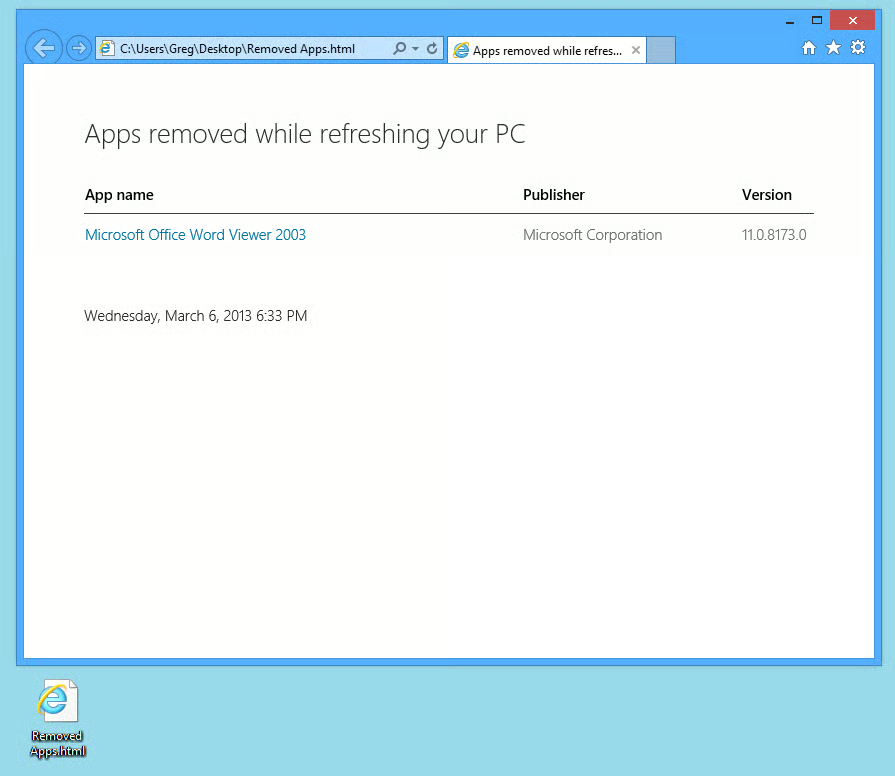
\n\tTo see what desktop applications were removed but not reinstalled, access the Desktop tile on the Start Screen. When you get to the desktop, look for an html file called Removed Apps. Open the file in Internet Explorer and you’ll see a display similar to the one shown in Figure K. As you can see in my example, I only had one desktop application installed, chances are that you will have a lot more, but this simple example allows you to see what this file will look like.
\n
\n\tAt this point, you can begin reinstalling your desktop applications. You can then get right back to work on a stable system.
\n
\n
\n\tNow that you know how the Refresh your PC option works, you’ll be ready to use it should the need arise. Have you used Windows 8’s Refresh your PC tool yet? If so, did it get your system back into a stable state? As always, if you have comments or information to share about this topic, please take a moment to drop by the TechRepublic Community Forums and let us hear from you.
\n
\n
\n\t
\n\t
\n
\n
\n\tCredit: Images by Greg Shultz for TechRepublic.

My first computer was a Kaypro 16 \"luggable\" running MS-DOS 2.11 which I obtained while studying computer science in 1986. After two years, I discovered that I had a knack for writing documentation and shifted my focus over to technical writing.


