Spotlight: MWSnap 3.0.0.74 screen capture - TechRepublic

Spotlight: MWSnap 3.0.0.74 screen capture

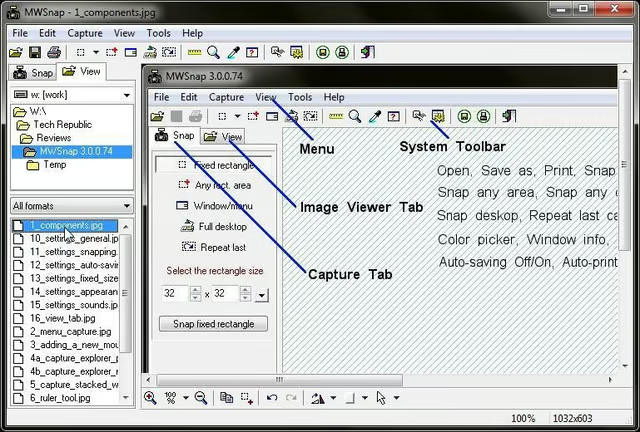
  • 1_components.jpg

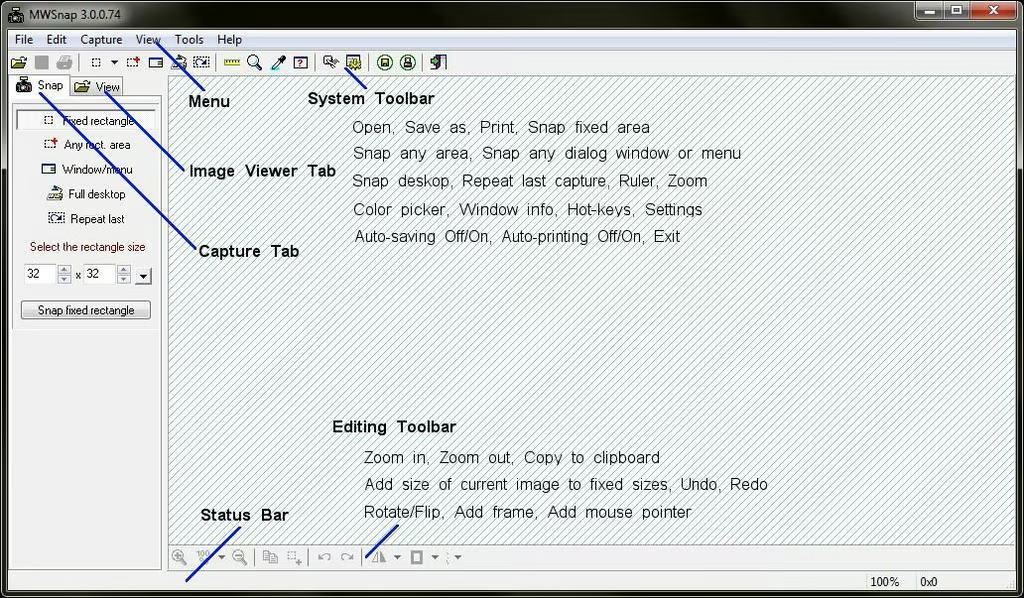
    The Components of MWSnap

    For a full review of MWSnap, check out the TechRepublic Product Spotlight Blog.

    Image created by Alan Norton for TechRepublic.

  • Capture Menu

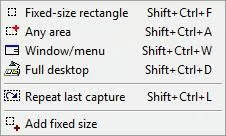
    You can easily capture a drop down menu by pressing [Ctrl][Shift][W] and selecting the open menu. This example shows the MWSnap capture menu.

    For a full review of MWSnap, check out the TechRepublic Product Spotlight Blog.

    Image created by Alan Norton for TechRepublic.

  • Adding a new mouse pointer

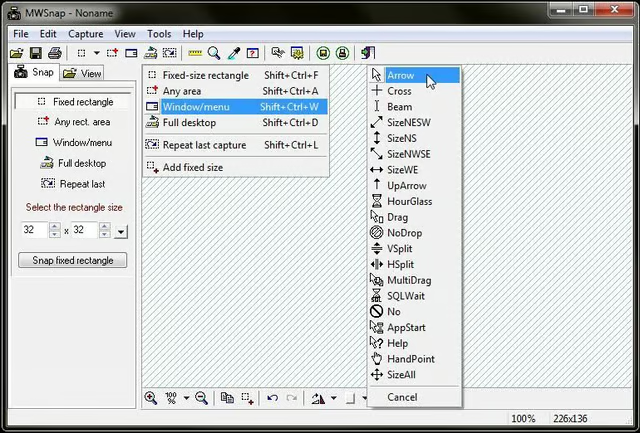
    Click the drop down arrow next to the Add a mouse cursor icon in the editing toolbar to add a mouse pointer. Choose from one of 20 mouse pointers that can be added to any screen capture.

    For a full review of MWSnap, check out the TechRepublic Product Spotlight Blog.

    Image created by Alan Norton for TechRepublic.

  • Capture a Window Pane or Parts of the Desktop

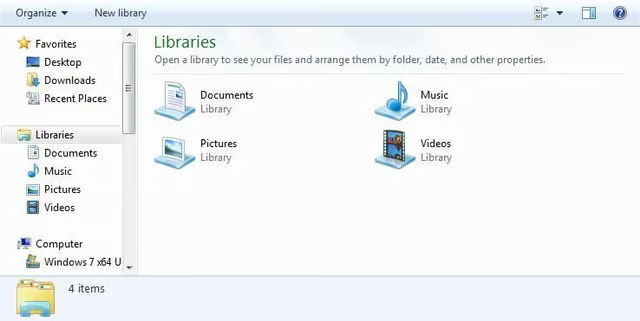
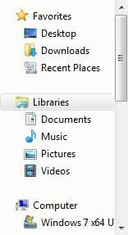
    You can easily capture only a pane or panes of a window or parts of the desktop, i.e. the taskbar, by pressing [Ctrl][Shift][W] and selecting the pane or desktop item. The following screen shots capture panes of the Windows Explorer window.

    For a full review of MWSnap, check out the TechRepublic Product Spotlight Blog.

    Image created by Alan Norton for TechRepublic.

  • Capture explorer

    For a full review of MWSnap, check out the TechRepublic Product Spotlight Blog.

    Image created by Alan Norton for TechRepublic.

  • Capture Stacked Windows

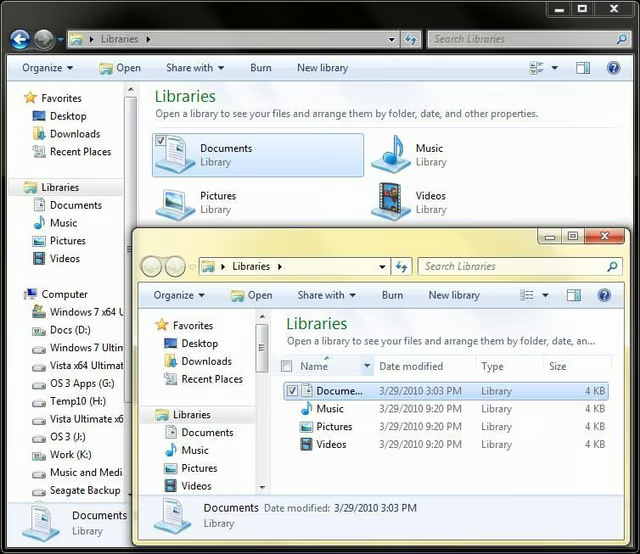
    The following example shows two two stacked windows. Capturing the bottom window captures both windows. In this example two different views in Windows Explorer are shown.

    For a full review of MWSnap, check out the TechRepublic Product Spotlight Blog.

    Image created by Alan Norton for TechRepublic.

  • The ruler tool

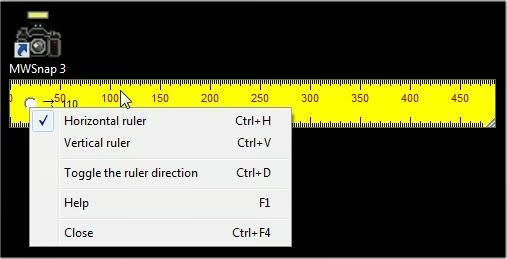
    The ruler tool measures the mouse cursor position, in pixels, horizontally or vertically. Click on the hole in the ruler to open the menu. In this example, the mouse cursor is at pixel position 110 horizontally.

    For a full review of MWSnap, check out the TechRepublic Product Spotlight Blog.

    Image created by Alan Norton for TechRepublic.

  • The Zoom tool

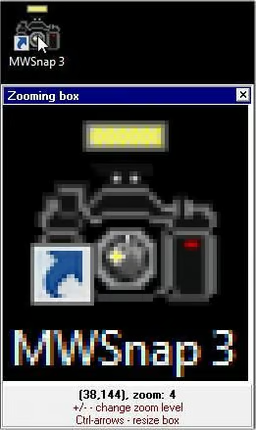
    The Zoom tool lets you zoom in on any section of the desktop.

    For a full review of MWSnap, check out the TechRepublic Product Spotlight Blog.

    Image created by Alan Norton for TechRepublic.

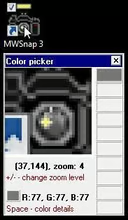
  • Color picker tool

    For a full review of MWSnap, check out the TechRepublic Product Spotlight Blog.

    Image created by Alan Norton for TechRepublic.

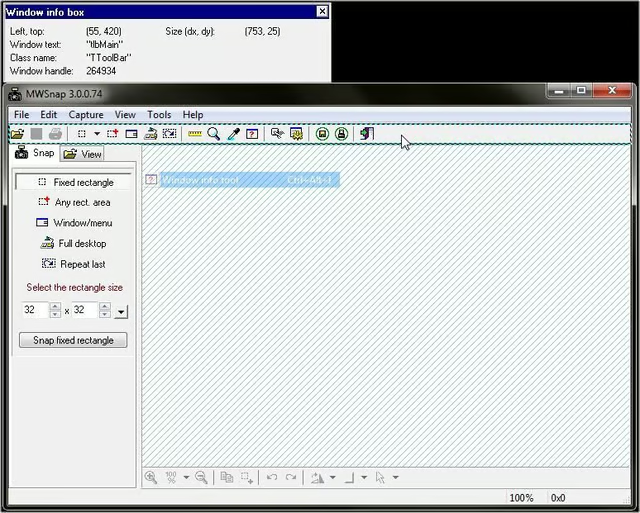
  • The Window Info Tool

    Select a window or an item in a window to get information.

    For a full review of MWSnap, check out the TechRepublic Product Spotlight Blog.

    Image created by Alan Norton for TechRepublic.

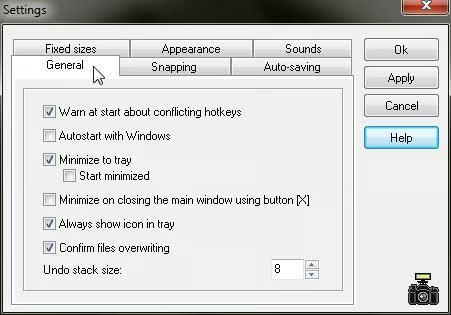
  • Settings | General Tab

    For a full review of MWSnap, check out the TechRepublic Product Spotlight Blog.

    Image created by Alan Norton for TechRepublic.

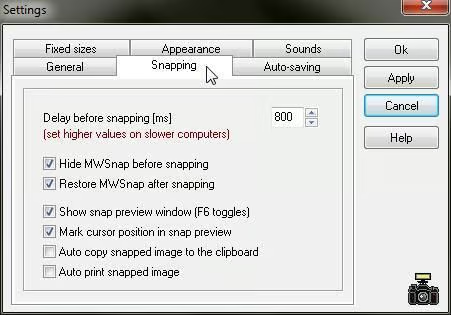
  • Settings | Snapping Tab

    For a full review of MWSnap, check out the TechRepublic Product Spotlight Blog.

    Image created by Alan Norton for TechRepublic.

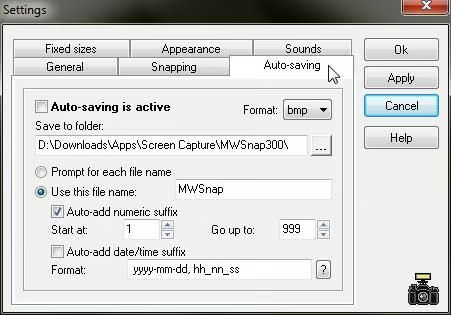
  • Settings | Auto-saving Tab

    For a full review of MWSnap, check out the TechRepublic Product Spotlight Blog.

    Image created by Alan Norton for TechRepublic.

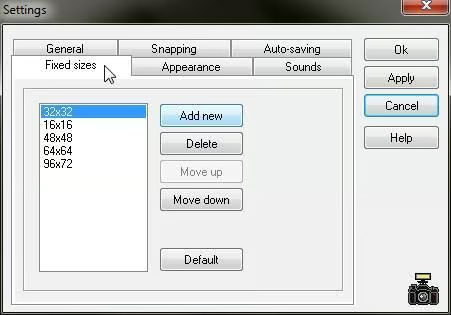
  • Settings | Fixed sizes Tab

    For a full review of MWSnap, check out the TechRepublic Product Spotlight Blog.

    Image created by Alan Norton for TechRepublic.

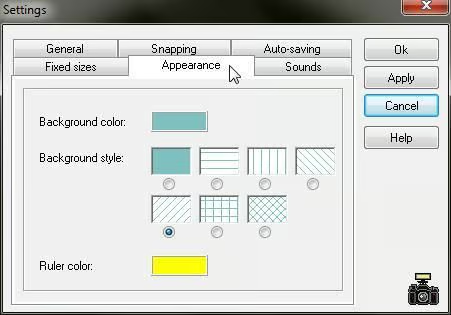
  • Settings | Appearance Tab

    For a full review of MWSnap, check out the TechRepublic Product Spotlight Blog.

    Image created by Alan Norton for TechRepublic.

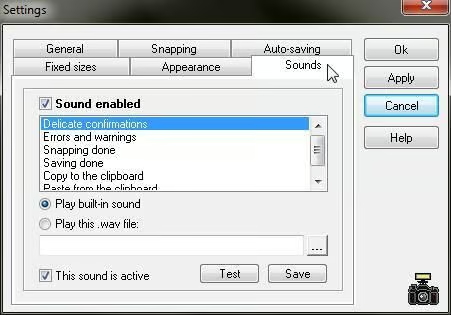
  • Settings | Sound Tab

    For a full review of MWSnap, check out the TechRepublic Product Spotlight Blog.

    Image created by Alan Norton for TechRepublic.

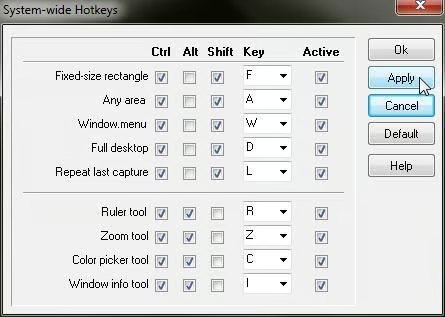
  • System-wide Hot keys

    The hot-keys for the five snapping modes and four tools can be reassigned and deactivated.

    For a full review of MWSnap, check out the TechRepublic Product Spotlight Blog.

    Image created by Alan Norton for TechRepublic.

  • The View Tab

    Click on the View tab to quickly view and review your captured images. Note: Text and lines must be added in an image editor.

    For a full review of MWSnap, check out the TechRepublic Product Spotlight Blog.

    Image created by Alan Norton for TechRepublic.

1 of 18
Alan Norton

You can contact me at mail@pecos-softwareworks.com. I began my career as little more than a data retrieval and reporting person. Early in my career I did whatever I could to be productive, creating spreadsheets in Framework and charts in GraphWriter. I was PC oriented and soon learned how to tap into the data on the mainframe to produce the charts via a data download to the PC. I found a niche building client/server systems where I was responsible for each phase of the project life cycle. \ \ I am fortunate to have enjoyed a broad background in IT including interfacing PC's and shop floor insertion machines to the mainframe database. I have also been an independent contractor, perhaps the most satisfying part of my career. I transitioned several mid-frame systems to a PC network based Access/Visual Basic system in the contract position and learned what it takes to be successful on your own. \ \ My last position was an analyst/programmer for a large IT service provider in support of their global help desk reporting team including a role as project lead. \ \ I consider myself lucky to have been in at the beginning of the personal computer revolution. I am currently semi-retired and learning a new skill, professional writing.