vSphere was released in 2009, with the 4.1 incremental release arriving in July of 2010. As with prior versions, ESXi (as well as ESX) is VMware’s hypervisor that is the critical piece vSphere. For anyone wanting to experiment with vSphere features, work with testing updates, or set up a lab environment to practice for training purposes; a virtualized lab environment can be very valuable.
ESXi can be installed as a guest operating system for these and other non-production purposes. In this gallery, the steps required to install virtual machine running ESXi will be performed on an ESXi host. While this is a capable function of the platform, it is not supported and should not be used for production workloads.
This gallery is intended to provide a step-by-step approach and is inspired by VMware employee Eric Gray’s post on the VCritical blog on how to do this procedure.
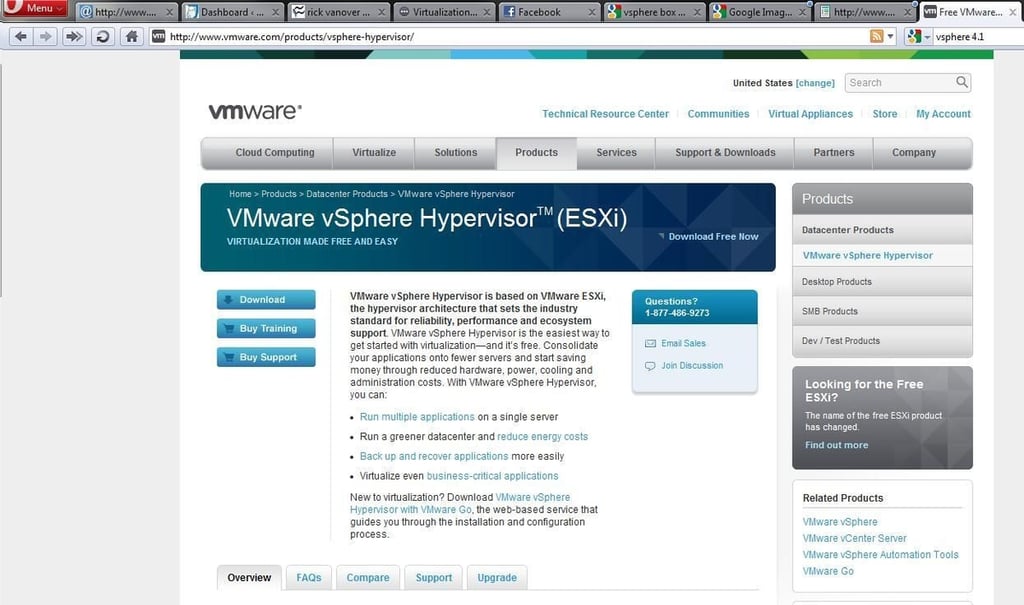
The first step is to register for a free download of ESXi if you don’t already have access to the installation files. If you are going to use the free version of ESXi, now dubbed “VMware vSphere Hypervisor,” it is a free download from the VMware website.
ESXi 4.1 is a 300 MB CD-ROM to install and can be installed on servers that meet the installation requirements outlined in the ESXi Getting Started Guide. Basic requirements include:
These are very lightweight specifications for ESXi, and any production installation would certainly need more in each category. This, however, is sufficient for a basic “virtual” ESXi host for test and development purposes.
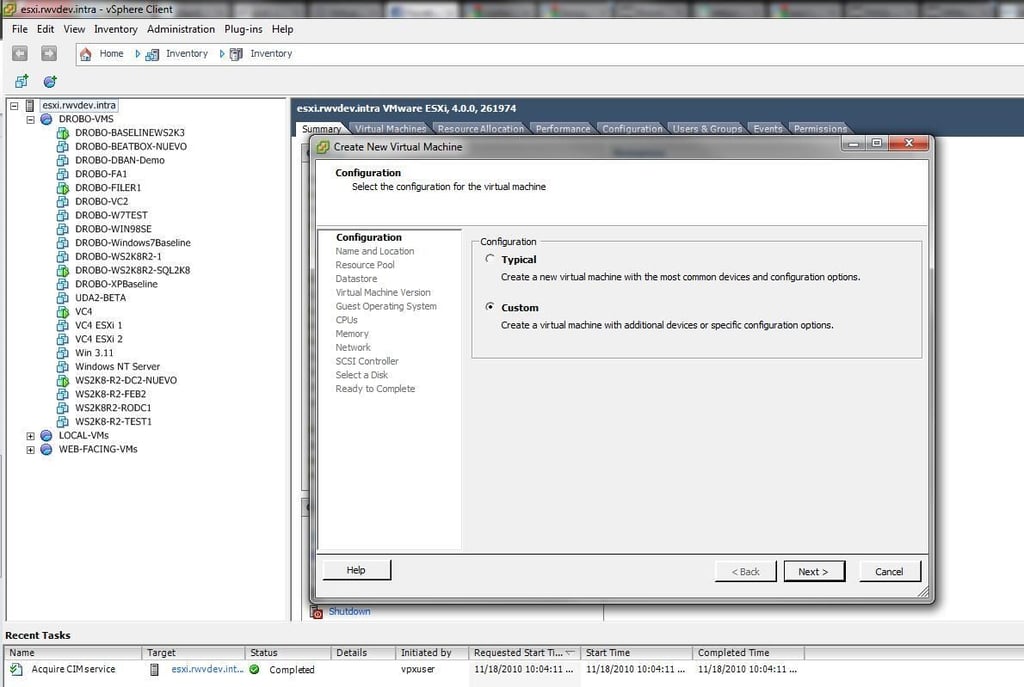
The CD-ROM .ISO image downloaded in the previous step will need to be available (either on a datastore or inserted into the CD-ROM drive of the physical ESXi host) for the step to create the ESXi virtual machine. Start the new virtual machine wizard and select the Custom option.
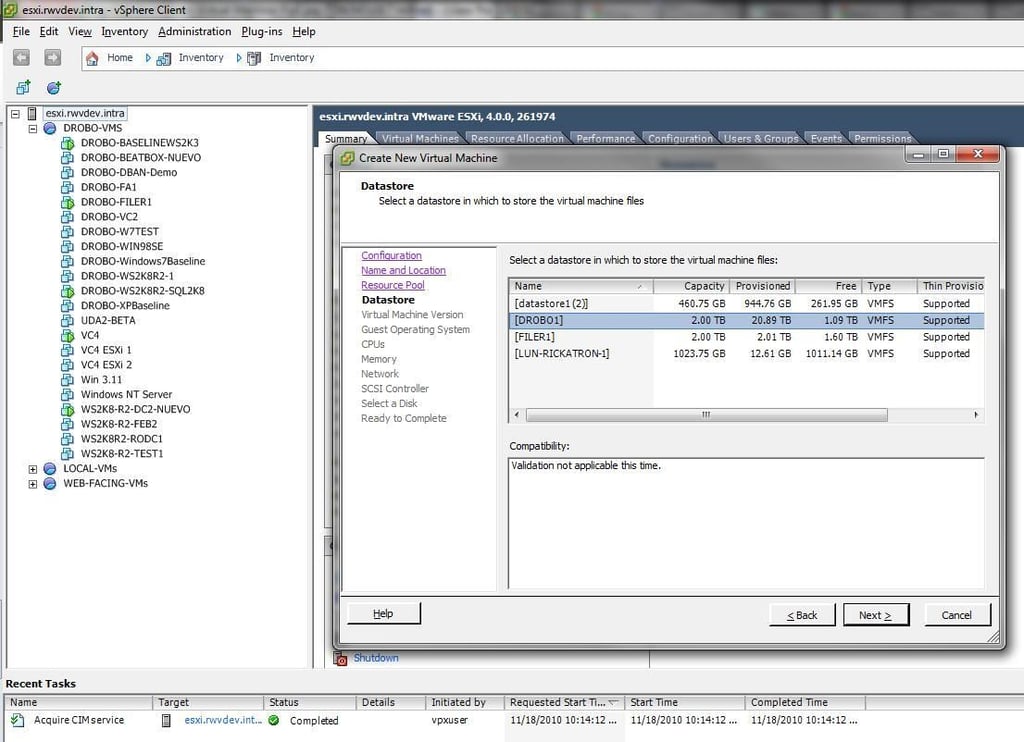
After a location (specified host) is specified, the datastore is selected in the wizard to create the virtual ESXi server. This is where it can start to get confusing. This menu option is only to select where to install the virtual ESXi server. This does not inherently present any shared storage (fibre channel, NFS or iSCSI) to the ESXi virtual machine.
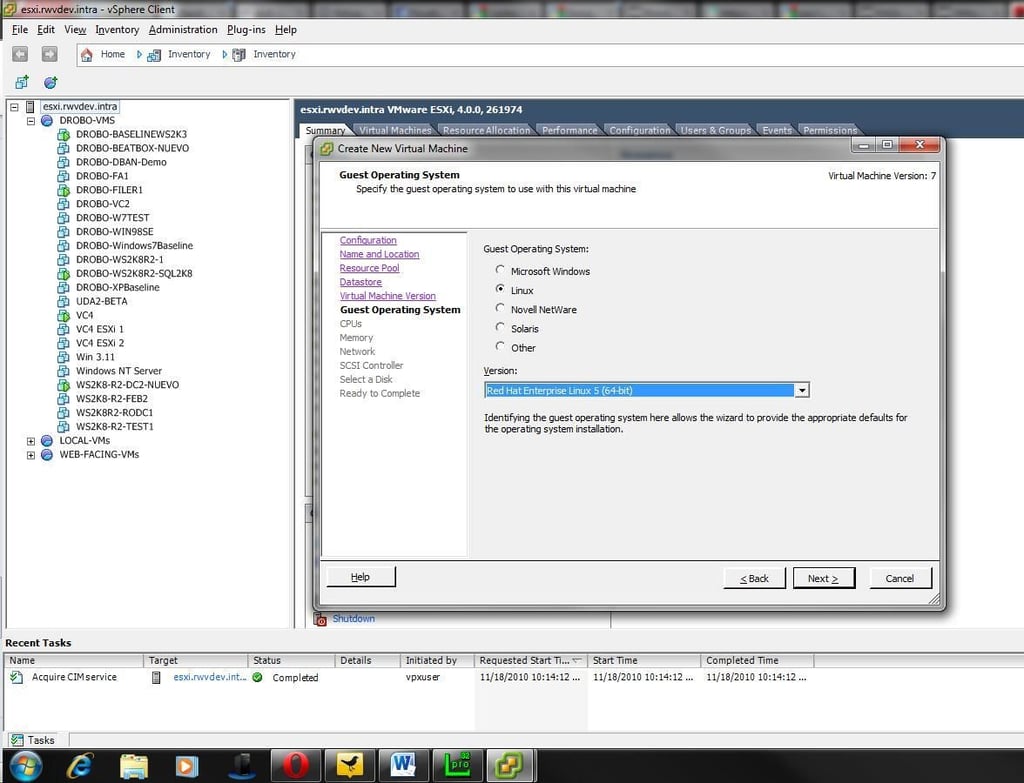
The virtual machine creation wizard will then ask what operating system the guest virtual machine will run. ESXi is not Linux, but it is most aligned to Red Hat Enterprise Linux 5, x64.
Classic ESX was based from the Red Hat Linux operating system with the vmkernel hypervisor added. ESXi as it is today is what I like to refer to as a JeOS for vmkernel. Just enough (of an) operating system to run vmkernel, which is the VMware hypervisor.
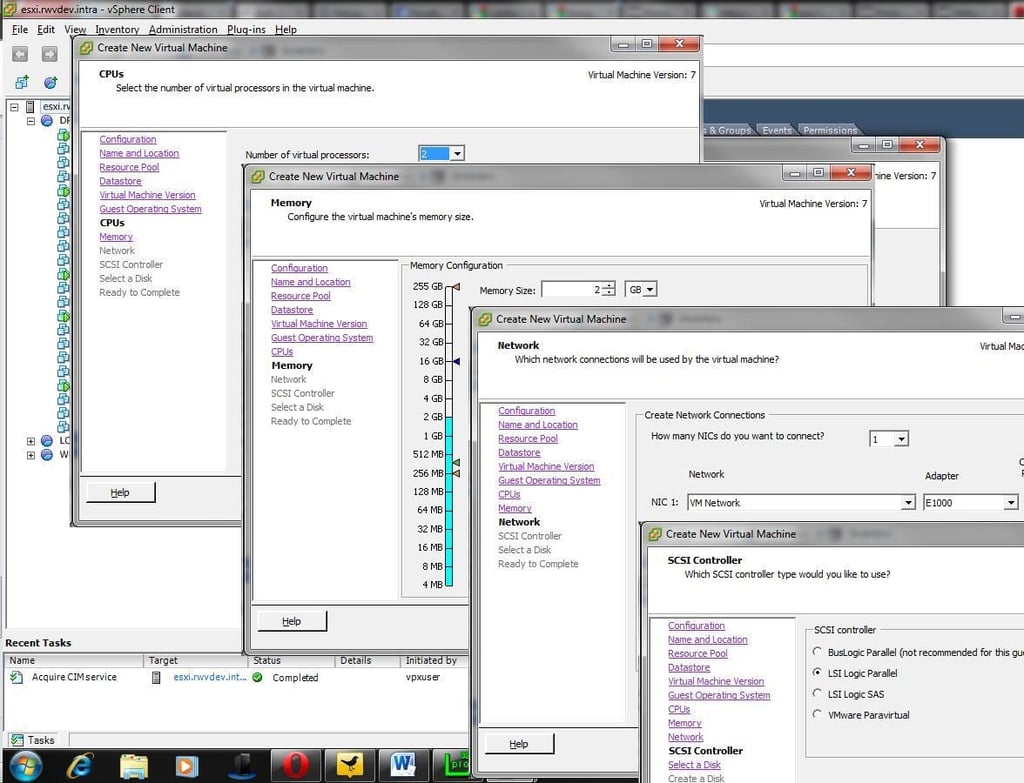
The new virtual machine wizard will then prompt you to enter the number of virtual CPUs to assign, how much memory to provision, and how many network interfaces to assign to the virtual ESXi server. If any virtual machines of any significance are to be run on the virtual ESXi server, consider using 4 GB or more for the virtual machine’s RAM configuration. Be sure to ensure that the LSI Logic Parallel option is selected for the disk controller.
Here is a tip that I use in my personal lab, for the virtual machines that are running on the virtual ESXi servers; I’m not too interested in what is running on those workloads. I’m more interested in vCenter features, ESXi configuration, cluster configuration, and other infrastructure features. I create a number of virtual machines that are very, very small. For example, many of them are 4 MB of RAM and are PXE boot virtual machines. These virtual machines are small and migrate very quickly with features such as vMotion. The only downside is that VMware Tools are not running on these virtual machines, so vSphere will not view the virtual machines as optimal. The resource savings are well worth it for testing purposes.
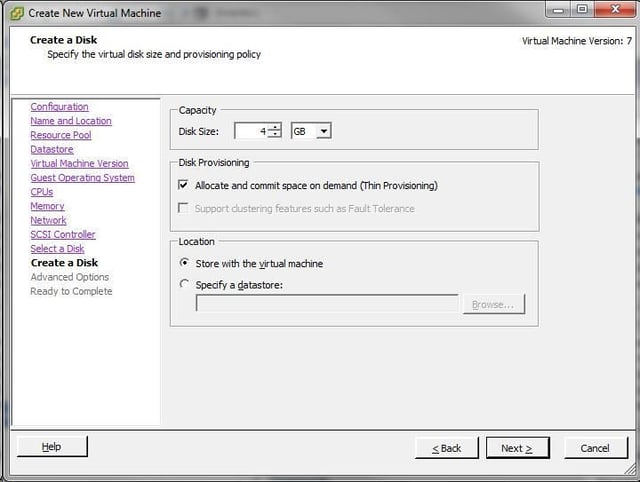
Configuring the virtual ESXi host to have 4 GB of disk storage space will be ample for the installation of ESXi; but not for running a virtual machine in most situations. The virtual ESXi server can be configured to connect to a shared storage resource (SAN/NAS); and work in a cluster with other ESXi servers in a cluster or access existing virtual machines.
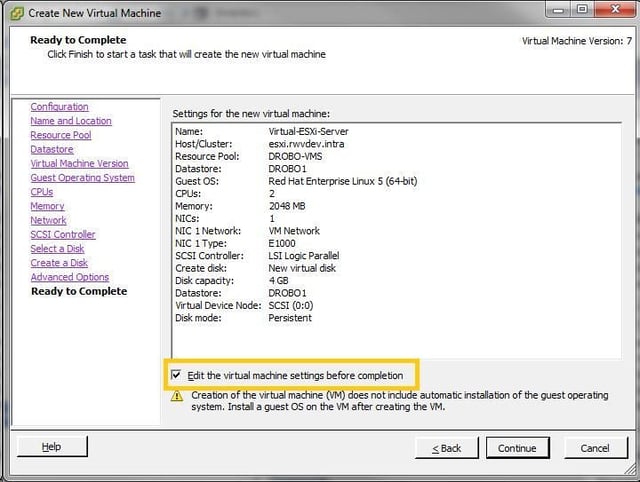
At the completion of the wizard, be sure to select the “Edit the virtual machine settings before completion” to add in the custom settings required for a virtual ESXi server. This will add in the mapping to the CD-ROM for the ESXi installation as well as set the special option to allow the host to run as an ESXi server.
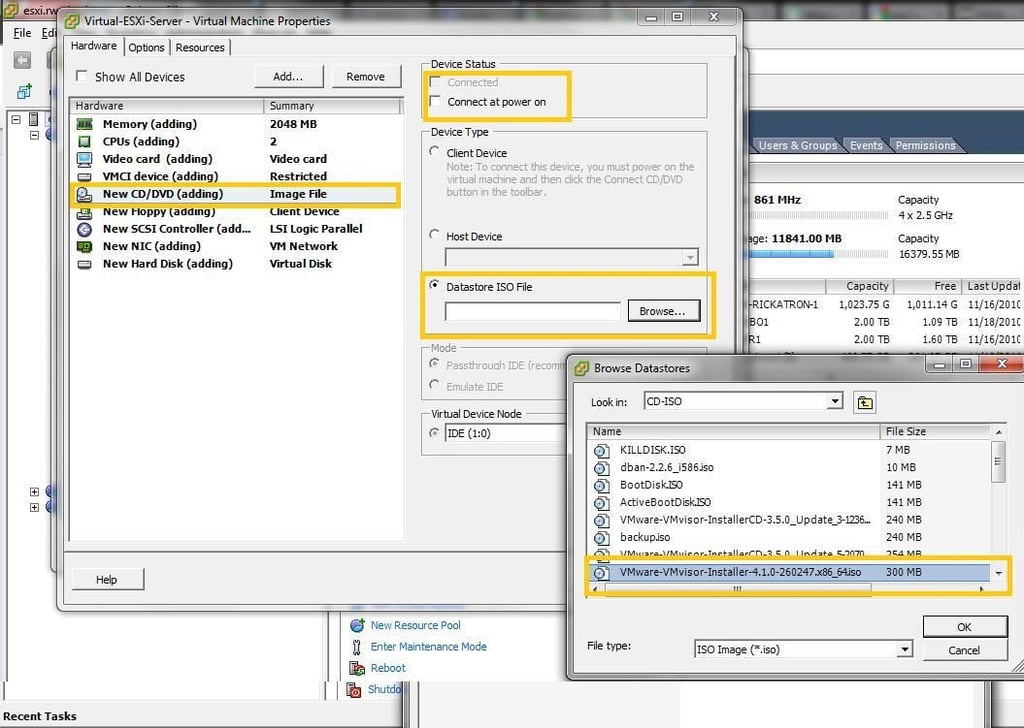
To map the virtual ESXi server to the CD-ROM .ISO file, browse to it on the datastore or redirect it to the host’s CD-ROM drive. If a CD-ROM .ISO file is used, be sure to select the Connect At Power On option in the top corner of the virtual machine properties page. If I had a dollar for every time I’ve forgotten that check box, I’d be a wealthy person.
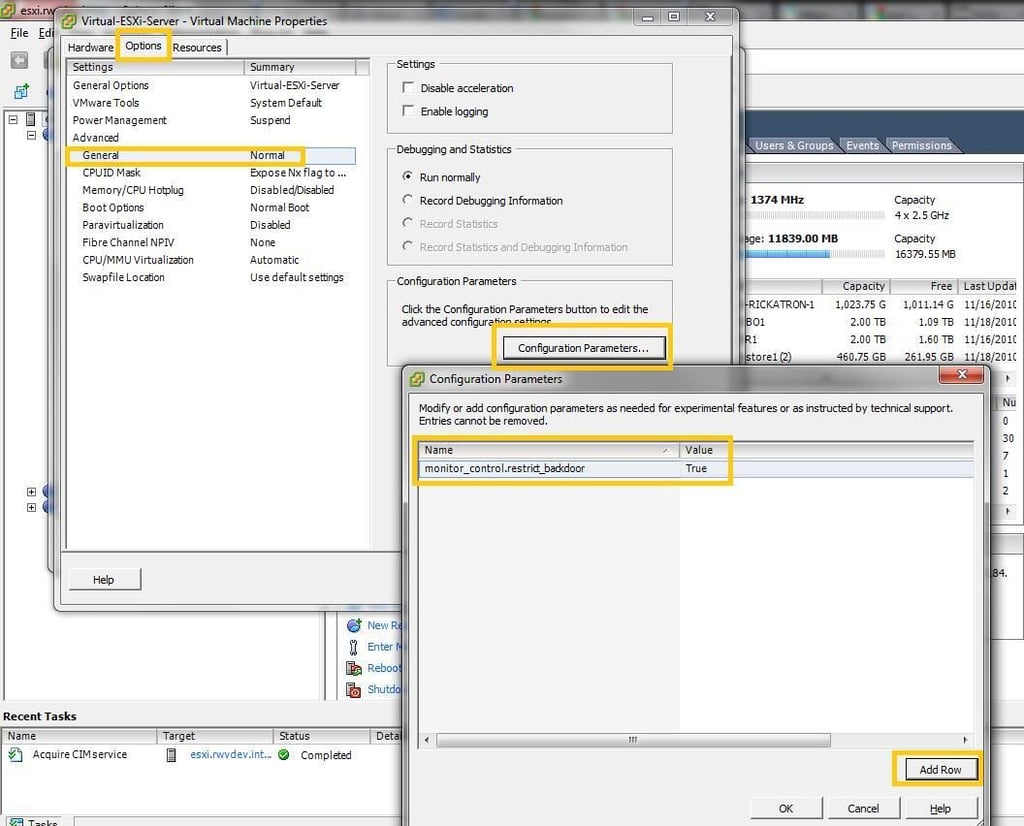
This next option is critical to allow a virtual machine to power on within the virtualized ESXi system. The advanced option “monitor_control.restrict_backdoor” with a value of “True” must be added to the virtual machine. The configuration parameters section is empty on the virtual machine at this point because it has not been created yet. If you have ever been in this section of the virtual machine configuration for a virtual machine that already exists, there are a number of options that are populated. I like to add this custom value during the creation of the virtual machine.
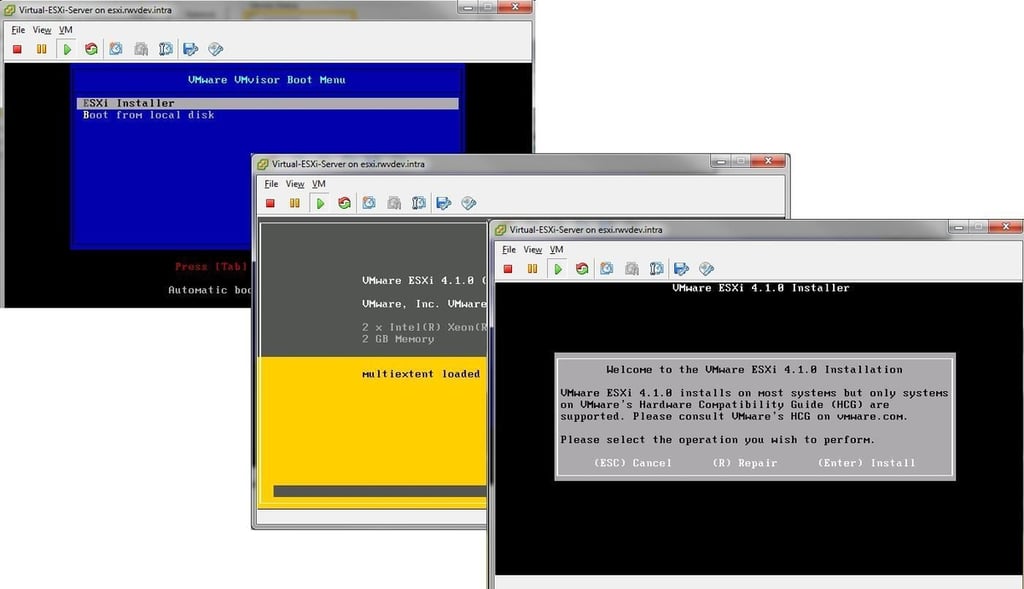
At this point, the virtual ESXi server is ready to power-on and be installed. If the CD-ROM is mapped correctly, the installation startup screen as show above will appear. You can press Enter to launch the installer. Pressing Enter at the final screen will install ESXi on the virtual machine.
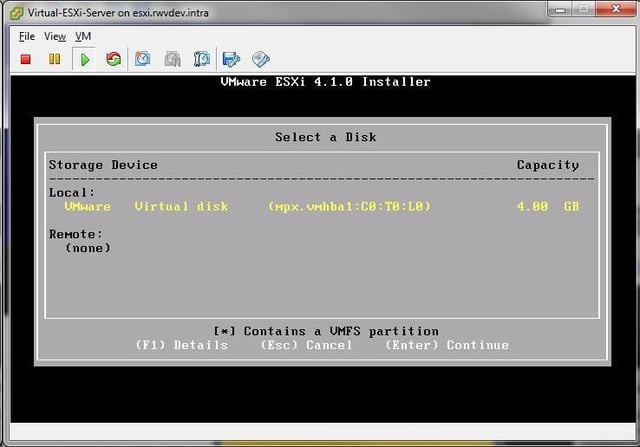
Before the installation proceeds, a confirmation is presented to select the disk location to install ESXi. In this example, there is only one location. This also reassures us that the disk is identified as a VMware Virtual Disk as we created it in the New Virtual Machine Wizard.
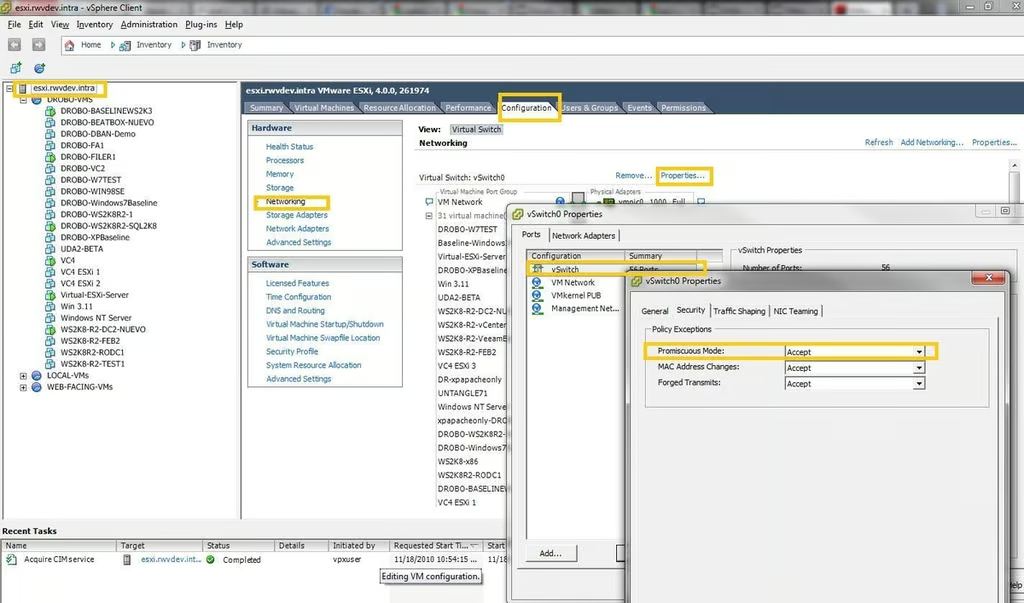
If virtual machines on the virtual ESXi server are going to be powered on, the Enable Promiscuous Mode option will need to be enabled on the vSwitch on which the virtual ESXi server resides. The image above shows this configuration At that point, the virtual machine is ready to go for all of your testing and development pleasure.

Selena Frye is a former Senior Editor for TechRepublic. Her background is in technical writing, editing, and research. I edit the Data Center, Linux and Open Source, Apple in the Enterprise, and IT Security blogs.


