By implementing IPSec on your network, you can increase security because IPSec encrypts data packets. You can configure IPSec in Windows Server 2003 by using a Wizard. This Screen By Screen shows you how it works.\r\n
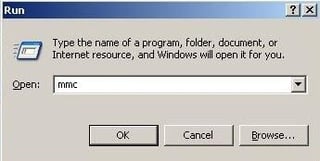
\r\nClick Start and select Run. Type mmc and click OK.
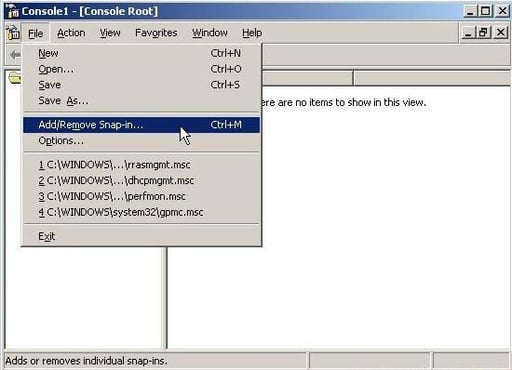
When the MMC appears, click Add/Remove Snap-in from the File menu.
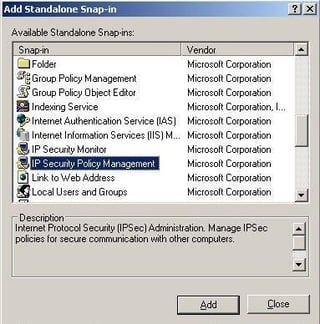
Click Add. Select IP Security Policy Management from the list of Available Standalone Snap-ins. Click Add.
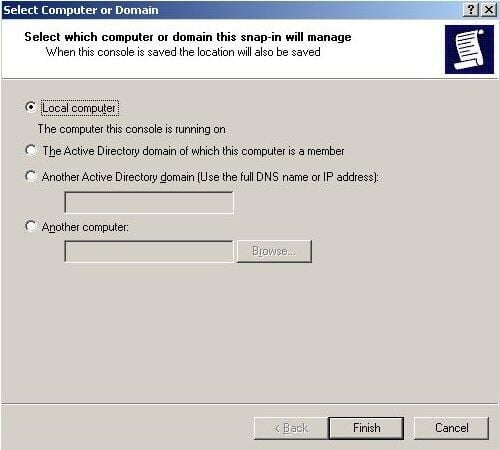
Verify that Local computer is selected. Click Finish. Click Close.
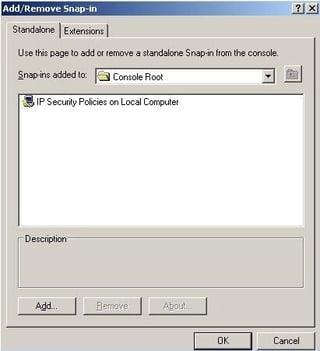
IP Security Policies on Local Computer will be listed in the Add/Remove Snap-in dialog box. Click OK.
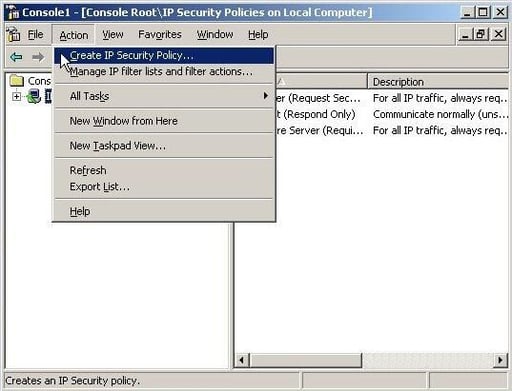
Select IP Security Policies on Local Computer under the COnsole Root. From the Action menu, click Create IP Security Policy.

The IP Security Policy Wizard will appear. Click Next to continue.
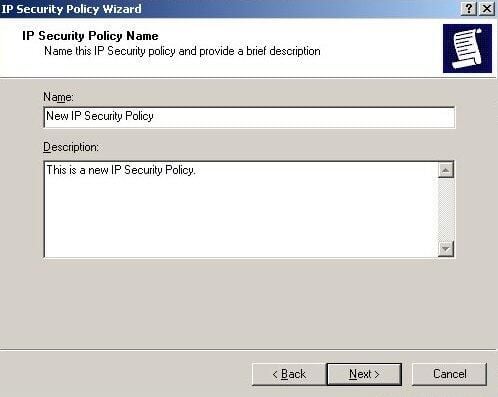
Type in a name and optional description for the new IP Security Policy. Click Next.
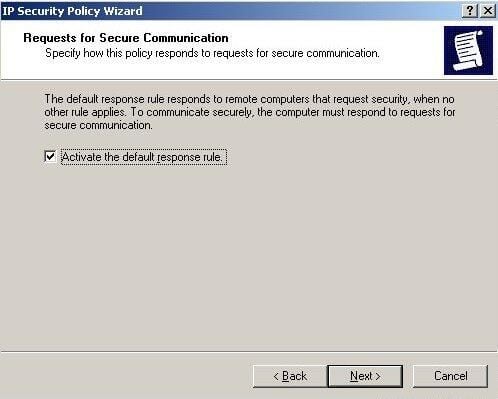
Verify that Activate the default response rule is selected. This means the server will respond for requests to use secure communications. Click Next.

Verify that Active Directory default (Kerberos V5 protocol) is selected as the initial authentication method. Click Next.
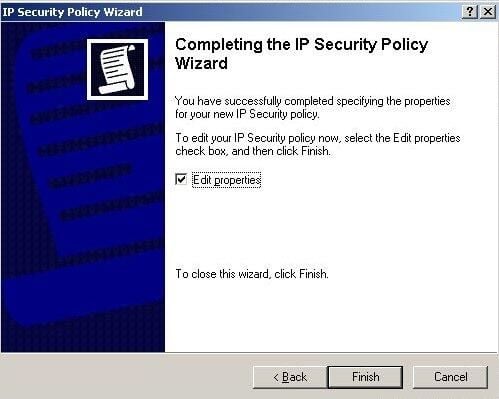
Verify that Edit properties is enabled. Click Finish.
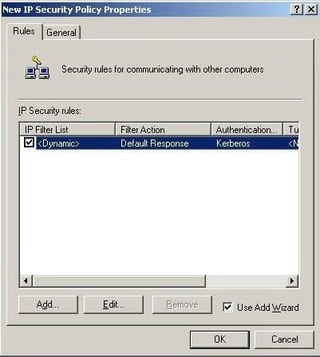
The Properties dialog box for the new policy will appear. Configure any additional settings and click OK.
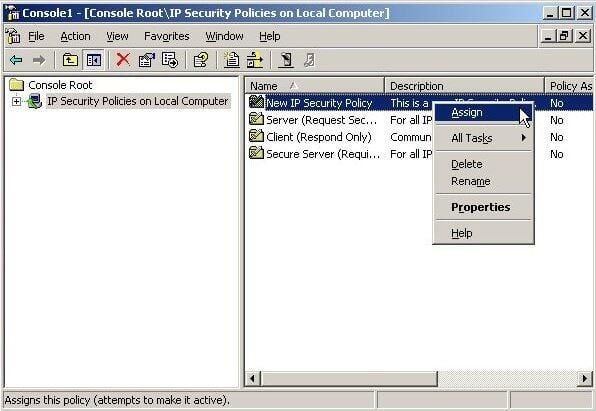
The new IP security policy will appear in the right pane. To assign the policy to the local computer, right click the policy and click Assign.
Bill Detwiler is the Editor for Technical Content and Ecosystem at Celonis. He is the former Editor in Chief of TechRepublic and previous host of TechRepublic's Dynamic Developer podcast and Cracking Open, CNET and TechRepublic's popular online show. Previously, Bill was an IT manager in the social research and energy industries. He has bachelor's and master's degrees from the University of Louisville, where he has also lectured on computer crime and crime prevention.


