


A Recovery Drive lets you boot your system and easily access a number of recovery and troubleshooting tools to revive a failing Windows 10 system. If you haven’t done so yet, you need to create a Windows 10 Recovery Drive. That way, you’ll be prepared should you encounter a problem with your Windows 10 installation.
In Windows 10, you can create a Recovery Drive on a USB flash drive as well as on an optical disc. While both procedures produce the same recovery tool, they are created from different user interfaces. The USB flash drive version is created using a stand-alone tool; the optical disc is created from the Backup And Restore (Windows 7) user interface. Why Microsoft didn’t unify the process under one roof, I don’t know. In this article, I’ll show you both ways to create a Windows 10 Recovery Drive.
Caveat
Regardless of whether you are creating a Recovery Drive on a USB flash drive or on an optical disc, it is important to remember that a Recovery Drive is bit specific. In other words, if you create a Recovery Drive in a 64-bit version of Windows 10, you can’t use that drive to boot up and repair a 32-bit version of Windows 10. Likewise, you can’t use a 32-bit Recovery Drive in a 64-bit Windows 10 system.
Using a USB flash drive
The USB flash drive you use will become a dedicated Recovery Drive–you won’t be able to use it for anything else. In its base configuration, the contents of the Recovery Drive will require about 330 MB of space. However, if you choose to include the system files, which will allow you to use the Recovery Drive to reinstall Windows, you’ll need more space. Thus, if you are creating a basic Recovery Drive, you can use a 1GB USB flash drive. (If you have a smaller drive, from the old days, you could use it as well.) If you are going to add system files, you’ll want at least a 16GB USB flash drive.
To launch the USB flash drive version of the Recovery Drive creation tool, open the Control Panel and type Recovery in the search box. When the search is complete (a matter of seconds), click Create A Recovery Drive, as shown in Figure A. You’ll then encounter a UAC, as shown in Figure B, and will need to click Yes to continue. As you can see in the UAC dialog box, the program name is listed as Recovery Media Creator.
Figure A
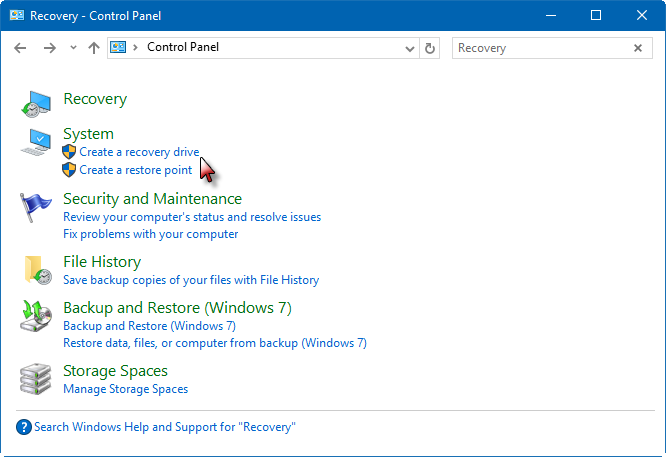
Accessing the Recovery Drive tool from the Control Panel is easy.
Figure B
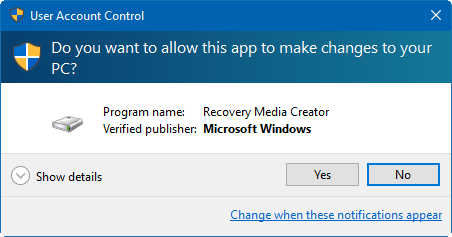
When you launch the Recovery Drive tool, you’ll encounter a UAC.
In a moment, you’ll see the first screen in the Recovery Drive wizard, shown in Figure C. As you can see, backing up system files is optional. (If you select this option, you’ll need a sufficiently large capacity USB flash drive.)
Figure C
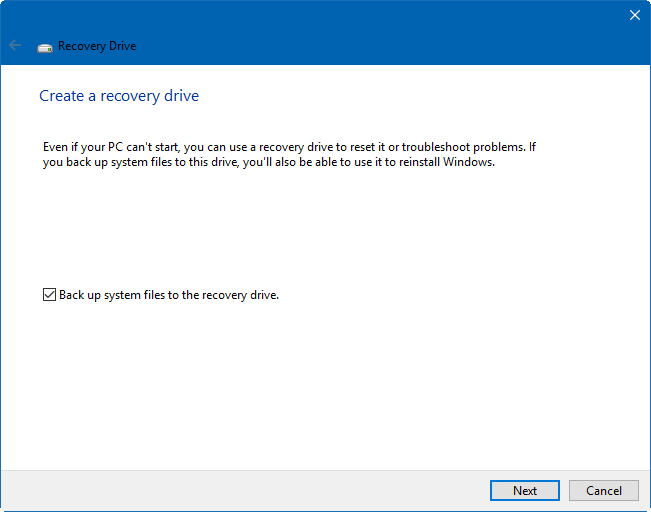
If you choose to back up system files, you can use the Recovery Drive to reinstall Windows.
For this example, I’m going to back up system files. To continue, click Next.
In the next screen of the Recovery Drive wizard, you’ll be prompted to select your USB drive. If the drive isn’t already connected to your system, insert it now. Windows 10 will then rescan the system and display your drive. Since I am backing up the system files, the wizard informs me that the drive will need to hold at least 16 GB and that everything currently on the drive will be deleted (Figure D). Remember, this will become a dedicated Recovery Drive. After you select your USB flash drive, click Next.
Figure D
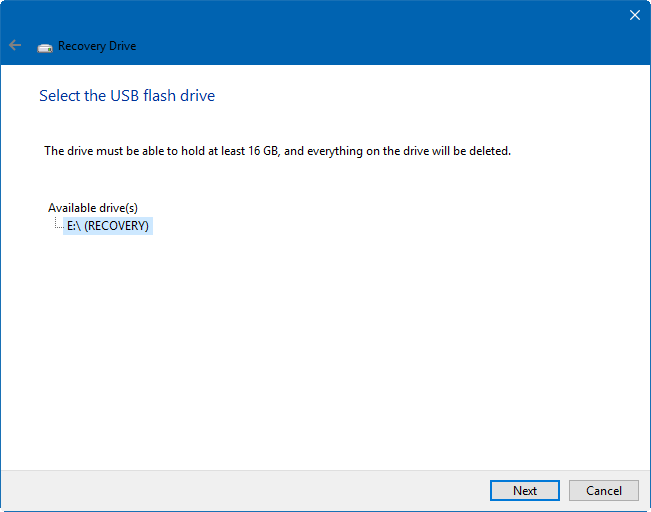
The USB flash drive you choose to use will become a dedicated Recovery Drive.
In the next screen, shown in Figure E, you are once again warned that the contents of the drive will be deleted.
Figure E

Windows warns you again that everything on the drive will be deleted.
To continue, click the Create button. When you do, the Recovery Drive tool will format the drive and begin copying files to the drive, as shown in Figure F. If you are creating a basic Recovery Disk, the process will just take a few minutes. If you are including a system files, go get yourself a cup of coffee–it could take as long as an hour.
Figure F
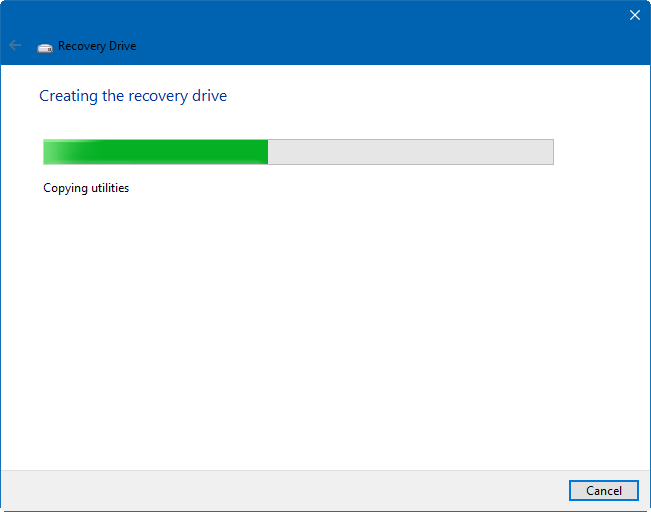
If you are including system files, the creation process can take up to an hour.
When the process is complete, you’ll be prompted to delete the recovery partition on your hard disk if you chose to include system files. You can open the drive in File Explorer so that you can see the contents, as shown in Figure G. You can then close the Recovery Drive wizard by clicking the Finish button.
Figure G
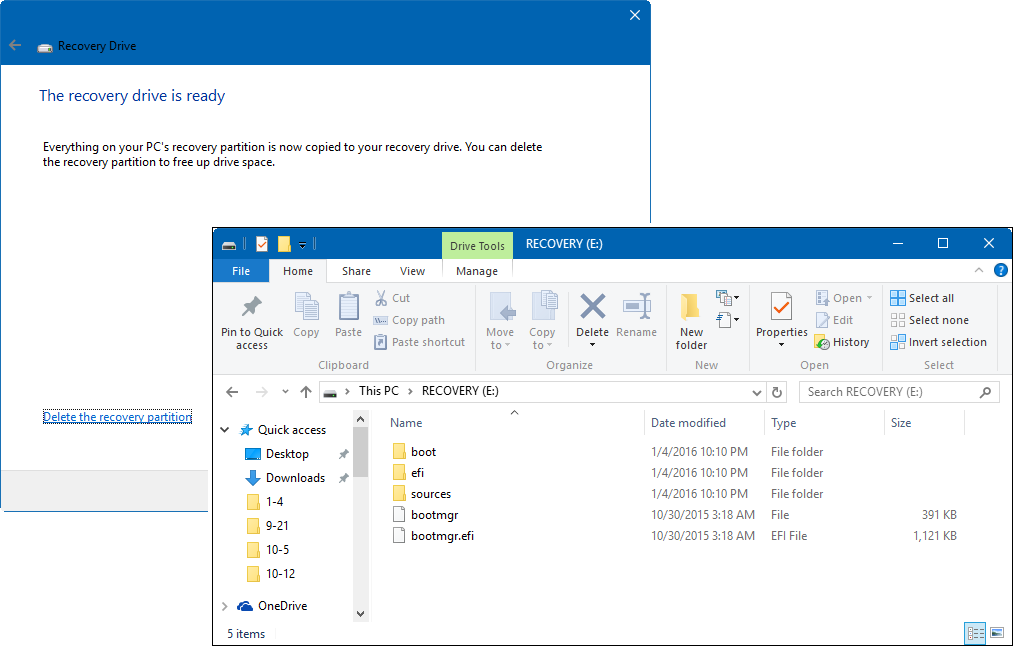
When the process is complete, you can check out the contents of the drive.
Using an optical disc
If you want to use an optical disc as a Recovery Drive, you’ll use the old System Repair Disc tool from Windows 7. Keep in mind that while you will use this legacy interface, you will indeed end up with the same set of Windows 10 Recovery Drive tools as are on a USB flash drive created with the Recovery Drive wizard.
To launch the optical disc version of the Recovery Drive creation tool, open the Control Panel and type Windows 7 in the search box. When the search is complete (a matter of seconds), click the Backup And Restore (Windows 7) link, shown in Figure H.
Figure H
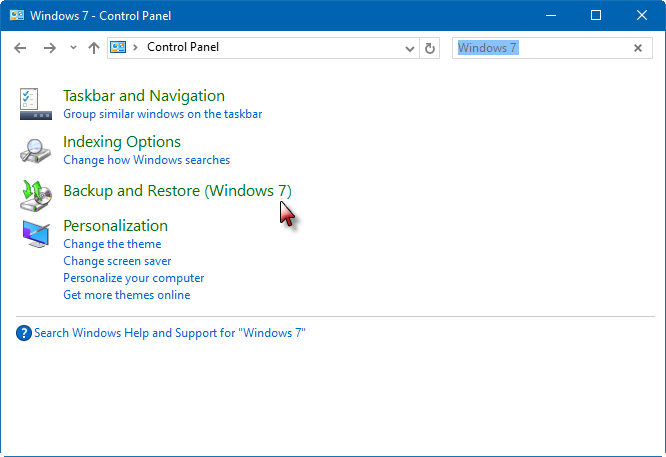
Accessing the Backup And Recovery (Windows 7) tool from the Control Panel is easy.
Now, when you see the Backup And Restore (Windows 7) user interface, select the Create A System Repair Disc command on the left side of the screen to launch the creation tool. This process is shown in Figure I.
Figure I
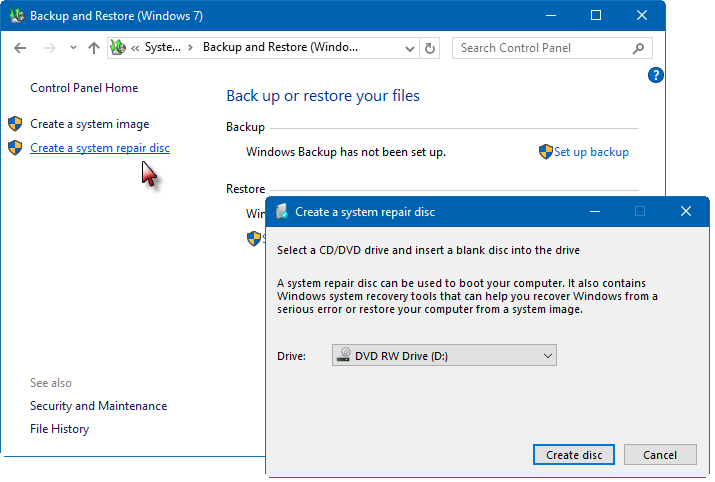
You’ll launch the Create A System Repair Disc procedure from the Backup And Restore (Windows 7) user interface.
To start the procedure, click the Create Disc button. The program will begin the process of creating the disc, as shown in Figure J.
Figure J
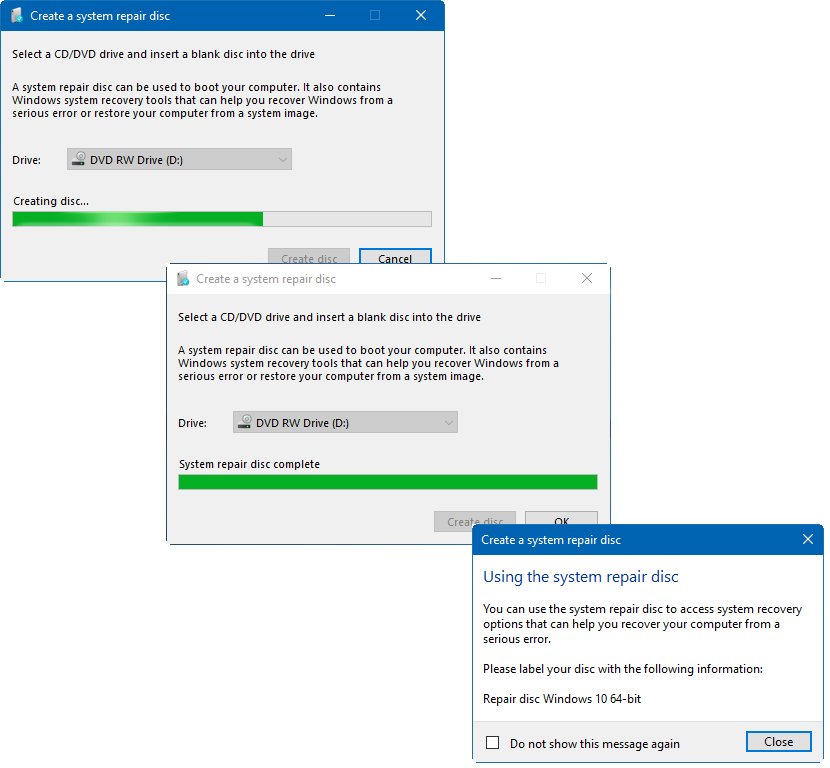
Creating a Recovery Drive on an optical disc is a relatively quick procedure.
What’s your take?
Will you use a USB flash drive or an optical disc to create a Recovery Drive? Share your opinion in the discussion thread below.
Also read…
- Which Windows editions let you use Remote Desktop Connection with multiple monitors?
- How’s your battery holding up? The Windows 10 Battery Report will tell you
- How to juggle multiple applications using Task View in Windows 10
- Investigating Windows 10’s Task Manager: More simplicity, more power
- Manipulating Windows 10’s Start Menu
