TFTP is a very versatile protocol that can be used for a variety of tasks, including backing up network configurations, upgrading code, and remote-booting devices without hard drives. However, because of its inherent insecurity, you must take special care in the design and configuration of a TFTP server. It’s a good idea to place such a server behind a firewall. Also, be sure to use TFTP on a server that includes additional security control, such as a Windows 2000 server.
Since TFTP is not as ubiquitous as FTP, setting it up is not quite as simple as installing the Internet Information Services on your Windows 2000 Server. But there are many providers of full TFTP servers that are sufficient to serve your needs. In this Daily Feature, I will explain how to download and set up both Cisco’s and SolarWinds’ free TFTP servers on a Windows 2000 server.
Where to download the TFTP server files
To download the Cisco TFTP server, you need to be a registered member of the Cisco site with a login ID and password. To register, you need a valid e-mail address. Once you’ve registered and logged in, download the TFTP server. You’ll need the file TFTPServer1-1-980730.exe.
The SolarWinds TFTP server is available on the SolarWinds Web site. You’ll need the file SolarWinds-TFTP-Server.exe. Click on the Try Now link on the right-hand side of the page to be directed to the download page.
The Cisco TFTP server
In this section, I will explain how to set up the Cisco TFTP server on a Windows 2000 Server running Service Pack 2. It’s simple to install, set up, and use this TFTP server, which should prove adequate for the needs of most network administrators.
To begin, simply double-click the downloaded file to extract the files. If you accept all the defaults, the server will be installed into C:\Program Files\Cisco Systems\Cisco TFTP Server. When complete, you will have a new program item on your desktop and the Start menu that runs the TFTP server. You don’t need to reboot to run the TFTP server.
Running TFTP
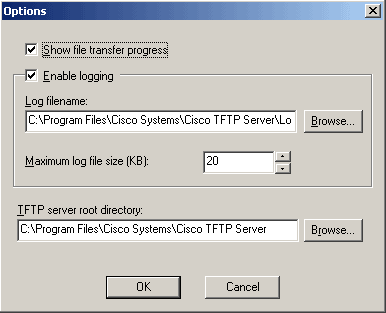
To start the Cisco TFTP server, click the shortcut on your desktop. You’ll notice that this program offers very few options. To see how your TFTP server is set up, choose View | Options. Figure A shows the default option settings.
| Figure A |
 |
| Here you see the Cisco TFTP server options. |
Make note of the TFTP server root directory, because this is where the files you transfer to the machine will be located, and it’s also the location where you will place files you need to transfer from the server onto a network device.
Using TFTP
To illustrate how TFTP can be used to back up your network hardware configuration, I’ll run through the process of backing up my Cisco PIX firewall to my desktop machine, which has the IP address of 172.16.1.207. To do this, I made sure I was in enable mode on my firewall. Then, I ran the commands below, which backed up the network hardware configuration. These commands work for the Cisco PIX and other Cisco equipment.
pixfirewall# write net 172.16.1.207:pixcfg.txt
Building configuration…
TFTP write ‘/pixcfg.txt’ at 172.16.1.207 on interface 1
[OK]
Other than Cisco
If you are not using Cisco, please refer to your system documentation for the syntax to back up your hardware configurations to a TFTP server.
The [OK] signified that the configuration was indeed backed up. When I looked in the TFTP server’s root directory, I saw a file named pixcfg.txt.
The Cisco TFTP server main window also reports on the progress and status of the download. Listing A shows the report generated on the Cisco TFTP server’s main window.
Security concerns
TFTP, by design, isn’t a very secure protocol to use. The purpose of TFTP is to send and receive data to and from pretty much anyone who asks, regardless of who they are. If a TFTP server is placed behind a firewall and you trust the users on the LAN, the security problem is somewhat lessened. A good rule of thumb is this: Assume that all of the files in the TFTP root directory of your TFTP server are readable by anyone. Do you want or care if someone gets all of the files from this directory? If not, the security issue is not as important.
But most of us don’t want just anyone getting their hands on router and firewall configurations. Such vulnerable information could give potential attackers critical information about your network, including exactly what kinds of traffic are allowed through the firewall.
Because of this insecurity, you should put your TFTP server on an isolated LAN that only the necessary equipment (such as routers and switches) can reach.
SolarWinds TFTP server
The SolarWinds TFTP server makes some strides in addressing the security concerns of TFTP at the application level. It includes TCP/IP access lists and other features that make it more difficult for just anyone to access the FTP server.
To install the SolarWinds TFTP server, double-click on the executable that you downloaded and accept the default installation, which will result in the program binaries being installed into C:\Program Files\SolarWinds\2002 Standard Edition. Once the installation is complete, the server will start up automatically.
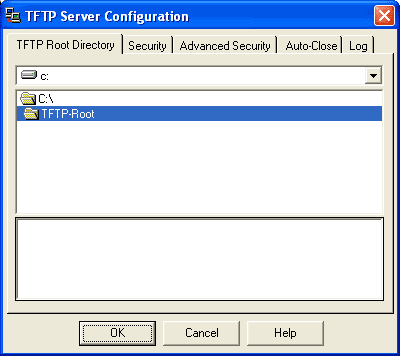
From the main SolarWinds TFTP server window, you can view the server configuration by choosing File | Configure and the window shown in Figure B will appear.
| Figure B |
 |
| SolarWinds TFTP Server Configuration options include an Advanced Security tab. |
By default, the TFTP root directory with the SolarWinds server is C:\TFTP-Root. Also, the server is set to Receive Only mode, which means it will only accept connections that transmit files to it, ignoring requests for outgoing file transfers. Receive connections are permitted from any IP address.
Testing
To test the SolarWinds server, I sent the same file that I sent to the Cisco TFTP server previously to it. The test was successful and I logged on to the main screen of the server.
Additional security
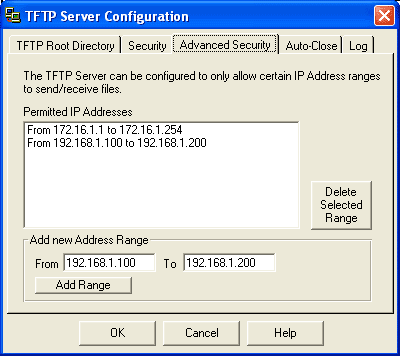
While allowing the server only to receive files is a great security measure, what do you do when you need a TFTP server capable of both sending and receiving files? The SolarWinds TFTP server can accept connections based on the source IP address, allowing you to strictly limit who is able to use it. To set this up, from the configuration screen, choose Advanced Security (Figure C).
| Figure C |
 |
| Only add trusted IP ranges to this configuration. |
Once you add IP ranges to the list of permitted IP addresses, the Advanced Security tab will look similar to Figure D.
| Figure D |
 |
| An IP address range can be removed by highlighting the range and clicking Delete Selected Range. |
Figure E shows an example of the log information you receive when it detects an attempt to bypass the security mechanisms.
| Figure E |
 |
| If the server detects an attempt to bypass the security mechanisms, your log file will contain errors like these. |
More about TFTP
While TFTP is the method of choice for backing up or upgrading network hardware, it also has other uses. TFTP is the protocol used for remote booting of devices without hard drives. In this way, it’s used with a bootp server. From the bootp server, the device receives its addressing information and the address of the TFTP server from which it should boot.
When configuring a firewall to allow access to a TFTP server on a protected network, keep in mind that the TFTP server uses port 69 for communication and relies on UDP rather than TCP. This also means that TFTP is not as reliable as FTP. The information (packets) is neither guaranteed to be complete nor acknowledged by the destination server.
The 512 limit
TFTP transfers files in 512-byte increments. When the TFTP server receives a packet smaller than 512 bytes, the server assumes the end of the file has been reached and closes the connection. Because of the 512-byte limit, data can easily be lost.