
Airtable is a popular relational database tool that allows users to easily create low-code or even no-code custom applications to streamline their workflows.
One of the key features of Airtable is its form creator, so below we’ll look at the steps needed to create your first form and how to customize it to fit your specific needs.
Creating A Form In Airtable
Airtable combines the functions of a spreadsheet and a relational database, so when it comes to forms you can populate tables via data captured by your forms. This data is stored as a single record and in a single table per form.
SEE: Feature comparison: Time tracking software and systems (TechRepublic Premium)
To get started, your database should already include the fields that will be going into the form.
Then, from the Views menu at the top left of Airtable, select Form from the Create menu and click the + sign next to Forms (Figure A).
Figure A
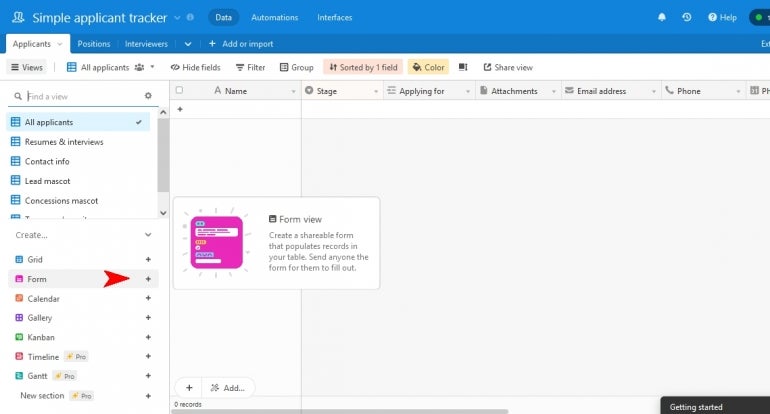
Note: You can also choose to use the Grid view to create your form, which will look more like a spreadsheet. But for simplicity, we will use the Form view in this tutorial. All features are available in both views.
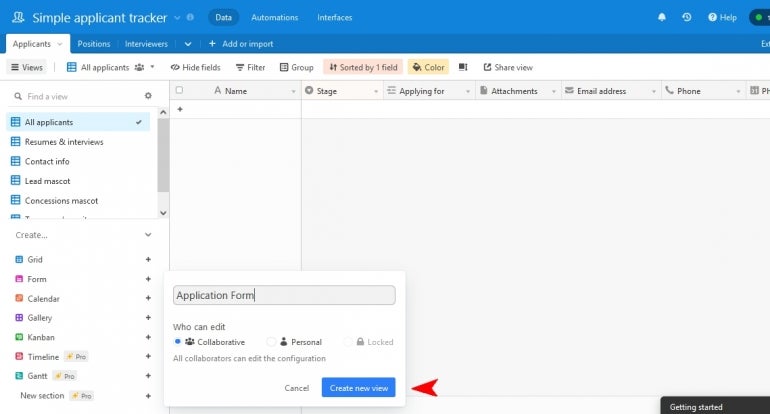
You will then want to name your form and click Create New View (Figure B). This will take you to the Form builder.
Figure B
From the Form builder view, you can start to add fields to your form. Begin by clicking on Add A Field To This Table (Figure C). You can also select one of the premade fields by simply clicking and dragging it over.
Figure C
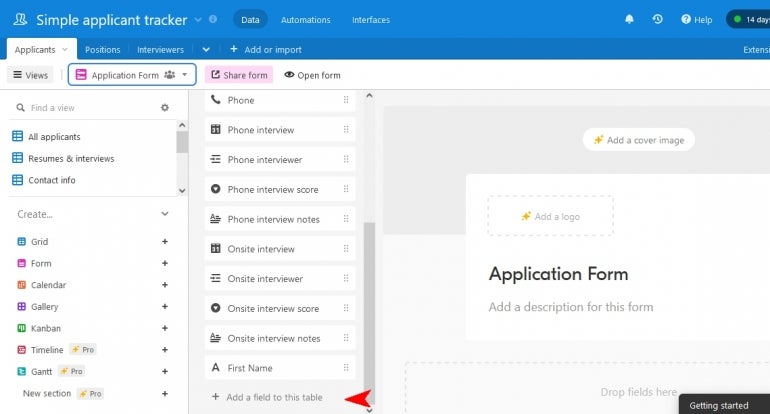
Any premade field you drag over can be customized once added to the form, so you are not locked into the default settings. Dragging these over can save you some time instead of having to manually create common fields for each form.
Each field you enter manually or drag over has a wide range of settings to help you manage the form and data.
Click on the top area of the field you just created to open the customization options for that specific field (Figure D).
Figure D
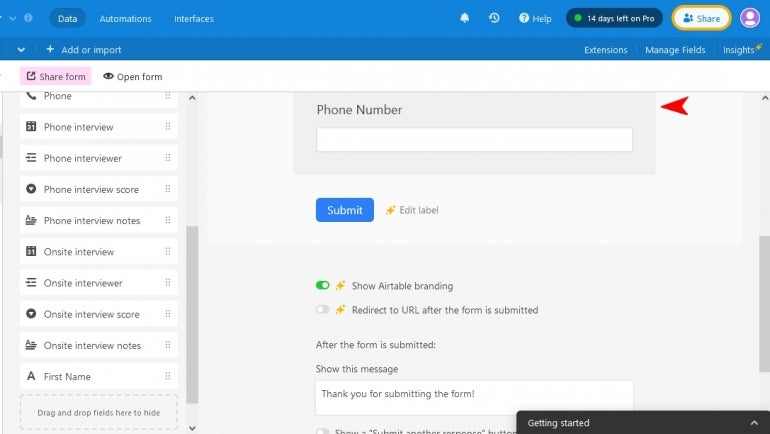
From there you can choose from several options.
Required will make the field mandatory, meaning that it cannot be submitted until the field is filled in, and Add Help Text will allow you to provide brief instructions to the user for a specific field.
With Show Field Only When Conditions Are Met, you can specify conditions needed to display this field (Figure E). For example, if a choice is made in one field, a new field can appear to further customize the choice.
Figure E
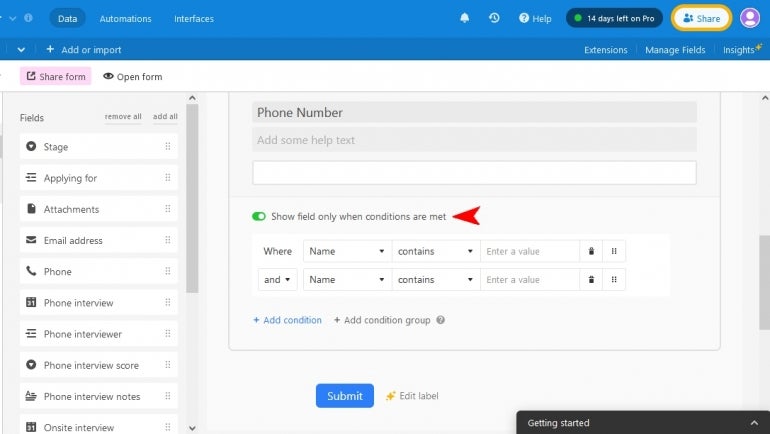
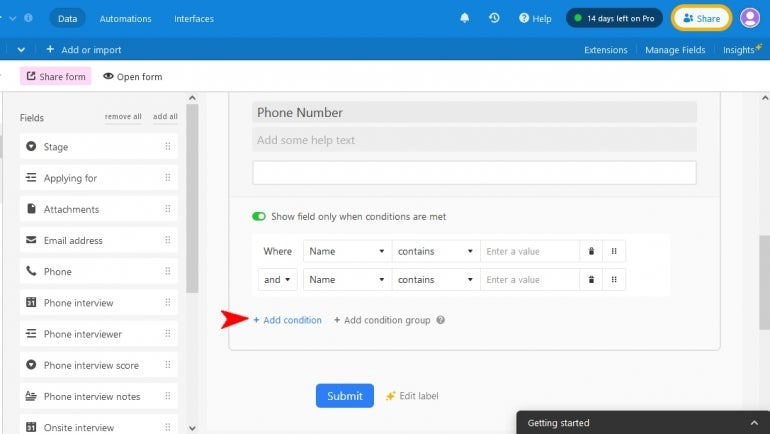
You can stack these conditions as well by clicking on Add Condition (Figure F).
Figure F
You can turn off the Airtable branding at the bottom of the form with Show Airtable Branding. Although, this option is only available on premium accounts.
Redirect To URL After Submitting allows you to specify where a user is taken after they submit the form. It can be to a standard thank you page or the next form in a series.
And the After The Form Is Submitted option lets you choose several options, such as a message to be displayed, whether to refresh the form, or to send an email to yourself containing the form data. For form collection from a large number of people, it’s best to turn off the email notifications.
Customizing An Airtable Form
The built-in form creator from Airtable is great for when all your data is being held within Airtable. However, it is not a fully featured form-building tool.
Because of this, many aspects of the look and layout of the form cannot be changed. Things like the field length or adding multiple columns is not possible.
But you can still do some customizing when it comes to the look of your form. This includes adding a brand logo or cover image.
To do so, simply click Add Logo or Add Cover Logo at the top of the form (Figure G) and drag in your image.
Figure G
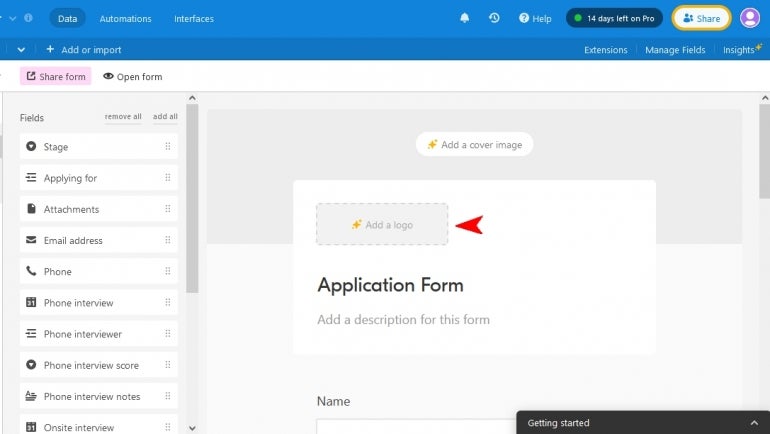
There isn’t a resize feature with these images, so you may have to resize your images beforehand, depending on their aspect ratio, so it matches with the space.
Airtable Form Automation
There are many automation options you can use with your form that are simple drag-and-drop operations that require no code.
To start, go to the top menu and select Automation (Figure H).
Figure H
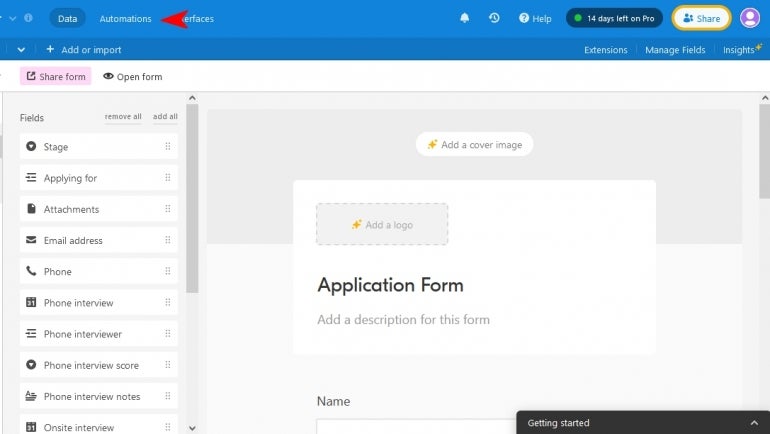
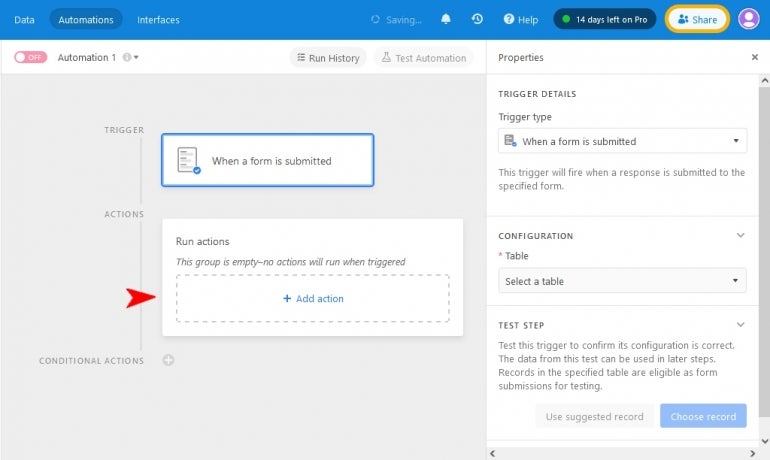
From here you drag the Trigger, which is the event, and then the Action you want performed (Figure I).
Figure I
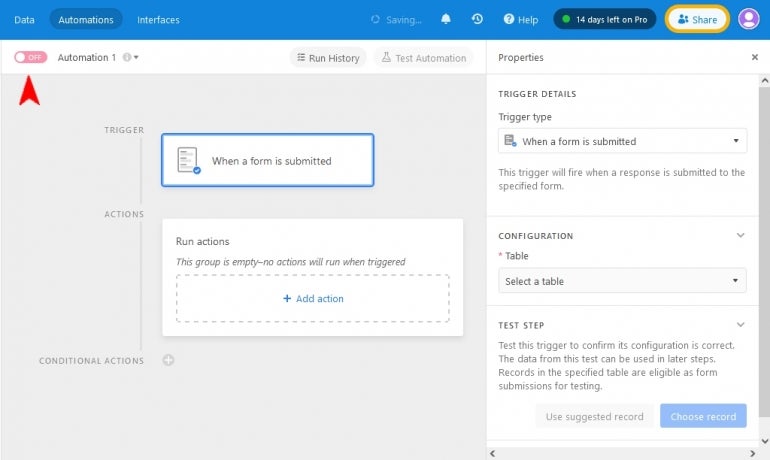
To activate it, you will need to turn on the Automation before leaving this page (Figure J).
Figure J
Some Limitations of Airtable Forms
The form builder in Airtable is a great tool when you want to stay completely within Airtable. But it does have some limitations.
The first is the layout limitations that were touched on earlier. For most cases this shouldn’t be a big concern. But for some, this may create the need to use a fully featured third-party form builder if complete control over the look of the form is needed.
Next is how the data is handled. The form builder in Airtable can only send one record to one table. If you need your data sent to multiple tables or to be duplicated or split across databases, you will need a third-party form builder that supports multiple databases.
But other than those limitations, Airtable’s built-in form builder should work for most applications, and it can all be done with no coding at all.
