


Mobility must-reads
- Big Apple OS Makeover: Here’s What to Expect & When
- MWC 2025: Nothing Shows Off (3A) Phones With AI Organization Tool
- Bad News for App Developers: Most Apps Fail to Hit $1,000 Monthly Revenue Within Two Years
- Mobile Device Computing Policy
Whether you’re working at your desk or on the go, creating and updating tasks, lists and to-dos is an important step in maintaining productivity and encouraging success. Just writing down goals improves your likelihood of completing them by 42%, a significant boost by any measure. Fortunately, the Reminders application included within iOS, iPadOS and macOS make it easy to create, edit, update, complete and otherwise manage tasks and lists using multiple devices from almost any location.
As previously reviewed, there are many ways you can tap into the power of Apple’s Reminders app. The first tip was to use and customize multiple Lists. Using Lists—the independent categories that permit organizing tasks, subtasks, checklists and corresponding responsibilities via altogether separate groups—you can better coordinate projects and improve task organization and tracking, whether you work using an iPhone, iPad, Mac or any combination of those devices.
SEE: iCloud vs. OneDrive: Which is best for Mac, iPad and iPhone users? (free PDF) (TechRepublic)
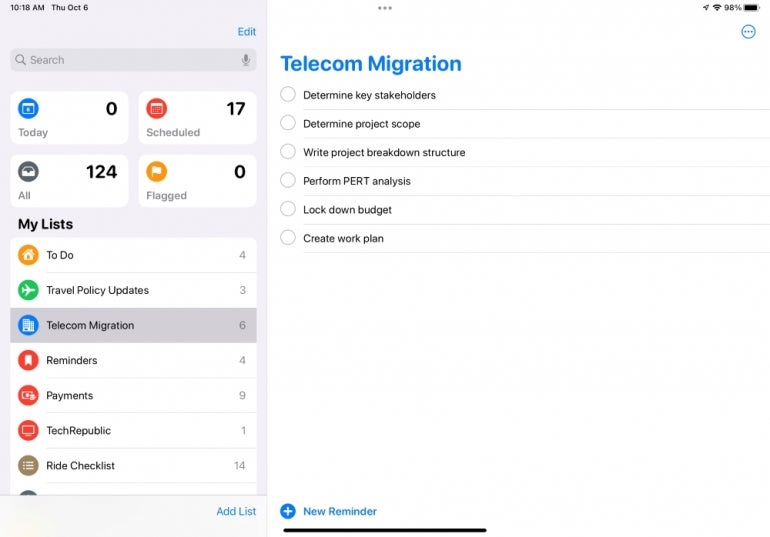
Creating a new List using an iPhone
To create a new List within Reminders using an iPhone, tap the Reminders app. From the My List view, as shown in Figure A, tap the Add List option that appears in the lower right corner.
Figure A

Next, enter a name for the new List, and add any tags or filters to further assist managing various tasks and lists using the Smart List menu. Specify a color if you wish to use colors to differentiate between Lists. Then, select a representative icon if you wish to differentiate projects instead of only using the default “list” icon (Figure B). Tap Done in the top right corner.
Figure B

Creating a new List using an iPad
The steps on an iPad are the same, but the Reminders app menus display differently thanks to the iPad’s larger display size. In case you skipped straight to these iPad instructions, though, here’s how to create a new Reminders List using iPadOS.
First, open the Reminders application. From the My List view, as shown in Figure C, tap the Add List option that appears on the bottom left-center.
Figure C
Next, enter a List Name, add tags or filters, specify a color and select an icon. Once you have everything the way you want it, tap Done in the top right corner.
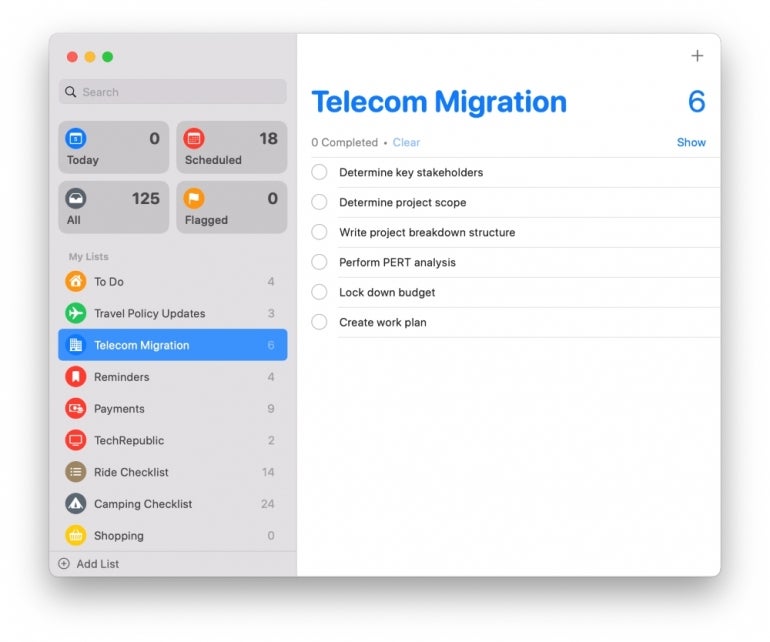
Creating a new List using a Mac
On a Mac, Reminders and the new Lists menus display differently. While the look and feel immediately mimics new List creation on iPhones and iPads, there are a few differences. To create a new list using macOS, open the Reminders app, and click the Add List option in the bottom left corner, as shown within Figure D.
Figure D
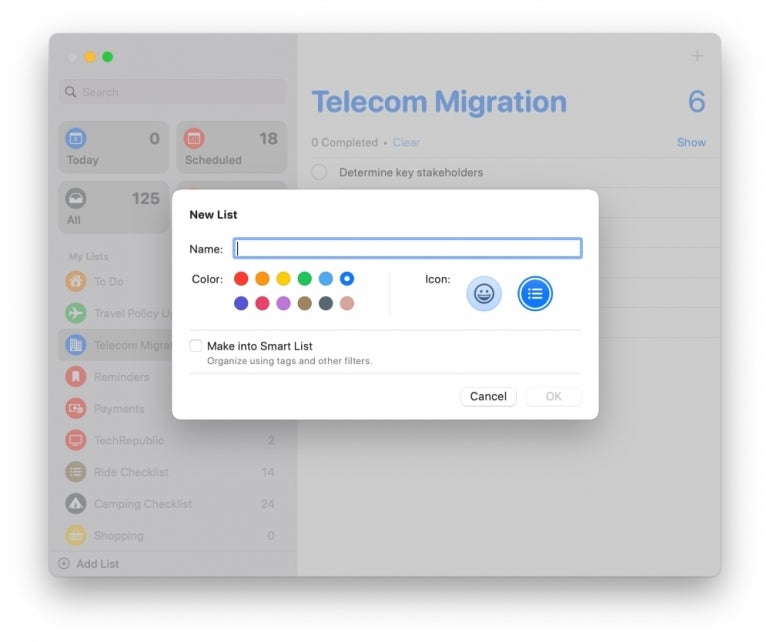
Next, enter a name for the new List (Figure E), and specify the color from the onscreen menu. You can also specify the icon or click an existing icon to call a pop-up menu from which you can choose from dozens of different flag, emoji and icon options. Then, check the box if you wish to associate tags or filters with the new List, and click the OK button.
Figure E
Sync Reminders across devices with iCloud
Thanks to iCloud, changes you make within Reminders—including making adjustments to individual tasks, adding notes, marking to-dos as complete and creating or updating Lists—can replicate automatically across all your Apple devices. To ensure new lists, tasks and corresponding information synchronizes, enable Reminders synchronization within iCloud settings on each device.
On iPhones and iPads, open Settings, tap your Apple ID, tap iCloud and confirm the Reminders radio button is set to enabled (green). On a Mac, open System Preferences, click Apple ID and confirm the Reminders radio button is enabled.