If you’ve been diving into the realm of docker containers, you’ve probably started dabbling with creating your own images and are looking to push those images to Docker Hub, so others can make use of your work. If that’s the case, you’re in luck; I’m going to walk you through that very process. Here we are going to create a new docker image and then push it to the Docker Hub — all from the command line.
This process isn’t challenging, but you will want to know your way around the docker commands. I’ll be demonstrating on a Ubuntu 16.04 Server, but the steps work on any Linux distribution that has docker installed. I will work under the assumption you already have docker installed and have an account on Docker Hub.
With that out of the way, let’s get to work.
Creating your new image
For the sake of simplicity, we’re going to create a new image, based on the latest Ubuntu image, which will include a LAMP server. Although there are tons of such images already available, this will serve as an easy example you can follow.
The first thing we must do is pull the latest Ubuntu image with the command:
docker pull ubuntu
The above command will pull down the latest Ubuntu image. Now we’re going to create a container such that we can work within our latest Ubuntu. To do this, issue the command:
docker run --name test-lamp-server -it ubuntu:latest bash
You can use any name you like in the above command. I’m calling my test-lamp-server (so I know exactly what I’m working with). When the above command completes, you’ll notice your terminal has changed to indicate you are now working within the container.
Once inside the container, the first thing you must do is update apt with the command:
apt-get update
If you do not issue the above command, you won’t be able to install anything into the container. Once the update completes, issue the command:
apt-get install lamp-server^
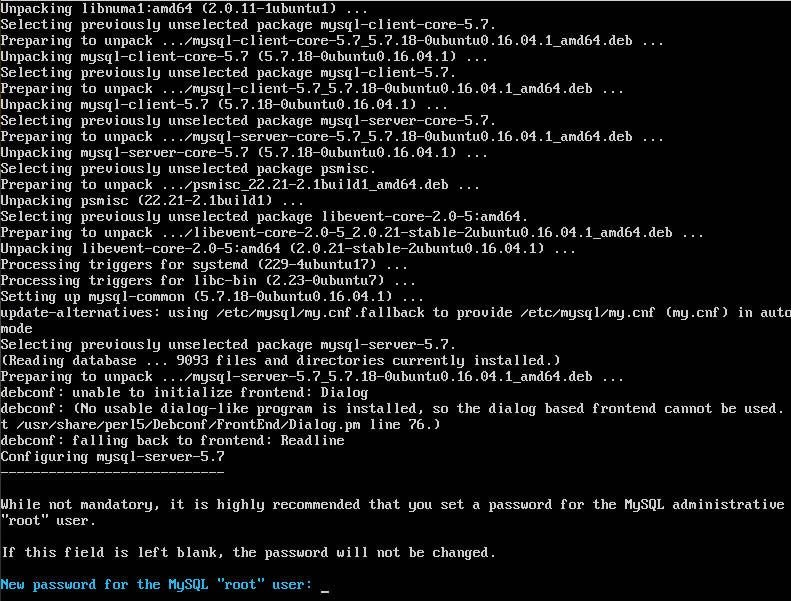
The above command will install everything you need for your lamp server. During the installation process, you will be asked to create (and verify) a password for the MySQL “root” user (Figure A).
Figure A

When the installation is complete, you need to exit the container with the exit command. Issue the command docker ps -a and you should see the new container listed.
Pushing the container to Docker Hub
Now it’s time we push our new container to Docker Hub. Remember, this is just a test container, so chances of you actually wanting to push such a container to the hub will be slim. We’ll do it anyway (so you know how it’s done). The first thing you must do is commit the change with the command:
docker commit -m "Added LAMP Server" -a "NAME" test-lamp-server USER/test-lamp-server:latest
Where NAME is your full name and USER is your Docker Hub user name.
Next we need to login to Docker Hub with the command:
docker login
You will be prompted for your Docker login credentials. Upon successful authentication, you will see Login Succeeded. Finally, you can push your image to Docker Hub with the command:
docker push USER/test-lamp-server
Where USER is your Docker Hub user name. The image will be uploaded to Docker Hub and you’re good to go. You can now pull that image back into docker from anywhere (so long as you have docker installed). Open up a web browser, log into Docker Hub, and you should see your image listed.
Develop your containers
At this point, you should be ready to start developing your containers and pushing them to the Docker Hub. Yes, we only created a very basic image here, but you can use all of your developer (and new-found docker) skills to create many varied images that will be useful to you, your colleagues, and the community at large.