I use a MacBook Pro for many reasons, one of which is that it’s a user-friendly platform that helps me get my work done anywhere I may roam. And speaking of roaming, one feature I find very helpful within macOS is the ability to create different Network Locations. This allows you to create different configurations for networks that you can quickly switch from.
Say, for instance, both your work and home networks use the same type of IP address scheme, but you are required to use DHCP via Ethernet at work and you want to assign a static IP address via Wi-Fi at home. Or maybe you have multiple wireless networks at home and you always want to connect to a particular one.
With Network Locations, you can make that a reality. Once you have them configured, you can just select the location you want and you’re good to go. This is an easy way to fine-tune your networking connections and associate a specific configuration to a specific location.
I’m going to show you how this works.
SEE: BYOD Approval Form (TechRepublic Premium)
What you’ll need
Network Locations has been around for some time, so it doesn’t require the most up-to-date version of macOS (although you should be using the most recent release). So, other than macOS, you’ll just need a couple of networks to connect to.
Let’s get to it.
How to create a new Network Location
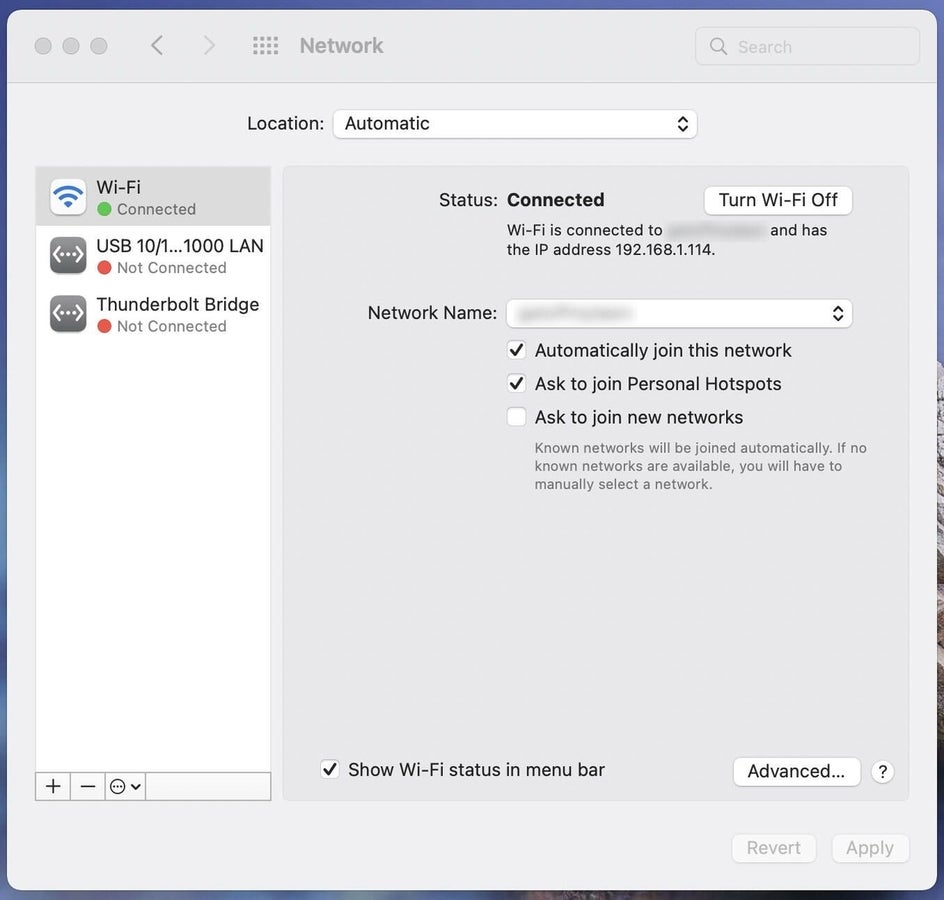
Click on the top bar network icon and then click Network Preferences. In the resulting window (Figure A), you should see the Location drop-down at the top.
Figure A
From the Location drop-down, select Edit Locations and then, when prompted, click the + button (Figure B) to create a new location.
Figure B
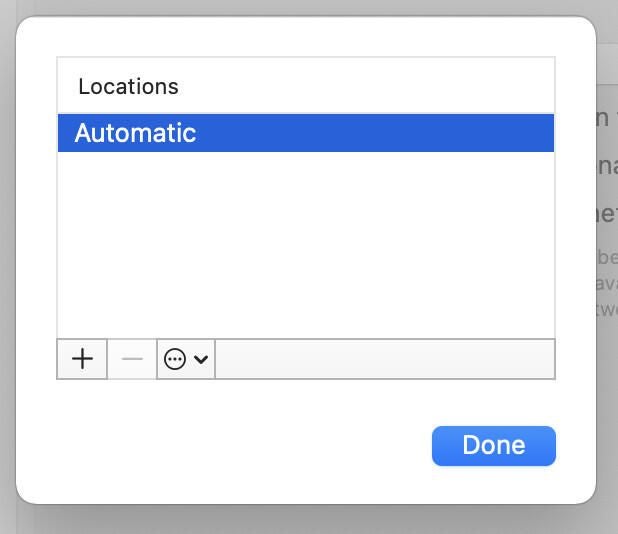
Give the new location a name and click Done. Then, in the configuration window for that location, configure it exactly as you need. Click Advanced to open the configuration window.
Let’s say you’re creating a new HOME STATIC location and you want to use a specific network from those available and set it as a static address. For that, you’d do the following:
- Select the preferred network from the list (Figure C).
- Click TCP/IP and select Manually from the Configure IPv4 drop-down (Figure D).
Figure C
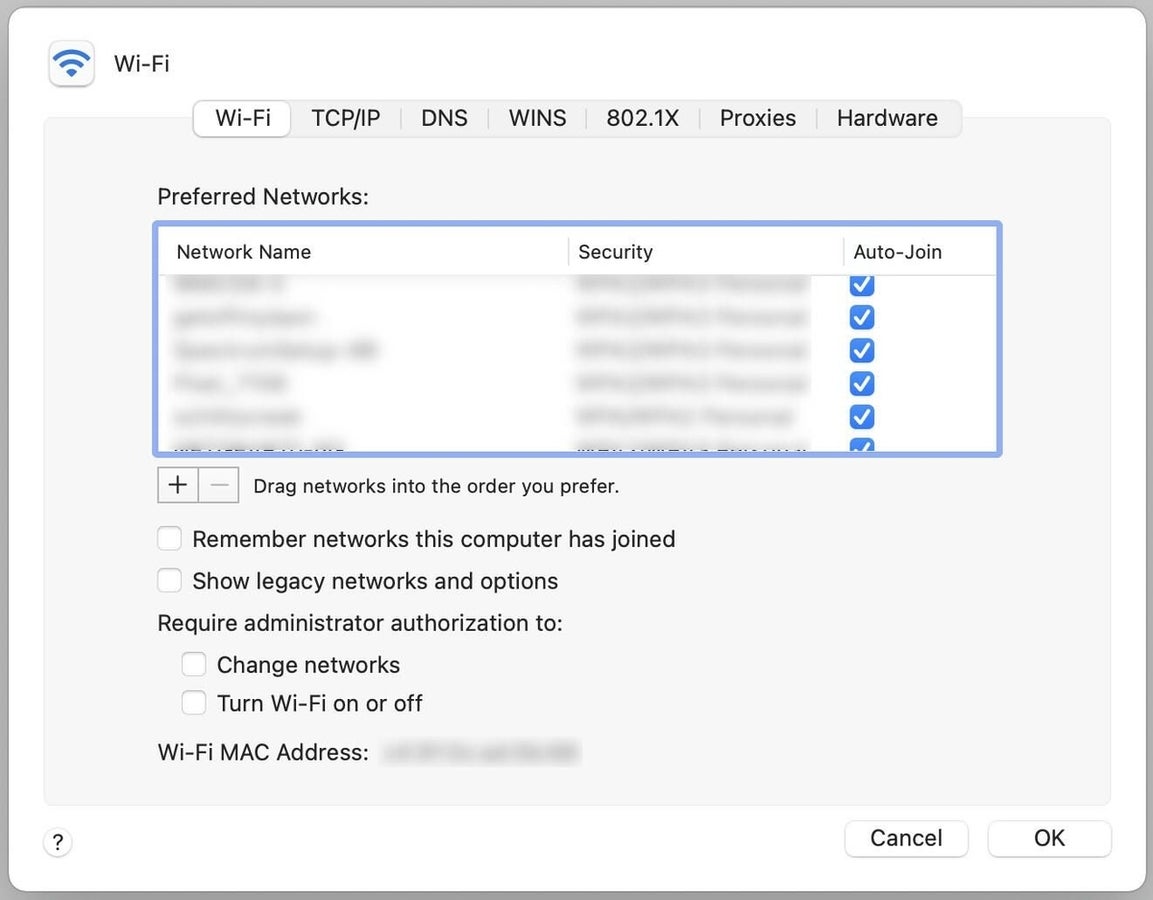
Figure D
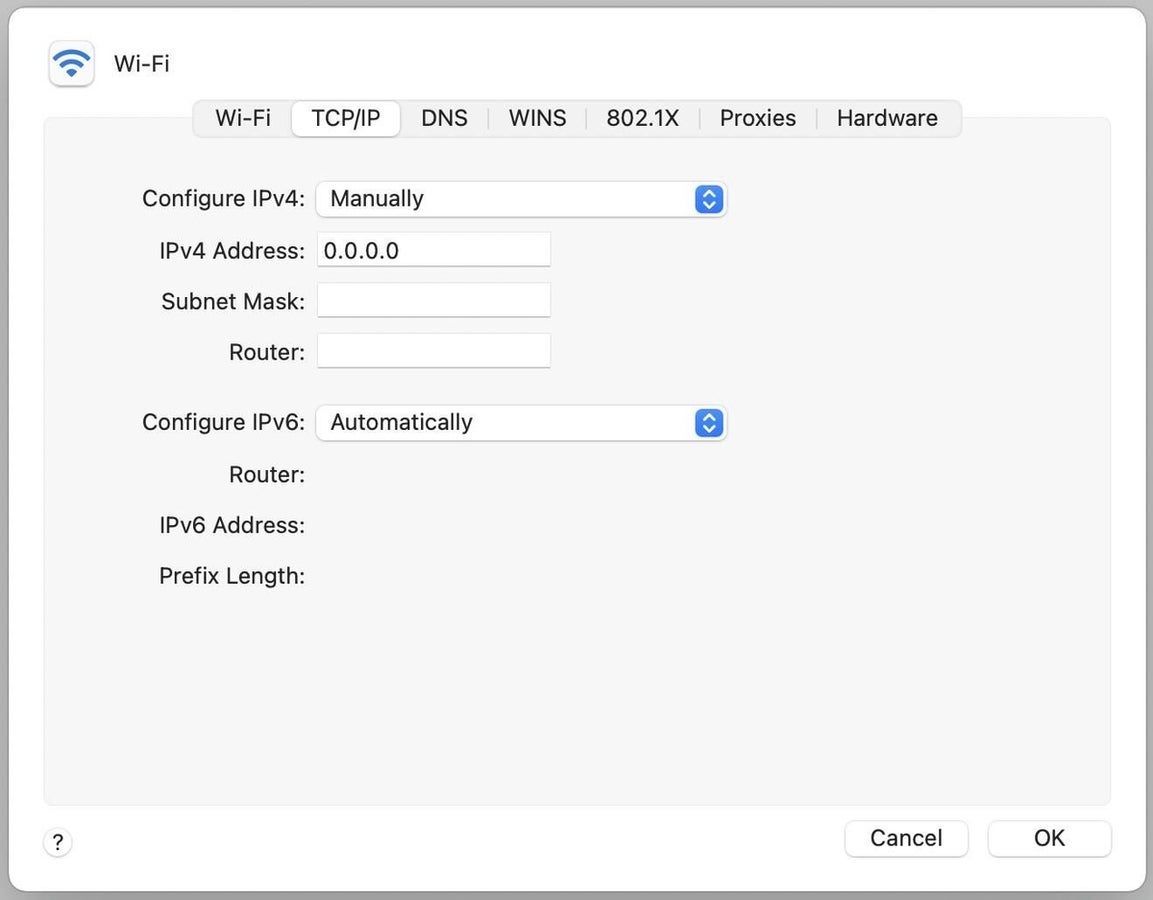
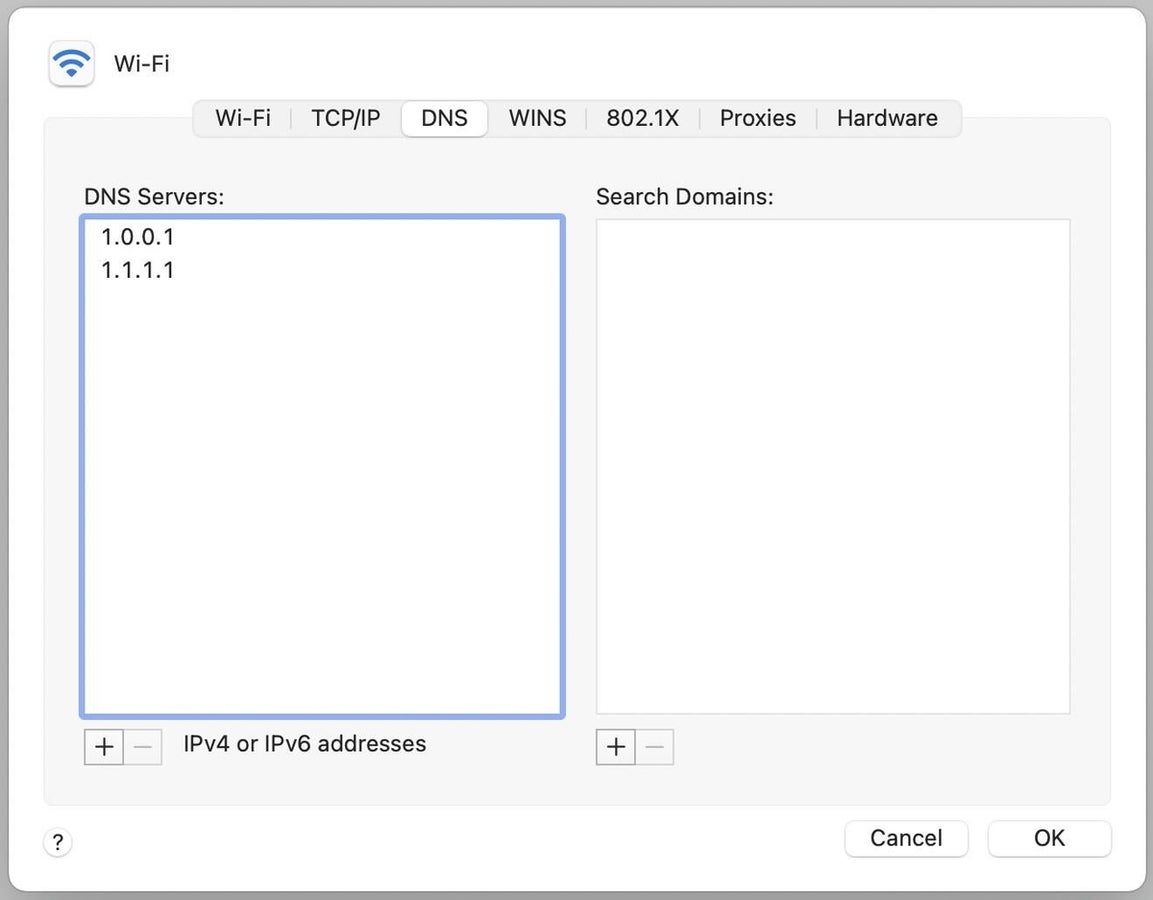
Next, configure the IP address you want to be associated with this connection and then click DNS and configure the DNS entries you want to use for the location (Figure E).
Figure E
Click OK and then click Apply in the main Network window. Your new Network Location is configured and ready to go.
How to select your Network Location
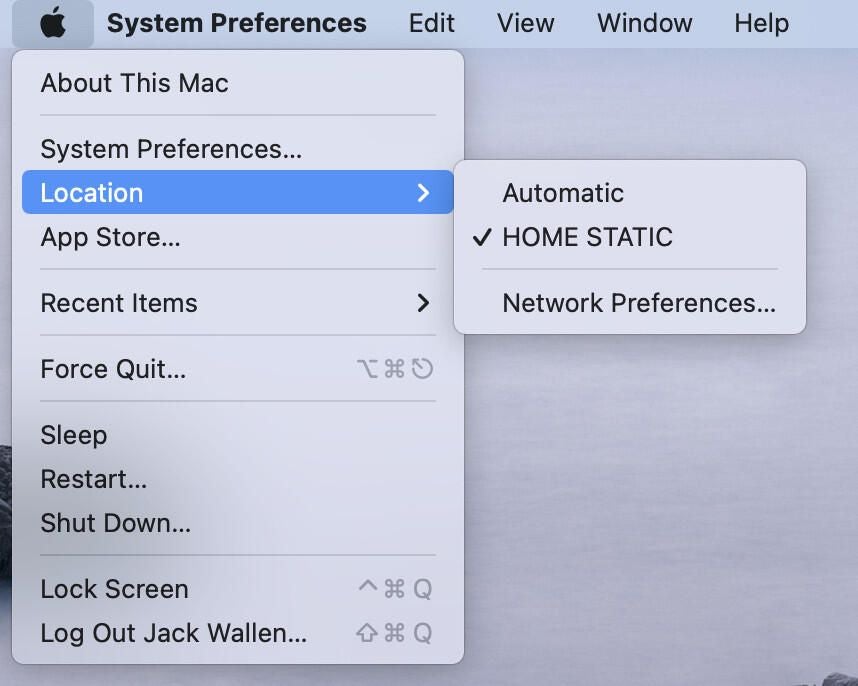
You can always select your location from the Network configuration window, but there’s an easier way. Click the Apple menu and then click Location | LOCATION, where LOCATION is the Network Location you want to use (Figure F).
Figure F
And that’s all there is to configuring a Network Location in macOS. Make sure to start using this feature, as it can make your mobile life considerably easier, more reliable and even more secure.
Subscribe to TechRepublic’s How To Make Tech Work on YouTube for all the latest tech advice for business pros from Jack Wallen.

Image: Apple