If you do any collaboration within Google Drive, you know how easy the big Alphabet has made the task of sharing. It’s incredibly simple to invite Google users and non-Google users to view and/or work with your documents. You right-click a file or folder, select Share, and add those people you want collaborating on your project.
On those projects, you can add as many people as you want. However, when you start adding a lot of people, it can get cumbersome, especially when you’re adding multiple teams. Google thought of that and made it easy for you.
SEE: Job description: Cloud engineer
It’s all about groups
What you can do to make regular sharing with numerous people easier is use Groups. So instead of typing a single person’s name in the Sharing field, you type the group’s name. Simple.
If you need to create a specific group for sharing, follow these steps in Google Contacts.
- Expand Groups in the left navigation.
- Scroll down and click New Group.
- Give the group a name.
- Click OK to save the group.
To add a member to the group, click the Add Person button (the red circle in the bottom right corner) and then type a name. As soon as the person appears, click their entry to add them to the group. Continue doing that until the group is filled with the necessary members.
Sharing with the group
Once you’ve got the group(s) just right, it’s time to share that file or folder with them; this is done in the standard fashion.
- Right-click the file/folder.
- Click Share.
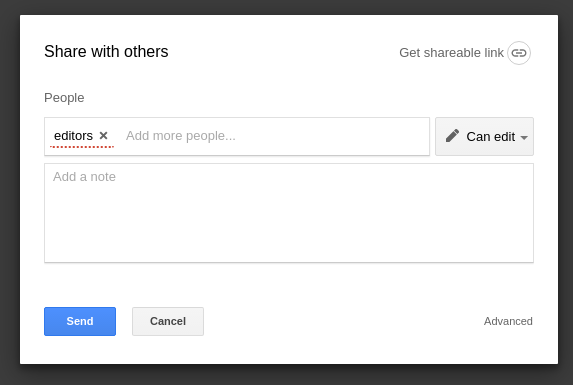
- In the field (where you’d normally type the name of the user you intend to share with), type the name of the group for collaboration (Figure A).
- Select the group permission from the Can Edit drop-down.
- Add a note (optional).
- Click Send.
Figure A

Collaborating with a group in Google Drive.
A caveat: You’ve effectively given the entire group the same permission. If you have to break those permissions up, you should consider creating different groups that will be given different permissions. For example: I could create a group of beta readers, a group of editors, and a group of proofreaders. When I share the file with the three groups, I could give the beta readers viewing-only rights, the editors editing rights, and the proofreaders commenting rights. By breaking it down into smaller groups, you have more control over who can do what with the collaboration file/folder.
Collaborate with ease
Google has made the process of collaborating on documents incredibly easy. With this simple-to-implement tip, you can make team collaboration quick and painless. So, what are you waiting for? Start collaborating!
