If you’re about to install a new instance of phpMyAdmin, you might be surprised that many things have changed. One of the biggest change is that configuration storage is a bit more challenging to setup. What is configuration storage? The name says it all. Unless you have configuration storage setup, every configuration option you change to phpMyAdmin through the web interface will only be stored on a per-instance basis. If you want to be able to make permanent changes to your phpMyAdmin installation via the web-based interface, you’ll want this enabled. With configuration storage enabled, you can easily configure settings such as:
- Login cookie validity
- Skip locked tables
- Show only specific databases
- Hide databases
- Maximum number of databases to display
- Page titles
- Replication
- User accounts
- And much more
But since the process has changed for enabling configuration storage, you’ll probably find no configuration options can be saved on a new phpMyAdmin setup. Let’s fix that.
The process is a bit cumbersome, but not terribly difficult. I will assume you already have phpMyAdmin up and running and can log in with an admin account. I’ll be demonstrating on phpMyAdmin 4.7.9, running on Ubuntu Server 16.04, via an Antsle virtual machine.
Create a new database
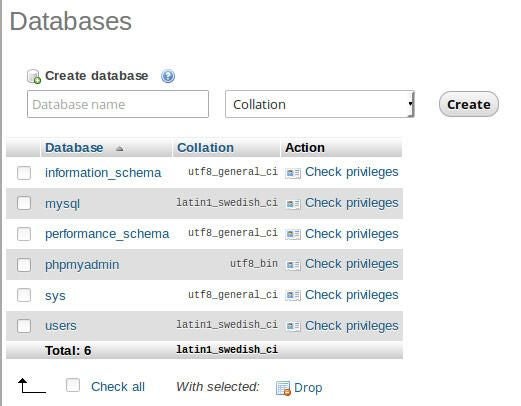
In order to enable configuration storage, we have to import a set of tables. However, we don’t want to just import those tables into any old database. That could wreak havoc on your database. So, let’s create a database called users. Log into phpMyAdmin and click on the New button in the left navigation. In the resulting window (Figure A), type users in the Database name field and click the Create button.
Figure A

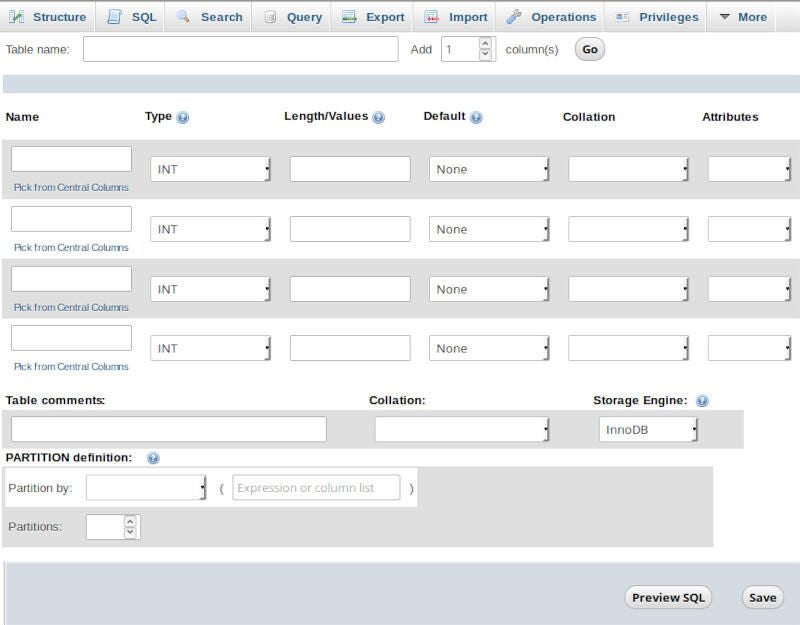
You will then be prompted to create a new table. Without this “dummy” table, you won’t be able to import the necessary table to enable configuration storage. Create a simple table by clicking New under the users database. In the resulting window (Figure B), name some columns, select a type (VARCHAR is always safe), and give them all a value (20 or so). Once you’ve filled out those bits of information, scroll down and click the Go button. Your dummy table has been created.
Figure B

Now we import the tables.
Importing tables
Once the database has been created, select the new database in the left navigation and click on the Import tab. This is where we import the necessary tables. However, we must get those tables first. Secure shell into your MySQL server and change into the directory housing the tables to be imported with the command cd /var/www/phpmyadmin/sql. Using the scp command, send those files to the desktop machine you’re working on, like so:
scp create_tables.sql USERNAME@IP:/directory/create_tables.sql
So if I’m copying the tables to IP address 192.168.1.162 for user jack to directory /home/jack, the command would be:
scp create_tables.sql jack@192.168.1.162:/home/jack/create_tables.sql
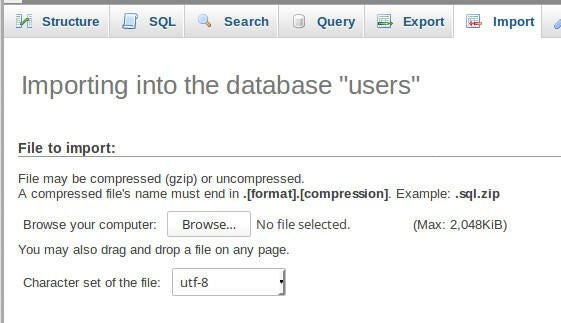
Now that the tables file is on my desktop machine, I can go to the Import tab for our users database and click the Browse button (Figure C).
Figure C

Navigate to the directory you saved the create_tables.sql file in (in my case, /home/jack) and select the create_tables.sql file. Scroll down and click the Go button and the tables will import.
At this point, the configure storage error will be gone and you can now configure your phpMyAdmin server via the web-based interface, and not have to worry about combing through the config.inc.php file for every configuration option.
A must-do task
If you plan on using phpMyAdmin for your database management, this task should be considered a must do. Without configuration storage enabled, you’ll be missing out on an ease of configuration for a number of advanced features within phpMyAdmin.