


Secure Sockets Layer (SSL) has become a necessity for web servers. Why? Because security has been forced into the spotlight, and every company now faces the fact that their web servers must serve up content securely.
More about data centers
- Stargate Norway: OpenAI’s First AI Data Center in Europe
- AI Data Centers’ Soaring Energy Use: Who Pays for Higher Utilities Costs?
- China’s Submerged AI Data Center Could ‘Influence Global Sustainable Computing’
- Google to Power Data Centers With Nuclear Energy by 2030 in First-Of-A-Kind’ Agreement
To that end, you need to make use of SSL. If you happen to work with NGINX, you’re in luck, as the process is quite possible (though slightly complicated).
I want to walk you through the steps of enabling SSL on a Ubuntu Server 18.04, running NGINX. I will demonstrate this with a self-signed certificate, but a certificate from an official Certificate Authority (CA) is a much better choice. In fact, you should use the self-signed certificate only as a means for testing purposes.
SEE: Disaster recovery and business continuity plan (Tech Pro Research)
What you need
To accomplish this, you’ll need NGINX running on Ubuntu Server 18.04, with a self-signed certificate at the ready. I’ll assume you already have Ubuntu and NGINX up and running. We’ll walk through the process of creating the self-signed certificate.
Self-signed certificate
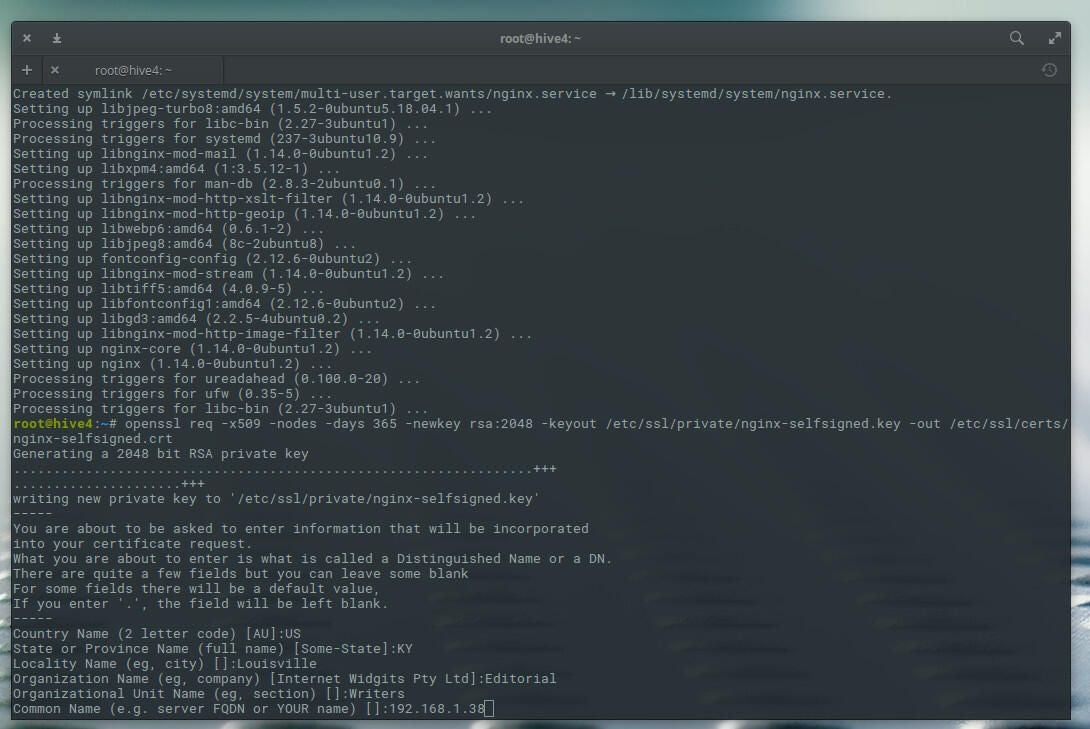
The first step is to generate your self-signed certificate. To do this, log into your server and issue the following command:
sudo openssl req -x509 -nodes -days 365 -newkey rsa:2048 -keyout /etc/ssl/private/nginx-selfsigned.key -out /etc/ssl/certs/nginx-selfsigned.crt
You will be asked a few questions (such as country name, state, locality, etc.). The most important answer is the Common Name. For this question, answer with the server’s IP Address (Figure A).
Figure A
Once the command completes, the necessary files will be added to the /etc/ssl directory and are ready to use.
Configure NGINX
Now we need to configure NGINX to use SSL. First, create a new configuration snippet file with the command:
sudo nano /etc/nginx/snippets/self-signed.conf
In that new file, add the following contents:
ssl_certificate /etc/ssl/certs/nginx-selfsigned.crt;

ssl_certificate_key /etc/ssl/private/nginx-selfsigned.key;
Save and close that file.
Next, create a second configuration snippet that points to our newly-generated SSL key and certificate. To do this, issue the command:
sudo nano /etc/nginx/snippets/ssl-params.conf
In that new file, add the following contents:
ssl_protocols TLSv1.2;

ssl_prefer_server_ciphers on;

ssl_dhparam /etc/ssl/certs/dhparam.pem;

ssl_ciphers ECDHE-RSA-AES256-GCM-SHA512:DHE-RSA-AES256-GCM-SHA512:ECDHE-RSA-AES256-GCM-SHA384:DHE-RSA-AES256-GCM-SHA384:ECDHE-RSA-AES256-SHA384;

ssl_ecdh_curve secp384r1; # Requires nginx >= 1.1.0

ssl_session_timeout  10m;

ssl_session_cache shared:SSL:10m;

ssl_session_tickets off; # Requires nginx >= 1.5.9

# ssl_stapling on; # Requires nginx >= 1.3.7

# ssl_stapling_verify on; # Requires nginx => 1.3.7

resolver 8.8.8.8 8.8.4.4 valid=300s;

resolver_timeout 5s;

add_header X-Frame-Options DENY;

add_header X-Content-Type-Options nosniff;

add_header X-XSS-Protection "1; mode=block";
Because we are using a self-signed certificate, we disable SSL stapling (a method for quickly and safely determining whether or not an SSL certificate is valid). If you’re not using a self-signed certificate, remove the # symbols before the two lines. You can also change the resolver line to reflect your preferred DNS servers. Save and close that file.
We also need to generate the dhparam.pem file with the command:
sudo openssl dhparam -out /etc/ssl/certs/dhparam.pem 2048
The above command will take some time.
The next step is to configure NGINX to be aware that we’re going to be using SSL. Let’s assume you have a server block for example.com in sites-available. Open that server block with the command:
sudo nano /etc/nginx/sites-available/example.com
In that file, edit it to reflect the following:
server {

listen 443 ssl;

listen [::]:443 ssl;

include snippets/self-signed.conf;

include snippets/ssl-params.conf;
server_name example.com www.example.com;
root /var/www/example.com/html;
index index.html index.htm index.nginx-debian.html;
}
Below that add a new server block (to perform an HTTPS redirect) like so:
server {

listen 80;

listen [::]:80;
server_name example.com www.example.com;
return 302 https://$server_name$request_uri;
}
Finally, we need to link from sites-available to sites-enabled with the command:
ln -s /etc/nginx/sites-available/www.example.com /etc/nginx/sites-enabled/
Check the profiles
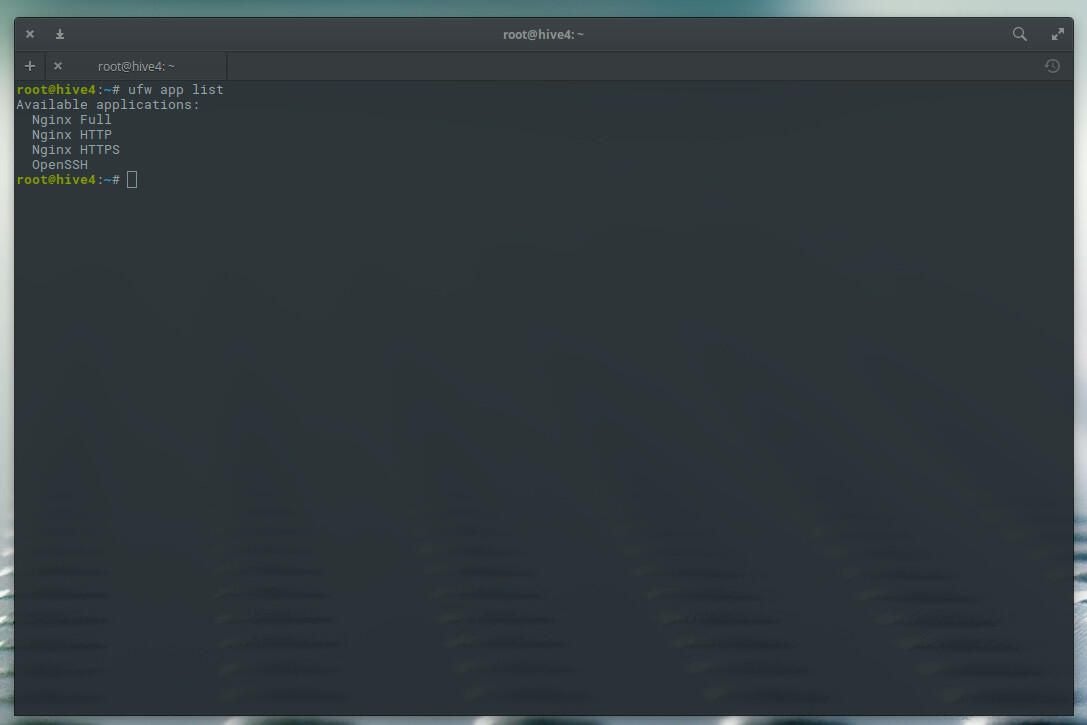
Using ufw, we can check our new SSL-enabled profiles with the command:
sudo ufw app list
This should clearly show NGINX HTTPS is enabled (Figure B).
Figure B
Restart NGINX with with the command:
sudo systemctl restart nginx
You should now be able to point a browser to https://SERVER_IP (where SERVER_IP is the IP address of your server) and see (because we’re using a self-signed certificate) a warning about the security of the certificate (Figure C).
Figure C

Congratulations, you now have SSL working on NGINX. Your data center web servers are more secure.
Become a Linux expert with these TechRepublic Academy resources: