I have a habit of mass deleting files. In certain “cast-off directories” (such as Downloads), they build up until I start having trouble finding what I need. That’s when the [Ctrl]+[A] happens and files get sent off, en masse, to the long kiss goodbye.
SEE: Google Chrome: Security and UI tips you need to know (TechRepublic Premium)
Sometimes, however, I’ll accidentally remove something I need, only to have to comb through the recycle bin to find it. Fortunately, most OSes I use include such a feature. Over a year ago, Google added this feature to Chrome OS, and I’m going to show you how to enable it on your Chromebook.
What you’ll need
The only thing you’ll need to enable this feature is a Chromebook running at least version 89 of Chrome OS. I’ll be demonstrating on a Chromebook running version 100.0.4880.0. Do note, this will restart your Chromebook, so make sure you’ve saved all of your work before you dive into these steps.
How to enable the Trash folder
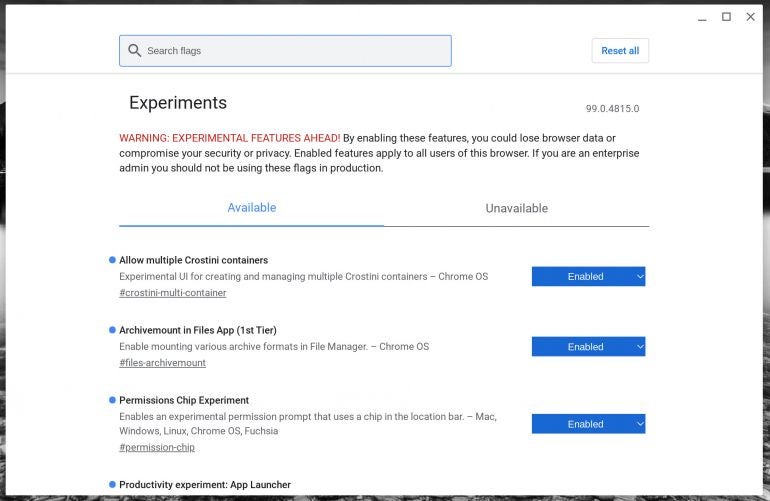
Log into your Chromebook, open Chrome, and type chrome://flags in the address bar. In the resulting window (Figure A), type trash in the search bar.
Figure A
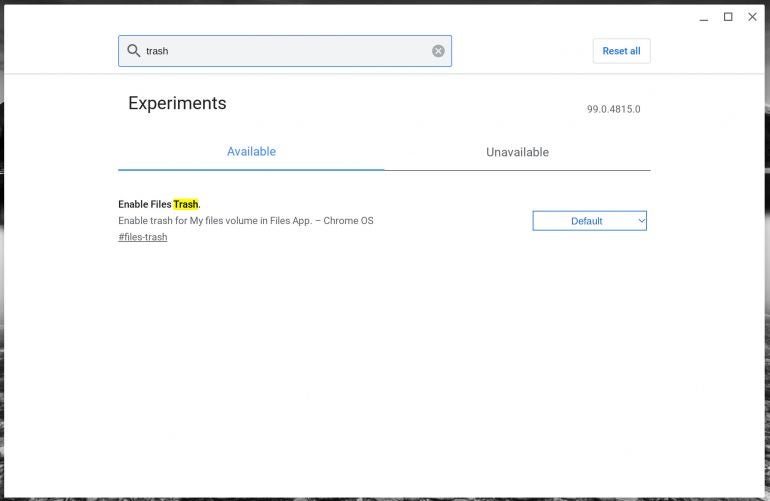
You should see Enable Files Trash listed (Figure B).
Figure B
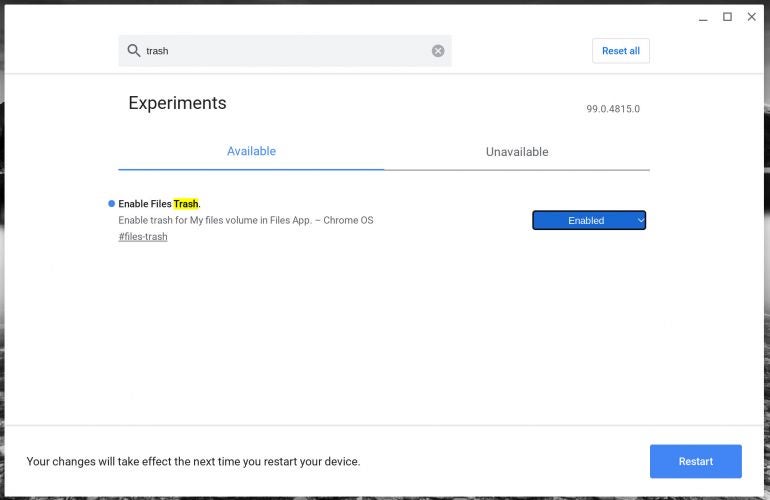
Select Enabled from the drop-down and, when prompted (Figure C), click Restart so the changes will take effect.
Figure C
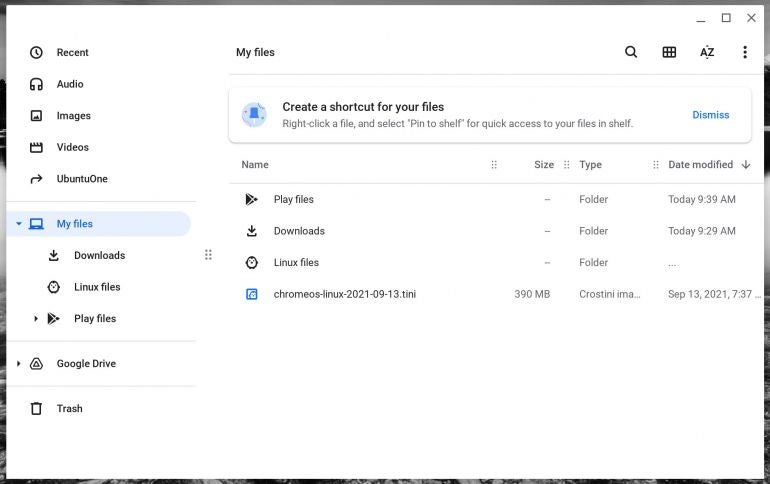
After your Chromebook restarts, log back in and open the Files application. You should see the new Trash icon in the left sidebar (Figure D).
Figure D
Now, when you right-click a file, you’ll notice you have both Delete and Move to Trash (Figure E).
Figure E
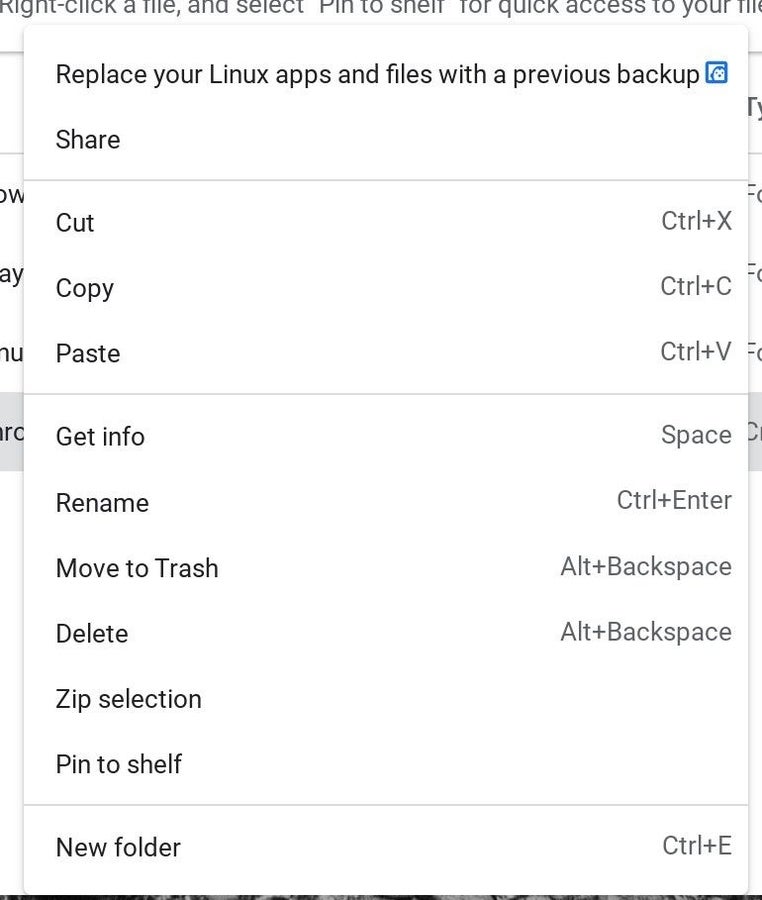
If you choose Delete, the file will be deleted as expected. If, however, you choose Move to Trash, the file will be stored away in the Trash folder, where it will remain for 30 days. If you don’t restore it before then, the file is gone forever. Because of that, do not treat the Trash folder as a permanent storage place for files you may or may not want. Instead, consider it a location to hold files you probably won’t need, but would like to keep them around for a short period … just in case.
Although this isn’t a deal-breaker or -maker, it’s yet another subtle way you can convert your Chromebook into a more productive environment.
Subscribe to TechRepublic’s How To Make Tech Work on YouTube for all the latest tech advice for business pros from Jack Wallen.
