Image: iStockphoto/Suwat Rujimethakul
FreeRADIUS is an open source, high-performance RADIUS server that provides centralized network authentication for desktops and servers. With RADIUS, you can maintain user profiles and track usage for various purposes. However, managing FreeRADIUS by itself can be a bit of a daunting task for many administrators.
Fortunately, there’s a web-based GUI, daloRADIUS, that makes FreeRADIUS administration much easier.
I’m going to walk you through the process of installing both FreeRADIUS and daloRADIUS on the Ubuntu Server 18.04 platform.
SEE: 10 free alternatives to Microsoft Word and Excel (TechRepublic download)
What you’ll need
The only things you’ll need to make this work are:
- A running instance of Ubuntu Server 18.04
- A user account with sudo privileges
How to install dependencies
The first thing to do is install the necessary dependencies. Although Ubuntu Server ships with Apache installed, there are plenty of related dependencies that must be added.
Open a terminal window and issue the command:
sudo apt-get install apache2 mariadb-server php libapache2-mod-php php-mail php-mail-mime php-mysql php-gd php-common php-pear php-db php-mbstring php-xml php-curl unzip wget -y
How to secure and configure the database
Once the installation completes, let’s secure the database installation with the command:
sudo mysql_secure_installation
You will first be asked to create a password for the MariaDB admin user. Do that and then answer Y (yes) to the remaining questions. When this completes, a new database is created. First log in to the database prompt with the command:
sudo mysql -u root -p
Create the database and user with the following commands:
CREATE DATABASE radiusdb;

GRANT ALL ON radiusdb.* TO radius@localhost IDENTIFIED BY "PASSWORD";
Where PASSWORD is a strong, unique password.
Finally, flush the privileges and exit from the database with the commands:
FLUSH PRIVILEGES;

exit;
Configure the database details in the proper file with the command:
sudo nano /etc/freeradius/3.0/mods-enabled/sql
Make sure to edit the file to reflect the following changes:
sql {

driver = "rlm_sql_mysql"

dialect = "mysql"
# Connection info:
server = "localhost"
port = 3306
login = "radius"
password = "PASSWORD"
# Database table configuration for everything except Oracle
radius_db = "radiusdb"
}
read_clients = yes
client_table = "nas"
Where PASSWORD is the same password you created for the radius database user.
Save and close the file.
How to install FreeRADIUS
Now we can install the FreeRADIUS server. This is done with the following command:
sudo apt-get install freeradius freeradius-mysql freeradius-utils -y
When the installation completes, change to the root user with the command su -i and then import the database schema with the command:
mysql -u root -p radiusdb < /etc/freeradius/3.0/mods-config/sql/main/mysql/schema.sql
Exit out of the root use with the command exit.
Create a symbolic link for the sql module with the command:
sudo ln -s /etc/freeradius/3.0/mods-available/sql /etc/freeradius/3.0/mods-enabled/
Change the ownership of two sql files with the commands:
sudo chgrp -h freerad /etc/freeradius/3.0/mods-available/sql

sudo chown -R freerad:freerad /etc/freeradius/3.0/mods-enabled/sql
Restart FreeRADIUS with the command:
sudo systemctl restart freeradius
How to install daloRADIUS
Download the latest release of daloRADIUS with the command:
wget https://github.com/lirantal/daloradius/archive/master.zip
Unzip the downloaded file with the command:
unzip master.zip
Move the newly unzipped directory into the Apache document root with the command:
sudo mv daloradius-master /var/www/html/daloradius
Import the daloRAIUS mysql tables to the FreeRADIUS database with the commands:
cd /var/www/html/daloradius

sudo mysql -u root -p radiusdb < contrib/db/fr2-mysql-daloradius-and-freeradius.sql
sudo mysql -u root -p radiusdb < contrib/db/mysql-daloradius.sql
Change the permissions of the daloradius directory with the commands:
sudo chown -R www-data:www-data /var/www/html/daloradius/

sudo chmod 664 /var/www/html/daloradius/library/daloradius.conf.php
Edit the daloRADIUS configuration file with the command:
sudo nano /var/www/html/daloradius/library/daloradius.conf.php
Make sure your configuration file reflects the following changes:
Where PASSWORD is the password used for the radius database user.
$configValues['DALORADIUS_VERSION'] = '1.1-1';

$configValues['DALORADIUS_DATE'] = '28 Jul 2019';

$configValues['FREERADIUS_VERSION'] = '2';

$configValues['CONFIG_DB_ENGINE'] = 'mysqli';

$configValues['CONFIG_DB_HOST'] = 'localhost';

$configValues['CONFIG_DB_PORT'] = '3306';

$configValues['CONFIG_DB_USER'] = 'radius';

$configValues['CONFIG_DB_PASS'] = ;PASSSWORD;

$configValues['CONFIG_DB_NAME'] = 'radiusdb';
Restart the FreeRADIUS and Apaches services with the commands:
sudo systemctl restart freeradius

sudo systemctl restart apache2
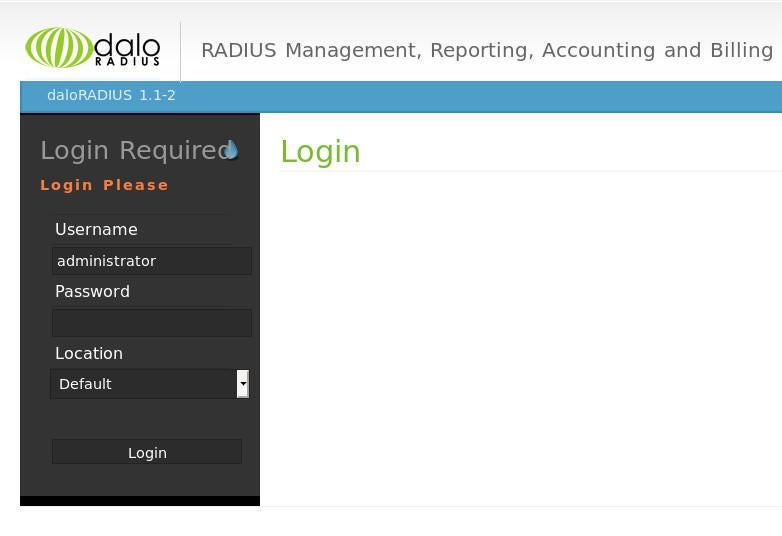
You can now access the daloRADIUS web-based GUI by pointing a browser to http://SERVER_IP/daloradius/login.php (where SERVER_IP is the IP address of the hosting server). At the login screen (Figure A), use the default credentials of administrator/radius.
Figure A

You can now begin managing FreeRADIUS via the user-friendly daloRADIUS web-based GUI.