


Past versions of macOS offered the System Preferences tool to give you access to all the settings and options for managing and customizing the operating system. With macOS Ventura, Apple has revamped this tool with a new name and new layout.
SEE: iCloud vs. OneDrive: Which is best for Mac, iPad and iPhone users? (free PDF) (TechRepublic)
Now known as System Settings, the tool borrows its layout from iPadOS, with a list of settings that you select to configure the operating system. But which settings are available, and how and where do you find each one?
How to update to macOS Ventura
If you haven’t already upgraded to macOS Ventura, click the Apple icon, select About this Mac and then click the button for Software Update. Click the Upgrade Now button to install the update.
How to configure System Settings in macOS Ventura
Must-read Apple coverage
- Nearly 7 in 10 iPhone Owners Plan iPhone 17 Upgrade
- Apple Prepares AI-Powered Siri Upgrade With Google Search Integration
- Apple’s Xcode 26 Beta Now Supports GPT-5 and Claude
- Apple’s Vision Pro Adoption Stalled As Content Released ‘Drip by Drip’
After the new version is in place, click the Apple icon and select System Settings. Notice the layout differences between System Settings and System Preferences from prior versions of macOS.
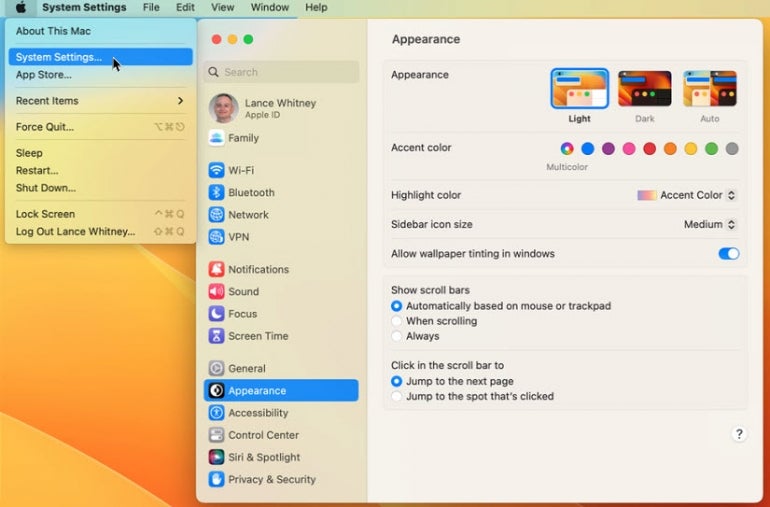
The System Preferences tool arranges the different settings through icons that you click to open. You then have to click the back arrow to return to the previous screen. The main problem with System Preferences is that the icons are arranged haphazardly with no logical order.
Adopting the layout from iPadOS, System Settings lists each setting on the left pane by category. Clicking a specific setting displays its configuration options on the right. Finding each setting and moving from one to another is much quicker and easier than in System Preferences (Figure A).
Figure A
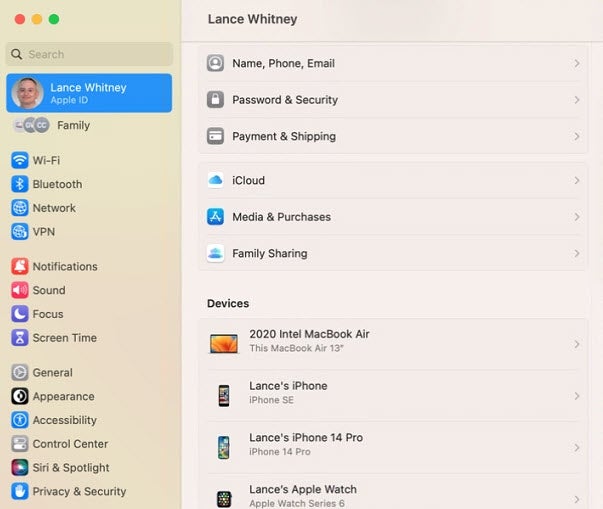
The first setting is for your Apple ID. Clicking that setting displays the same options as in System Preferences, but the Family Sharing option is more easily accessible (Figure B).
Figure B
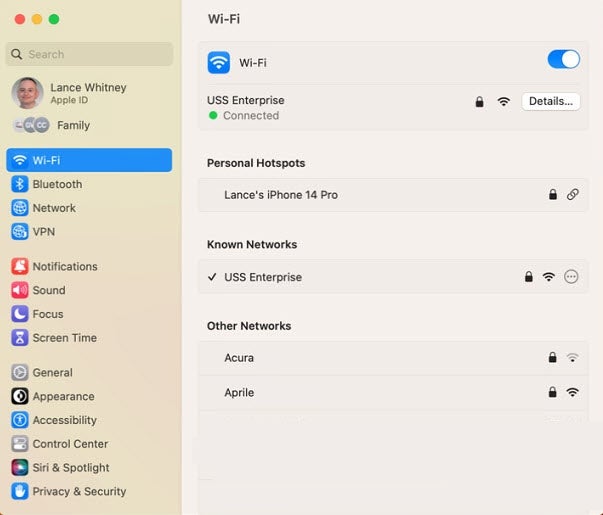
The next section offers the connectivity settings — Wi-Fi, Bluetooth, Network and VPN. This arrangement is a huge improvement over System Preferences, where you had to hunt for these individual items either as individual icons or as options nestled under Network. Now, each setting is easily visible and accessible within this one section (Figure C).
Figure C
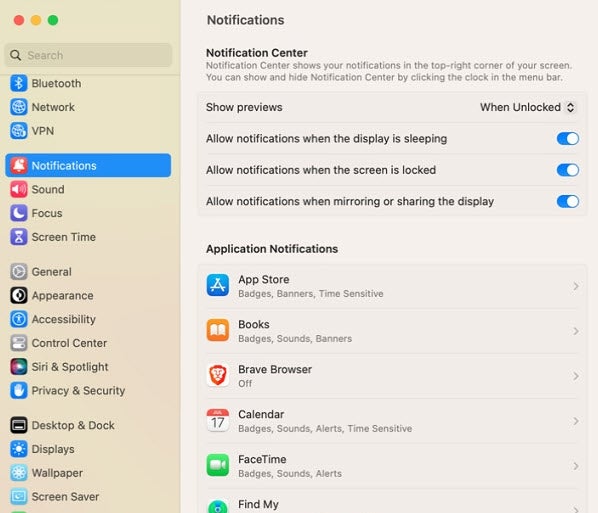
The next section presents Notifications, Sound, Focus and Screen Time, a logical way of organizing these settings rather than displaying them randomly as in System Preferences. The entry for Notifications is cleaner and easier to navigate as is the one for Sound (Figure D).
Figure D
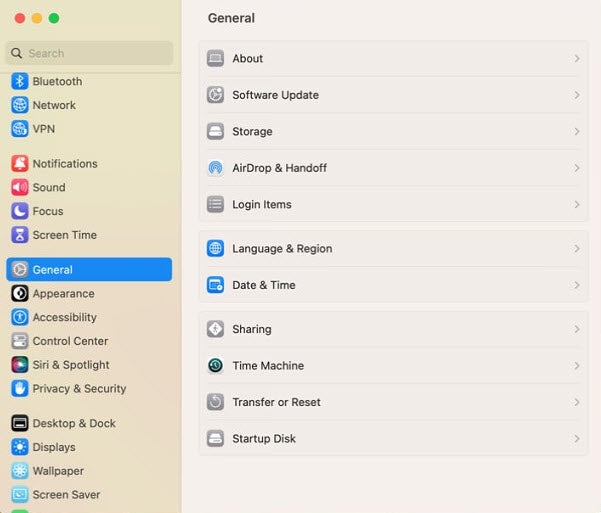
The next section is a bit of a miscellaneous one with settings for General, Appearance, Accessibility, Control Center, Siri & Spotlight and Privacy & Security.
This is another improvement over the old layout in System Preferences. Rather than displaying these different settings as separate icons scattered around the screen, this section divides them logically into core functions. Even the General setting is better arranged with options for Software Update, Storage, AirDrop, Time Machine, Startup Disk and other features (Figure E).
Figure E
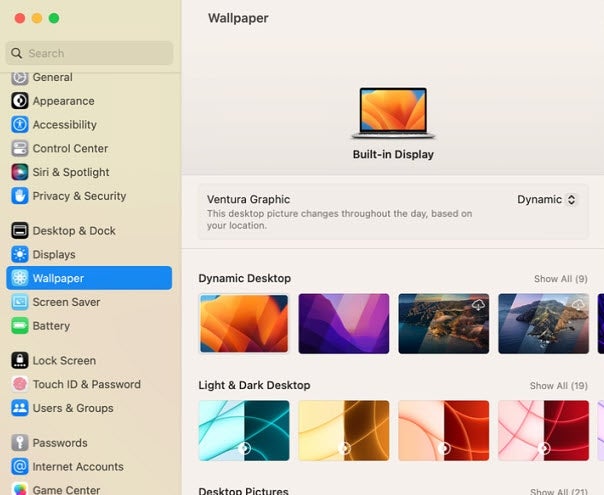
The next section contains settings for Desktop & Dock, Displays, Wallpaper, Screen Saver and Battery. This section groups the features logically rather than presenting them as individual icons as in System Preferences. Each entry balances text with images to lead your eye into viewing and customizing the precise details (Figure F).
Figure F
Managing your security and user accounts is the theme of the next section with settings for Lock Screen, Touch ID & Password and Users & Groups. With the first setting, you determine when and how your Mac locks the screen. The second setting helps you change your login password and set up your fingerprint for Touch ID. The third setting lets you add and control accounts for other users (Figure G).
Figure G

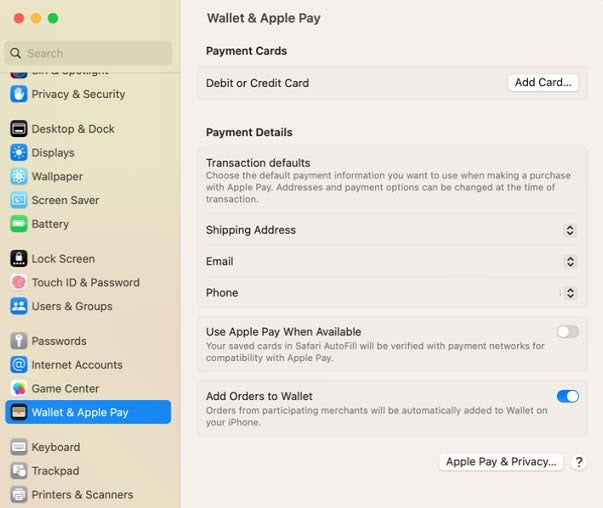
The next section covers online accounts and activity. The Passwords setting lets you manage the passwords stored in iCloud Keychain. Internet Accounts allows you to add accounts for email, contacts and calendars. The Game Center setting is for game playing, and the setting for Wallet & Apple Pay helps you set up and control payment options from your Mac (Figure H).
Figure H
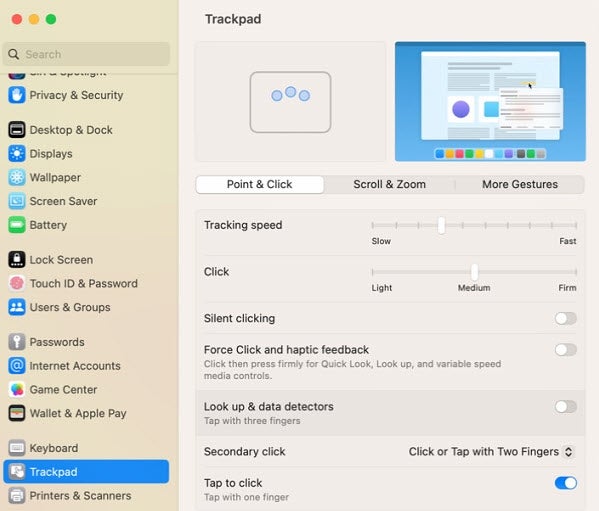
Devoted to connected devices, the final section offers settings for Keyboard, Trackpad (or Mouse) and Printers & Scanners (Figure I).
Figure I
Overall, the layout in the new System Settings tool adds a more logical organization to the different settings and options. Of course, any change requires time to get used to it, but you should find it easier to access and customize the different settings now that they’re better arranged and you know where they all live.