


New Mac users can quickly familiarize themselves with audio configuration options and settings. Unlike most standard Windows keyboards, Apple’s elegant Bluetooth-enabled Magic Keyboard and integrated laptop keyboards offer immediate access to muting, lowering, and raising sound volume. A Mac’s F10 key mutes volume, while F11 and F12 incrementally lower and raise volume, respectively.
SEE: New user education checklist (Tech Pro Research)
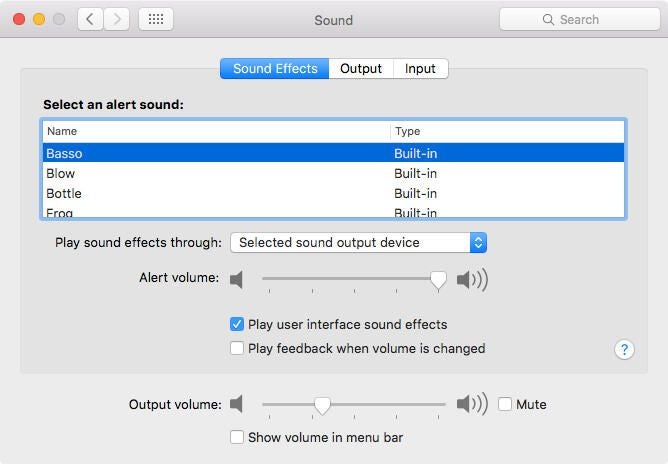
Mac users can place a shortcut icon for the volume control on the Mac’s menu bar. To display volume on the Mac menu bar, open System Preferences, select Sound, and, from the Sound Effects tab, check the box for Show Volume In Menu Bar (Figure A). Subsequently clicking the menu bar’s volume icon prompts a pop-up window to appear from which the slider button can be raised or lowered to adjust the Mac’s output volume. A Mac’s volume can also be adjusted using the slider bar found on the Sound Effects tab, where users can opt to mute volume by checking the corresponding box.
Figure A
Anyone having trouble locating System Preferences on a Mac should scan the Dock for the bold gear icon. If the System Preferences icon is not present, click Finder, select Applications within the Favorites submenu, and double-click the System Preferences entry.
When multiple output devices are present, use the Sound Effects tab’s drop-down box to specify which device should be used when the computer plays back sounds. Two additional options are present on the Sound Effects tab.
- Play User Interface Sound Effects configures the Mac to play sound alerts when certain events occur.
- Play Feedback When Volume Is Changed prompts the Mac to sound audible tones as the system volume is adjusted up or down.
The Sound pane has two tabs in addition to Sound Effects: Output and Input.
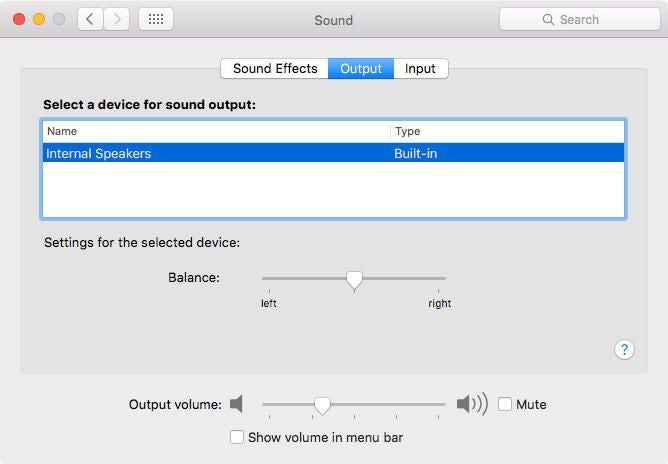
The Output tab (Figure B) displays the sound output. Built-in speakers or headphones, if connected, will appear within this Output window. Macs automatically adjust and update the display to reflect connected devices. For example, my MacBook Air displays built-in Internal Speakers as the output unless I connect headphones, in which case the display updates to read Headphones. The Sound’s Output tab notes the headphones are not built-in and updates the Type field to confirm the headphones are connected to the headphone port.
Even seasoned professionals I’ve met forget a Mac’s balance control is present on the Sound pane’s Output tab. Adjusting the Balance slider bar adjusts sound correspondingly to either left or right channels according to the slider bar’s position.
Figure B
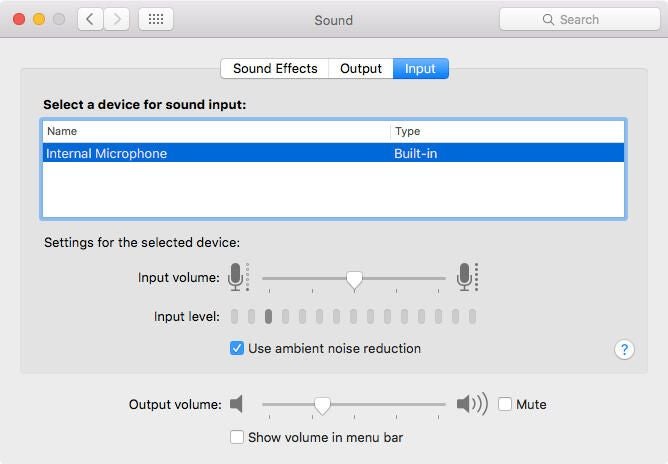
The Input tab (Figure C) presents devices available for receiving sound inputs. Mac models have changed over the years, so the inputs on your Mac may vary. Newer models typically include a single headphone jack that can accommodate a microphone if the microphone is integrated with the headset, which is the case with Bose QuietComfort 25 headphones for Apple devices and RHA MA7501 headphones. When such headphones are plugged in to the Mac, the Input tab automatically updates to use the external microphone connected to what the Mac describes as the Microphone port, even though the Mac refers to the same port as the Headphone port on the Output tab, so that’s a little confusing. Typically, though, the built-in Internal Microphone will prove the only option. But if you’ve connected a USB microphone, for example, you can confirm the device’s proper operation by reviewing the Input tab. You may also need to access the specific audio application’s Preferences to select the USB microphone, should your Mac default to using the computer’s built-in microphone.
The Sound pane’s Input tab presents a slider bar for setting the input volume. A corresponding input level meter is present, too, which displays audio input level in real time. Depending upon the mic you use, an option to Use Ambient Noise Reduction may prove available, too. Checking the box prompts the Mac to capture less background noise. Incidentally, the output volume slider bar is displayed at the bottom of the Input tab, which, while counterintuitive, often proves convenient.
Figure C
Last, users seeking to adjust a Mac’s built-in equalizer for iTunes audio playback will quickly become frustrated seeking the equalizer controls within Sound System Preferences. The equalizer is specific to iTunes and must be accessed from within the application. Adjust iTunes’s equalizer by clicking Window from the iTunes menu bar and selecting Equalizer when using iTunes version 12.5.