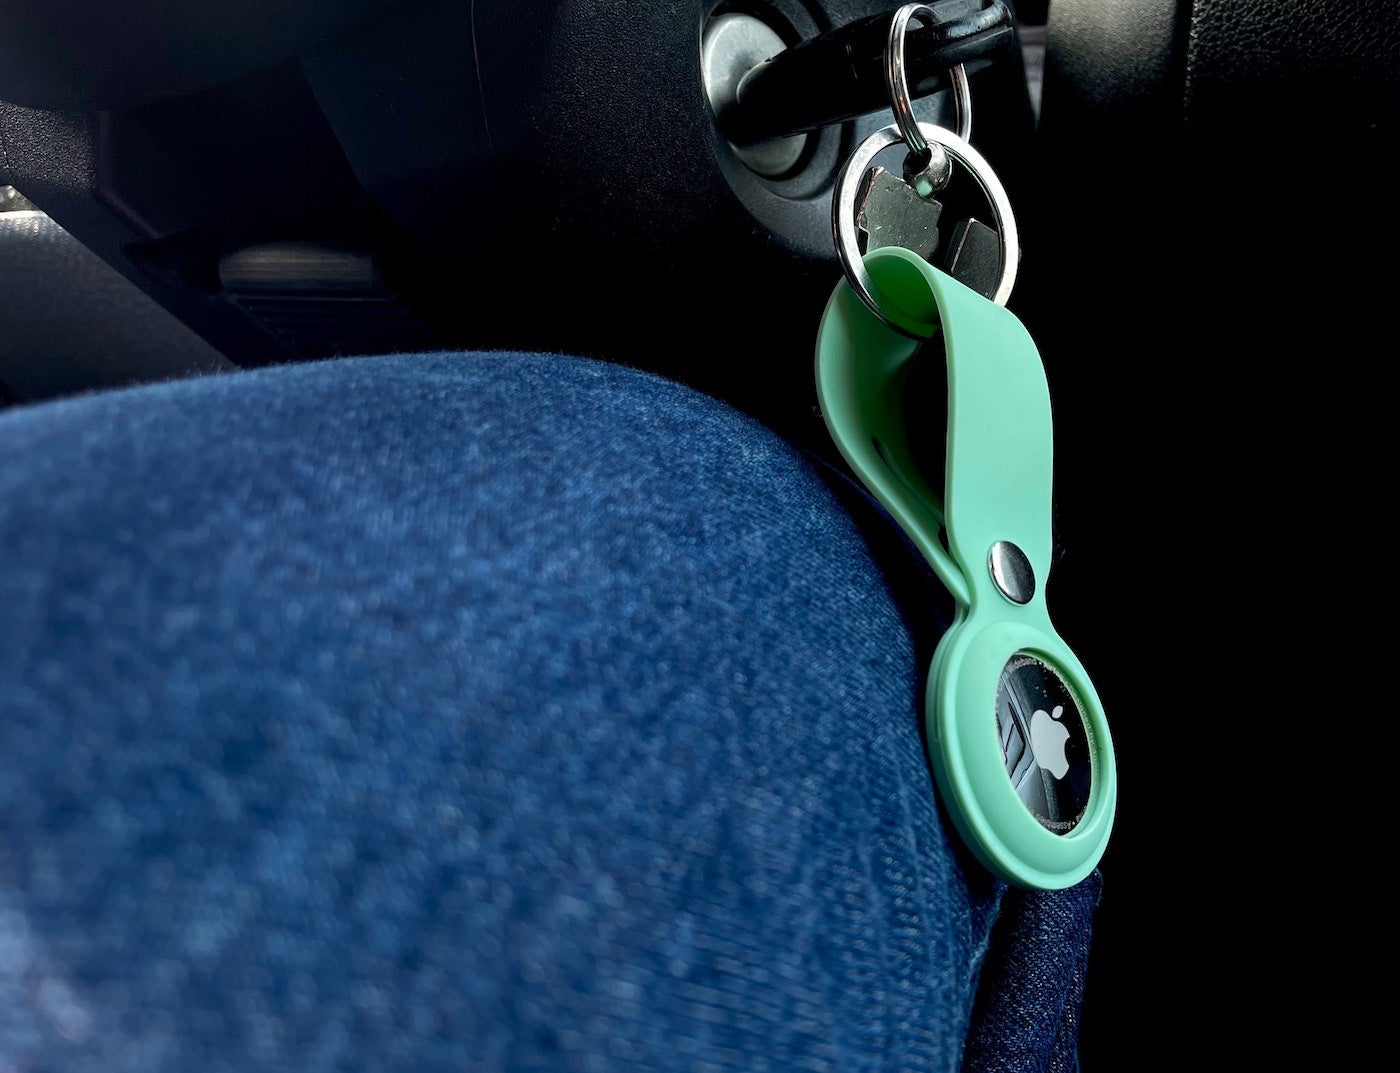
An Apple AirTag is a useful gadget for tracking and finding just about any personal item — from your electronic devices in the house to misplaced aircraft luggage.
SEE: iCloud vs. OneDrive: Which is best for Mac, iPad and iPhone users? (free PDF) (TechRepublic)
After attaching an AirTag to an object or placing one inside a suitcase or travel bag, you can find the item via directions on a map, trigger the tag to play a noise to help you locate it, receive an alert if the item and tag are found, and get notified if you’ve left the item behind.
What you’ll need to set up and use Apple AirTag
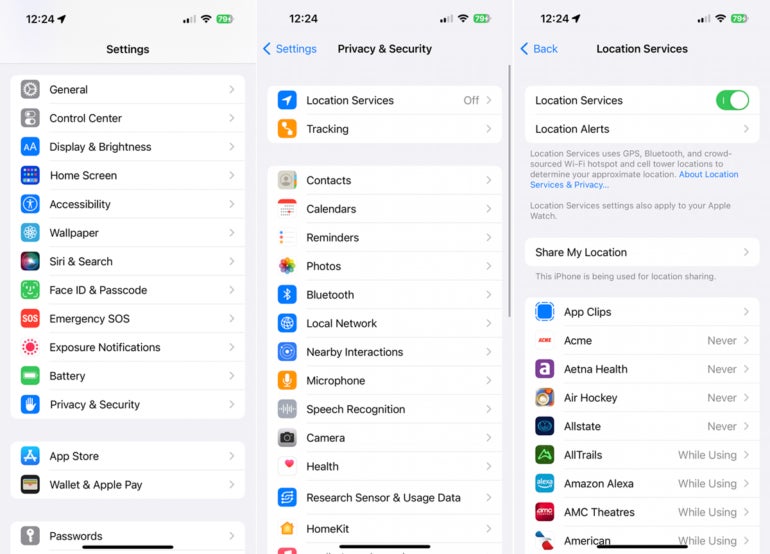
To use an AirTag to locate an item, you’ll need to enable Location Services on your mobile device. Go to Settings, select Privacy & Security and then select Location Services. Turn on the switch for Location Services (Figure A).
Figure A
Next, you’ll want to turn on precision finding to pinpoint the most accurate location for your AirTag.
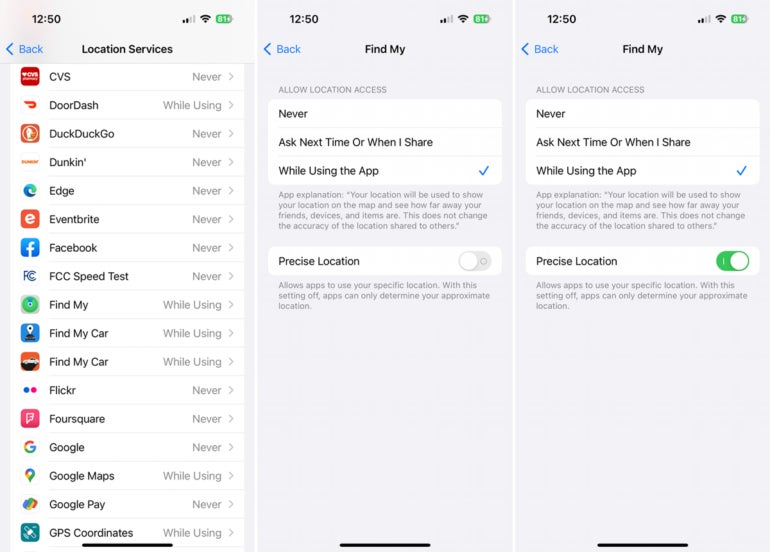
To do this from the Location Services screen, swipe down to the entry for Find My. Make sure the option for Allow Location Access is set to either Ask Next Time Or When I Share or While Using the App. Then turn on the switch for Precise Location (Figure B).
Figure B
How to set up your AirTag
The initial AirTag setup is fairly seamless. Assuming the AirTag is new and never used, remove the plastic wrapping around it and then pull the tab at the end of the wrapping to activate the battery.
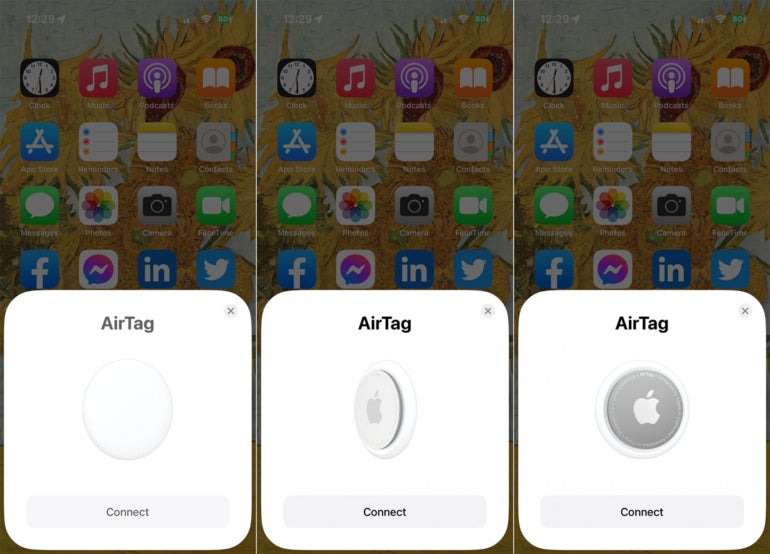
The AirTag will then emit a sound. Hold the AirTag near your iPhone or iPad: A connection notice should appear on the screen. Tap the Connect button (Figure C).
Figure C
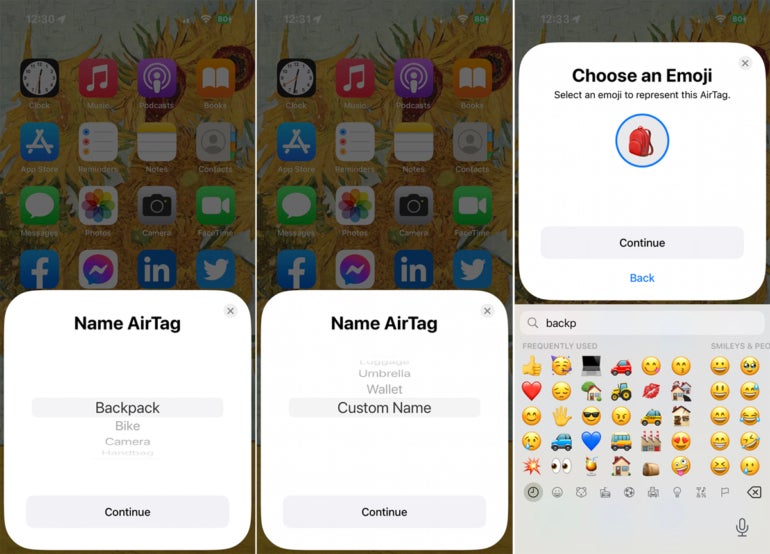
You’ll then be asked to name the AirTag. Pick one of the existing names, or swipe down the list and select Custom Name to use a name of your own choosing. Tap Continue.
Next, pick an Emoji to represent the AirTag and tap Continue (Figure D).
Figure D
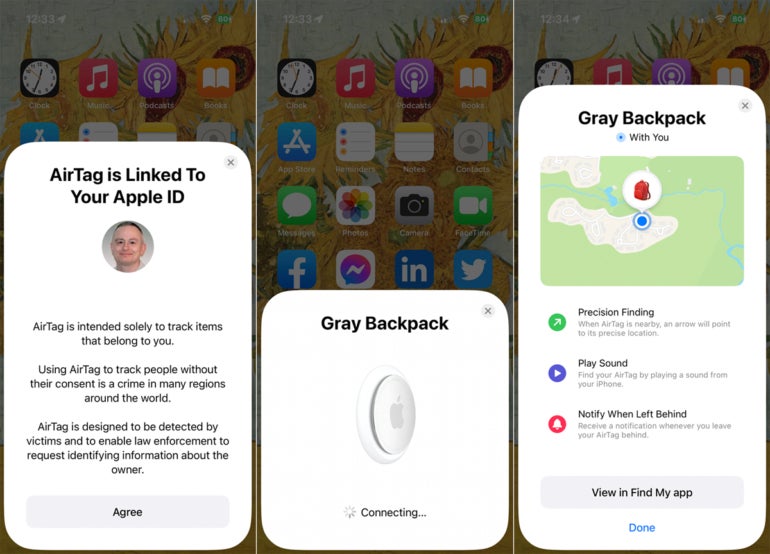
A notice indicates that the AirTag is linked to your Apple ID. Review the information and then tap Agree. The next screen points to the location of the AirTag with some tips on how to find it. Tap Done (Figure E).
Figure E
How to find your AirTag
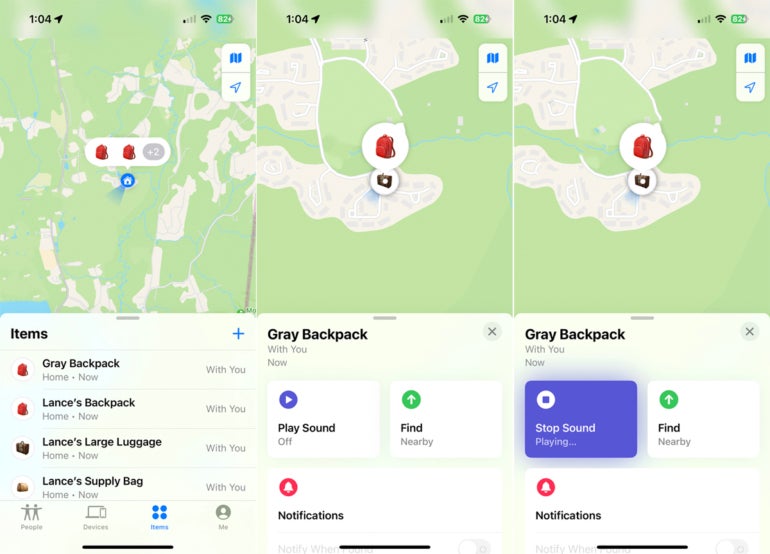
On your iPhone or iPad, open the Find My app, then tap the icon at the bottom for Items. Tap the entry for the AirTag you want to find. The map shows the location of the item.
Tap the Choose Map button at the upper right, and you can switch between Explore view and Satellite view. Tap Play Sound, and the AirTag itself emits a beeping noise (Figure F).
Figure F
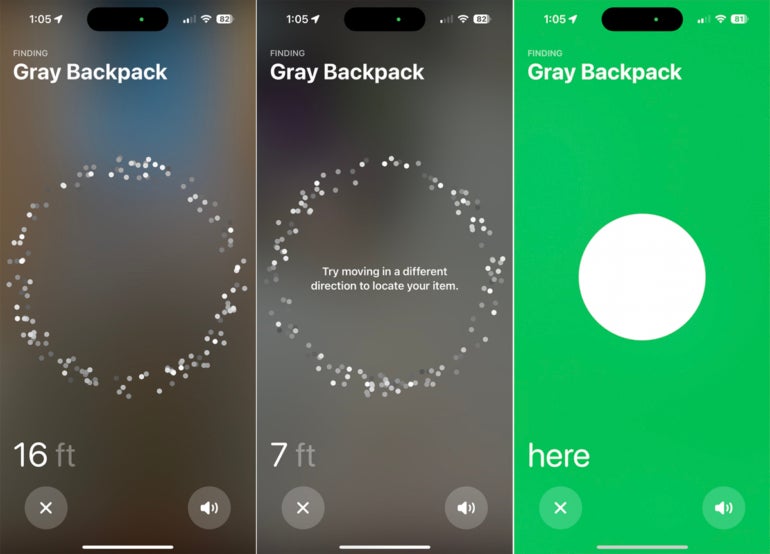
Tap Find, and the app tries to steer you to the AirTag by indicating the distance and the direction you need to take to reach it (Figure G).
Figure G
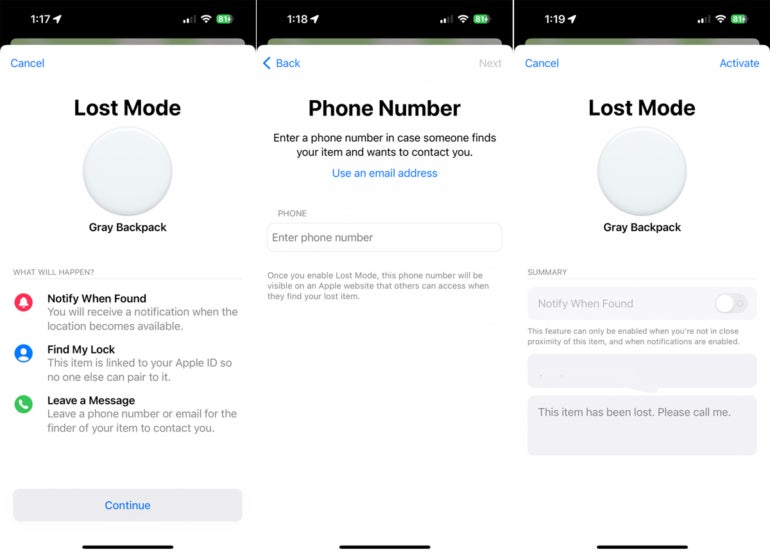
If you can’t find the AirTag and are concerned the item may be lost, tap the Enable command under Lost Mode. Tap Continue at the Lost Mode screen.
Next, enter an email address or phone number through which someone who finds the AirTag and item can contact you. Tap Next.
Confirm the information that appears if someone else locates the AirTag, and then tap Activate (Figure H).
Figure H
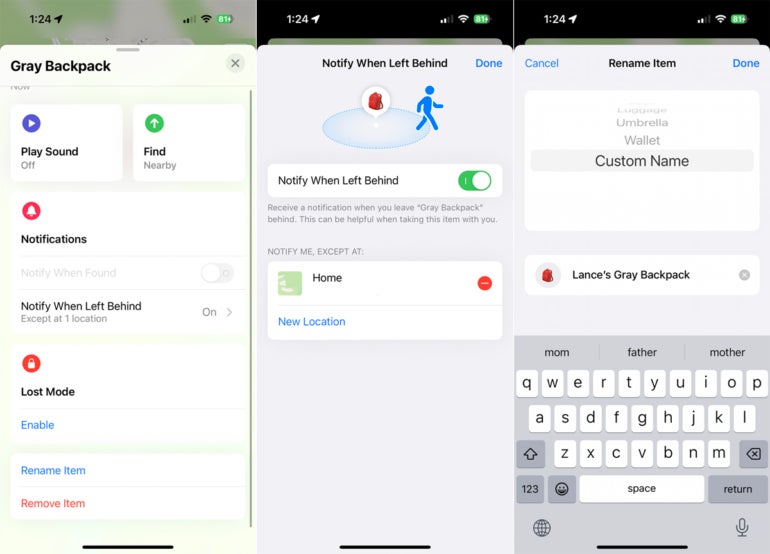
To always keep track of the item with this AirTag, tap the option for Notify When Left Behind. Turn on the switch for this option, and you’ll be notified anytime you leave a location without the item. You can also add specific locations for which you won’t receive these notifications.
Finally, you can always give the AirTag a different name. Tap Rename Item and then enter the new name (Figure I).
Figure I
We’ve found some more articles for you. Check out Lance Whitney’s recent tutorials for the iPhone and iPad: How to use the latest Siri features and how to search for emails.
