Before March 2017, two human behaviors sometimes caused problems for G Suite administrators.
First, people left organizations. When this happened, a G Suite administrator transferred ownership of Google Drive files from the person leaving to a new owner. These files ended up in a folder stored on the Google Drive of the new owner. If–or when–that person left, the transfer happened again, to another new owner.
Second, people rearranged files. These people moved files from one folder to another. Sometimes they even moved files to the trash. This rearranging of files was all well and good, until someone did it with the files and folders inside shared folders. Then, those files were rearranged for everyone.
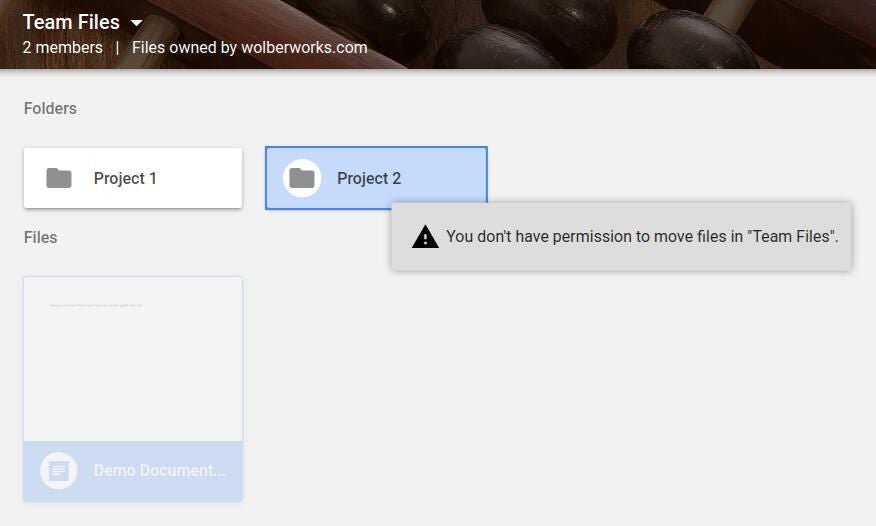
Team Drives solve both of the above problems for organizations that use G Suite. A Team Drive provides a place to put files owned by the team, so that when a person leaves, any files they’ve placed on a Team Drive remain. A Team Drive also allows an administrator to control who may move files, so files remain in expected locations.
If your organization uses G Suite and Google Drive, here’s what you need to know to create and use Team Drives.
1. Enable Team Drive
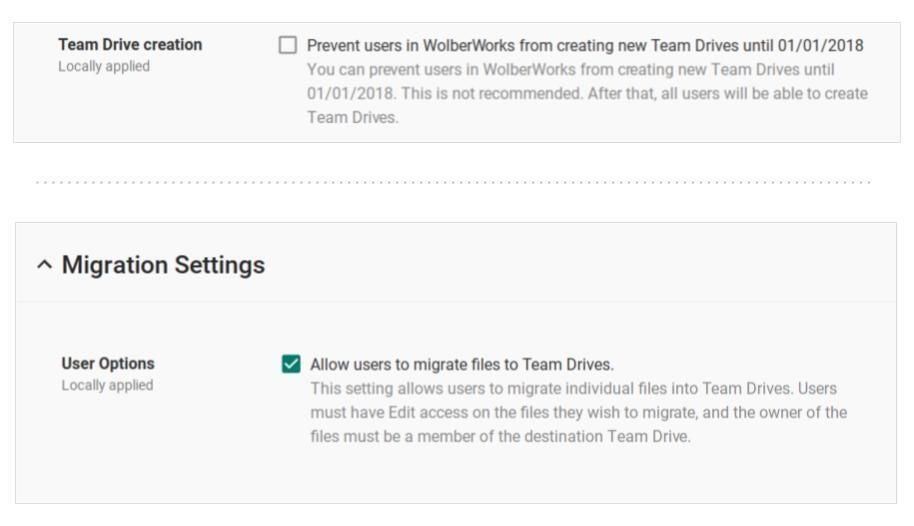
To use Team Drives in 2017, a G Suite administrator needs to first enable Team Drives. (Starting in January 2018, Team Drives will be enabled by default.) Login with a G Suite administrator account to http://admin.google.com, go to Apps > G Suite > Drive and Docs, open Sharing Settings, then uncheck the box next to “Team Drive creation” to enable Team Drives. Select “Save” to keep your setting.
Next, from the Apps > G Suite > Drive and Docs settings, open Migration Settings, and check the box to “Allow users to migrate files to Team Drives.” Again, select “Save” to keep your setting.
Now, wait a day or so for Google to deploy this administrative setting change across your organization. You’ll know that Team Drives are ready when you login to http://drive.google.com on the web and see a new “Team Drives” icon below “My Drive.”

2. Create a new Team Drive
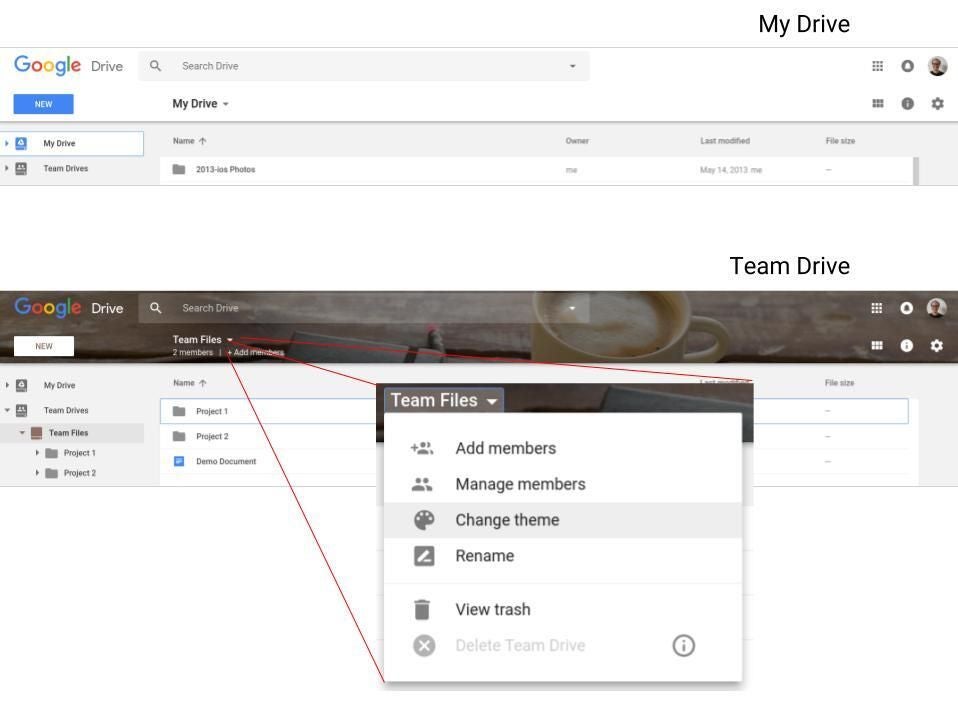
Select the new Team Drive icon, then choose “New” to create a new Team Drive. Much like creating a new folder or file, you’ll be asked to name your Team Drive.
Your new Team Drive looks much like a new folder. However, when you select it–or a folder on it–you’ll notice that a different header image displays. This gives you a clear visual indication that you’re working with files on a Team Drive. You can also change the Team Drive theme.
3. Add members
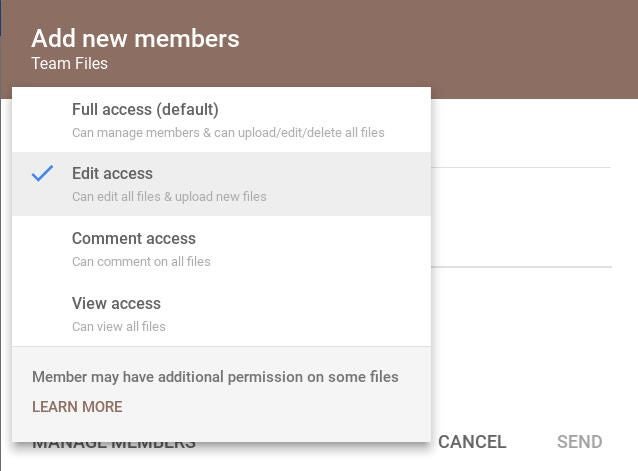
Next, add email addresses to allow people to access your Team Drive. Much like other Google Drive sharing features, you can select different levels of access for different people. When you add a member, the default setting, “Full”, allows people to upload, edit, delete, and move files around.
For most Team Drive members, I suggest you choose the “Edit” level of access, which allows a member to edit and upload files, but not delete or move items. More limited access levels that restrict a member to “Comment” only or “View” only access might be helpful in some circumstances. If your G Suite administrative settings allow it, you can add people outside the organization. (For example, staff members of a school or nonprofit organization might share documents with board members using “Comment” only or “View” only access to one Team Drive, while the same board member might have “Edit” access to another Team Drive for committee documents.)
4. Move files
Move files from existing “My Drive” folders to the appropriate Team Drive. As with other file-and-folder operations, you can drag-and-drop items from “My Drive” to the appropriate location on a Team Drive.
If you’re the owner of many folders of items shared with other people, some of these folders might best be moved to a new Team Drive. Any set of folders and files consistently used by a group of people may be a candidate for moving to a Team Drive. Keep other items on your own “My Drive.”
5. Collaborate
After your files have been moved from “My Drive” to a “Team Drive,” make sure that everyone who needs access knows how to find the new files. Your “Team Drive” will appear on the web, and in the Android and iOS Google Drive mobile apps. (In the mobile apps, tap the Menu option–the three horizontal lines in the upper left. Then tap the “Team Drive” icon to show all the drives you can access.)
When you create a new file and move it to a Team Drive, you don’t need to worry about access permissions. Members gain access to files on a Team Drive at the permission level assigned. When team members change, files remain. File and folder structures remain the same too, unless changed by someone with Full access to the Team Drive.
Most importantly, now that an administrator can create and configure Team Drives, there’s really little need for a local file server anymore.
Have you migrated files from the traditional Google “My Drive” to a “Team Drive?” Do you find the new “Team Drive” permissions easier for people to use? Let us know in the comments or on Twitter.