Docker is an incredibly powerful tool that enables companies to expand their offerings and make deploying containerized applications incredibly simple. Rolling out a container is actually pretty simple with Docker; you pull down the image and you deploy the container. But how does that container save data? Or how do you work with that data or share it between containers?
The mechanism for Docker containers is a series of read-only layers that contains a final, read-write layer on top. It’s a very complex system (called a Union File System) that doesn’t work with data in the standard fashion.
This file system does an outstanding job when you don’t need to retain data. But what about when you need to stop and redeploy a container, and retain the data? To be able to save data (or share data between containers), you have to take advantage of volumes. A Docker volume is a directory (or files) that exists on the host file system (outside the Union File System).
How do you create and manage these volumes? Let’s find out. I will be working with the latest release of Docker on the Ubuntu Server 16.04 platform. The process for using volumes will be the same, regardless of host OS.
SEE: Research: Cloud vs. data center adoption rates, usage, and migration plans (Tech Pro Research)
Creating a standard volume
Let’s create a volume called volume1. This is done with the command:
docker volume create --name volume1
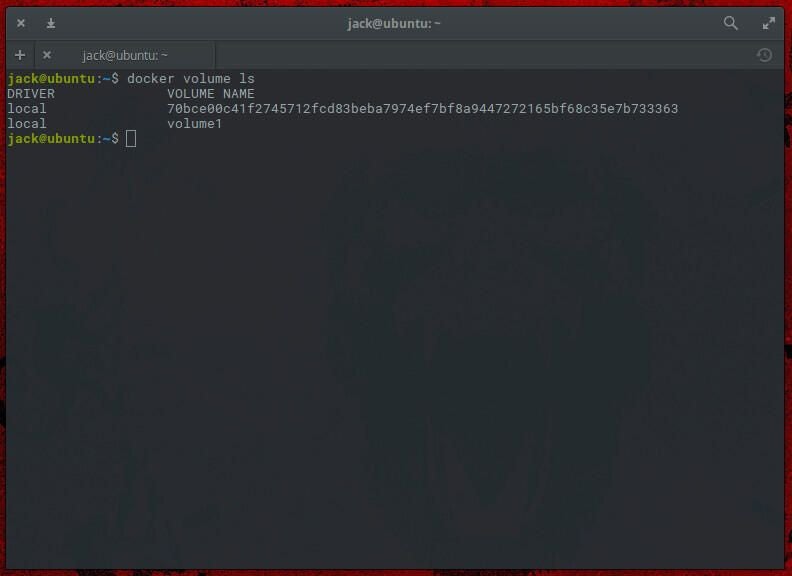
If we issue the command docker volume ls the newly created volume will appear in the listing (Figure A).
Figure A

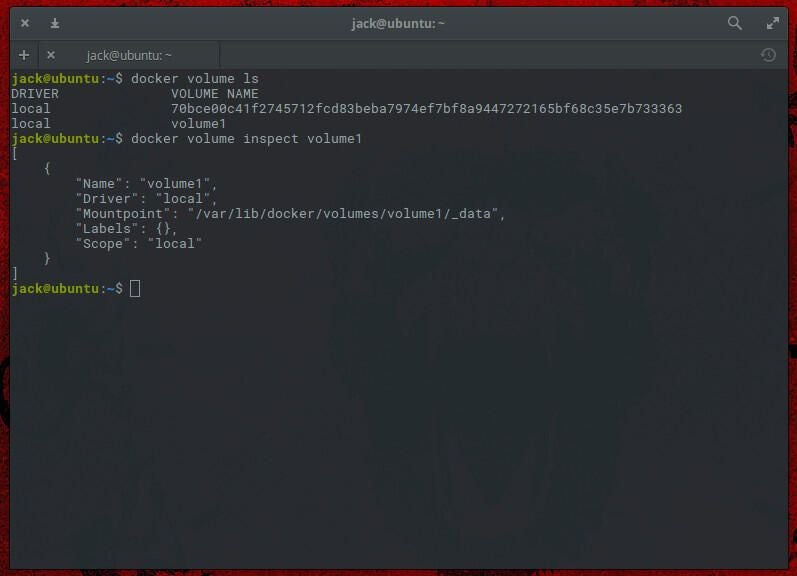
You can get more details about the volume by issuing the command docker volume inspect volume1. The output of that command (Figure B) will display the name, options, mountpoint, and more.
Figure B

A standard volume, however, isn’t all that helpful. Let’s create a volume that will go a long way to making your Docker containers even more flexible.
SEE: Cloud computing is the new normal: Is it time to use it for everything? (TechRepublic)
Creating a host data volume
Now what we are going to do is deploy a new container (based on the latest Ubuntu image) that contains a volume attached to a directory on the host. This means you can work within that container and save data into a container directory, that will be in sync with a host directory. The first thing you must do is make sure to create the host directory. We’ll create a directory called container-data with the command:
mkdir ~/container-data
Make sure the above directory is created in a location that a Docker user will have access to. You can actually create that directory anywhere on your system (so long as the user has read-write permission). With that directory in place, the command to deploy the container (attaching the host directory to the container volume located at the /data directory within the container) would be:
docker run -d -P --name test-container -v /home/jack/container-data:/data ubuntu
You should be presented with the container ID. Make note of the first four characters. Now let’s test this out. Gain shell access to the running container with the command:
docker attach ID
Where ID is the first four characters of the running container.
You should now find yourself at the bash prompt of the running container. If you issue the command ls / you should see the data directory we added at container run-time. Let’s create a test file with the command touch /data/test. Now go back to the terminal of the host and issue the command ls ~/container-data/. You should see the test file listed. From within that same terminal, issue the command touch ~/container-data/test2. Go back to our container shell and issue the command ls /data and both test and test2 should appear. Your running container is now sharing data on the host file.
You can then attach as many containers to that host directory as needed; each container (as well as the host) will have access to the same data. As Larry David might say, that’s pretty, pretty, pretty handy.
Making Docker even more useful
Volumes are a great way to make Docker containers more useful. Volumes can help you backup your data, share data between containers, and even share data between containers and hosts. Learn more about volumes with the official Docker docks.