


If you’ve been waiting for Google to release a desktop client for Linux, keep waiting. For whatever reason, the great Google has decided to not release a client for the operating system that powers much of their services.
That’s fine, because this is Linux and there are always options. If you’re looking for a GUI tool, you’ll turn to Insync (which is a great solution). However, if you’d prefer a command-line solution, there’s a tool right up your alley. It’s called Grive2 (based on the original Grive) and I’m going to show you how to install and use this solution.
I’ll be demonstrating Grive2 on the Mutiny respin of Linux Mint. You can use these same instructions for any flavor of Ubuntu (even the likes of Elementary OS Freya). With that said, let us to the installation!
Installing Grive2
The first thing you must do is add the necessary repository so the Grive app can be installed. To do this, open up a terminal window and issue the command:
sudo add-apt-repository ppa:nilarimogard/webupd8
Enter your sudo password and hit Enter. You’ll then be prompted to hit Enter again, in order to add the repository. With that complete, you need to update apt with the command:
sudo apt-get update
Allow this command to complete and then install Grive2 with the command:
sudo apt-get install grive
Hit enter, accept the dependencies, and the installation will run and complete without error.
You’re ready to now use Grive2.
Usage
The first thing you must do is create a directory for the syncing process. Let’s call that folder GOOGLE and place it in our home directory. Issue the command:
mkdir ~/GOOGLE
Now change into that directory with the command:
cd ~/GOOGLE
The next thing you must do is issue the command grive -a. This command will respond by issuing a link (Figure A). Copy that link and paste it into your browser window (do not close that command window, as you must input a key you’ll receive in a moment).
Figure A
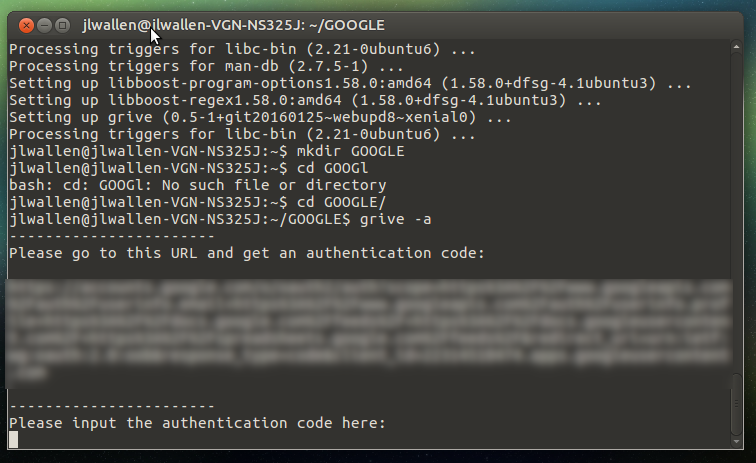
Getting your authentication link from Grive.
That URL will open a window and ask permission to connect to your Google Drive account. Click Allow and then copy the code you are given and paste it back in the command window (which is still waiting for your input). Once the key is pasted into the window, hit Enter. As soon as you do this, the sync will start. Depending on the amount of data you have in your Google Drive account (and the speed of your connection), this could take some time, so sit back and wait patiently.
After that is complete, whenever you want to sync those folders with your Google Drive account, do the following:
- Open up a terminal window
- Change into the folder housing your sync’d Google Drive folders/files
- Issue the command grive
That’s it. The folders will sync with your Google Drive account and you’re good to go.
Should you want to have Grive2 run the sync automatically, you can always set up a crontab job. Let’s set Grive2 to sync daily at 11:59 PM. To do this, follow these steps:
- Open a terminal window
- Open up your user crontab for editing with the command crontab -e
- Enter the following line in crontab: 59 11 * * * grive –path /home/USER/GOOGLE/ (Where USER is your actual user name)
- Save your crontab file
You’re good to go. Grive2 should now sync your Google Drive remote folders to your local folders.
The ideal command line Drive tool
Grive2 is an outstanding solution for syncing your Google Drive and Linux machine via the command line. It’s easy to use, reliable, and free. Give it a try and see if it doesn’t make the process of syncing Google Drive a snap.