In Windows 10, you can search for files and other content using the built-in Search tool on the Taskbar. But you can also search for files directly through File Explorer. With the Windows 10 November 2019 Update, Microsoft has integrated Windows Search into File Explorer. This means you can click or type a keyword in the search field, and File Explorer will suggest files based on your search term. But even without this latest enhancement, there’s more to searching in File Explorer than meets the eye. Let’s look at how to use the Search tool in File Explorer.
SEE: 20 pro tips to make Windows 10 work the way you want (free PDF) (TechRepublic)
First, to take advantage of the integration of Windows Search into File Explorer, make sure you’ve upgraded to the Windows 10 November 2019 Update version 1909. Be aware, though, that there is a bug in this update that sometimes renders the search field in File Explorer unresponsive when you click in it. The Microsoft support document Fix problems in Windows Search offers some workarounds for the issue. You’ll also want to check for the latest updates following Windows 10 version 1909 to see if Microsoft has fixed the glitch.
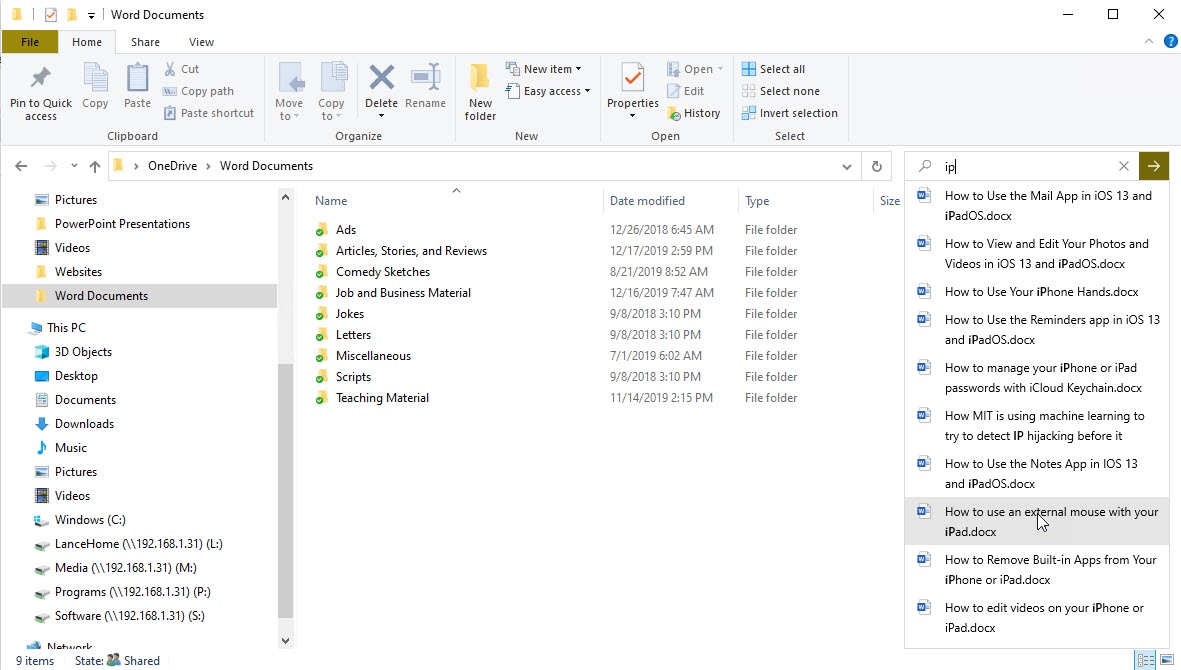
Open File Explorer to a specific folder that you want to search. Click in the Search field. If the functionality is working, you should see a list of items from previous searches. Type a character or two, and the items from previous searches match your criteria (Figure A).
Figure A
Press Enter to see all the search results in the window. Click on the right search result to open the corresponding document or other file (Figure B).
Figure B
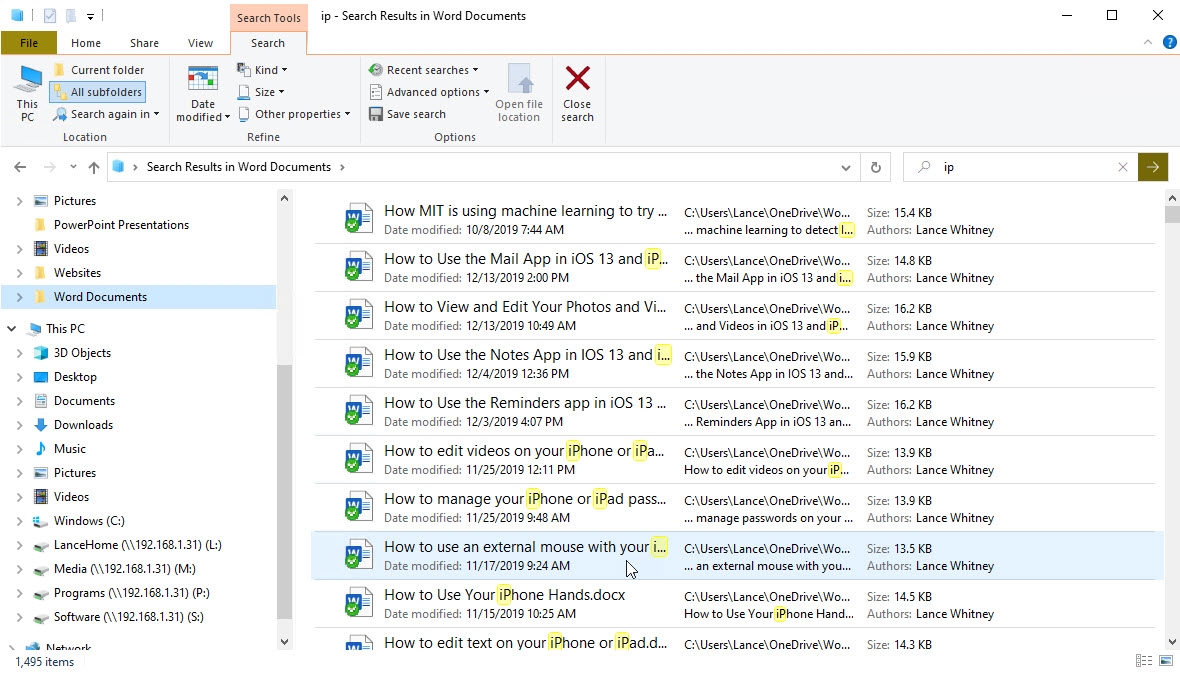
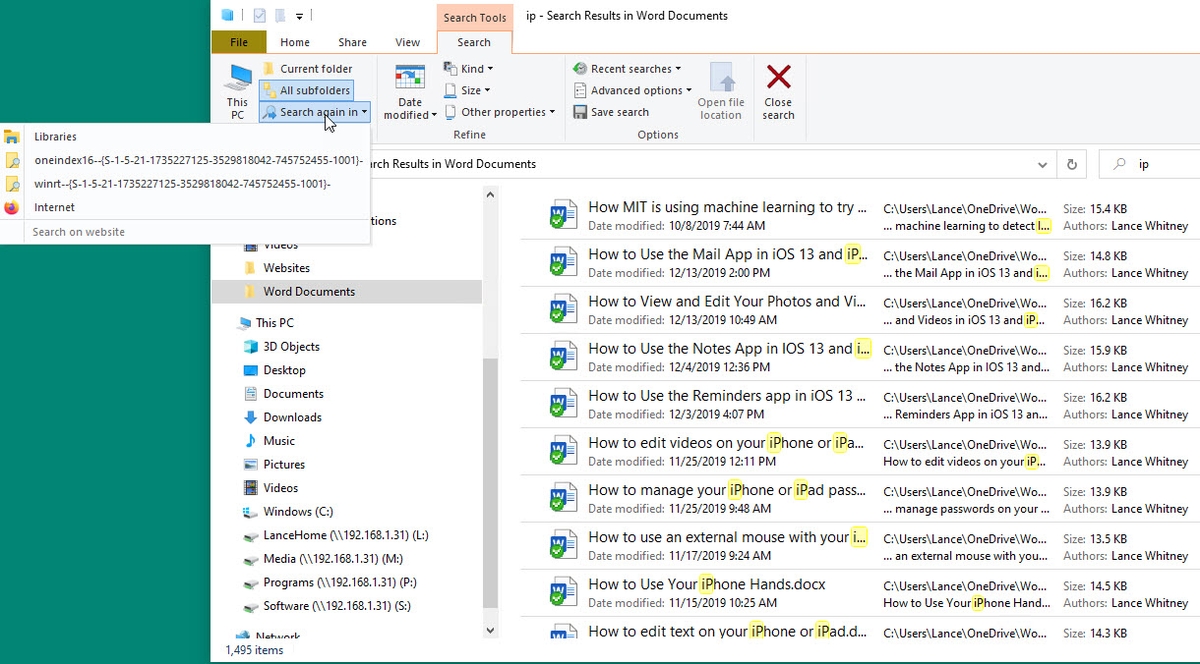
With the Search Ribbon in File Explorer, you can take advantage of different commands, options, and criteria to refine your searches. To expand the location of the search to your entire computer, click on the icon for This PC. To limit the location to just the current folder and no subfolders, click on the icon for Current Folder. To include the current folder and all subfolders, click on the icon for All Subfolders. And to search in other spots, click on the icon for Search again in and choose a different folder (Figure C).
Figure C
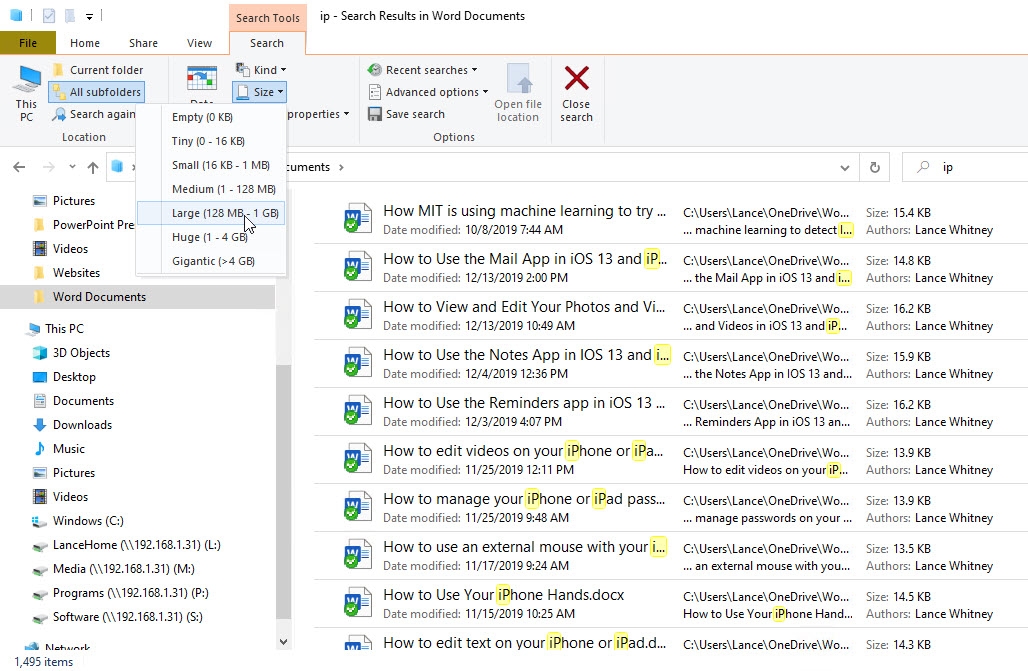
To search by date, click on the icon for Date Modified and select from Today, Yesterday, This Week, or another timeframe. Click on the Kind icon, and you can specify the type of file you’re seeking, such as a document, picture, video, or program. Click on the Size icon to narrow the search to specific file sizes, such as Small (16 KB to 1 MB), Medium (1MB to 128 MB), or Large (128 MB to 1 GB) (Figure D).
Figure D
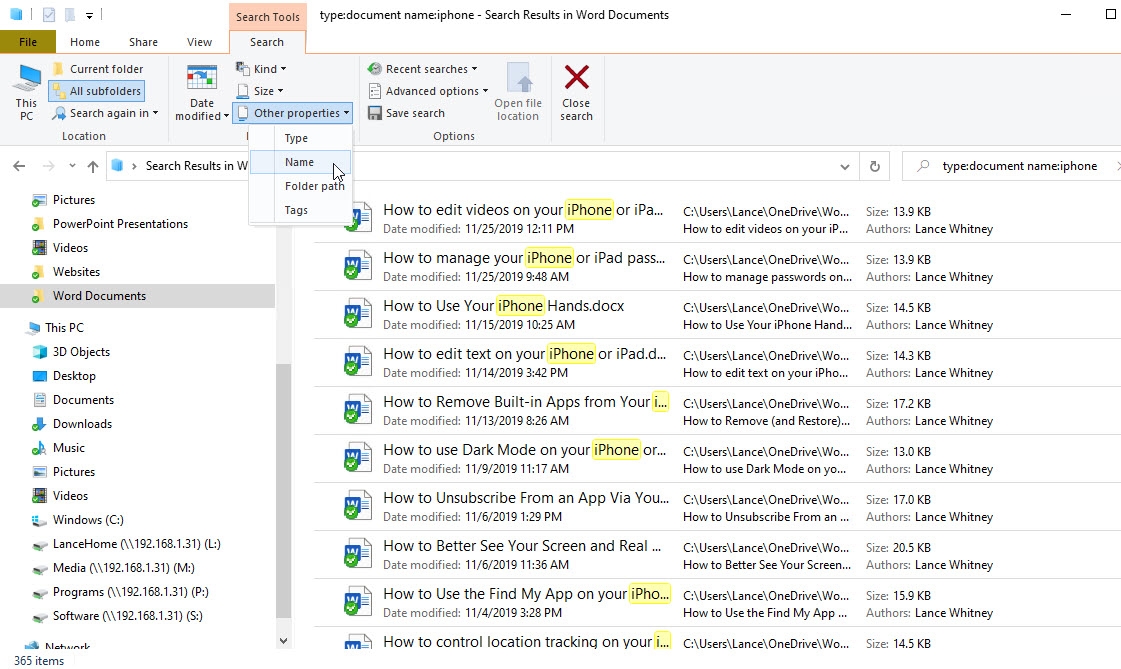
Click on the icon for Other Properties. Then click on one of the choices from the menu: Type, Name, Folder Path, or Tags. In the Search field after the property name and colon, you can then type a specific value. For example, if you select Type, you can enter document or picture as the specific type. If you select Folder Path, you can enter a specific pathname. You can also add multiple properties to a single search (Figure E).
Figure E
To access past searches, click on the icon for Recent Searches and select the search you want to run again. Next, Windows indexes and looks in certain locations to speed up your searches, but you can change that. Click on the Advanced Options icon. Click on the option to Change Indexed Locations.
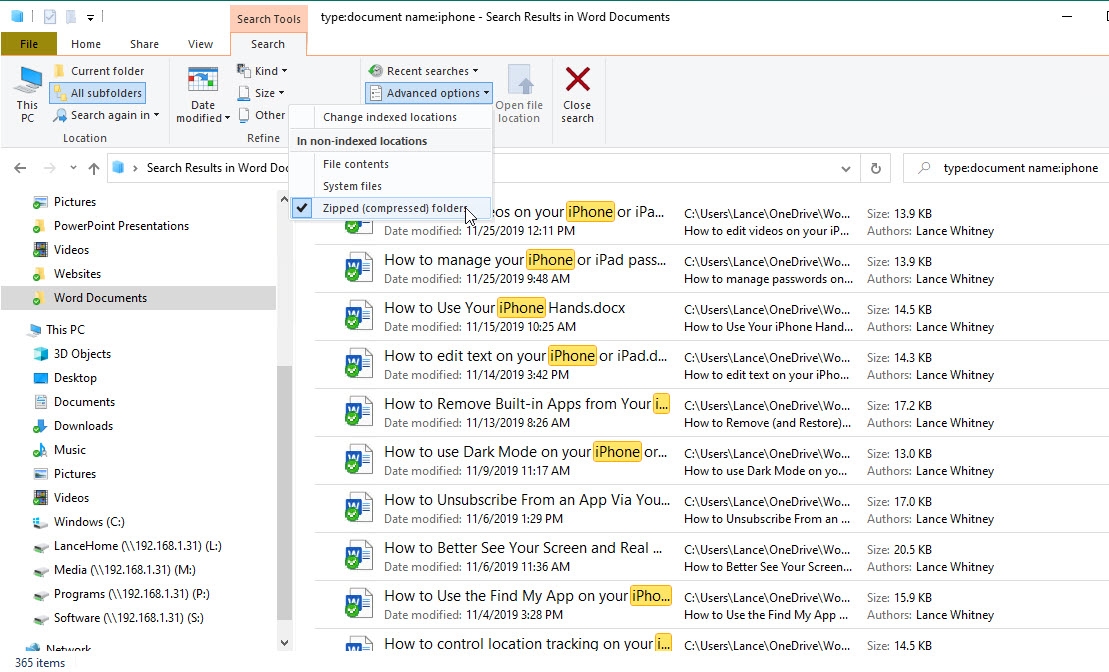
From the Indexing Options window, you can add or remove locations in the index. Click Close when done. Go back to Advanced Options. Select or deselect any of the three non-indexed locations that you want to include or exclude in your search, specifically File Contents, System Files, or Zipped (Compressed) Folders (Figure F).
Figure F
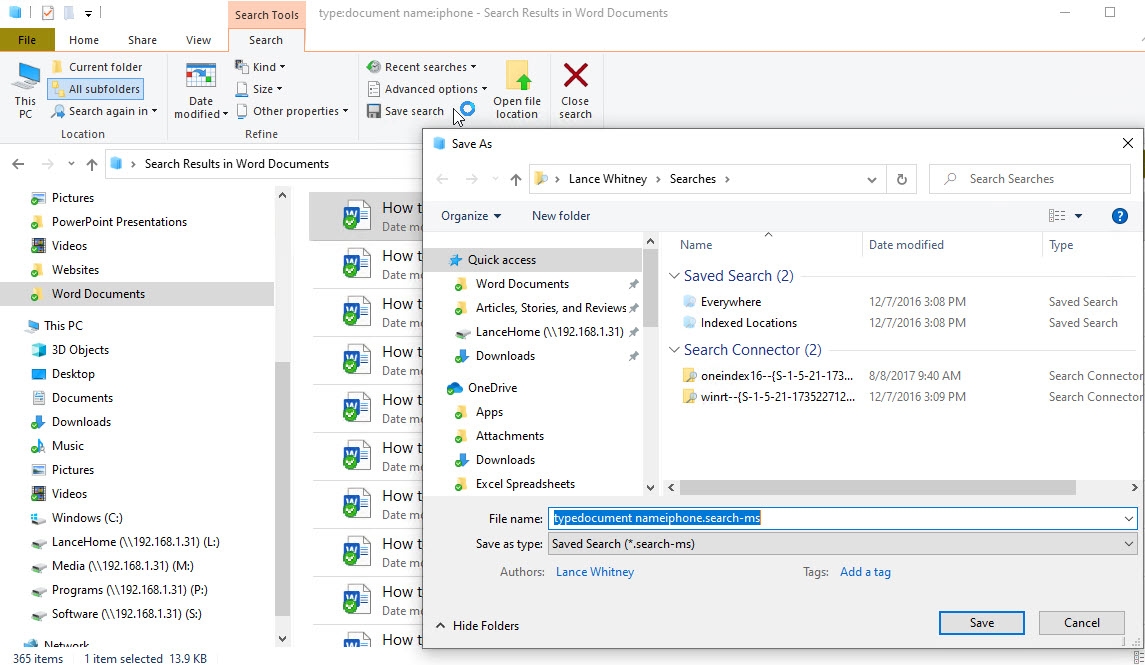
To save your current search criteria and options, click on the icon to Save Search. Type a name for the search or leave the default name. Keep the default location. Click Save (Figure G).
Figure G
Finally, to open the entire folder for a specific file from the search results, click on the file and then click on the icon to Open File Location. When finished with your search, click on the icon to Close search.
