


Image: Aajan, Getty Images/iStockphoto
You may work with Microsoft Excel mostly in Normal view with the default zoom level, which displays a limited number of rows and columns on the screen at one point, but Excel offers a variety of other views that can help you see more or less of your spreadsheet. For instance:
- You can zoom in or out to a specific percentage or select part of your spreadsheet and zoom into that selection.
- You can also turn off the formula bar, gridlines, and headings to make more room for your data.
- You can see how your spreadsheet will print by going into Page Break Preview mode or Page Layout mode.
- You can even create your own custom views to apply certain display and print settings and then switch among those different views.
For this article, I’m using Excel from an Office 365 subscription, but the features I describe are accessible in other versions of Excel.
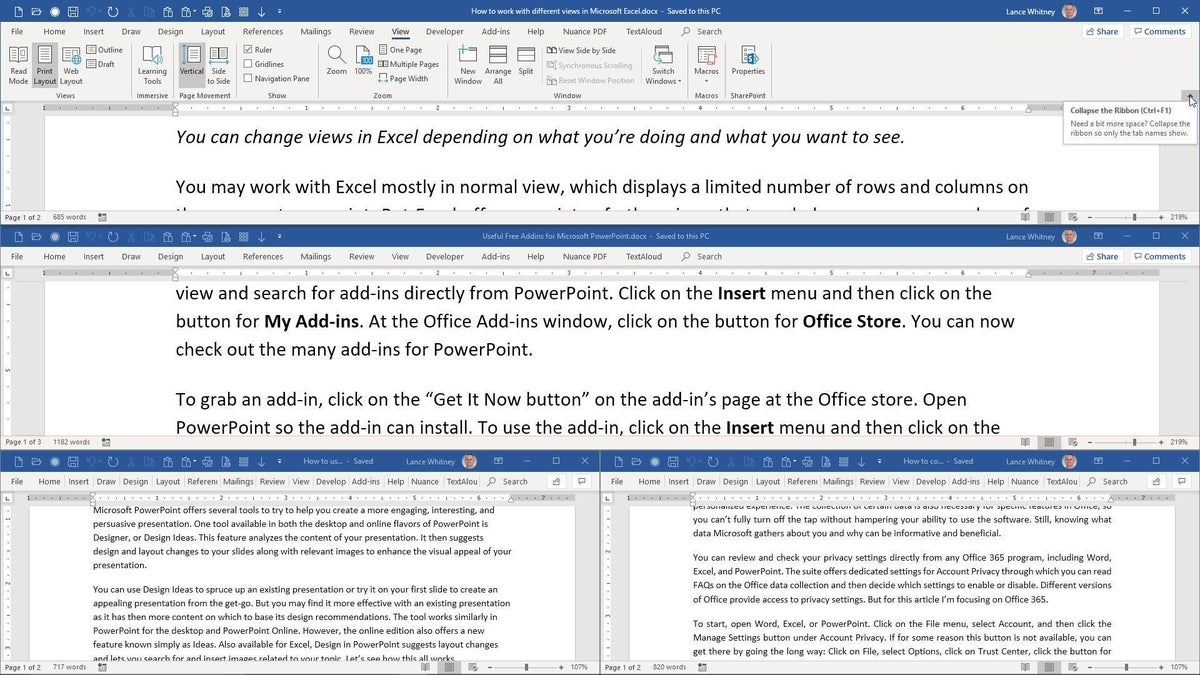
To start, launch Excel and open a spreadsheet, preferably one with more rows and/or columns than you can see on the screen at one time. You’re probably already familiar with the Zoom tool, but let’s go over the options here. Click the View tab to display the View Ribbon. Click the button for 100%. Depending on your current view that will either zoom you in or zoom you out. In my case, the view was set for 150%, so switching to 100% displayed more of my spreadsheet on the screen (Figure A).
Figure A
Next, you can switch to a specific zoom level. Click the Zoom button. You can choose any of the default values or type your own custom number. Select a value and click OK. You can also zoom to a selection. This can be handy for narrowing your view just to rows and columns you need to see. Select a specific area of the spreadsheet and then click the button for Zoom To Selection (Figure B).
Figure B
You can turn off certain screen elements to change the look of your spreadsheet or to see more of your data. In the Show section of the View Ribbon, turn off Gridlines to give your sheet a more open appearance. Turn off Formula Bar if you don’t need to add more formulas to the sheet. Turn off Headings to remove the headings for your rows and columns (Figure C).
Figure C
Gauging how your spreadsheet will print is a challenge when you’re in Normal view; two other views offer a better peek. In the Workbook Views section of the View Ribbon, click the button for Page Layout to see how many printed pages your spreadsheet will take. Click the button for Page Break Preview to see how the pages will look when printed. In both Page Layout and Page Break Preview, you can use the Zoom tools to zoom in or out and turn Gridlines, Formula Bar, and Headings on or off (Figure D).
Figure D
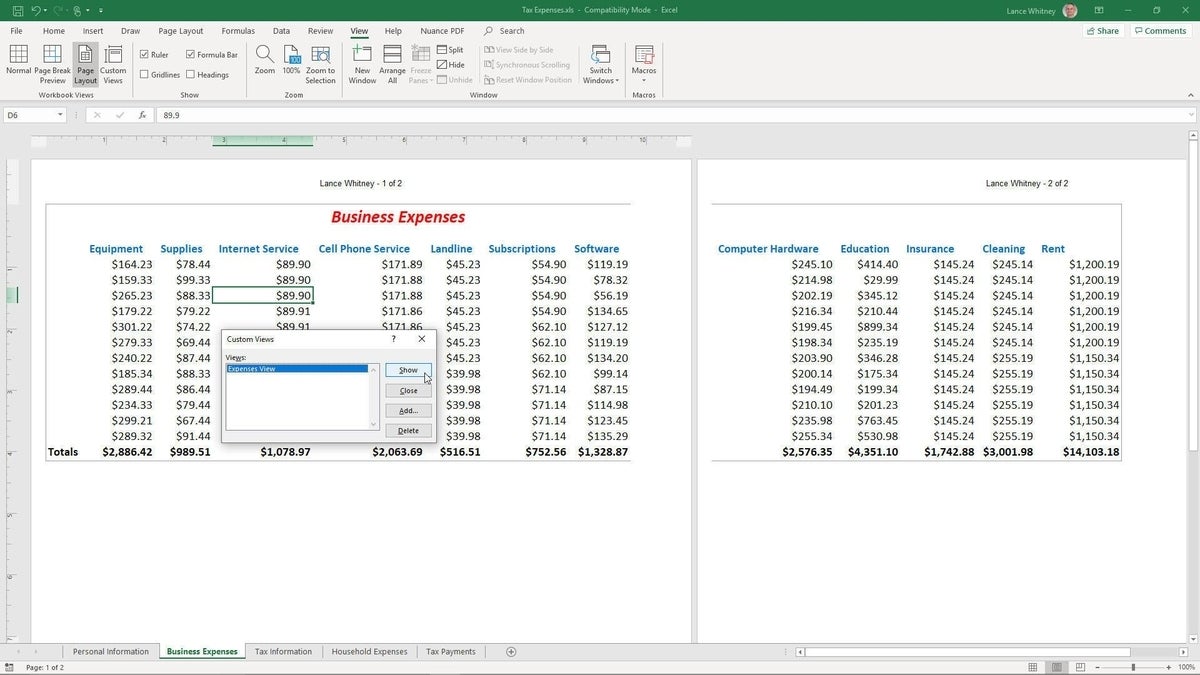
Next, you can create custom views. With a custom view, you can establish certain display and print settings, such as no gridlines or headings, specific margins, and a specific Workbook view. You then save that view so you can easily apply it to your spreadsheet. You can even create multiple views. To try this, make some changes to a spreadsheet. Turn off gridlines and headings. Set specific margins. Create a header or footer. Change the view from Normal to Page Layout. At the View menu, click the button for Custom Views. At the Custom Views window, click Add. Create a name for this view and click OK (Figure E).
Figure E
Now, reverse all the changes you made. Turn on gridlines and headings. Reset the margins. Remove or change the header or footer. Go to back Normal view. Click the Custom Views button. Make sure the view you created is highlighted. Click the Show button, and all the settings you created for that view are applied back to your spreadsheet (Figure F).
Figure F