


On Sept. 20, 2022, Microsoft officially unleashed its first major update for Windows 11. Known as Windows 11 22H2, this version offers a variety of enhancements to key features in the operating system. If you’re the type to download now and read the instructions later (or never), you can go to the Windows 11 download page now.
Windows 11 22H2 is available as a free update for Windows 11. But, how do you know your PC can handle the 22H2 update? Where will you find it? And how do you install it? Let’s check out the process.
Features and enhancements new to Windows 11 22H2
The Windows 11 22H2 update came with the following new and improved features:
- Start menu folders: You can create Start menu folders to better organize your apps.
- Resize the Pinned Apps section: You can change the size of the Pinned apps section to control how many icons are visible at once.
- Drag and drop on Taskbar: You can drag and drop icons onto the Taskbar.
- Snapping window layouts: You’ll find new layouts for snapping and arranging multiple windows and apps.
- OneDrive access: You can more easily access your OneDrive storage in File Explorer
- View your Microsoft 365 information: Microsoft 365 users can view their subscription details from the Accounts screen.
- Use Clipchamp: You can use the preloaded Clipchamp app to edit your videos.
Does your PC meet the system requirements for Windows 11 22H2?
Windows 11 22H2 has the same requirements as the initial version of Windows 11. This means your PC needs to be equipped with a 64-bit processor with two or more cores, at least 4GB of RAM, at least 64GB of storage, the Secure Boot feature and Trusted Platform Module version 2.0.
SEE: Here’s everything you need to know about Windows 11.
If you’re already running Windows 11, you should be able to move to the 22H2 update with no trouble. If you’re running Windows 10, then you’ll need to check your PC to see if it’s compatible; Microsoft offers a PC Health Check tool that will tell you if your computer qualifies. You should also download the latest update to Windows 10 before jumping ship to Windows 11.
Where to find Windows 11 22H2
At this point, Windows 11 22H2 should be available to all qualifying PCs through Windows Update. You can easily see if it’s ready on your PC:
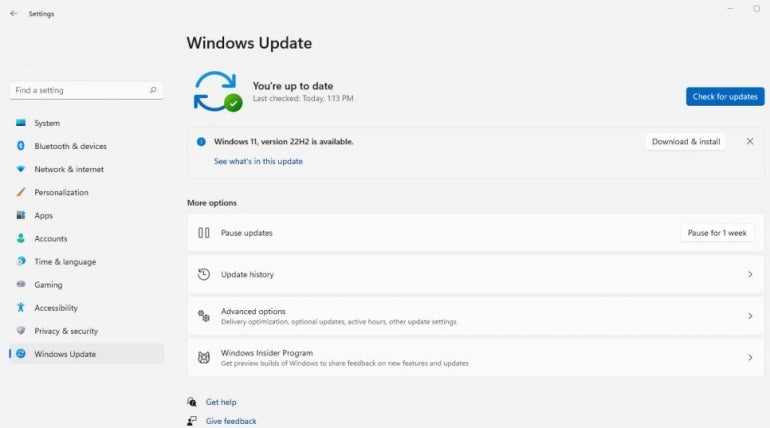
1. In Windows 11, go to Settings, select Windows Update and click the button for Check For Updates.
2. If Windows 11 22H2 pops up, click the button for Download & Install, and let the process run.
3. Reboot your PC when prompted, and sign back in. The new version of Windows 11 will now be ready for you to explore (Figure A).
Figure A
How else can you install Windows 11 22H2?
If the update isn’t yet available through Windows Update, your best bet is to wait until it appears. But if you’re anxious to dive into Windows 11 22H2 right away, there are other options, courtesy of Microsoft’s website.
From the PC you wish to update, browse to the Download Windows 11 page. There, you’re given two choices: the Windows 11 Installation Assistant and the Windows 11 Disk Image (ISO) file. There’s also a third choice to create Windows 11 installation media if you want to set up a bootable USB drive or DVD to install the update on a different computer. But, let’s assume your goal is to update your current PC.
How to use the Windows 11 Installation Assistant
Supporting both Windows 11 and Windows 10, the Windows 11 Installation Assistant is the most direct and simplest way to update your PC to the 22H2 version:
Click the Download Now button in that section, and save the downloaded file to your PC (Figure B).
Figure B
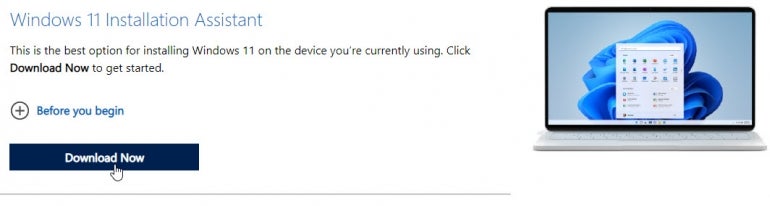
1. Click Download Now, and save the file to your PC.
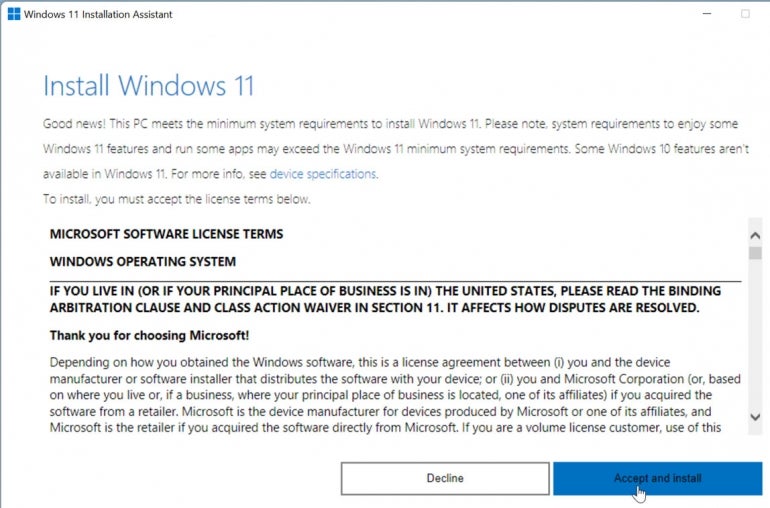
2. Run the Windows11InstallationAssistant.exe file. You’ll be told that your PC qualifies or prompted to download and run the PC Health Check app.
3. Assuming your PC qualifies for Windows 11, click the button for Accept And Install to install the update (Figure C).
Figure C
4. Allow the update to download and install.
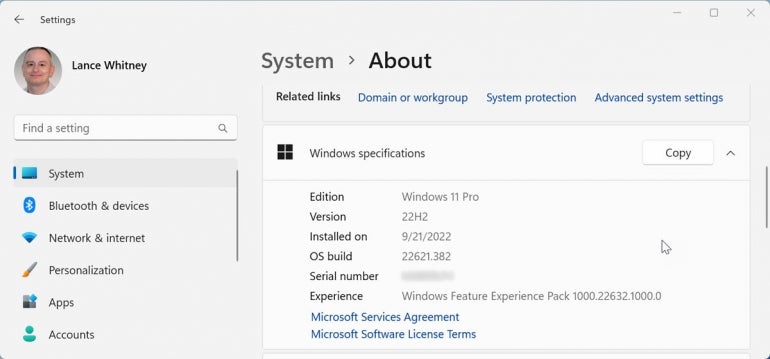
5. Reboot your PC, and sign back in. The Windows 11 22H2 update should now be in place. To double-check, go to Settings and then System, and click the option for About. Scroll down to the Windows specifications section, and confirm the version says 22H2 (Figure D).
Figure D
How to create the Windows 11 Disk Image ISO file
Creating an ISO file to update to Windows 11 22H2 is another handy, though less direct, option available for Windows 11 or Windows 10. To go this route:
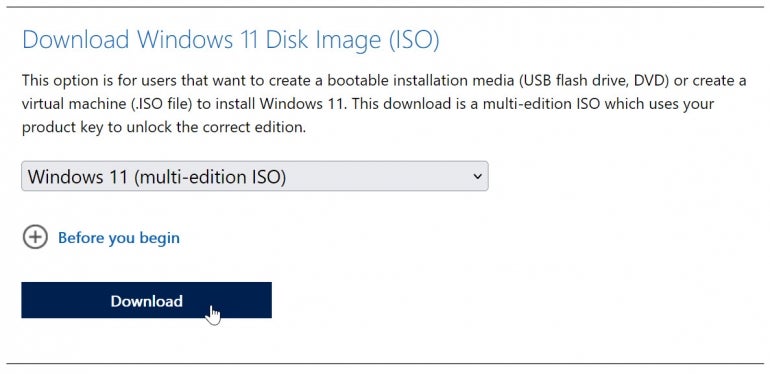
1. At the Download Windows 11 page, click the dropdown menu for Select Download in the Download Windows 11 Disk Image (ISO) section.
2. Select Windows 11 (multi-edition ISO), and click Download (Figure E).
Figure E
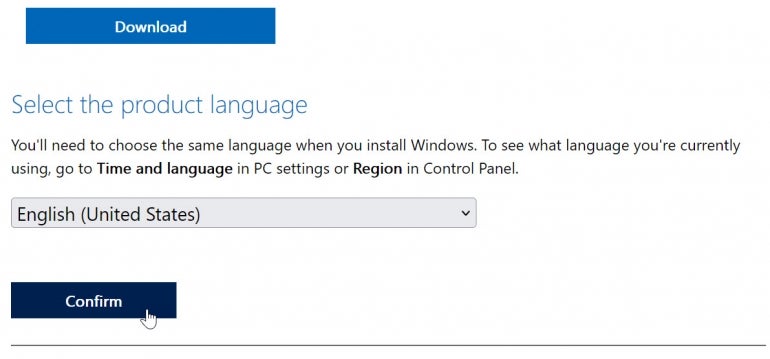
3. After the screen refreshes, click the dropdown menu for Choose One to select the product language.
4. Pick your language, and then, click Confirm (Figure F).
Figure F
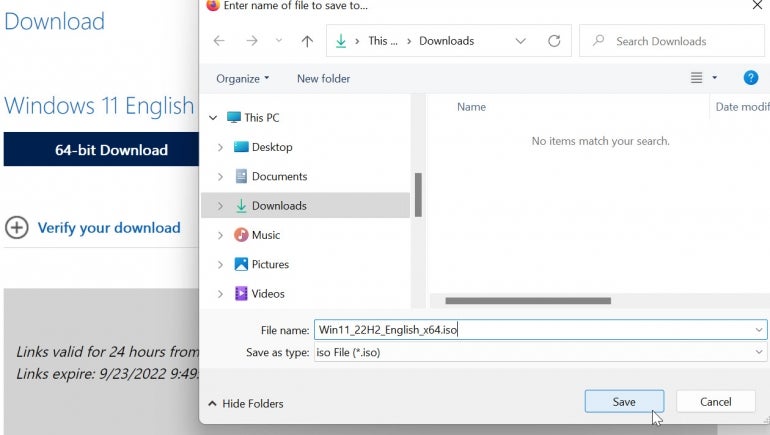
5. Now, click the button for 64-bit Download for your language, and save the ISO file to your PC (Figure G).
Figure G
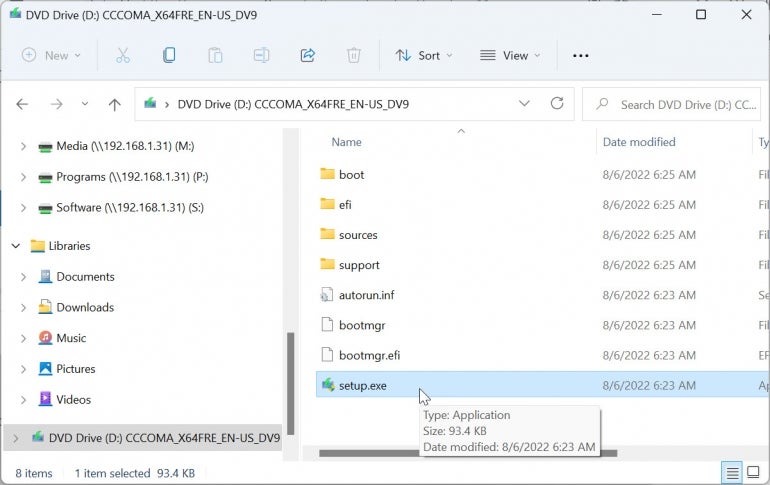
6. After the ISO file has downloaded, right-click it, and select Mount from the pop-up menu — that mounts the ISO as a virtual drive, so you can see its contents.
7. Double-click the setup.exe file to install the update (Figure H).
Figure H
8. Follow the prompts to run the setup, and then, install the update.
9. After your PC reboots, sign back into Windows. You can now take the latest version of Windows 11 for a test drive.
SEE: Windows 11 Moment 3 is just around the corner. Here are some features to expect.