


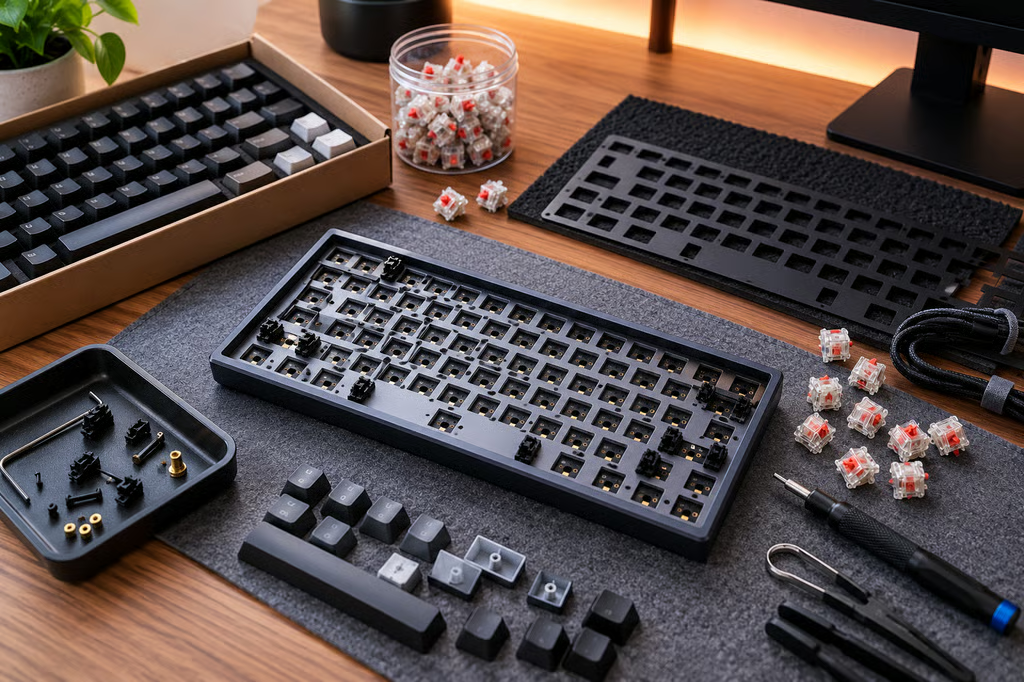
Building your own mechanical keyboard lets you choose how it looks, feels, and sounds. You can pick your favorite switches, select a layout that fits your desk, and change the keys to suit your typing style.
You don’t need expensive equipment or soldering experience to get started. A beginner-friendly hot-swappable keyboard kit lets you install switches and keycaps without soldering anything.
The most important part happens before assembly: making sure your components fit together. Here’s what you’ll need, how much to budget, and how to build your first keyboard without buying incompatible parts.
What you need to build a custom mechanical keyboard
For your first build, start with a barebones keyboard kit. It usually includes the case, circuit board (PCB), mounting plate, and stabilizers. You’ll typically buy the switches and keycaps separately.
Buying everything individually gives you more control, but it also creates more opportunities for compatibility mistakes.
Choose your keyboard layout
Keyboard layouts determine how much space your board takes up and which keys you’ll have.
- 65%: Compact, with arrow keys but usually no function row or number pad.
- 75%: Keeps the function row and arrow keys while saving desk space.
- Tenkeyless (TKL): Has the main keys and function row but removes the number pad.
- Full-size: Includes a number pad, useful for spreadsheets and frequent number entry.
For most beginners, a 75% or TKL layout is a comfortable starting point.
Before ordering, make sure the case, PCB, and mounting plate are designed to work together. Two keyboards with the same layout percentage won’t necessarily use interchangeable parts.
A complete kit is usually easier than mixing a case and PCB from different manufacturers.
Pick compatible switches and keycaps
Mechanical switches come in three common types:
- Linear: Smooth keypresses without a noticeable bump.
- Tactile: A small bump you can feel when pressing the key.
- Clicky: A tactile bump with an audible click.
If you’re unsure which you prefer, try a switch tester before buying a full set.
Most beginner kits use conventional mechanical switches, but not every hot-swap socket supports every switch.
For example, magnetic switches used in many gaming keyboards generally require different electronics from conventional mechanical switches. Our mechanical vs magnetic keyboards comparison explains the differences.
Keycaps also need to match your layout. Check the sizes of the spacebar, Shift keys, and other larger keys, particularly on compact keyboards.
Some switch and keycap combinations can interfere with one another, so confirm compatibility with your kit’s documentation.
Decide which extras you actually need
Many custom keyboards offer different case materials, mounting styles, and sound-dampening options.
An aluminum case can feel heavier and more substantial, while a plastic case generally costs less.
Gasket mounting uses cushioning between the keyboard’s internal assembly and case, which can change the typing feel. Foam and other materials can also affect sound.
None of these upgrades is essential for your first build. Start with the kit’s included parts and see how it feels before spending more on modifications.
How much does a custom mechanical keyboard cost?
A first custom keyboard doesn’t have to cost hundreds of dollars, although premium cases and switches can raise the price quickly.
The biggest difference is whether you buy a complete keyboard, a barebones kit, or every component separately.
| Build option | What you get | Cost considerations |
|---|---|---|
| Prebuilt mechanical keyboard | Ready to use | One purchase; less assembly |
| Barebones hot-swap kit | Case, PCB, plate, often stabilizers | Switches and keycaps cost extra |
| Fully custom build | Parts purchased individually | More choices, shipping costs, and compatibility checks |
For a straightforward first build, a reasonable starting budget is about $120–$200, depending on the parts you choose.
One documented budget build from MechKeyFoundry came to approximately $130:
- Barebones hot-swap kit: $70
- Mechanical switches: $30
- PBT keycaps: $30
- Total: $130
That example is a parts-budget illustration, not a current shopping quote. Check today’s prices and availability before ordering.
A separate cost guide from KeebKit also puts a typical first build in roughly the $120–$200 range. More expensive switches, cases, and keycaps can push the total higher.
Don’t forget shipping, taxes, and any tools your kit doesn’t include.
Tools you’ll need
A basic hot-swap build usually requires:
- Keycap puller
- Switch puller
- Small screwdriver
- Tweezers, if needed for smaller parts
Some kits include these tools, so check the box contents first.
You won’t need a soldering iron unless you choose a PCB that requires soldered switches.
For beginners, a hot-swap kit is usually the simpler and more forgiving option.
How to assemble your custom mechanical keyboard
The exact assembly order varies by kit. Follow the manufacturer’s instructions if they differ from the general steps below.
Step 1: Check and test the PCB
Before installing everything, inspect the PCB for visible damage.
Connect it to your computer using the manufacturer’s recommended method and confirm that it’s detected. Where supported, test the key positions using a keyboard-testing tool or the procedure supplied with the kit.
It’s easier to identify a faulty board before adding dozens of switches.
Step 2: Install the stabilizers
Stabilizers keep larger keys, including the spacebar and Shift keys, from wobbling excessively.
Some barebones kits come with stabilizers already installed. If yours doesn’t, attach the correct type according to the kit’s instructions.
Check that they move freely before continuing.
You can tune or lubricate stabilizers later if they rattle, but that isn’t necessary to complete your first build.
Step 3: Install the mounting plate and switches
Position the plate and PCB according to your kit’s instructions.
For hot-swap switches, check that their pins are straight before pressing them into the sockets.
Line up each switch carefully and press it into place without forcing it. If you feel unusual resistance, remove the switch and check the pins and alignment.
Installing a few switches first can help hold the plate and PCB together while you finish the remaining positions.
Step 4: Test every key
Before closing the case completely or installing all the keycaps, connect the keyboard and test every switch.
If a key doesn’t register, check whether its switch is properly seated and whether any pins are bent.
Testing at this stage saves you from having to disassemble the finished keyboard to locate a problem.
Step 5: Finish the case and install keycaps
Once the switches work, complete the case assembly according to the manufacturer’s instructions.
Connect any internal cables or daughterboards as directed, taking care not to pinch wires.
Then install the keycaps, checking that larger keys fit their stabilizers and that no keys stick.
Step 6: Set up your keyboard software
Many custom keyboards support VIA, which lets users change key assignments and shortcuts through a graphical interface.
Others use QMK firmware or manufacturer-specific tools.
Check your keyboard’s official support page before buying if remapping keys is important to you. Not every keyboard supports VIA, even if it uses QMK.
In its August 2026 changelog, QMK said maintenance of its VIA integration is moving to the VIA team. Existing support will remain during a transition period, but individual keyboard compatibility still needs to be confirmed.
You don’t need to change the firmware immediately if the default keyboard layout already meets your needs.
Is building a custom mechanical keyboard worth it?
Building your own keyboard makes sense if you enjoy choosing your switches, adjusting the typing feel, or creating a layout that suits your workspace.
It isn’t necessarily cheaper than buying a finished keyboard. The savings depend on the kit and parts you select, while the main advantage is control over the final result.
If you want the simplest route, buy a complete mechanical keyboard with replaceable switches. If you want to assemble something yourself, start with a barebones hot-swap kit.
Before ordering, confirm three things:
- The case, PCB, and plate are compatible.
- Your switches and keycaps fit the chosen layout.
- The keyboard supports the software and operating system you plan to use.
A first build doesn’t need expensive modifications to be successful. Start with compatible parts, test everything before closing the case, and upgrade only after you’ve spent some time typing on it.
Also read: Our best mechanical keyboards of 2026 guide compares ready-made options for gaming and work if you’d rather skip the assembly process.