


Initially designed as a low-cost computing board for teaching kids to code, the Raspberry Pi has since evolved into a fully fledged PC comfortably capable of replacing your desktop setup. At the same time, the board’s legions of dedicated fans have ensured a steady stream of ingenious open-source projects: media center, weather station, virtual assistant, Lego-powered book scanner – if you can imagine it, the chances are it’s been done.
Open source: Must-read coverage
- Debian vs Ubuntu: Which Linux Distro Fits Your Needs Best?
- Ubuntu Server: A Cheat Sheet
- Llama 3 Cheat Sheet: A Complete Guide for 2024
- CISA Report Finds Most Open-Source Projects Contain Memory-Unsafe Code
The internet is also filled with Raspberry Pi projects aimed at the home office. In keeping with the current times, we’ve selected five Pi projects for taking your remote working game to the next level.
For everything you need to know about the Raspberry Pi and what you can do with it, be sure to check out TechRepublic’s must-read Raspberry Pi cheat sheet.
Wi-Fi extender
More of us working from home means more competition over the family Wi-Fi connection, not to mention less personal working space to call our own. You can use the Raspberry Pi to boost the coverage of your wireless network so that it reaches all corners of the house, meaning you won’t all need to huddle around the router just to get a stable connection.
All you need to get started is a Raspberry Pi board, an ethernet cable, a microSD card and a Wi-Fi dongle. You’ll need two dongles if you’re using an older Pi board, as only models 3 and 4 feature in-built Wi-Fi.
This guide offers step-by-step instructions for turning your Raspberry Pi into a Wi-Fi extender.
Wall-mounted calendar
Apps have largely done away with the traditional paper calendar, but it can still be useful to have a static reference point to glance at to help us keep track of our busy schedules. With a little bit of tinkering, you can turn the Raspberry Pi into a modern version of the classic wall-mounted calendar that syncs with Google to keep you abreast of all your scheduled meetings, deadlines and other appointments.
Granted, this project takes a smattering of DIY skills as it requires securing a monitor to a wall or – if you’re feeling particularly creative – fitting your display of choice into a bespoke frame. We say: start simple and see how you get on.
You can find easy-to-follow instructions for this project over at Instructables.
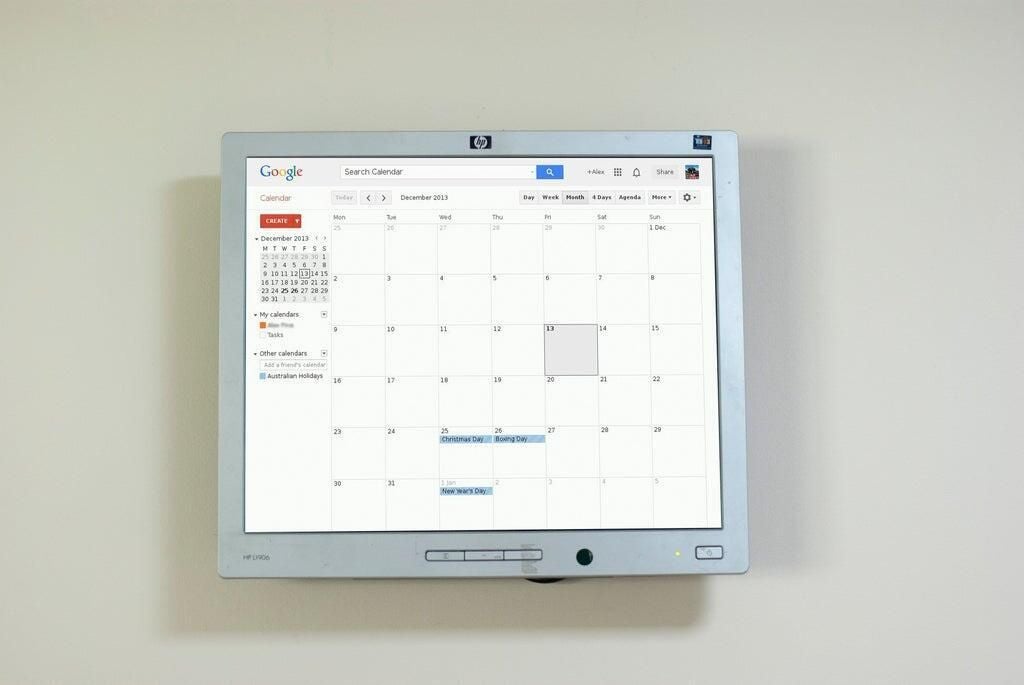
Image credit: Piney / Instructables
Network-monitoring tool
Cybersecurity has become a major concern for companies while their employees are working from home, who now have far less visibility on the devices being used to access corporate data. While a Raspberry Pi won’t provide the solution for IT admins, it can be modified into a handy network-monitoring tool that will allow you to keep an eye on devices and data connecting to your home network.
SEE: Cheat sheet: Raspberry Pi (free PDF)
This home office hack requires the use of the Nagios Enterprise Monitoring Server (NEMS) an open-source monitoring tool for Windows and Linux PCs and servers. The software needs to be run on the Raspberry Pi in place of the official Raspberry Pi OS.
You’ll also need a microSD card with at least 16GB of storage space on it. Check out the full how-to guide here.
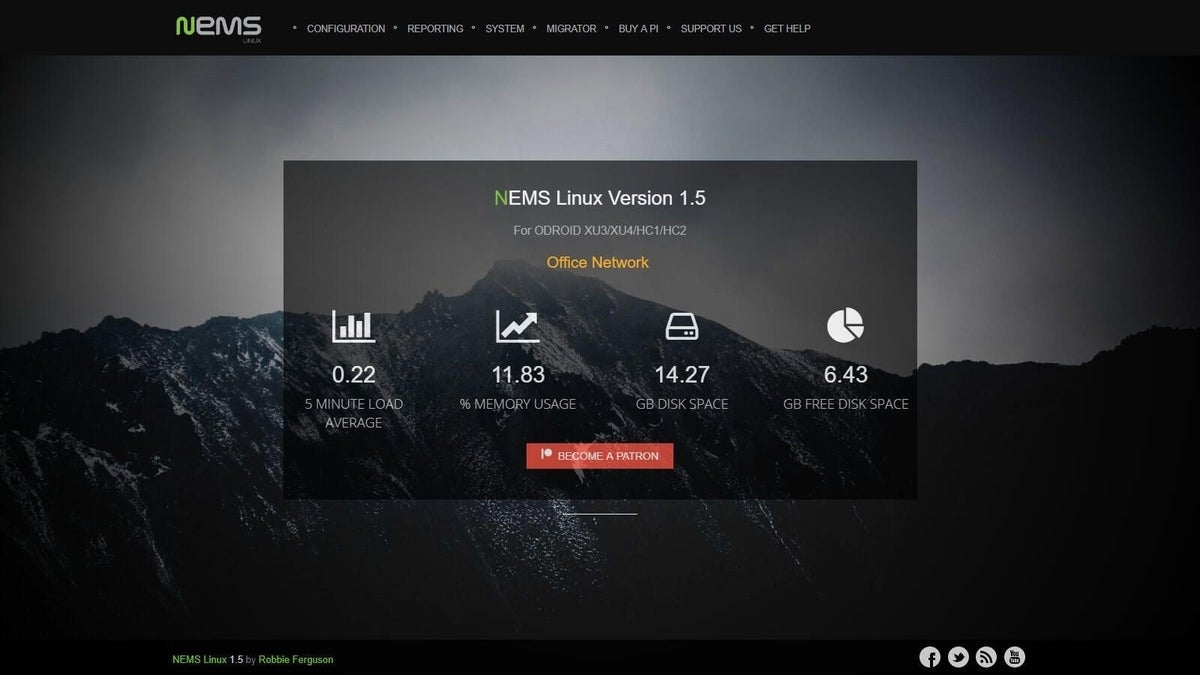
Image: NEMS Linux
VPN server
Many companies will let you sign up to a VPN service for as little as $5 a month, but if you don’t mind giving it a little bit of elbow grease, you can turn your Raspberry Pi into a dedicated VPN server that will let you surf the net on a secure, encrypted network that keeps your data away from prying eyes.
To do this, you’ll need to connect your Raspberry Pi to the OpenVPN server, which allows you to customize your VPN port, key encryption strength and client DNS server, so you can browse the internet more securely through your home network. You can do this using the handy PiVPN script.
SEE: Raspberry Pi sales are rocketing in the middle of the coronavirus outbreak: Here’s why (TechRepublic)
Wireless printer
If you have an old printer lying around that still works but lacks network connectivity, you can use a Raspberry Pi to give it a second lease of life in your home office by using it as a wireless module. To do this, you’ll first need to make sure your Raspberry Pi is connected to your home network. You’ll also need to download and install the Samba file sharing software and the Common Unix Printing System – or CUPS.
From there, it’s a case of the connecting to the local network via a wireless adapter, or through a wired Ethernet port. You can find full instructions here.
Instructables.
You
’
ll need a RetroPi kit for starters, and some woodwork skills if you really want to commit.

Image: rolfebox / Instructables