


Ant Pruitt
My Creative Cloud suite of apps provides tons of useful features, although sometimes clicking through each one hinders my speed and efficiency. I found that taking advantage of keyboard shortcuts, which are already built into Adobe Premiere Pro, can speed up my workflow.
More about Innovation
- Sovereign AI Explained
- The Rise of the AI-Native Factory
- Why Data Determines AI Success
- SS&C Intralinks DealCentre AI vs. Datasite: Which platform is built for the future of dealmaking?
Let’s look at the common keyboard shortcuts available in Premiere Pro.
SEE: Top keyboard shortcuts you need to know (free PDF) (TechRepublic)
General menu access
Menu access in Premiere Pro is very simple to use as it utilizes your OS. Your primary File and Edit menus site across the top of the interface and are accessible either at the click of a mouse or the ALT button and applicable first letter key. For example, if you’re trying to access the File menu hold down the ALT (or option key on MacOS) key, and you’ll notice the menu activates and the letter “F” will have a line under it. This means that if you hold ALT and press the “F” key, the File menu will display. Once the menu displays, you can navigate options with your arrow keys. You’ll also notice shortcuts next to some options in the menu listing. If you can memorize these keystrokes, you’ll eliminate the need to scroll through the list (especially for simple commands such as CTRL + s to save your work.)
SEE: Choosing your Windows 7 exit strategy: Four options (TechRepublic Premium)
Timeline tools and navigation
Navigating through the timeline with a mouse is such a drag. No pun intended. You have your clips arranged in your project bin, then you drag them to your timeline to begin adding cuts, effects, or placing the clips into position. So, let’s look at some commonly used keyboard shortcuts to speed up your video editing workflow.
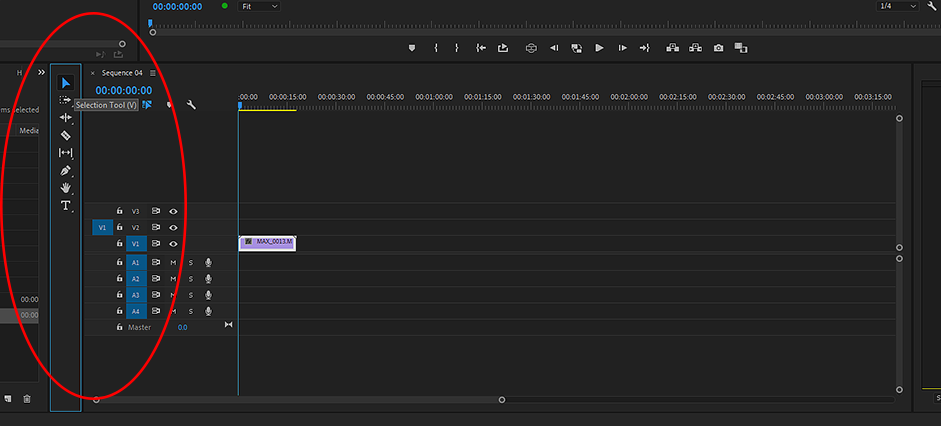
The navigation and clip tools are easily accessible with the click of the mouse because the panel is near the timeline. But learning the shortcuts is much faster. By default, the standard Move tool is used to drag clips around your timeline. To access the Move tool, just press the “V” key. You’ll notice that your mouse cursor looks like the standard arrow found in most computer apps. If you hover your mouse over the Move tool, you’ll also notice a tool tip display, which hints that the keyboard shortcut is “V” (Figure A). Note: Your interface may not look like my screenshots because the Adobe Creative Cloud suite allows you to move panels and menus to fit your visual needs.
Ant Pruitt
Moving tracks
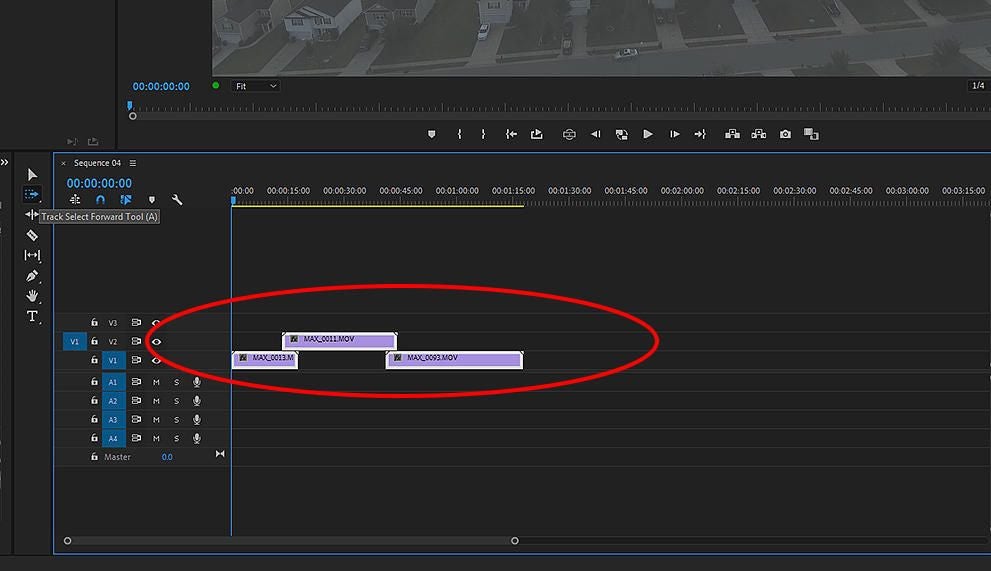
Let’s look at a scenario where you need to move multiple tracks a few frames forward or backwards on your timeline. In some situations, you can select all of the clips with your mouse by clicking and dragging your cursor around the clips to highlight them all. This works fine for a small number or clips, but if you work with a large timeline it can become tedious. Instead, tap the “A” key on your keyboard, and you can click on the very first clip in the timeline. Everything to the right of the timeline will be highlighted or selected. With everything selected, you can click and drag clips with ease to different positions on your timeline. Notice that the cursor head changes to two arrows pointing to the right. This signifies that everything to the right of the clip you selected will be included in your selection. Shift+A will select everything to the left, and you’ll notice the cursor head changes (Figure B).
Ant Pruitt
Clipping segments
If you need to cut a clip into two segments, use the “C” key on your keyboard to activate the Razor tool. Use this tool to cut clips into segments if you need to move said clips along the timeline for your video’s flow. When the Razor tool is activated, your mouse cursor looks like a razor blade instead of an arrow.
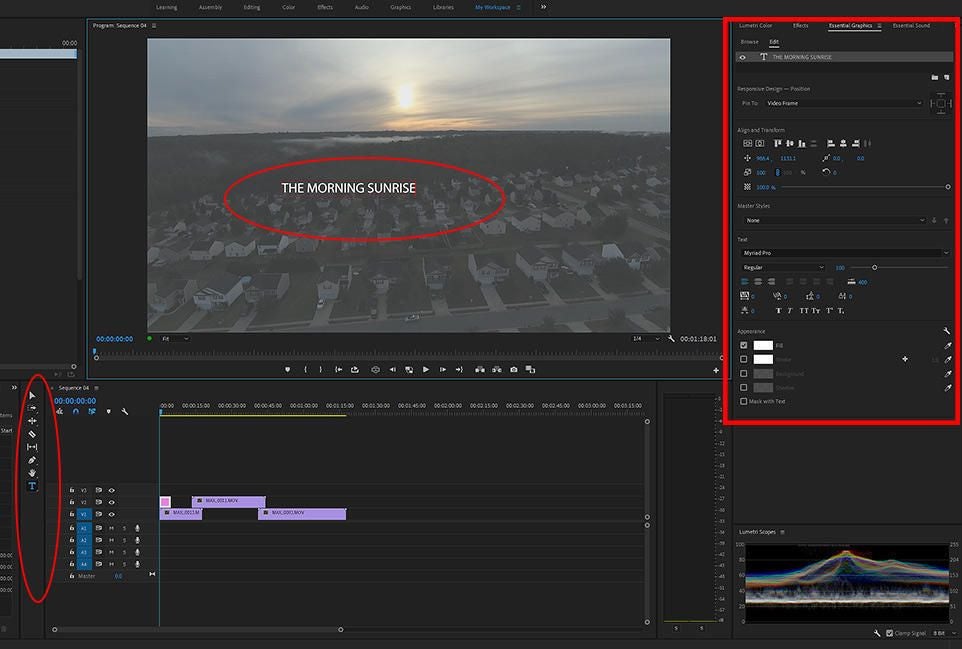
I also use the Text tool for when I create simple lower third text on videos. Just press the “T” key on your keyboard, and your mouse cursor will change into a standard text cursor. After pressing the “T” key, you can click on your video in the program monitor and begin to type any on-screen text. This also allows use of the Essential Graphics panel for further editing such as font adjustments and alignment (Figure C).
Ant Pruitt
Scrubbing through your timeline
Finally, scrubbing through your timeline is easy with four keys. You can press your spacebar, and your timeline will play. If you want, you can also utilize the “J,” “K,” and “L” keys. These are my favorites.
- Use the “J” key to scrub backwards on the timeline.
- The “L” key scrubs forward.
- The “K” key stops the scrubbing.
- If you want to increase scrubbing speed, just press the key again.
- If it’s still slow, press it again, and it will speed up in increments based on how many times you press the shortcut key. For example, tapping “K” two times will quickly scrub ahead in your timeline. Pressing “K” stops it.
Hopefully, these keyboard shortcuts will help you edit videos faster and more efficiently. There are so many more keyboard shortcuts available in Premiere Pro. You can even customize existing shortcuts or create your own. Let me know if these quick shortcuts help you out in your workflow by tagging me on Twitter.