


For the longest time, I’ve been using Google Keep as my go-to note-taking app. For the most part, that tool has been serviceable. I can take quick notes and know that they’ll be in sync with any device I use.
SEE: iCloud vs. OneDrive: Which is best for Mac, iPad and iPhone users? (free PDF) (TechRepublic)
Must-read developer coverage
- What Powers Your Databases? Take This DZone Survey Today!
- Microsoft’s Historic 6502 BASIC Code is Now Open Source
- TIOBE Index: Top 10 Most Popular Programming Languages
- TechRepublic Exclusive: AWS Says Entry-Level Workers Need ‘Curiosity’ In the Age of AI
However, there are a couple of things that bother me about Keep. First, it’s very basic. You can take quick notes, do a bit of formatting, share them, pin them, archive them and not much more. The second issue I have is that there is no desktop application. Sure, I primarily work within a browser, but with the number of tabs I keep open daily, “just one more tab” can become a problem.
Along comes Upnote, with more features than Keep and an app for Linux, macOS, Windows, Android and iOS. Already, I have to ask, “What’s not to love?”
It only took me a few minutes (after installing Upnote onto my daily drivers Pop!_OS and Android) to realize that this app will most likely usurp Google Keep as my go-to note-taking application.
Upnote includes features such as:
- Rich text formatting
- Support for Markdown
- Multiple notebooks
- Hashtags
- Offline mode
- Support for lists, images, links, attachments, quotes, code blocks
- Multiple fonts
- Text highlighting
- Focus mode
- Automatic backup
- Bidirectional linking
- Note export
- Import from Evernote and Simplenote
- Note pinning and starring
- Theming
You can use Upnote for free but are limited to only 50 notes with basic features. The Premium version is only available for iOS, Android, or macOS, but should be made available for Linux in the future. And seeing as how it does not have a web-based version, if you want the Premium plan, you must install it on one of the currently supported platforms.
Let’s get Upnote installed on Linux (as the installation on the other platforms is handled through their respective app stores) and then see just how easy the tool is to use.
What you’ll need
The only thing you’ll need is a running instance of a Linux distribution that supports snap and a user with sudo privileges.
Let’s make this happen.
How to install Upnote on Linux
There are two ways to install Upnote via snap. The first is from the command line. Log into your Linux machine, open a terminal window, and issue the command:
sudo snap install upnote
That should do the trick. If you find yourself installing a lot of snaps, you might also want to install the Snap Store, which is a GUI for locating and installing snaps. To install the Snap Store, issue the command:
sudo snap install snap-store
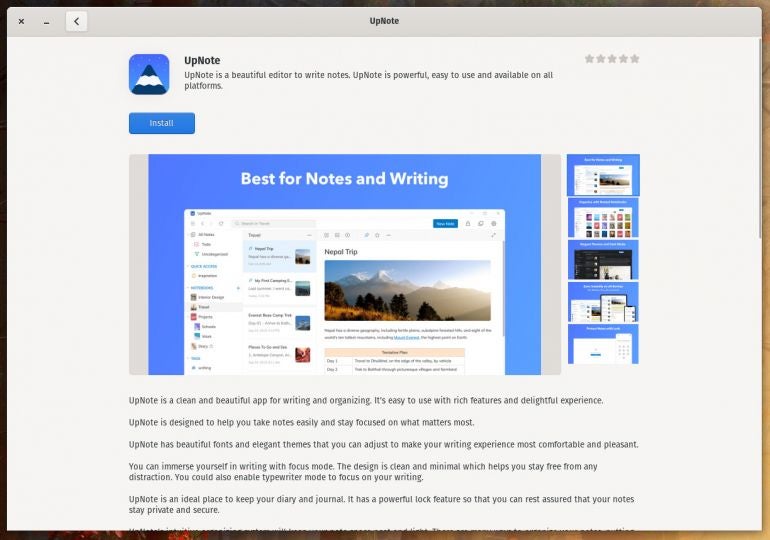
Once the Snap Store installs, you’ll find it in your desktop menu, where you can search for Update and Install with a single click (Figure A).
Figure A
How to use Upnote
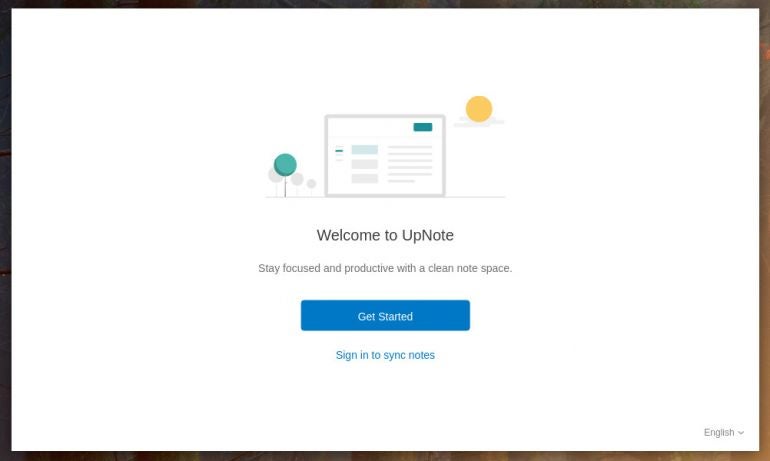
Once you open Upnote, the first thing you’ll want to do is create an account (so you can sync across devices). This is done in-app. From the welcome screen (Figure B), click Sign In to Sync Notes.
Figure B
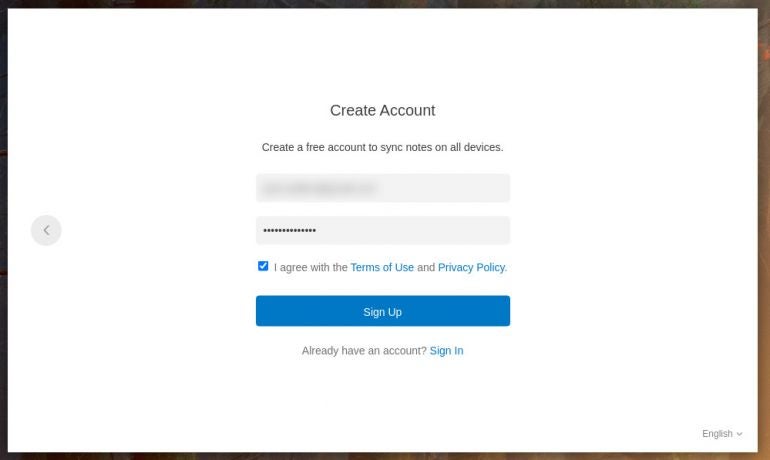
Click to create an account and then, in the resulting screen (Figure C), type an email address and add a strong/unique password. Agree to the terms and click Sign Up.
Figure C
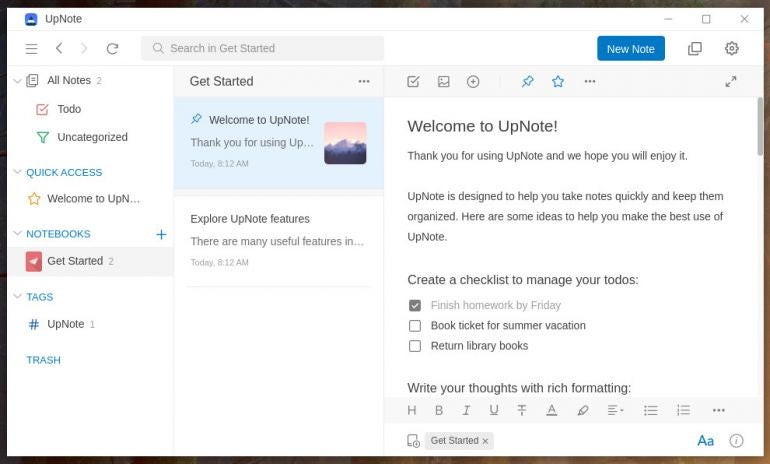
Once you’ve created your account, the upnote window will open (Figure D), where you can get to work.
Figure D
If you’ve used any note-taking app, you should have no problem getting up to speed with Upnote. One of the nice things about using Upnote is that many of the keyboard shortcuts you know and love already work, so [Ctrl]+[k] inserts links to highlighted text, [Ctrl]+[b] will bold text, [Ctrl]+[i] sets italics, [Ctrl]+[C] (note the capital C) will start a line of code, and so on.
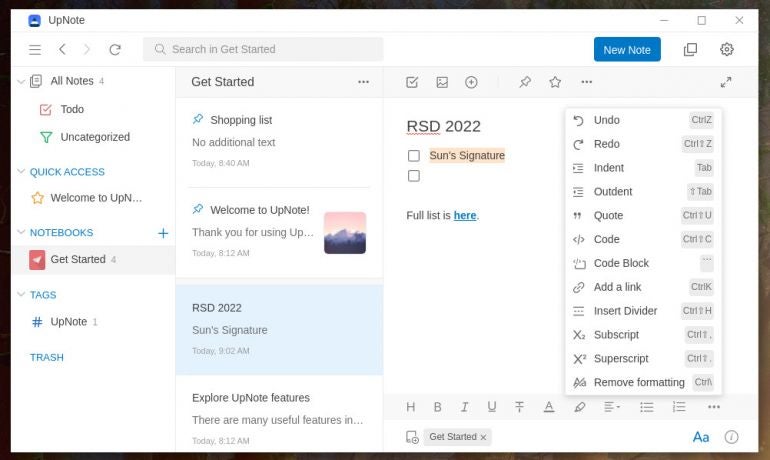
If you’re not a fan of keyboard shortcuts (but who isn’t?), or just want to quickly find out what key combinations do what, click the three-dot menu near the bottom right corner to reveal the various shortcuts (Figure E).
Figure E
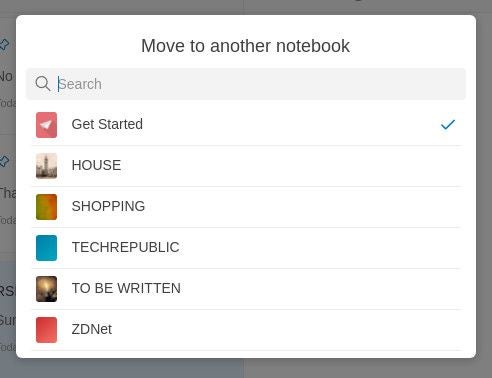
One thing to keep in mind with Upnote is that you can create multiple notebooks and then add notes to them. If you create notebooks after you’ve started creating notes, you can move notes to a notebook by right-clicking the note and selecting Move to Another Notebook. In the resulting popup (Figure F), select the notebook to house the note and you’re good to go.
Figure F
And that’s pretty much the gist of Upnote. If the likes of Google Keep can’t keep up with your need for more, I highly recommend this note-taking app. You’ll find the feature list far surpasses Keep and the ease of use cannot be beaten. And having a desktop app for most platforms is a big bonus.
Subscribe to TechRepublic’s How To Make Tech Work on YouTube for all the latest tech advice for business pros from Jack Wallen.