Configure Microsoft’s Remote Desktop Connection Manager
Image 1 of 12
Installation of RDCMan
There are days when I look down at my taskbar and see way too many open connections to servers and I can’t remember what’s what. In our small IT shop, my staff and I wear many hats, and we all have varying needs to jump on different servers to accomplish a necessary task. It can be a challenge to keep track of our 15 physical servers and our 40 – 45 virtual servers, particularly when it comes to connecting to multiple servers that house related servers. For example, is it the server named SQL04 or is it the server named SQL08 that houses the SharePoint database? As you move into larger environments, it gets even worse as the number of servers grows exponentially.
Microsoft’s Remote Desktop Connection Manager (RDCMan) makes our administrative task of keeping track of remote desktop connections much easier. RDCMan aggregates Windows server remote desktop connections so administrators can connect to server with a point and a click rather than hunting around for a connection. Here are configuration tips for getting the most out of RDCMan.
Note: My default is Windows 7, but if you intend to use RDCMan with Windows XP, you may need to install version 6 or higher of the Remote Desktop Connection client software. I also included a link to RDCMan 7 for Windows Vista below.
- Update for Windows XP (KB969085) u2013 RDCMan 7 for Windows XP SP3
- Update for Windows Vista (KB969084) u2013 RDCMan 7 for Windows Vista
This TechRepublic gallery is also available as a Servers and Storage blog post.
Installation
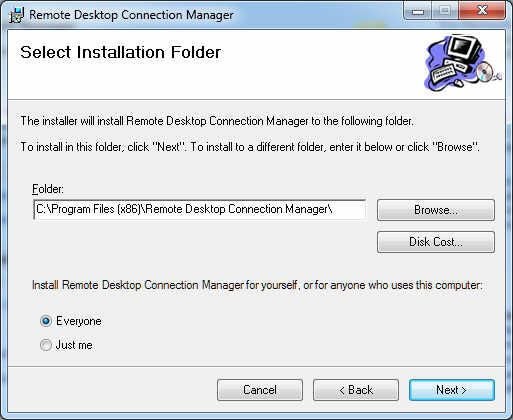
Installation is a breeze; you just double-click it and then click Next a couple of times.
The Tree tab
General RDCMan options
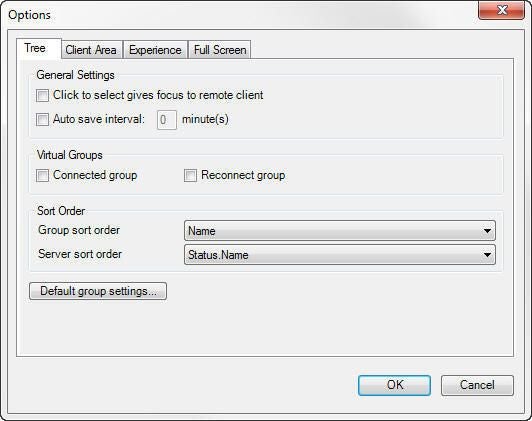
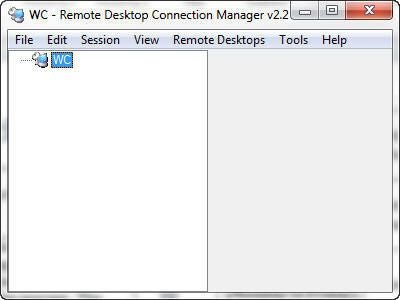
When RDCMan is installed and you start the program, you’re presented with a pretty barren landscape that you need to populate with a top level group, servers, and service groups. Before you begin, you can provide some general parameters that will inform the way the program operates. To set these options, from the Tools menu, choose Options. The Options dialog box contains four tabs: Tree, Client Area, Experience, and Full Screen.
The Tree tab provides you with general options; the most important item on the screen is the Default Group Settings button, which I’ll discuss in more detail later in the gallery.
The Client Area tab
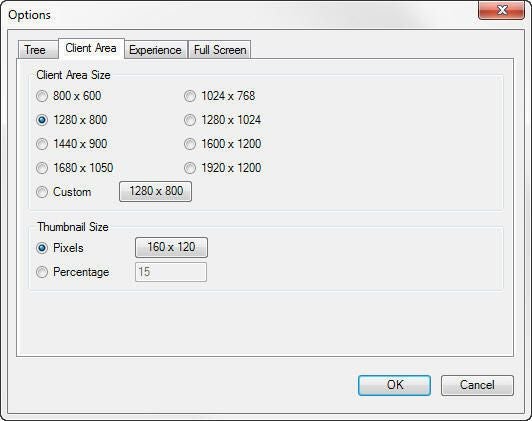
Next you see the Client Area tab; this is the main part of the RDCMan window and is where server desktops will appear. On the Client Area tab, you can choose the default client area size you’d like to use, as well as the thumbnail size you’d like for minimized connections.
Choose Full Screen options
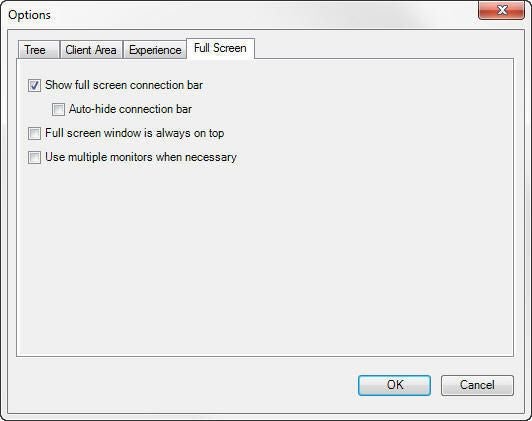
In the Full Screen tab, you can specify how you want Full Screen mode to operate. For example, do you want to show the full screen connection bar at the top of the screen?
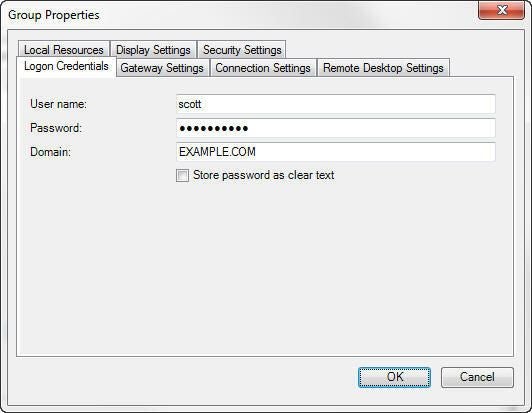
Group Properties – Logon Credentials tab
Now, let’s go back to the Tree tab’s Default Group Settings button. When you click this button, it opens a dialog box that allows you to establish a number of default settings for the group, including Logon Credentials, Access To Local Sources such as sound, and whether or not a Terminal Services gateway server needs to be used for the connections. This figure shows the Logon Credentials tab. You can override this setting in the individual server connections, if necessary.
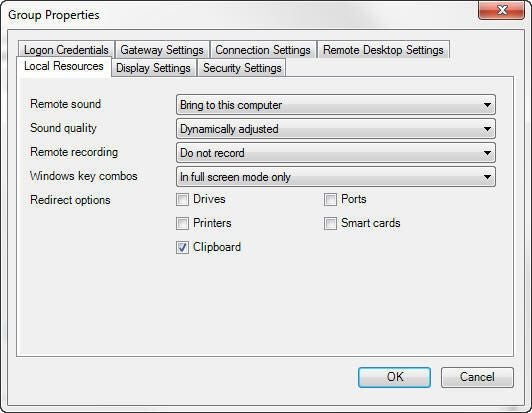
Group Properties – Local Resources tab
This image shows the Local Resources tab. You can override this setting in the individual server connections, if necessary.
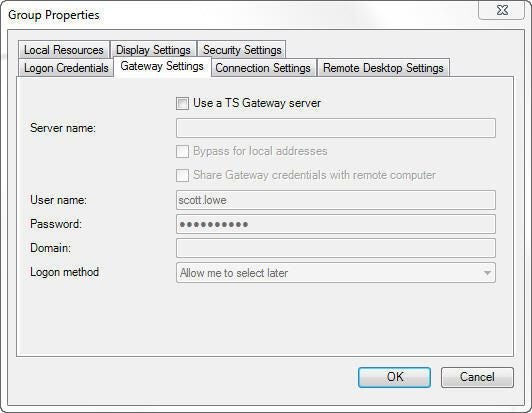
Group Properties – Gateway Settings tab
This image shows the Gateway Settings tab. You can override this setting in the individual server connections, if necessary.
The RDCMan top level group
The top level group
RDCMan can manage server access in a number of ways. For smaller organizations like mine, it makes the most sense to create a single top level file/group into which individual servers and service groups will be deployed. I’ll talk about service groups in a bit, but for now, let’s focus on individual servers.
Creating a new top level group is as easy as going to the File menu and choosing New and providing a file name for the top level group. The new file will appear as the top level group in your navigation hierarchy.
The newly created top level group contains a number of properties that you can set as the default for all of your remote desktop connections. To open the Properties page, right-click the top level group and, from the shortcut menu, choose Properties.
Add a new sub group
Creating service groups
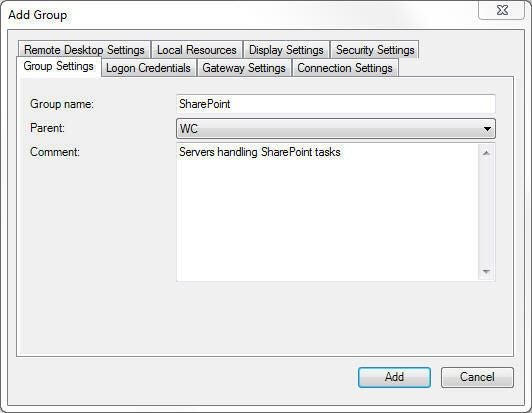
One of the beauties of RDCMan is its ability to handle server groupings; so now you can create groups of servers that support similar services. For example, I could create a group that includes all of my SharePoint servers so I don’t need to hunt around for the right SQL server.
In this figure, you see the Add Group dialog box; I call this a service group since I group like services together. You’ll note that the tabs in the previous figure are much like the ones shown when you created the top level group and chose default settings for RDCMan. This is one spot where you can override the settings you created in higher level groups.
Add a new server
Add servers
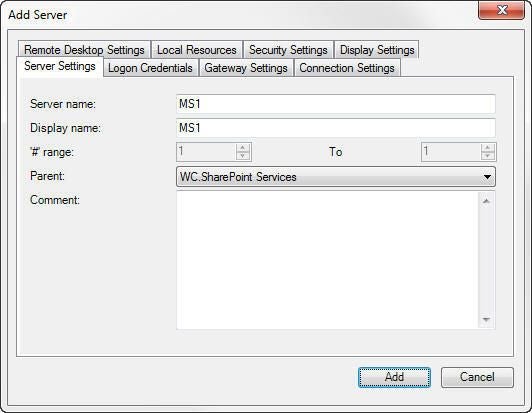
Now you can add individual servers wherever you like — either in the new service group or in the parent group. To add a server, rightu2013click a group and choose Add server; this opens up the Add Server dialog box that looks a lot like the windows we’ve seen earlier in this tutorial. It’s time to provide the name of the server you’d like to add. You can override the connection settings at this level if necessary. For example, suppose that this server is not a part of the domain and uses different credentials. This figure shows you the Add Server window.
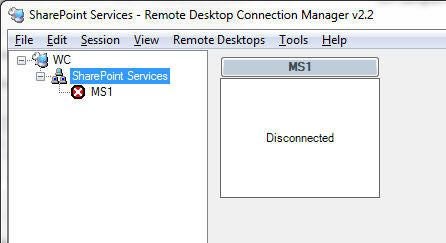
The new server has been added
When a server is added, it will appear minimized and in a Disconnected state in the client area, as shown in this figure.
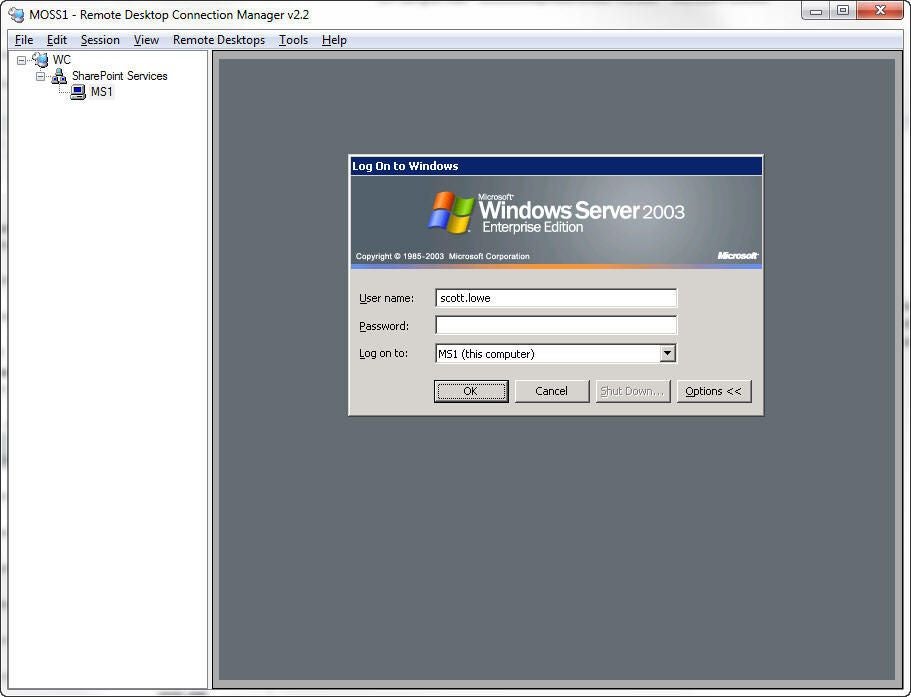
Connect to and manage any server
To establish a connection to the server, just double-click the server’s name. The client area will house the server desktop and provide you with a single window in which to handle server work from a client desktop.
Summary
When you use RDCMan, you can ditch all of your taskbar icons and no longer have to remember dozens of server names. RDCMan also allows administrators to create service groups, preload the utility with server connections, and, ultimately, focus on getting the job done rather than knowing the mechanics behind establishing the connection.
