With all of the excitement about the MacBook Air lately (Due largely to their excellent commercials), we thought it might be interesting to compare the cutting edge Apple MacBook Air with its predecessor from back in 2000.
Has notebook technology made a huge leap forward in features and functionality, or has it made a few measured steps targeted mostly at the “cool kids”?
We shall see, as we dissect its ancestor, the Apple G3 Pismo Firewire. Named such because it was the only G3 series notebook to feature Firewire ports which were quite the rage in 2000, but seemed to stall and fall by the wayside somewhere between 2000 and 2008.
We’ll start with a few notable comparisons of the two, and while doing so, we find that this also serves as a comparison by proxy to most other notebooks of the time and of today as well.
The dimensions are the most obvious, the Air being .95 inches slimmer than our Pismo, and indeed, most other notebooks. As a point of reference the screen alone on our Pismo is approximately the same thickness as complete AirBook. As Mark Kaelin pointed out, that was accomplished in part by eliminating the cumbersome drive bays.The Screen sizes are similar, 13.3 for the AirBook, and 14.1 for the Pismo.Battery life technology hasn’t done much in 8 years, as they both have a 5 hr battery life. You might consider however, that the Air battery is extremely thin and light, and if it were the same size/weight as our Pismo battery, we may well get much more time out of it. According to Mark Kaelin, the battery was modeled after those found in the iPods.
Don’t forget that you can click the image to enlarge.
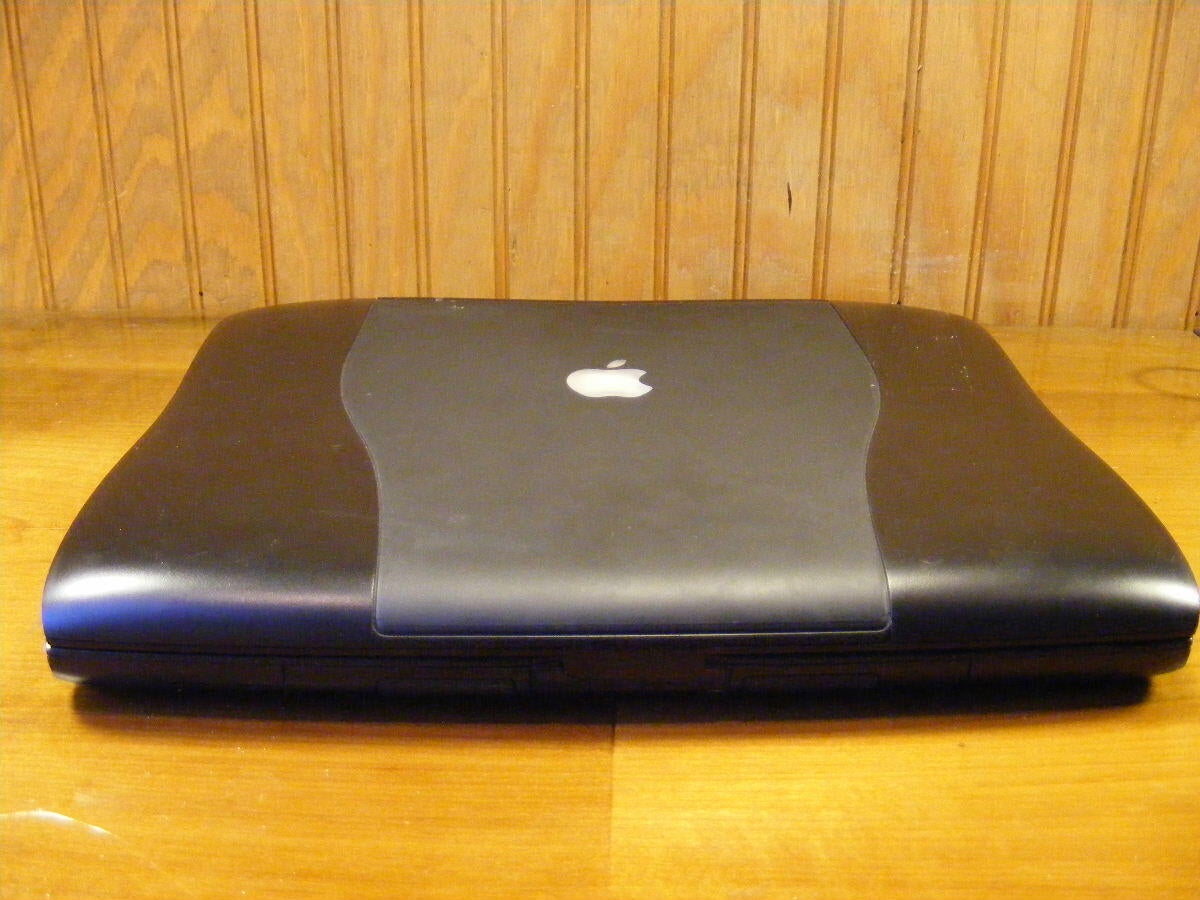
Here we have the front view of our subject. It was really very typical of notebooks at that time, aside from the sexy lines that it exhibited compared to its x86 competitors.
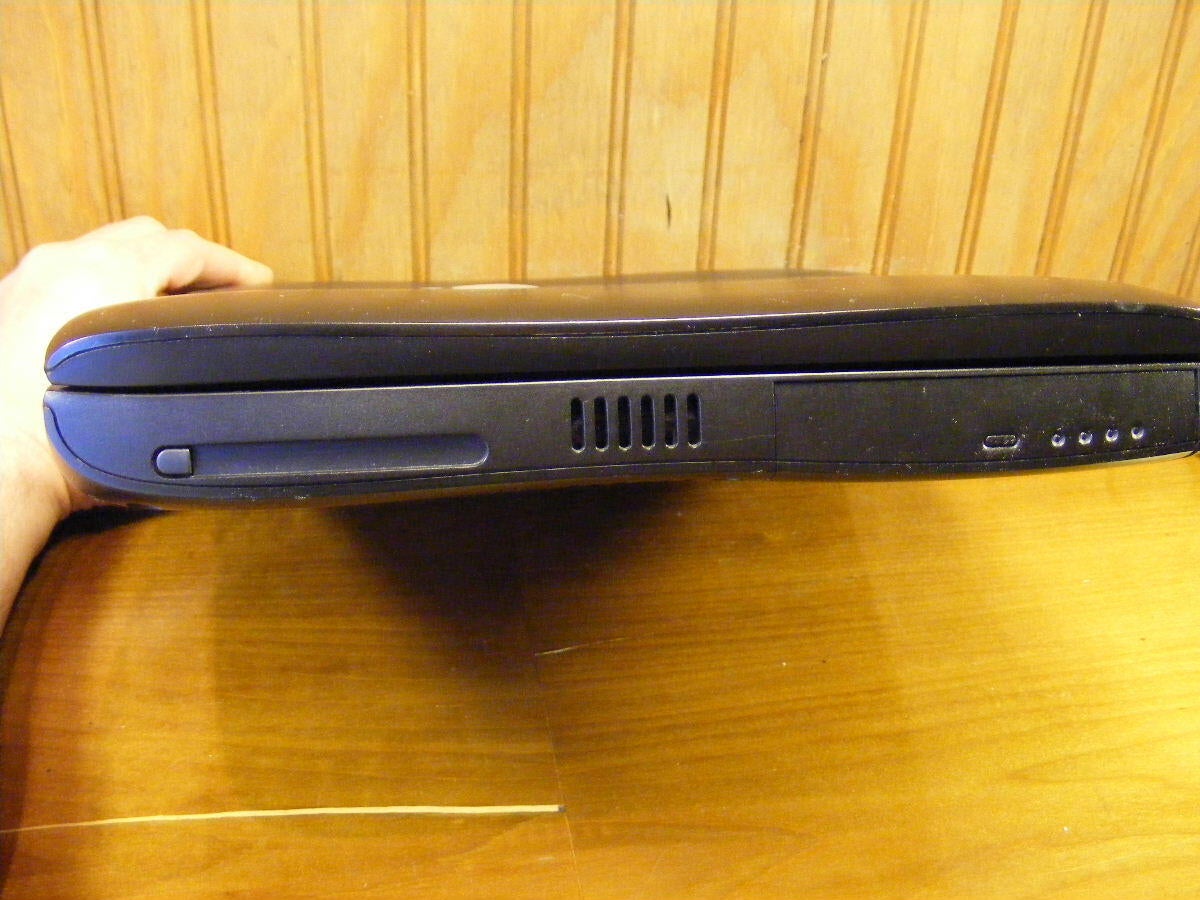
The left side where we see the battery, the case fan vent, and the PC slot – yawn.
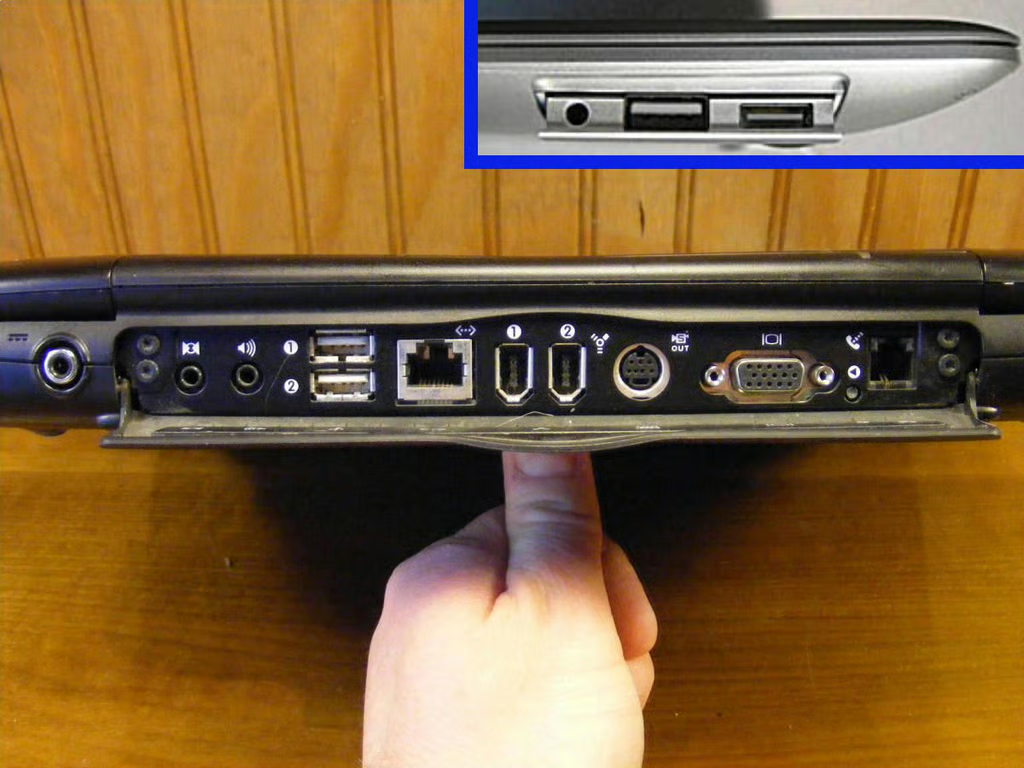
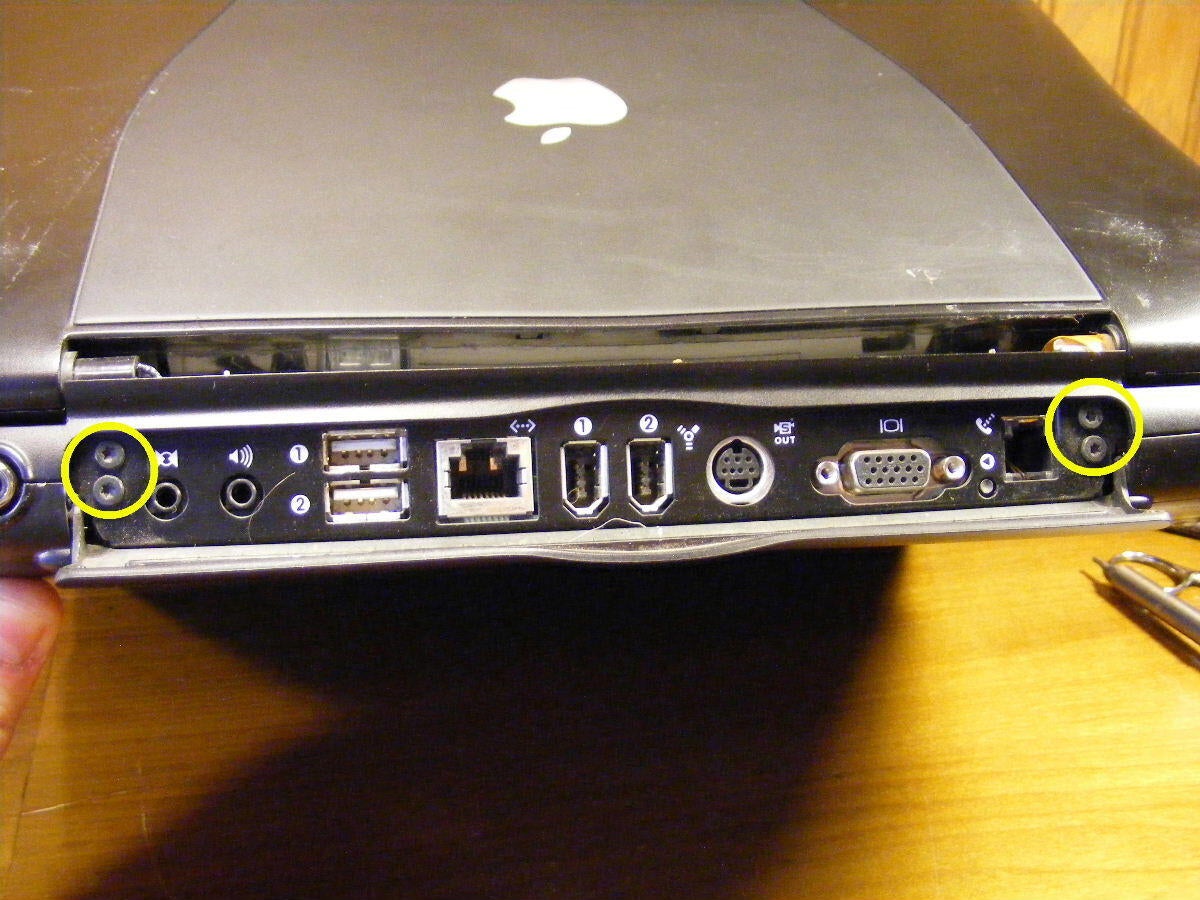
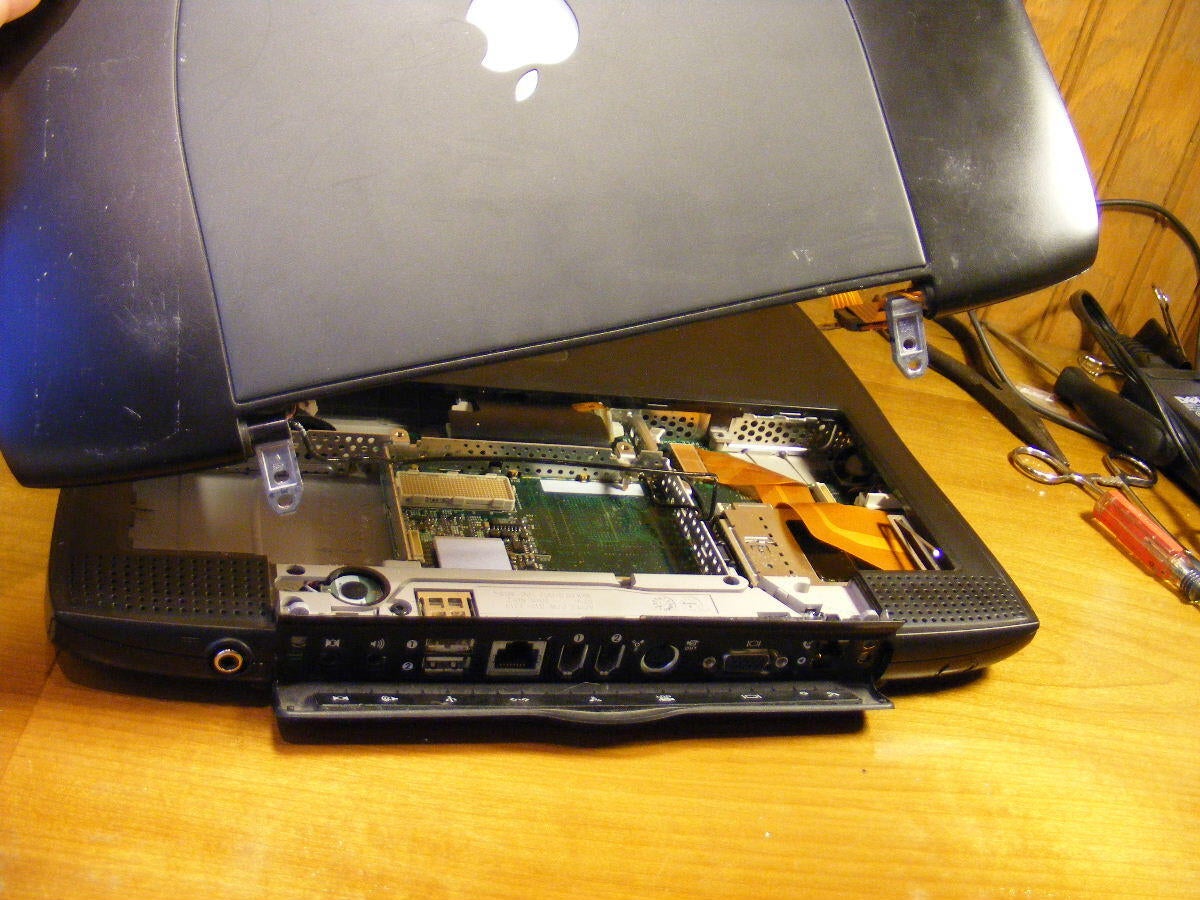
Here we have a view of the business end of the Pismo – a veritable cornucopia of ports. The two scantly used Firewire ports are front and center – well, center at least.
In contrast, we see the very humble ports that adorn the MacBook Air (inset). The right-hand port appears to be the port for external devices, which you will be using quite a bit if you plan to use cutting-edge devices such as CD/DVD players and the like. There is one USB and audio, which will do nicely for most of us.
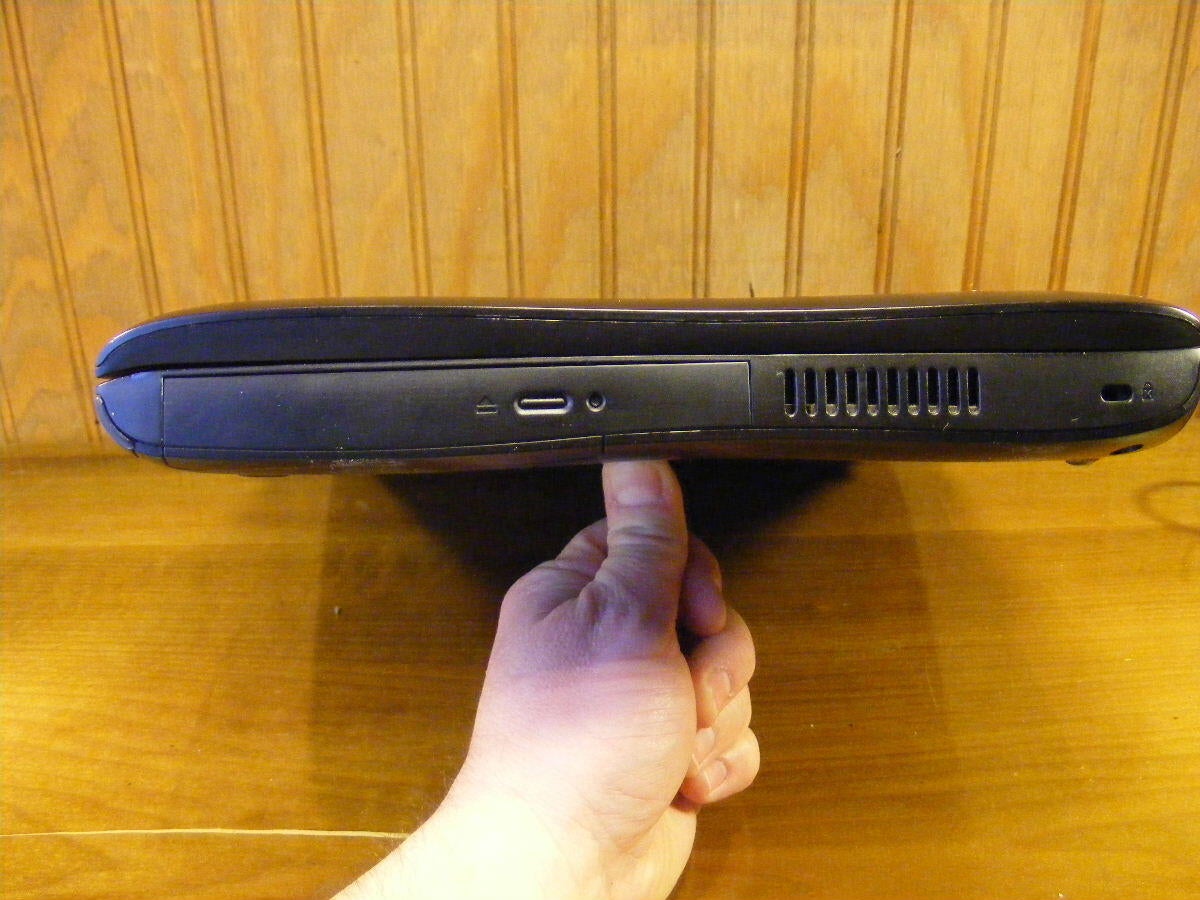
The right side of the notebook – DVD player and a vent with no fan to go with. Another smaller yawn and nod of the head.
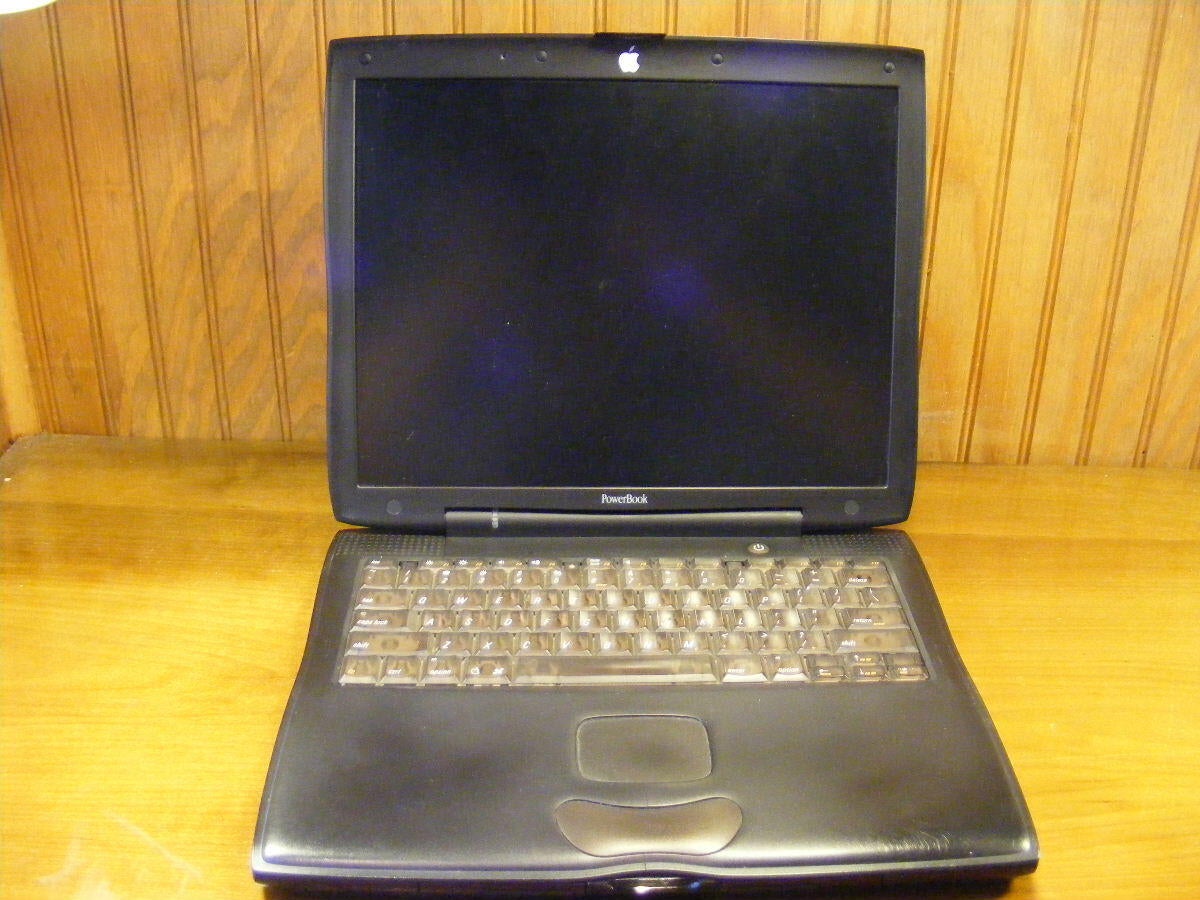
Here we have what we all know as “The Pismo” – the big difference here vs other notebooks of the time, was the opaque “bronze” keyboard that came with the Pismo. They may have used the same keyboard on other G3 models but I could not confirm/deny.
\r\n\r\nThe Airbook has a similarly cutting edge keyboard, as it’s profile is so low as to appear to be a touch pad.
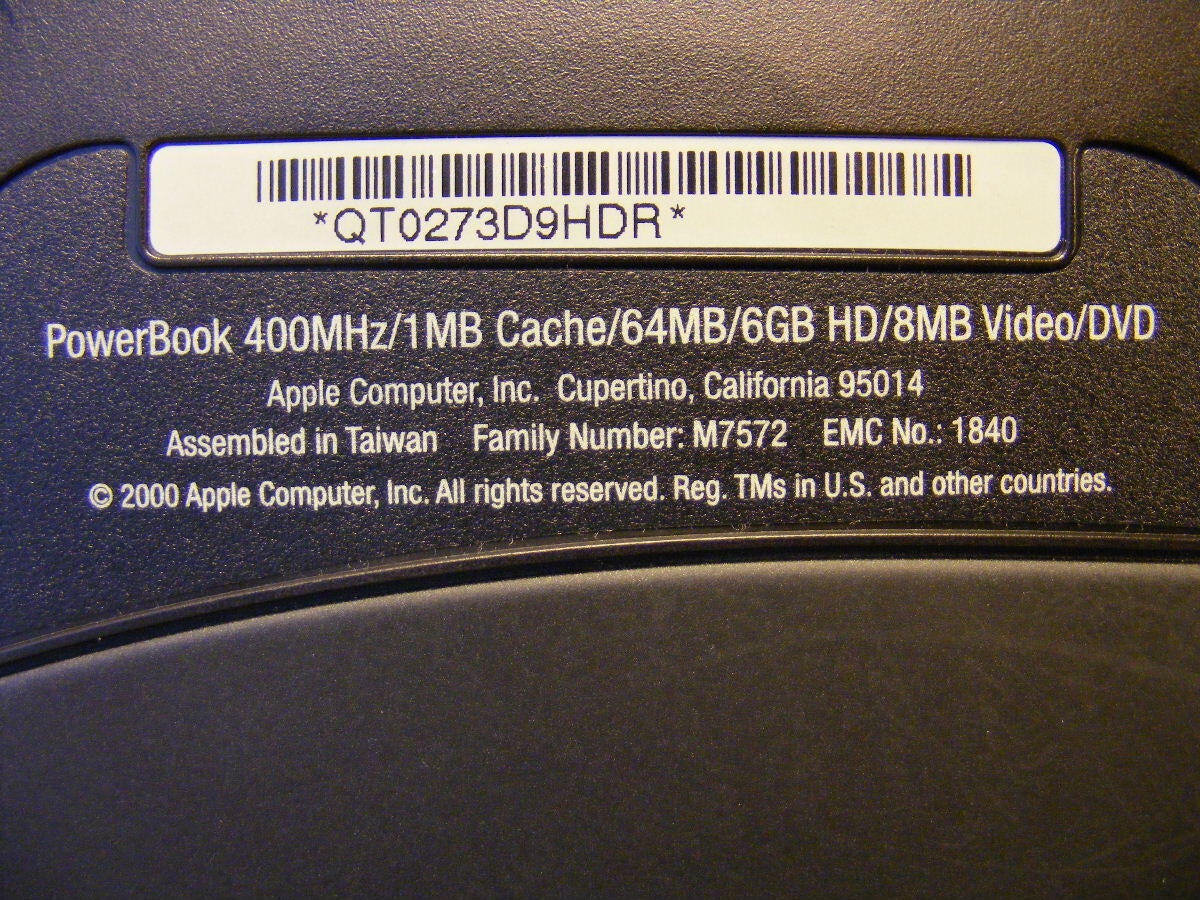
Here we have a brief summary of the spces for the unit, courtesy of Apple. All of the info you need to call for service.
Though from my limited experience with Apple PCs, you probably won’t need it.
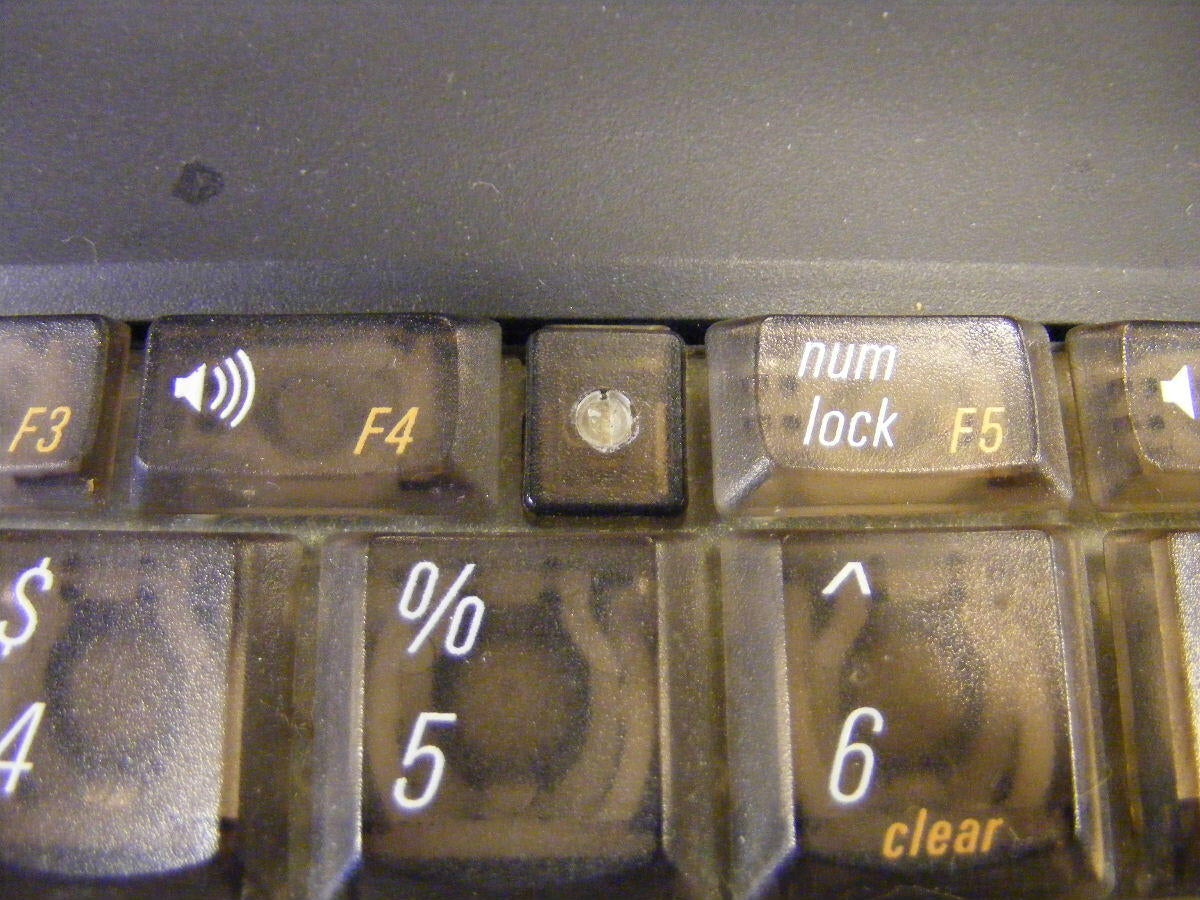
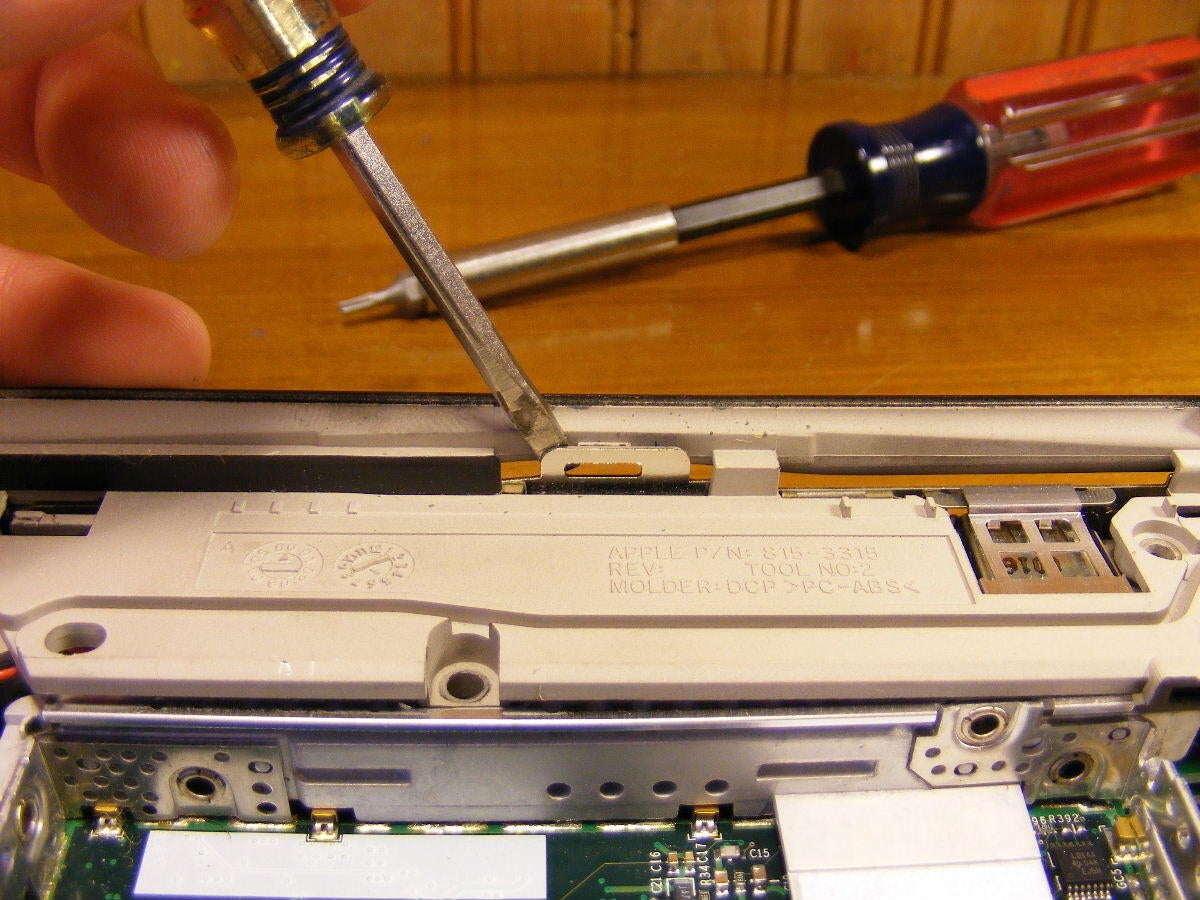
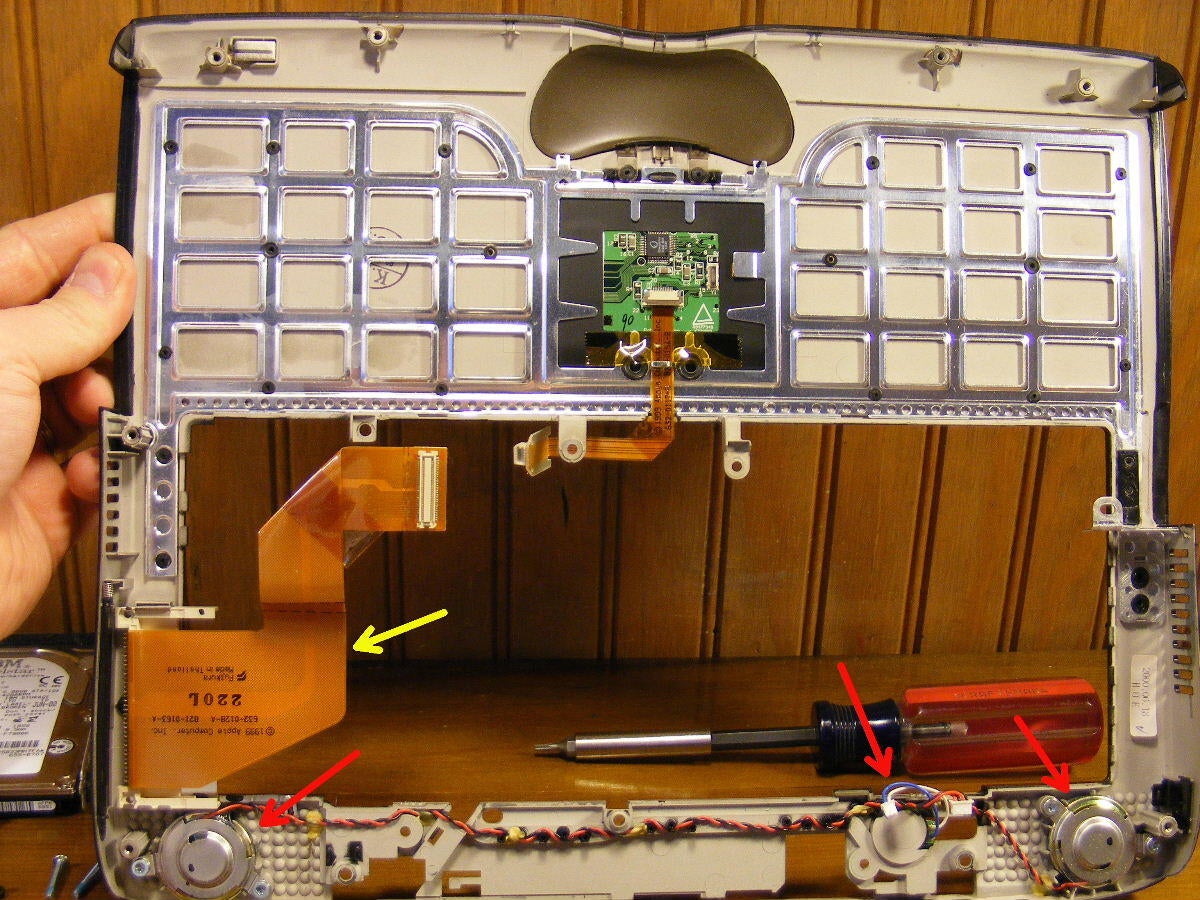
Working on a few notebooks in my short time here on earth, I really appreciate this happy little gadget to remove the keyboard – a turn of the flathead screwdiver and…
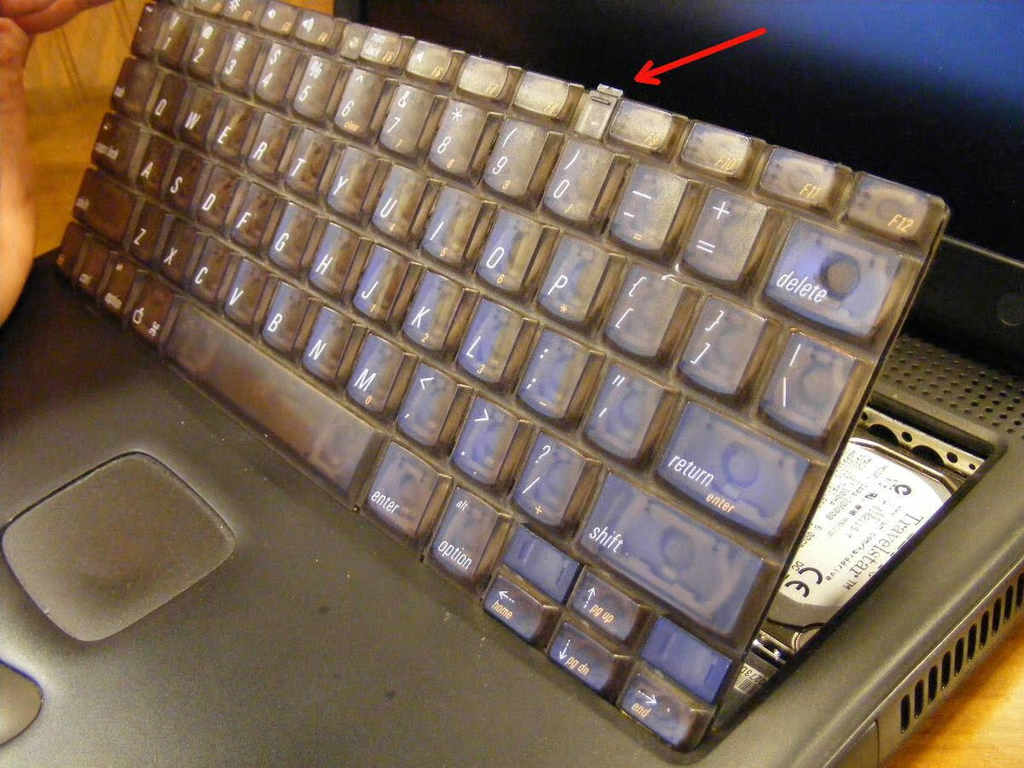
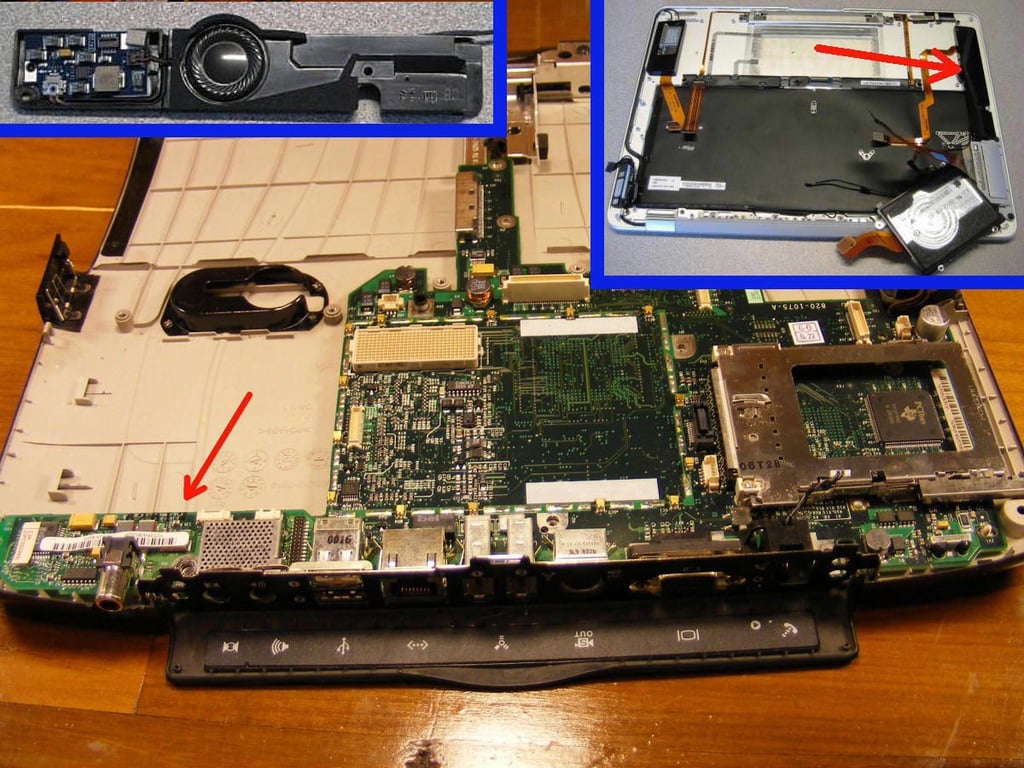
…activate these great little latches (red arrow indicates) and out comes the keyboard. There is two actually, one on each side of the release screw. The other one not shown because the photographer cut its head off, as it were.
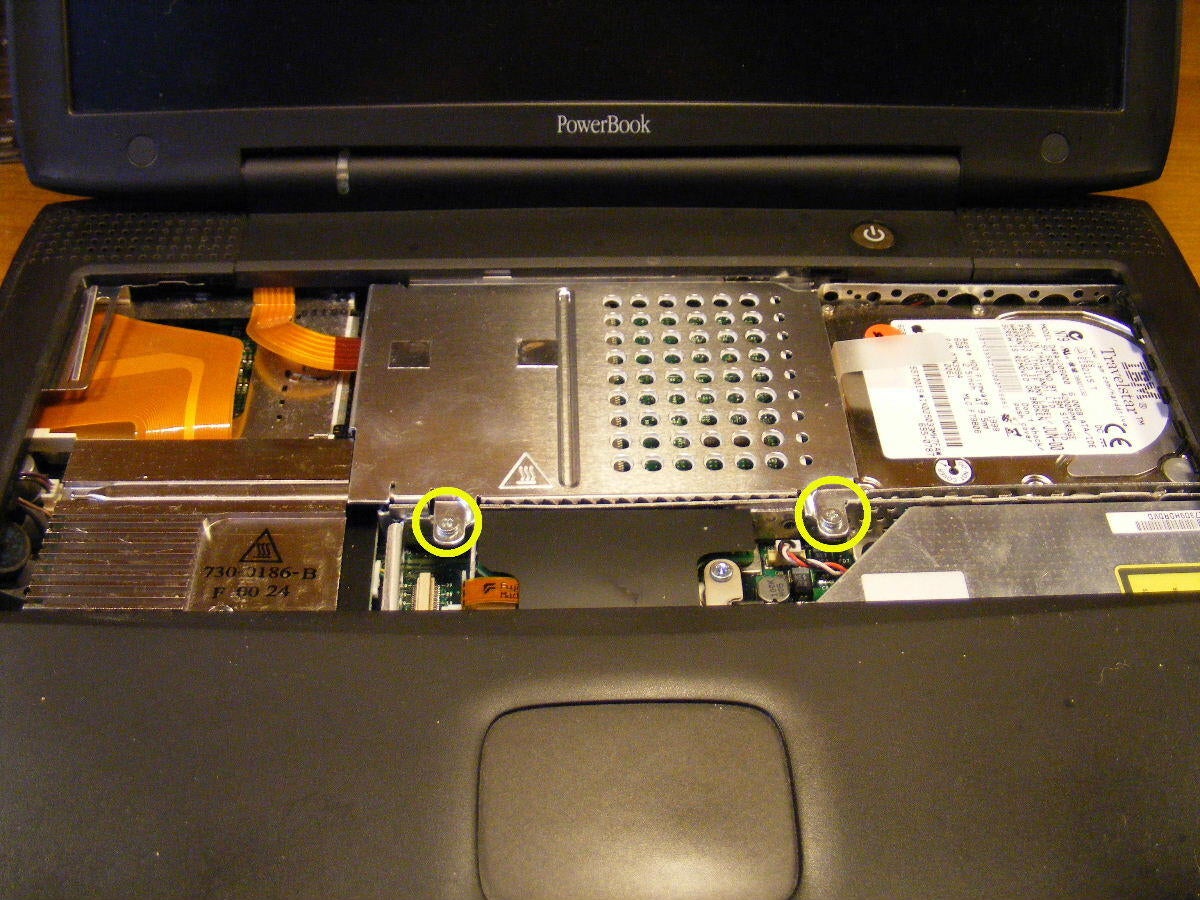
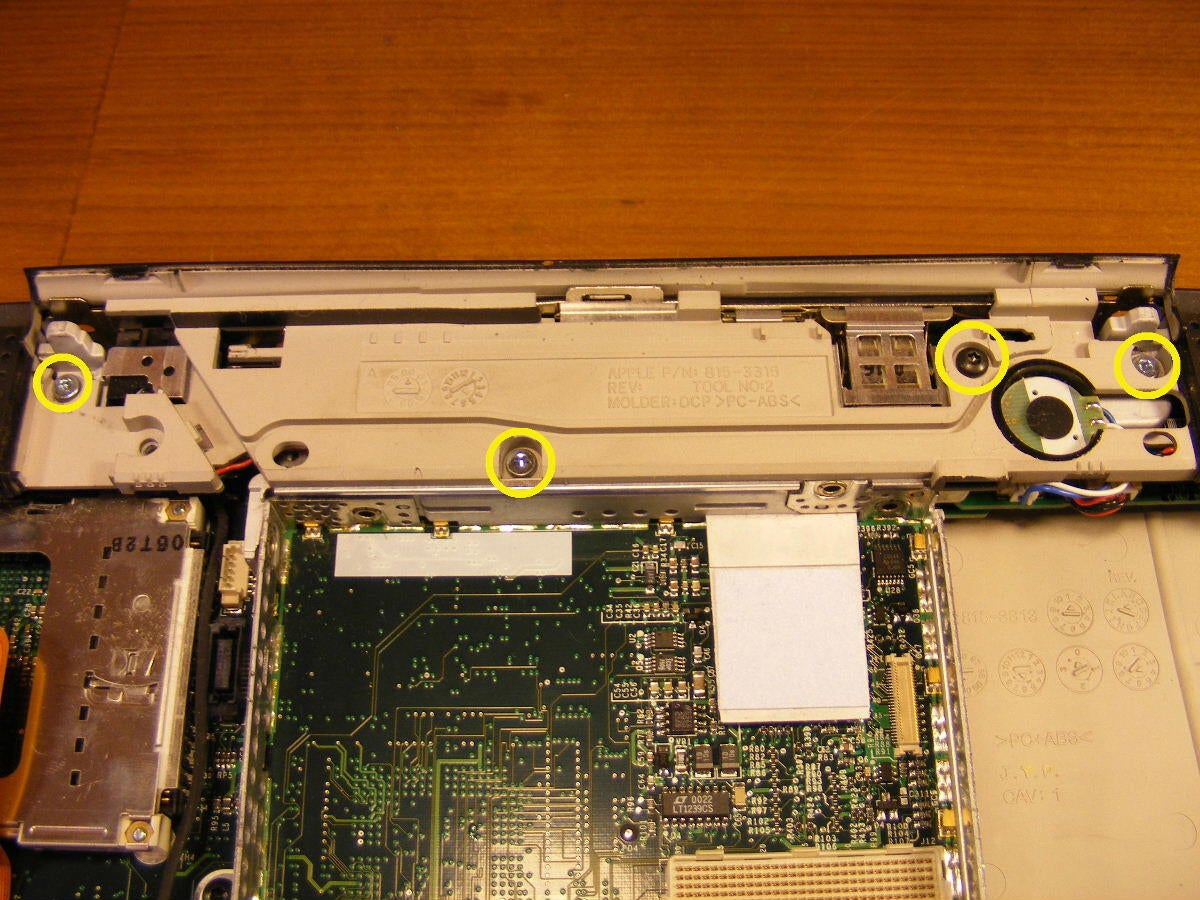
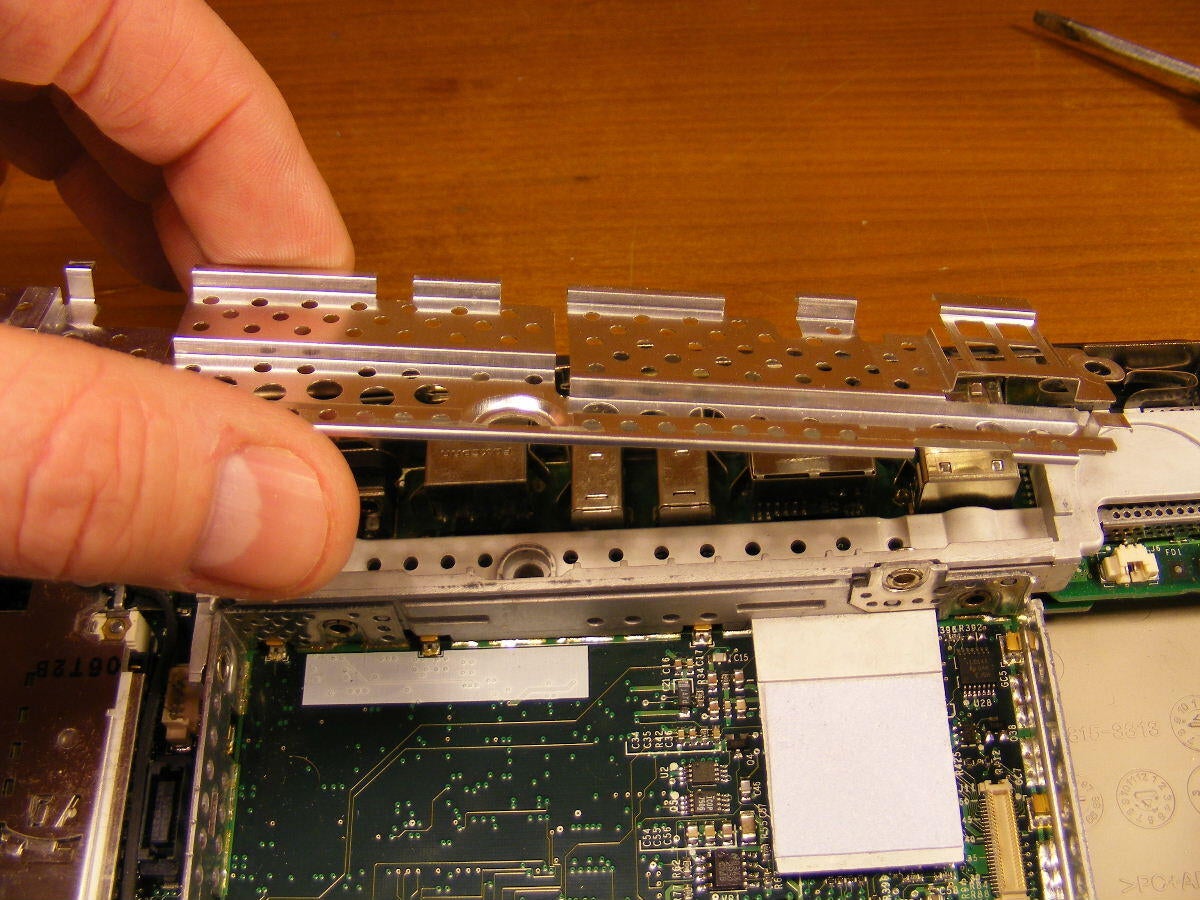
Keyboard removed, ribbon unplugged, we see our first target. The heat/noise shield. Two yellow circles identify.
AirBook: Curiously, I didn’t see any of this sort of thing on the AirBook – shielding, that is.
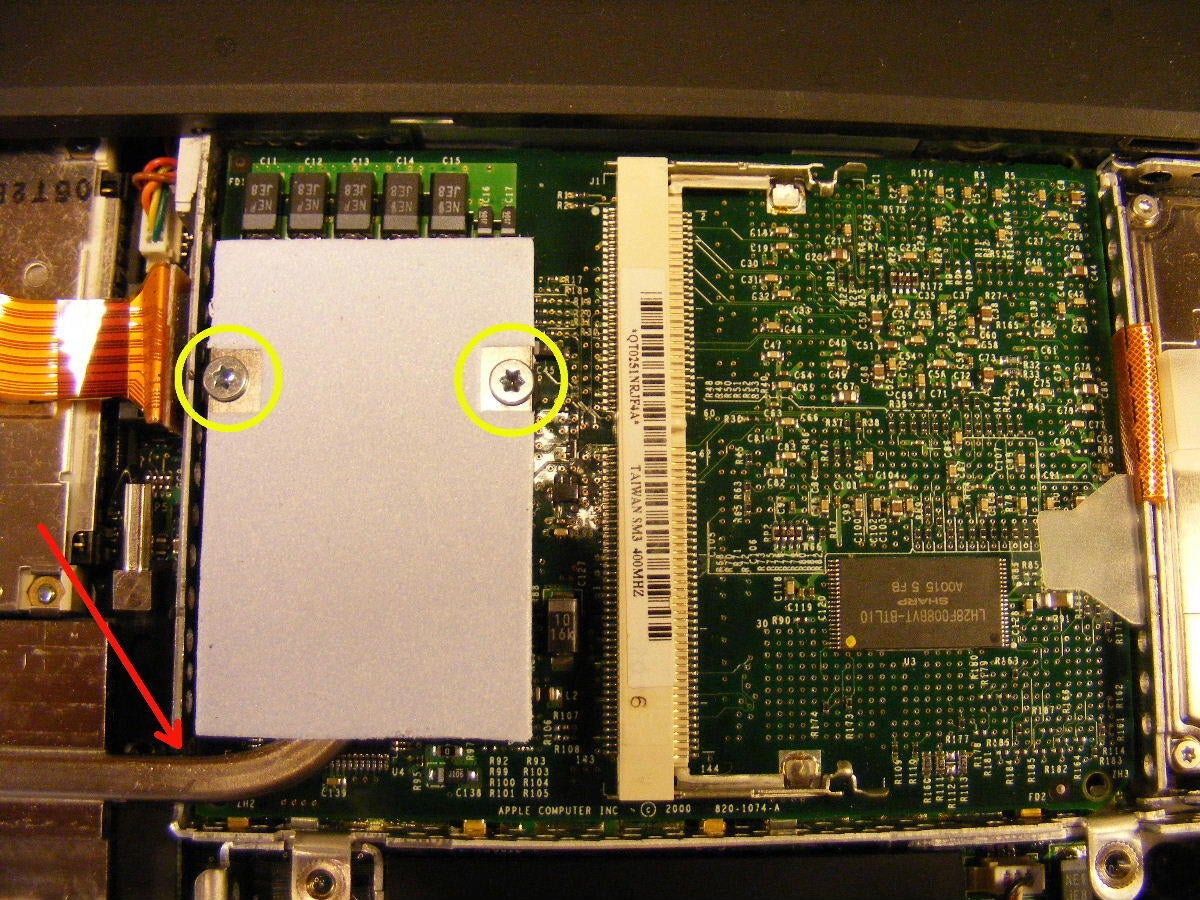
Heatshield removed, we see our CPU board or daughter board. Note the groovy heat sink with a heat transfer tube (pointed out by red arrow) leading over to the general vicinity of the case fan.
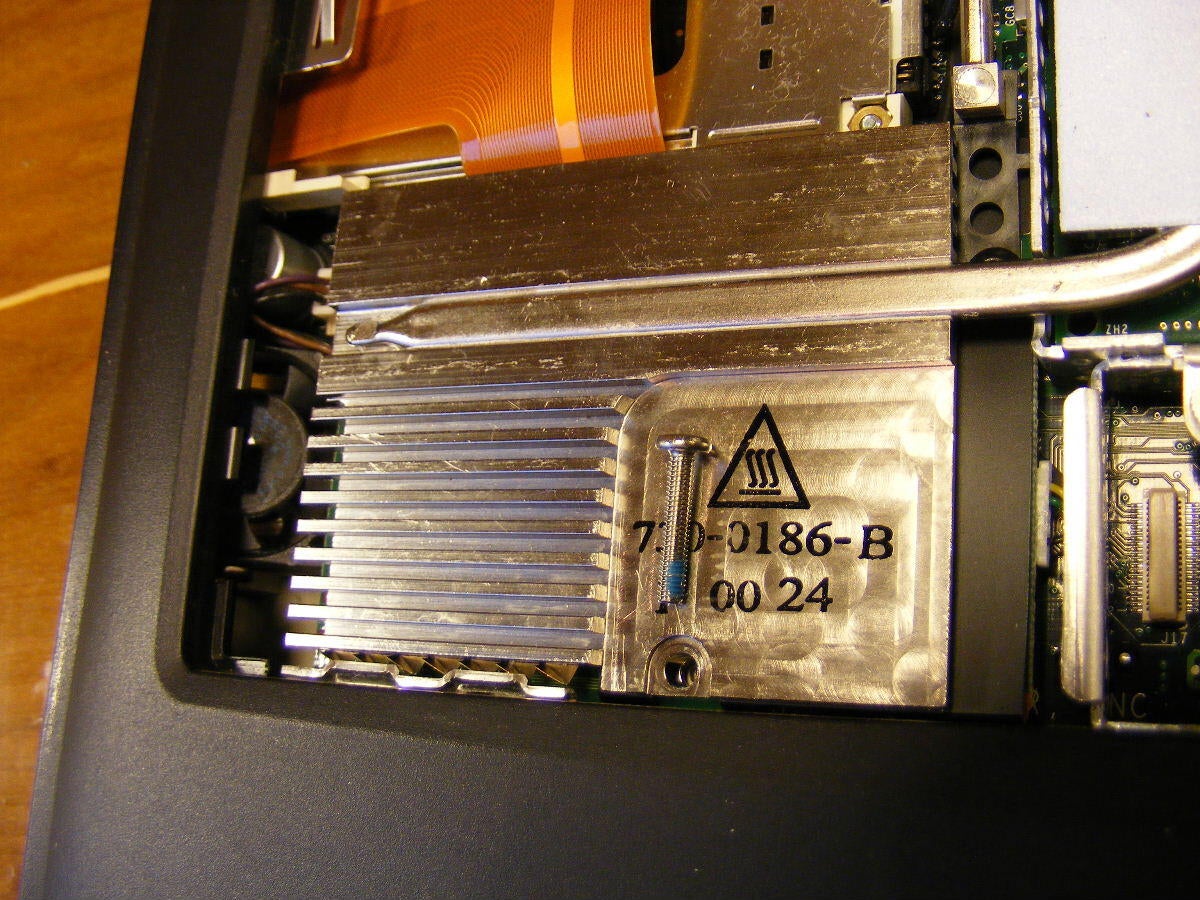
Closeup of the other end of our heatsink. Underneath, lies the modem.
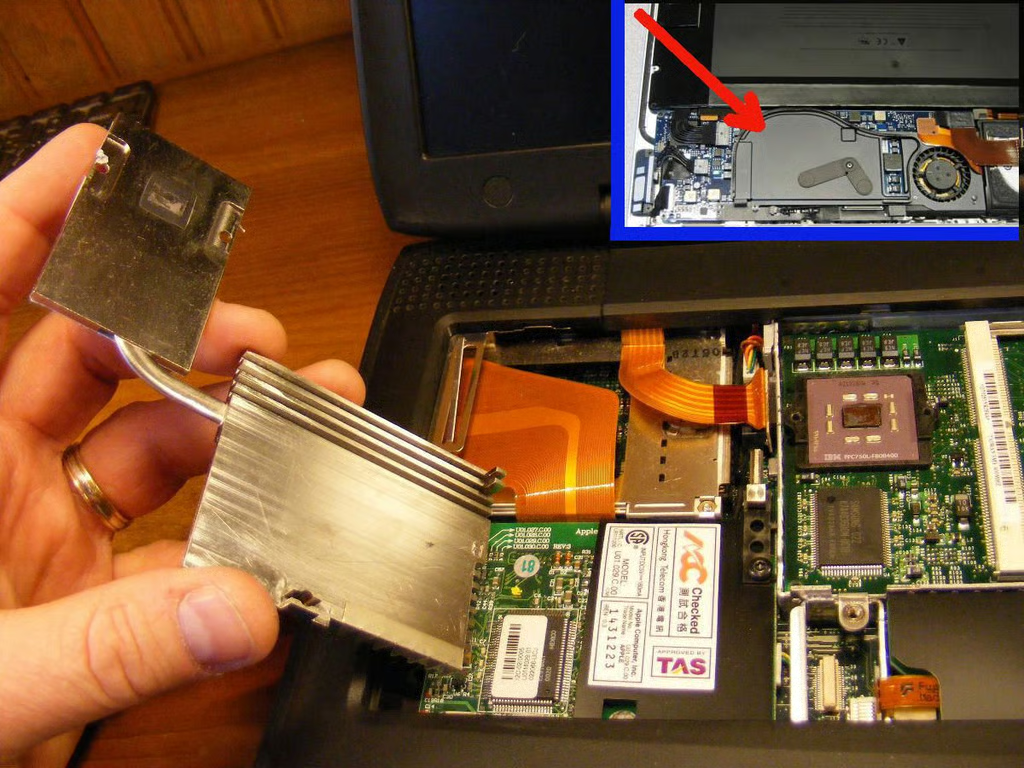
Here we have our sink removed to expose the CPU and the modem. It does not appear as though the sink actually touched the modem card, so it didn’t do much to cool it.
MacBook Air: Inset, we see the CPU cooler for the Air. We can’t really see much in this image, but I’d like to know a little more about the way this one works, as it seems to be very thin, and significantly more efficient than our Pismo – as it should be.
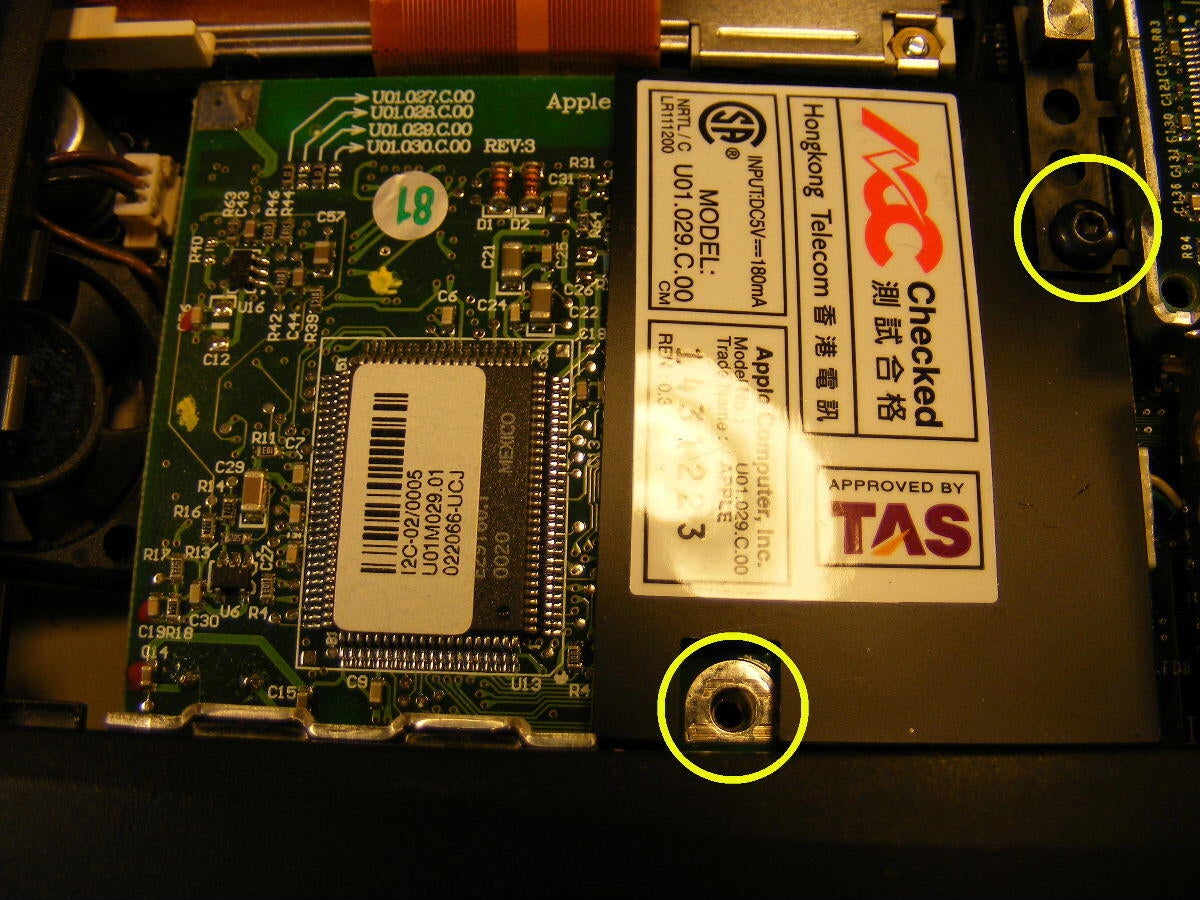
Two small screws holding the modem, as shown.
HongKong Telecom!
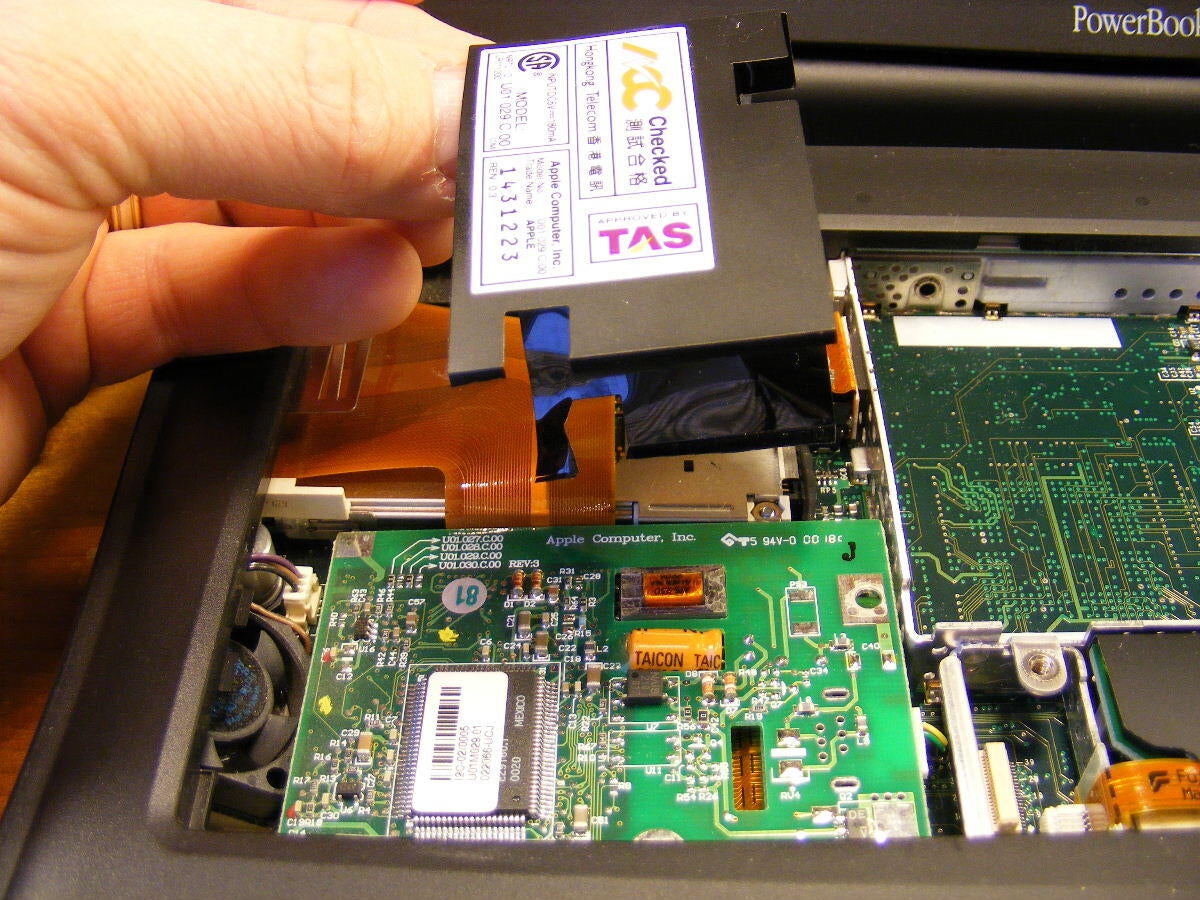
A little plastic shield that was loosely wrapped around the card. Mostly to prevent any damage should the sink bang into it – OR to keep you from shoving a screwdriver into it.
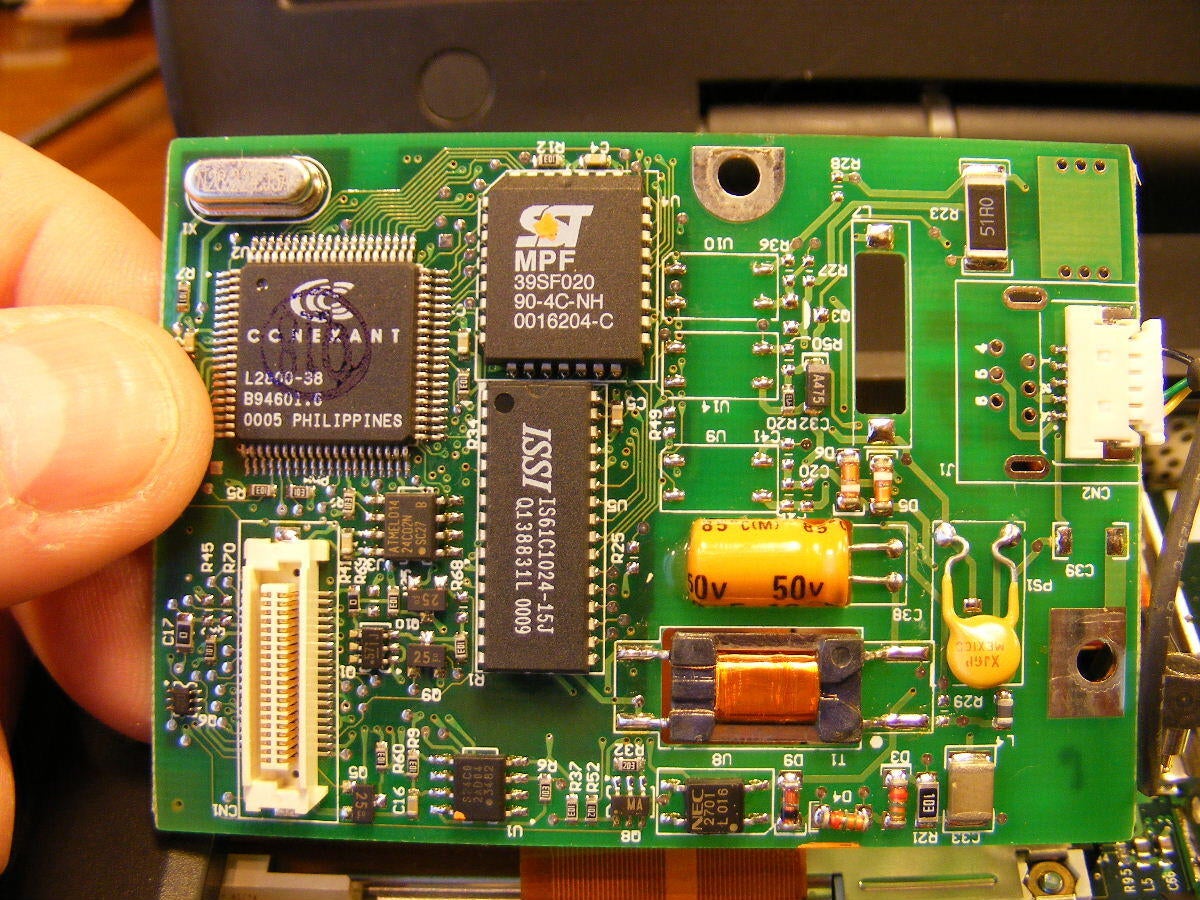
Conexant, SST, and ISSI chips power the modem card.
Airbook: No modem. No big surprise – who uses a modem?
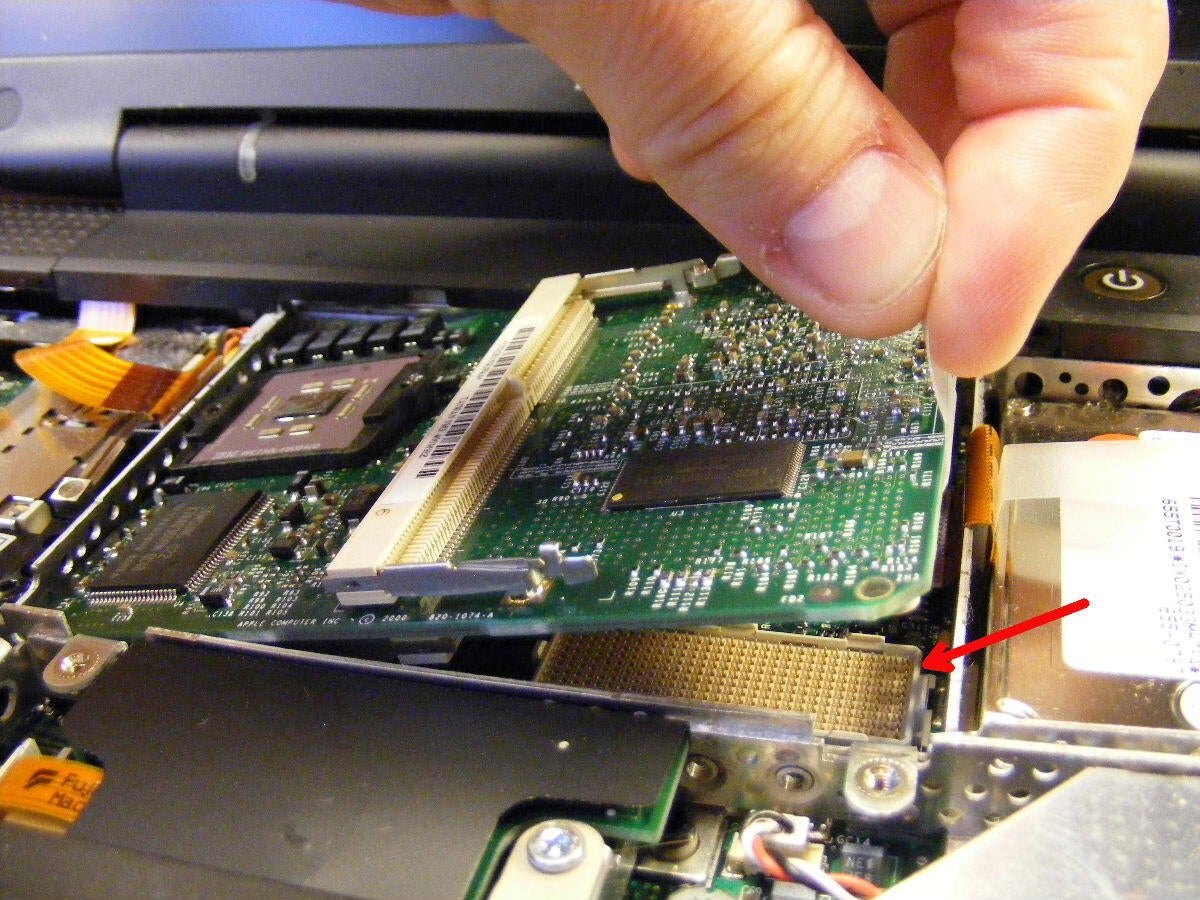
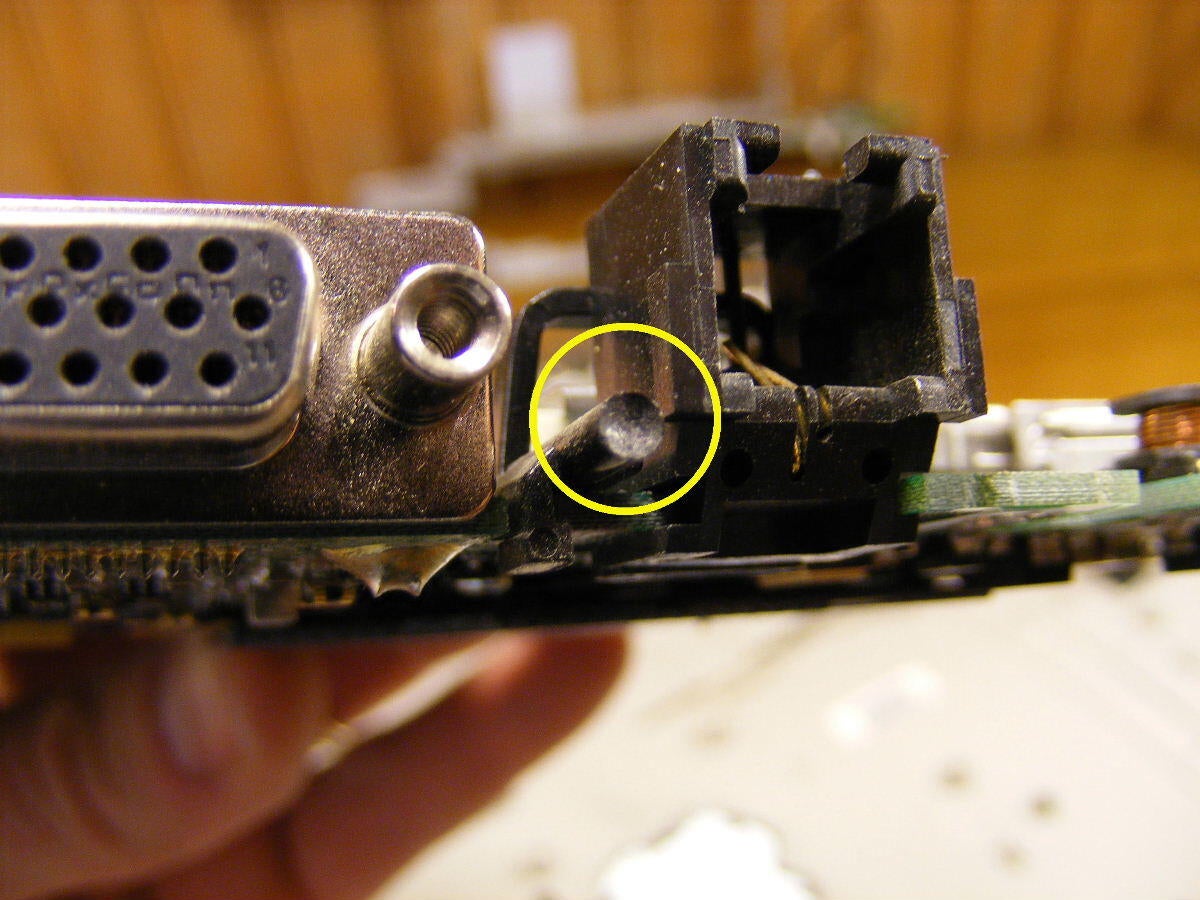
One of the things that I like about the Pismo insides are the little plastic tabs on removable parts. The red arrow points out the cool little socket that the board fits into.
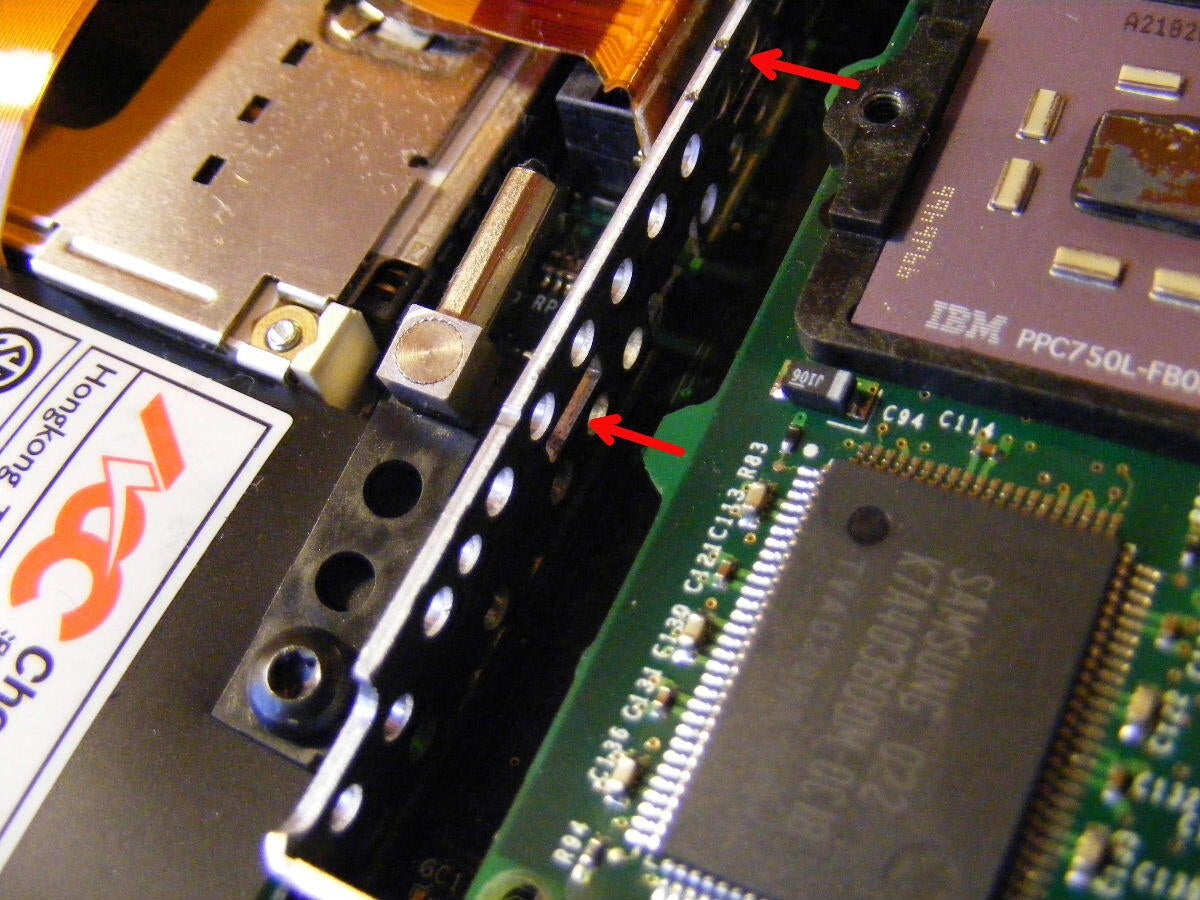
Interesting that the only thing supporting this, the most critical part of the unit, is two little unsecured tabs.
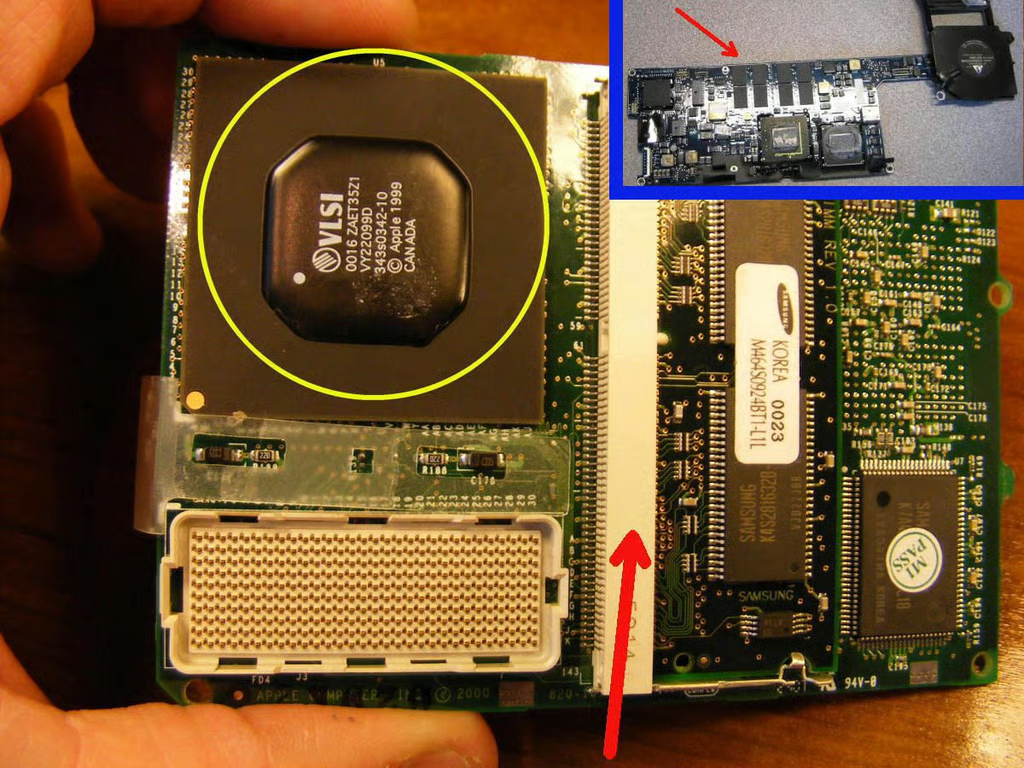
This is a bit of a busy picture.
First:
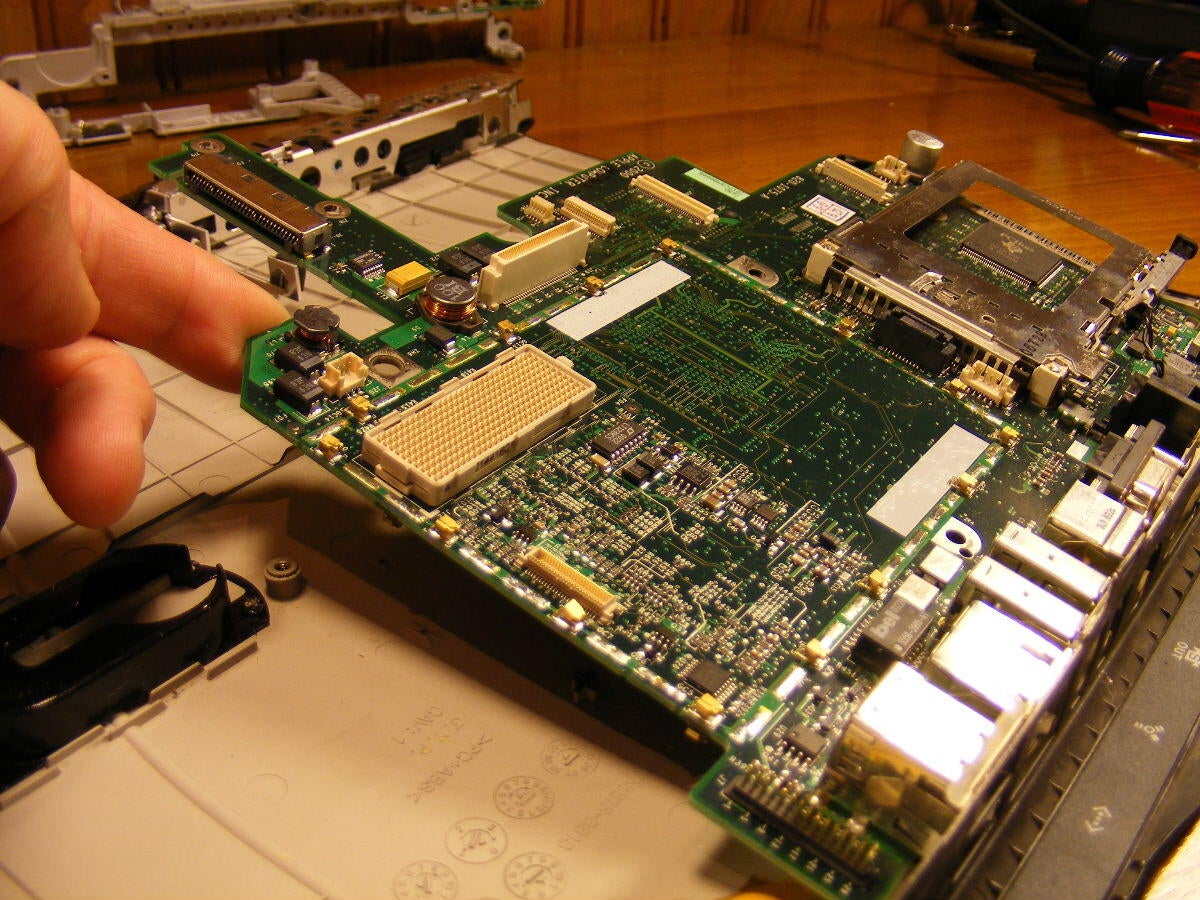
The inset image shows the ENTIRE logic board of the MacBook Air. I put it here because it is about the same width as the CPU card shown on the Pismo and maybe twice the length. So the entirety of the logic board of the Air is maybe twice the size of the CPU card alone on the Pismo. Significant hardware changes there in eight years.
Second:
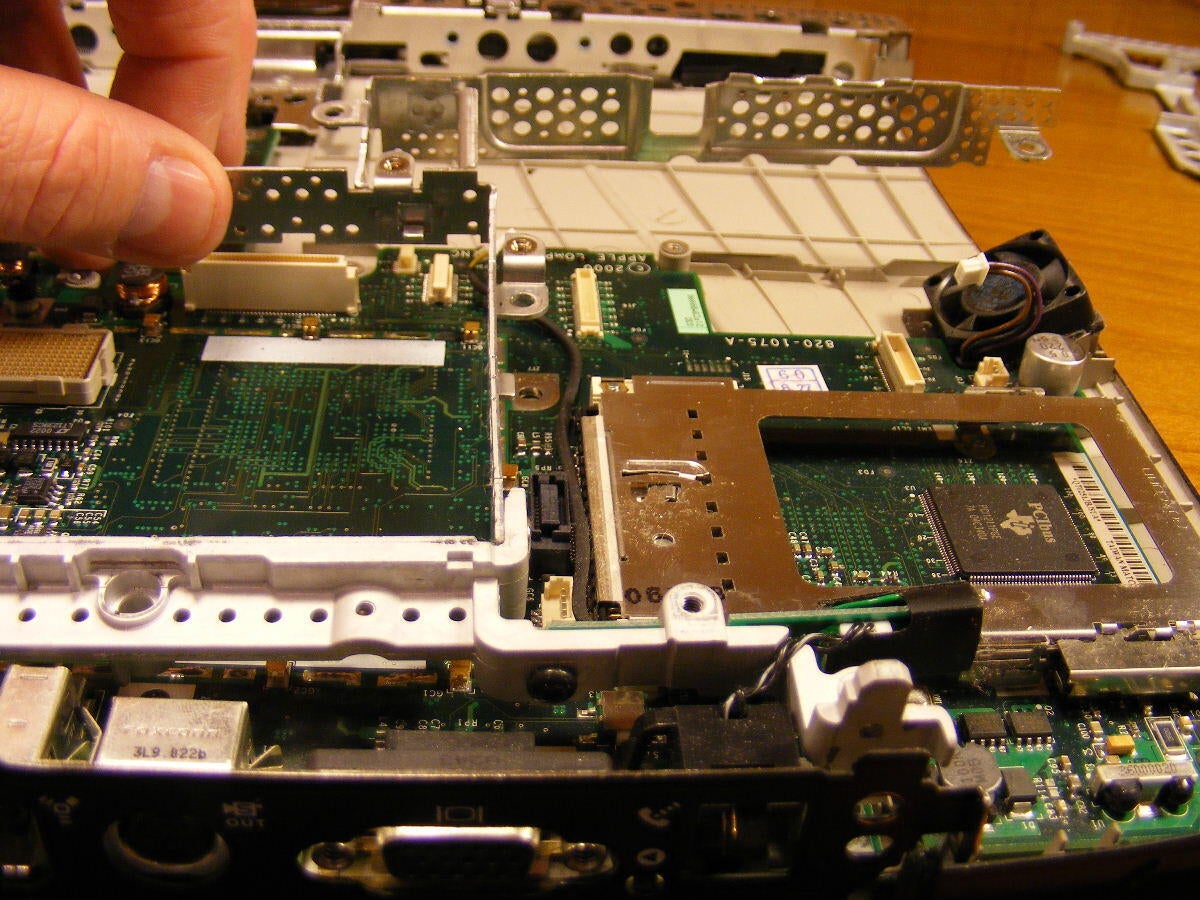
The red arrow points to the expansion memory slot of the Pismo. Officially, the Pismo memory maxed out at 512MB, but most found that you could run it up to 1GB with no trouble.
Third:
Circled in yellow is the bottom of the chip that I think serves as a support for the card itself. In the next image, you see the tab that it rests on.
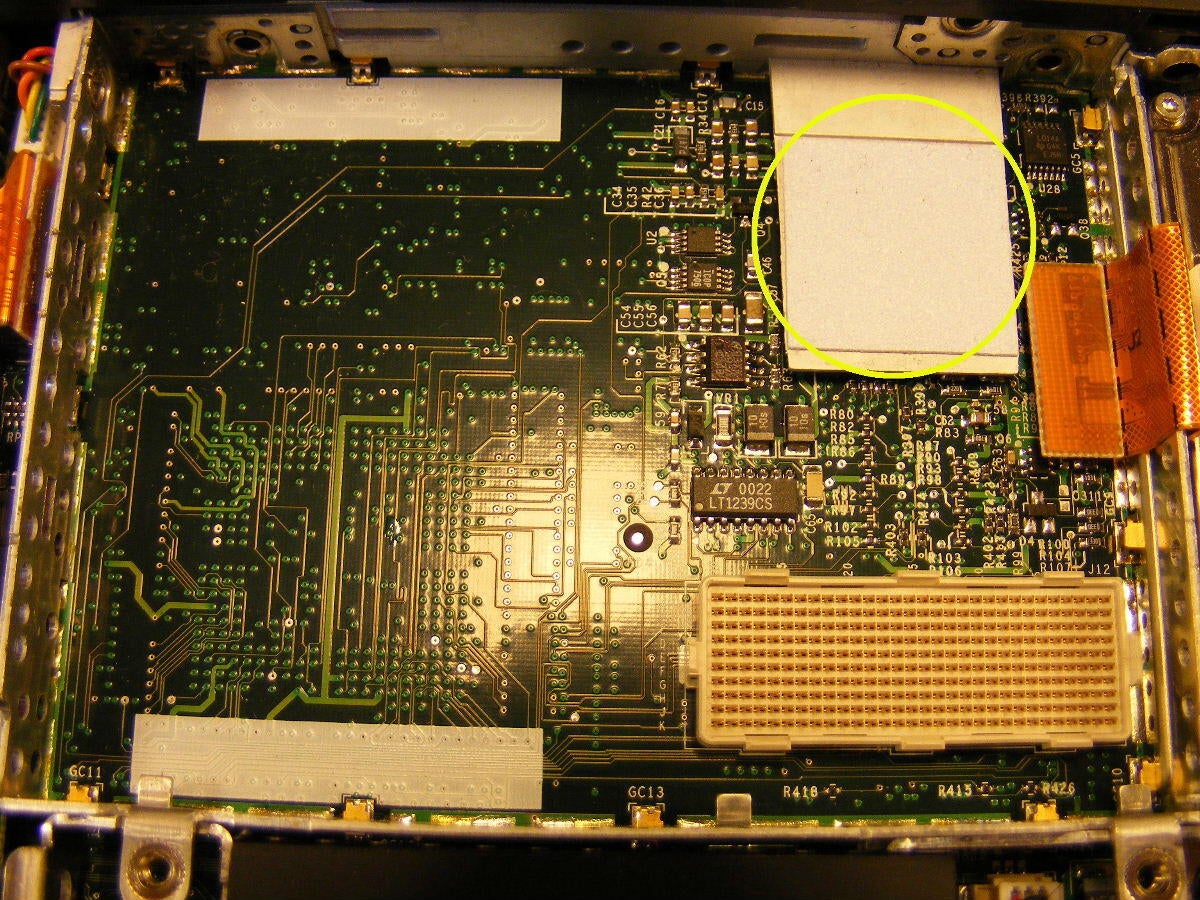
Circled is the shelf discussed in the prior frame. I thought it was a sink before, but not with the foam between it and the chip.
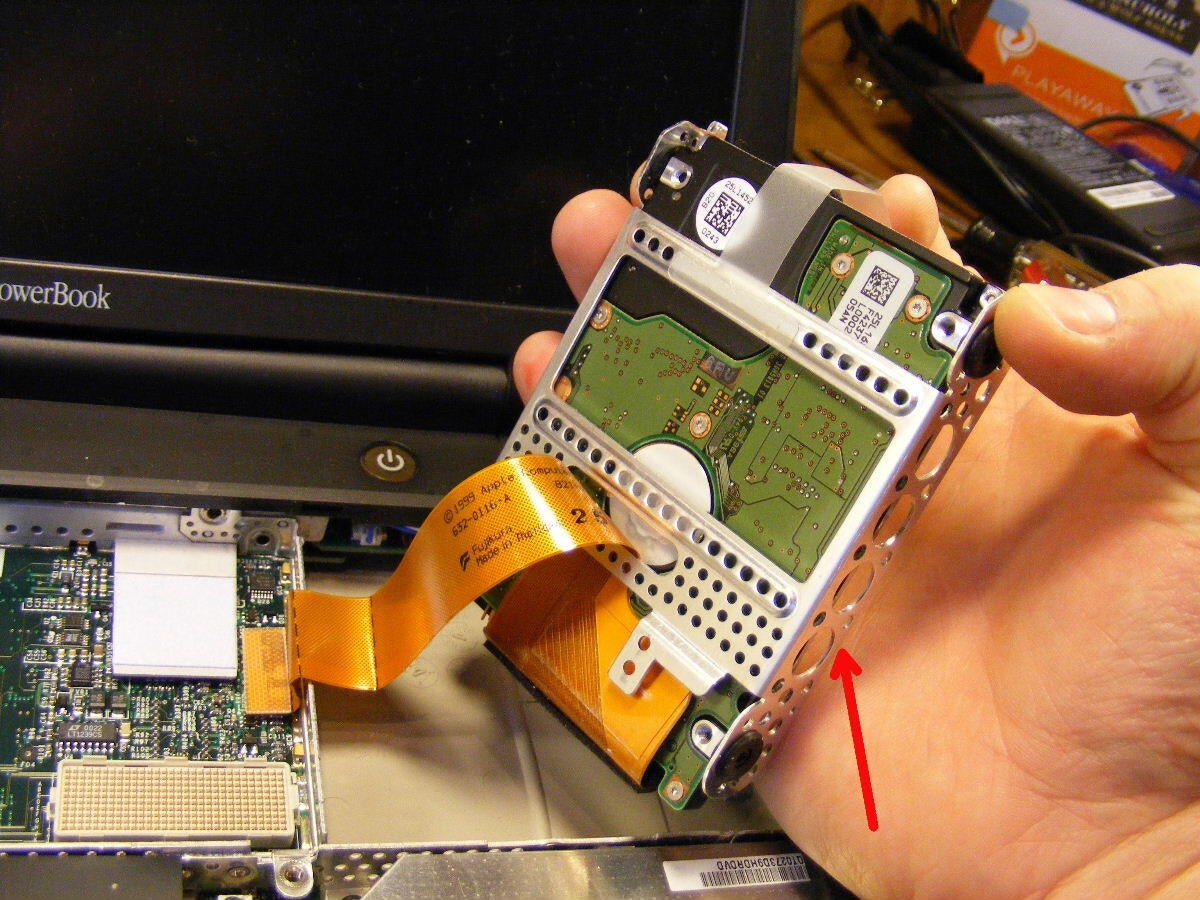
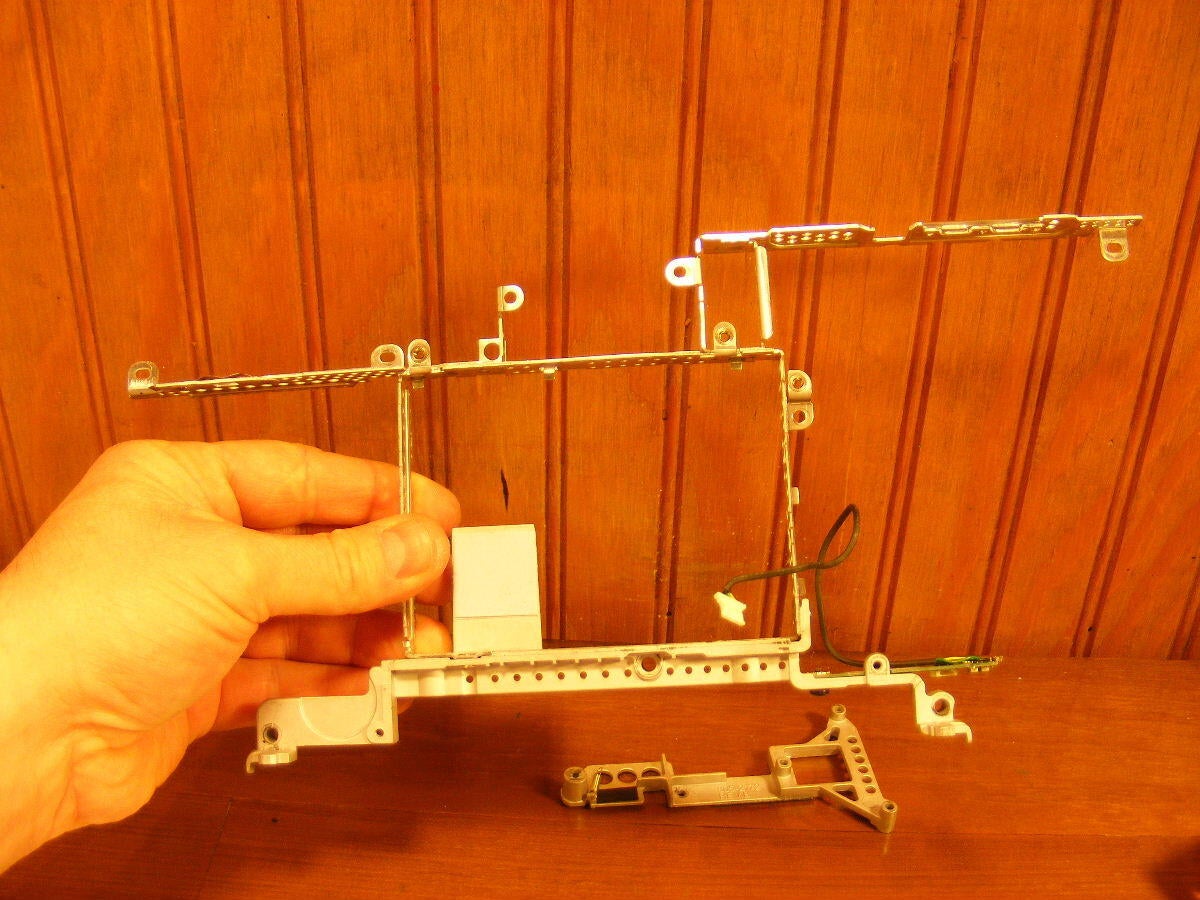
Apple seemed to be very weight conscious, as they lightened everything possible, including the hdd carrier.
Also another nice little pull tab for this.
The Aircard would have fit into a hidden socket under the edge of the case as shown.
I was surprised to see that they stuck the end of the antenna wire into a plastic bracket – seemed like a bit of an afterthought.
MacBook Air: They use virtually the same arrangement for the Air – same location and type of antenna wire. A nice little ribbon connects to the main logic board, however, instead of the bulky, PCMCIA type of plug used in the Pismo.
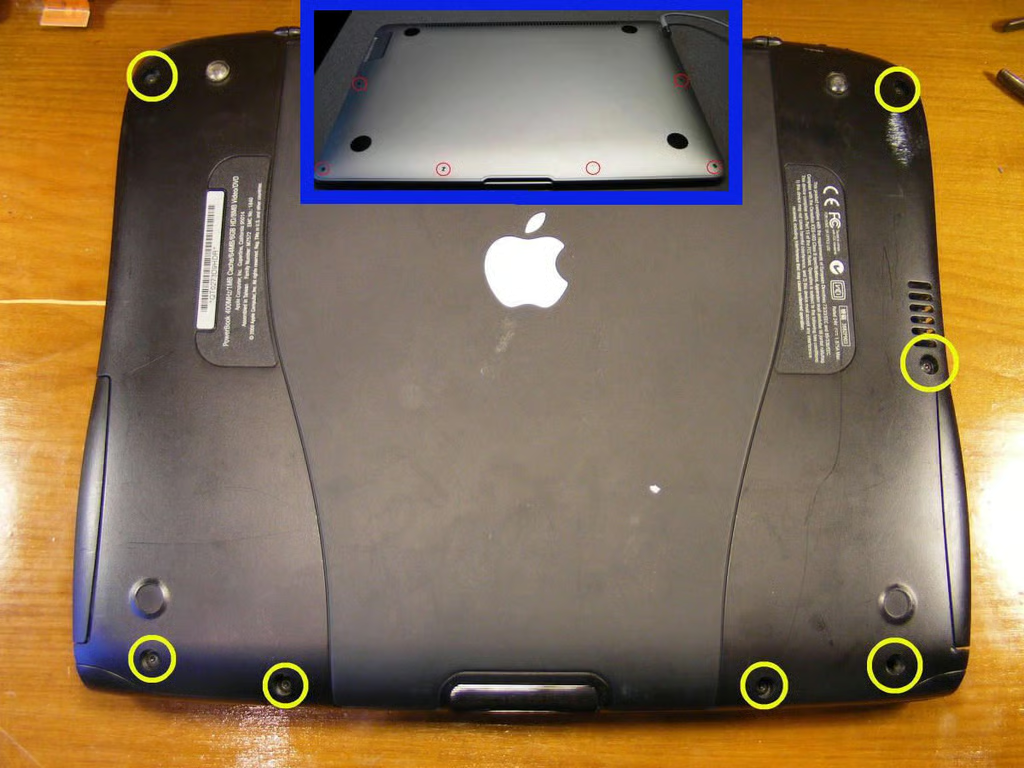
Circled are the screws to separate the top and bottom halves of the case.
MacBook Air: Same arrangement there – no tricky new fasteners or clips.
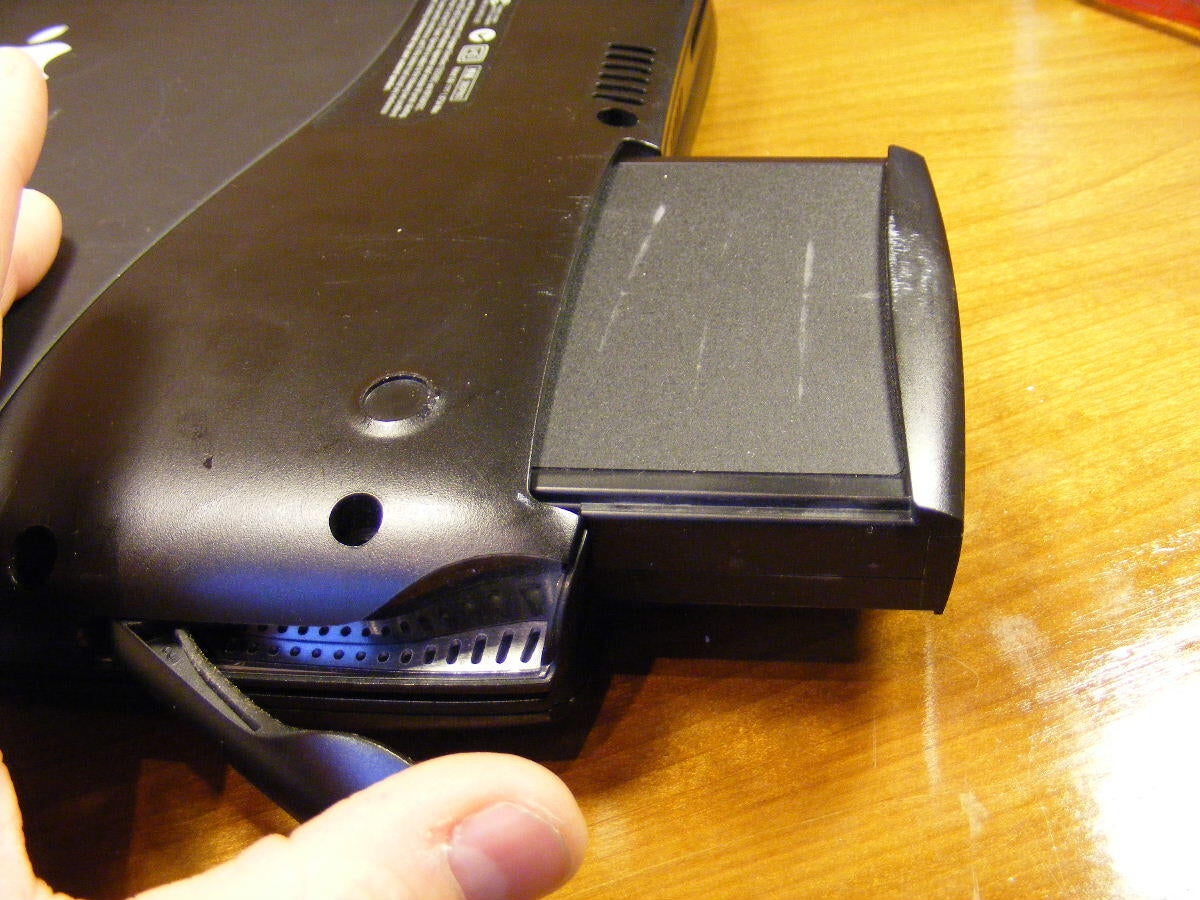
Out comes the battery – I really dig the little eject levers. You feel like you’re really doing something when you operate them.
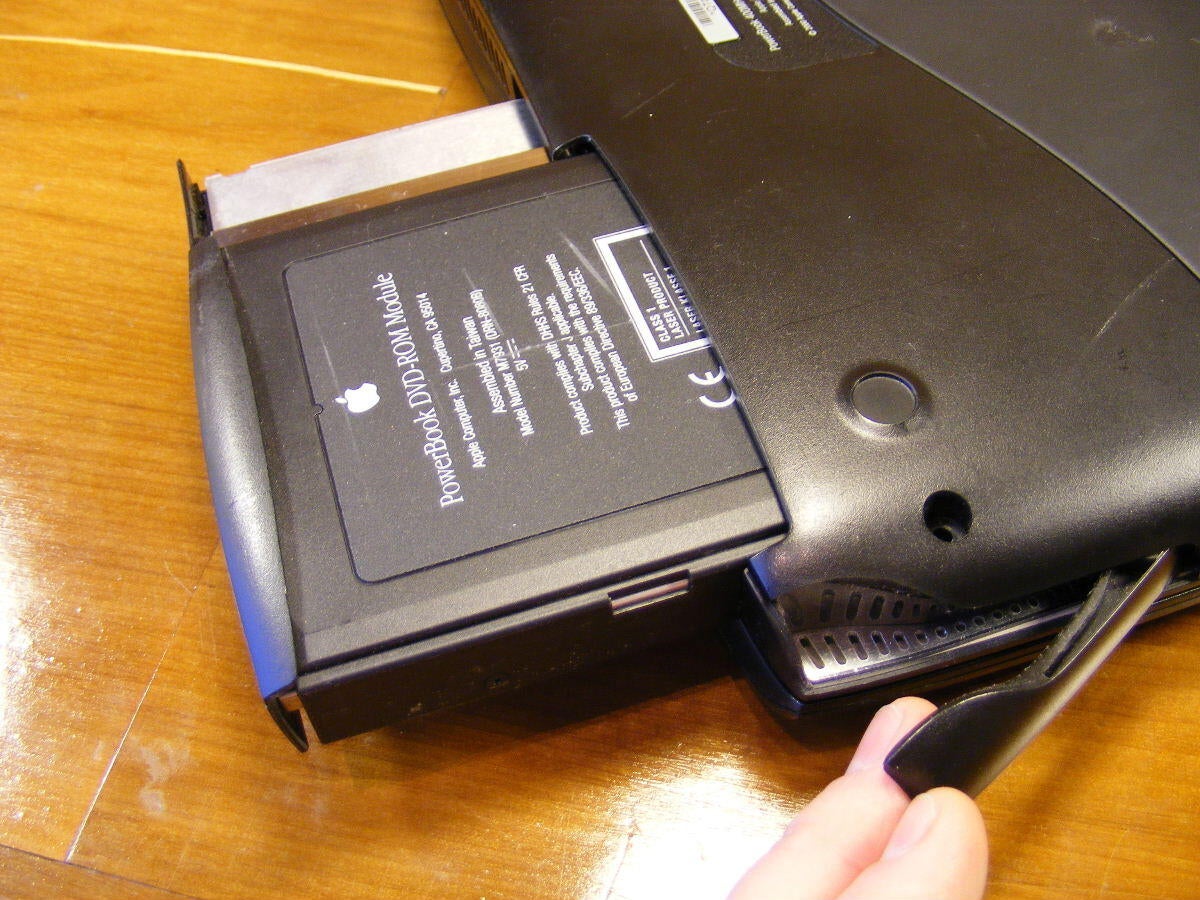
Out next is the DVD ROM – a nice item back then.
Here is the PRAM battery on its way out.
MacBook Air: I did not see an on-board battery anywhere on the Air. I’m assuming that this is because the battery is not user replaceable and thus the board has power all the time, unless it dies. In which case, there is probably more than enough to trickle to the board, etc. until the battery is fully charged.
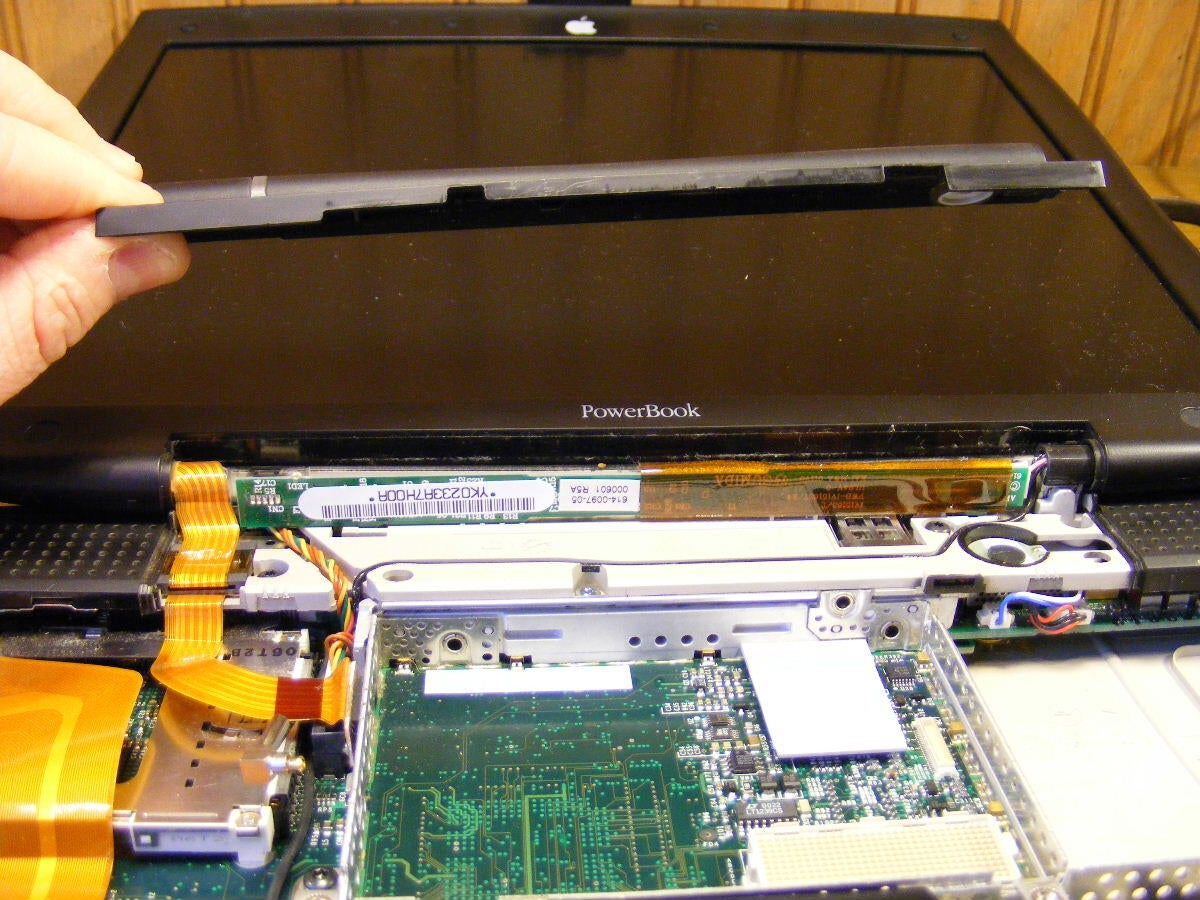
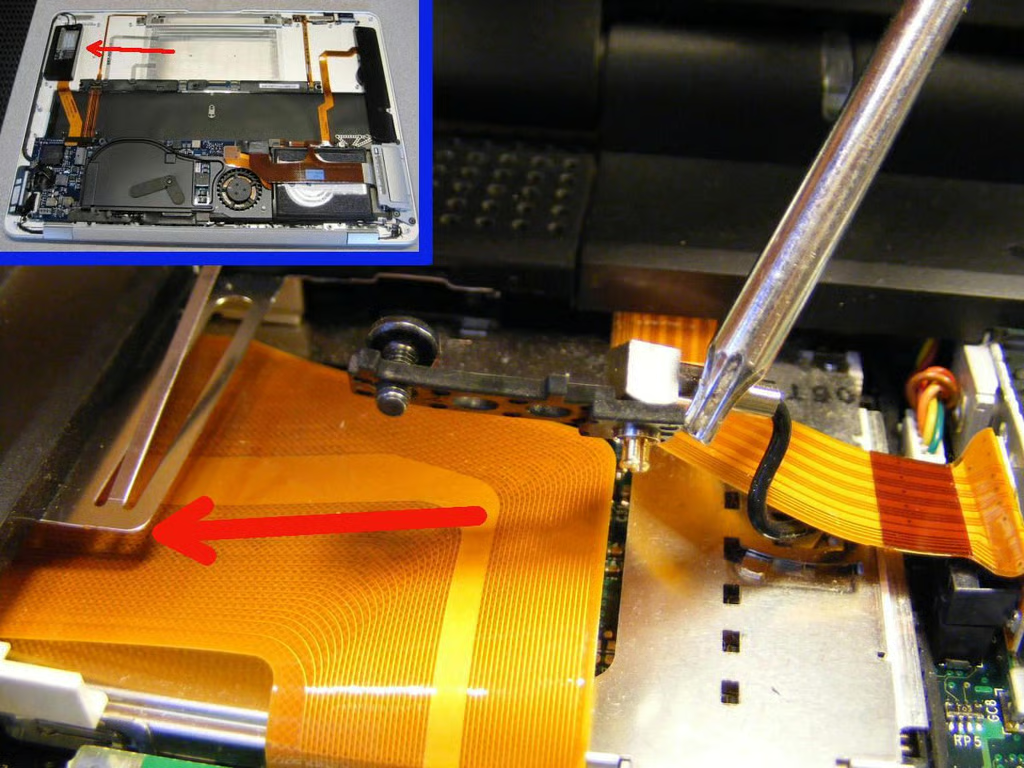
Lifting away the clutch cover, and exposing the display inverter.
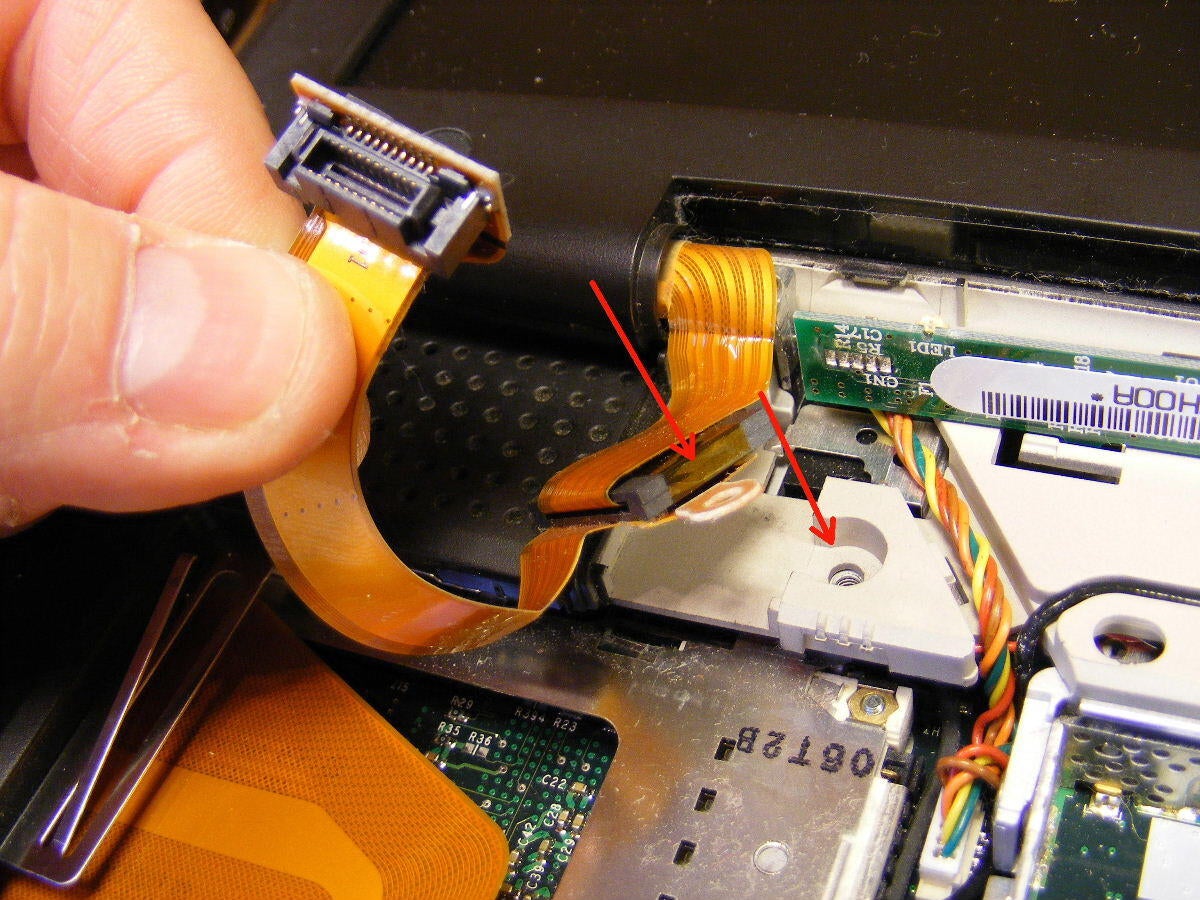
The display ribbon, once released, was tied down with a screw as well. Arrows show empty holes – I already removed it here.
Our ever-vigilant circles identify the four screws to remove our display.
Off goes the LCD.
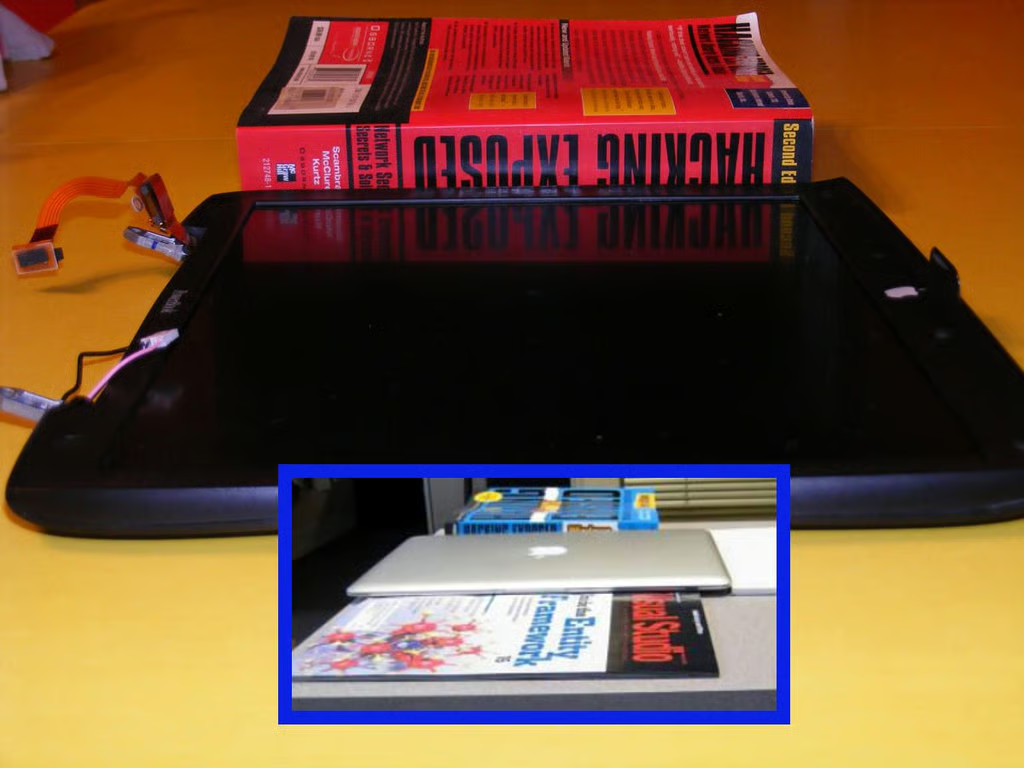
In the inset picture, we can see Mark Kaelin’s comparison of the MacBook Air to common office items – everyone has a copy of “Hacking Exposed,” right? I set my (older) copy of the same book next to the screen alone to emphasize the thinness of the Air. Our Pismo LCD screen alone is about the thickness of the complete MacBook Air.
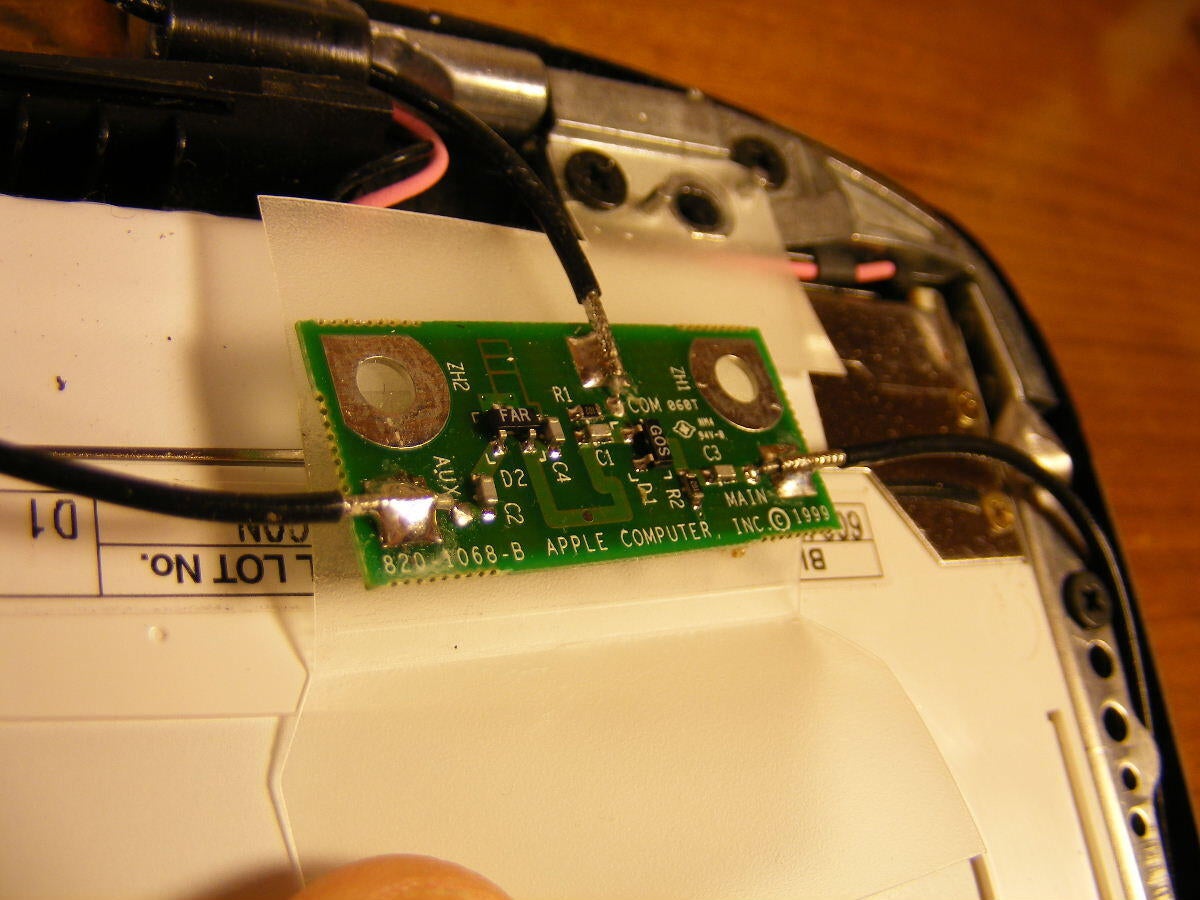
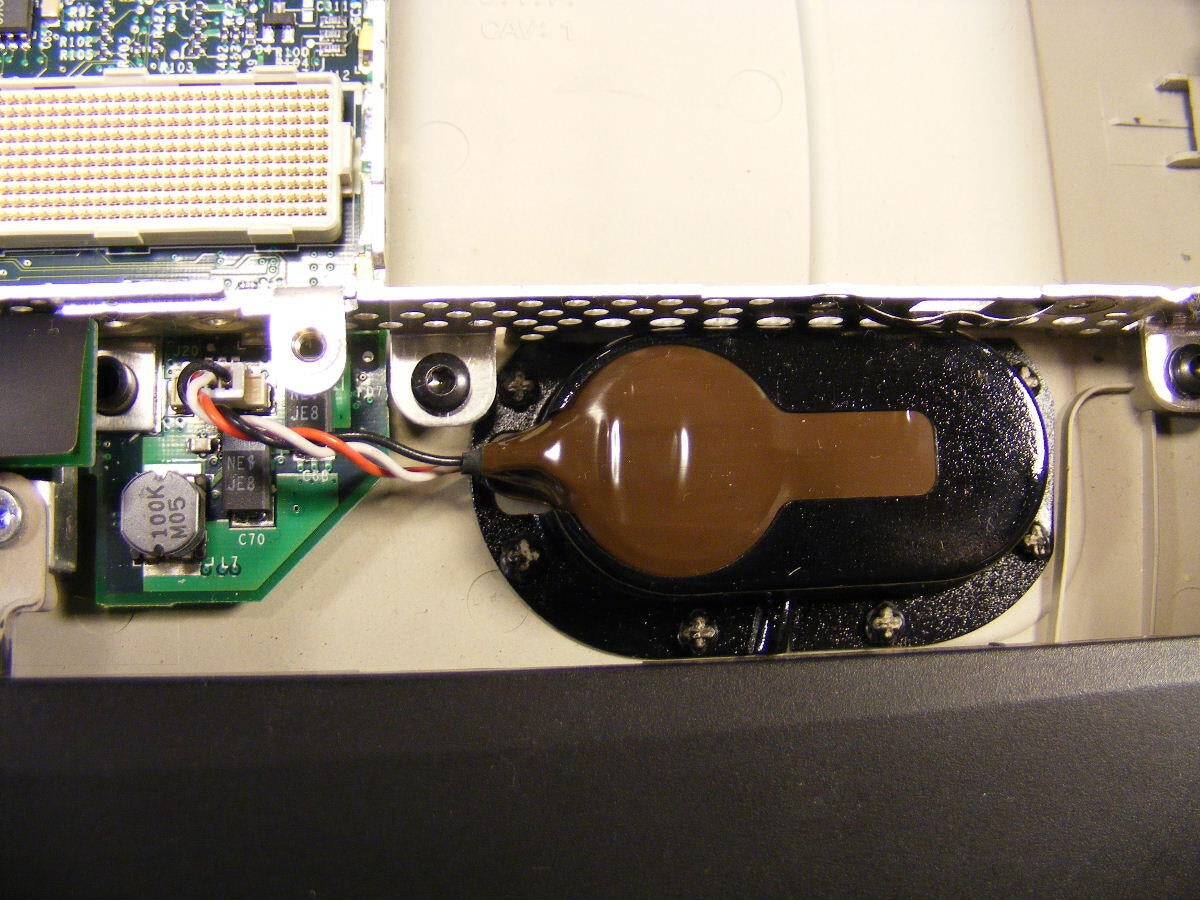
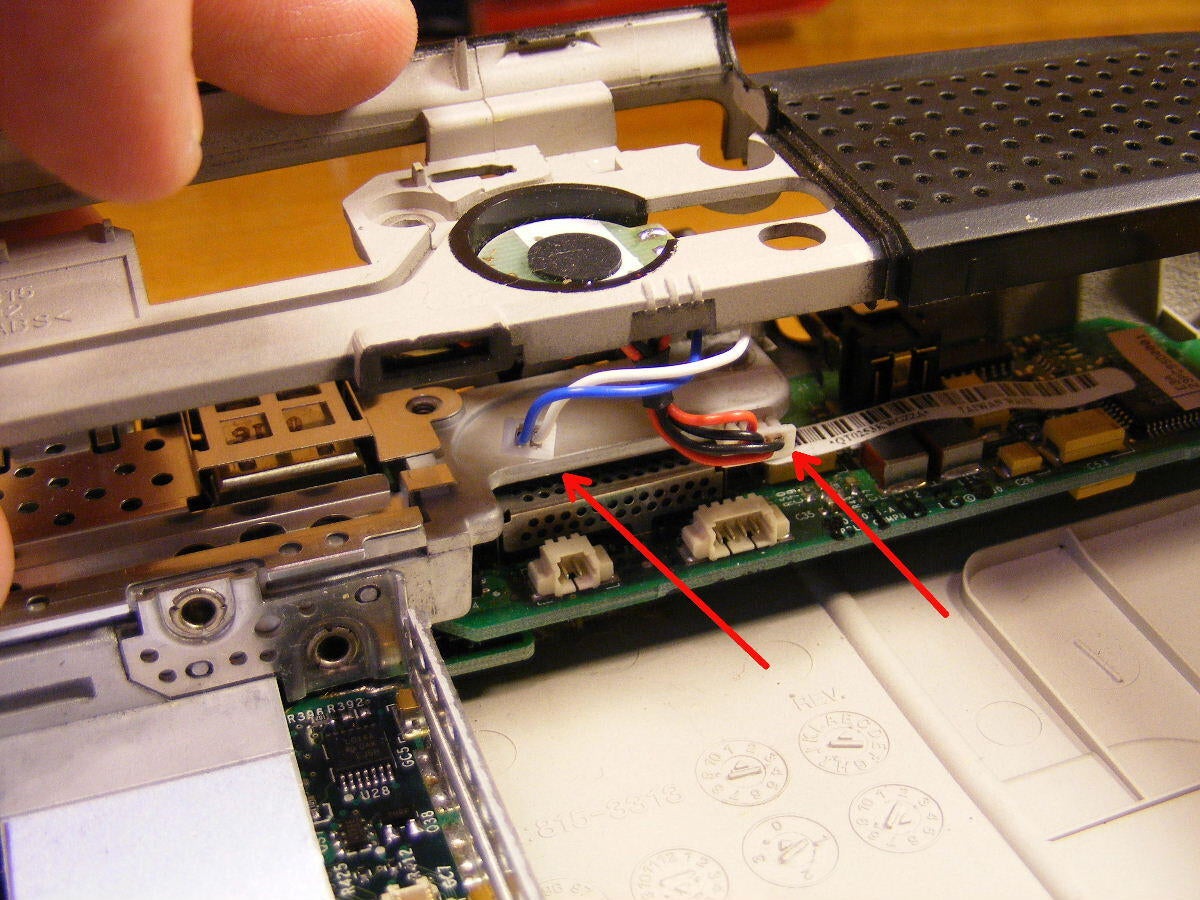
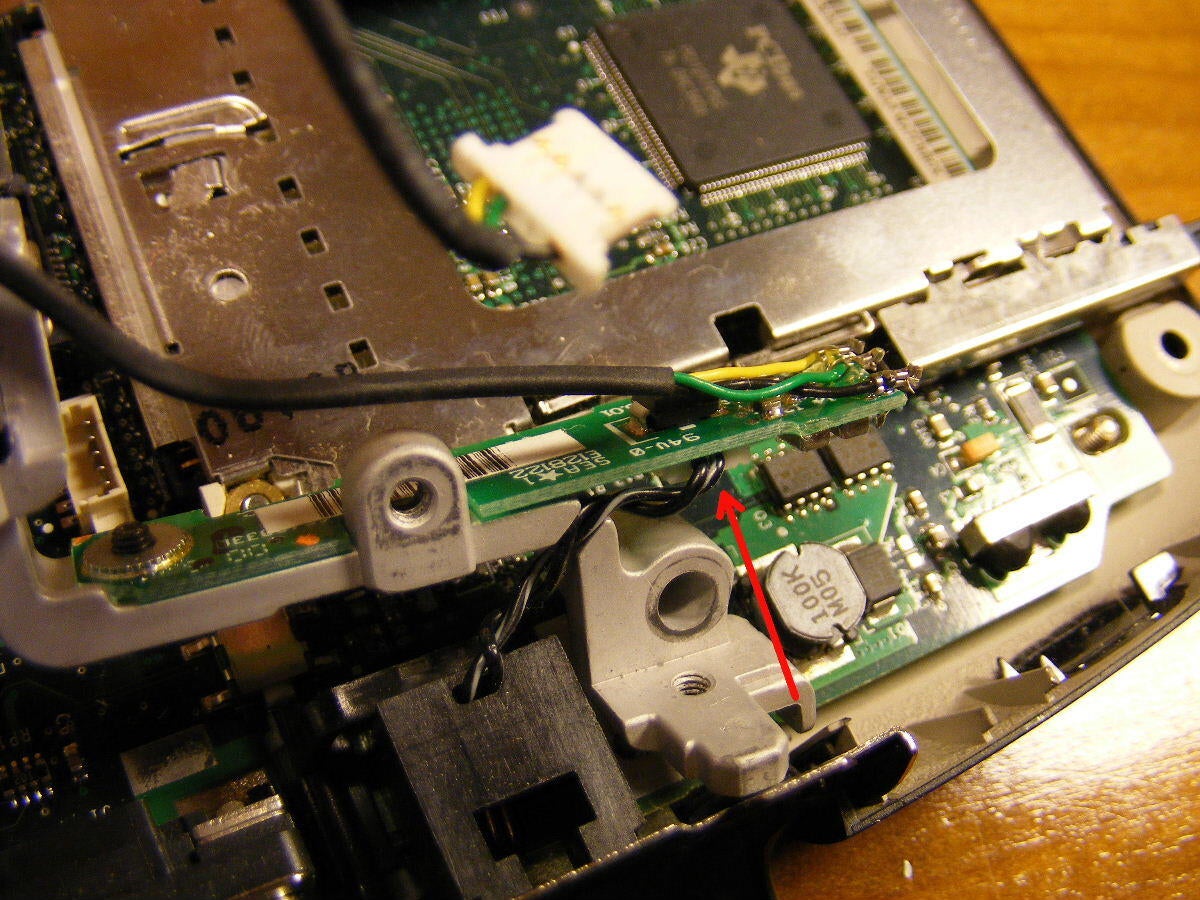
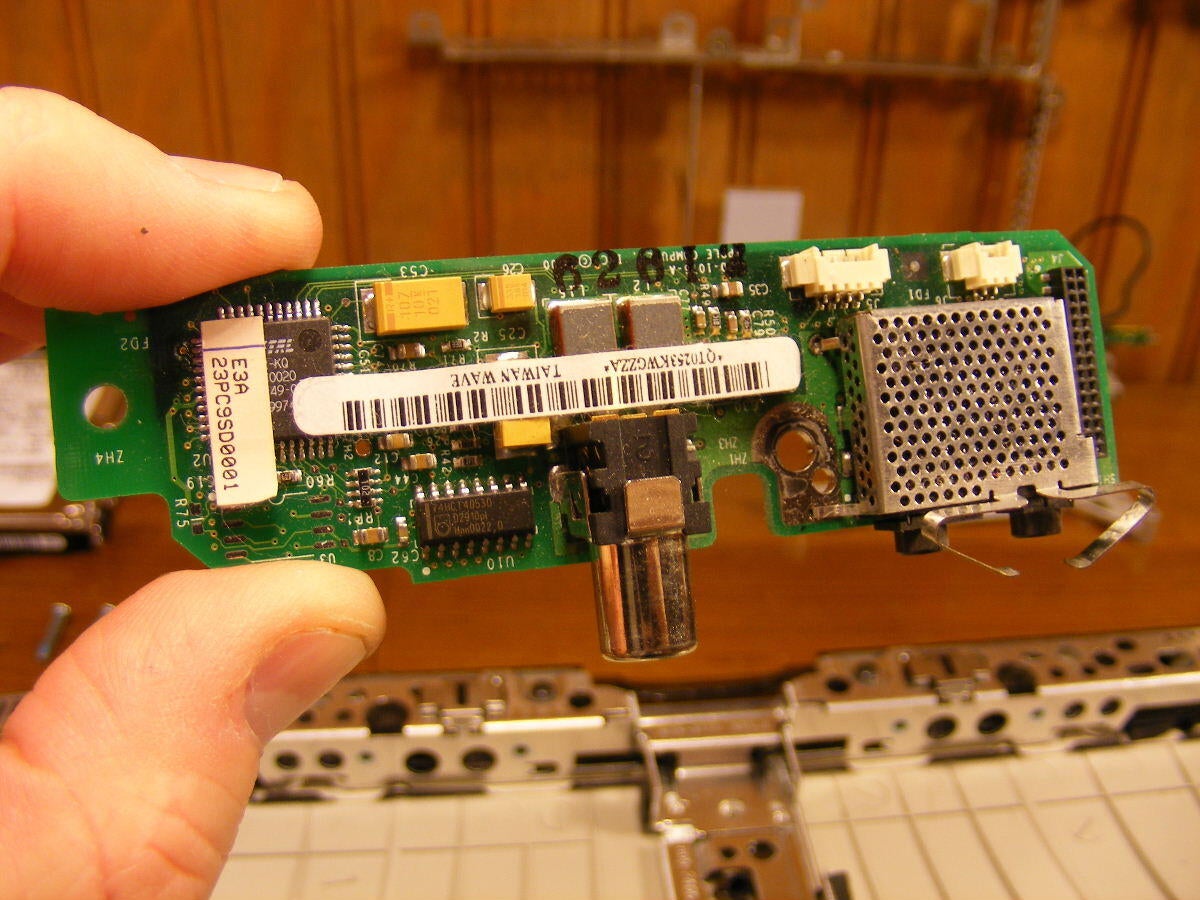
A closeup of the little board that splits the two wires off. Simple circuit it seems – anyone know why they would need to do that as opposed to just splitting them off of one another?
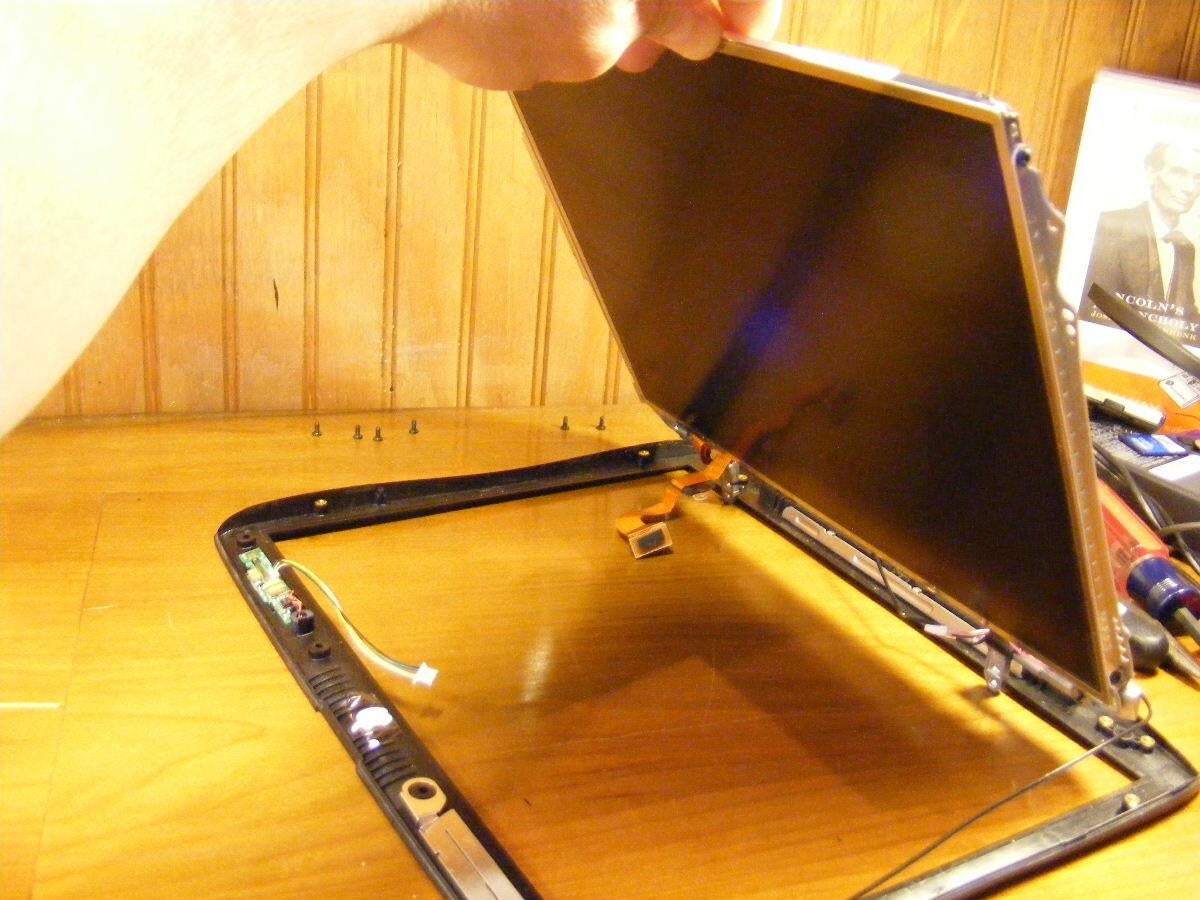
Lifting the screen out of the frame with the hinges attached.

Here we have a hinge separated from the screen. This flimsy looking framework supports the LCD and framework through many thousands of opens and closes.
Next we have to get the upper case off. Yellow circles indicate the target fasteners.
MacBook Air: Was much more simple. Just the screws on the bottom, and in you go.
I need to pry this little tab back to get started.
I had to press the PC card eject button all the way in and pry the case out a bit to get the button past the opening.
Looks like a bit of an engineering oversight to me.
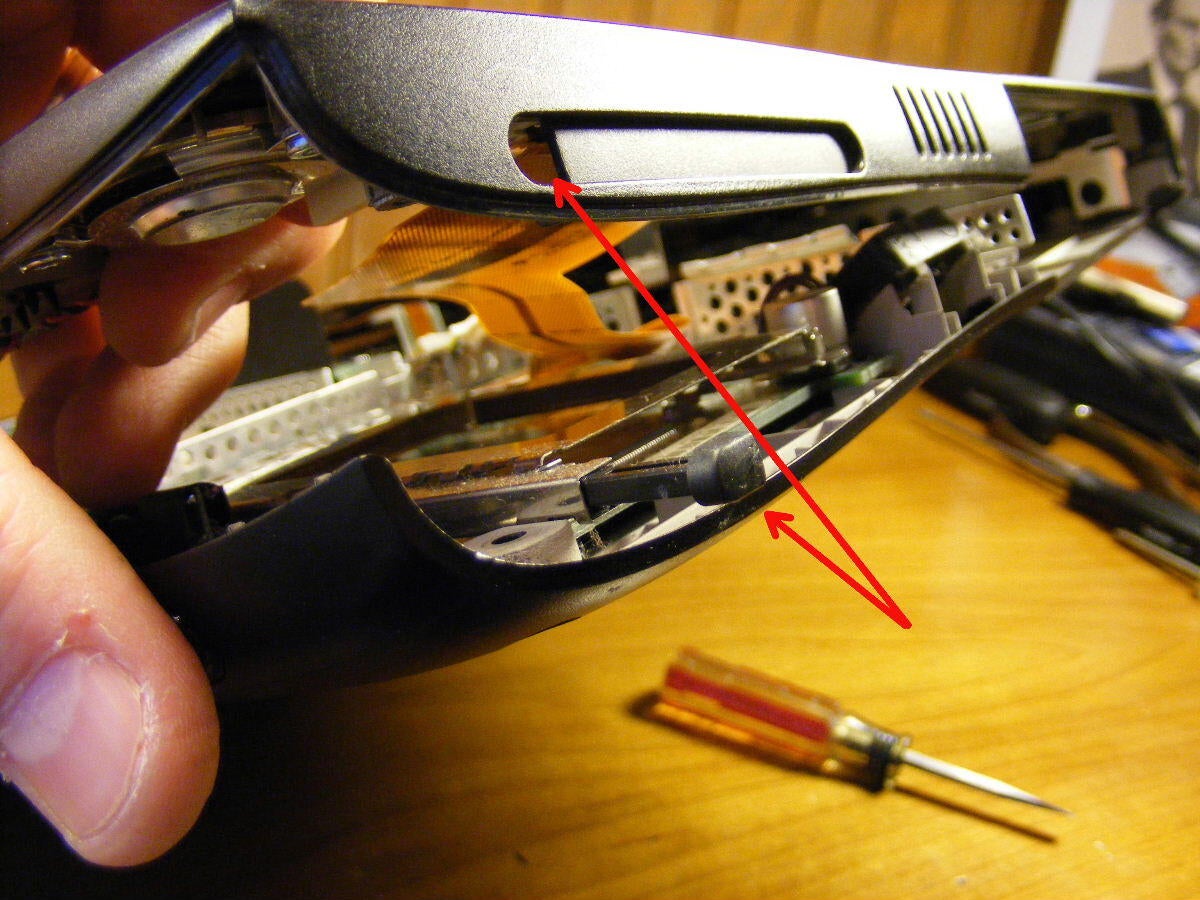
These have to come off as they are connected to the lower half.
The yellow arrow points to the ribbon that powers/controls the AirCard and connects to the main logic board. The red points out that those two connectors from the frame before were for our power switch and our stereo speakers.
MacBook Air: The aircard is controlled by a very small ribbon by comparison. The speakers on our Pismo are stereo where the speaker (singular!?) on the Air is Mono. More on this later.
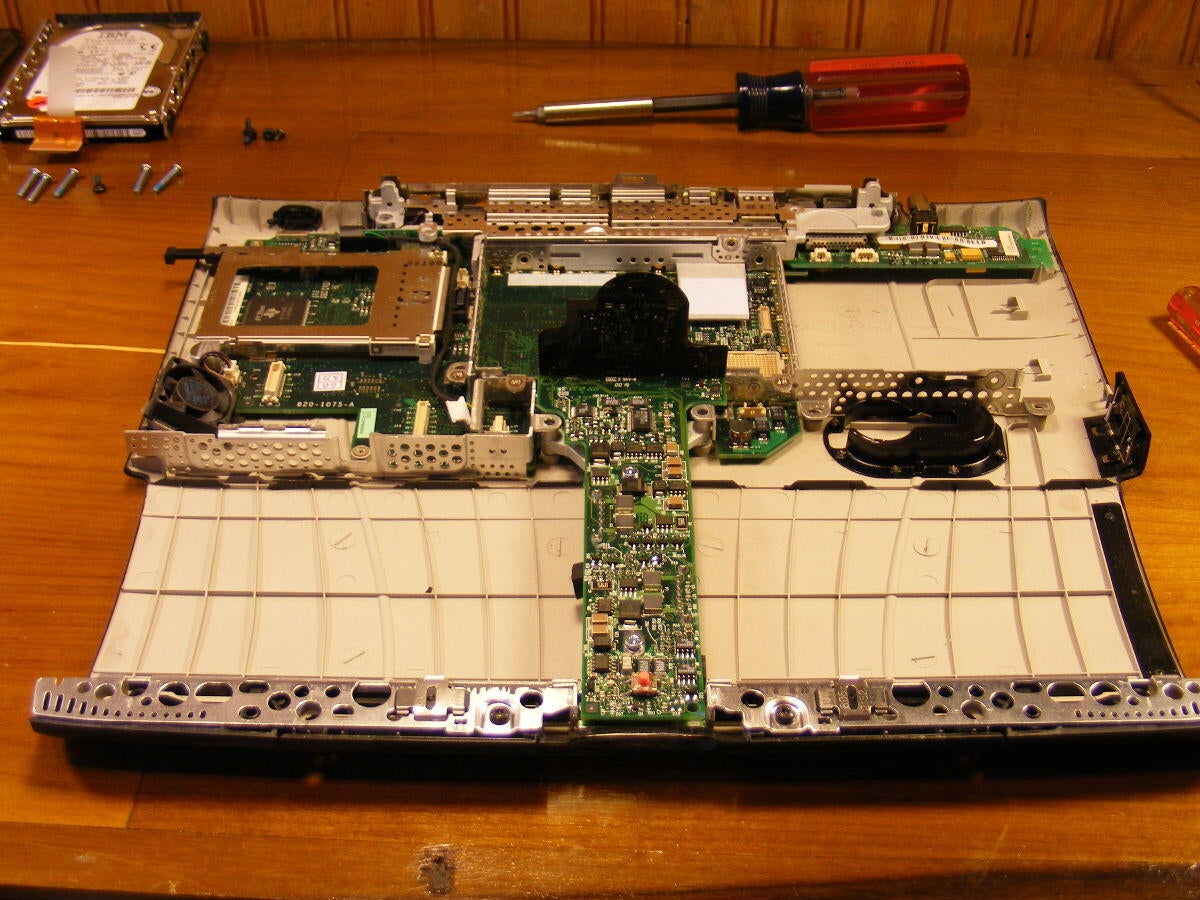
The top half removed, we see the very basic boards of the unit.
Here is the funny thing to me, and partly what prompted me to do this comparison: If you take away the big battery, the bulky DVD drive (both of which the Air did) and slim down some of the framework, it would have been completely feasible to build a unit nearly as slim, had there been a demand for something smaller. Granted, the screen would have to be reworked and slimmed down as well, but I believe it could have been done.
Here we have the power card – so named because the battery plugs into this card, as you will see.
Two screws in yellow, and the singular mouse button at the end of the red arrow, that the Apple is known for.
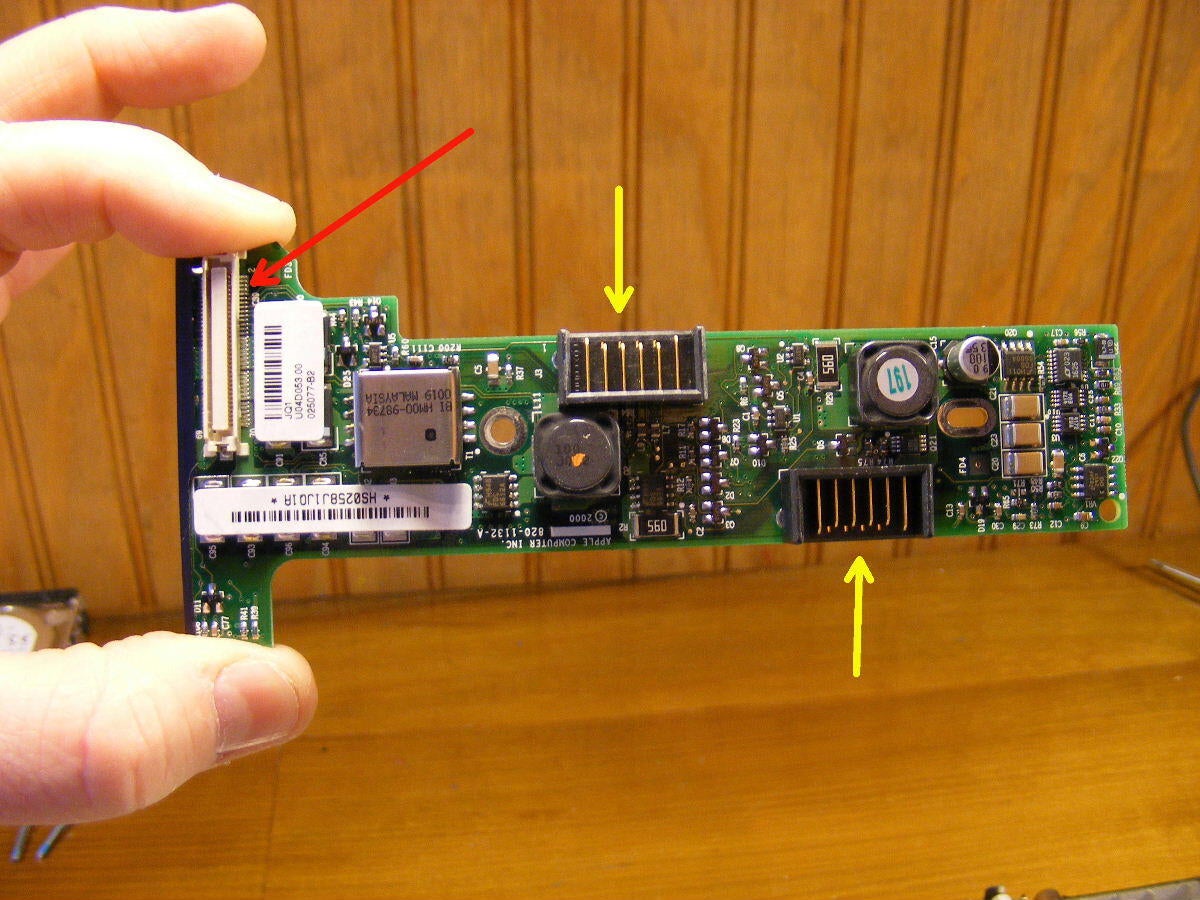
The yellow arrows point to the plugs for the battery and the drive bay. Red arrow is the connector to the mainboard.
The heat/noise/falling objects shield was easily removed, exposing the rest of the logicboard and its associated ports.
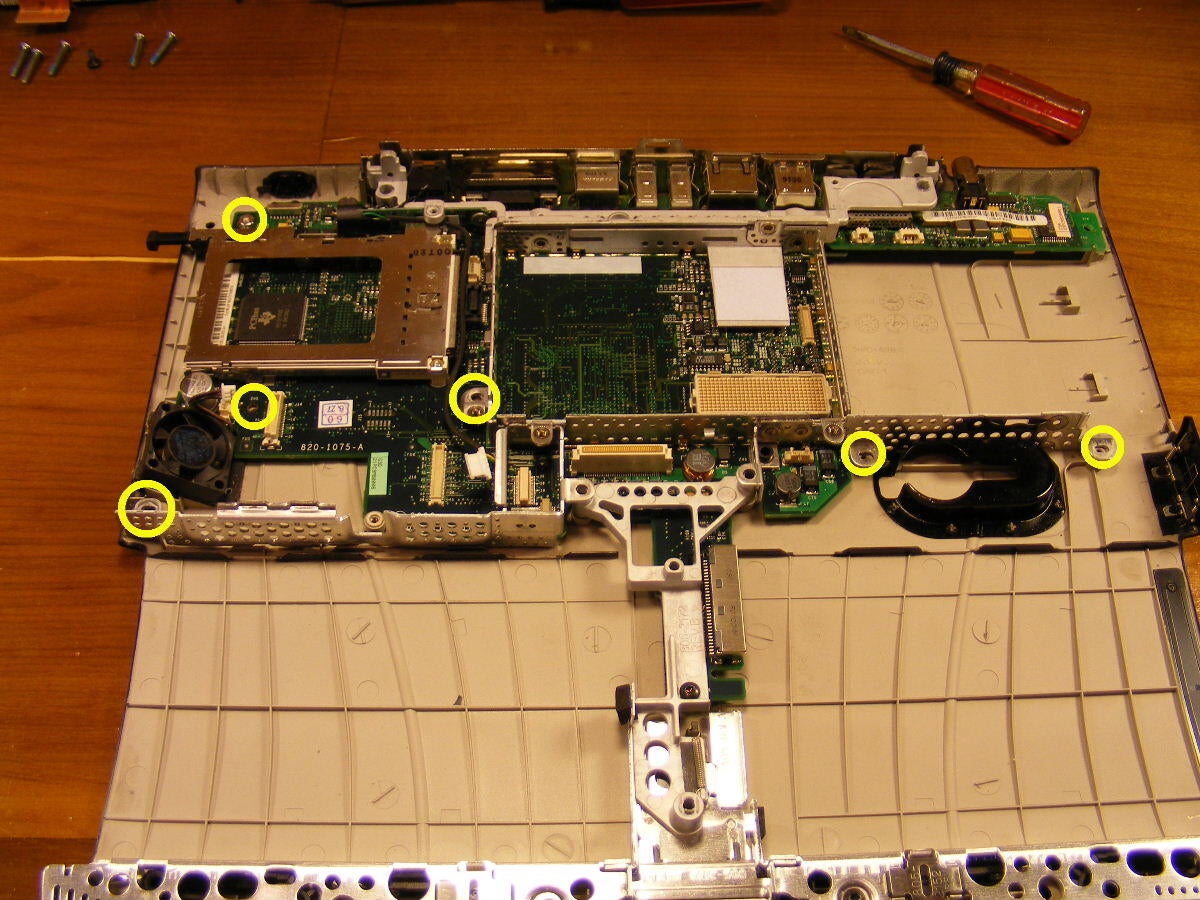
Yellow circles point out the screws that hold the logicboard. I had already removed some of them.
Screws removed, I can now remove the framework on top of the logic board.
We see a small intermediate card between the modem card and the external jack attached to the framework. A (blurry) red arrow points it out. The green/yellow wires with black cover then ran to the modem. You can see the (blurry) connector at the top of the frame.
The frame removed and displayed. In the background, you see another, smaller part of the frame that came out earlier (it was cut from the project).
The sound card comes out next, and nearly last.
MacBook Air: In the right-hand inset frame, we see the location of the Air sound “module”, and we see that it is about the same size, but it includes the speaker. On the left, we see a better picture of the “module”.
I was surprised that Apple used mono sound here, when all others have tried to sharpen the “multimedia experience” in notebooks. I have heard that it sounds quite good, though I have not heard it my self.
Maybe some of the thought process here was that most users who want great sound would get an external system anyway, so why waste the weight/space/engineering?
The card removed. Nothing was holding it, as the screws were removed with the framework.
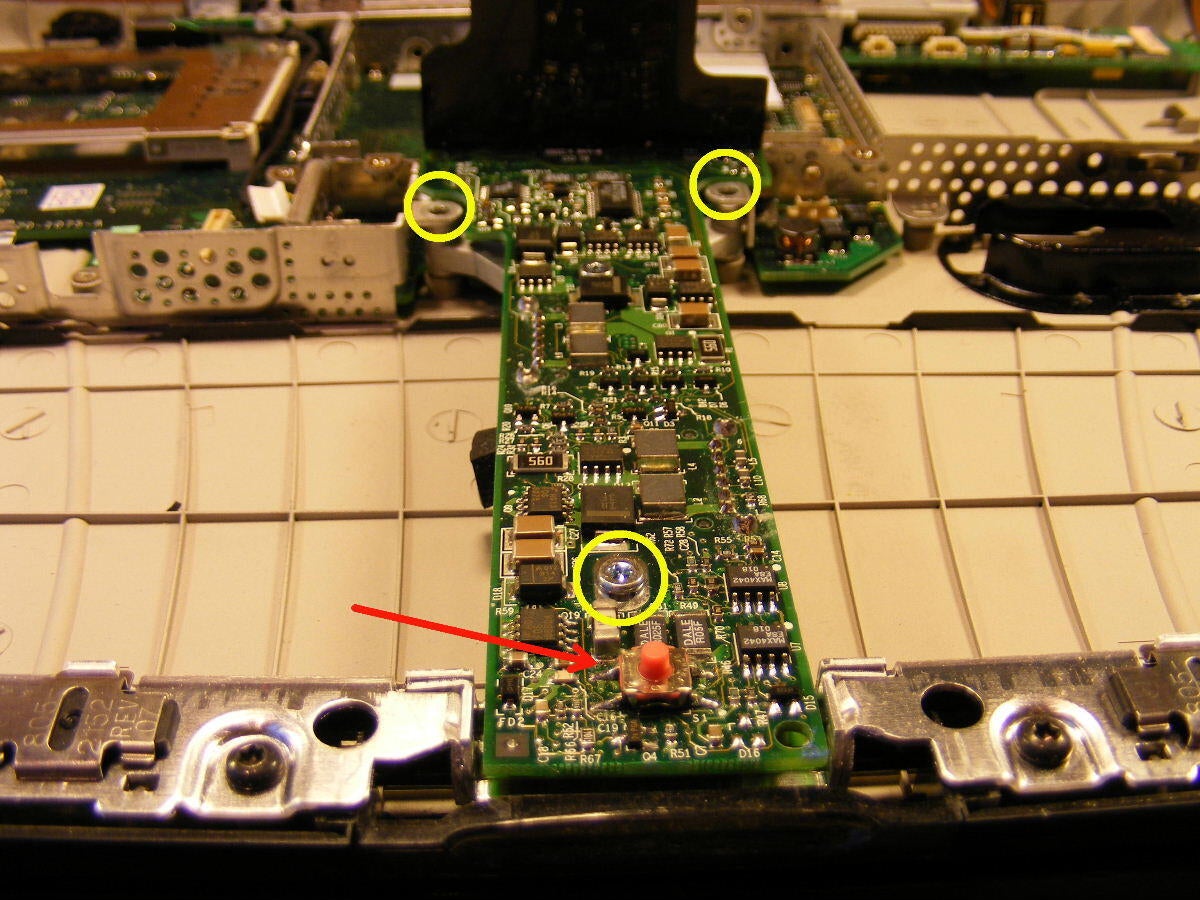
Lifting the logic board from its bed.
I saw this little button, which I did not see before. It seems that it is a hard reset for the unit. It apparently does a factory reset of the hardware.
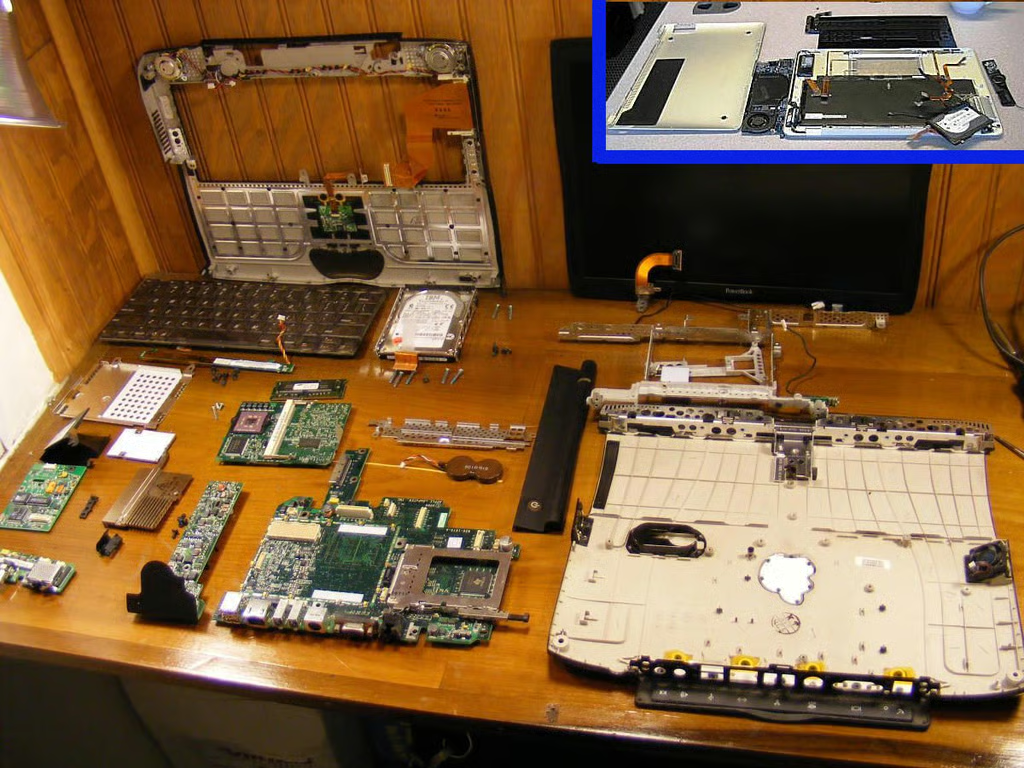
Here we have the whole unit, blown up once again, for your enjoyment.
MacBook Air: In the inset picture, we see the MacBook Air, also blown up, though with significantly fewer pieces.
My question at the start was – could we have made a notebook as thin as the Air 8 years ago when the Pismo was hot? Based on what we saw here, I think yes. If the demand for smaller and smaller devices had been there in 2000, Apple could have/would have come up with a way to make it happen.
The removal of bulky devices, a thinner battery (that was really key), and RAM built onto the board were three of the key changes that allowed the Air to happen.
Apple, of course is usually the first to blaze a trail when it comes to device aesthetics and functionality, so it makes sense that they would take the first step with the Air.


