IT pros can use third-party tools to extend Microsoft Exchange into the room and equipment management and scheduling arena. However, in many cases, organizations simply need to be able to semi-automate the scheduling of equipment and conference rooms in order to mitigate the need for a person to be involved in the process.
In Exchange 2010, you can accomplish this task with the use of room and resource mailboxes. A mailbox in Exchange is associated with a user, and the user has an Active Directory domain account to which his mailbox is connected. Although room and resource mailboxes still rely on the use of an Active Directory domain account, when you create a room or resource mailbox, the underlying Active Directory account is disabled. You can associate another user account with the resource mailbox so that a person has some control over what could quickly become chaos.
Creating a resource mailbox \u2013 GUI
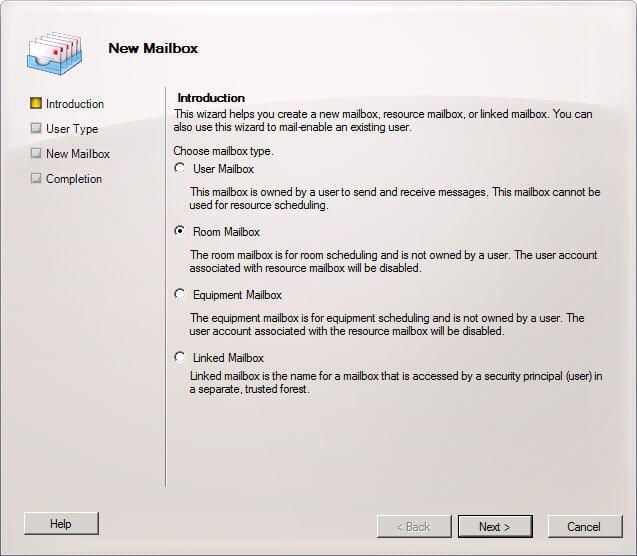
The first step in creating a resource mailbox is to open the Exchange Management Console and navigate to Recipient Configuration | Mailbox. To add a new resource mailbox, right-click the Mailbox option and choose New Mailbox from the shortcut menu. This opens the Introduction page. From this page, choose the Room Mailbox option.
This gallery is also available as a Servers and Storage blog.
Screenshot by Scott Lowe for TechRepublic
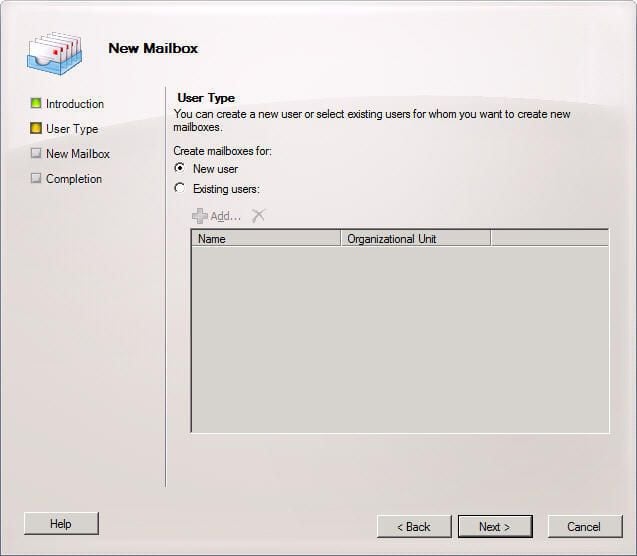
The resource mailbox needs to be associated with an Active Directory user account. On the next page of the wizard, you need to decide if you’re going to create a new account or use an existing one. As you can see in this figure, I’m creating a new user account.
Screenshot by Scott Lowe for TechRepublic
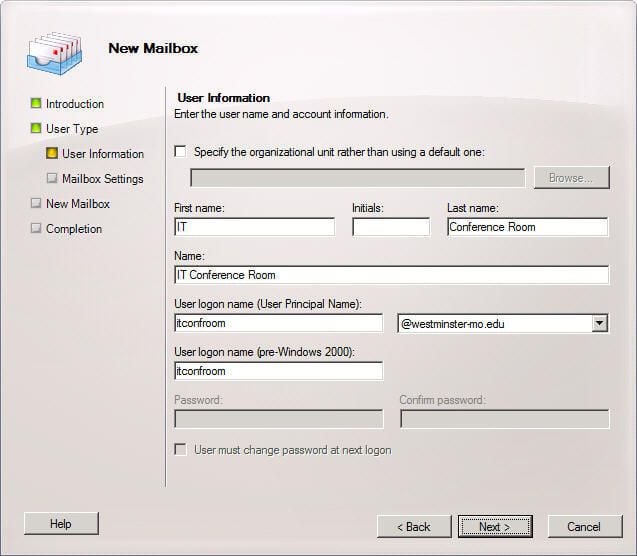
When you choose to create a new Active Directory account, you’ll be asked to fill out the User Information page as you would for any other mailbox. (Note that you’re not asked to fill out the password information. Remember, this account will be immediately disabled right after it’s created, so it doesn’t need a password.)
Screenshot by Scott Lowe for TechRepublic
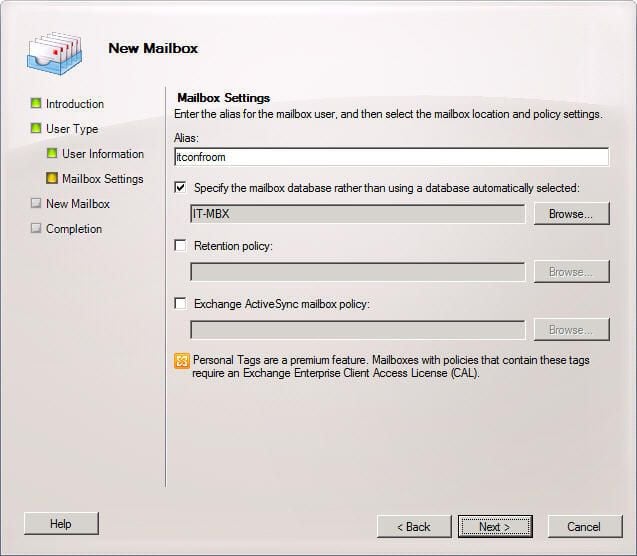
Next, you need to decide which Exchange database will store the new mailbox. This figure shows that I’m planning to store my new room mailbox in the IT-MBX database.
Screenshot by Scott Lowe for TechRepublic
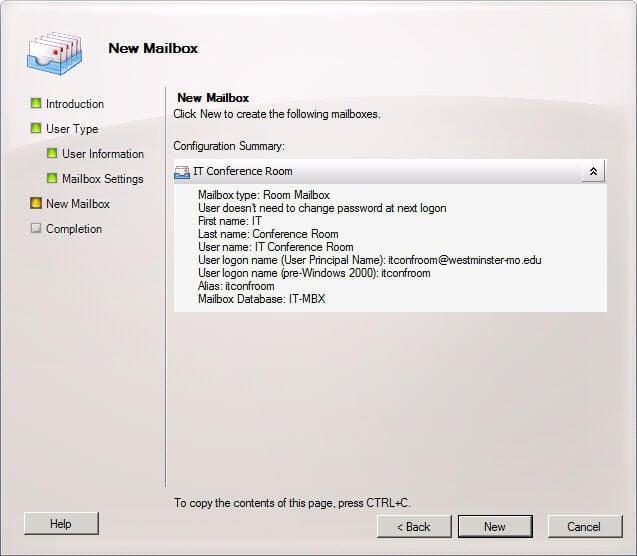
Now, review the summary of your selections and click the New button to create the new account and mailbox.
Screenshot by Scott Lowe for TechRepublic
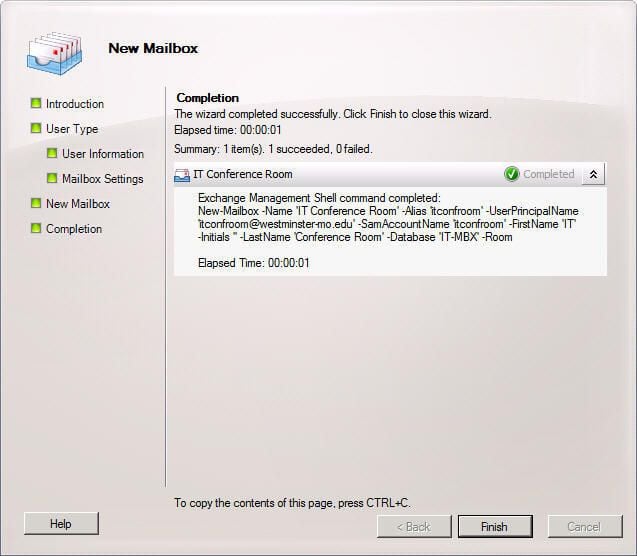
When the process is complete, you’ll receive a notice indicating that the creation process was successful. Click the Finish button to complete the process.
From PowerShell
Many admins like to automate tasks, so here’s the PowerShell command that accomplishes the same goal as the GUI:
New-Mailbox -Name ‘IT Conference Room’ -Alias ‘itconfroom’ -UserPrincipalName ‘itconfroom@westminster-mo.edu’ -SamAccountName ‘itconfroom’ -FirstName ‘IT’ -Initials ” -LastName ‘Conference Room’ -Database ‘IT-MBX’ -Room
Screenshot by Scott Lowe for TechRepublic

Mailbox properties
When you look at a list of mailboxes in the selected mailbox database, you’ll see the new resource mailbox with a slightly different icon denoting its room status.
Screenshot by Scott Lowe for TechRepublic
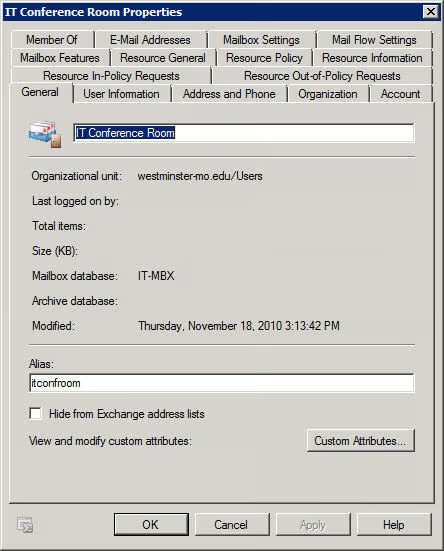
From the Exchange Management Console, open the new mailbox’s Properties page. From there, you’re directed to the object’s General tab, which shows general information about the underlying mailbox account.
Screenshot by Scott Lowe for TechRepublic
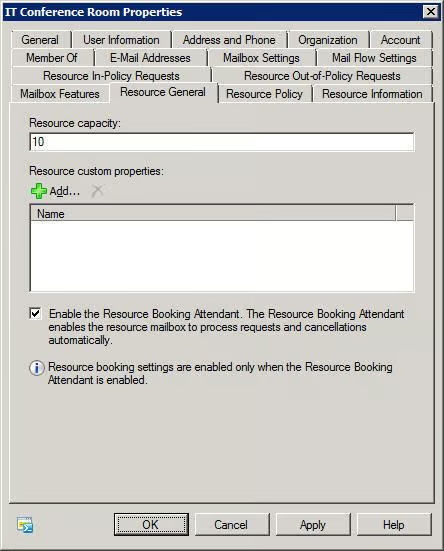
On the Resource General tab, provide a value for the maximum number of people that can be in a room. This information will show up for the user when they book the resource.
Screenshot by Scott Lowe for TechRepublic
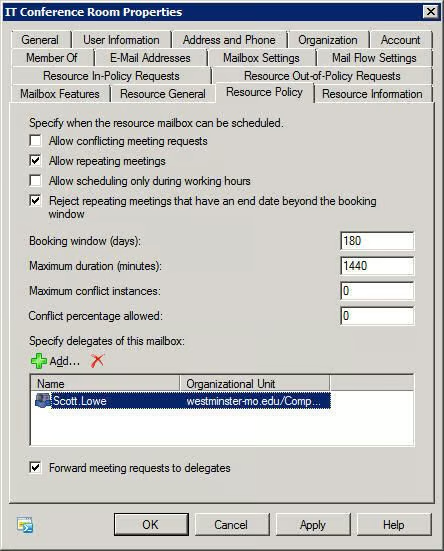
It’s entirely possible that someone will try to overbook a resource. You can allow or disallow the option to overbook a resource by making adjustments to the Resource Policy tab. From this tab, you can also choose to allow or disallow repeating meetings, and you also specify the booking window (i.e., the amount of time that people can book the resource) and the maximum time that the resource can be booked. On this tab, I can also choose a user account that will act as a delegate for this resource. This account has management responsibility for the resource.
Screenshot by Scott Lowe for TechRepublic
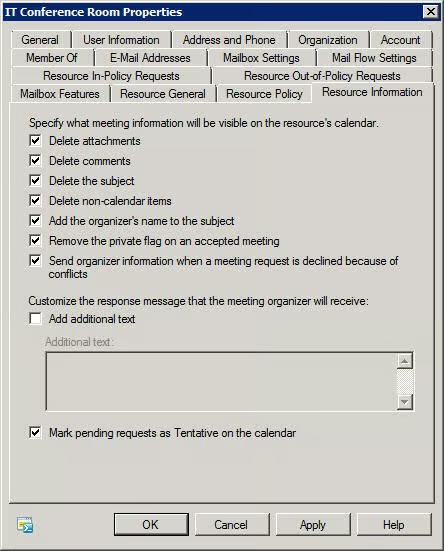
When you invite a resource to a meeting, there are a number of options you can specify to control how appointments appear on the resource’s calendar. For example, you can strip the subject information, add the organizer’s name to the subject line, remove attachments, or any of the other options that you see in this figure.
Screenshot by Scott Lowe for TechRepublic
\n\tThe user experience
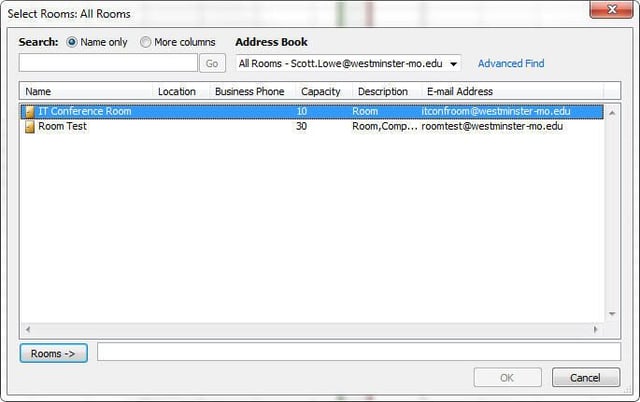
\n\tWith the new resource mailbox created, your users are able to make use of this object to make it a bit easier to book resources. In this figure, you’ll see an Outlook view of a new meeting request that shows a list of the rooms that are available for booking. Note that the room clearly displays the room capacity making planning a little easier.
\n\t
\n\tScreenshot by Scott Lowe for TechRepublic
\n
\n\n\n


